Feb 22, 2021
Spring is in the Air! Easter Release Sneak Peeks!
Hey, crafty friends! It’s Taylor here today! It seems that we’ve made it through the coldest cold that winter has to offer this year (at least I’m crossing my fingers and hoping that’s true!). On the heels of this cold spell, I’m even more excited to introduce our beautiful spring/Easter release filled with pretty pastels, beautiful blooms, the promise of spring, and the hope that He is Risen indeed!
As always, the Creative Team and I have been busy creating new projects with the goodies from this release and we’re ready to set your thoughts toward spring with some beautiful inspiration! This release includes over 25 new products including new stamps, dies, stencils, and the cutest little wooden bunny embellishments complete with cotton tails!
Here’s what you’ll find on the blog this week:
- Our blog posts (Monday – Thursday) will feature a video showcasing the new release products.
- New products will be available for purchase starting tomorrow (Tuesday, February 23rd) at 9am Central Time at the TE webstore!
- Get a chance to win it before you can buy it by commenting with your answer to my Question of the Day today only (located at the bottom of this blog post)
- Last, but certainly not least – take advantage of our special offer for this release (details below).
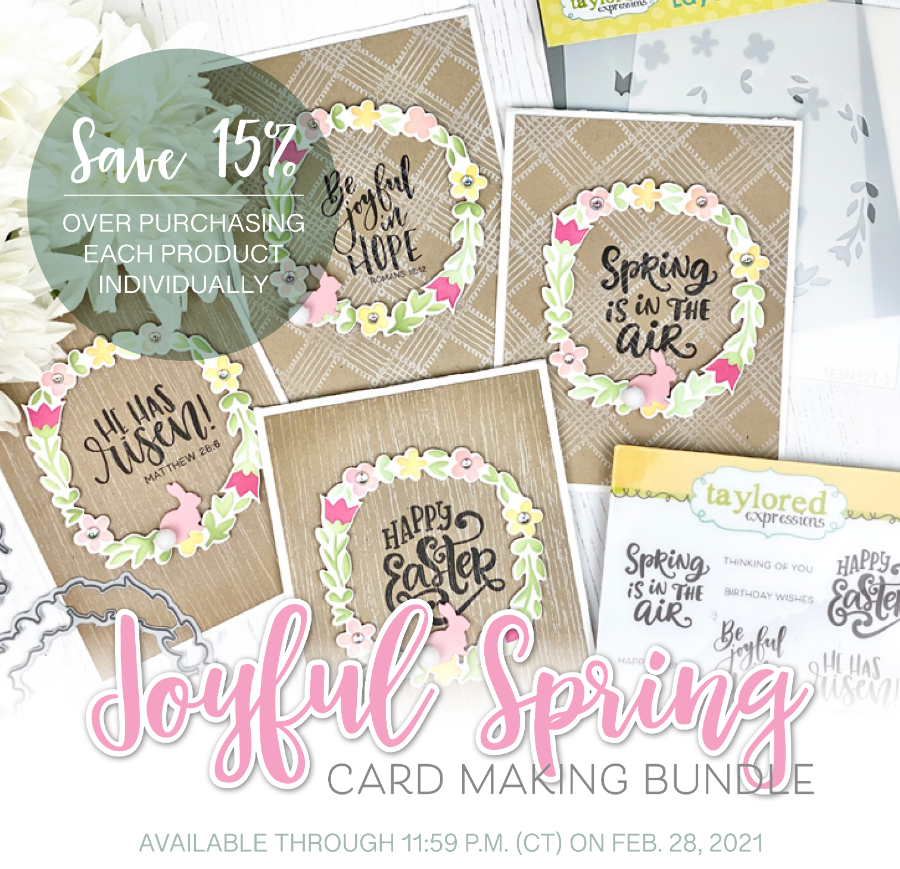
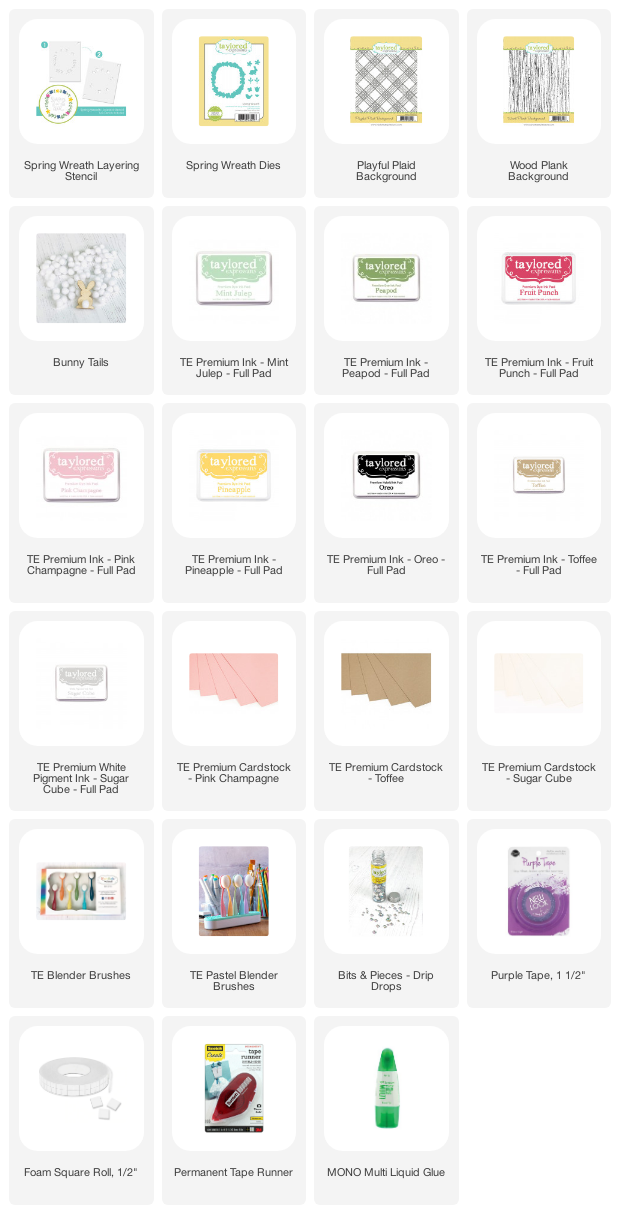
Tuesday, February 23rd, through Sunday, February 28th (or while supplies last), You can get the Joyful Spring Bundle for 15% off! The bundle includes the Spring Wreath Layered Stencil set, Spring Wreath die collection, and Be Joyful stamp set. The discounted bundle price is only available through Sunday, February 28th.
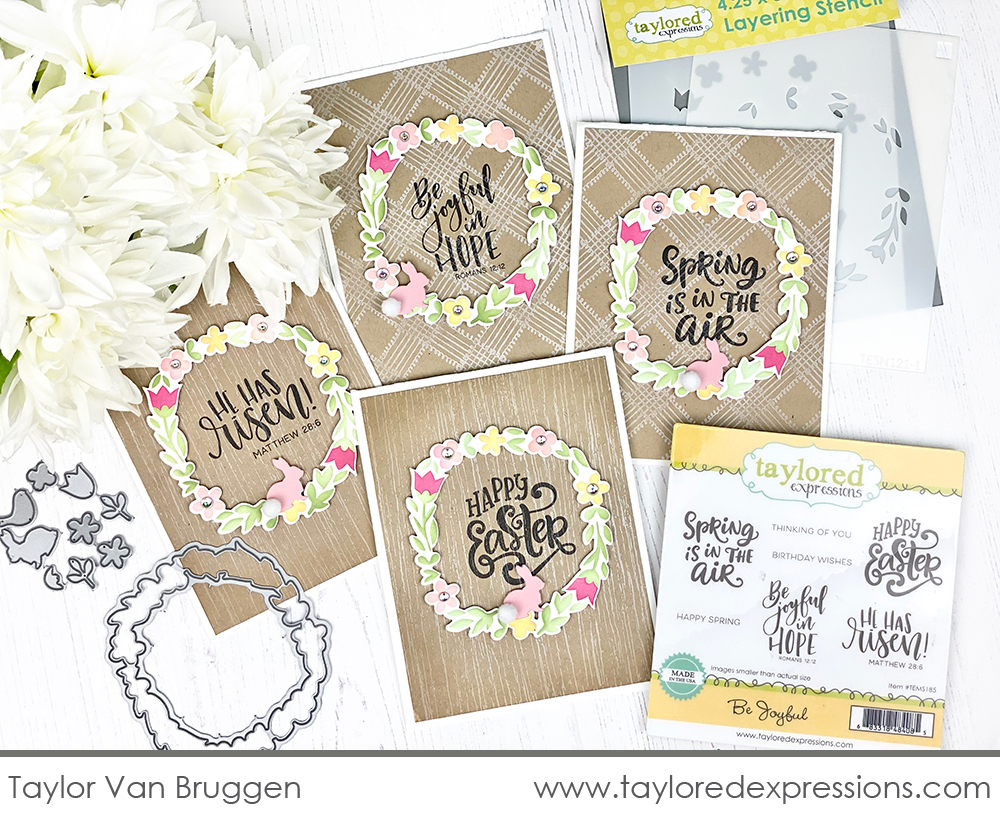
I had lots of fun pulling out my pretty pastels and pairing them with our new Spring Wreath Layering Stencil to mass-produce a set of cards for spring and Easter. I used everything from our special bundle offer plus two of our newest backgrounds to create this set of cards. Check out the video below for all the details and tips and tricks for quick and easy mass-production:
I started by stenciling the wreath onto an A2 card panel and then created a template to die cut the stenciled wreaths with the coordinating die. I stamped backgrounds using Sugar Cube ink on Toffee cardstock and added the stamped sentiments centered inside the wreath opening. I added a few finishing touches with my favorite Drip Drops embellishments and the cute bunny die cuts complete with a pom pom butt!
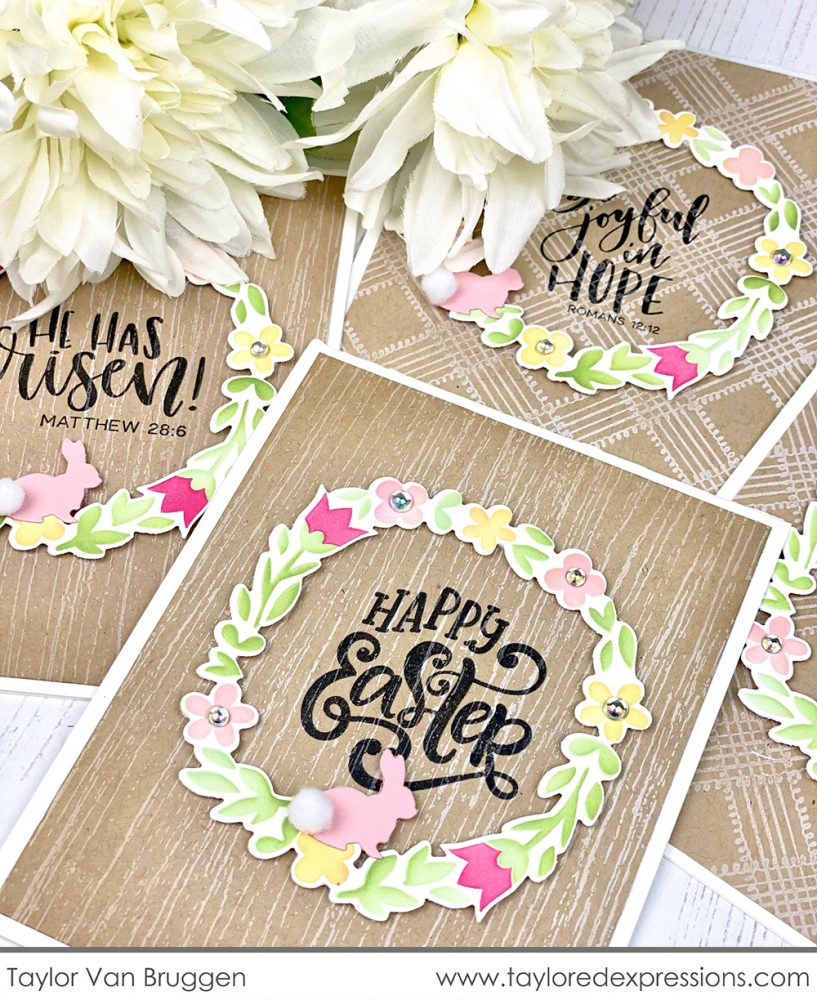
I used two different colors of green ink for more dimension in the leafy layer. I also used Toffee ink to blend around the outside of the wood plank panels, giving them a more realistic/rustic look.
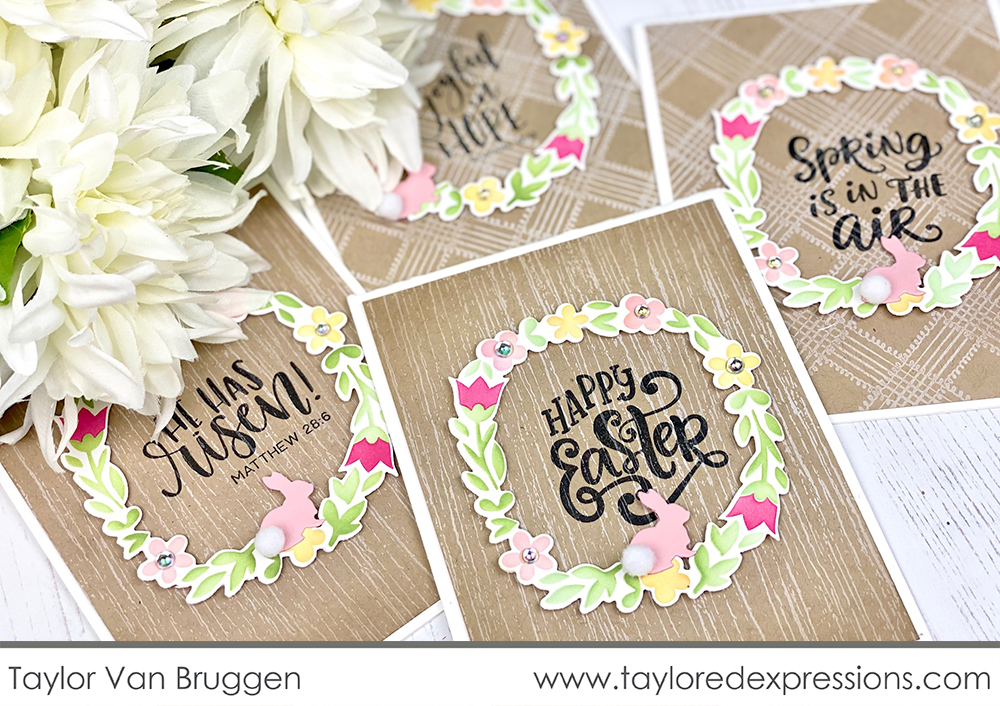
These were so quick and easy to make and I love how they turned out! I’ll definitely be making more so I can use them as my Easter card this year. What’s your favorite sentiment in the Be Joyful set?

Now that I’ve shared my project, it’s time to settle in and take a peek at all of the new Easter release products along with inspiration from the TE Creative Team!
Here’s a closer look at the products that you just saw in my video above. These are the same three products that are part of the Joyful Spring Bundle and available for 15% off:

Create a pretty wreath with the Spring Wreath Layered Stencil set. The set includes two stencils: one for stenciling the wreath greenery and one for adding the floral elements. Cut out the stenciled wreath and add extra elements using the Spring Wreath die collection.
The Be Joyful stamp set features four larger Easter and spring themed sentiments in a hand-lettered style along with three smaller sentiments that you can pair with the larger ones or use on their own. The larger sentiments are sized to center within the wreath from the Spring Wreath Layered Stencil set.
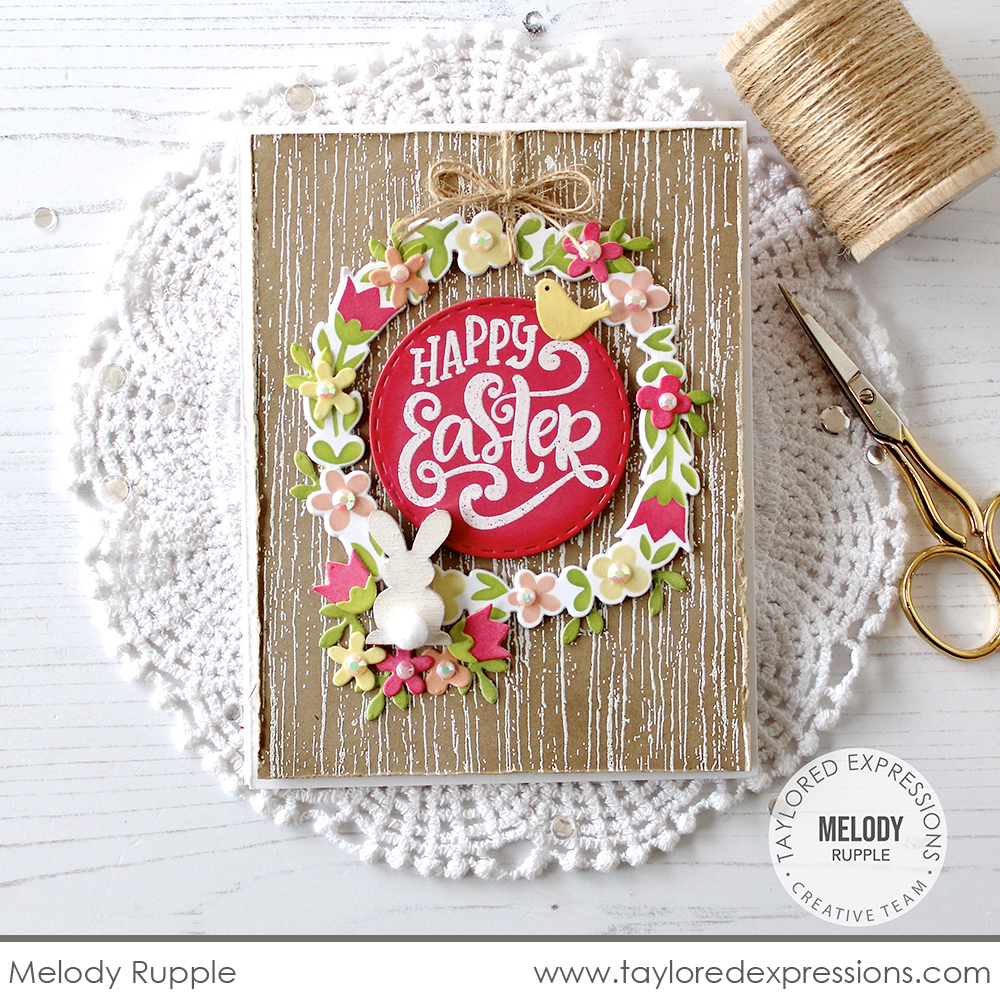
While I chose a pastel color palette on my set of cards above with the Spring Wreath Layered Stencil set, Melody Rupple chose a fresh and bright color combination. She stenciled the wreath and then added additional flowers using the coordinating Spring Wreath die collection. I love how she embossed the ‘Happy Easter’ sentiment from the Be Joyful stamp set on a Fruit Punch die cut from Stitched Circle Stacklets. The Bits & Pieces – White Rhinestones add lots of fun sparkle… and you’ll learn more about that cute wooden bunny and the great rustic background a little bit later in this post!

The Cottontail Wishes Stamp & Die Combo set features the cutest bunny in a soft and sweet style. The bunny will be perfect not only for Easter, but for baby cards, birthdays, and more. The set also includes sentiments in a pretty script font that cover a number of occasions.
The graceful floral and greenery sprays in the Unexpected Blessings stamp set (+ coordinating dies) can coordinate with the bunnies in the Cottontail Wishes stamp set or be used on their own to create delicate designs perfect for many different occasions. The comforting sentiments in the set will add a heartfelt touch to your handmade cards.
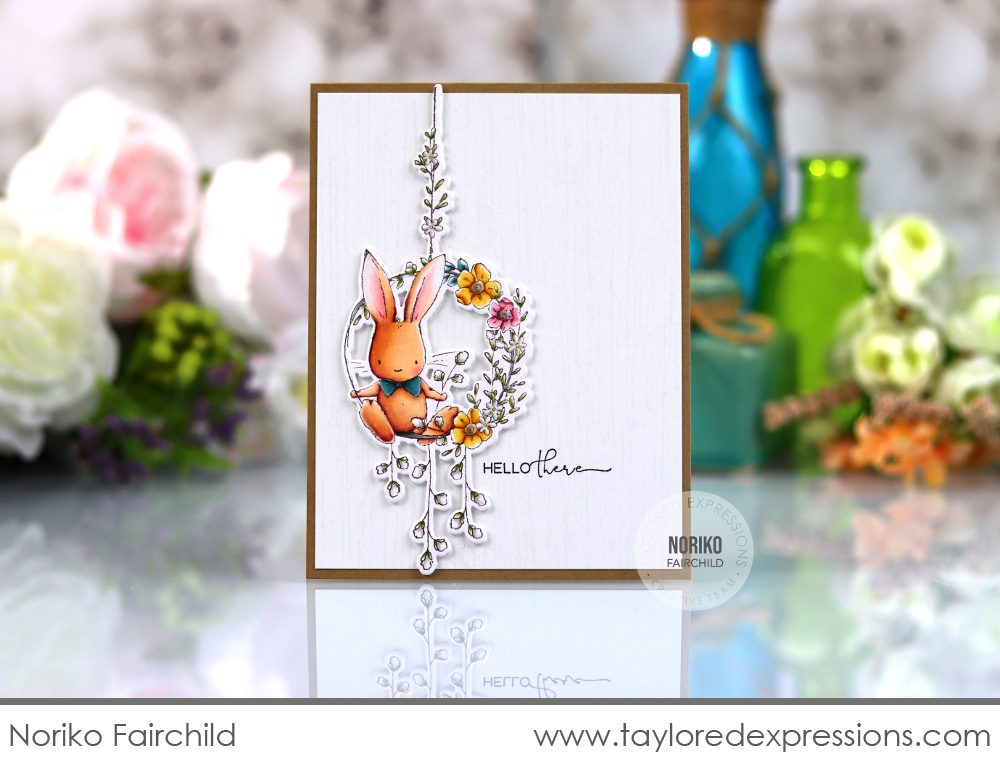
Noriko Fairchild reached for her Copic markers to color the cute bunny in the Cottontail Wishes Stamp & Die Combo set and she sure let her coloring skills shine! She cut out the bunny with the coordinating die and added it to a tone on tone background that is stamped with one of our new background stamps (keep scrolling to learn more!). I love that the die cut extends above and below the background just a tiny bit. It’s a great, subtle detail that steps up the design!
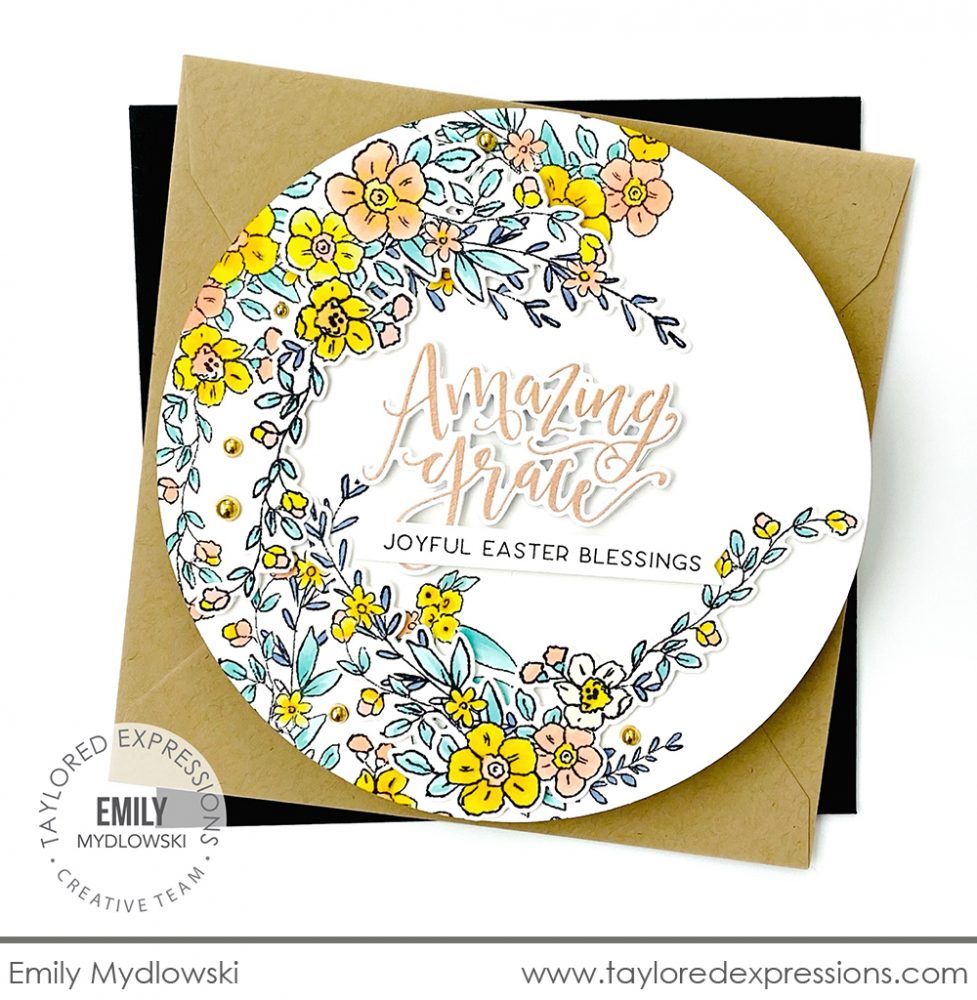
Non-traditional card shapes are an unexpected and fun surprise! Emily Mydlowski created a circle card for Easter that is adorned with the delicate and pretty floral sprays from the Unexpected Blessings stamp set. The curved images are perfect for the round shape of the card and the colors that Emily used just speak springtime to me! The ‘Amazing Grace’ sentiment is from the Handlettered Easter stamp set and is paired with a sentiment strip from a new Simple Strips stamp that I’ll share more about in just a little bit!

Stencil a whole card full of bunnies with the Oh Hoppy Day stencil using ink, pastes, and more! This stencil includes the etched alignment guides to line everything up perfectly on an A2 card front.
For extra dimension on your Easter and spring projects, we have new wooden bunny embellishments! The bunny coordinates perfectly with the Oh Hoppy Day stencil or you can use them on their own too. The Bunch of Bunnies includes 10 wooden bunnies and you can add a bunny tail to them with one of the White Pom Pom Bunny Tails (sold separately).
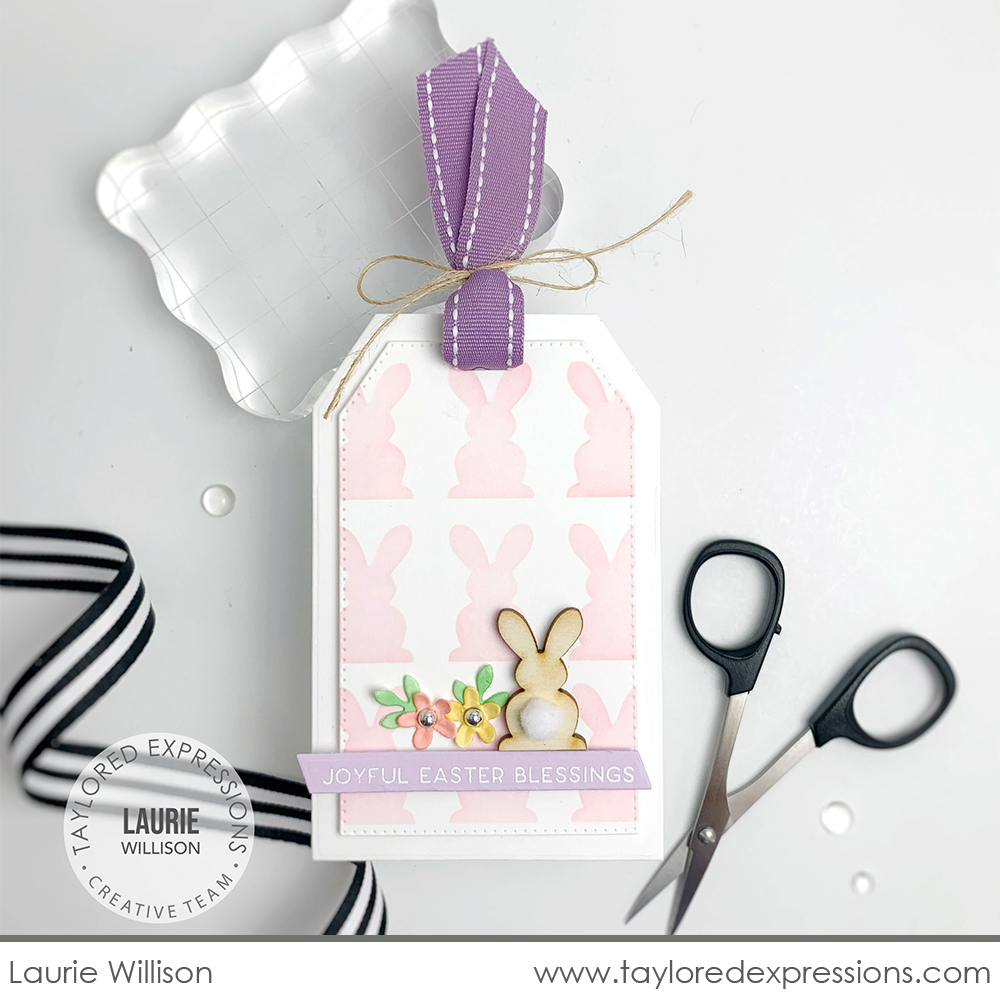
Laurie Willison stenciled pastel pink bunnies with the Oh Hoppy Day stencil for the background on this adorable Easter basket tag. She added one of the wooden bunnies from the Bunch of Bunnies pack as a focal point for the tag along with a few flowers that are cut out using the Spring Wreath die collection. Easter basket tags are a sweet keepsake that you can tuck into your scrapbook as a memento of the holiday!
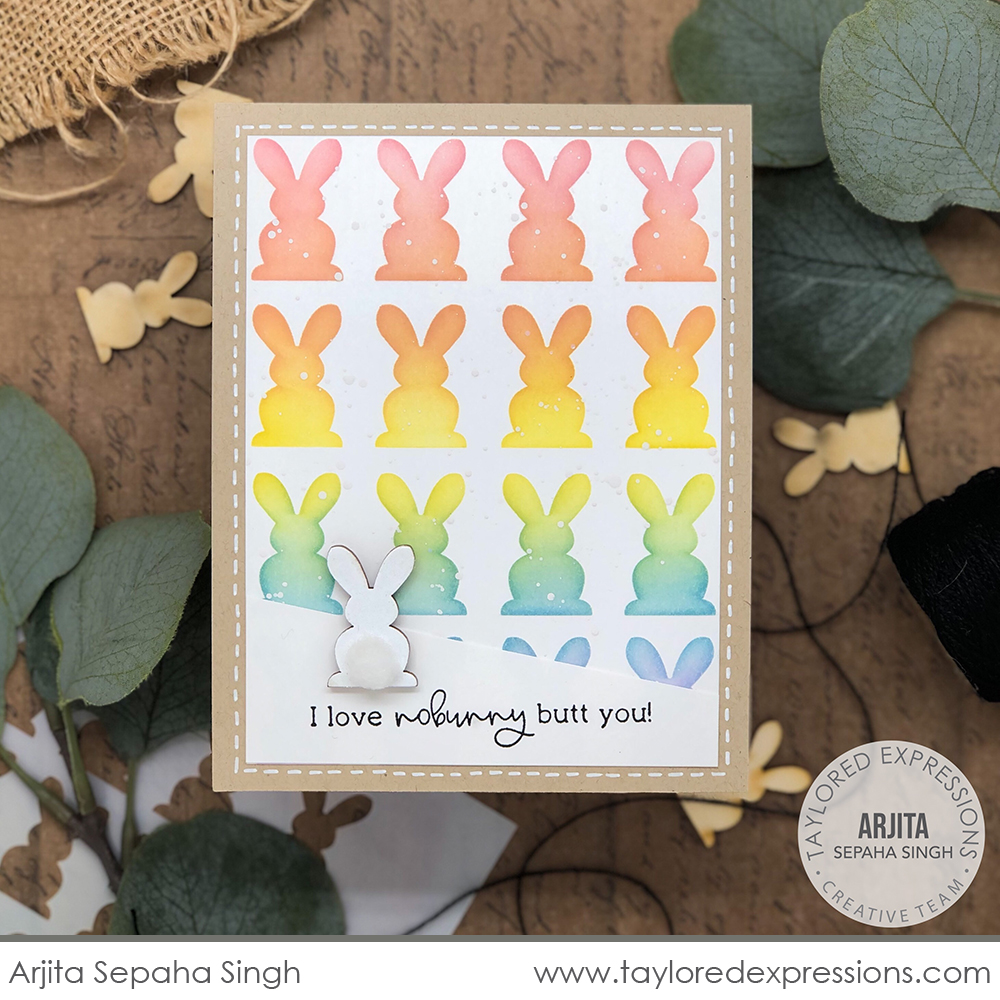
Arjita Sepaha Singh used her Blender Brushes to stencil a rainbow of bunnies with the Oh Happy Day for the background on this cute card! She added one of the wooden bunnies that she painted white that’s also sporting one of the White Pom Pom Bunny Tails at the bottom of her card next to the ‘I love nobunny butt you!’ sentiment. This card design is perfect to send to the special people in your life any time of year!
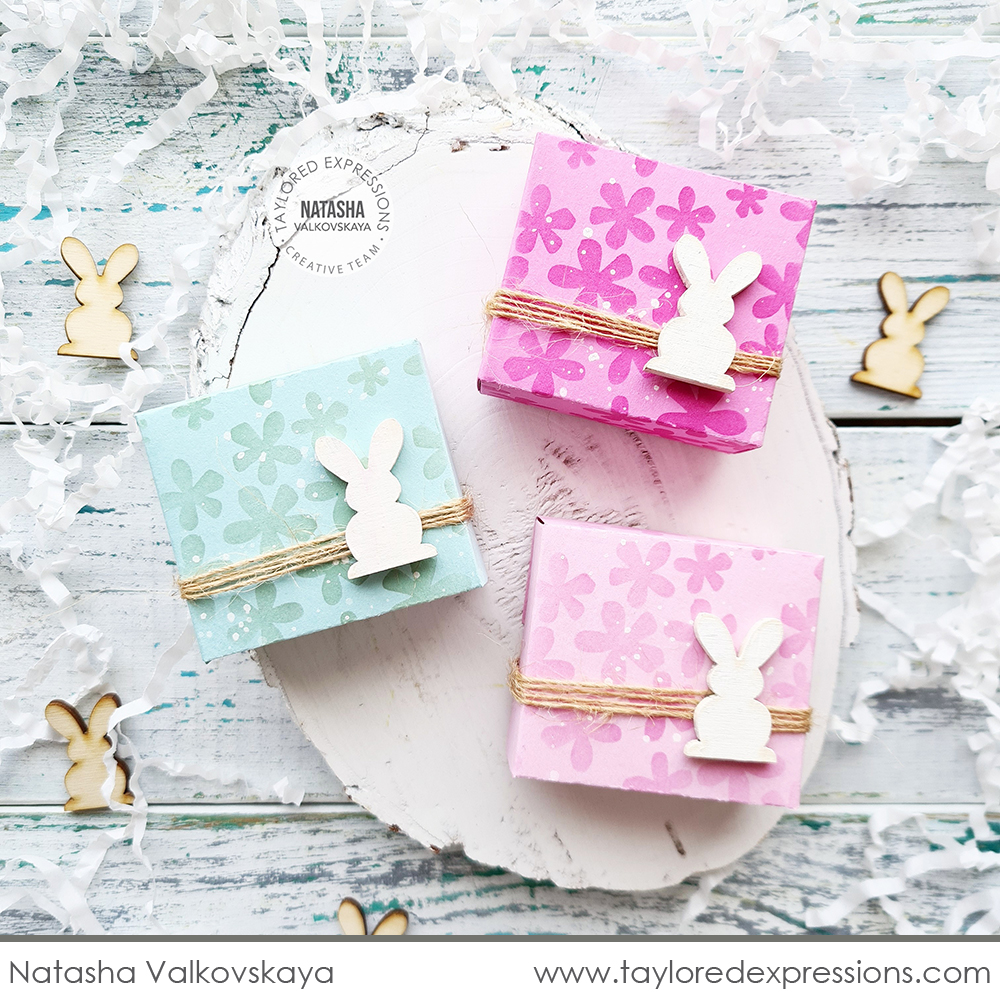
I am always looking for new ways to package up Easter treats and small gifts and I love this sweet idea created by Natasha Valkovskaya! She used the Scattered Floral stencil to add a tone on tone pattern to the little boxes created with the All Tucked In die. I love how she secured the boxes closed with burlap twine topped off with the wooden bunnies from the Bunch of Bunnies pack!

Get ready to combine your love of stamping and stenciling with the Good Egg Stamp & Stencil Combo. This set is a fun way to make a custom background that’s perfect for Easter projects. Simply stamp or emboss the egg pattern background, lay the egg stencil over the top, and add color with your Blender Brushes. And you have the option to cut out the eggs with the coordinating Good Egg dies and use them individually on your projects.
The cute little bunny in the Springtime Smiles stamp set is going to steal your heart! There are three bunny images as well as a basket, flowers, and more to create the sweetest scenes on your projects along with five sentiments that are perfect for the springtime season.
The new Pennant Parade – Easter clear stamp set coordinates with the previously release Pennant Parade Cling & Clear Combo stamp set. There are 5 new Easter-themed pennants along with seven sentiments that the Easter Bunny would definitely approve of!
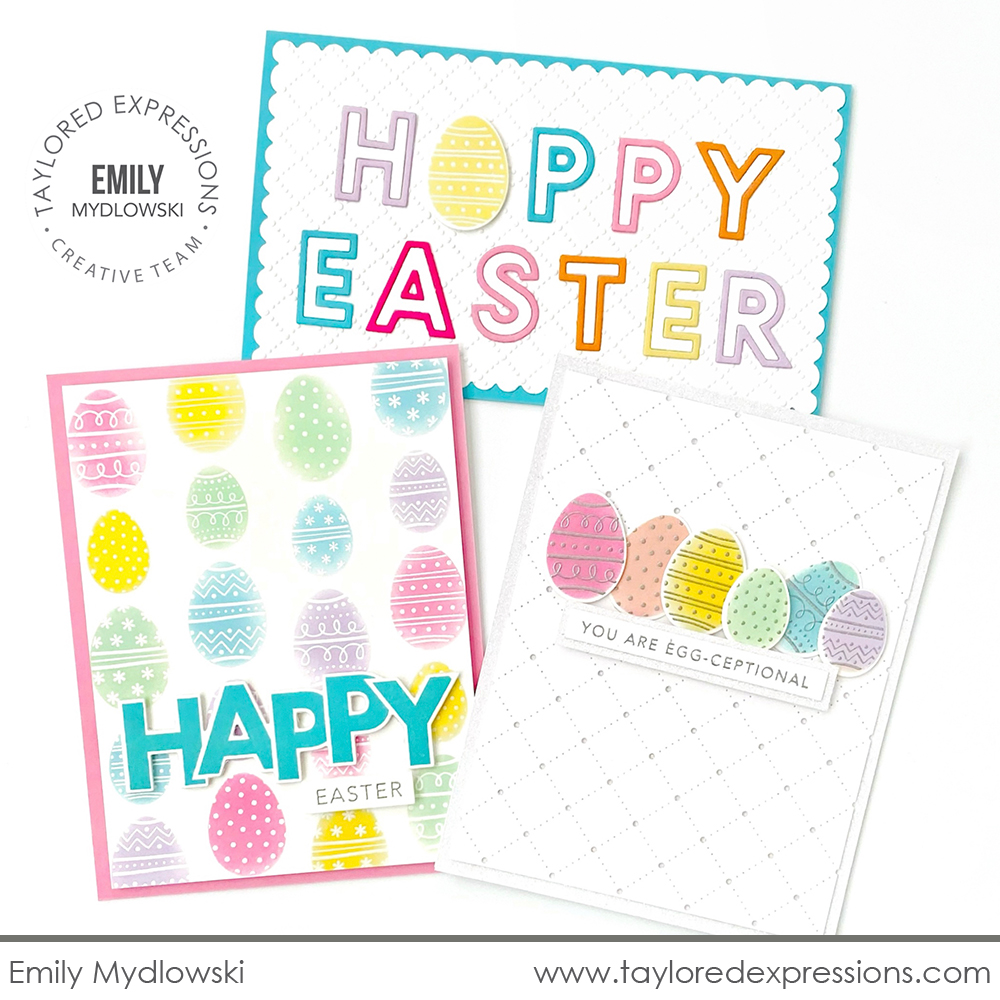
Emily Mydlowski put together a trio of cards that feature decorated eggs from the Good Egg Stamp & Stencil Combo set! The lower left card includes the full background: the egg pattern is embossed in white and then the stencil was used to add the egg shapes with Blender Brushes. The card on the bottom right has a line up of eggs that are cut out with the coordinating dies and set on top of the ‘you are egg-ceptional’ sentiment from the Mini Strips – Easter stamp. For the card at the top, Emily swapped out the ‘A’ for one of the eggs in the ‘Happy Easter’ sentiment (or it could be an ‘O’ for hoppy!) created with the Cap it Off Alpha dies. There are so many fun ways to use these eggs!
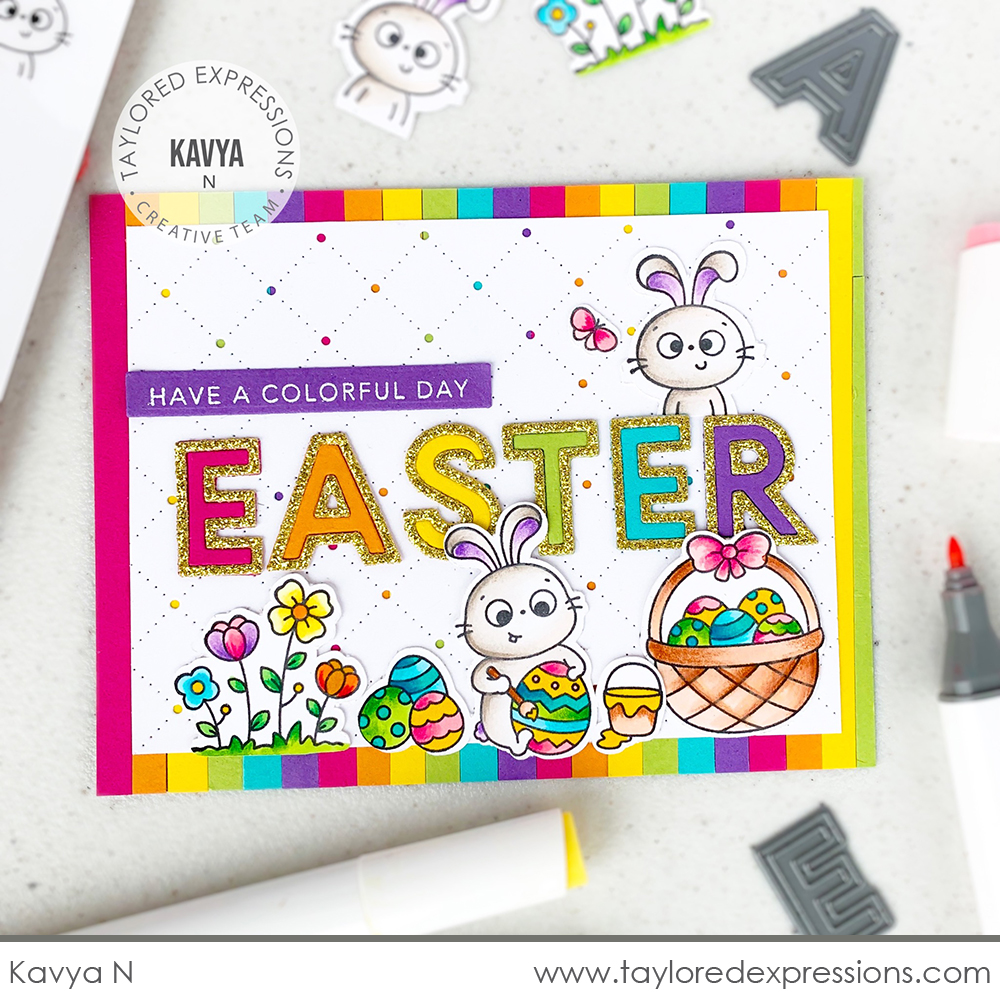
Kavya created a colorful Easter scene with the Springtime Smiles stamp set for this Easter card! She colored the images to match the rainbow of colors that she used to spell out ‘Easter’ with the Cap it Off Alpha dies and the background created with strips of cardstock. The ‘have a colorful day’ sentiment from the Mini Strips – Fun & Funny stamp ties everything together perfectly! (I know you are wondering about that new background Cutting Plate, I am getting to it soon!)
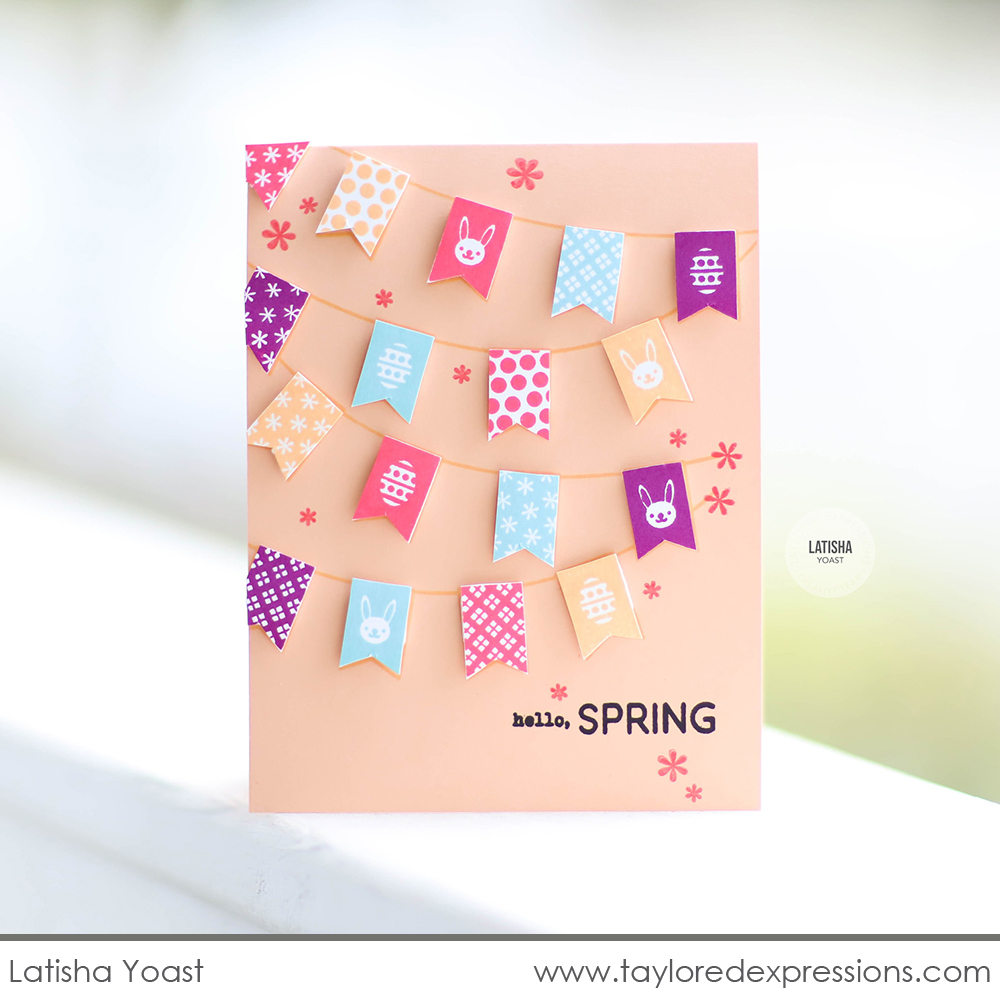
I am always excited about new color combinations to try out on projects and I really like the one that Latisha Yoast used on this sweet Easter card. She combined Peaches ‘n’ Cream, Guava, Sprinkles, and Plum Punch to create the festive banner using the Pennant Parade – Easter stamp set. The banners are cut out using the Pennant Parade dies and set over the original Pennant Parade background image on the card front. The flowers that are stamped scattered down the card are the perfect springtime touch!
We have new additions to our sentiment collection perfect for using on your religious-themed cards for the Easter season and more:

The Jesus Script die features a dainty font perfect for this special word! Use this die for sending inspirational and religious themed cards throughout the year. You can also layer it over the Jesus Script Backer die (sold separately) to add more dimension to the die cut word.
The new Simple Strips – Easter Blessings stamp includes 18 inspirational sentiments to celebrate the Easter Season. Use the innovative alignment guides to cut out all 18 sentiments with one pass through your die cut machine with the coordinating dies (sold separately): Simple Strips, Simple Strips – Well Rounded, and Simple Strips – Asymmetrical.
The Handlettered Easter die collection coordinates with our previously released Handlettered Easter stamp set (sold separately) to perfectly set off the sentiments on your projects.
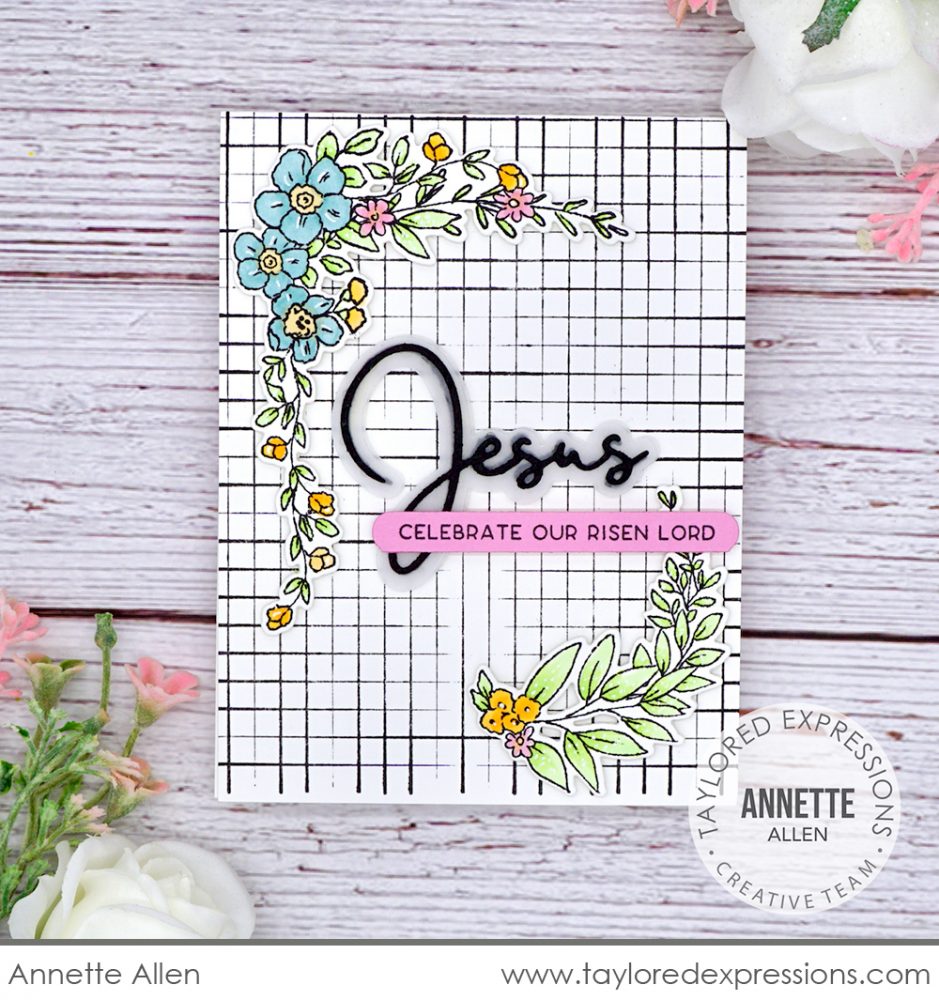
Annette Allen die cut the Jesus Script from Oreo cardstock and set it onto a layer of vellum cut out with the Jesus Script Backer die. She paired it with the ‘celebrate our risen Lord’ sentiment from the new Simple Strips – Easter Blessings stamp and cut out with the Simple Strips – Well Rounded die. The sentiment takes center stage on this Easter card and Annette surrounded it with the delicate flower sprays from the Unexpected Blessings stamp set.
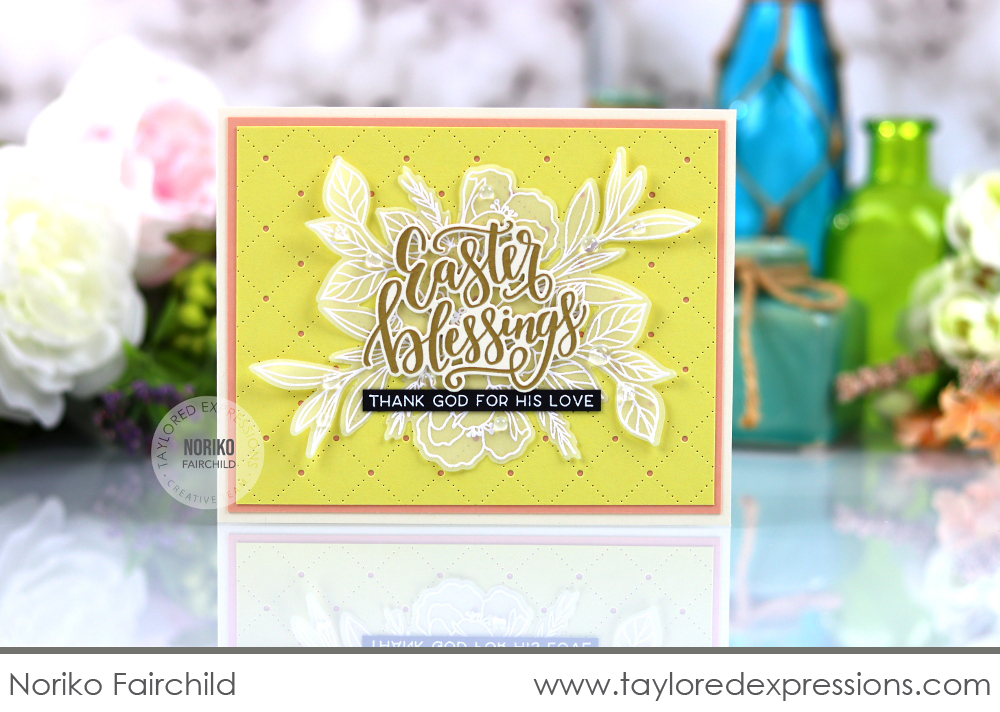
Noriko Fairchild embossed the ‘Easter blessings’ sentiment from the Handlettered Easter stamp set in gold and cut it out with the new coordinating die. She paired the sentiment with the ‘Thank God for his love’ sentiment from the Simple Strips – Easter Blessings stamp that is embossed in white on an Oreo cardstock strip. I love how she layered the sentiments over our new Spring Spray floral image (that you’ll find out more about soon) that is embossed in white on vellum. It’s such a pretty look!
A few of these next products might look familiar to you as two of them were incentive sets you could earn during our Black Friday weekend at the TE webstore. We are excited to now make them available to purchase!

The Diamond Botanical stamp set features a diamond shaped frame that is adorned with botanical greenery. Pair the frame with one of the five greetings to create and elegant look that is versatile for many different occasions. We also now excited to offer the Diamond Botanical die to cut out the frame image.
The Masking Stencils – Diamonds set was previously the incentive set you could earn during the month of December and will now be available to purchase. The diamond shape coordinates perfectly with the frame in the Diamond Botanical stamp set and you’l love using this masking stencil shape for other designs too. Use the innovative etched alignment guides to line up the masking stencils perfectly on your A2 card fronts and use the included insert shapes for even more masking possibilities!
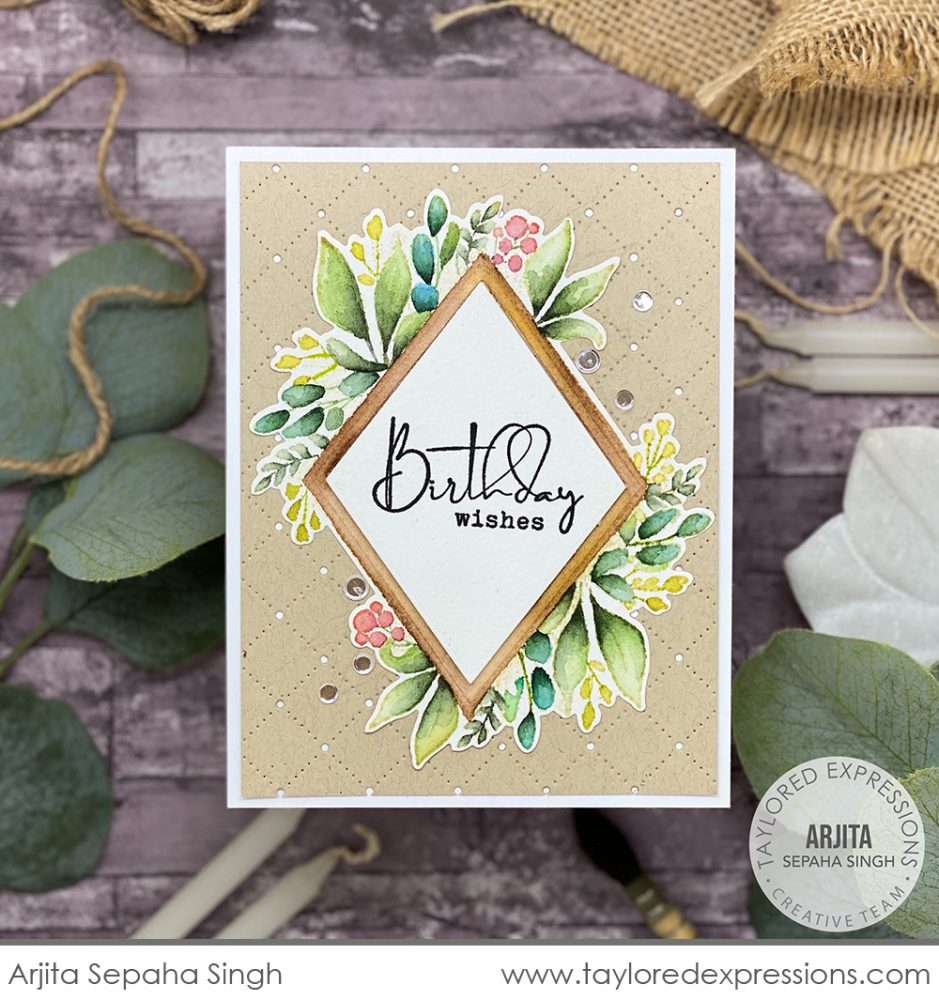
Arjita Sepaha Singh brought her no line coloring skills out for this birthday card created with the Diamond Botanical stamp set. She stamped the image in a light toned ink (Sea Salt ink works great for this technique!) and used watercolors to paint the image. After stamping the sentiment in the frame opening, she cut it out with the coordinating die and set it onto a pretty pierced background.

I don’t think you can ever have too many florals in your stamp collection and I know that the Spring Spray stamp (+ coordinating die) will be a perfect addition! This gorgeous spray of flowers is perfect to use with your favorite coloring mediums: Copic markers, watercolor, colored pencil, and more. Plus, florals like this work to use on cards and projects for so many different occasions!
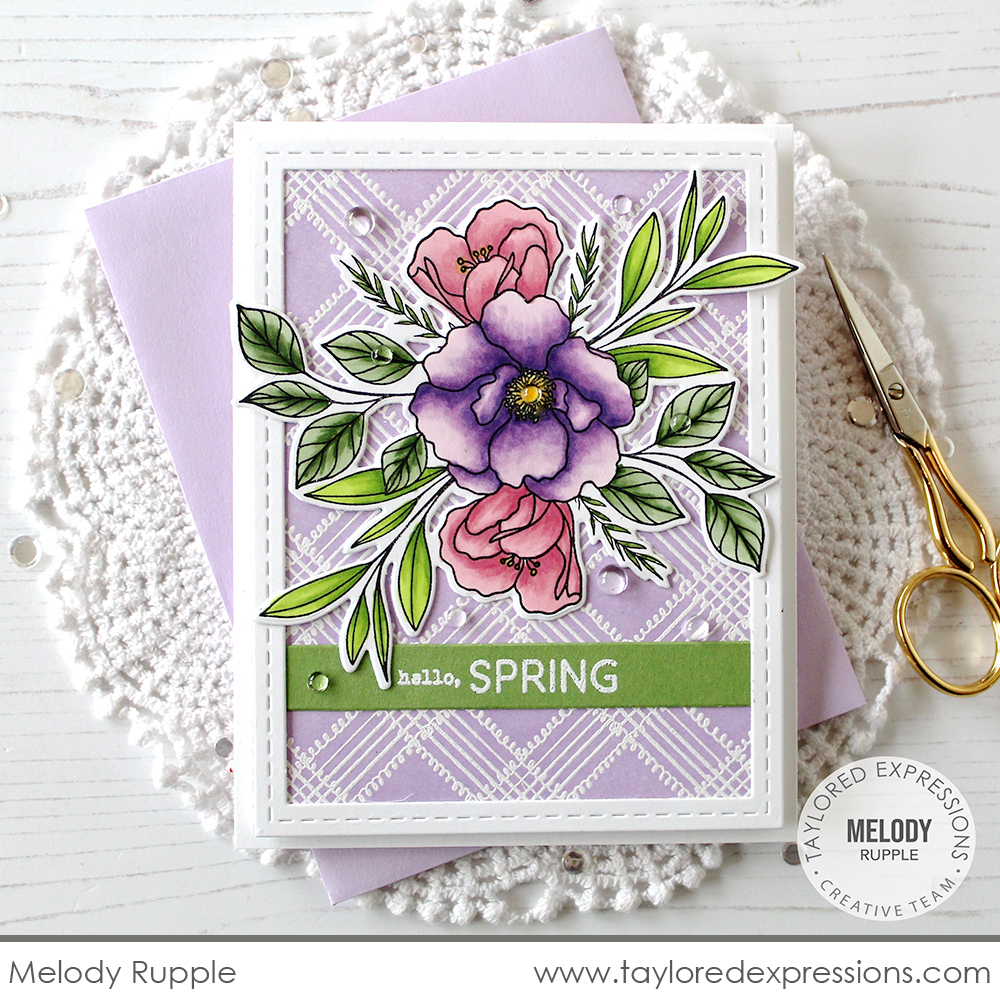
Melody Rupple colored the Spring Spray with Copic markers using pinks and purples for the florals with a touch of yellow for the centers. She cut out the image using the coordinating die and set it over the Playful Plaid Background (I’ll tell you about this new background below!) that is embossed in white on Lavender Glaze cardstock. The sentiment is from the new Pennant Parade – Easter stamp set and Melody added a few Bits & Pieces – Clear Drip Drops for the perfect finishing touch.
And lastly, you have likely noticed this next group of products showing up in several projects from the TE Creative Team members. It’s finally time to introduce them to you! All of these are great basics that you’ll love having as part of your crafty collection:

The Playful Plaid Background stamp features a whimsical plaid design with a fun looped line detail that will will dress up your A2 card front. This background will add a touch of sweetness and whimsy to any project.
If you like the farmhouse rustic touch, you will love the new Wood Plank Background. Add the rustic woodgrain texture to your backgrounds, borders, die cut shapes, and more. This is a background I know I’ll be reaching for again and again!
Add a pierced pattern detail to your A2 card background with the Pierced Lattice Cutting Plate die. The cutting plate impresses a pierced lattice design into your card from and cuts a tiny hole at the line intersections that will show a peek of the cardstock underneath.
Step up your tags with the Pierced Tag Stacklets 2 die collection. This die collection cuts out several tag sizes with a pierced border and it layers perfectly with the Tag Stacklets 2 die collection.
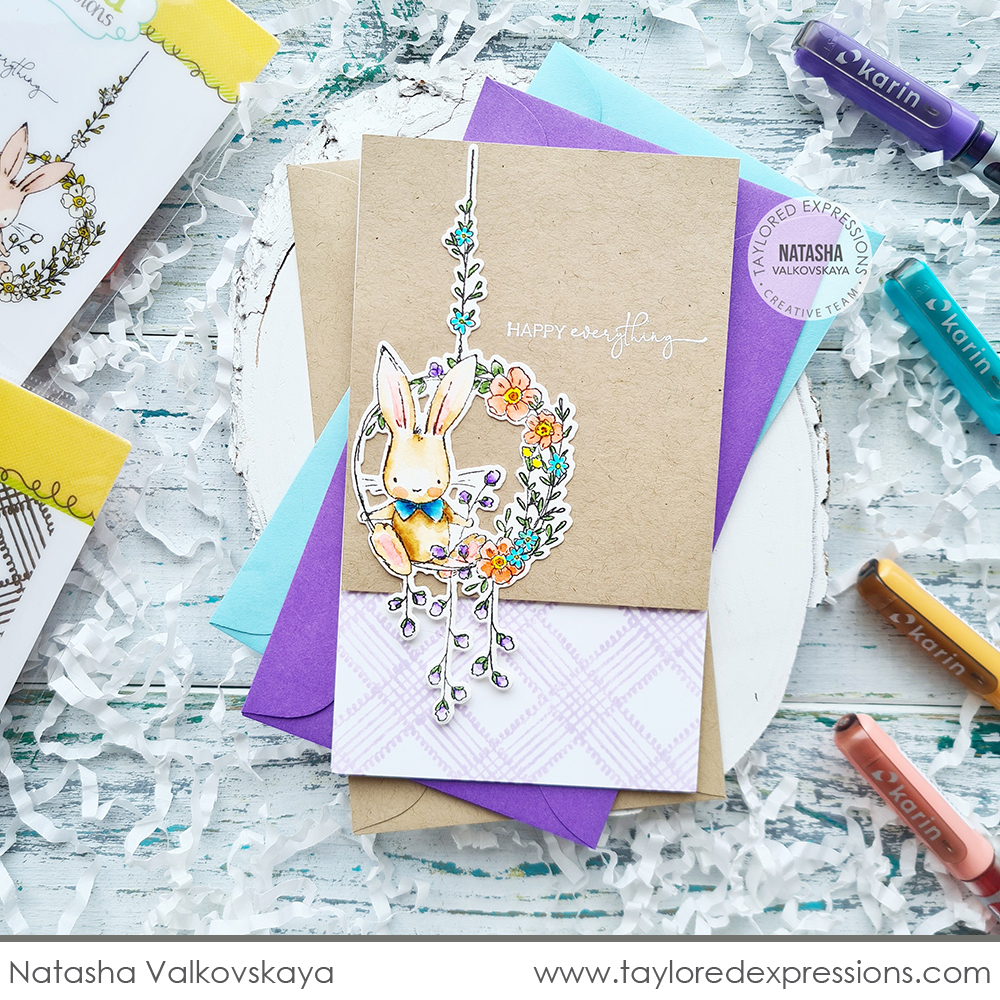
The Playful Plaid Background is peeking out on the bottom of this Mini Slim card created by Natasha Valkovskaya. The sweet and whimsical plaid is perfect to pair with the cute bunny from the Cottontail Wishes stamp set. Natasha stamped the background with Lavender Glaze ink to coordinate with the lavender touches in the main image that is colored with Karin Brushmarkers. This card would be perfect to welcome a new baby or to send a little happy to a dear friend.
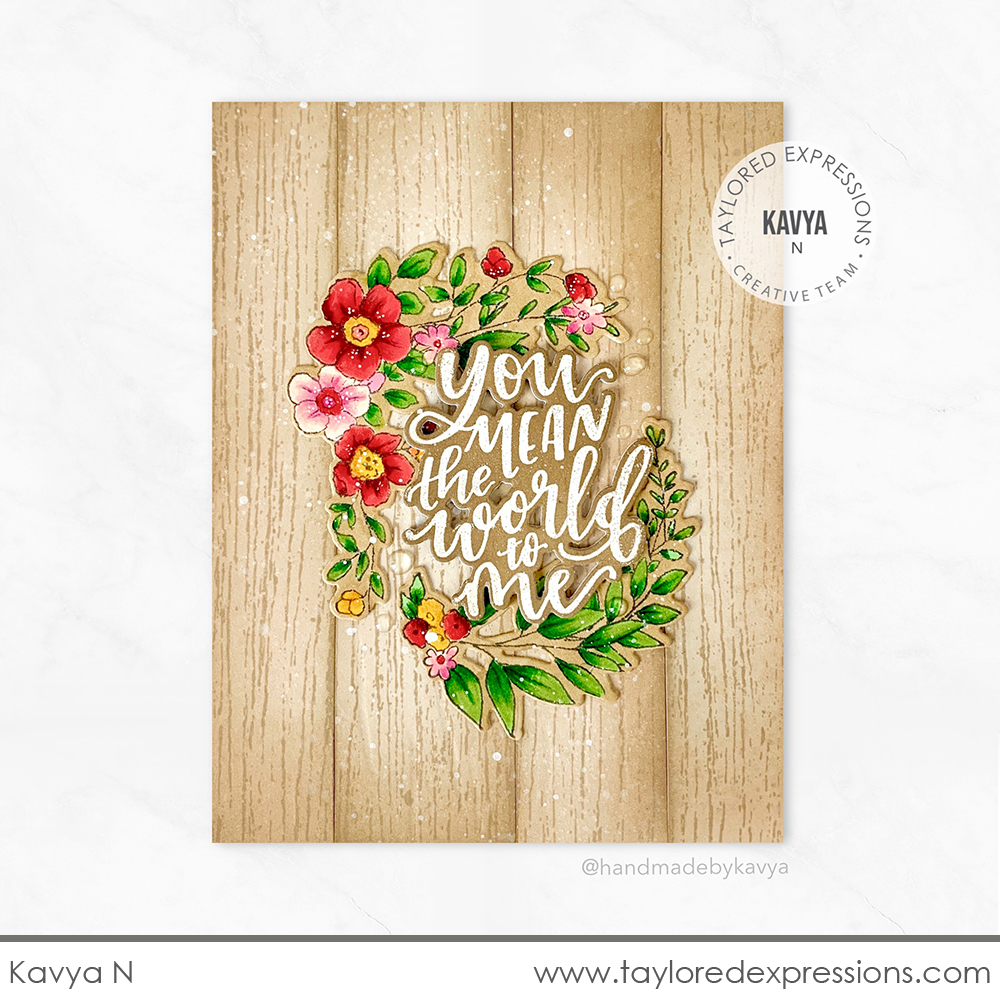
Kavya cut the Wood Plank Background image stamped with Toffee ink onto Toffee cardstock into wide strips to create a wood panel effect. She used her Blender Brushes to add extra shading around the edges of each piece for a more realistic look. It’s the perfect backdrop for the pretty floral wreath that Kavya created with the Unexpected Blessings stamp set that encircles the ‘you mean the world to me’ sentiment from the Handlettered Sentiments stamp set.
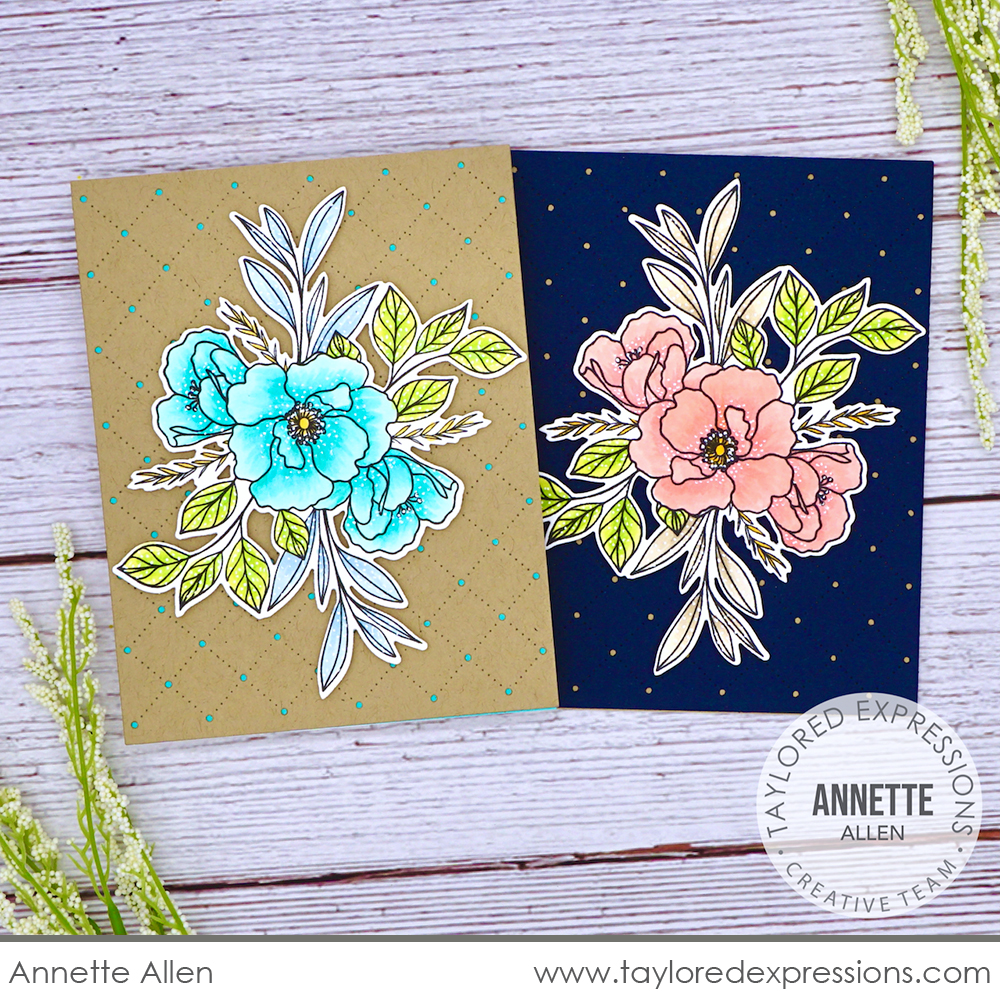
Annette Allen is giving you examples of a few different looks with the Pierced Lattice Cutting Plate die on this set of cards featuring the image from the Spring Spray stamp. The background is cut from Toffee cardstock for the card on the left and layered over a Cookie Monster card base and the card on the right is cut out from Blue Corn cardstock and layered over a Toffee card base. I love the texture that this cutting plate adds to your backgrounds and the pop of color you can get by layering the die cut over different cardstock colors.
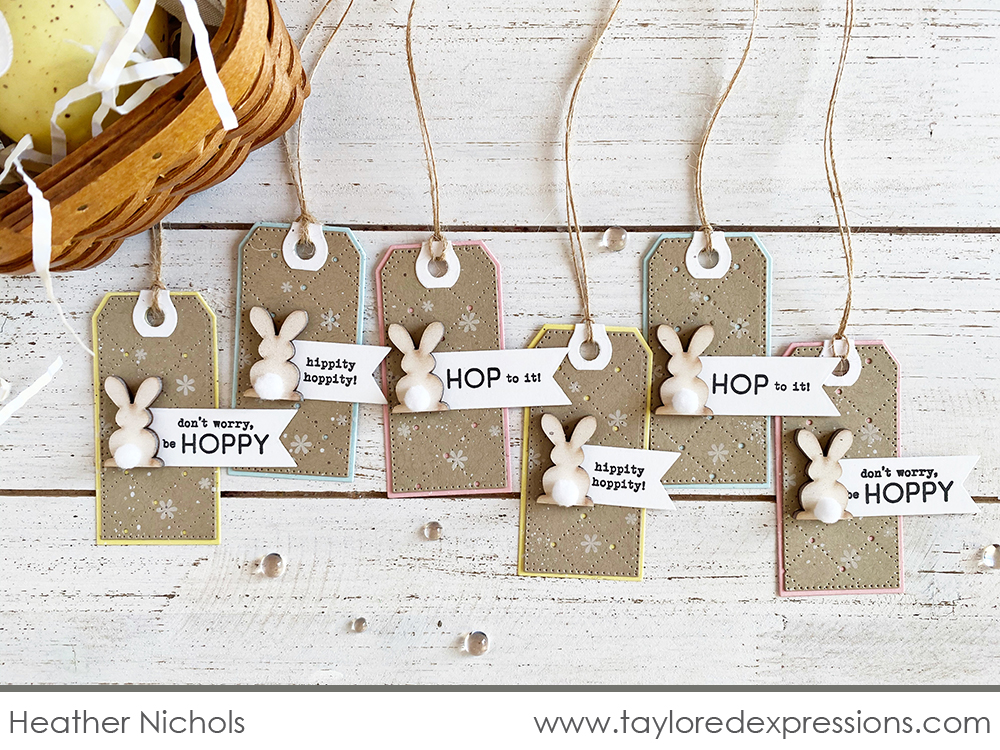
Heather Nichols is known for her tags and she created a whole pile of them to attach to Easter treats using the new Pierced Tag Stacklets 2 dies. She cut out the pierced tags from Toffee cardstock that she had cut with the Pierced Lattice Cutting Plate die and layered them onto tag bases that are cut out with the Tag Stacklets 2 die collection in a few pastel colors. The tags feature the wooden bunnies with pom pom butts and sentiments from the Pennant Parade – Easter stamp set.
Our new Easter release will be available for purchase starting tomorrow at 9am Central Time, but before I head out for today, you have a chance to win it before you can buy it! Just comment below and let me know:
What are you most excited to see in this release? What’s the first thing you’d envision making?
I’ll choose three lucky winners to receive one product of their choice (sorry, not a bundle) from this release!
Simply leave your comment by TONIGHT, Monday, February 22nd at 10PM Central Time. One comment per person. Winners are chosen at random and will be announced on the TE blog on release day, tomorrow, February 23rd!
Thank you for stopping by for our new Easter release sneak peeks! Stop back tomorrow for more inspiration from the TE Creative Team and a video from Heather. See you then!


