Jun 22, 2021
The NEW Very Cherry Kit!
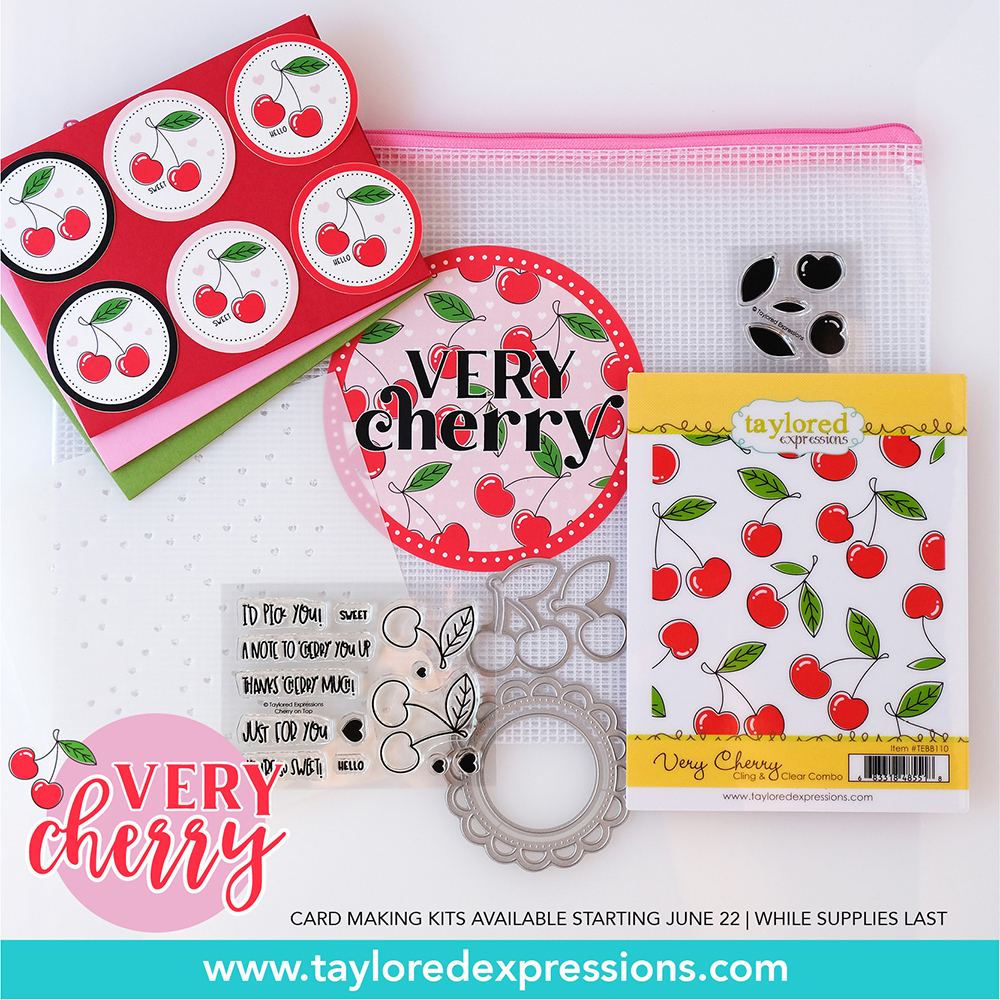
Hey, crafty friends! It’s Taylor here and it’s a ‘cherry’ nice day at Taylored Expressions today with the launch of our latest card kit, Very Cherry! Isn’t it so cute!? These simple cherry images can be filled with color using the included clear stamps OR color them in with a medium of your choice. You’ll see in the creative team samples that they’re beautiful in watercolor and Copic markers too! When Laurie Willison asked if I’d consider a cherry themed kit, I thought it was an awesome idea! Over several months we chatted through various design options and it’s super fun to finally see this come kit come to fruition… see what I did there?…. ‘fruit’ion. I’m always up for a good pun and you’ll find several punny sentiments included in the kit.
So what’s unique about our kits? First, there’s no subscription necessary. Also, in keeping with our mission to Share Joy, we encourage you to send the cards you create by including six envelopes along with six custom envelope seals to match the theme of the kit. Each kit comes packaged in a zippered pouch with a coordinating vinyl sticker making it easy to keep the supplies together.
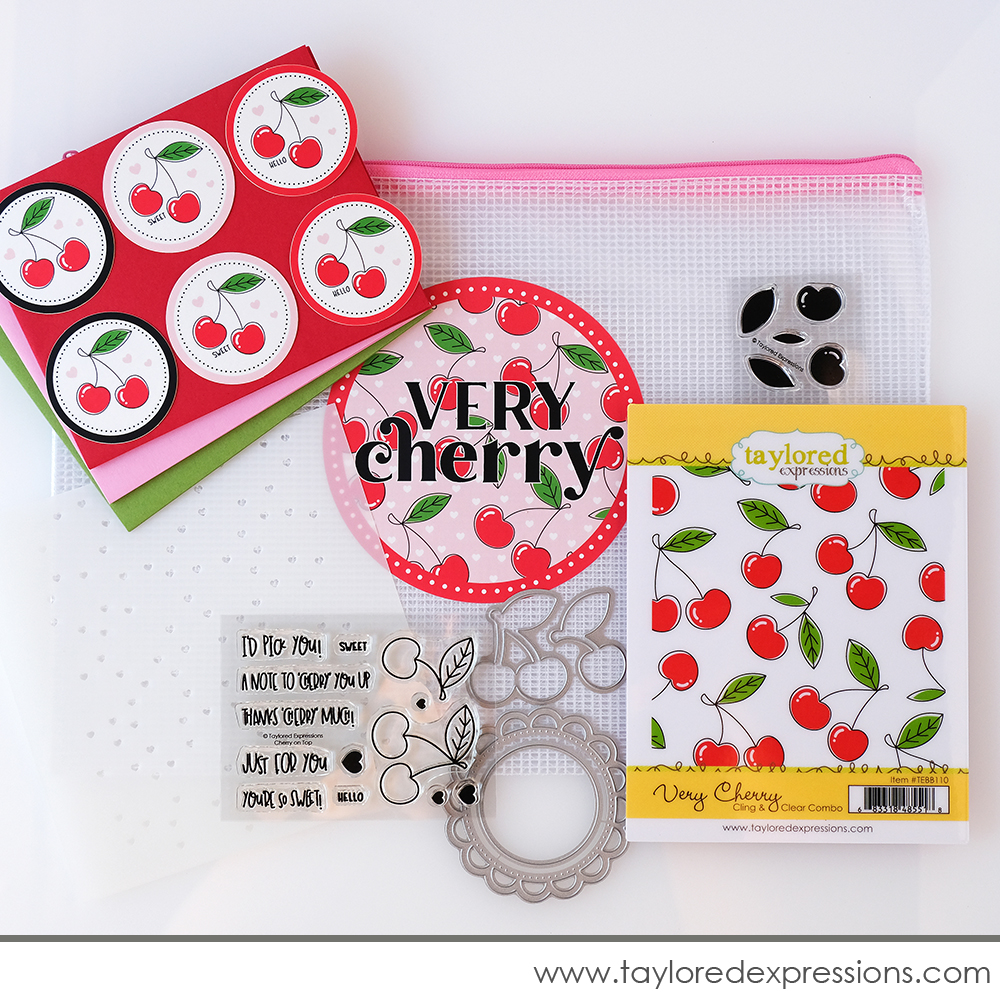
Here’s everything included the Very Cherry Kit– which is available for $65:
- Very Cherry Cling & Clear Combo set
- Very Cherry stencil
- Clearly Crafty Cherry on Top stamp set
- Cherry on Top die collection
- Open Scallop Circle die
- 6 Custom Envelope Seals
- 6 A2 Envelopes: 2 each of Cherry Pop, Strawberry Milkshake, and Peapod
- Packaged in a zippered pouch with a custom kit label
Limited quantity available. Most items not available to purchase individually.
You will be able to purchase additional envelope seals separately!
Alright, it’s time to sit back, relax, and enjoy all of the inspiration from the TE Creative Team using the new Very Cherry Kit!
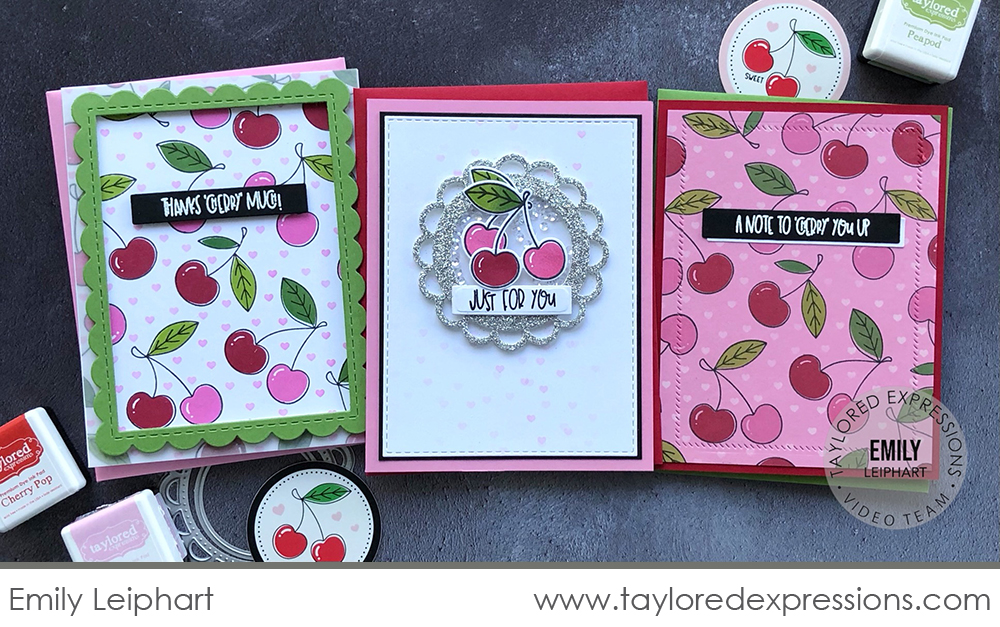
Our video today comes to you from Emily Leiphart. She dove right into the Very Cherry Kit and created three ‘cherry’ cute cards. Watch the video below to see how the cards come together from start to finish:
In the video, Emily gives you a closer look at all of the products in the Very Cherry Kit and creates three cards with it. Two of the cards feature backgrounds created with the Very Cherry Cling & Clear Combo and coordinating stencil. For the other card, Emily creates a shaker using the Open Scallop Circle die and uses the Cherry on Top stamp set (+ coordinating dies) to add cherry images to the front of the card. Emily stamps and embosses a variety of sentiments from the Cherry on Top stamp set and cuts them out using the Mini Strips Backer die to use on her cards.
Here’s a closer look at each of the cards that Emily creates in the video:
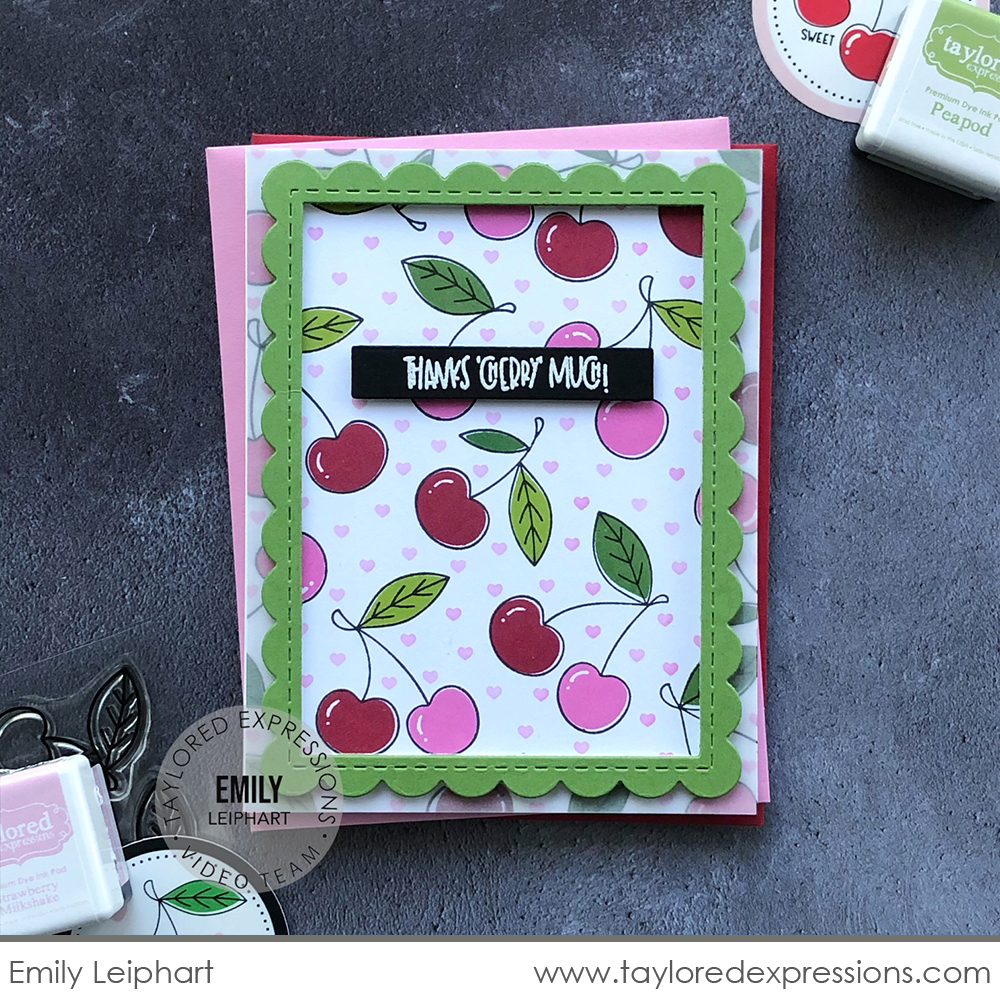
This first card features a background stamped with the Very Cherry Cling & Clear Combo set. She stamped the cherries with Oreo Ink and added color using the clear stamps. For the cherries, she used Cherry Pop and Strawberry Milkshake inks and for the leaves she used Peapod, Granny Smith, and Cilantro inks. The hearts in between the cherries are stenciled with the Very Cherry stencil using Strawberry Milkshake ink. Emily framed the background with a Frame in Frame 2 Cutting Plate die and I love how she softened the outside edges of her card with another frame of vellum. The sentiment on this card is embossed in white on Oreo cardstock.
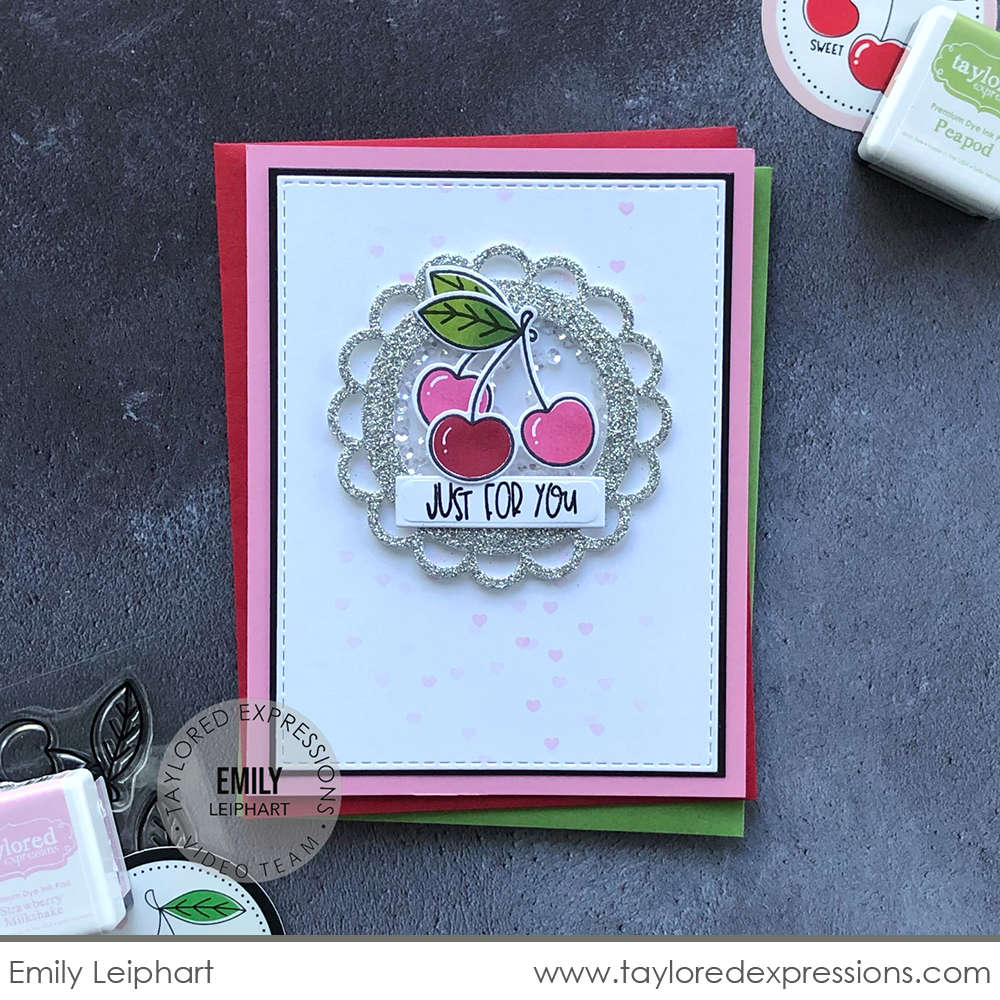
This second card features a glittery shaker! Emily created the shaker with the Open Scallop Circle die cut from silver glitter cardstock. She backed the frame with window acetate, added foam tape to a Sugar Cube Cardstock base, and added shaker filler. The front of the shaker is adorned with a few cherries stamped with the Cherry on Top stamp set and I really like the ombre look that Emily created on the leaves by inking up the clear leaf stamp with Granny Smith and Cilantro inks. The background on this card is created with the Very Cherry stencil to create a bokeh effect. Emily stenciled portion of the stencil with Strawberry Milkshake ink, shifted the stencil over, and stenciled another portion of the stencil with Cherry Pop ink.
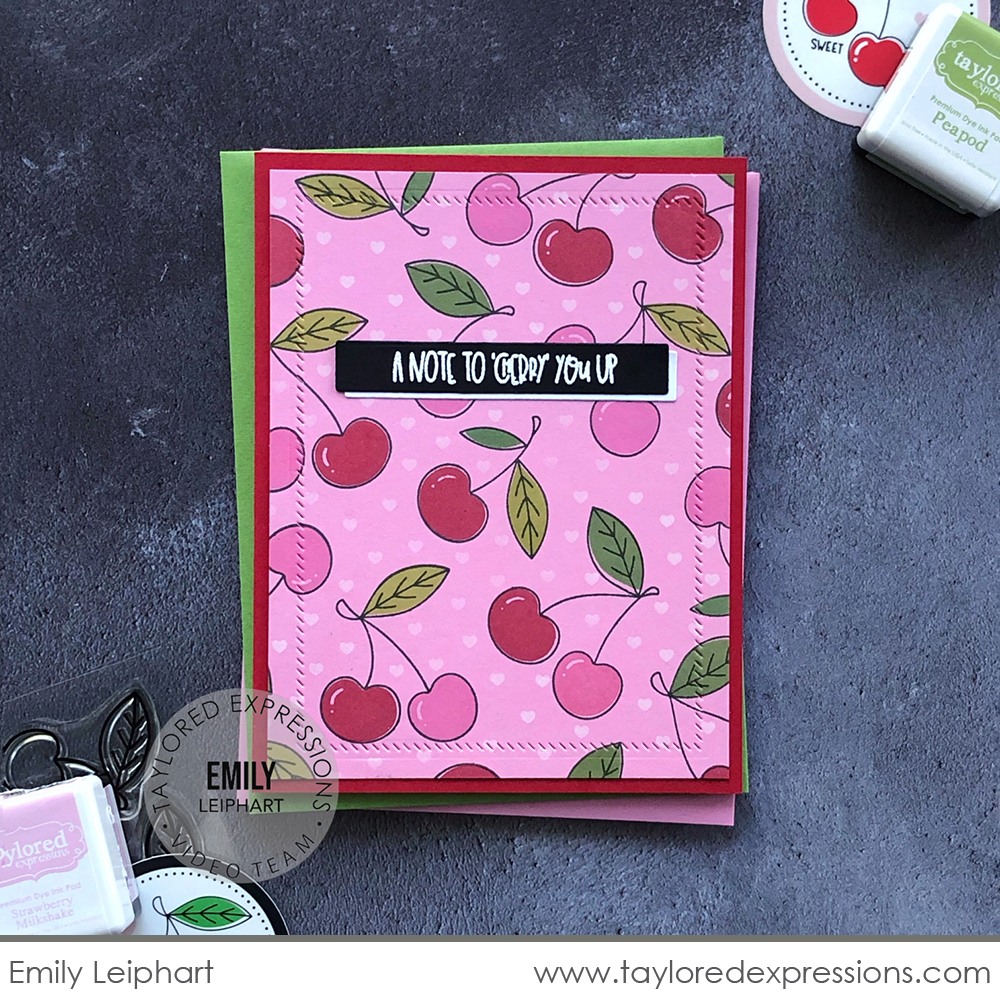
This last card features the Very Cherry Cling & Clear Combo set stamped onto Strawberry Milkshake Cardstock. It’s fun to experiment with stamping your designs on different cardstock colors like Emily did here! For this background, she added the hearts using the Very Cherry stencil with Sugar Cube ink. To frame the background design, Emily used a Diagonal Stitch Rectangle Stacklets die and added the sentiment embossed in white on Oreo cardstock to complete the card design.
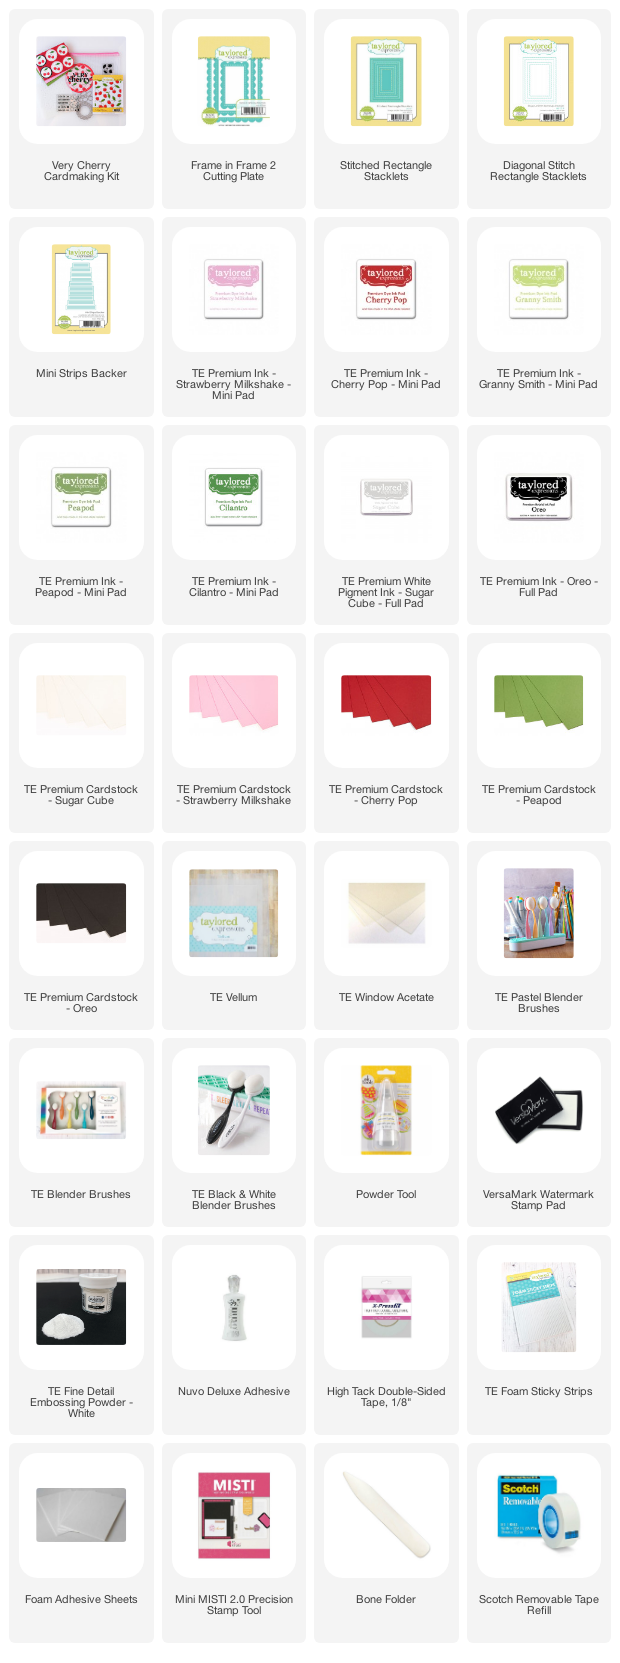
Check out the list below for all of the supplies that Emily used on her projects:

Now, let’s take a closer look at the different elements of the kit as well as more inspiration from the TE Creative Team. Note: Most of these items are only available as part of the Very Cherry Kit.
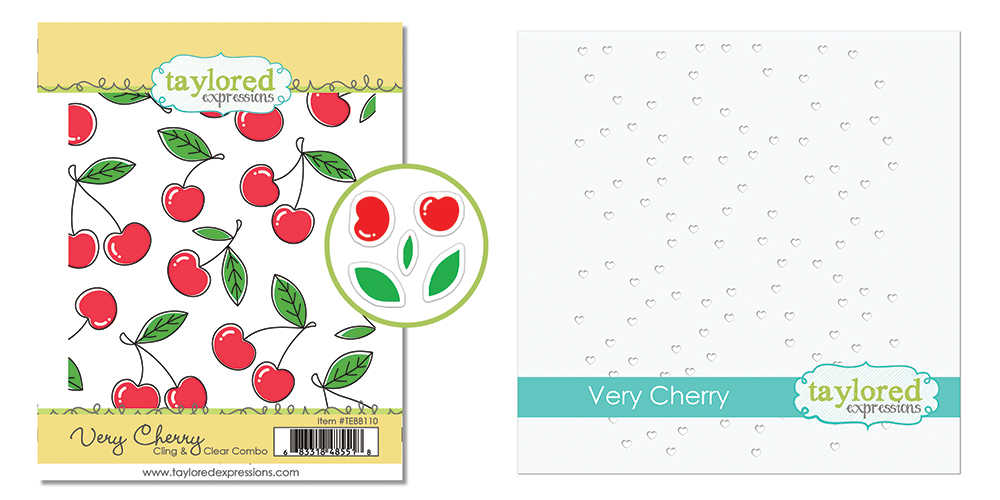
The Very Cherry Cling & Clear Combo set has a red rubber background stamp that fills up an A2 card front with the sweetest cherries! In addition to a red rubber stamp featuring a fun pattern of cherries, the set includes five clear, photopolymer stamps to fill the cherries and leaves with color. The coordinating Very Cherry stencil adds a scattered heart pattern into the background between the cherry images.
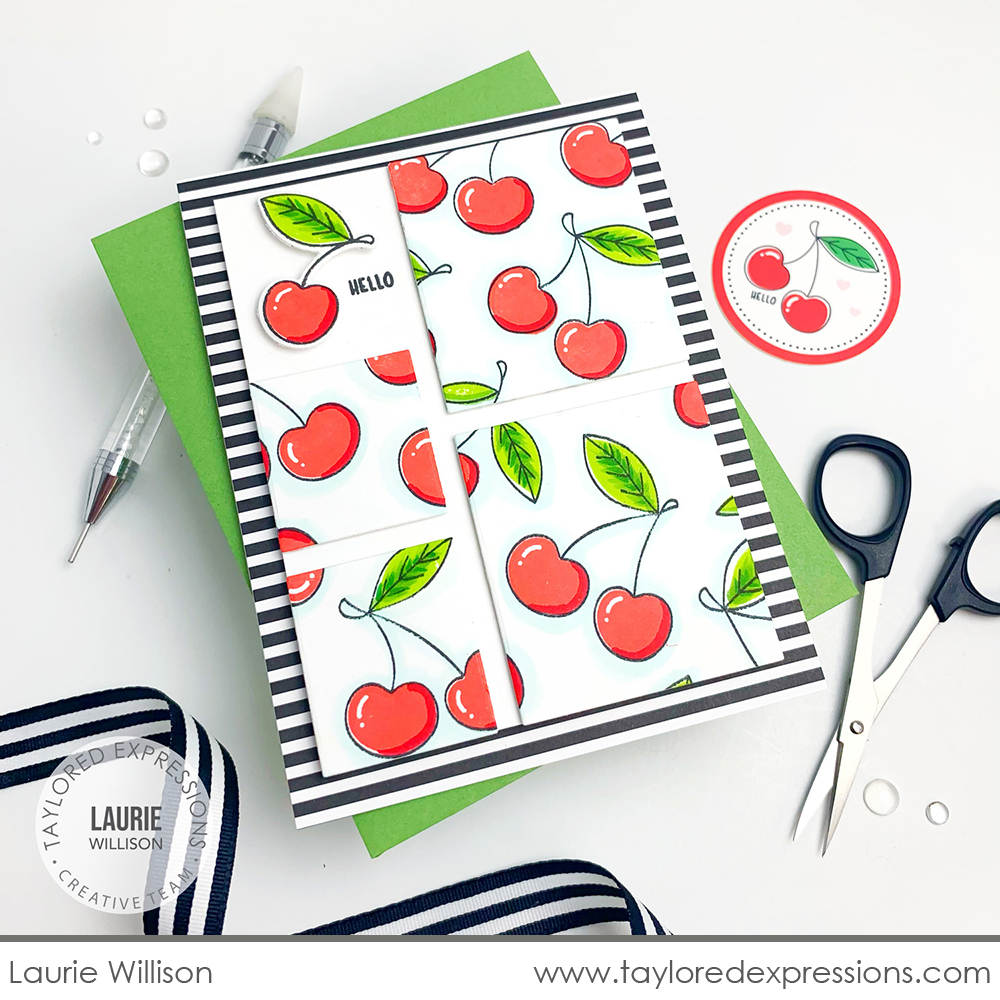
Laurie Willison stamped the cherry background from the Very Cherry Cling & Clear Combo set and added color with the coordinating clear stamps. She stepped up the details by adding shading to the cherries and leaves with Copic markers – the touch of light blue around the cherries give the design an extra pop! I really like how Laurie cut the stamped panel apart and then pieced it onto the card front and I love how the black and white striped paper gives the card a fun, but sophisticated feel!
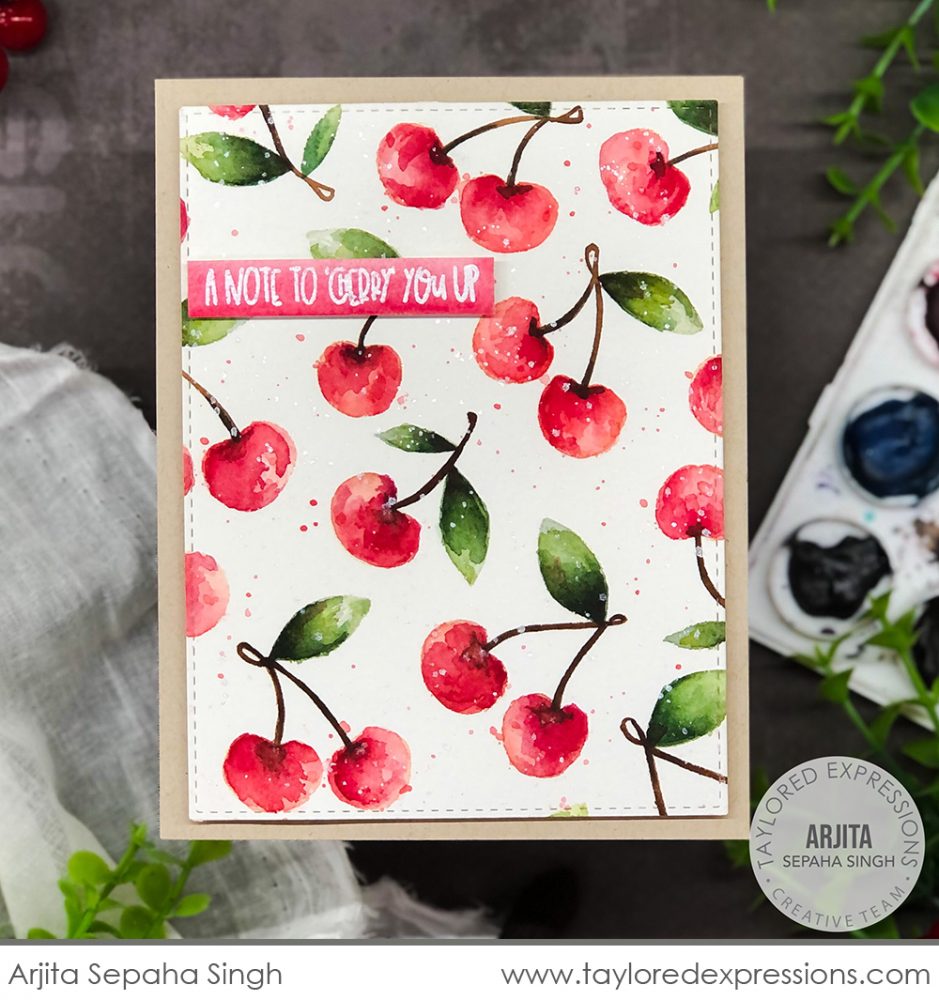
Don’t the cherries look incredible on this card by Arjita Sepaha Singh? She did a no-line watercolor technique by stamping the background from the Very Cherry Cling & Clear Combo set in a light ink tone (Sea Salt ink works great for this) onto watercolor paper and then adding color to the cherries using watercolor paints. The extra drips and splatters are the perfect touch and Arjita added the sentiment onto a watercolor paper strip embossed in white that is painted with a coordinating color. One of these days I am going to actually sit down and practice doing this technique and hope I am as good as Arjita is at it!
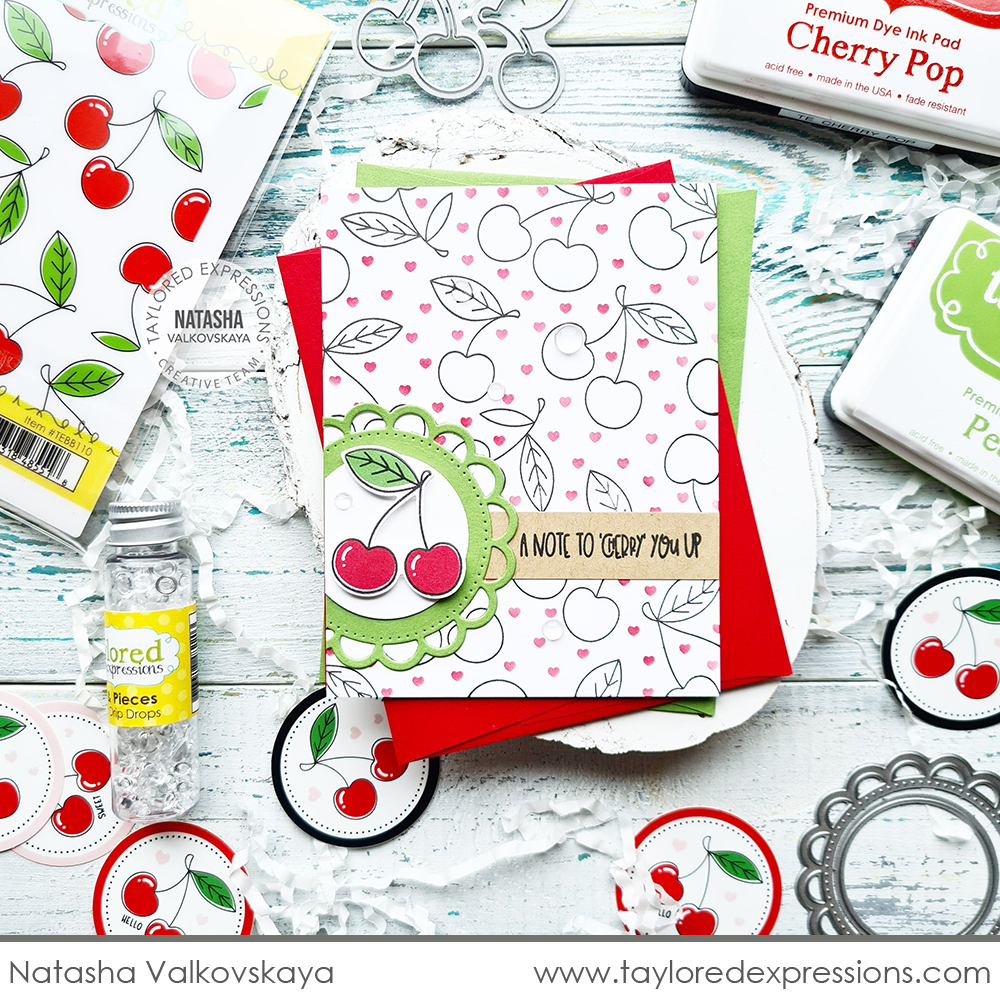
You don’t always have to go all out with color on your projects! Natasha Valkovskaya created a great background for her card by simply stamping the cherry background from the Very Cherry Cling & Clear Combo set in Oreo Ink from the and adding the hearts with Cherry Pop ink using the Very Cherry stencil and her Blender Brushes. Using just a few colors for the background allows the main image and sentiment to shine on the card. The main cherry image and sentiment are a part of the Cherry on Top stamp set (+ coordinating dies) that you’ll learn more about below!

The Clearly Crafty Cherry on Top stamp set features two cherry images that coordinate with the Very Cherry Cling & Clear Combo set. Stamp additional cherries to use as focal images and accents on your projects along with seven ‘cherry’ fun sentiments and tiny hearts. You can color the cherries using the clear stamps from the Very Cherry Cling & Clear Combo set or use your favorite coloring medium and then cut them out with the coordinating Cherry on Top dies.
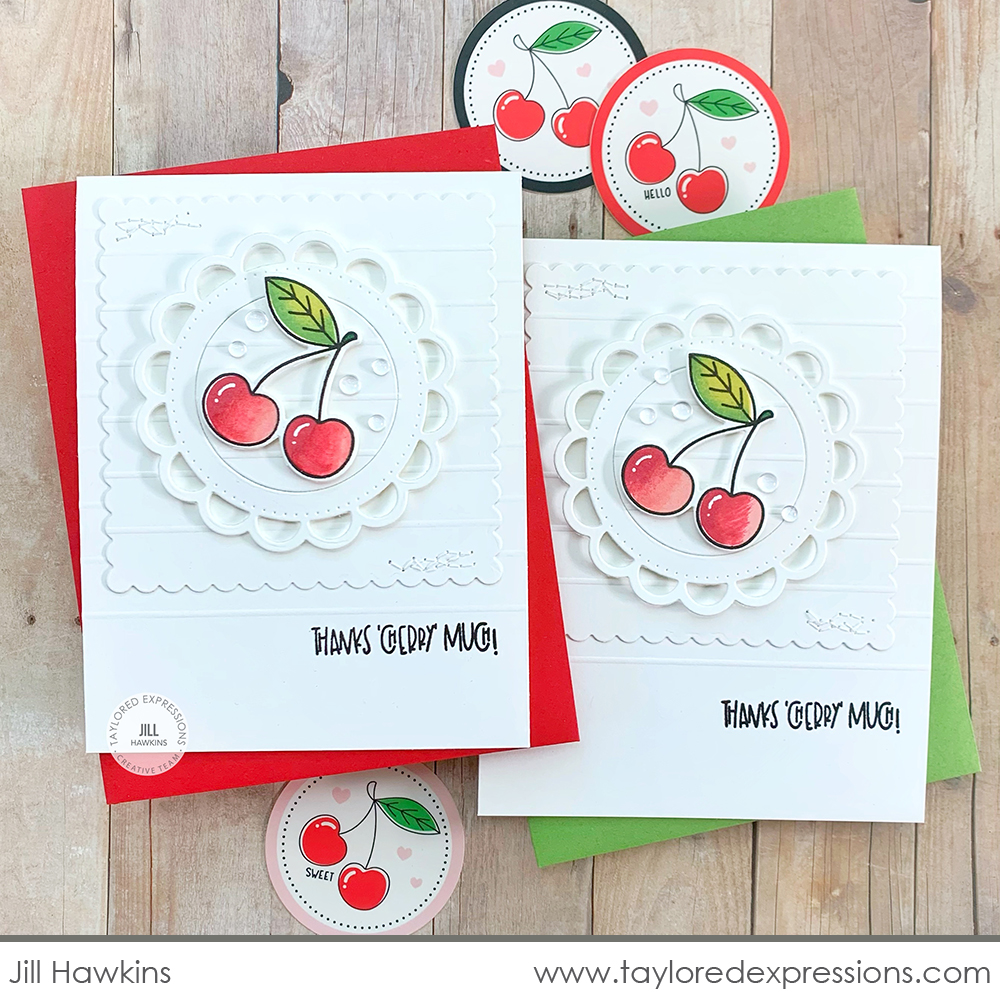
This sweet and simple set of cards by Jill Hawkins shows off the cherries and sentiments from the Cherry on Top stamp set perfectly! Jill stamped the cherries in Oreo ink and added color with the clear stamps from the Very Cherry Cling & Clear Combo set. She inked up the filler stamps with multiple ink tones to create a great shaded effect – mini ink cubes are great for this! The background is created with Sugar Cube Cardstock using a few different dies and score lines to create all sorts of texture. The Sugar Cube background lets the cherries and sentiments really stand out on the cards!
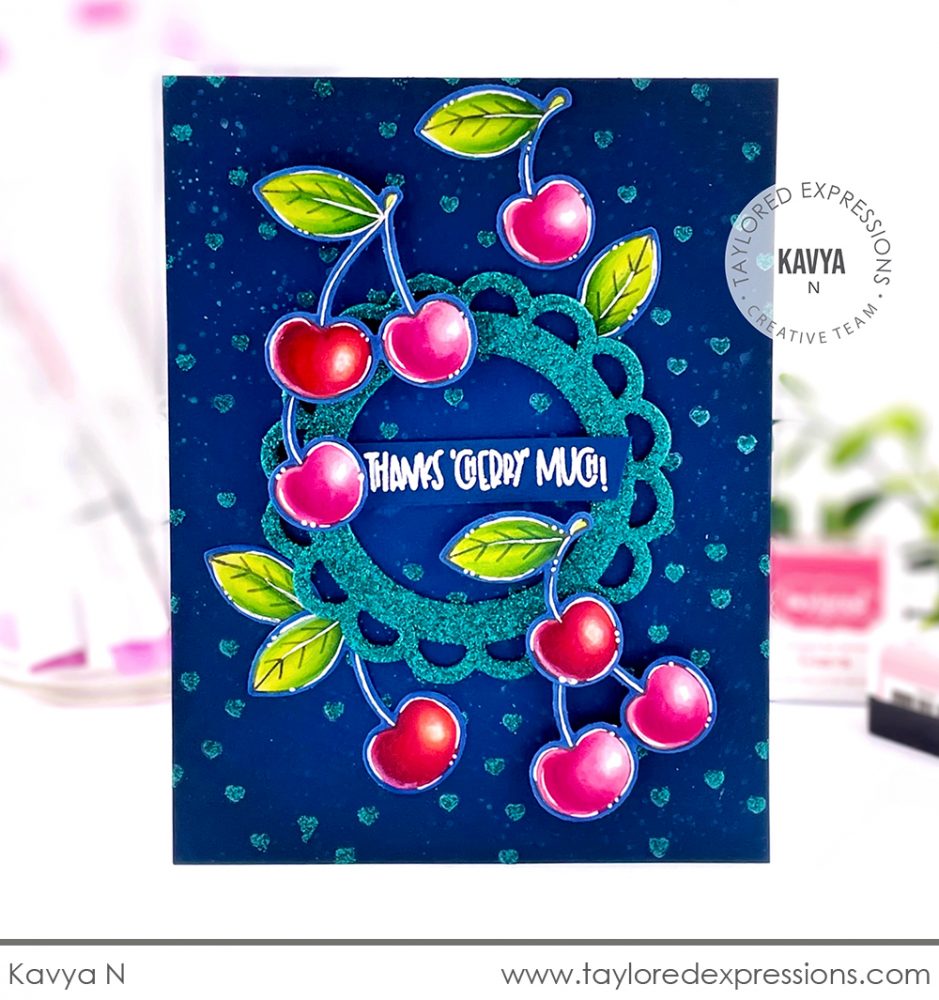
Kavya cascaded a bunch of brightly colored cherries down the front of this thank you card. The Blueberry background is stenciled with the Very Cherry stencil using Glitter Grab and then sprinkled with Cookie Monster glitter. Kavya coated the scalloped circle frame with Cookie Monster glitter to match! The cherries are stamped with the Cherry on Top stamp set and colored with Copic markers, including the edges to match the card base. To finish off the card, the ‘thanks ‘cherry’ much!’ sentiment is embossed in white on a strip of Blueberry cardstock and set into the glittered frame.
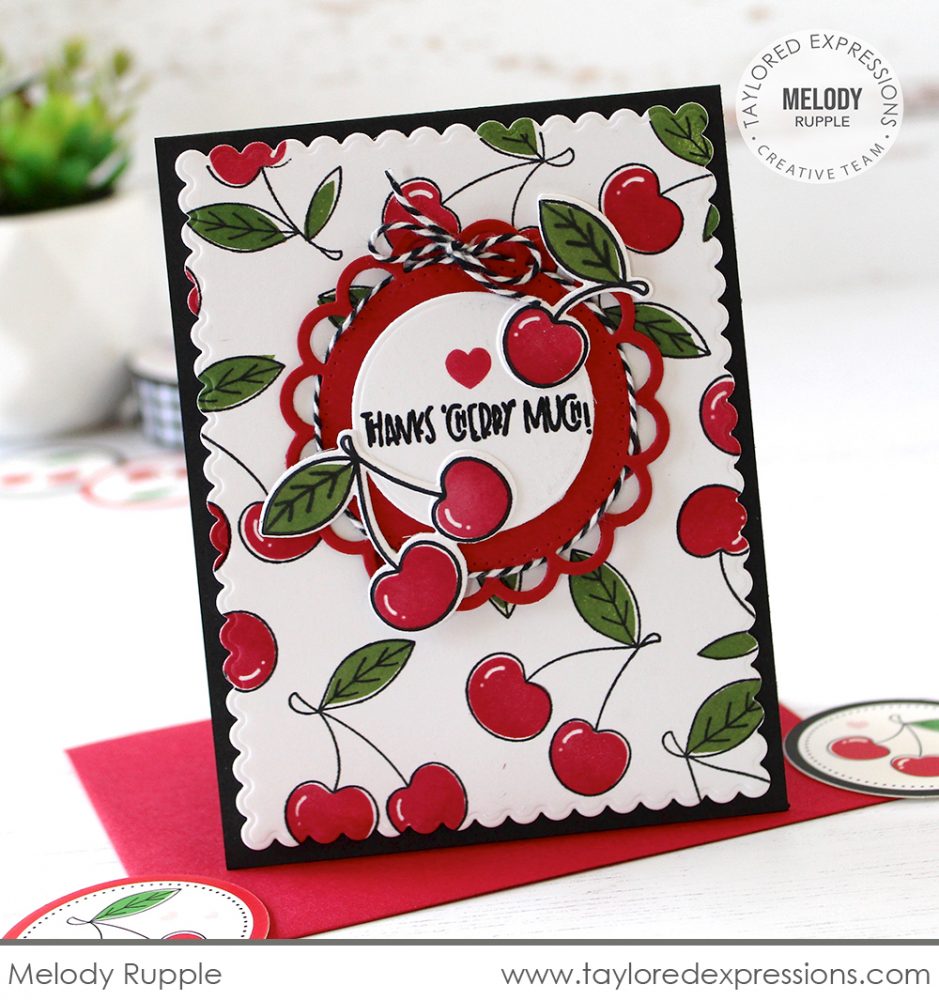
Melody Rupple let the cherries and sentiment from the Cherry on Top stamp set take center stage on this thank you card! The background is stamped with the Very Cherry Cling & Clear Combo set and cut out using a Petite Scallop Rectangle Stacklets die. Melody added the sentiment inside the scalloped frame, added a few of the cherry images around the frame edges, and I love how she wove a piece of black and white twine through the open scallops – so fun! Learn more about the scalloped frame you have been seeing on many of the TE Creative Team projects below.
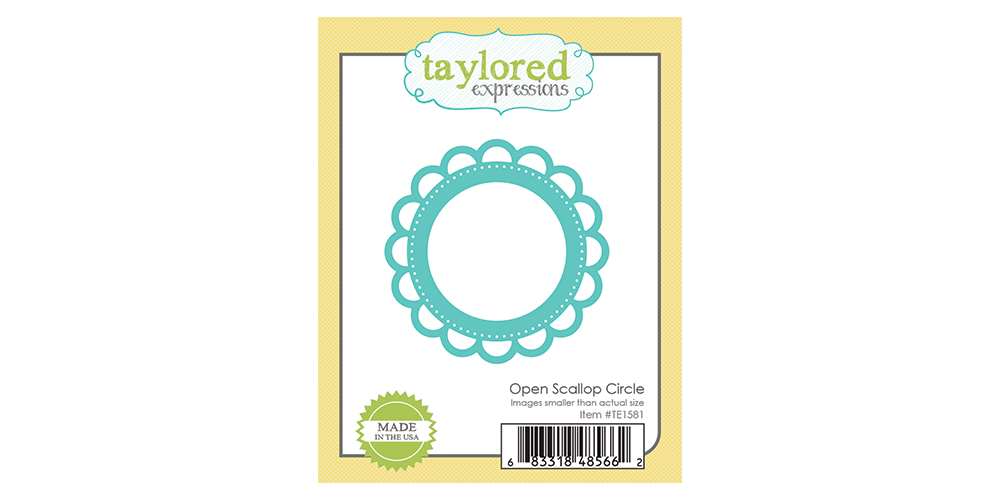
The Open Scallop Circle die cuts out an open scalloped frame with a pierced border detail. There are so many possibilities for this frame! Use it to frame the cherries or sentiments, use it as a shaker element on your projects, and more!

Mindy Eggen used the Open Scallop Circle die to frame both the cherries and sentiment on this set of ‘cherry’ cute cards. She cut out the frames from Cherry Pop and Lime Zest Cardstock and added a piece of Sugar Cube cardstock for the centers. I love the different background that Mindy created for her cards using Cherry Pop, Lime Zest, and Pink Champagne cardstock strips and especially like how she stamped the strips for the card on the right with cherries with the Very Cherry Cling & Clear Combo set before she cut them up!
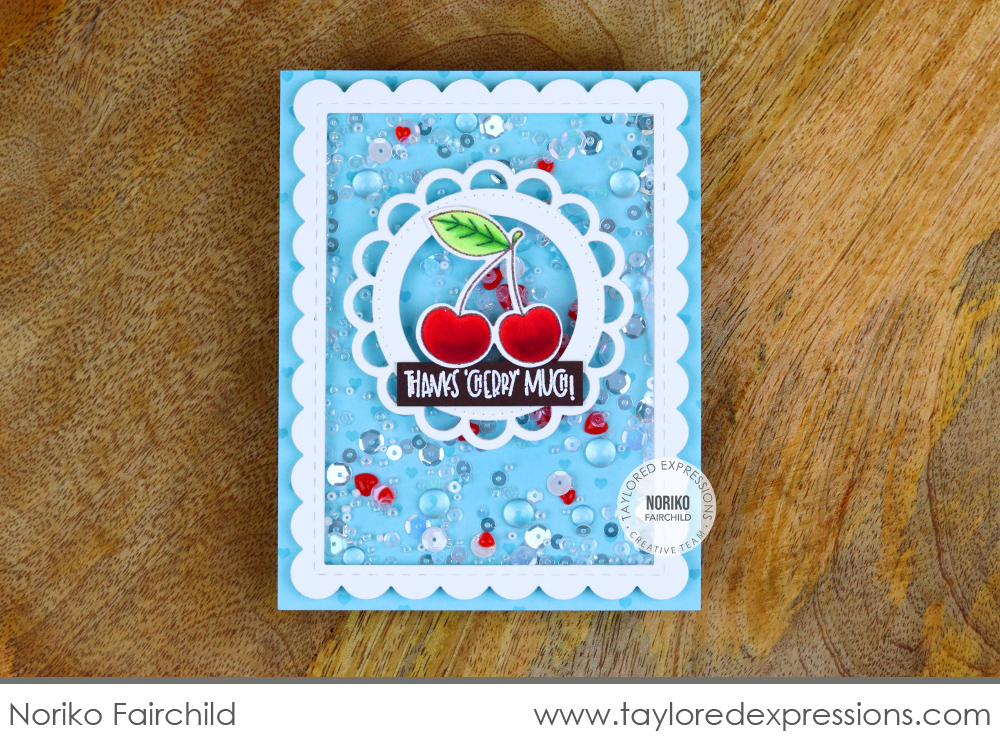
Noriko Fairchild made a shaker card with a Frame in Frame 2 Cutting Plate die and embellished the front of the shaker with cherries stamped with the Cherry on Top stamp set and framed with the Open Scallop Circle die. The shaker is filled with a fun mix of embellishments including Bits & Pieces – Clear Drip Drops and Snow Flurries sequins. Take a closer look at the card background and you will spy tiny hearts stenciled with the Very Cherry stencil!
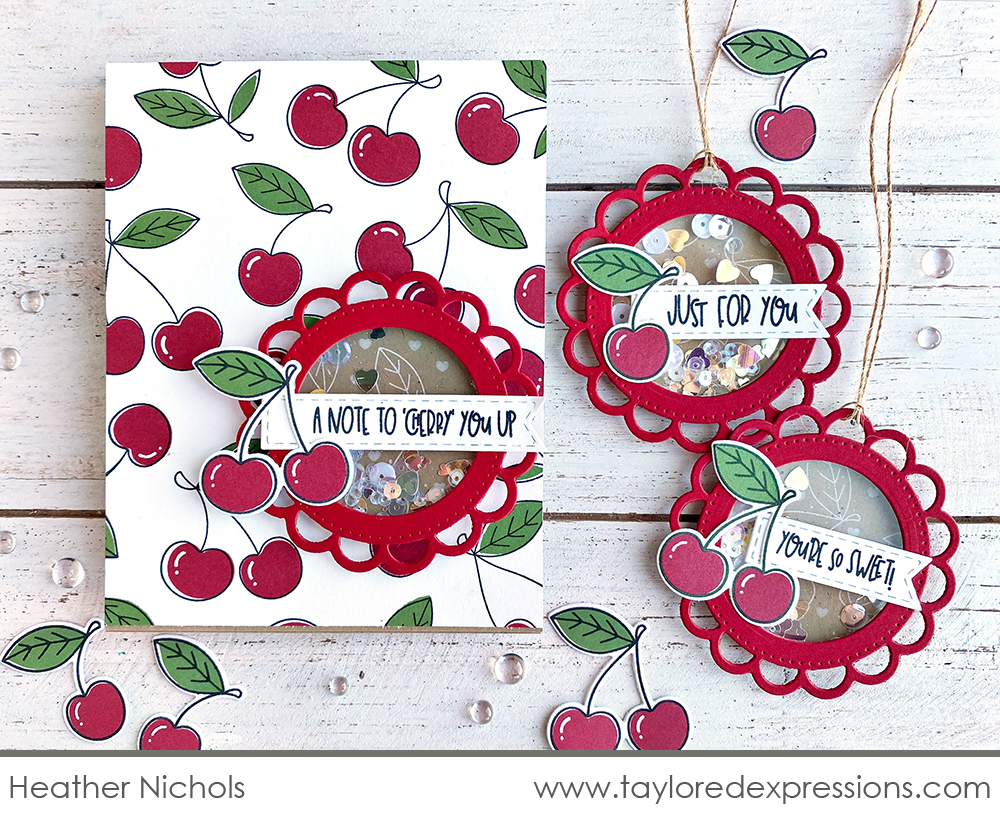
You can use the Open Scallop Circle die to create a shaker element like Heather Nichols did here for this card and tag set! She cut out the frames with Cherry Pop cardstock, added window acetate over the center opening, and filled the shakers with Bits & Pieces – Full of Heart and Snow Flurries sequins. The sentiments are stamped on a Stitched Banner Stacklets die and added to the front of the shakers along with cherries stamped with the Cherry on Top stamp set. One of the shakers is added to a card stamped with the Very Cherry Cling & Clear Combo set and the others have a bit of burlap twine threaded through one of the open scallops so that it can be attached to a gift.
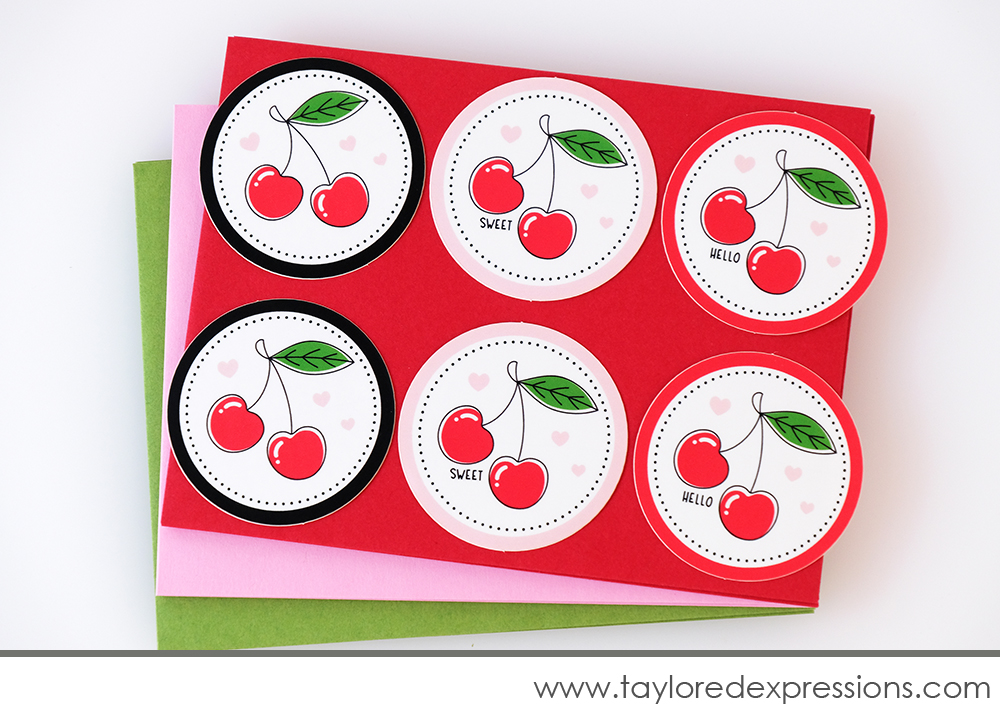
The Very Cherry Kit includes 6 envelopes and 6 custom envelope seals that coordinate with the theme of the kit. The six A2 envelopes are Cherry Pop, Peapod, and Strawberry Milkshake and the coordinating envelope seals are made from durable, weatherproof material and are sure to bring a smile to the recipients of your cards. You can purchase additional envelope seals (pack of 10) in the TE webstore right now!
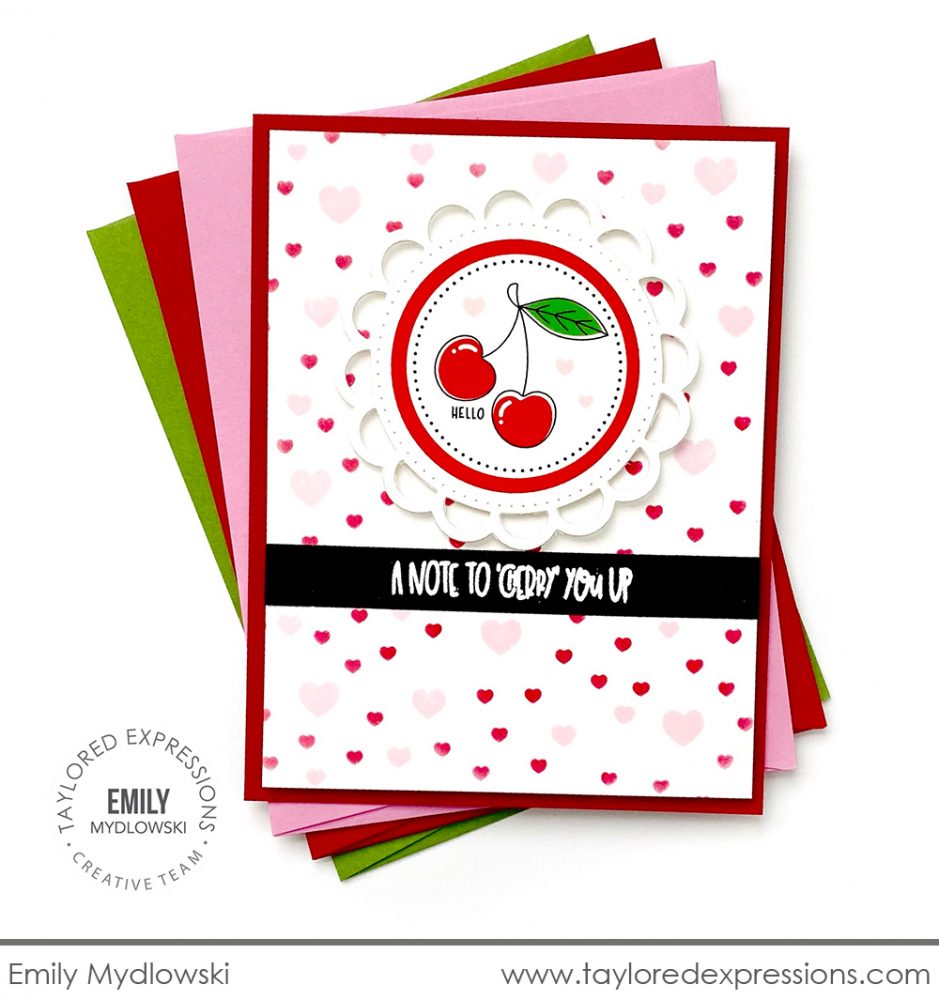
Emily Mydlowski used one of the envelope seals as the focal image for this ‘cherry’ sweet card! She framed the envelope seal with the Open Scallop Circle die. I really love how Emily created the background for her card using the Very Cherry stencil with Cherry Pop ink and stamping the open areas with the tiny hearts from the Cherry on Top stamp set. The sentiment is added to the card embossed in white on an Oreo Cardstock strip.
Join Taylor live for “T Time” at 1pm Central today on the Taylored Expressions Facebook Page. She’ll be sharing a closer look at the Very Cherry Kit. We hope to see you there – come join in the fun!
Thank you so much for stopping by today! Make sure you check out the rest of the TE Creative Team projects using the Very Cherry Kit – click their faces below to hop to their blogs! Stop back again here on the TE blog on Thursday for more inspiration, including a video from Joy Baldwin. See you then!


