Jan 11, 2022
NEW Products for Valentine Treats!
Hey, crafty friends! It’s Taylor here! It’s time to “treat” your friends, kids, grandkids, coworkers, and all you love with something sweet for Valentine’s Day! Today’s release features bags, tags, and boxes perfect for sharing a little treat with those you love this Valentine’s Day, plus some of the cutest critters to decorate your treat container. Let’s get to the goodies!
**Please Note that we have 2 blog posts today, this one featuring the new Valentine Treats release products and another featuring the new Kids Valentine Kit! CLICK HERE to check out the Valentine Kit!
Get ready for blog posts today and Thursday that feature a new video and inspiration from the TE Creative Team featuring the new Valentine Treat products! Also, check out how you can earn FREE Valentine Treat Stickers below:
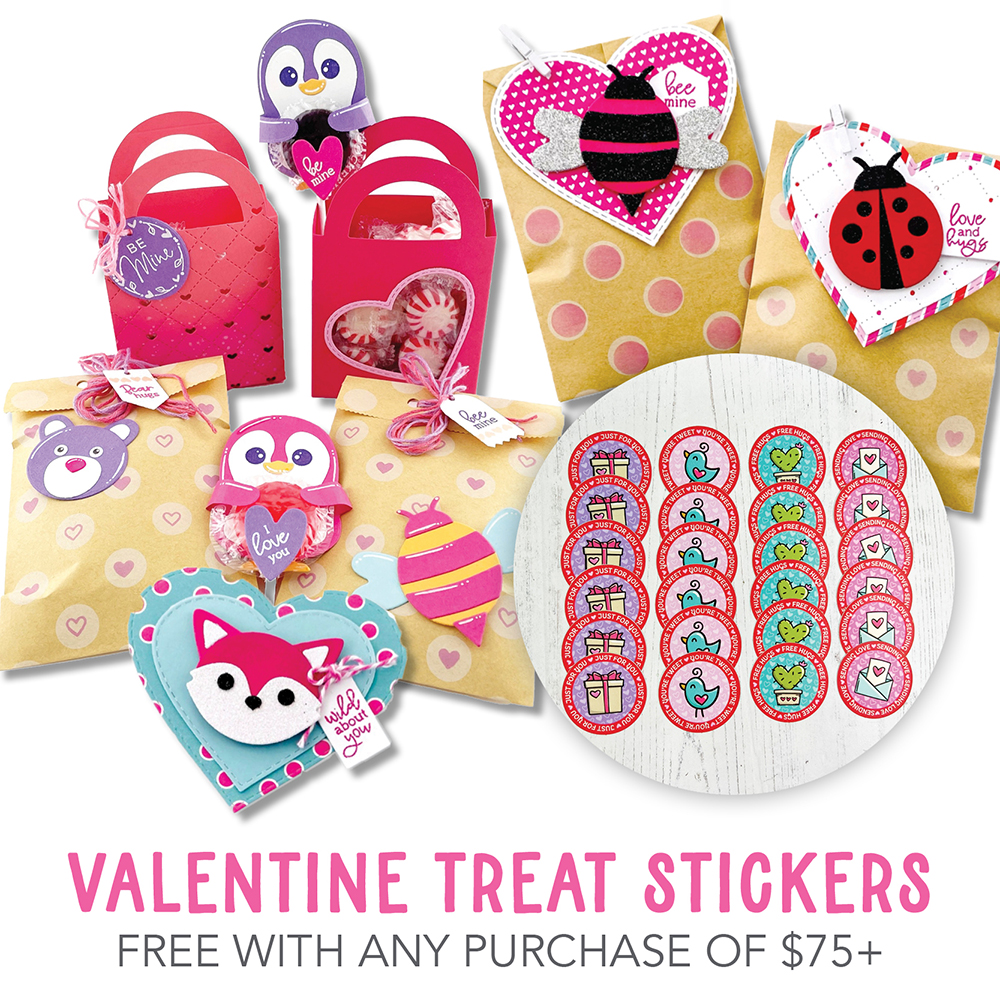
Right now through Sunday, January 16th you can earn a FREE pack of 25 Valentine Treat Stickers (6 each of 4 different designs + one bonus of the envelope design!) with any purchase of $75 or more (before tax and shipping). Share the stickers with friends for Valentine’s Day or use them to seal up treat bags, envelopes, and more!
Click below to shop the new Valentine Treat release products and then keep scrolling for all of the inspiration!
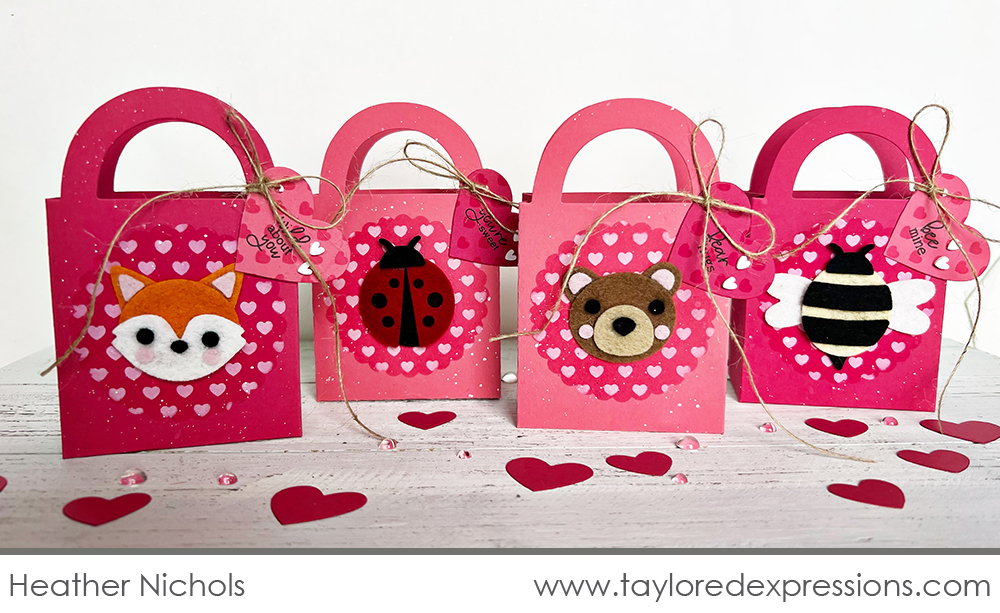
Today’s video is from Heather Nichols and she is sharing how to create these adorable treat bags! These treat bags are perfect to package up small gifts and sweet treats to share with your friends and family. Watch how Heather created the treat bags below:
In the video, Heather shows how to assemble the four critters from the Critter Clips – Valentine die collection using our 100% wool felt. She adds a pretty design to the Valentine Treat Totes using the Masking Stencils – Scalloped Circles set and Swiss Hearts Mini Slim stencil using blender brushes, ink to match the Valentine Treat Totes cardstock color, and Sugar Cube ink – it’s the perfect spot to add the felt critters onto! Heather shows how to assemble the Valentine Treat Totes and how she created heart tags with a Heart Stacklets die and sentiments from the Itty Bitty Sentiments – Valentine stamp set.
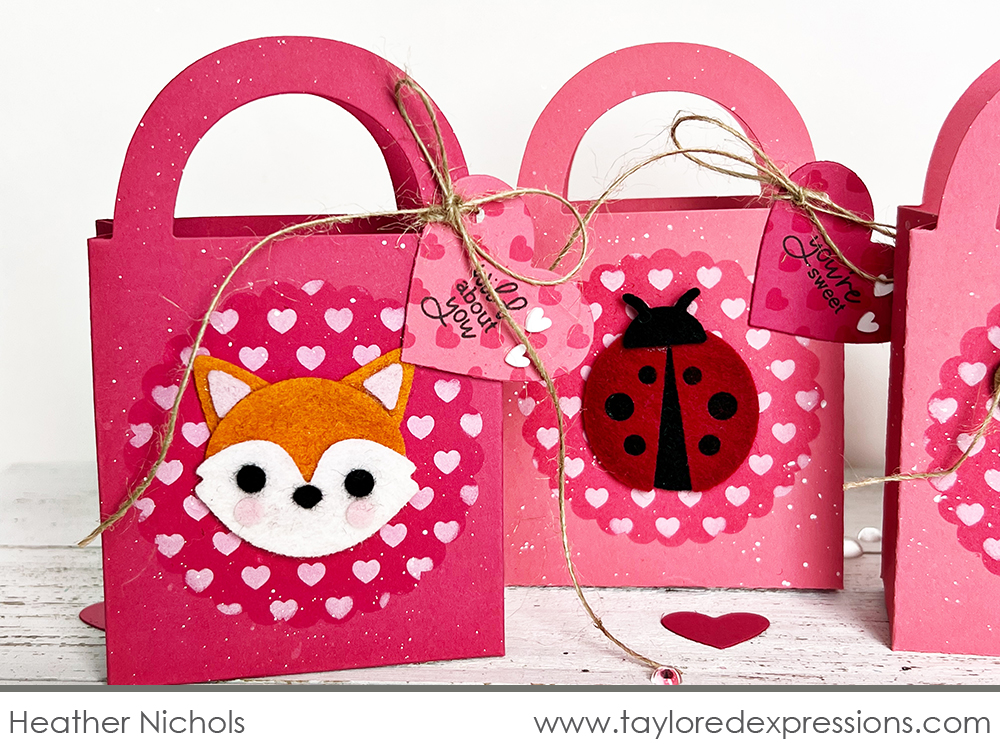
You can definitely use cardstock to cut out the critters in the Critter Clips – Valentine die collection, but using felt just adds that extra fun plush texture and dimension to your projects. Look at how cute the fox and ladybug critters are!
I really love how Heather chose to add the patterned scallop circle with the Masking Stencils – Scallop Circles set to each of the treat bags instead of covering the whole thing with pattern. It definitely saves time while still customizing the project and the scalloped shape adds a sweet and dainty touch.
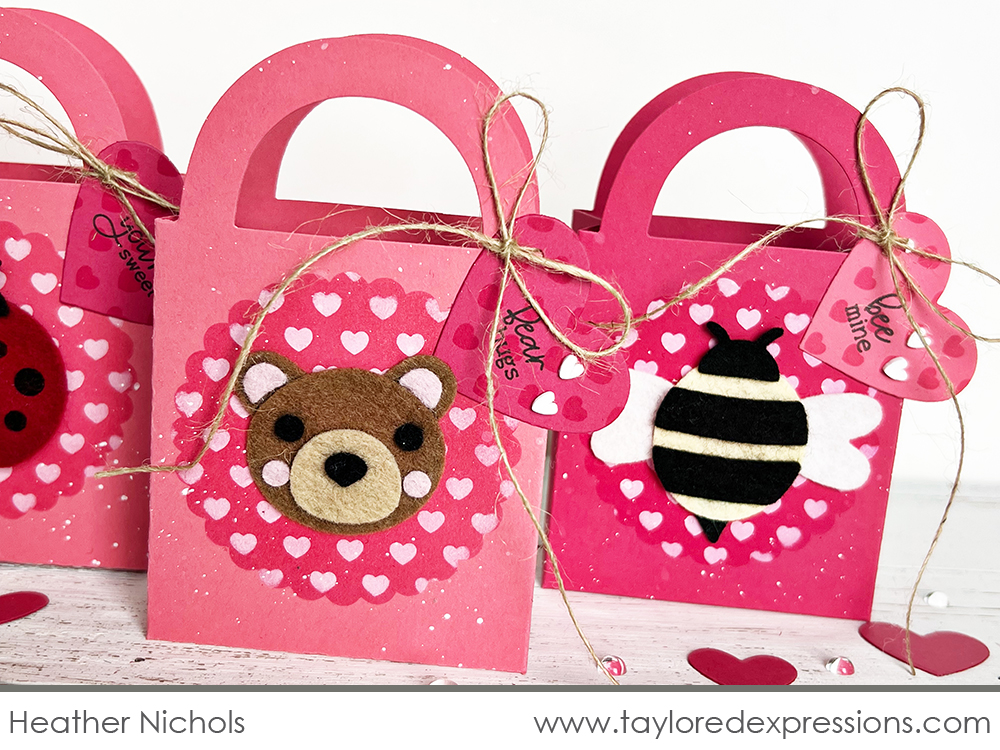
Here’s a closer look at the bear and bee critters from the Critter Clips – Valentine die collection. All of the critters in the set will work for throughout the year for a number of occasions, making them a versatile addition to your crafty collection.
Did you catch that several of the sentiments from the Itty Bitty Sentiments – Valentine stamp set coordinate with the critters? Heather used ‘bear hugs’ with the bear, ‘bee mine’ with the bee, ‘wild about you’ with the fox, and ‘you’re sweet’ with the ladybug on the tags attached to the treat bags!
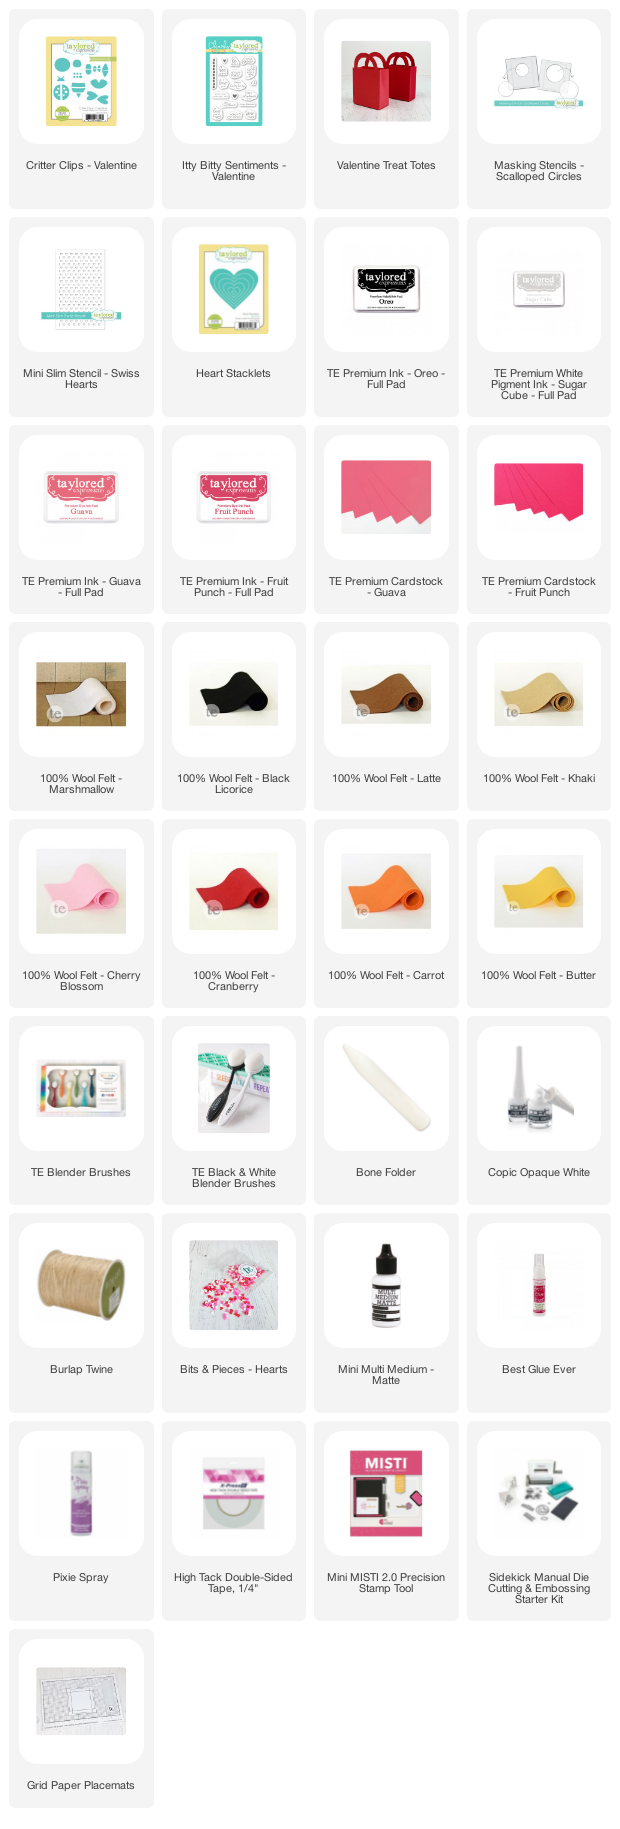
Check out the list below for all of the supplies that Heather used to create the treat bags:

Now, here’s a closer look at the new Valentine Treat products debuting today along with inspiration from the TE Creative Team.

Create the cutest critters for Valentine’s Day using the new Critter Clips – Valentine die collection (you just saw these in Heather’s video above!) The set of Mixed Media dies includes a main body shape that can become a fox, bear, ladybug, or bee. Cut out your critters from felt, cardstock, and more! Add the critters to a jumbo paper clip (the black clips are available in a set of 10) to create cute clips (a great gift or package embellishment!) or add the critters to cards, tags, and more.
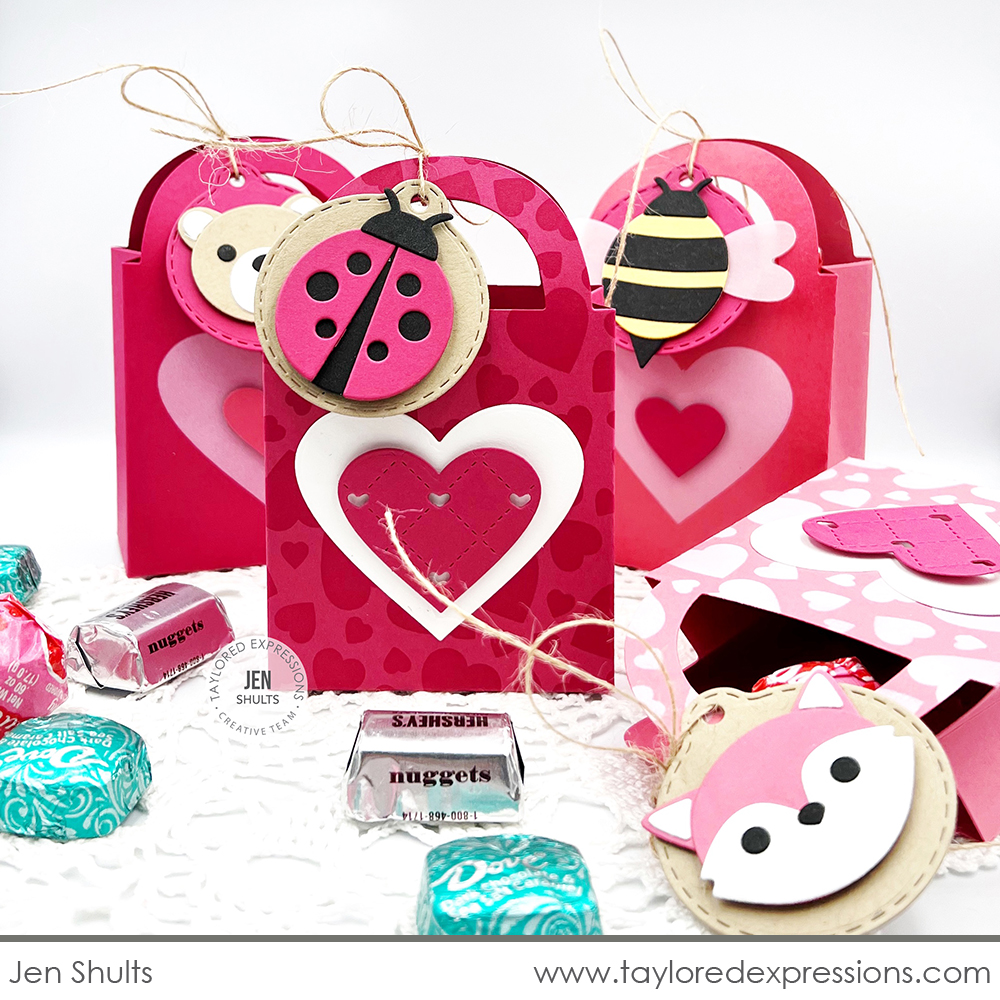
Jen Shults cut out the critters from the Critter Clips – Valentine die collection from cardstock to make cute tags for the treat bags that she created with the Valentine Treat Totes. The tags bases are cut out with the Tag Stacklets 3 die collection and Jen popped up the critters on the tags with a foam tape adhesive for extra dimension. The treat bags are decorated with stencils and hearts cut out with the Heart Stacklets dies. Jen added patterns to a few of the hearts by also cutting them with the Stitched with Love Cutting Plate.
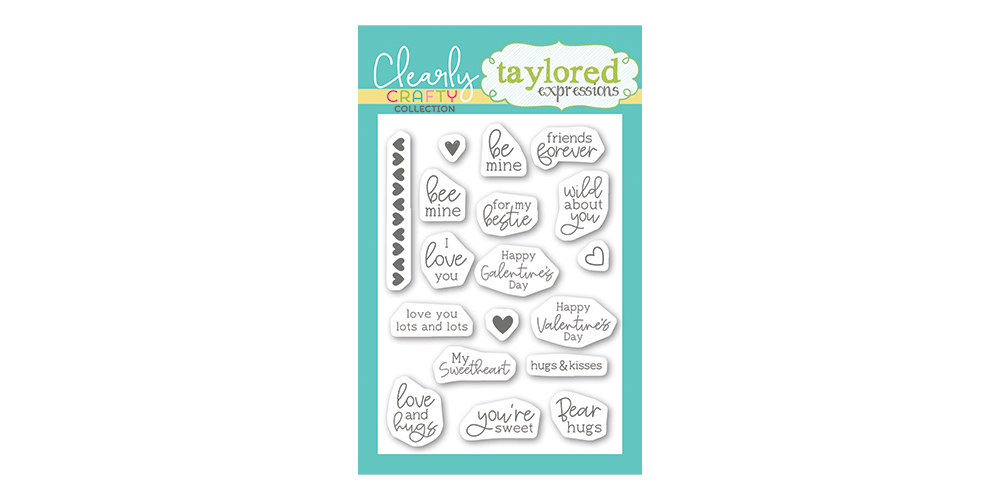
Tie on tiny greetings to your Valentine gifts, treats, and more with the Clearly Crafty Itty Bitty Sentiments – Valentine stamp set. Use the sentiments with any of the Itty Bitty Tags die collections (sold separately) or on their own. The stamp set includes 14 tiny sentiments (several that coordinate with the Critters I shared above) plus lots of tiny heart accent options.
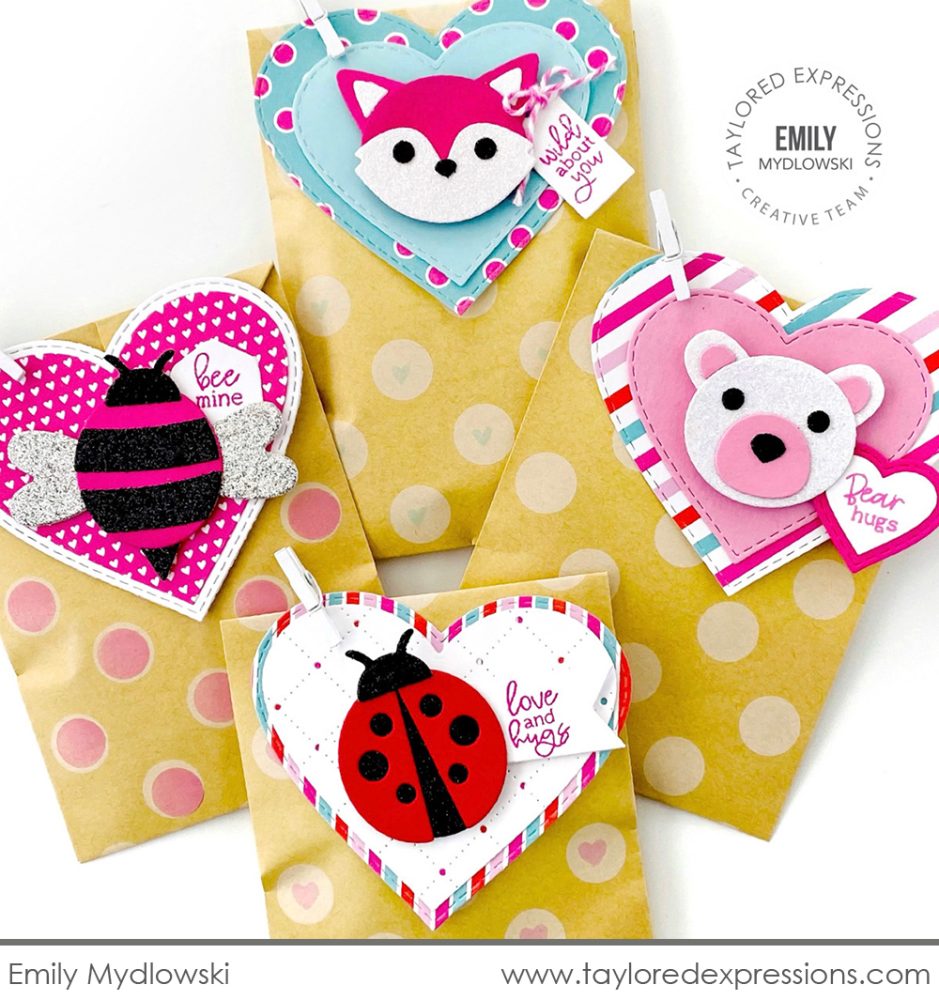
Emily Mydlowski cut out the critters from a variety of both plain cardstock and glitter cardstock to add to the heart tags for this set of treat bags. The heart tags are cut out with Heart Stacklets and Stitched Heart Stacklets dies from cardstock and the Playful Patterns – Valentine paper pack. Emily added sentiments from the Itty Bitty Sentiments – Valentine stamp set to coordinate with each of the critters onto tiny tags cut out with die from the Itty Bitty Tags 1 and Itty Bitty Tags 2 die collections. The heart tags are attached to Polka Dot Kraft Bags using tiny clothespins.
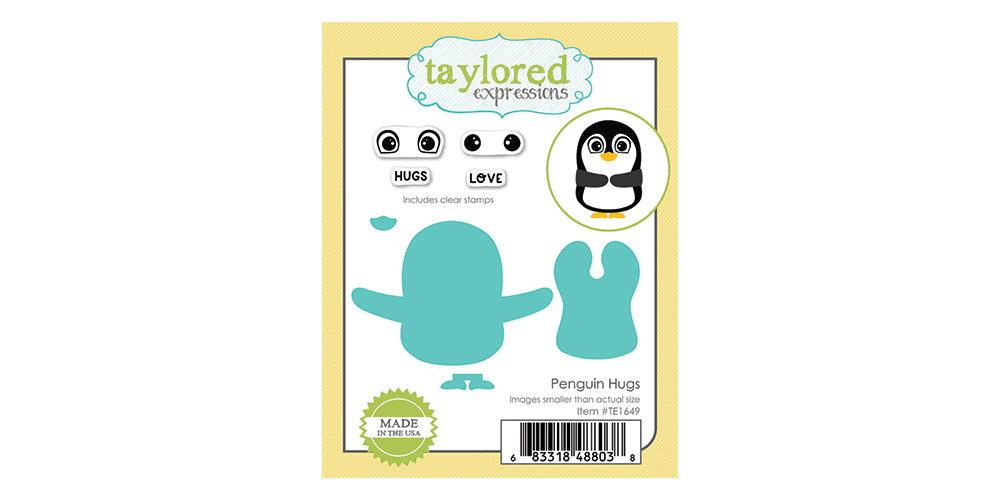
Create the cutest penguins with the Penguin Hugs Die & Clear Combo set. The dies cut out the penguin body and then you can stamp the eyes and a few words (‘hugs’ and ‘love’) using the included clear stamps. The penguin arms can either be left outstretched or folded in to hold a treat, heart, and more.
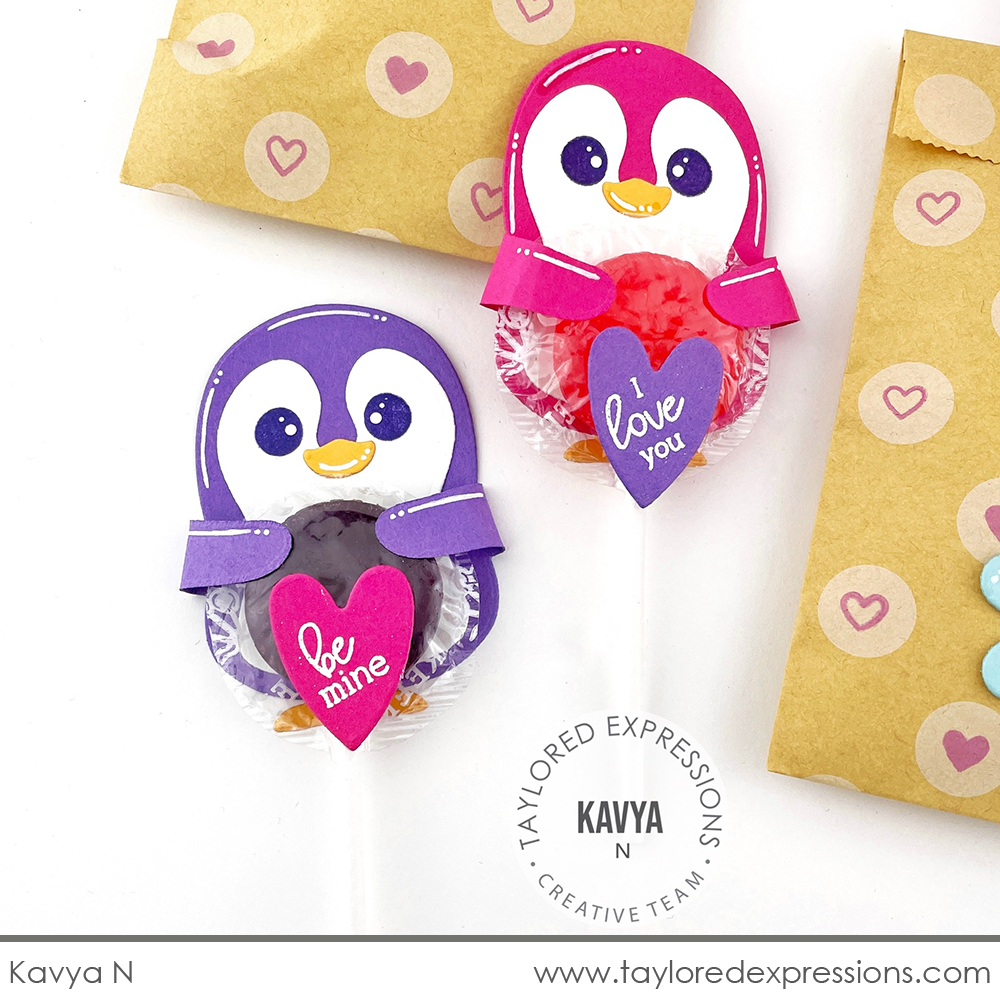
Kavya created these adorable penguins (!!) from Jelly Donut and Lollipop cardstock, adding eyes using the clear stamps, and lots of details with a white gel pen. The penguins are are wrapped around lollipop treats and Kavya added sentiments from the Itty Bitty Sentiments – Valentine stamp set embossed in white on die cut hearts. These are going to be so fun to pass out to friends for Valentine’s Day!
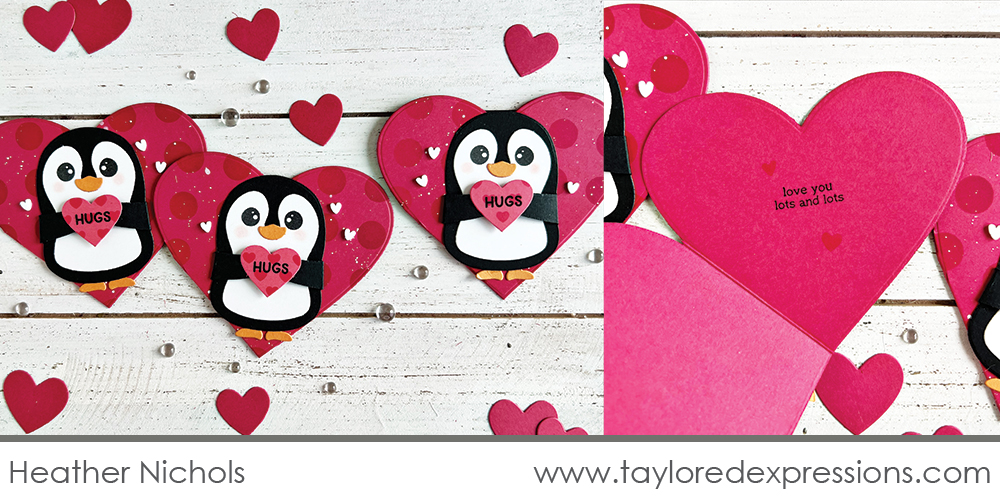
Heather Nichols added the penguins to heart card bases that she created with the largest Heart Stacklets die from Fruit Punch cardstock that is stenciled with the Polka Party stencil. To create the card, Heather folded a piece of cardstock in half and then added the die so that the fold fell to the inside of the cutting edge so it didn’t get cut as it ran through the die cut machine. The penguins on the front of the card are holding a tiny heart stamped with the ‘hugs’ word and inside the card is a sentiment from the Itty Bitty Sentiments – Valentine stamp set along with a few tiny hearts!
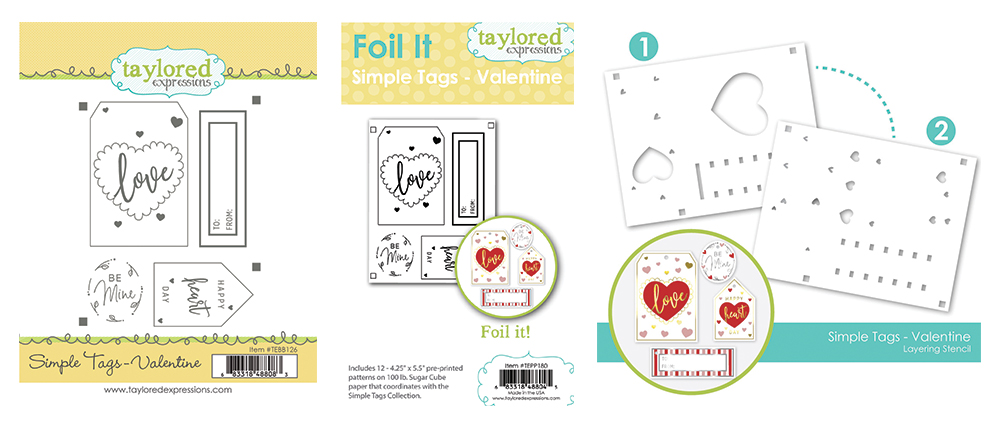
By popular request, we have added a stamp option to the Simple Tags collection starting with the new Valentine options debuting today! Use the Simple Tags – Valentine stamp to add four tag designs to an A2 piece (4.25″ x 5.5″) of cardstock. Using the alignment guides, cut out all four tags with one pass through your die cut machine with the Simple Tags die.
Or, instead of starting with the stamp, add foiled accents to the tags you create with our Foil It Simple Tags – Valentine panels. Simply top the panel with the foil of your choice and run it through your foiling machine. Foil It Simple Tags – Valentine are sets of 12 pre-printed panels on TE Premium Cardstock (each measures 4.25″ x 5.5″).
Add color, texture, and more to your tags with the Simple Tags – Valentine Layering Stencil set. This set of two stencils coordinates with the Simple Tags – Valentine stamp and Foil It Simple Tags – Valentine panels. Use the alignment guides on the stencils to add hearts and stripes to the tag designs using ink, glitter paste, and more!

Melody Rupple used the Simple Tags – Valentine stamp to create tags to decorate Valentine treat boxes. She did one set of tags embossed in gold and one stamped with Fruit Punch ink. The details are added to the tags with the coordinating stencils and the tags are cut out with the Simple Tags die. Melody tied the tags to the Valentine Treat Totes that are stenciled with the Swiss Hearts and On the Dot Mini Slim stencils. Tiny clothespins and colorful twine are the perfect finishing touches to attach the tags to the boxes!
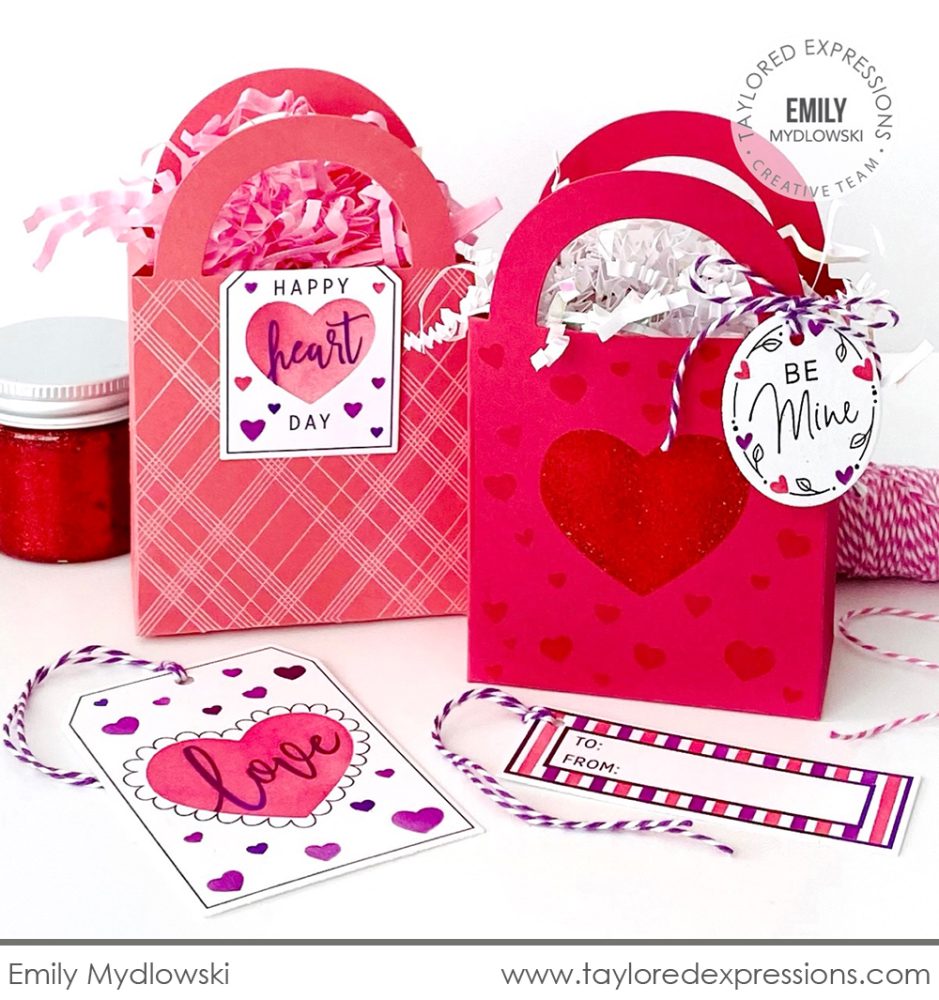
Emily Mydlowski created foiled tags by adding Purple Deco Foil to a Foil It Simple Tags – Valentine panel with a Minc machine (you can also foil with a heat laminator.) The extra details are stenciled with the Simple Tags – Valentine Layering Stencil set using Plum Punch, Guava, and Fruit Punch inks. One pass through a die cut machine cuts out all of the tags at once with the Simple Tags die and Emily added them to treat boxes created with the Valentine Treat Totes.
…..
Here’s a closer look at the treat packaging that we are offering for this release. You saw lots of packaging examples from the TE Creative Team above!

The Valentine Treat Totes are a set of 12 pre-cut and scored boxes, 6 each of Guava and Fruit Punch, that you simply decorate and fold to assemble.
Package up treats and small gifts in Polka Dot Kraft Bags. The bags come in a set of ten and measure about 3.5″ x 6″. Leave the bags as is, or decorate with stamps and more!
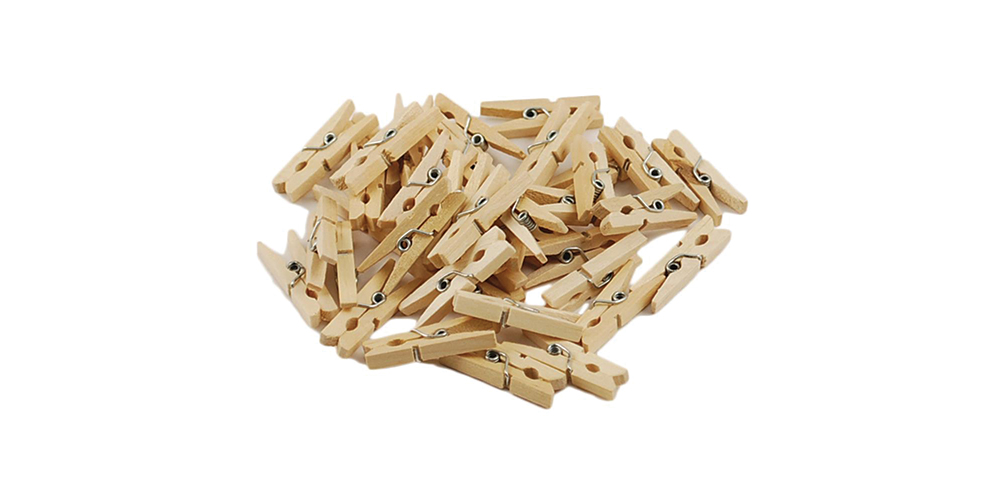
Finally, you can purchase mini wood clothespins to clip your tags to treat boxes, bags, and more! The mini clothespins are wooden with a metal spring so you can pinch them open and they come in a set of 40. Leave them the natural color or use markers or paint to match them to your projects.

Join me live for “T Time” at 1pm Central today on the Taylored Expressions Facebook Page. I’ll be sharing a closer look at the items in the Kids Kit and Valentine Treats release along with crafty inspiration. We hope to see you there – come join in the fun! (Don’t worry, if you miss the live you can always watch the saved broadcast afterward!)
Thank you so much for stopping by today! Make sure you check out the rest of the TE Creative Team projects using the Valentine Treats release products – click their faces below to hop to their blogs! Stop back again here on the TE blog on Thursday for more inspiration, including a video from Joy Baldwin. See you then!


