Feb 03, 2022
Get Inspired with NEW Stencils!
Hey, crafty friends! It’s Heather here today! I have extra inspiration to share with you today using the new stencils from our release this week. I have been loving creating with all of the new designs that are awesome additions to my personal stencil collection. Was there a new stencil design that caught your eye? Which size stencil do you like the best: the traditional 6×6 size or the newer Mini Slim size? I love both sizes for different reasons! And how about the new storage options for stencils? I can use all of the help that I can get to organize my crafty supplies and I am over the moon about the new binders, sleeves, and the new Mini Slim wooden stand options. I know I will most likely use a combination of everything and I am especially am looking forward to using the binders for when I travel for crafty get togethers with friends.
Today’s inspiration includes a video from me (Heather Nichols) along with a round up of inspiration from the TE Creative Team. Kick back, relax, start scrolling, and enjoy! Also, here is a reminder about the buy more, get more promotion happening this week for stencils:

Right now through 11:59PM CT Sunday, February 6th, when you buy more, you save more on stencils! Buy any 4 stencils to save 10%, buy 5-8 stencils to save 15%, and buy 9+ stencils to save 20%! This promotion is limited to in stock items and excludes the Create-in-Quads collection. It’s a great time to pick up those stencil designs that have been on your wish list and stencils make great gifts for your crafty friends!
Click below to shop the new Stencil Storage and stencils in the TE webstore. Then keep scrolling for today’s inspiration from the TE Creative Team!
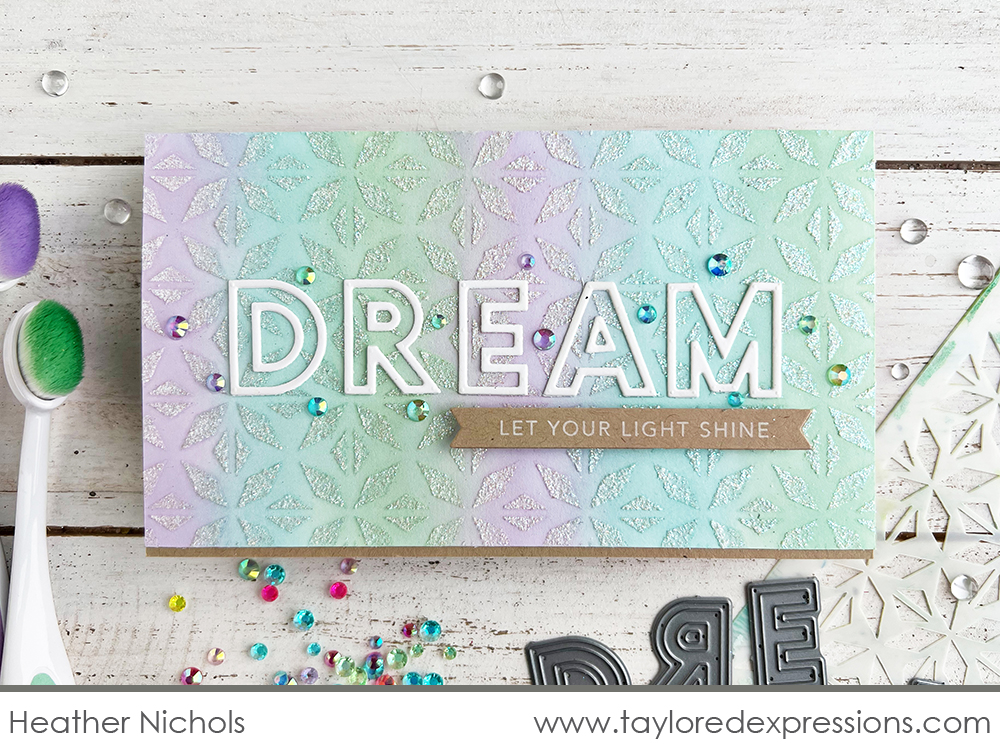
For today’s video, I used the new Mini Slim Prism stencil with my Bitty Blender Brushes and Happy Medium – Iridescent Glitter to create the Mini Slim card above. Watch the video below to see how I created it:
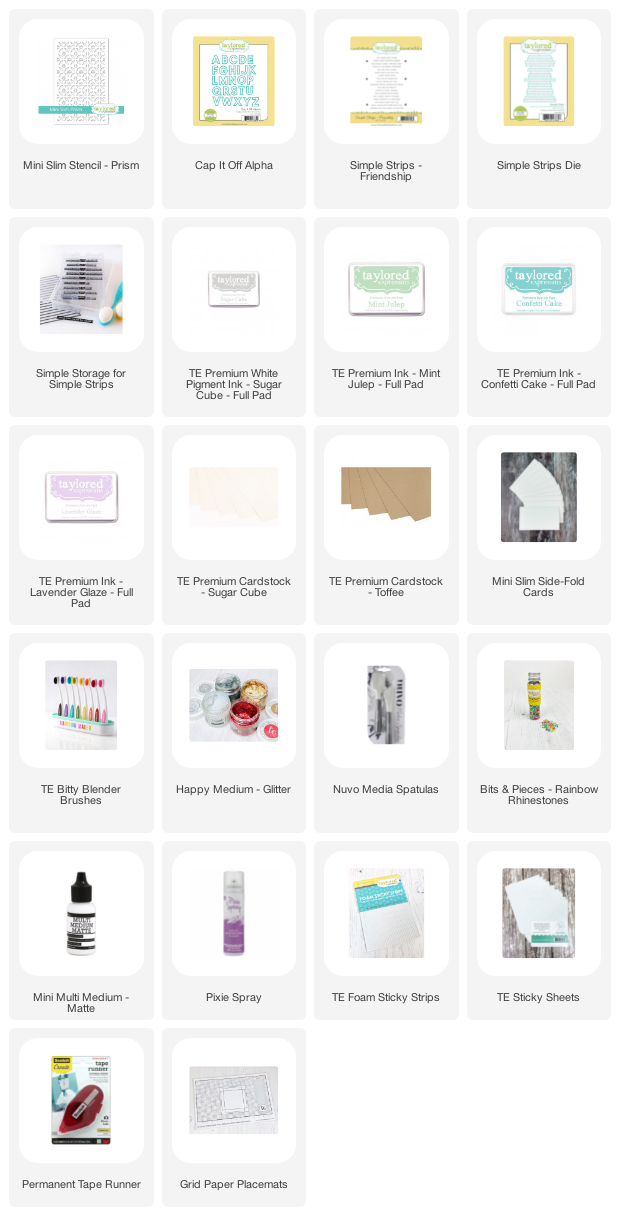
In the video, I used my Bitty Blender Brushes to make a background blend with Mint Julep, Confetti Cake, and Lavender Glaze inks. I layered the Mini Slim Prism stencil over the top of the color blend and stenciled the pattern over it using the same colors. Before removing the stencil, I added a layer of Happy Medium – Iridescent Glitter into the stencil openings. The sentiment on the card is put together with the Cap it Off Alpha die collection and a sentiment from the Simple Strips – Friendship stamp. The finishing touch is Bits & Pieces – Rainbow Rhinestones scattered across the card.
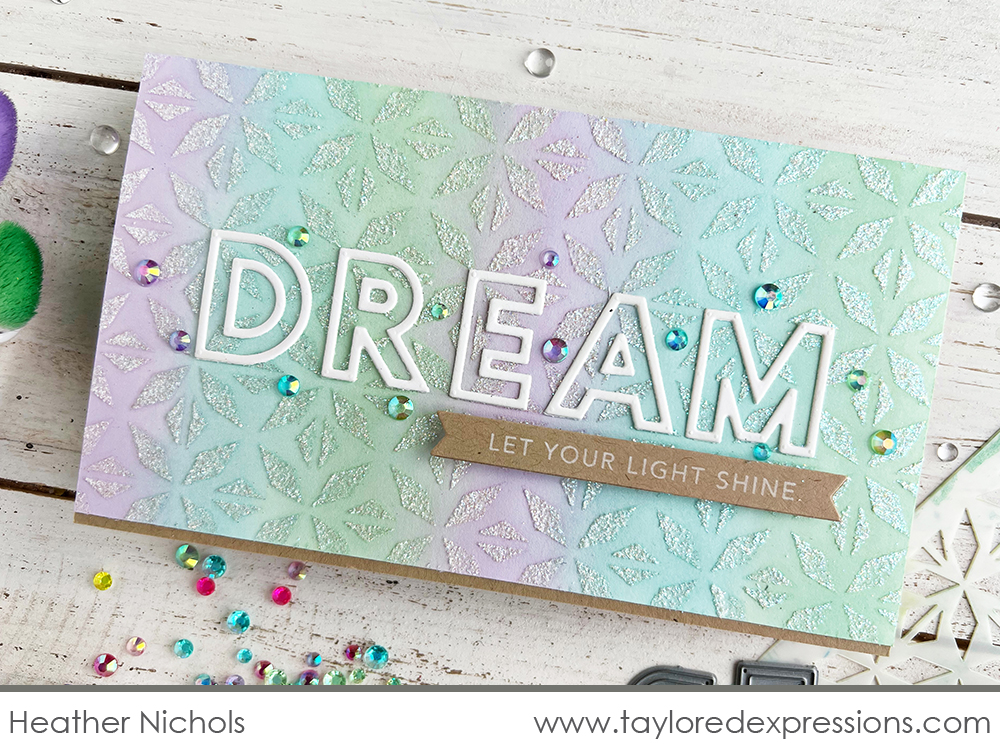
Using the Bitty Blender Brushes allowed me to create thinner blended stripes on the background than if I had used a larger brush. The smaller head size on the brush gives you greater control over where your color goes. I stenciled the pattern using the Mini Slim Prism stencil and matched the colors that I used to the colors in the background. The extra layer of color give a nice defining look to the design after Happy Medium – Iridescent Glitter is layered over the top.

Do you need a sentiment that you don’t have a stamp or die for? That’s when the Cap it Off Alpha dies can step in to save the day! I cut out letters to spell the word ‘dream’ from Sugar Cube cardstock. Backing the cardstock with a sticky sheet before die cutting is a great way to add adhesive onto the back of finer detail shapes like the outline letters that I used on this project. The ‘let your light shine’ sentiment is from the Simple Strips – Friendship stamp and I pulled it out of the Simple Storage for Simple Strips case that holds extra sentiments that I stamped and die cut previously from this stamp. It worked perfectly to be able to select a sentiment that was ready to go for this project!

Here’s the round up of inspiration from the TE Creative Team with the new stencils from this week’s release:
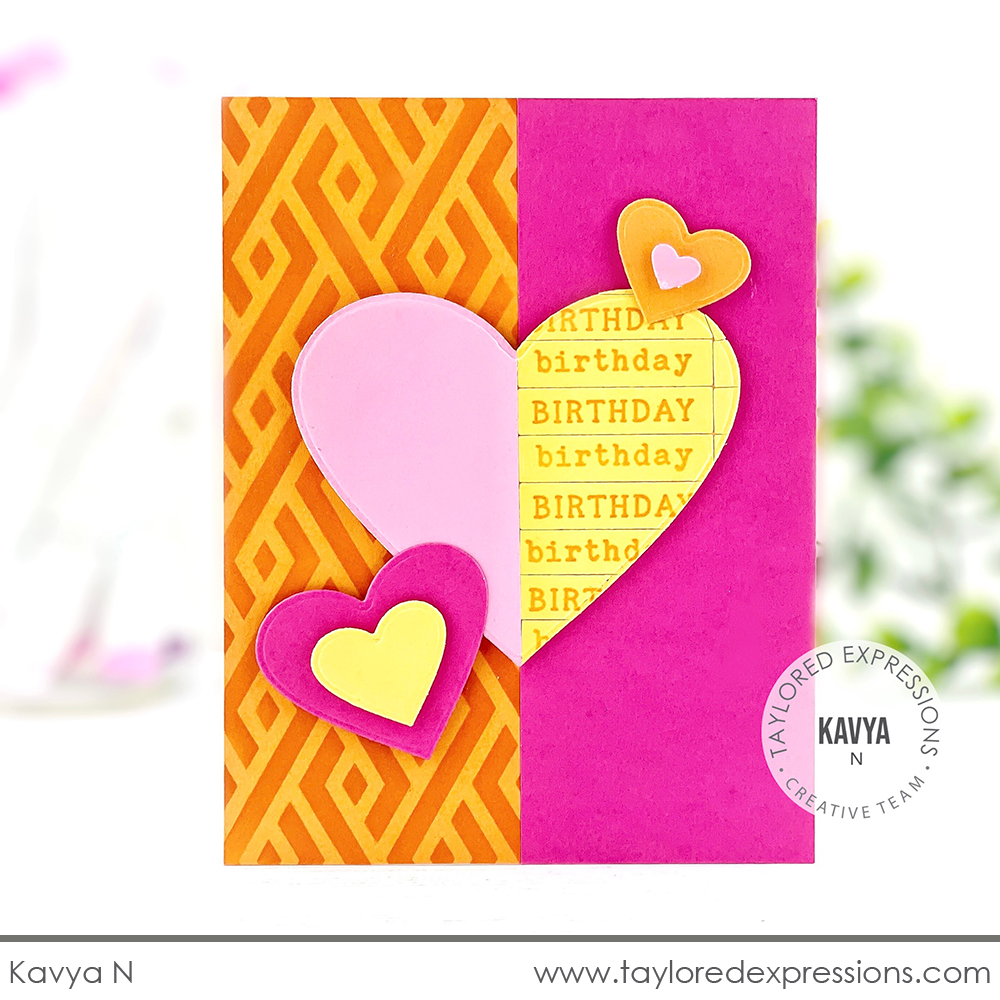
Kavya starts off the inspiration with a sweet birthday card featuring the Braided Diamonds stencil. She created a color block design by piecing parts of the background and large heart in the center to create the card design. The background includes a block of Candy Corn cardstock that is stenciled with the Braided Diamonds stencil using Sweet Potato ink and a block of Lollipop cardstock. The heart cut out with the Heart Stacklets die collection is split in half down the center with one half being Cupcake cardstock and the other half a block of ‘birthday’ words pieced together from the On Repeat – Birthday stamp. A few smaller hearts cut out from coordinating cardstock colors complete the look.
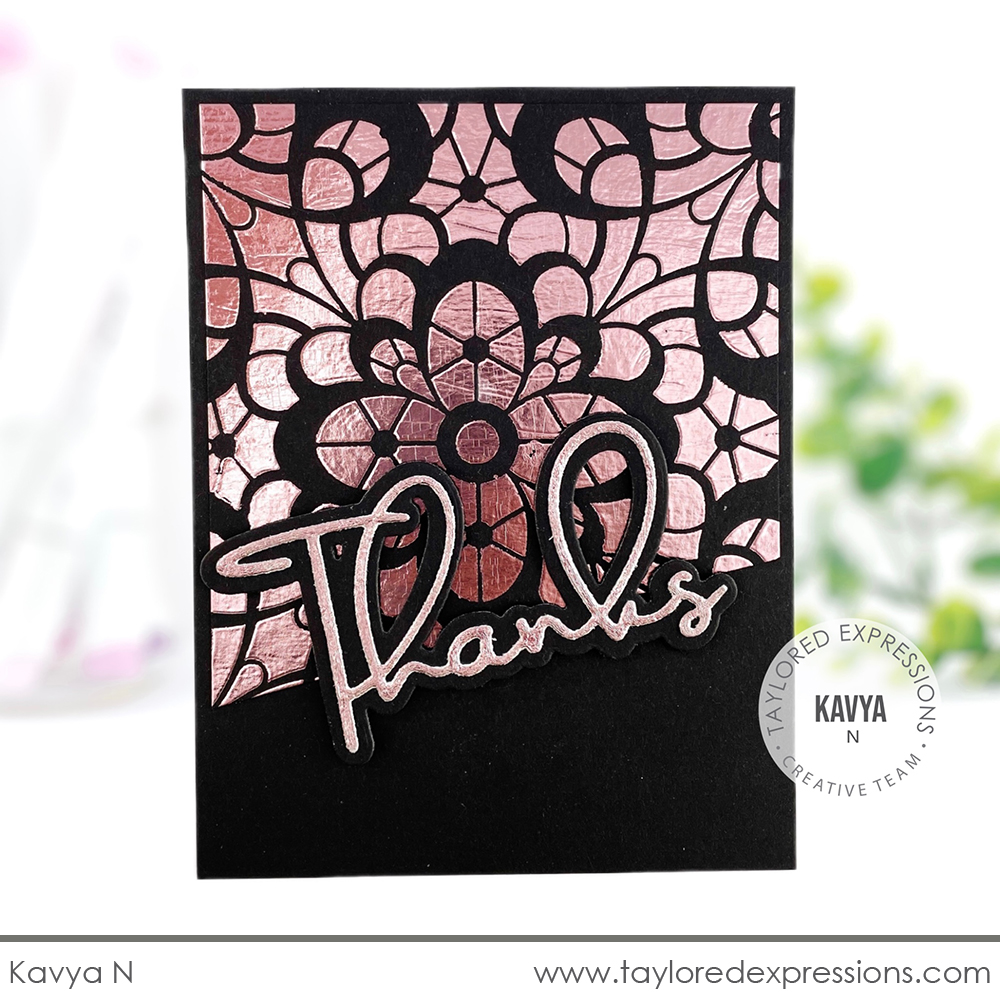
Kavya created a completely different look on this card created with the Chantilly stencil. She stenciled the background of the card with Glitter Grab on Oreo Cardstock. Once the Glitter Grab was completely dry, she foiled the design using Enchanted Rose Deco Foil and her Minc machine (a heat laminator will work to foil as well.) The sentiment is cut out with the Signature Thanks die from a piece of cardstock that is covered with a sticky sheet. Kavya removed the paper backing and added the foil over the exposed adhesive. The foiled ‘Thanks’ is added to an Oreo cardstock Signature Thanks Backer die cut and then added to the card front at an angle. The Enchanted Rose foil is just stunning on the black background!
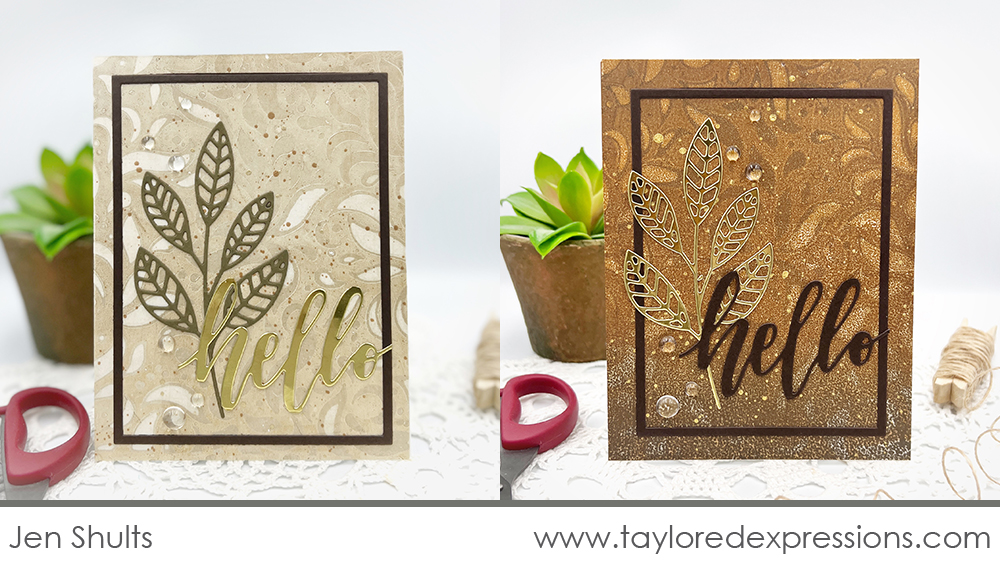
Jen Shults created a stunning pair of cards with the Flickering stencil and her Gel Printing Kit. To create the backgrounds, Jen layered the Flickering stencil onto her gel press that was coated with a layer of paint. She pulled up color from the stencil openings with a scrap piece of paper, pulled up the stencil, and pulled the prints. I love the earthy color palette that she used and it pairs perfectly with the die cut branch from the Branch Out die collection. The design is framed with one of the frames from the A2 Thin Frame Cutting Plate die and Jen added the ‘hello’ that is trimmed out of the Framed Script – Hello die.
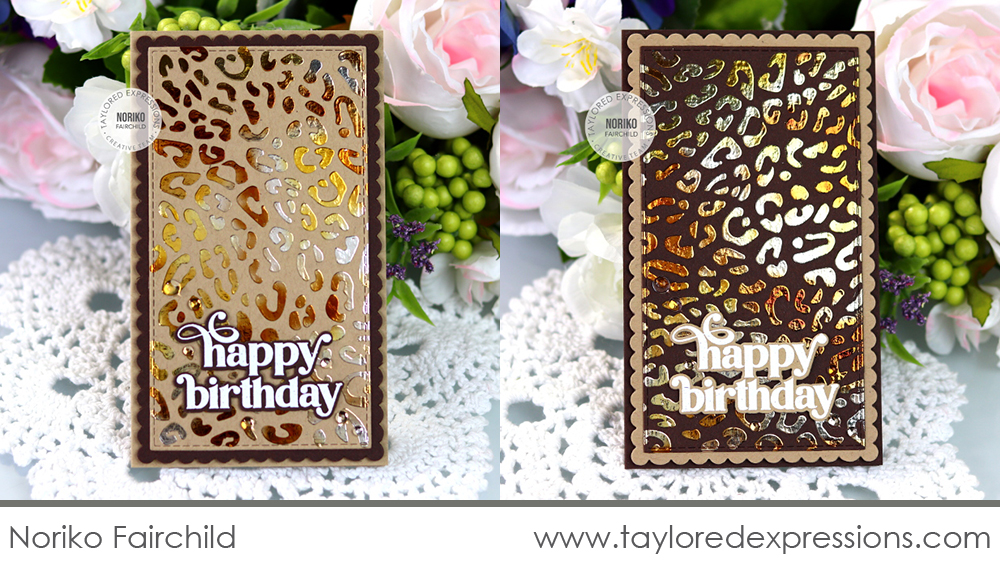
Noriko Fairchild takes us to the ‘wild’ side with this pair of Mini Slim cards created with the Leopard stencil. She stenciled the design onto Toffee and Chocolate Truffle Cardstock panels with Glitter Grab. Once the Glitter Grab was completely dry, she foiled the panels with Amber Watercolor Deco Foil. The panels are cut out with a Stitched Mini Slim Stacklets die, layered onto a Petite Scallop Mini Slim Stacklets die cut, and added to a Mini Slim sized card base (3.5″ x 6″). The final touch for this pair of cards is the ‘happy birthday’ sentiment and a few Bits & Pieces – Clear Drip Drops.
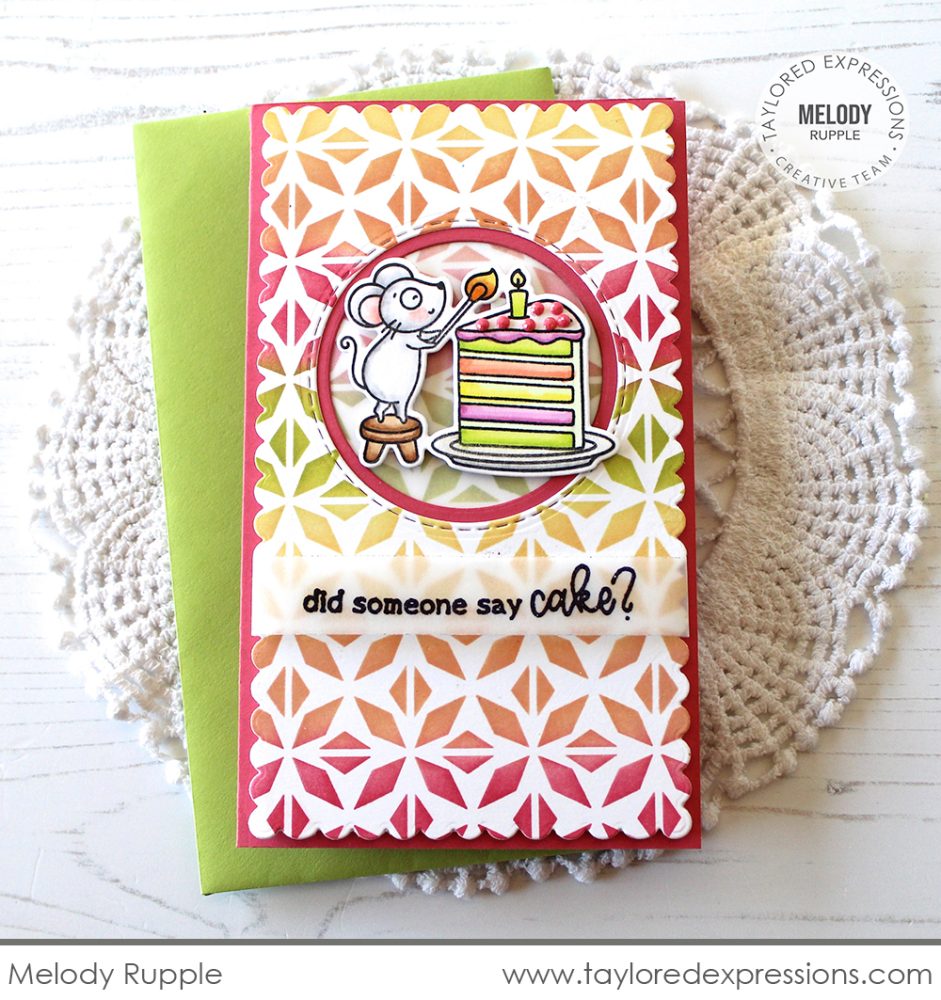
This cute Mini Slim birthday card that features the Mini Slim Prism stencil was created by Melody Rupple. Melody did a color blend through the stencil with Potato Chip, Peaches ‘n’ Cream, Guava, and Granny Smith inks. The circle opening in the background is cut out with the dies from the Mini Slim Trifold Template + Dies – Circle set. It’s the perfect place to set Millie lighting a birthday candle on a slice of cake from the Millie’s Birthday Bash stamp set. The ‘did someone say cake?’ sentiment is embossed in black on a vellum strip that is wrapped around the background panel.
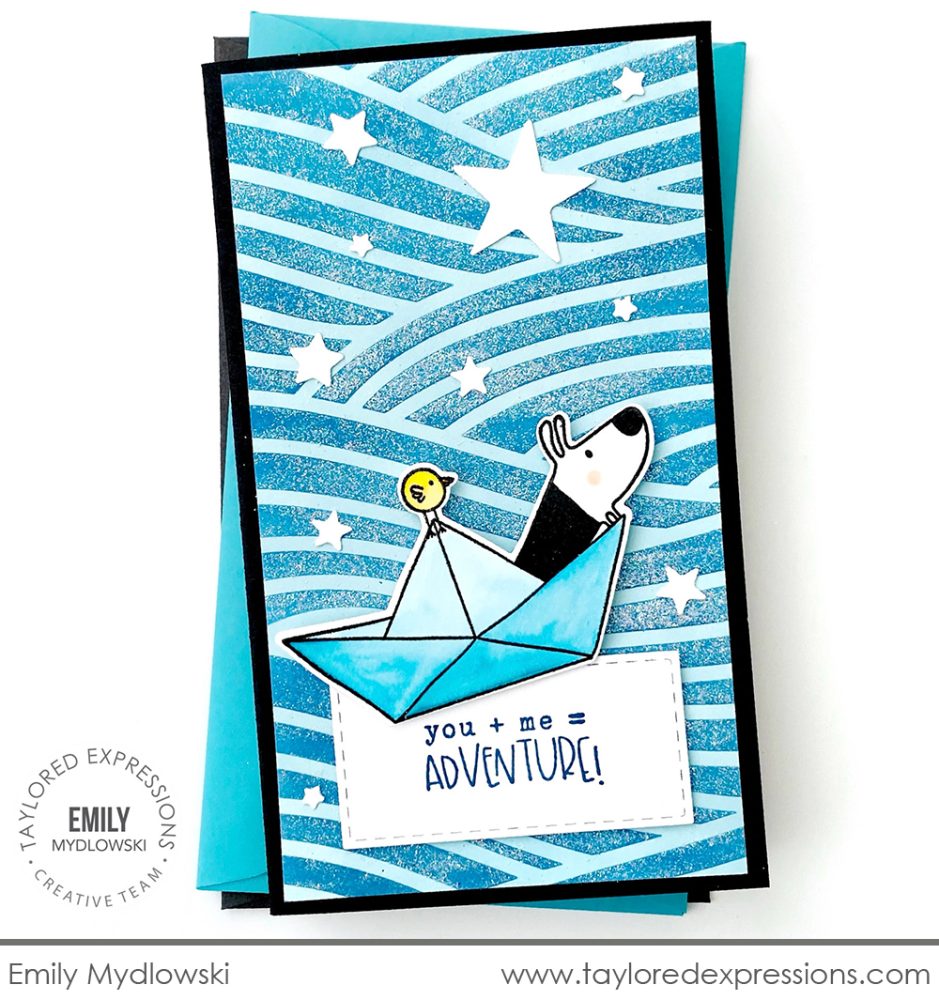
Emily Mydlowski created a sparkly blue background on this Mini Slim card using the Mini Slim Tidal stencil that is the perfect backdrop for Gus setting sail in his boat with Gertie along for the ride! Emily stenciled the background using a variety of blue ink colors and then added a layer of Happy Medium – Iridescent Glitter over the top to add the sparkle. The image is from the Gus & Gertie Ride On stamp set and Emily added stars scattered around the background that are cut out with the Gathered Stars die.
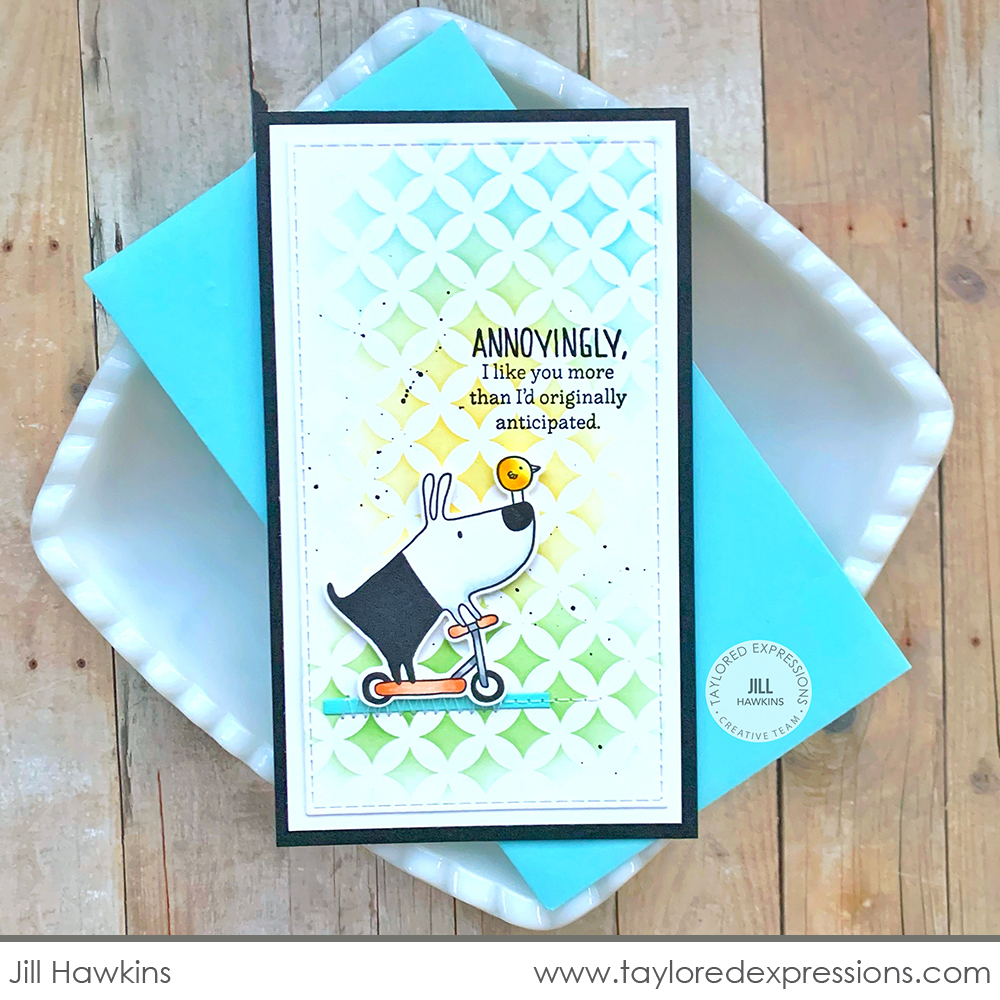
Here’s Gus again, but this time on his scooter with Gertie riding on his nose, on this Mini Slim card by Jill Hawkins. Jill stenciled the background for this card with the Mini Slim Trellis stencil using Sprinkles, Pineapple, and Cilantro inks – I love how she selectively inked only portions of the design! The image is from the Gus & Gertie stamp set and that snarky sentiment is from the Shenanigans stamp set.
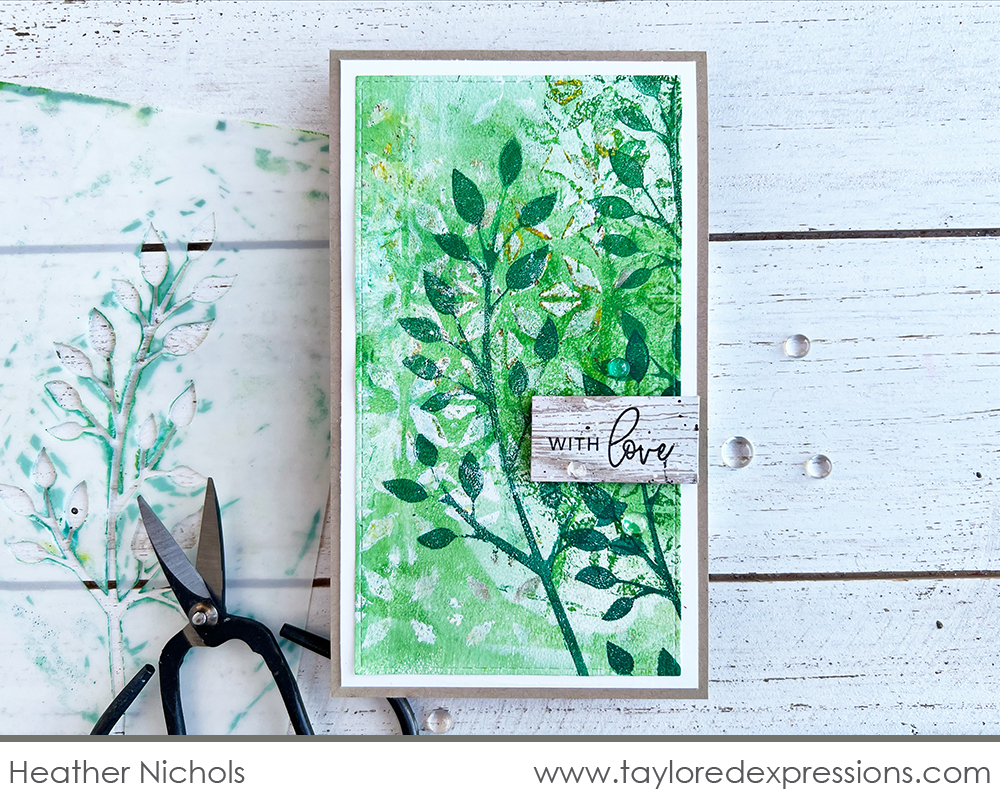
This last card for today is created by me (Heather Nichols) using the new Mini Slim Twiglet stencil with my Gel Printing Kit. I created a background with the Mini Slim Prism stencil using white and light green paint and then printed the stenciled branches from the gel press over the top. The ‘with love’ sentiment from the Aflutter stamp set is added to a piece of Toffee cardstock that is painted with white acrylic paint and stamped with the Wood Plank Background stamp.

Today, join me (Heather Nichols) live for “T Time” at 10AM Central on the Taylored Expressions Facebook Page. I have a fun crafty Valentine treat idea to share – come join in the fun! (Don’t worry, if you miss the live you can always watch the saved broadcast afterward!)
That wraps up the inspiration for our Stencil Storage release! We would love for you to share your crafty creations with the new stencils and how you are organizing your stencil collection with the new Stencil Storage products on the Fans of Taylored Expressions Facebook Page – if you aren’t a member of the group, come join us to see all of the crafty TE inspiration that is shared. Stop by the blog next week for a few new additions to the TE webstore – some for a limited time!
Did you know that you can subscribe to our blog and get our posts right in your inbox? Just sign up right HERE – that’s all there is to it to make sure you don’t miss any of our crafty inspiration!


