Feb 15, 2022
Oh, Hoppy Day! NEW Easter Products Available NOW!
Hey, crafty friends! It’s Taylor here! It’s time to hippity hop down the bunny trail with our spring and Easter release! I’m super excited to share our pretty new products in anticipation of Spring! Tune in here on the blog today and Thursday for a new video each day and inspiration from the TE Creative Team featuring the new products! Also, We have two special offers for this release so check those out below:
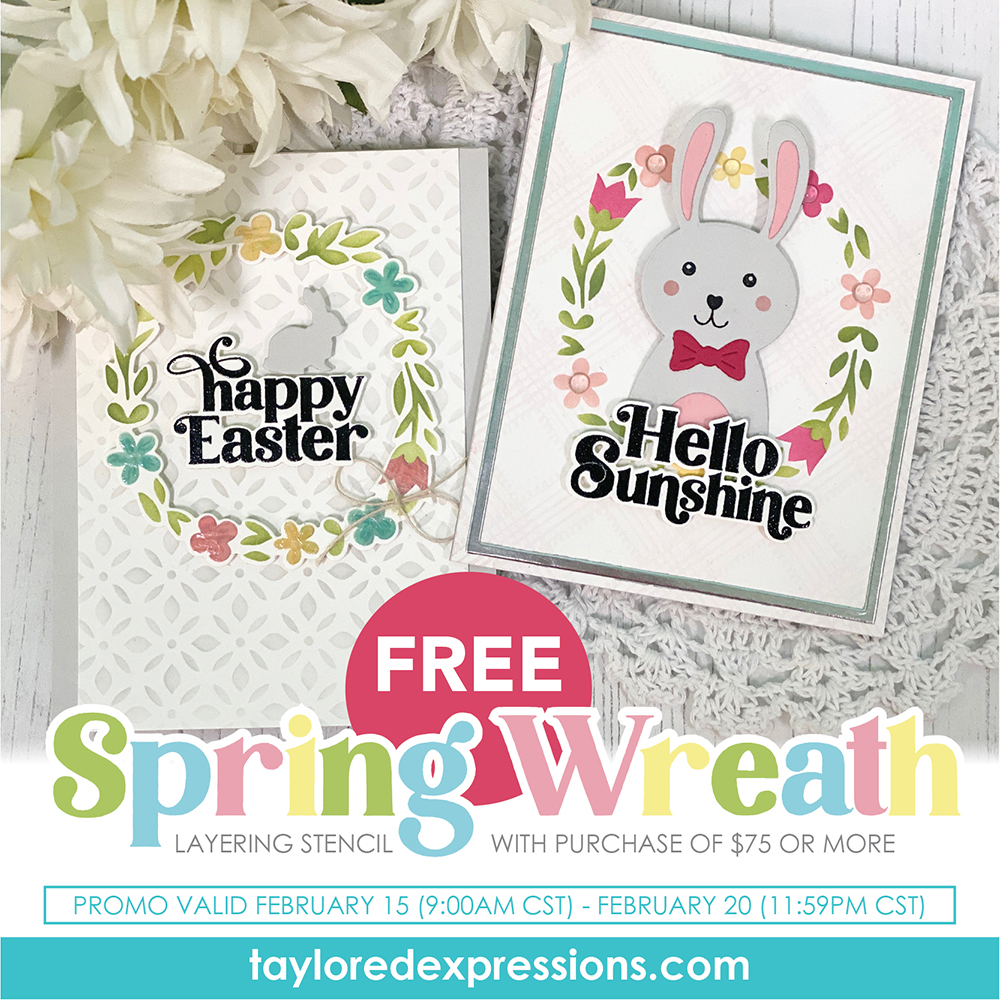
With any purchase of new release products of $75 or more, you will receive a FREE Spring Wreath Layering Stencil set. Our Spring Wreath Layering Stencil makes it easy to create lovely cards to welcome Spring, say Happy Easter or share other kind wishes with the ones you love. Simply use the first stencil to create your wreath base, then align the tabs on the second stencil to those on the first to add your tulips and daisies!
This offer is valid through 11:59PM Central Time Sunday, February 20th, or while supplies last. If your order qualifies you will see the free item in your cart prior to checking out. If you think your order should qualify and you do not see it added to your cart, please contact customer service before checking out.
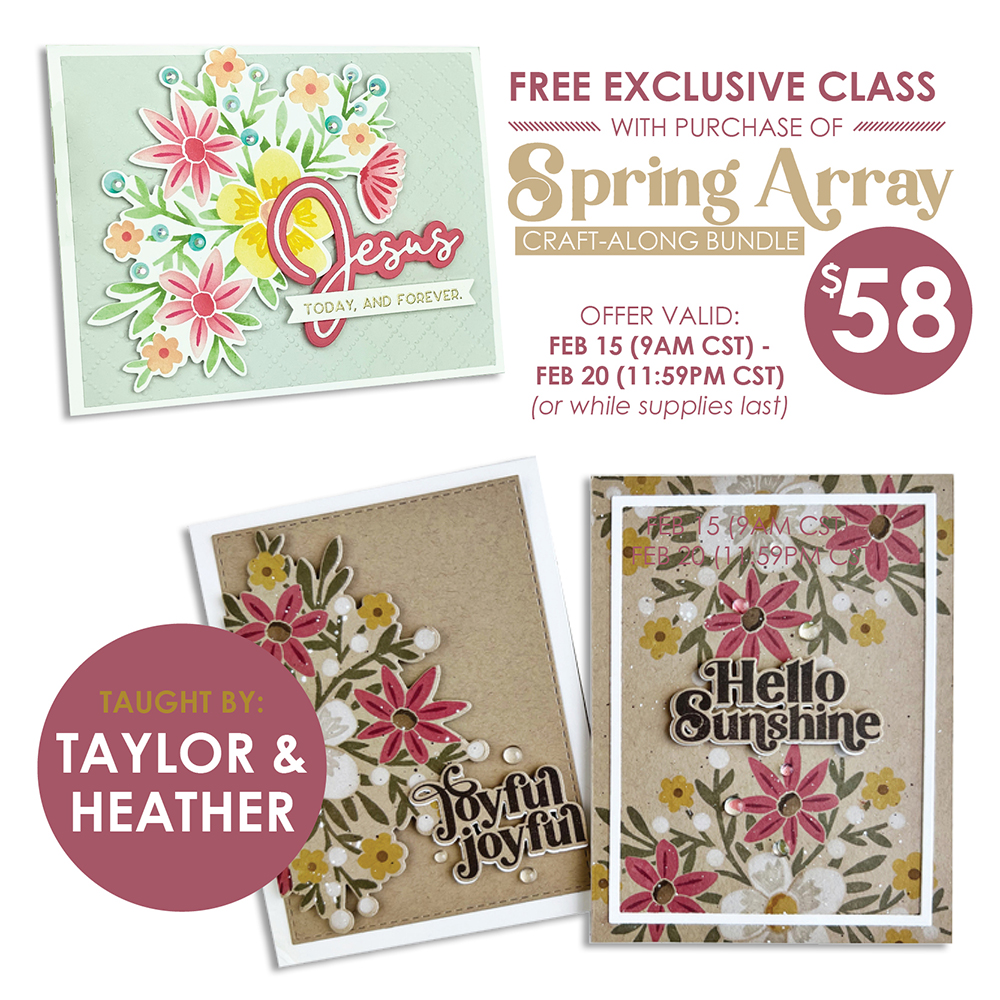
When you purchase the Spring Array Collection (Spring Array Stamp, Stencil, & Clear Combo set and Spring Array die) through Sunday, February 20th, you will get a FREE exclusive video craft along class with Taylor and Heather!
This mini version of our Online Crafty Classes is a great way for you to put your new goodies to use right away making 3 different card designs at your own pace! Watch the video as often as you like and learn some new crafty tips and tricks!
Once you complete your purchase, you will receive an email (separate from your order confirmation email) with links to the class video on YouTube.
Although Taylor and Heather will recommend extra supplies (ink, cardstock, embellishments, etc.), you can use anything you have to make these projects uniquely yours!
Hurry! This offer is only valid through 11:59 pm (CT) on Sunday, February 20th, or while supplies last. After the promotion has ended, the class will be available to purchase.
Click below to visit the new release products in the TE webstore and then keep scrolling for all of the inspiration!
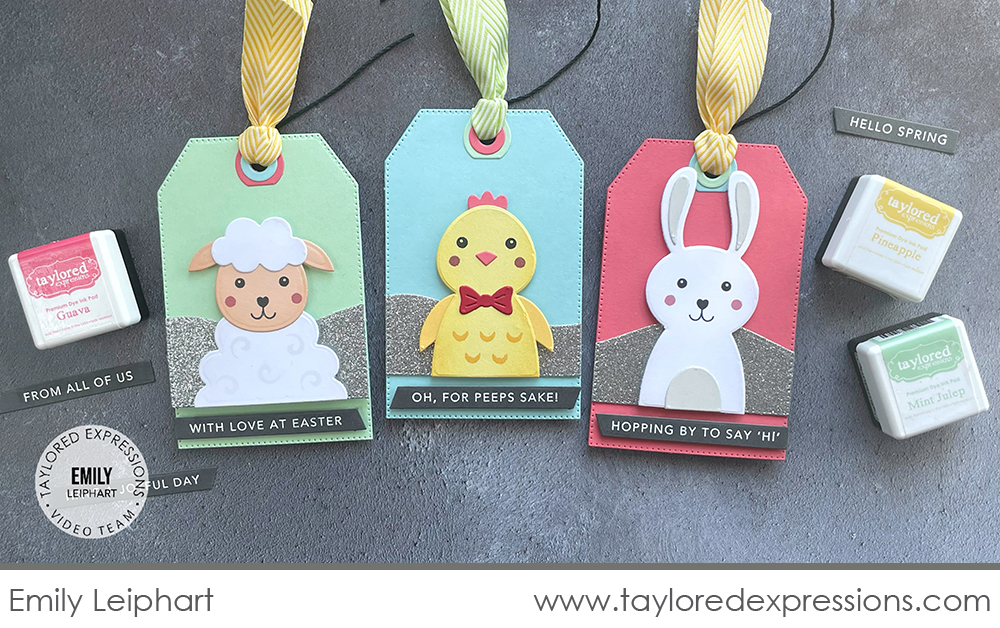
Today’s video is from Emily Leiphart. She is sharing an adorable set of Easter tags created with the new Spring Squad Die & Clear Combo set. Watch the video below to see how Emily created the tags from start to finish:
In the video, Emily shares how she cut out the critters in the Spring Squad Die & Clear Combo set from cardstock, added blending for extra dimension with Bitty Blender Brushes, assembled the critters, and added details to them with the clear stamps in the set. The critters are added to tags cut out with the largest die in the Pierced Tag Stacklets 2 die collection and Emily layered two tags together to create a mini card that you can open up. She shares how to do partial die cutting in the video to create a shorter tag for the top layer. There are reinforcements at the tops of the tags cut out with the Tag Reinforcements die collection and Emily added a hill behind the each of the critters cut out with the Build a Scene – Rolling Hills die collection from silver glitter cardstock. The sentiments from the Mini Strips – Easter stamp are embossed in white onto Earl Gray cardstock, cut out with the Mini Strips – Asymmetrical die, and added to the bottom of the tags.

These sweet tags are just the cutest and would be perfect for attaching to an Easter basket, gift, or treat! I always love the color combinations that Emily chooses – they are always different from what I would normally pick out and she is always giving me ideas to try something new. The tag bases are cut out from Sprinkles, Mint Julep, and Guava cardstock and Emily added the rest of the color in the combo layered together for the tag reinforcements.
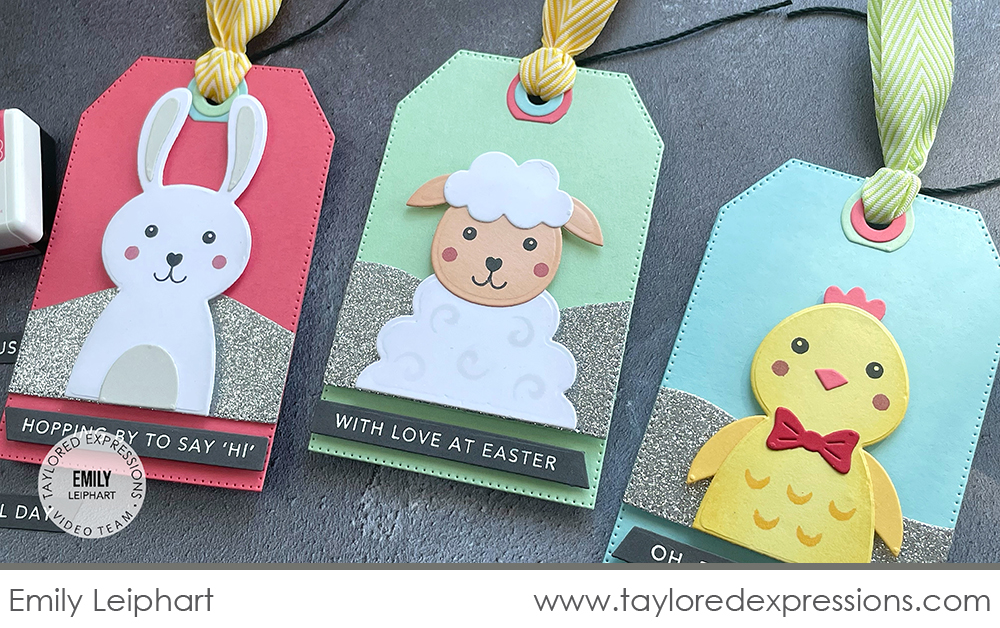
Extra details, like the layered tag reinforcements, will step up your projects to the next level. Emily did that in a few other ways on her tags. The tag becomes a mini card with just an additional tag layer so a special message can be added inside. Who doesn’t love extra sparkle and Emily added that by using silver glitter cardstock behind the critters. Finally, a bit of dimension can add so much to your projects! The critters on the tags are popped up with foam adhesive and the sentiment strips at the bottom of the tags are adhered with foam sticky strips.
Check out the list below for all of the supplies that Emily used on her tags:

Here’s a closer look at the new products along with inspiration from the TE Creative Team:
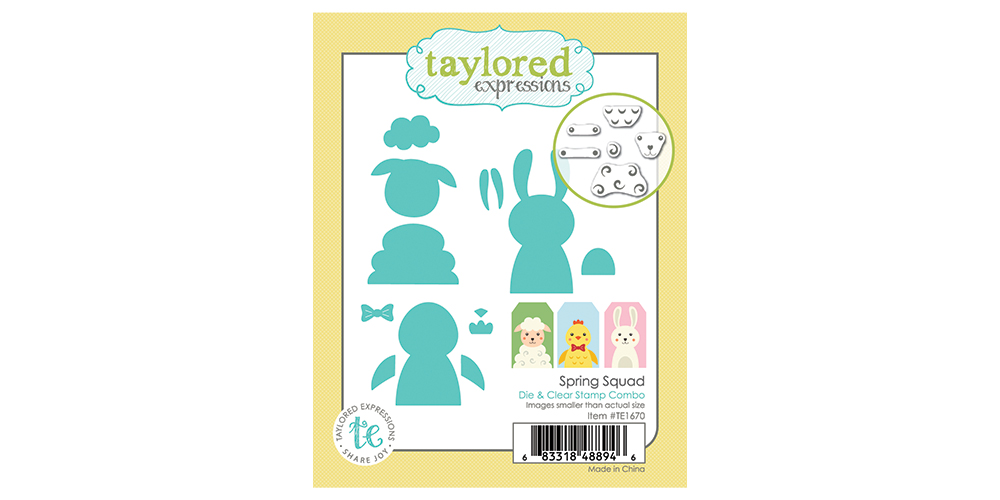
Use our Spring Squad Die & Clear Combo set to make adorable gift tags and projects that kids from 2 to 92 will love! The set includes all the dies you need to create a sheep, a chicken wearing a bow tie, and a bunny, plus a set of six clear stamps to add the faces, rosy cheeks and other fun details to these springtime friends!
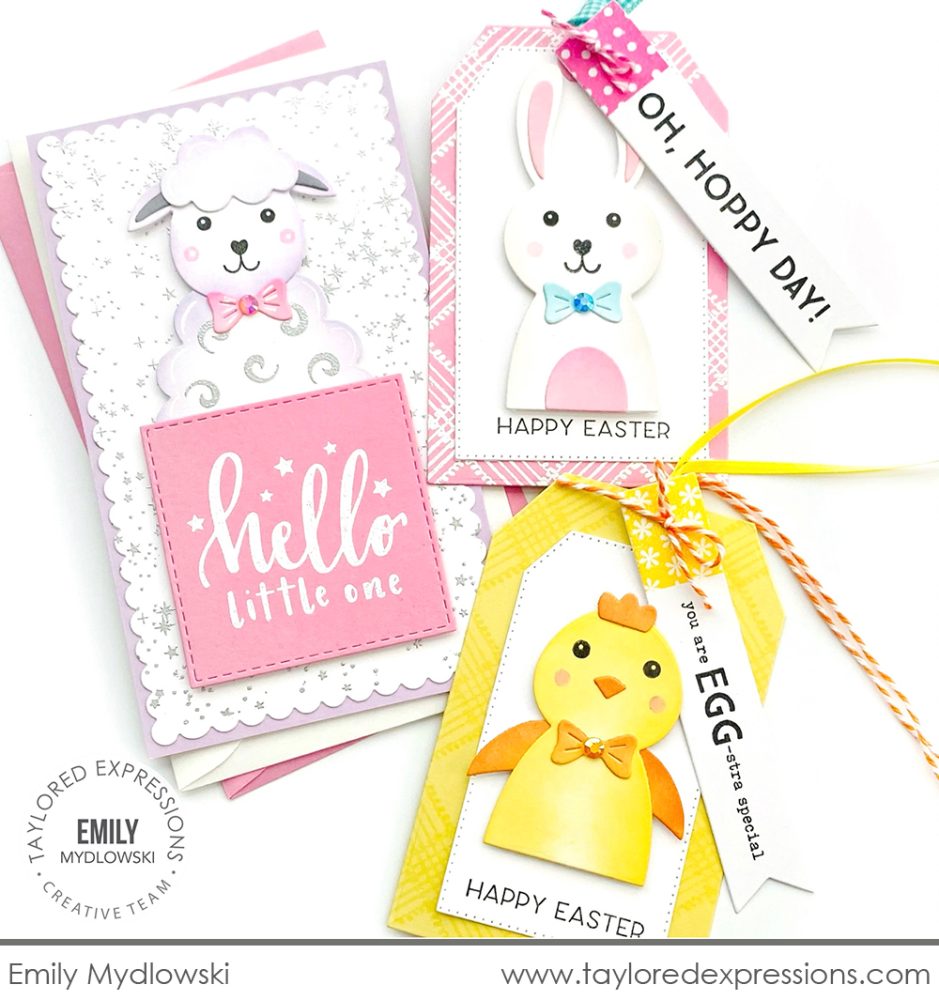
Emily Mydlowski created several adorable projects with the Spring Squad Die & Clear Combo set. She created a few Easter tags with the bunny and chicken, adding the critters to tags cut out with the Pierced Tag Stacklets 2 die collection and layered on Tag Stacklets 2 die cuts that are stamped with the Playful Plaid Background stamp. I love the extra tag layered at the top created with the Tag Team – Easter stamp set and Tag Team dies! Emily used the sheep from the set on a Mini Slim baby card. The background on the card is embossed in silver with the Twinkle Twinkle Background stamp and the card includes a sentiment from the Handlettered Baby stamp set.
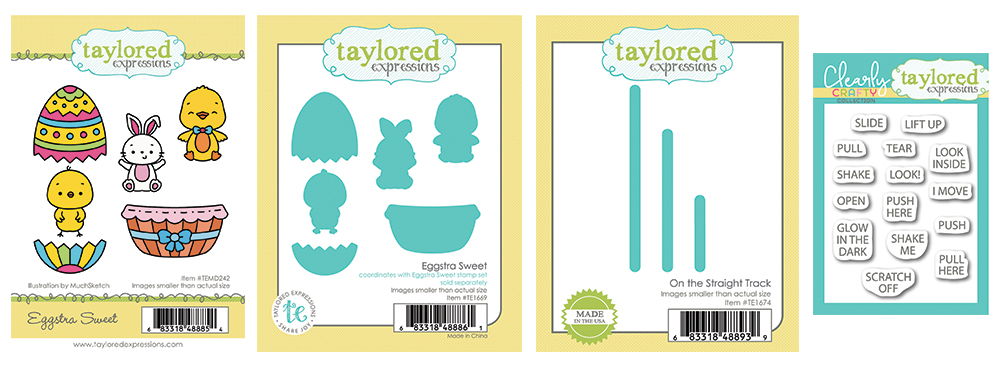
Send the cutest Easter critters tucked into a basket or decorated egg with the Eggstra Sweet stamp set (+ coordinating dies). The stamp set includes three critters: chick, bunny, and duck that you can color with your favorite coloring medium like Copic markers, colored pencils, paints, and more to send message of spring to your loved ones.
Take an ordinary card and step it up to something interactive and extraordinary with the On the Straight Track die collection. There are three track lengths to choose from to use with On the Right Track Discs and foam sticky circles to enable your stamped and die cut images to move across your cards!
Use the Clearly Crafty I’m Interactive stamp set to add directions to cards with interactive elements! The set includes 15 different words and phrases for all sorts of interactive elements that you might include on your projects.
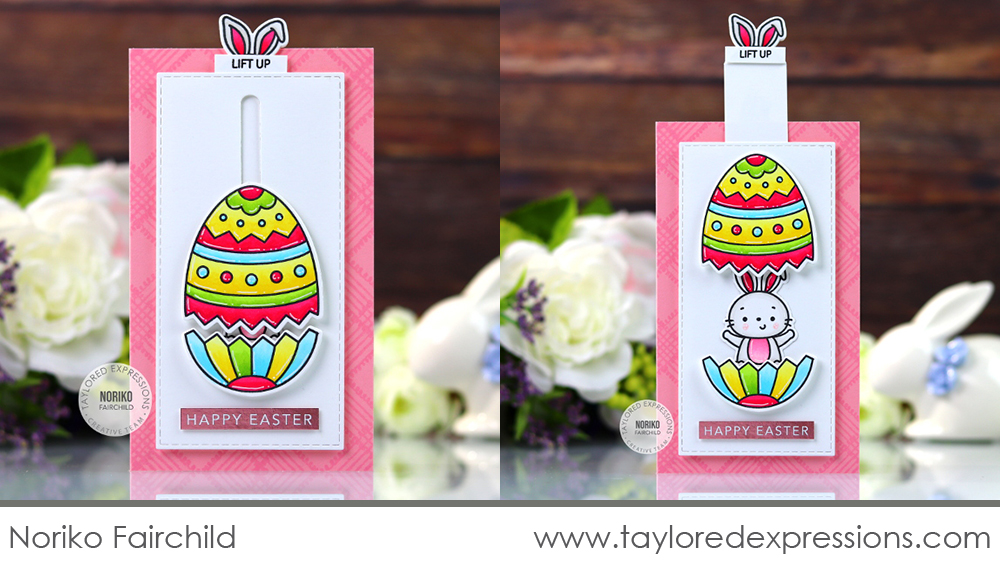
Noriko Fairchild is one of our resident interactive card experts and she created the cutest Easter egg reveal card with the new Eggstra Sweet stamp set (+ coordinating dies) and On the Straight Track dies. The top part of the egg is attached to the track cut out with the On the Straight Track dies using the On the Right Track Discs and a foam sticky circle. Noriko attached a cardstock strip behind the panel and added the ‘lift up’ message from the I’m Interactive stamp set. When you lift the strip by pulling on the ears at the top of the card, the top part of the egg slides up to reveal the cute bunny inside!
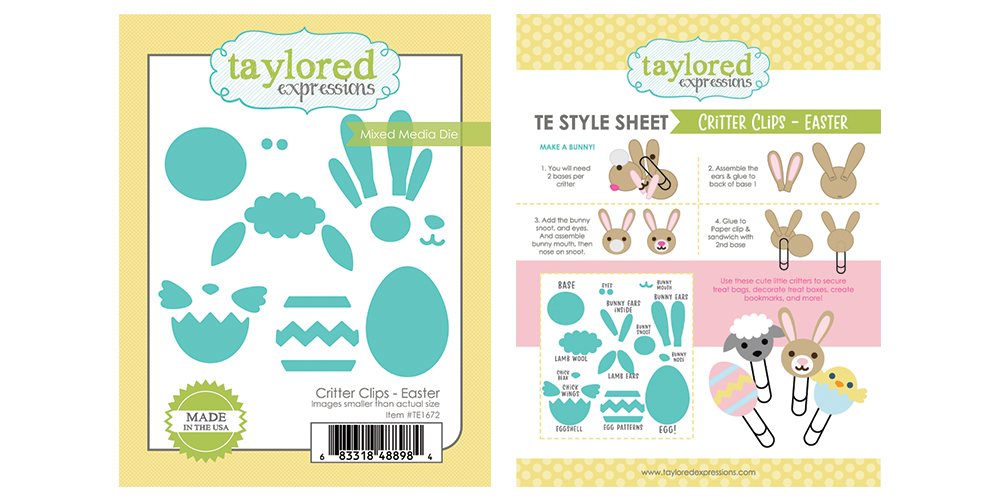
Get the kids involved in making adorable Easter treats with our Critter Clips – Easter Mixed-Media dies! Use the round die with any of the accent dies and decorate to make a bunny, chick, or sheep and use the egg base and accent dies to create a cute decorated egg out of cardstock or felt. Then simply attach your critters to black jumbo paper clips to secure treat bags, use as bookmarks, or add to Easter baskets. You can also use the critters without the clips to use on cards, tags, and more!
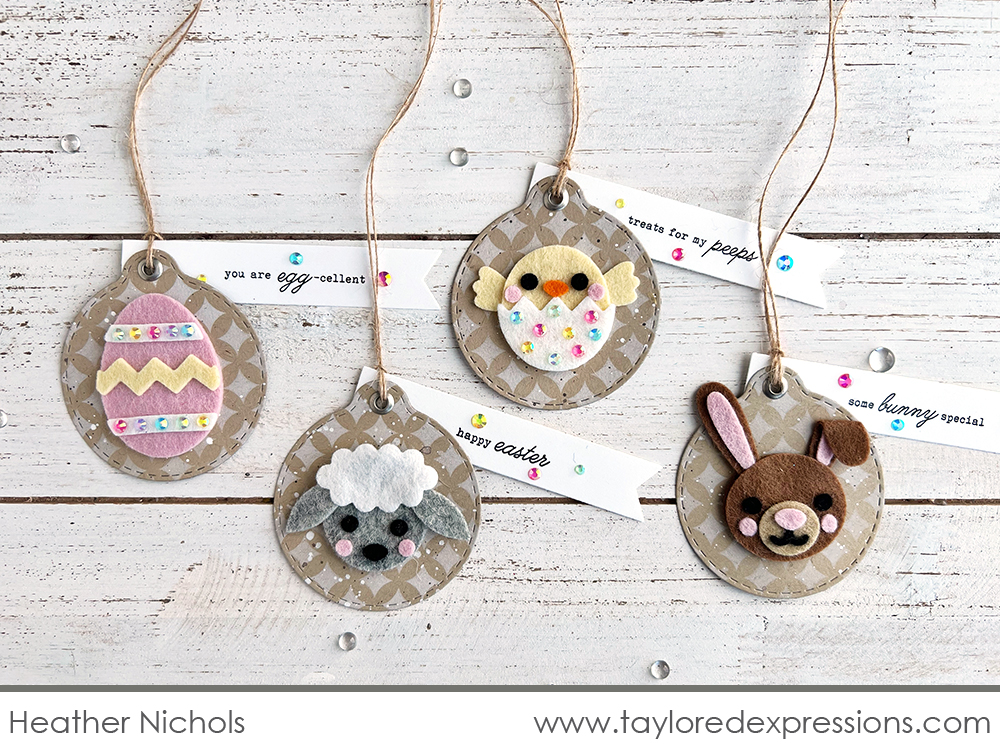
Leave it to Heather Nichols to create some of the cutest Easter tags with the new Critter Clips – Easter die collection! Heather cut out the critters from felt (Cherry Blosson, Butter, Carrot, Marshmallow, Heather Gray, Licorice, Latte, and Khaki) and added Bits & Pieces – Rainbow Rhinestones to a few of them for extra color and sparkle! The critters are added to tag bases that are cut out with the Tag Stacklets 3 dies and stenciled with the Mini Slim Trellis stencil. The sentiments from the All Tucked In – Easter stamp set are stamped onto tags cut out with the Tag Team dies that are attached to the tops of the main tags.
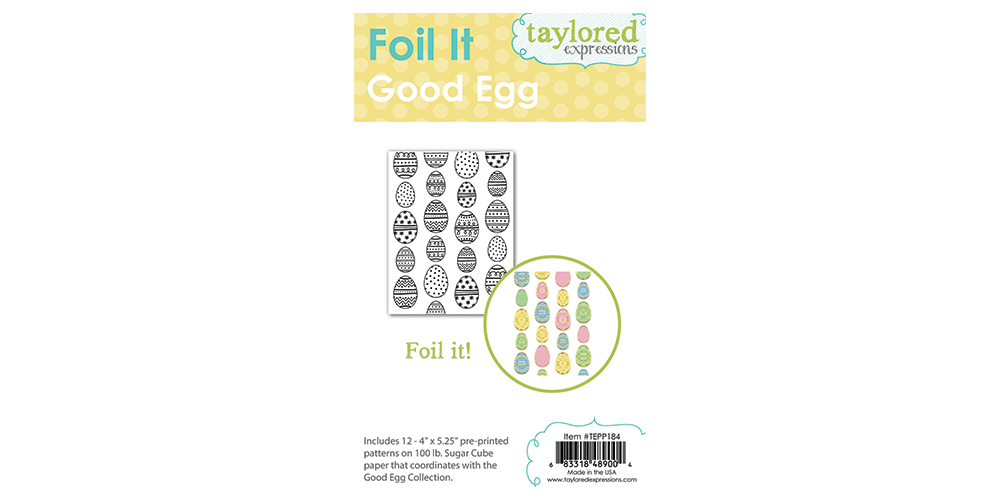
Add shimmery accents to the cards you create with our Good Egg Stamp & Stencil Combo (sold separately) with our Foil It – Good Egg panels. Simply use the stencil from the Combo set to add colorful egg shapes over the patterns, then top with the foil of your choice and run it through your foiling machine. Voilà – a beautiful pattern of shiny, decorated eggs! You can choose to leave the panels as is as well! The Foil It – Good Egg pack is a set of 12 pre-printed panels on TE Premium Cardstock (each measures 4″ x 5 1/4″).
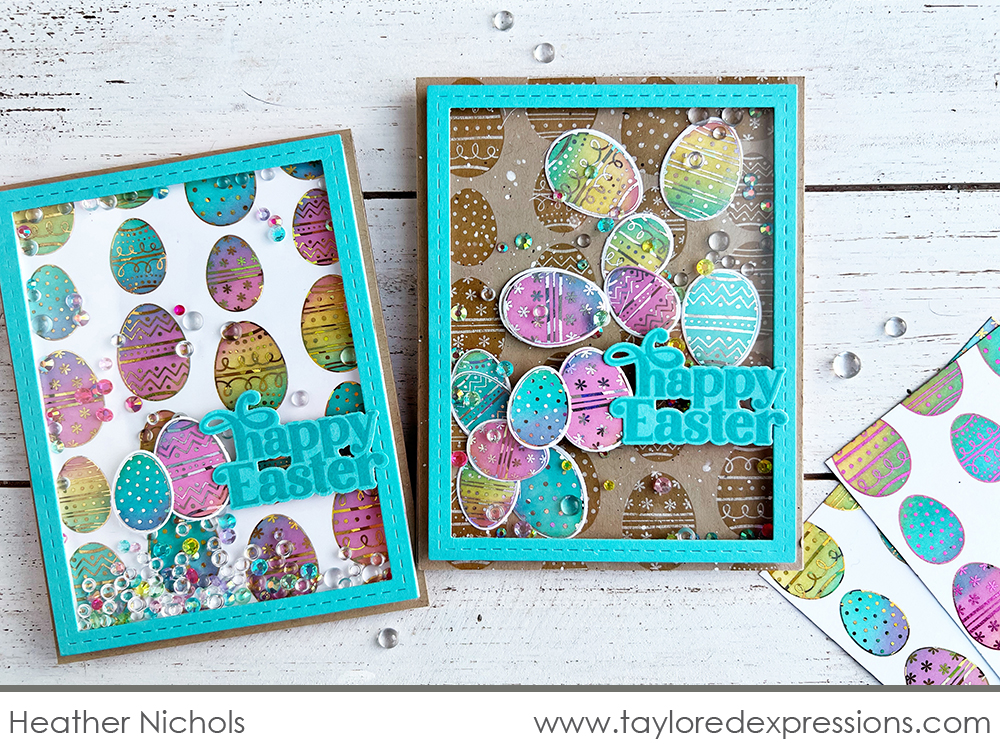
Heather Nichols foiled up several Foil It – Good Egg panels to create a fun pair of shaker cards! Once the panels were foiled, Heather added color to the eggs using the stencil from the Good Egg Stamp & Stencil Combo set using her Blender Brushes with Strawberry Milkshake, Pineapple, and Cookie Monster inks. For the card on the left, Heather left the panel intact for the background of the shaker card. For the card on the right, Heather cut out the eggs with the Good Egg dies to use inside her shaker card. The ‘happy Easter’ sentiment on both cards is from the newest sentiment set making its debut today – keep scrolling for more details on that!

Create the cutest mini Easter baskets by pairing the Present Treat Wrap die collection with the new Treat Wrap – Basket Accessories die collection. Cut out the base and add the woven texture sides along with a cute scalloped trim and basket handles to complete the look! Fill the basket with sweet treats and/or small gifts for the Easter season.

Aren’t these little baskets created by Kavya just the cutest?! The base of the basket is cut out with the Present Treat Wrap die and then Kavya added the basket details with the new Treat Wrap – Basket Accessories die collection. I love how Kavya added extra dimension to the basket-weave panels by threading cardstock strips cut out with the Easy Strips – 1/4″ die through the cuts in the panels to coordinate with the woven design! The colorful eggs from the Foil It – Good Egg panels that Kavya added to the bottom of the baskets are the perfect festive touch.
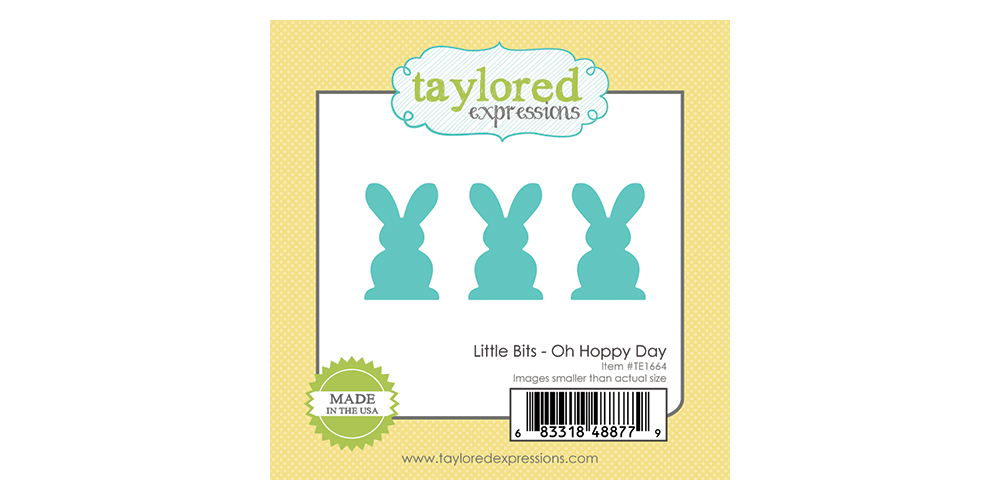
Last spring, we released the Oh Hoppy Day stencil and we heard from so many of you about wanting a die option in the same cute bunny shape! We are excited to share the new Little Bits – Oh Hoppy Day die with you for this release. The die cuts out 3 cute bunny shapes at one time and you’ll find yourself adding them to all of your springtime projects. Add a pom pom or rhinestone tail for a fun detail!
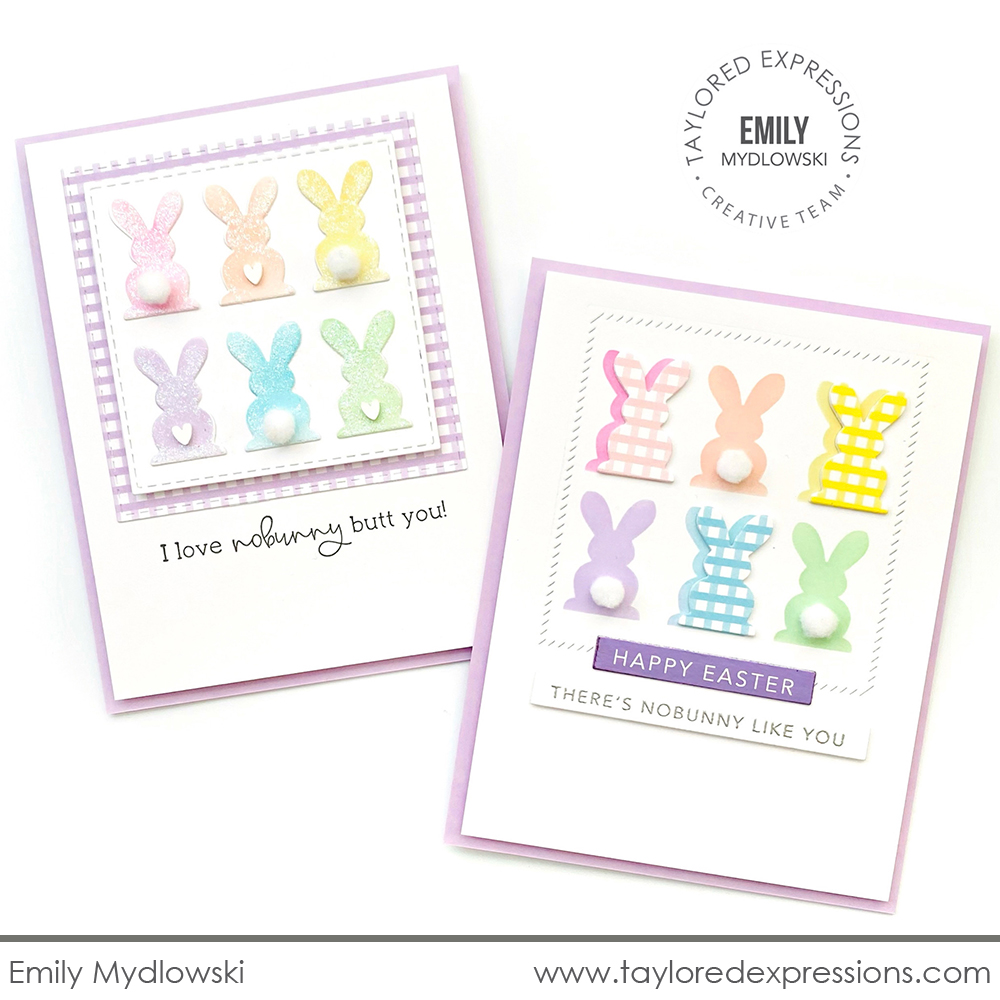
Emily Mydlowski gathered a bunch of bunnies together for this pair of sweet Easter cards! For the card on the left, Emily cut out the bunnies using the Little Bits – Oh Hoppy Day die from a variety of pastel cardstock tones, coated them with glitter, and added details with bunny tails and white Bits & Pieces – Hearts. For the card on the right, Emily stenciled the bunnies with the Oh Hoppy Day stencil in pastel ink tones and added Little Bits – Oh Hoppy Day die cuts layered over a few of them that are cut out from the Playful Patterns – Sweet 6×6 Paper Pack.
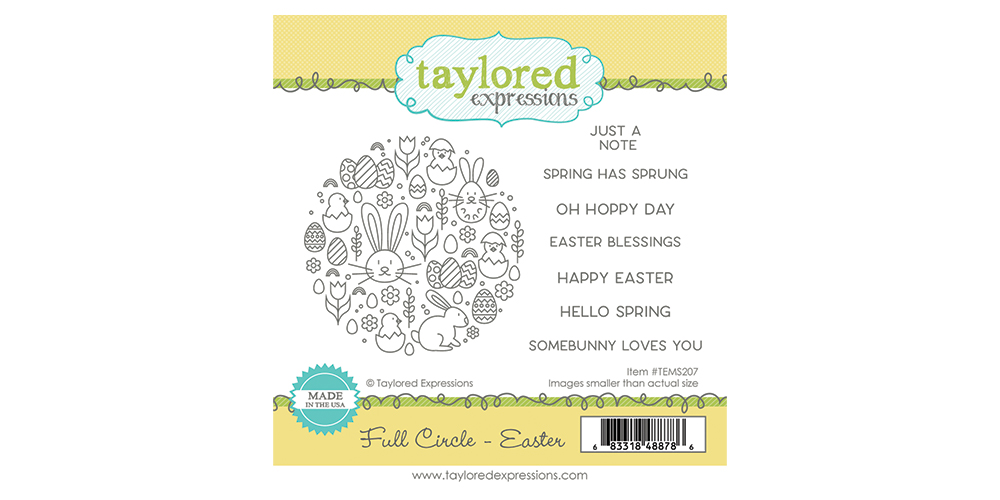
Create sweet springtime cards for everyone with our Full Circle – Easter stamp set! The set features a 3 1/4″ round stamp filled with Easter-themed icons (like bunnies, eggs, chicks, and flowers) that can be used as a background or an accent on your cards and crafts. (It also happens to fit perfectly inside the larger circle stencil that’s part of our Masking Stencils – Circles!) Make it extra special when you add one or more of the included sentiments: ‘just a note’, ‘spring has sprung’, ‘oh hoppy day’, ‘Easter blessings’, ‘happy Easter’, ‘hello spring’, and ‘somebunny loves you’.
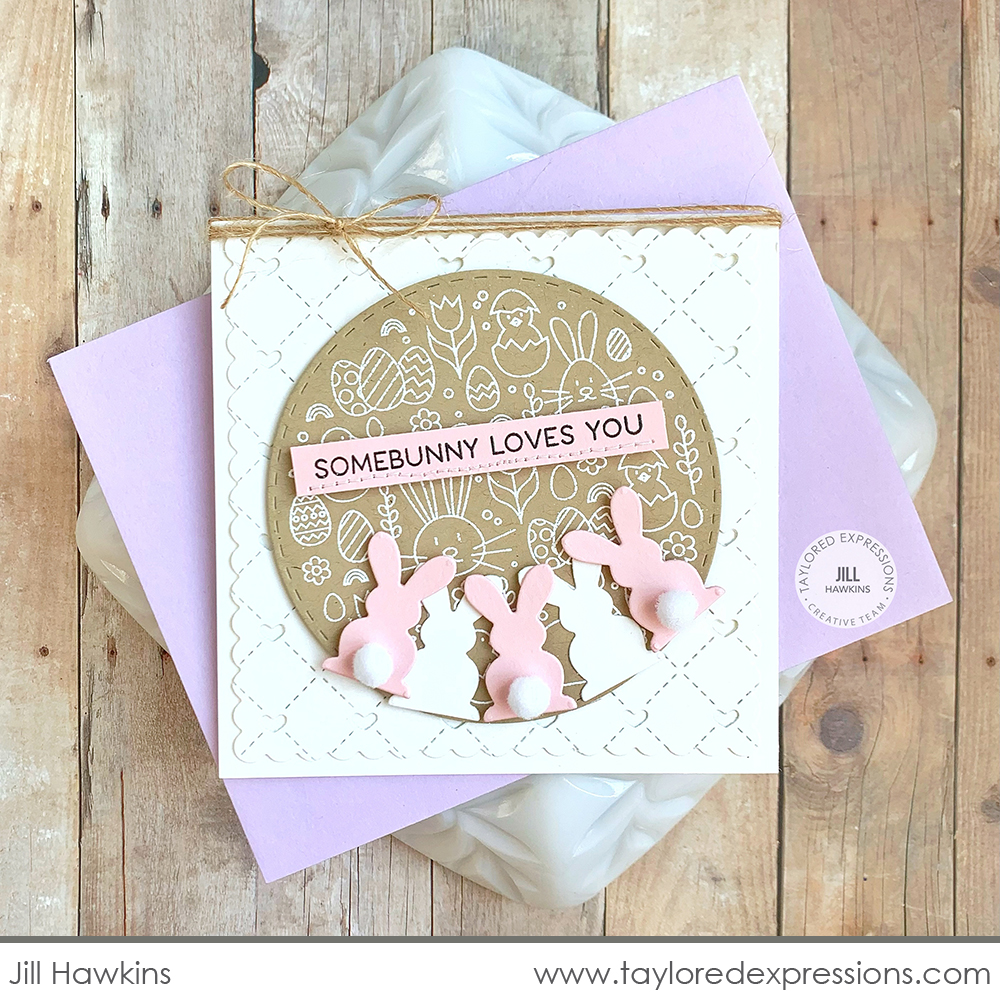
I spy more bunnies gathered together on this Easter card by Jill Hawkins! Jill cut out the bunnies from Sugar Cube and Cupcake cardstock with the Little Bits – Oh Hoppy Day die and gathered them at the bottom of a Stitched Circle Stacklets die cut that is embossed in white with the circle image from the Full Circle – Easter stamp set. Jill added the circle to a Petite Scallop Square Stacklets panel that is cut with the Stitched With Love Cutting Plate. Final touches on this card include the ‘somebunny loves you’ sentiment strip, stitching, burlap twine, and a few bunny tails!
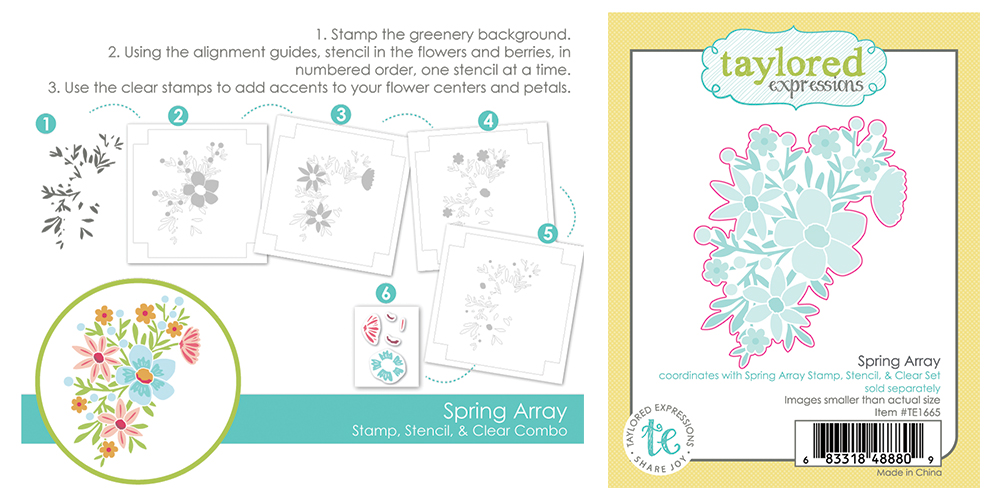
The Spring Array Stamp, Stencil, & Clear Combo set and Spring Array die are included in the class bundle promotion above. Feature a lovely bouquet on cards for Spring, Easter, or almost any occasion with our Spring Array Stamp, Stencil, & Clear Combo. Simply use the red rubber stamp to create your base spray of greenery, then use the etched guidelines on the stencils to line them up with the stamped image to add the flowers, and use the included clear stamps to add the details. Cut out the whole image using the Spring Array die.
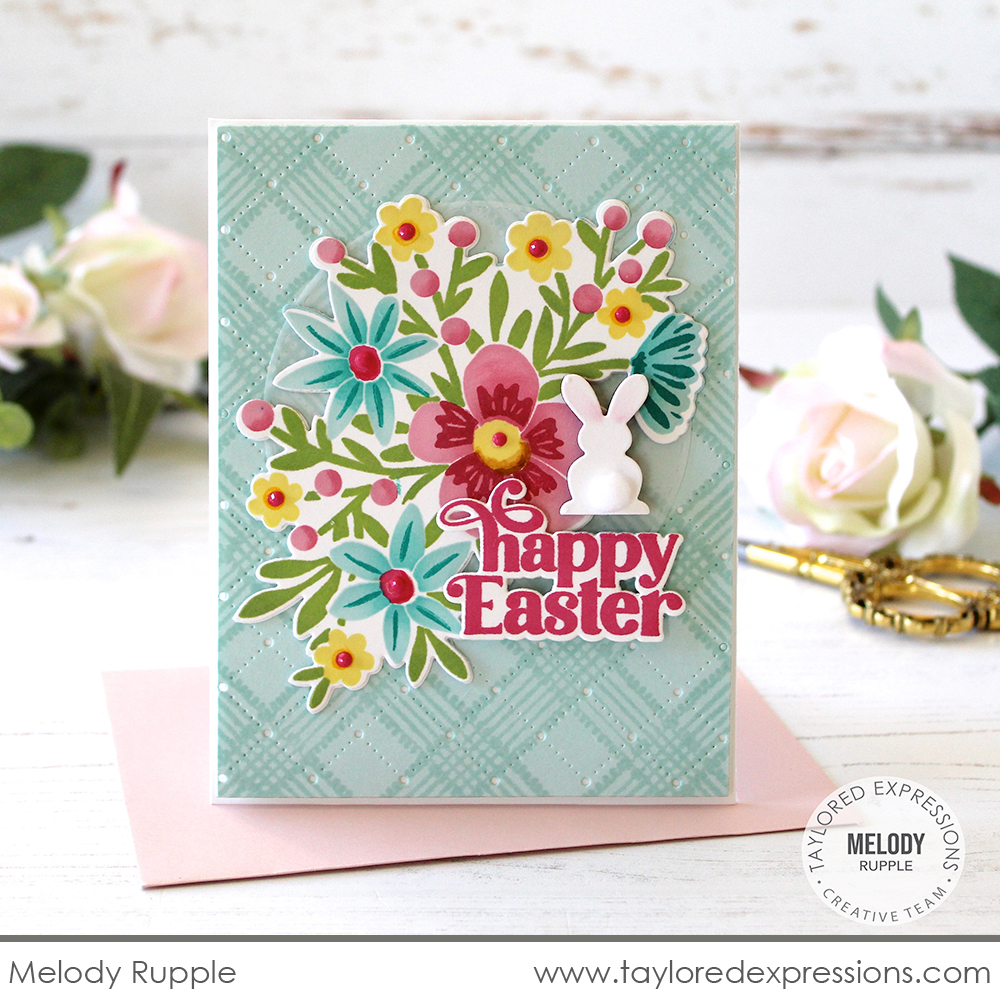
Melody Rupple created a beautiful floral spray for this Easter card with the Spring Array Stamp, Stencil, & Clear Combo set. I just love her color combination! Melody used Lime Zest and Peapod inks to stamp the greenery and the stenciled the flowers with Guava (shaded with Fruit Punch), Salt Water Taffy (Shaded with Blue Raspberry), and Potato Chip (shaded with Lemon Meringue). The flowers are cut out with the coordinating die and added to a background created by pairing the Playful Plaid Background with the Pierced Lattice Cutting Plate. Melody added a bunny cut out with the Little Bits – Oh Hoppy Day die and the sentiment (more details a bit later in the post!) to finish the card.
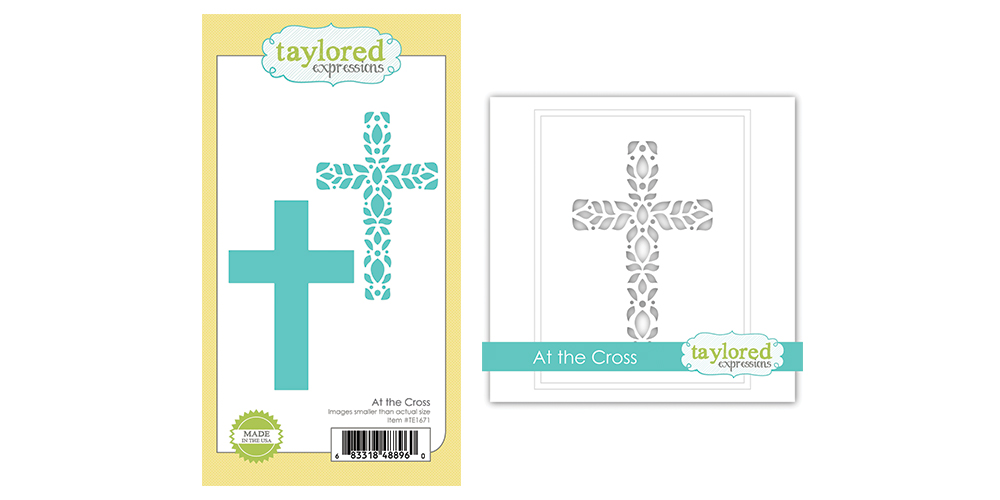
Use our At the Cross collection to cut out both a solid cross shape and a cross shape created with various cut out shapes. Use the dies separately or together to create several different elegant looks. The At the Cross stencil features the cross shape created with various cut out shapes, matching the die in the At the Cross die collection. Use the At the Cross stencil to add pattern, texture, and more to the sold cross shape or use it on its own for your projects.
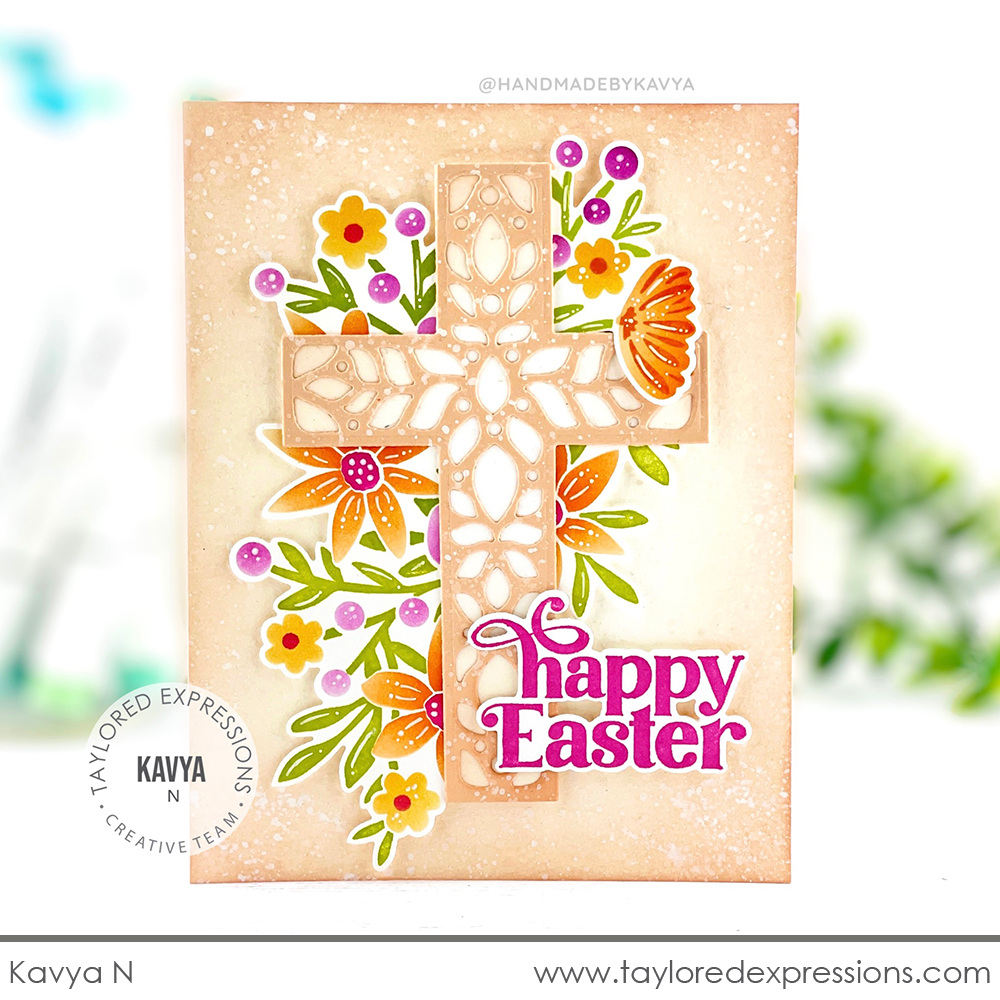
Kavya paired the new Spring Array products with the new At the Cross die collection to create this gorgeous Easter card! Kavya cut out the solid cross shape twice and cut out the detailed cross design from one of them. The crosses are layered together and the flowers created with the Spring Array Stamp, Stencil, & Clear Combo set are added behind it – I love how Kavya overlapped a part of the flowers over the cross to add a dimensional effect! The ‘happy Easter’ sentiment that is stamped with Lollipop ink and cut out with the coordinating die (more on this soon!) is added by the bottom of the cross.

Celebrate the reason for the Easter season with the He is Risen die and coordinating He is Risen Shadow die. The die features the ‘He is Risen’ sentiment in a classic serif font in a size that will make a statement on your spiritual Easter cards. Add an extra layer behind the sentiment with the He is Risen Shadow die for extra dimension.
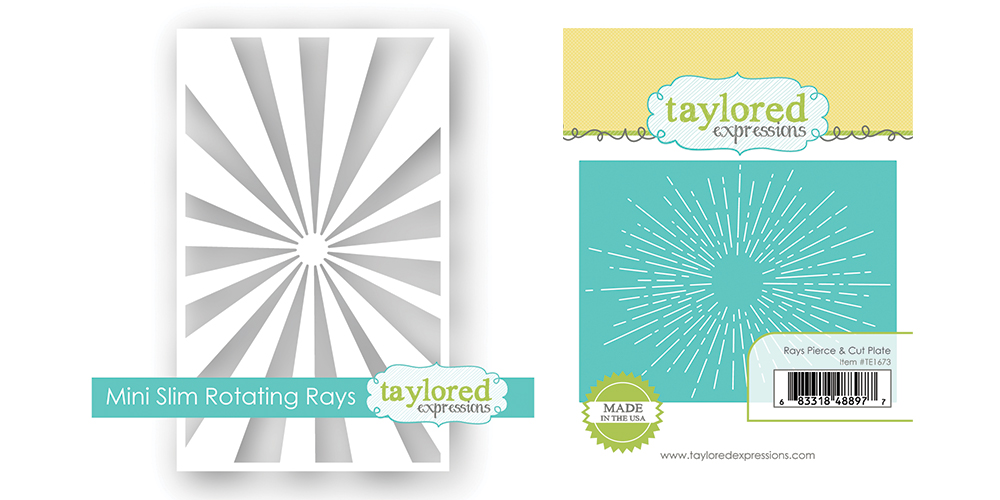
If you like our Here Comes the Sun stencil or Mini Slim Sunray stencil, you’ll love the new Mini Slim Rotating Rays stencil! It’s a another version of the sun ray design with the light source centered in the middle of the stencil. The stencil can be used on cards with a variety of themes, from casual, to religious, to elegant.
The new Rays Pierce & Cut Plate gives you another option for adding a sun ray effect. The cutting plate pierces and cuts the radiating lines into your cardstock, creating a wonderful texture that will showcase whatever you feature in the center. You can also use the Rays Pierce & Cut Plate paired with the Mini Slim Rotating Rays stencil to create more background effects!

This beautiful card by Noriko Fairchild uses all four of the new products that you just learned about above! The ‘He is Risen‘ sentiment cut out from gold glitter cardstock takes center stage on this card and the He is Risen Shadow die cut from Oreo cardstock really makes the sentiment stand out. Noriko added the scene behind the sentiment with the Third Day Border die and the background is cut with the Rays Pierce & Cut Plate, blended with Lollipop and Pineapple inks, and stenciled with the Mini Slim Rotating Rays stencil using Sugar Cube ink. While the stencil was still in place, Noriko added white splatters to the stenciled rays and I think the effect is pretty magical!
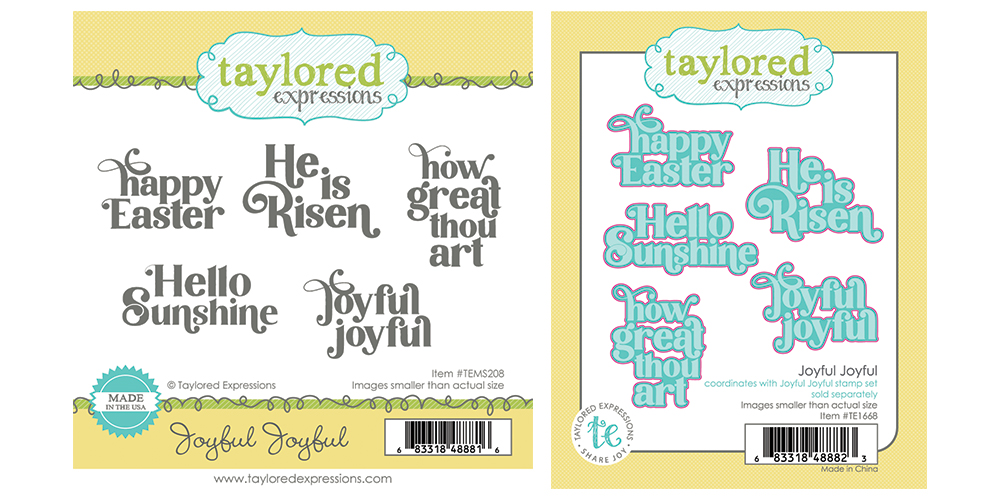
Create a joyful sentiment this year for the spring and Easter season when you use the bold but beautiful sentiments from our Joyful Joyful stamp set. Featuring a stylish serif font with extra tails and flourishes, the sweet sentiments include: ‘happy Easter’, ‘Hello Sunshine’, ‘He is Risen’, ‘how great thou art’, and ‘joyful joyful’. Cut out the sentiments with the coordinating Joyful Joyful die collection.
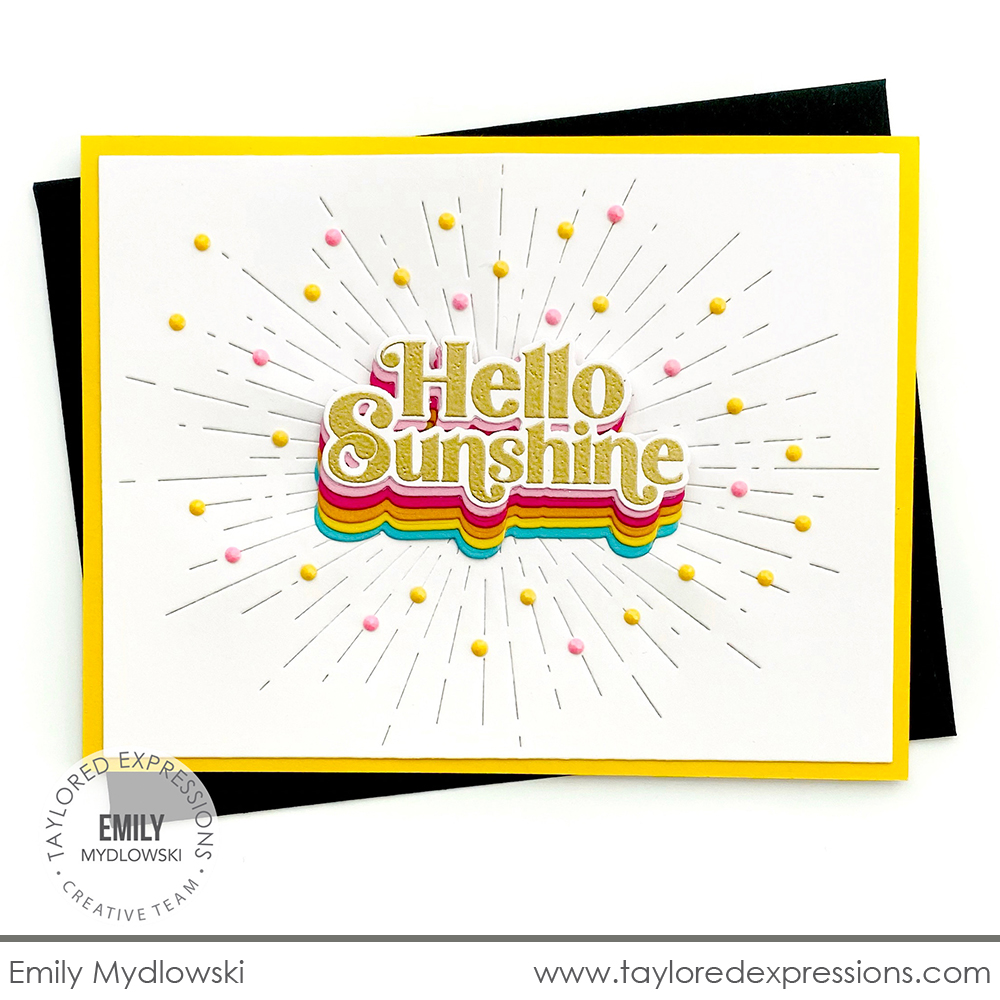
Emily Mydlowski used the Rays Pierce & Cut Plate as the background on this card to showcase the ‘Hello Sunshine’ sentiment from the new Joyful Joyful stamp set. The sentiment is embossed in gold and Emily added several die cut layers in a rainbow of colors cascading out from the bottom of the sentiment – the effect is so fun and whimsical! I also love all of the pink and yellow Tiny Diamonds added to the background that add to the playful look.
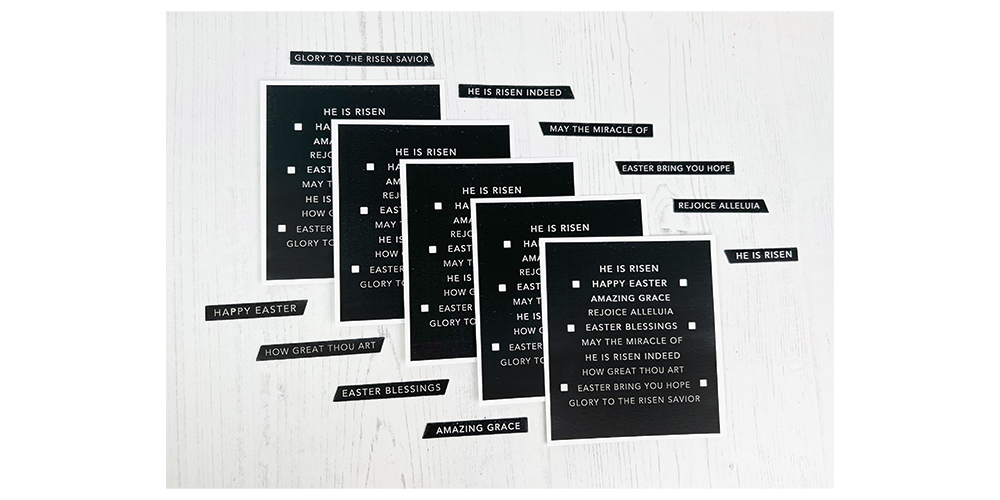
Get ready to turn everything you know about Mini Strips for Easter and springtime themed projects on its head with our Mini Strips In Reverse – Easter collection! The pre-printed panels come on TE Premium Cardstock and can be cut out as-is using any of the Mini Strips dies (sold separately) to leave you with crisp white sentiments on a black background, or can be topped with foil and run through a foiling machine to create crisp white sentiments on a fancy foiled background! Each panel includes alignment squares to line up with the alignment tabs to cut out 10 sentiment strips.
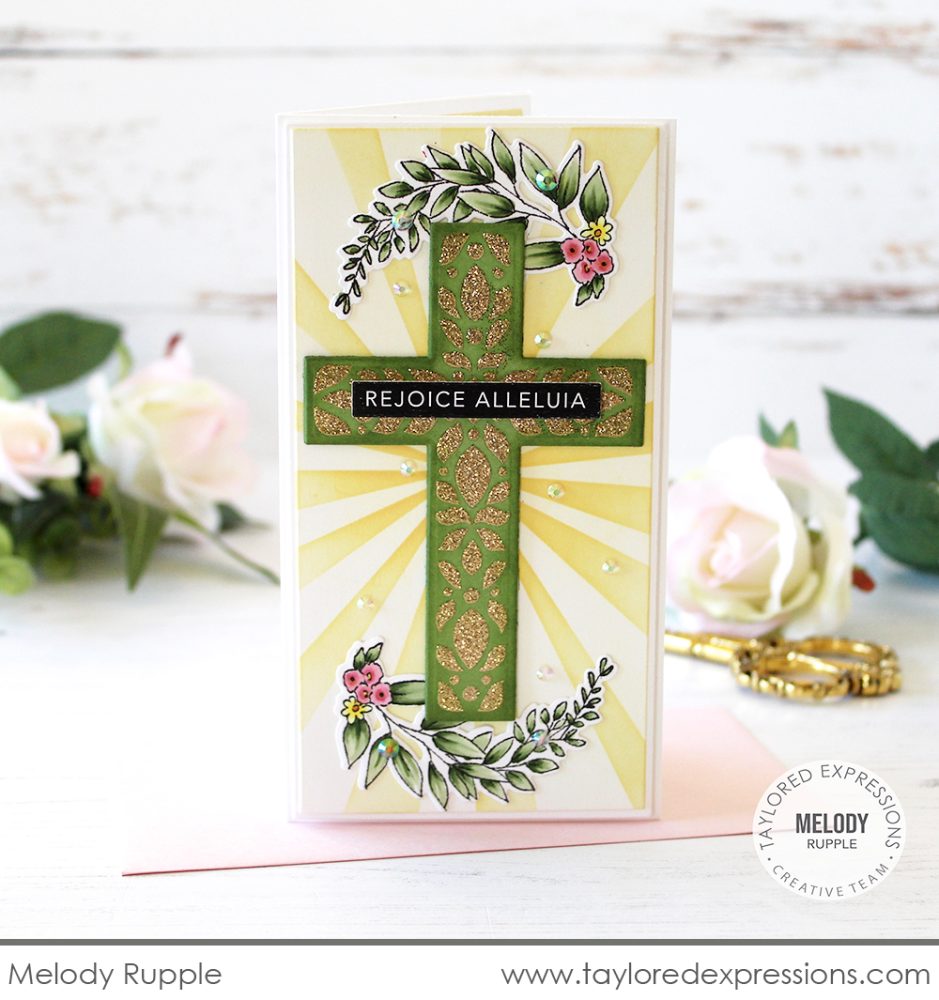
If you scroll up through the project shared above, you’ll see several examples of the sentiment strips from the Mini Strips in Reverse – Easter panels. Melody Rupple added the ‘Rejoice Alleluia’ sentiment strip to the cross on this Mini Slim Easter card that she created with the solid cross shape from the At the Cross die collection that is stenciled with the At the Cross stencil using Happy Medium – Gold Glitter. The cross is added onto a background stenciled with the Mini Slim Rotating Rays stencil and branches from the Unexpected Blessings stamp set are added at the top and bottom of the card.

Join me live for “T Time” at 10AM Central today on the Taylored Expressions Facebook Page. I’ll be sharing a closer look at the new products that are a part of our Easter release. We hope to see you there – come join in the fun! (Don’t worry, if you miss the live you can always watch the saved broadcast afterward!)
Thank you so much for stopping by today! Make sure you check out the rest of the TE Creative Team projects using the new Easter release products that we are releasing today – click their faces below to hop to their blogs! Stop back again here on the TE blog on Thursday for more inspiration – including a video from Joy Baldwin. See you then!


