Feb 17, 2022
Hello Sunshine! Here’s More Inspiration for the NEW Easter Products!
Hey, crafty friends! It’s Heather here today with more inspiration to share using the new Easter products that we released this week. Have you started planning your Easter projects? I know there are some crafters out there that have all of their projects complete already, there are others out there that will be crafting at the last minute, and many who fall somewhere in-between! I personally tend to fall somewhere in the middle… leaning toward the last minute status! What ever type of crafter you are, I know you will find ideas and inspiration for your next Easter and spring themed projects today. I have a video to share from Joy Baldwin along with projects from the TE Creative Team.
Don’t forget about the promotions happening for this week’s release! Here are the details:
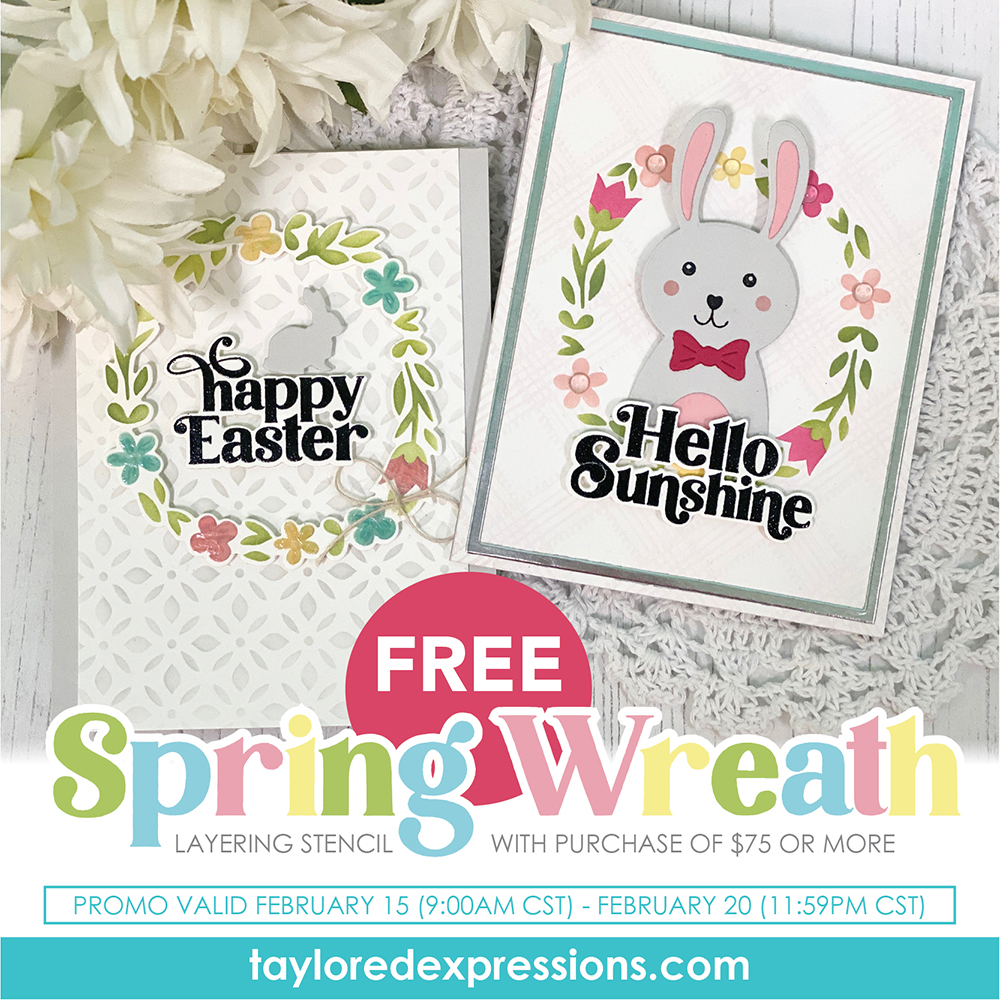
With any purchase of new release products of $75 or more, you will receive a FREE Spring Wreath Layering Stencil set. Our Spring Wreath Layering Stencil makes it easy to create lovely cards to welcome Spring, say Happy Easter or share other kind wishes with the ones you love. Simply use the first stencil to create your wreath base, then align the tabs on the second stencil to those on the first to add your tulips and daisies!
This offer is valid through 11:59PM Central Time Sunday, February 20th, or while supplies last. If your order qualifies you will see the free item in your cart prior to checking out. If you think your order should qualify and you do not see it added to your cart, please contact customer service before checking out.
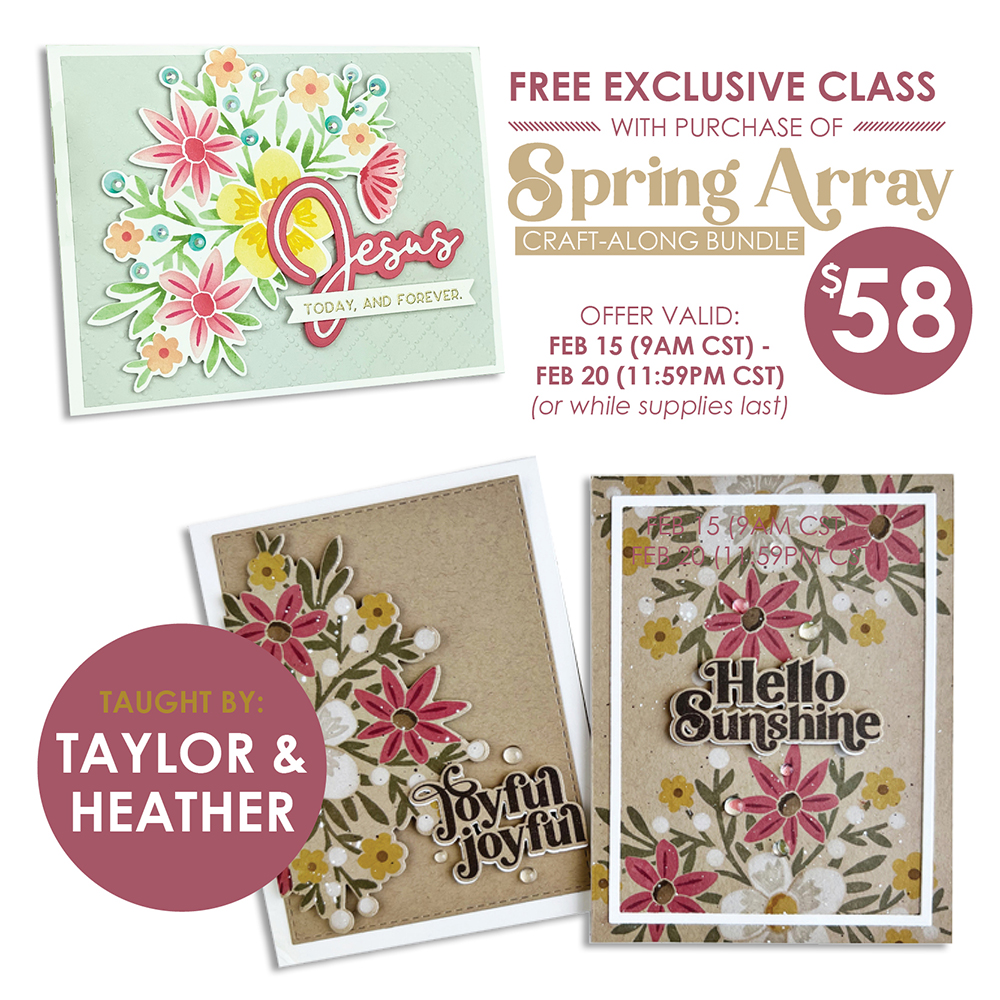
When you purchase the Spring Array Collection (Spring Array Stamp, Stencil, & Clear Combo set and Spring Array die) through Sunday, February 20th, you will get a FREE exclusive video craft along class with Taylor and Heather!
This mini version of our Online Crafty Classes is a great way for you to put your new goodies to use right away making 3 different card designs at your own pace! Watch the video as often as you like and learn some new crafty tips and tricks!
Once you complete your purchase, you will receive an email (separate from your order confirmation email) with links to the class video on YouTube.
Although Taylor and Heather will recommend extra supplies (ink, cardstock, embellishments, etc.), you can use anything you have to make these projects uniquely yours!
Hurry! This offer is only valid through 11:59 pm (CT) on Sunday, February 20th, or while supplies last. After the promotion has ended, the class will be available to purchase.
Click below to visit the new release products in the TE webstore and then keep scrolling for all of the inspiration!
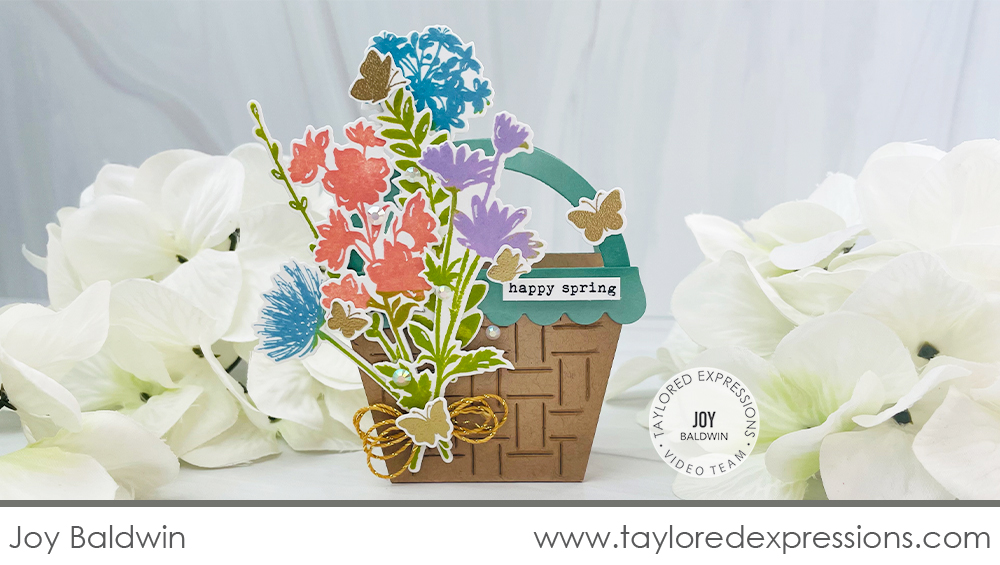
Joy Baldwin brings us the video for today and she is sharing how to create this adorable treat basket for spring with the Present Treat Wrap and Treat Wrap – Basket Accessories die collections. Watch the video below:
In the video, Joy shares how to use the Treat Wrap – Basket Accessories dies with the Present Treat Wrap dies to create a spring treat basket. She shows how to add the woven texture to the sides of the wrap, how to create and add an insert into the wrap to create sides on the basket, add shading to the basket elements with Bitty Blender Brushes, and how to assemble everything together. Joy stamped flowers to add to her basket using the Spring Stems stamp set and cut them out with the coordinating dies. The ‘happy spring’ sentiment is from the Tag Team – Easter stamp set and Joy finished off the basket with a few gold embossed butterflies, Bits & Pieces – White Rhinestones, and white gel pen details.
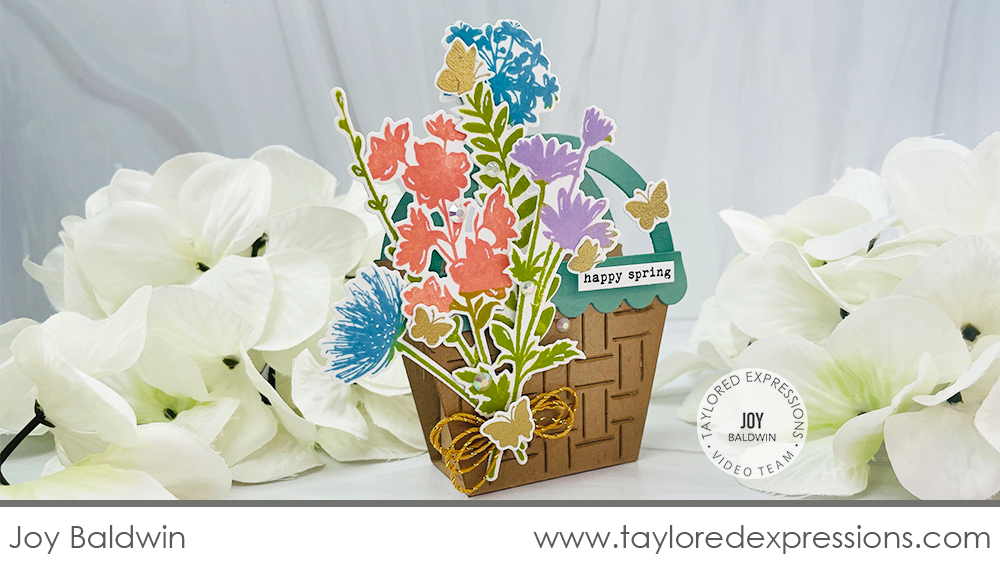
While the Treat Wrap – Basket Accessories were designed for our Easter release, the basket can be used for so many other occasions. By pairing the basket with the florals from the Spring Stems stamp set, this basket is perfect for any springtime occasion – and wouldn’t this floral basket be wonderful for Mother’s Day? I love how Joy added multiple colors to the floral stems using the mini ink pads. First she inked up the greenery and stems with Granny Smith ink and then added color (Pink Champagne, Lavender Glaze, and Gumball) to the flowers to create the multi-colored look.
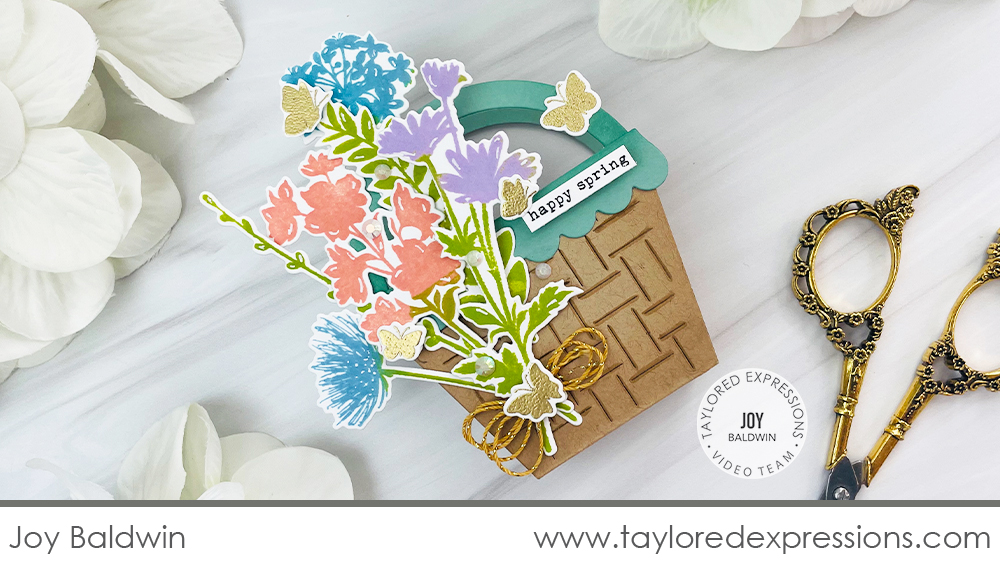
Finishing touches make all the difference! Joy highlighted the basketweave design using a Copic marker just a shade darker than the Toffee cardstock and added highlights and details to the flowers with a white gel pen. I love the elegant touches of gold with the tiny butterflies and bow at the bottom of the bouquet. Bits & Pieces – White Rhinestones add a lovely touch of sparkle!
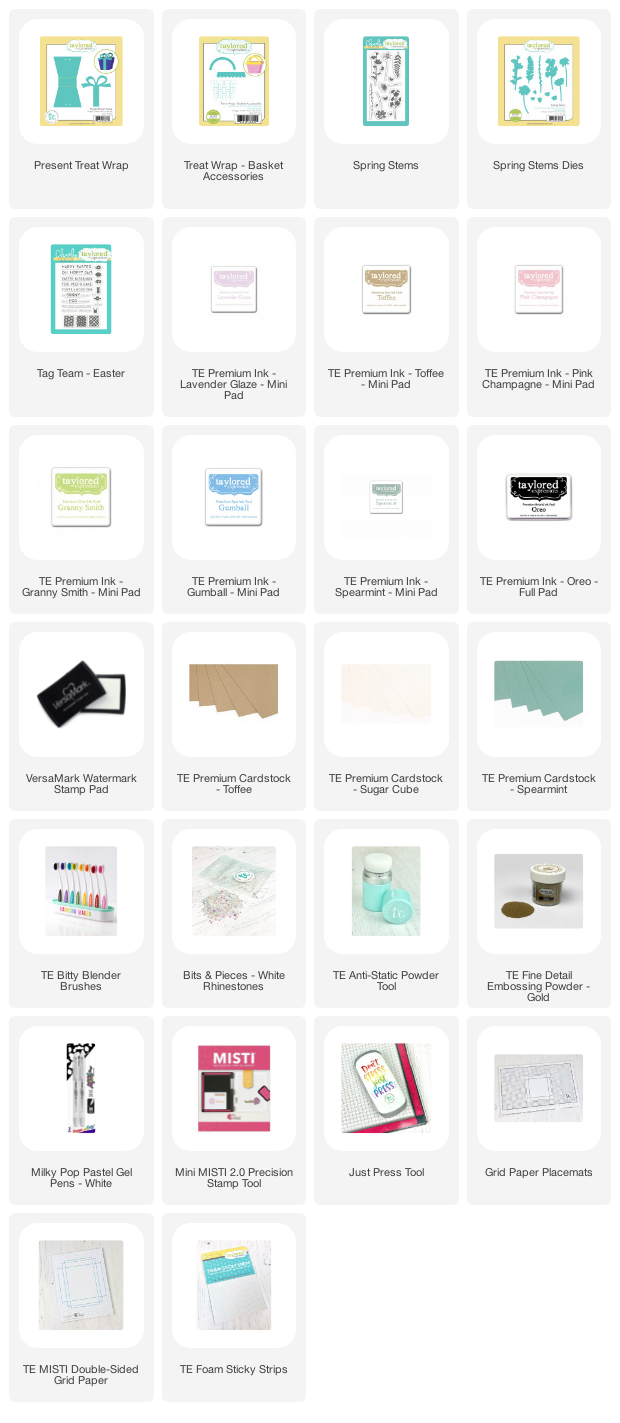
Check out the list below for the supplies that Joy used to create the treat basket:

Here is more inspiration from the TE Creative Team using the new products from this weeks release:
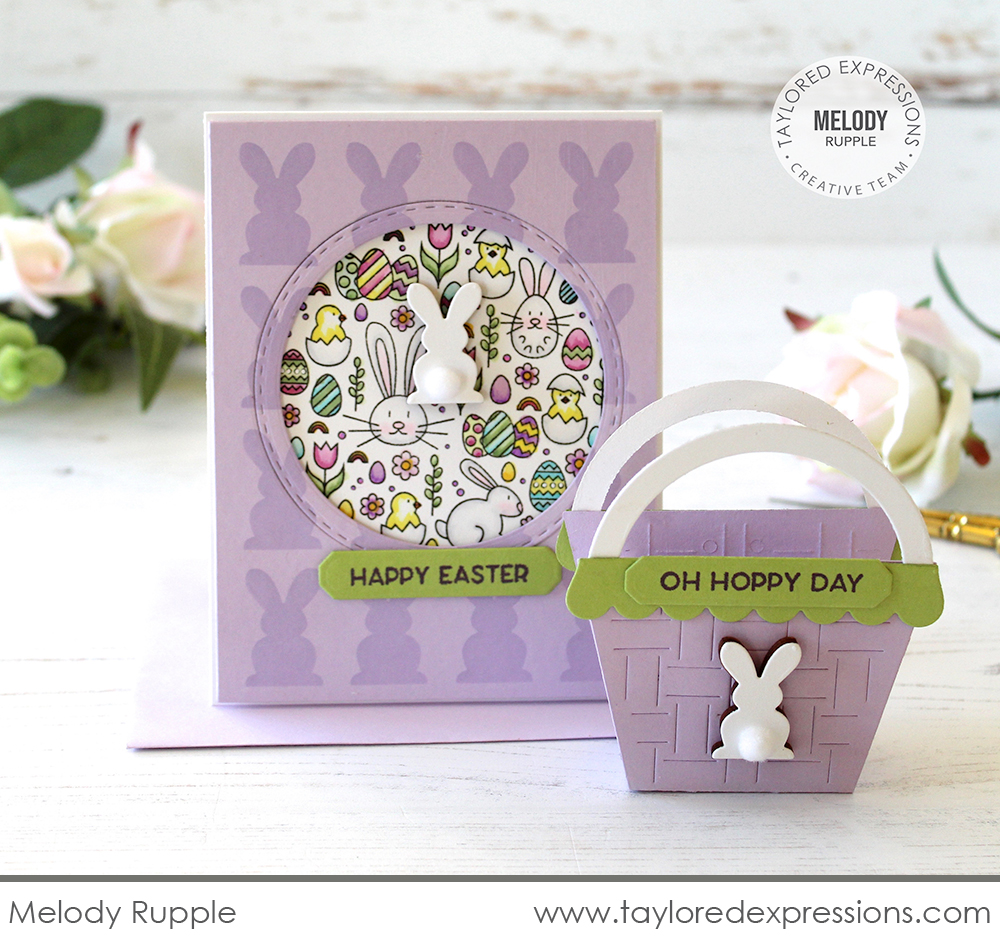
Melody Rupple put together this cute-as-can-be card and treat basket set for Easter using several of the new Easter goodies! The card features the main circle image from the new Full Circle – Easter stamp set. The image is stamped in Oreo Ink and color is added with Copic markers. The background of the card is stenciled with the Oh Hoppy Day stencil and Melody used the Little Bits – Oh Hoppy Day die to add a bunny to the center of the main image, complete with a fluffy bunny tail. The coordinating treat basket is created by pairing the Present Treat Wrap dies with the new Treat Wrap – Basket Accessories die collection.
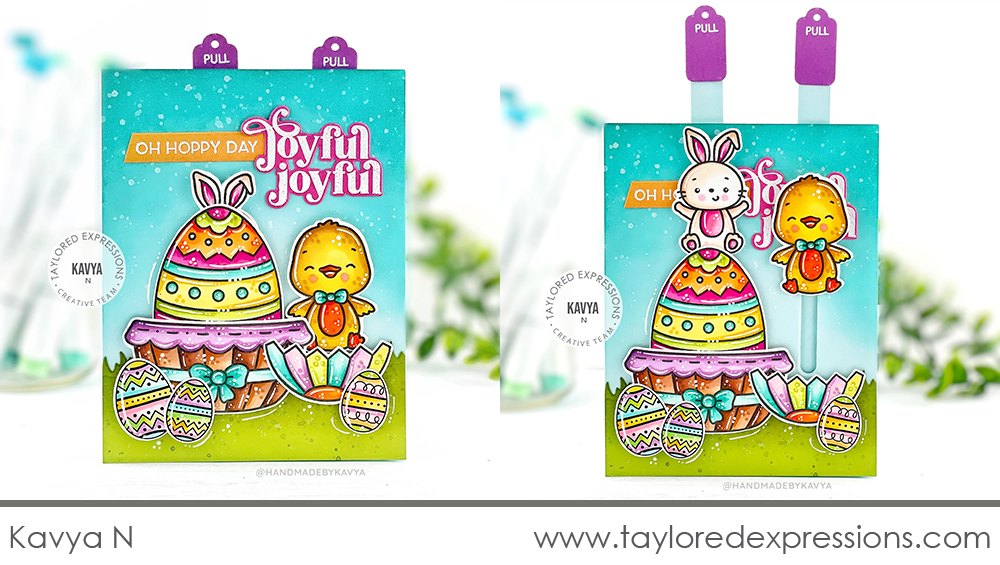
This Easter card created by Kavya will have you jumping for joy! Kavya created a sweet Easter scene with the Eggstra Sweet stamp set (+ coordinating dies), coloring it with Copic markers and a white gel pen. She added interactive elements with the On the Straight Track dies, On the Right Track Discs, and foam sticky circles. When you pull up on the tags stamped with the I’m Interactive stamp set, the bunny and chick jump up from the Easter eggs! The sentiment is put together with the Joyful Joyful stamp set and a sentiment from the Full Circle – Easter stamp set.
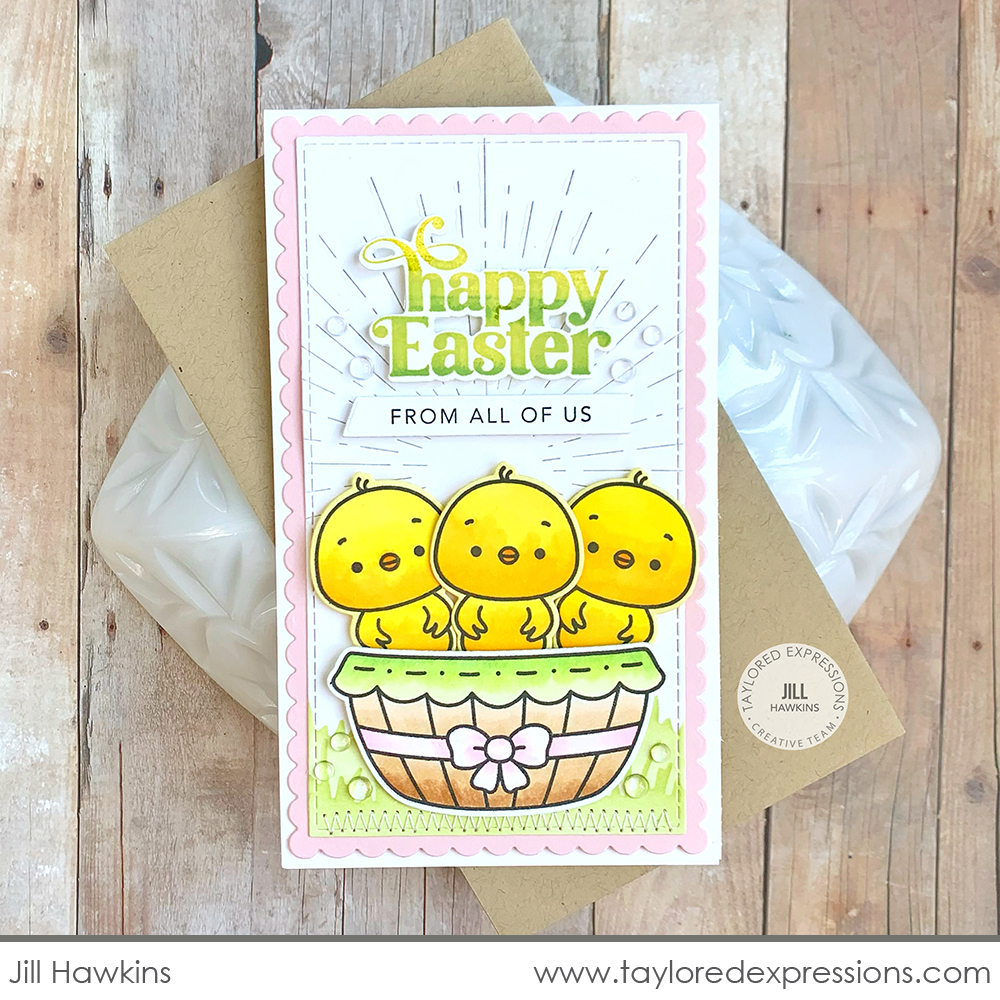
Jill Hawkins filled an Easter basket up with the cutest chicks on this Mini Slim card created with the Eggstra Sweet stamp set. The basket of chicks is set onto a background cut with the Rays Pierce & Cut Plate that Jill added grass to the bottom of using the Set the Scene – Grass Stencil Strips set. The ‘happy Easter’ sentiment is from the Joyful Joyful stamp set and is stamped with few shades of green ink to create an ombre look. The sentiment strip underneath is from the Mini Strips – Easter stamp and is cut out with the Mini Strips – Asymmetrical die.
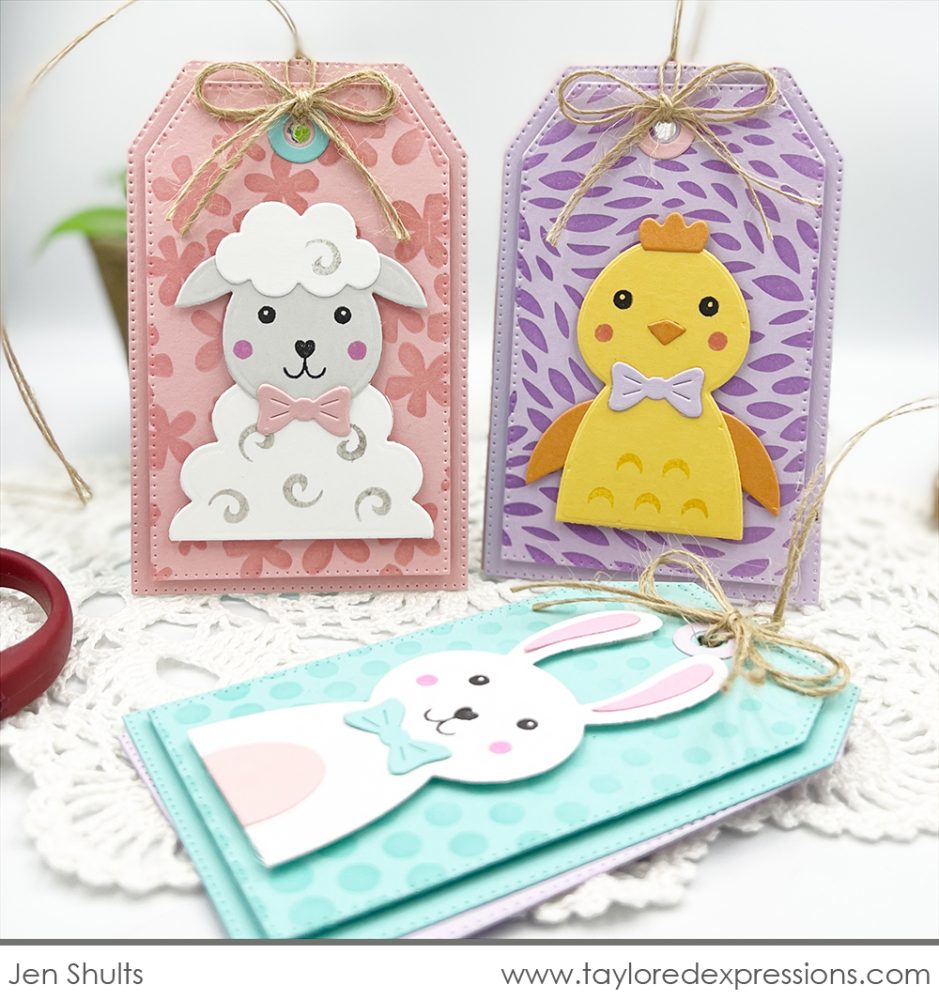
The Spring Squad Die & Clear Combo set enables you to create the cutest Easter tags around like these tags that Jen Shults made! These double layer tags are cut out with the Pierced Tag Stacklets 2 dies and are tied together at the top so the front tag can be lifted up like a card to add a message inside! The backgrounds are stenciled with a tone on tone look, using the same color ink as the cardstock. The critters are added to the front of the tags and now they are ready to tie onto to Easter treats!
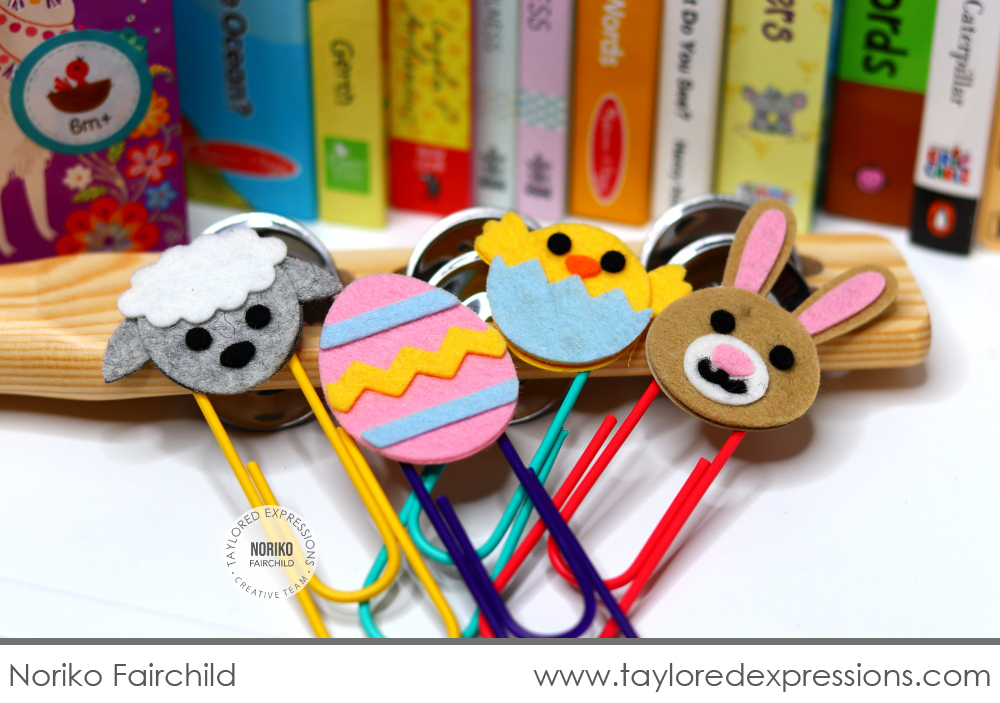
Creating a small easter gift is so quick and easy with the Critter Clips – Easter die collection and a few jumbo paper clips. Noriko Fairchild created this pile of Easter clips by cutting out the elements to create the different critters and Easter egg from felt, assembling them with glue, and adding them to the tops of the jumbo clips. The clips are perfect for marking your spot in your favorite books and Noriko reports that the larger clips even work well on board books!
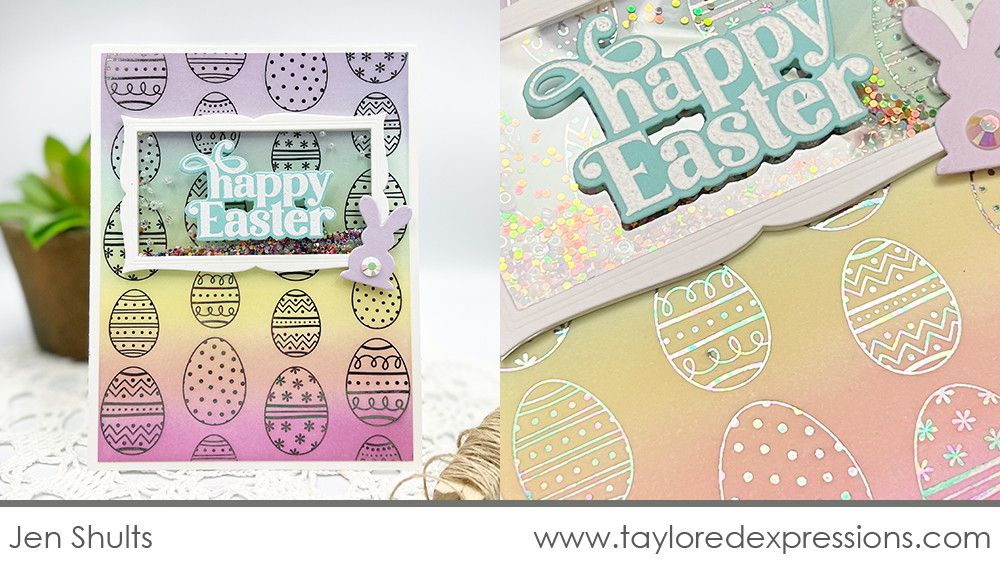
Jen Shults foiled up a bunch of eggs using the Foil It – Good Egg panels to create this fun Easter shaker card! The background panel is foiled with an Iridescent Deco Foil using a Minc machine (a heat laminator works well to foil too) and then Jen did a pastel tone rainbow blend over the top of the foiled design. The shaker element is created with a frame from the Frame in Frame Cutting Plate that is backed with acetate and added to the background with foam sticky strips. Jen filled the shaker with Bits & Pieces – Sparkly Circles and beads. The sentiment on the front of the shaker is from the Joyful Joyful stamp set and the cute bunny embellishment is cut out with the Little Bits – Oh Hoppy Day die.
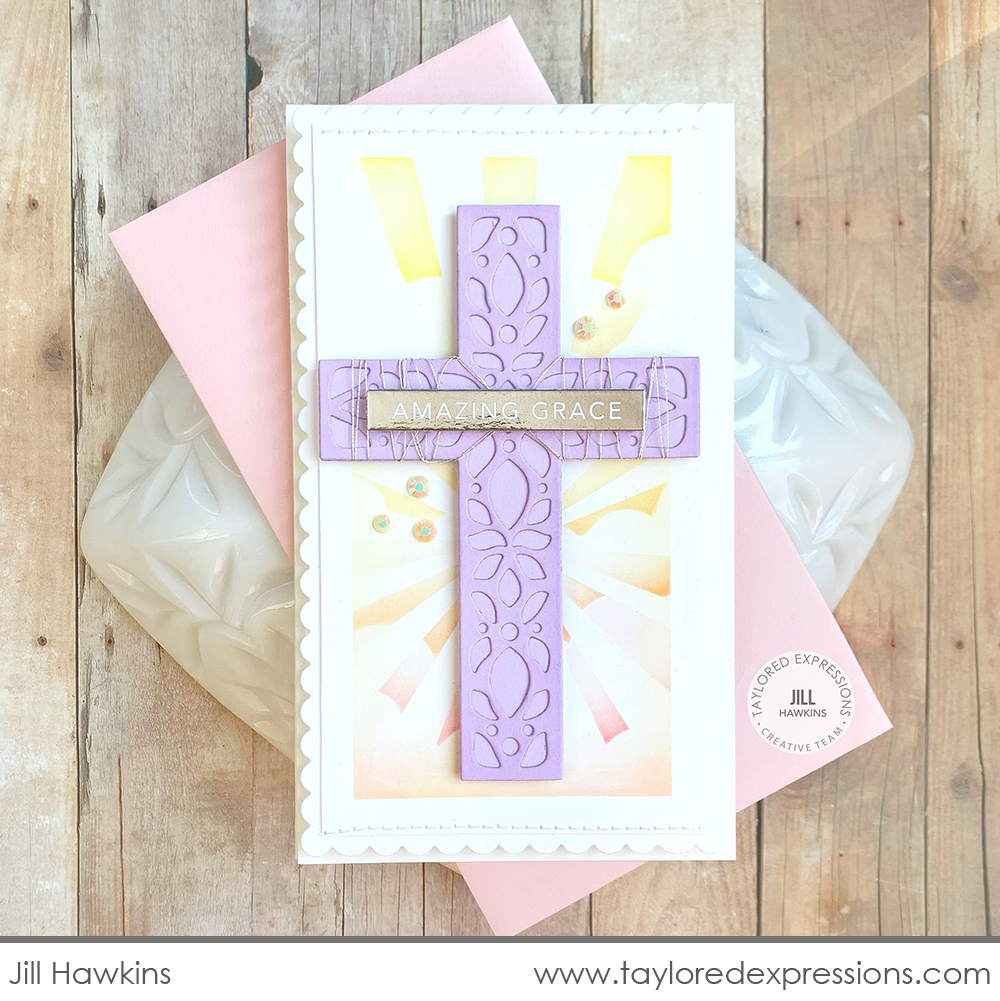
Jill Hawkins created a beautiful spiritual card to celebrate the reason for the Easter Season – and this card would be wonderful to use for other religious events throughout the year as well! She cut out two solid crosses using the At the Cross die collection. One of the crosses is also cut out with the detailed cross in the set and then the two crosses are layered together. Jill added the cross over a background that she created by stenciling the Set the Scene – Clouds Stencil Strips in pastel ink tones over the top of the Mini Slim Rotating Rays stencil. The sentiment strip is from the Mini Strips in Reverse – Easter set and is foiled with Silver Deco Foil.
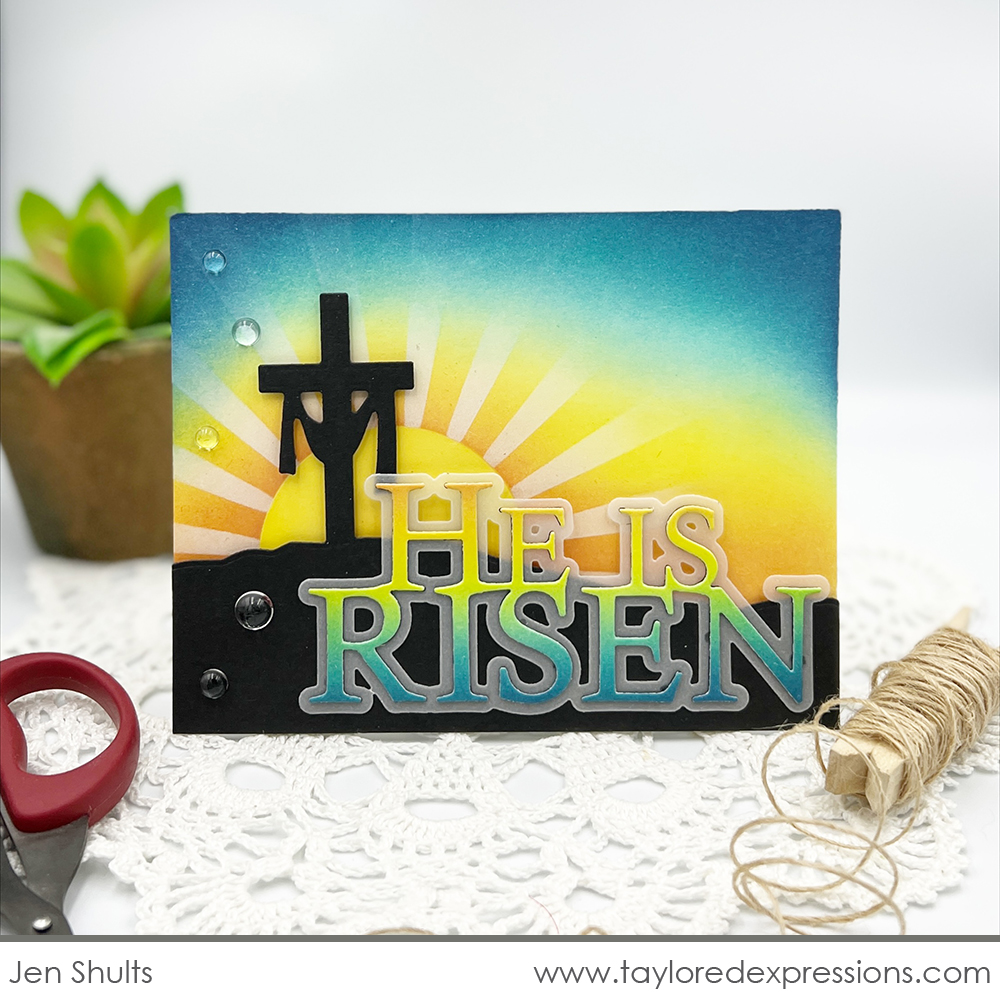
This stunning Easter card is created by Jen Shults using the new He is Risen and He is Risen Shadow dies. Jen did a color blend both on the background of the card and on the letters using Candy Corn, Lemon Meringue, Cookie Monster, Blue Raspberry, and Poblano Pepper ink. The sun is created with the Masking Stencils – Circles set and Here Comes the Sun stencil. The sentiment is backed with vellum and layered over the Third Day Border cut out from Oreo cardstock. Jen finished the look with a few Bits & Pieces – Clear Drip Drops along the left side of the card.

Today, join me (Heather Nichols) live for “T Time” at 10AM Central on the Taylored Expressions Facebook Page. I’ll be sharing Easter tags today that you can personalize for the special people in your life for adding to baskets, gifts, and more – come join in the fun! (Don’t worry, if you miss the live you can always watch the saved broadcast afterward!)
That wraps up the inspiration for our Easter release! We would love for you to share your crafty creations with the new Easter goodies on the Fans of Taylored Expressions Facebook Page – if you aren’t a member of the group, come join us to see all of the crafty TE inspiration that is shared. Next week on the blog brings you a new kit! Stop by this weekend for a sneak peek!
Did you know that you can subscribe to our blog and get our posts right in your inbox? Just sign up right HERE – that’s all there is to it to make sure you don’t miss any of our crafty inspiration!


