
Feb 20, 2025
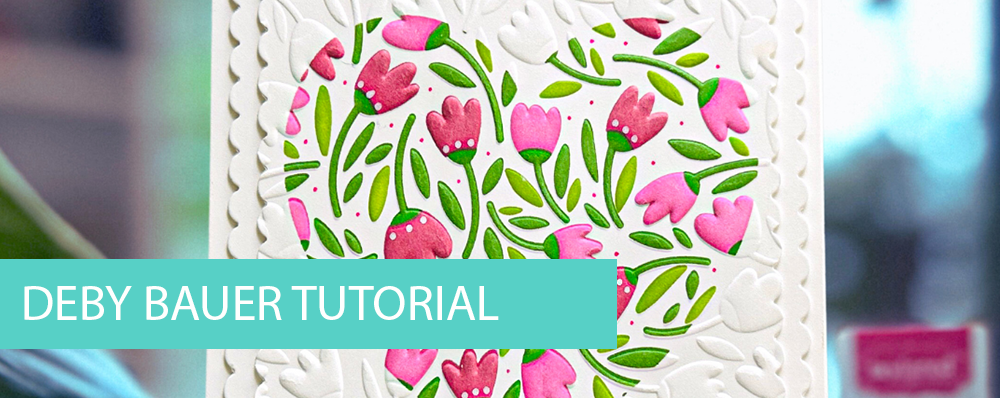
Creative Team Tutorial with Deby Bauer!
Hey, crafty friends, Rachel here! This week we open our Combo Club registration! If you want to learn more about that or register, click the button below to get more details. But that’s not all—today, I’m excited to share a fabulous tutorial from Creative Team member Deby Bauer!
Scroll down for step-by-step instructions on how Deby created her stunning card using the Blooming Botanical Embossing Folder + Blooming Botanical Layering Stencil. You might just pick up a fun new technique along the way! And don’t forget to join Heather Nichols live at 10 AM for more crafty fun.
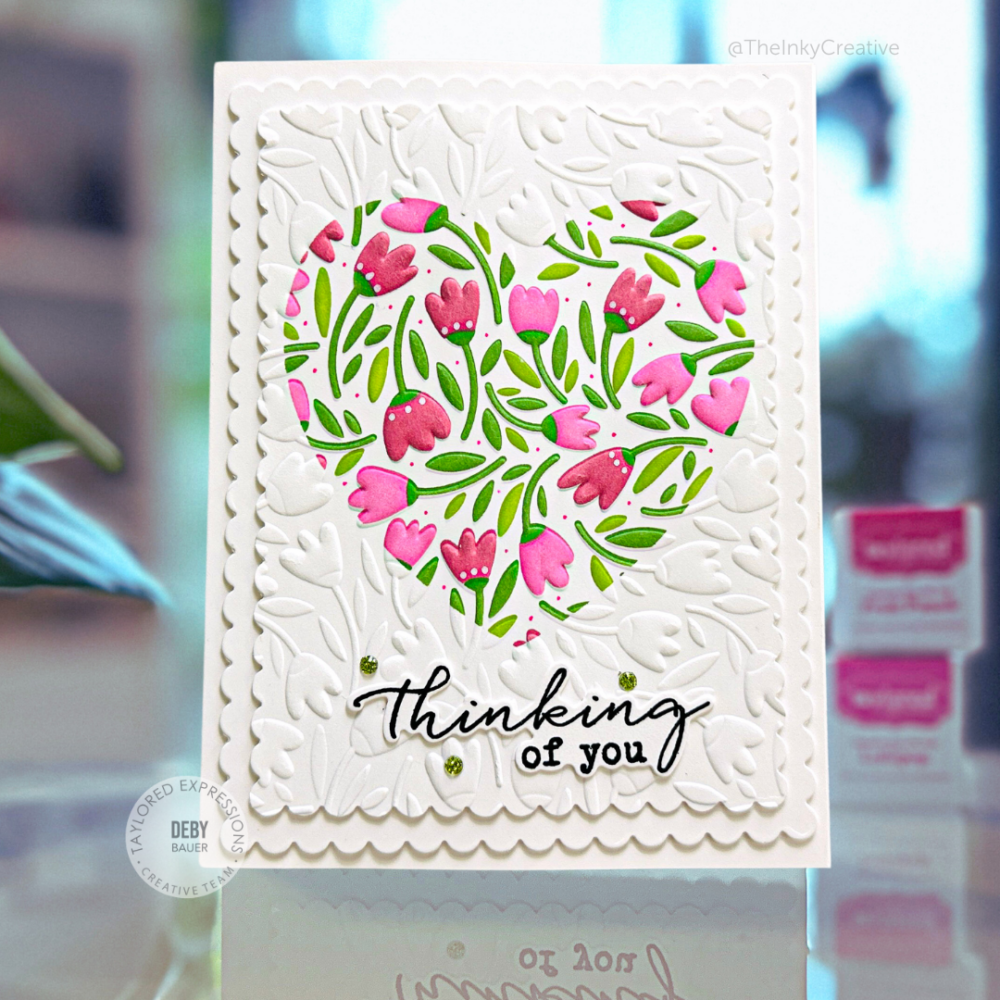
Deby’s Floral Heart Card Tutorial
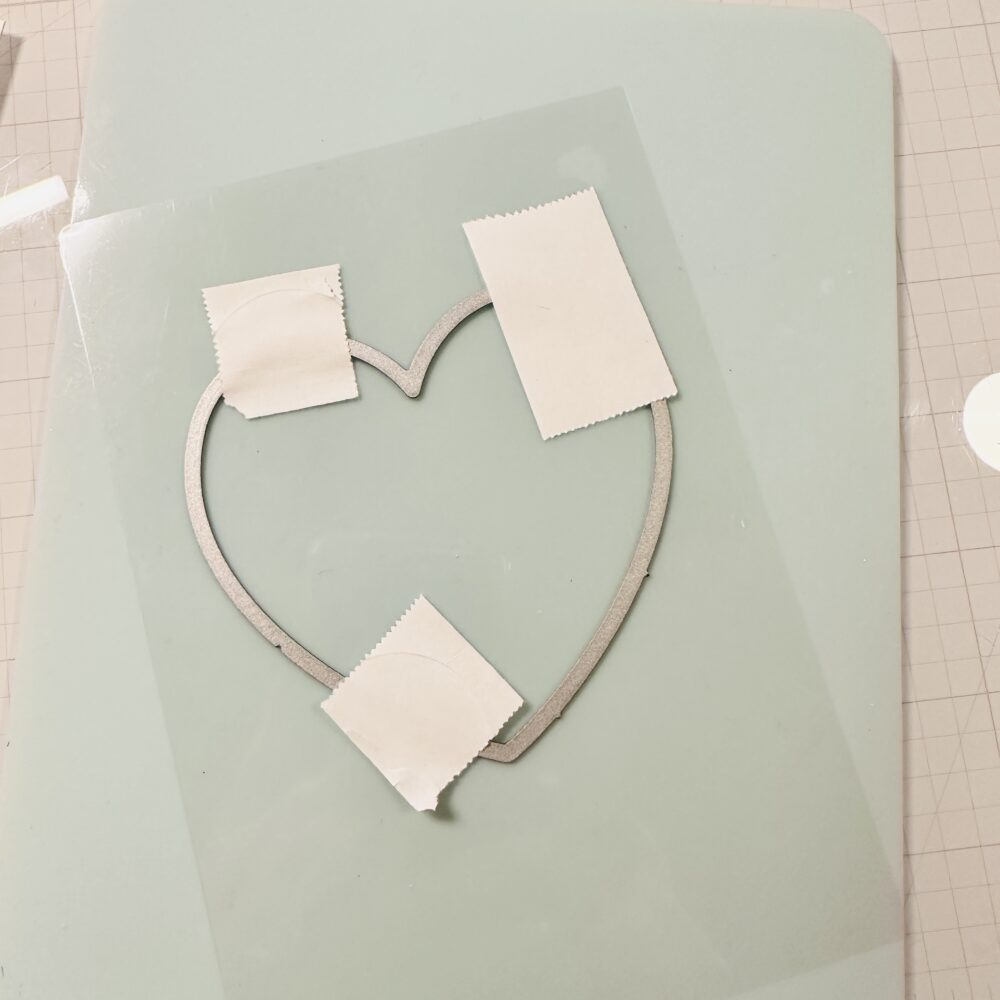
Step 1: Create a Masking Stencil
- Cut a piece of vellum slightly larger than your A2 sugar cube card front then center it on top of the sugar cube piece.
- Place the open heart die on top of the vellum, positioning it about 1-¼ inches from the top of the card front which is beneath the vellum.
- Tape the heart die in place with a few pieces of Post-It tape.
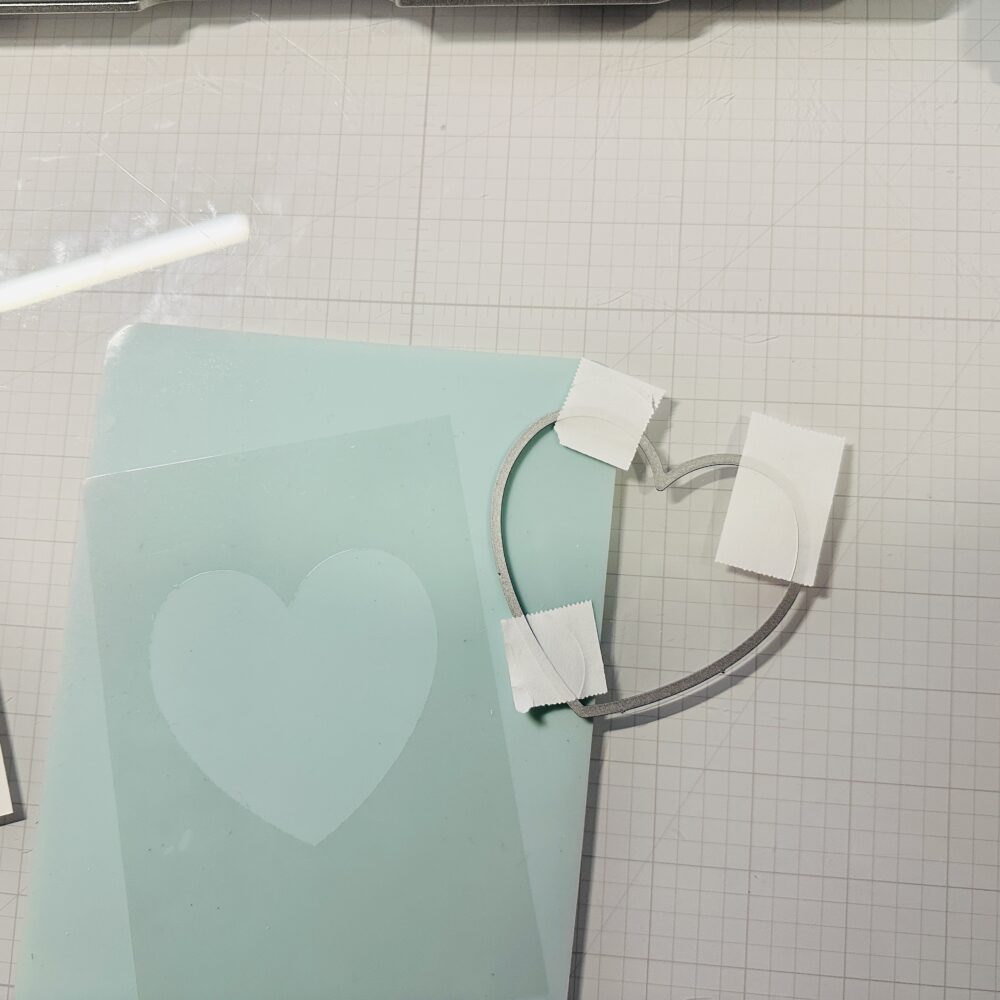
- Run the Vellum and heart die through your die cutting machine. You have just created a masking stencil!
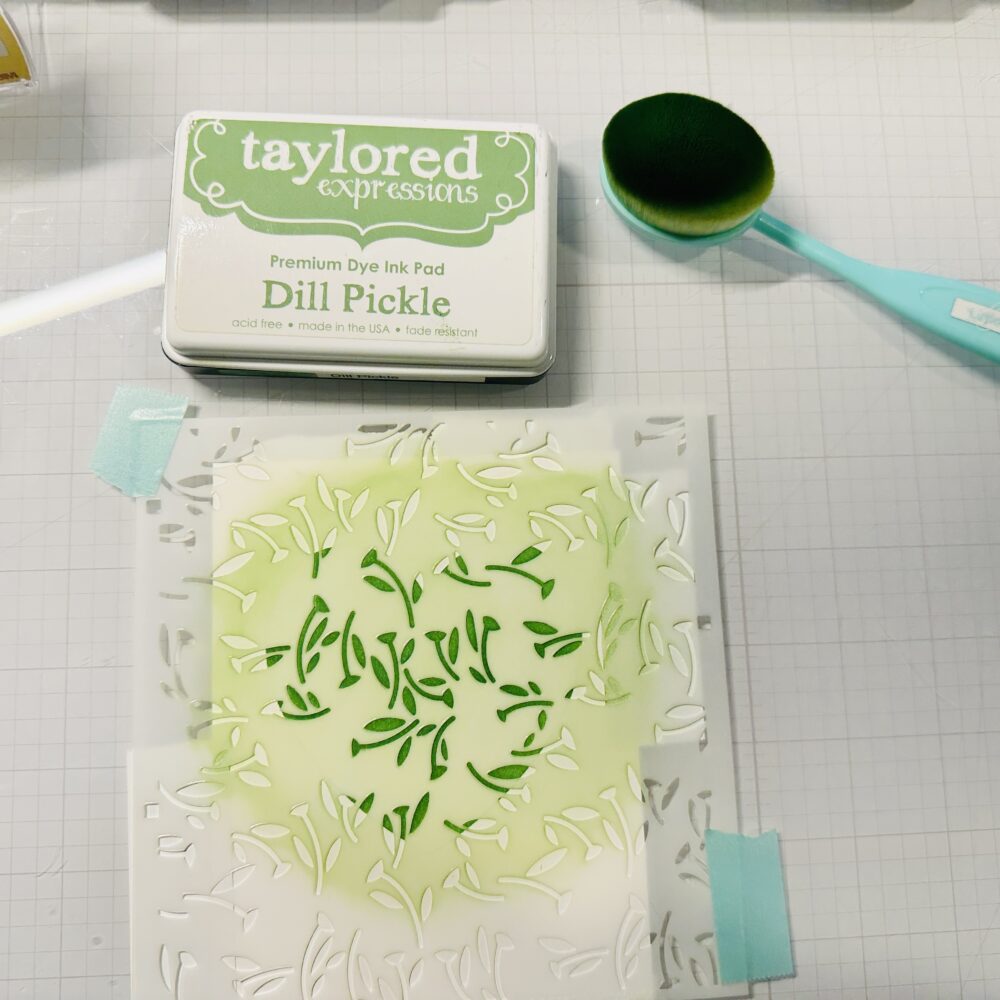

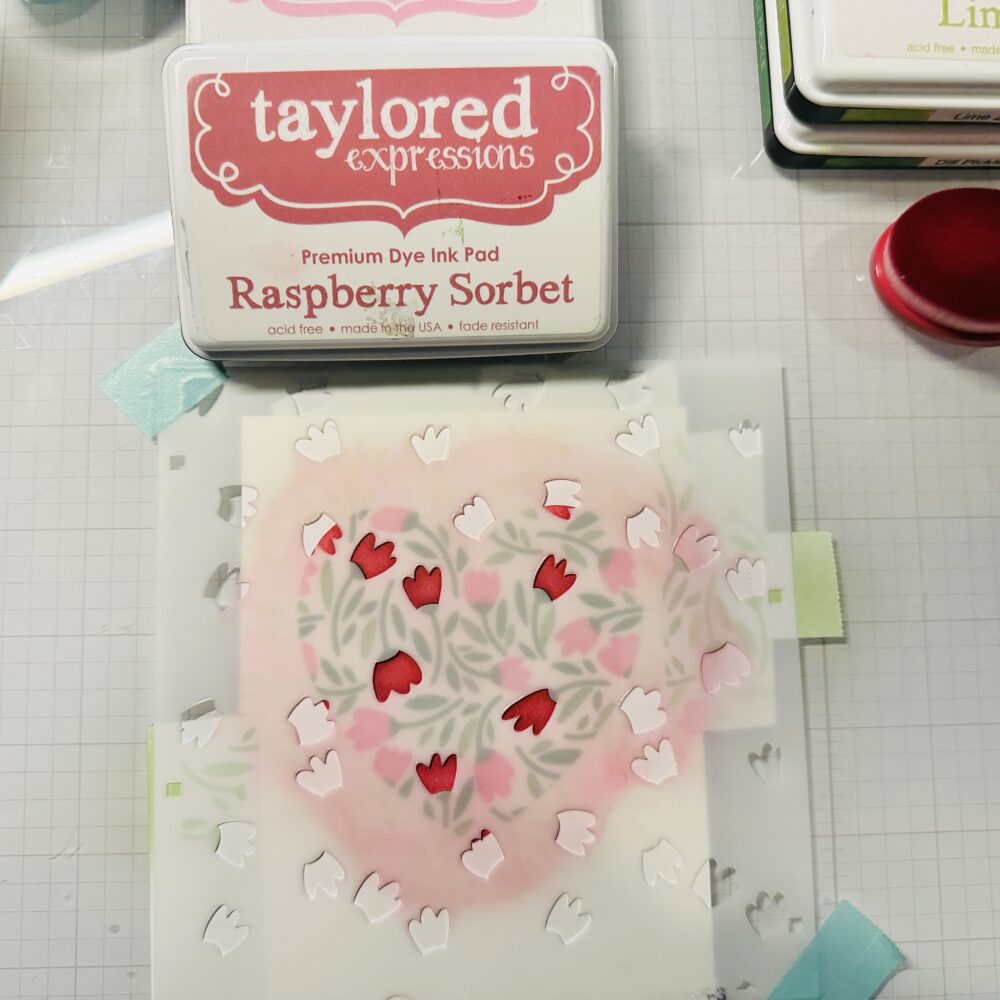
Step 2: Ink Blend the Heart using the Layering Stencil
- Now place your vellum stencil over the Sugar Cube card front and secure it with Post-It tape on the back in several places.
- Secure the vellum and card front to your work surface using teal tape.
- Grab the first stencil and your choice of ink and stencil over the visible heart-shaped area of the sugar cube card front.
- Continue ink blending each stencil until you’ve used all 4 of the layers.
Pro Tip: Deby uses a glass board for her work surface and put four pieces of Post-It tape where the stencil alignment squares are so she can easily line each stencil up perfectly.

Step 3: Add Embellishments (Optional)
- Use a pink gel pen to place accent dots in the white space around the design.
- Use a white gel pen to add highlighting dots on the darkest flowers.


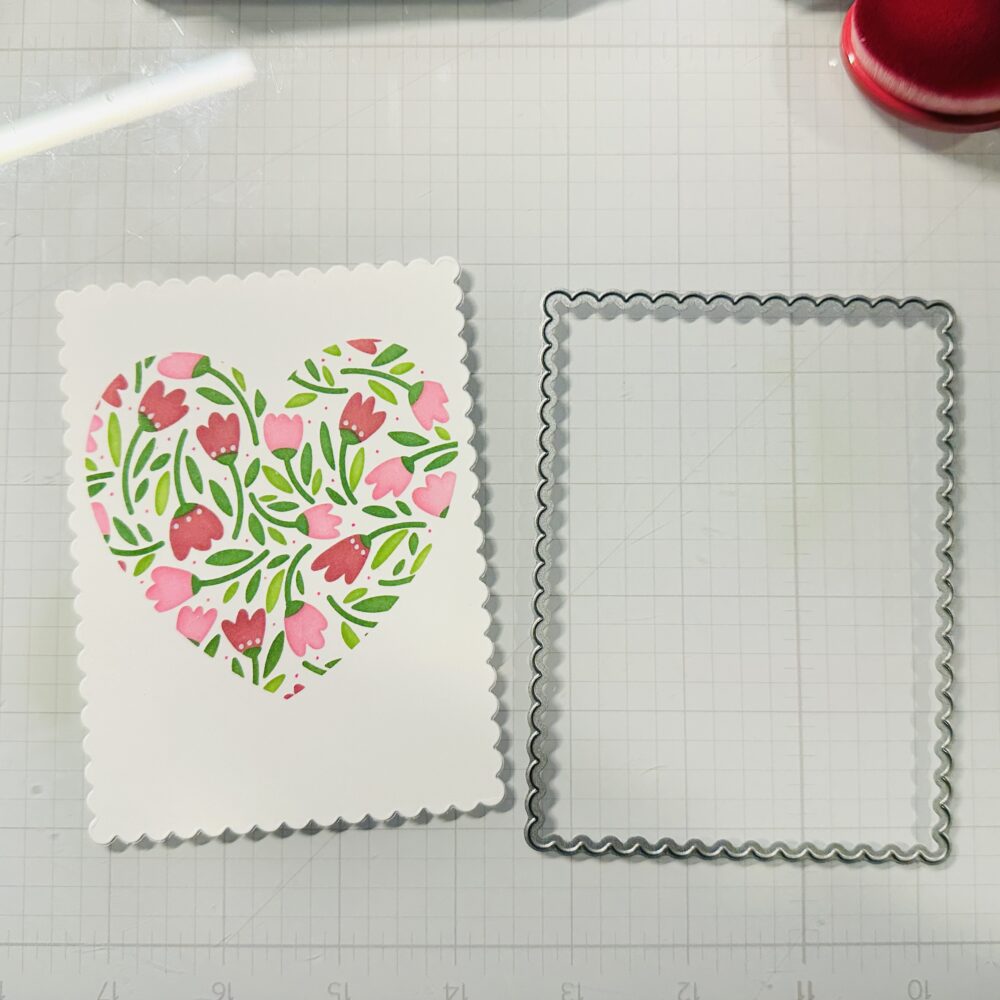
Step 4: Die Cut & Emboss
- Position the second-largest Petite Scallop Rectangle Stacklets die over the ink-blended heart panel so that you have even spacing on each side, still keeping the top of the heart about 1-¼ inches from the top, then die cut.
- Carefully line up the ink blended panel into the coordinating 3D embossing folder so the design lines up as perfectly as you can get it, then run that through your die cutting machine using the manufacturer suggested sandwich.
- Die-cut the largest Petite Scallop Stacklets die from Sugar Cube cardstock and set aside.

Step 5: Assemble the Card
- Prepare an A2 Sugar Cube card base (5 ½ x 4 ¼ in.)
- Adhere the largest scallop die-cut to the card base using foam adhesive strips.
- Layer the ink-blended, embossed panel on top with foam adhesive for extra dimension.
Step 6: Stamp & Emboss the Sentiment
- Using a scrap piece of sugar cube card stock, position it into your Misti then rub it with the anti static powder tool.
- Stamp your sentiment on a scrap piece of Sugar Cube cardstock using VersaFine ink and a MISTI. Stamp the image 2-3 times until you get a solid impression.
- Now take your sentiment and pour the clear embossing powder over top then melt it using your heat tool.
- Once that’s cooled, use the coordinating die to cut the sentiment.
- Cut an extra piece of cardstock with the die and stack it behind for extra dimension.
- Glue the sentiment to the card front.
Step 7: Finishing Touches
- Add three Green Glitter Drops around the sentiment for a touch of sparkle!
And that’s it! A beautifully textured, layered, and ink-blended floral heart card—perfect for a variety of occasions. Visit Deby’s blog at www.TheInkyCreative.com to learn more and see other projects!

Join Heather Nichols live at 10AM Central on the Taylored Expressions Facebook Page or on our Taylored Expressions YouTube Channel for a bright and cheerful project using the Easter Card Bundle. Plus, she’s spilling some exclusive tea about the Combo Club free gift for 6-month subscribers. You won’t want to miss this! (Don’t worry, if you miss any of our live broadcasts, you can always watch the live replay afterwards!)
Thanks for visiting the TE blog today. Stop by this weekend for a sneak peek at our newest cardmaking kit!

