Feb 09, 2021
Field Notes 2 – A Beautiful Bouquet
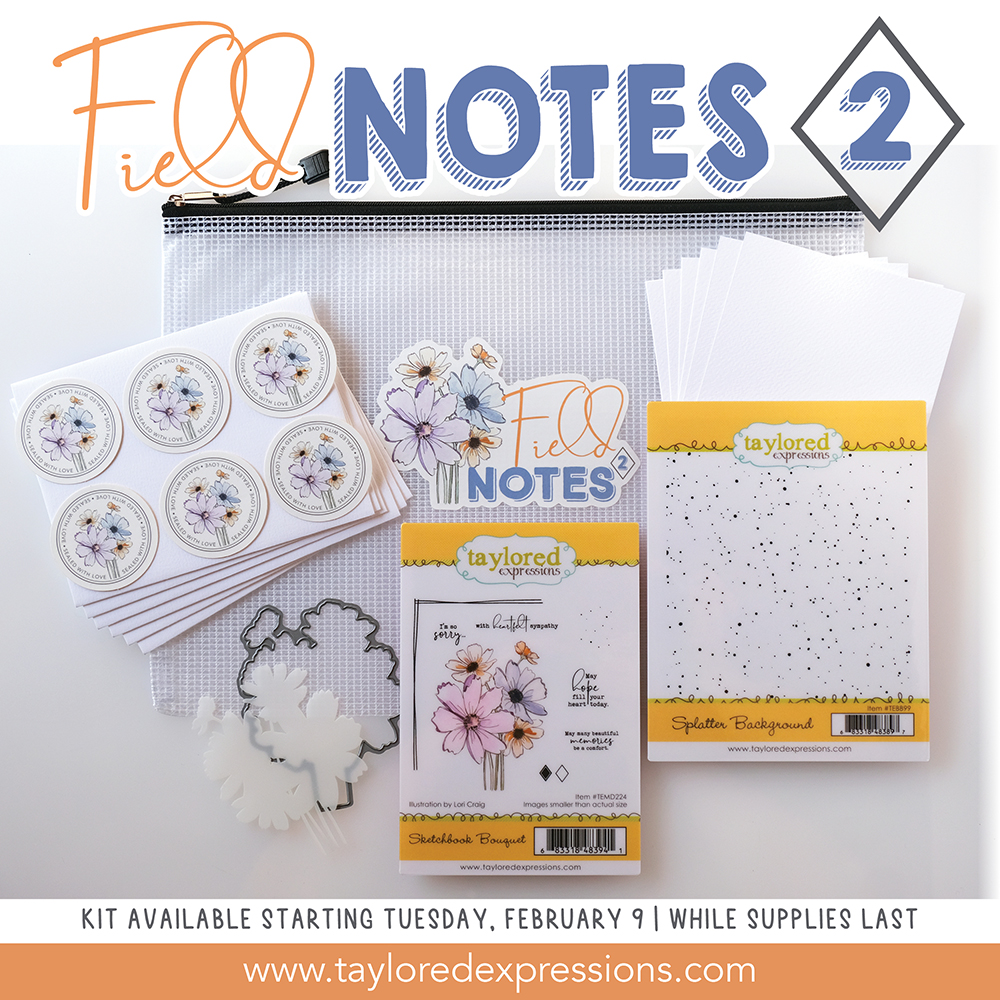
Hey, crafty friends! It’s Taylor here today and I’m super excited about the kit I have to share with you today! The perfect imperfection of Mother Nature is back for a special spring edition! Our Field Notes 2 Kit – inspired once more by the floral sketches drawn by Lori Craig – is here to help you welcome a change of season with stunning beauty! Use your imagination to create gorgeous projects that are filled with color and warm wishes!
So what’s unique about our kits? First, there’s no subscription necessary. Also, in keeping with our mission to Share Joy, we encourage you to send the cards you create by including six envelopes in a variety of colors along with six custom envelope seals to match the theme of the kit. Each kit comes packaged in a zippered pouch with a coordinating vinyl sticker making it easy to keep the supplies together.
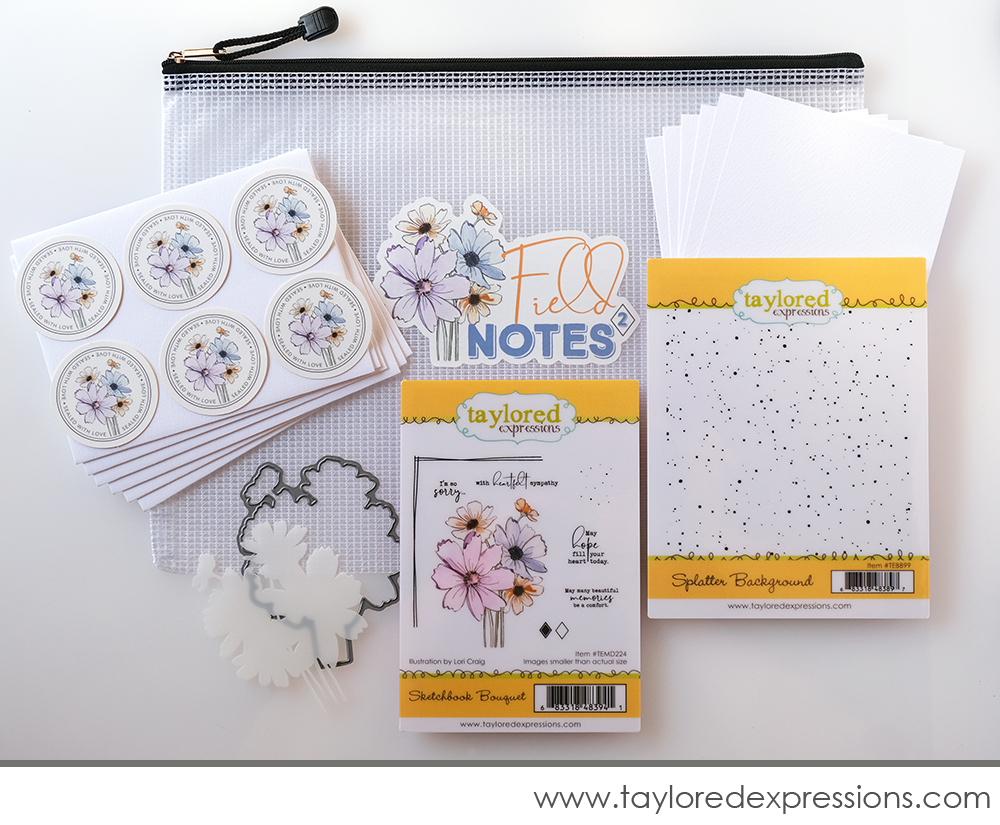
Here’s everything included the Field Notes 2 Kit – which retails for $55:
- Sketchbook Bouquet stamp set
- Sketchbook Bouquet Die
- Sketchbook Bouquet Stencil
- Splatter Background stamp
- 6 Watercolor 111 lb. A2 Cardstock Panels
- 6 Textured Watercolor A2 Envelopes
- 6 Custom Envelope Seals
- Packaged in a zippered pouch with a custom kit label
Limited quantity available. Most items not available to purchase individually.
Now, let’s get to that Field Notes 2 Kit inspiration from the TE Team!
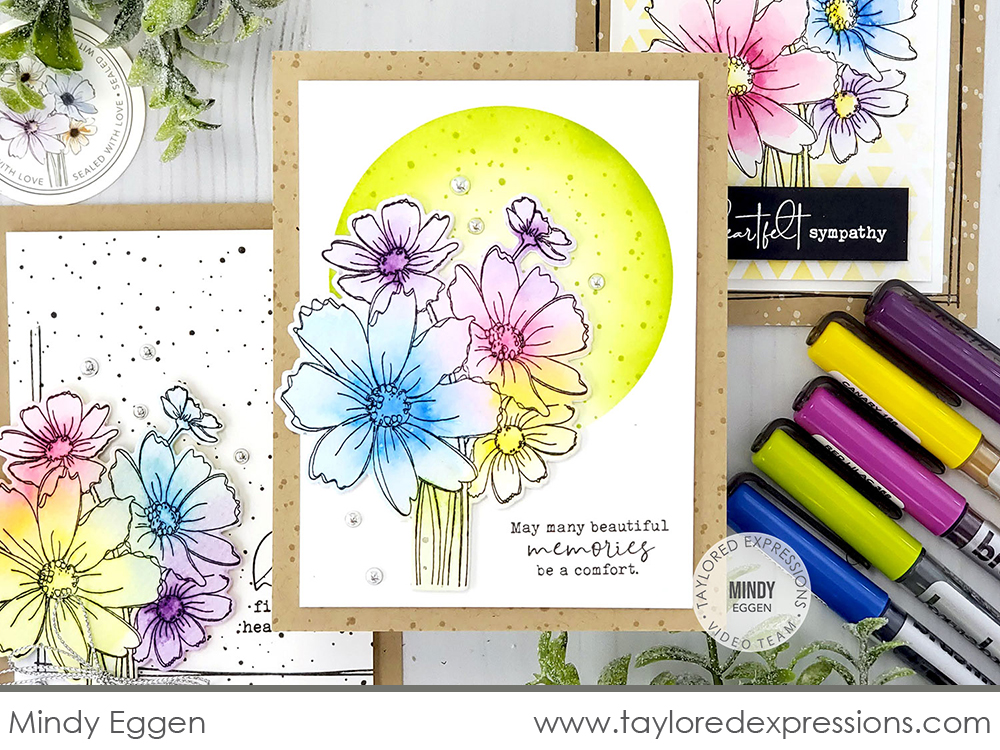
Today’s video is from Mindy Eggen and she is sharing set of cards that she created with the Field Notes 2 Kit. Watch below to see how the cards come together:
In the video, Mindy creates three cards using the Field Notes 2 Kit. She stamps the floral bouquet image onto the 111 lb. watercolor cardstock panels and adds color to the images using Karin BrushmarkerPRO markers in Taylor’s palette (you will learn more about our curated BrushmarkerPRO TE Palette Packs a little later in this post!) Mindy assembles each of the cards using different stamps and sentiments included in the Field Notes 2 Kit.
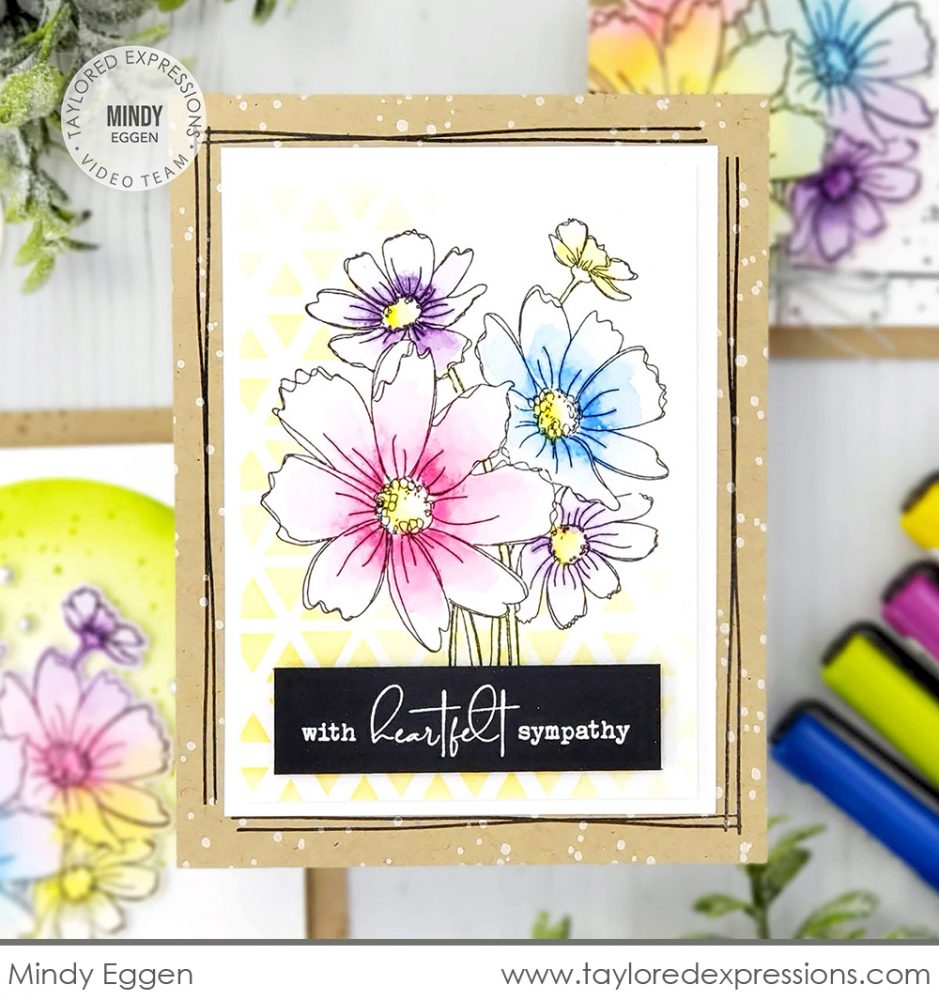
Mindy used the Sketchbook Bouquet stencil to mask off the floral bouquet on this card so she could add a stenciled background around it using the Play the Angle stencil and her Blender Brushes with Pineapple ink. The Toffee card base is stamped with the Splatter Background in Sugar Cube ink and the sketched lines in Oreo ink to add a frame around the main image. The ‘with heartfelt sympathy’ sentiment is embossed in white on a piece Oreo cardstock and set at the base of the flowers.
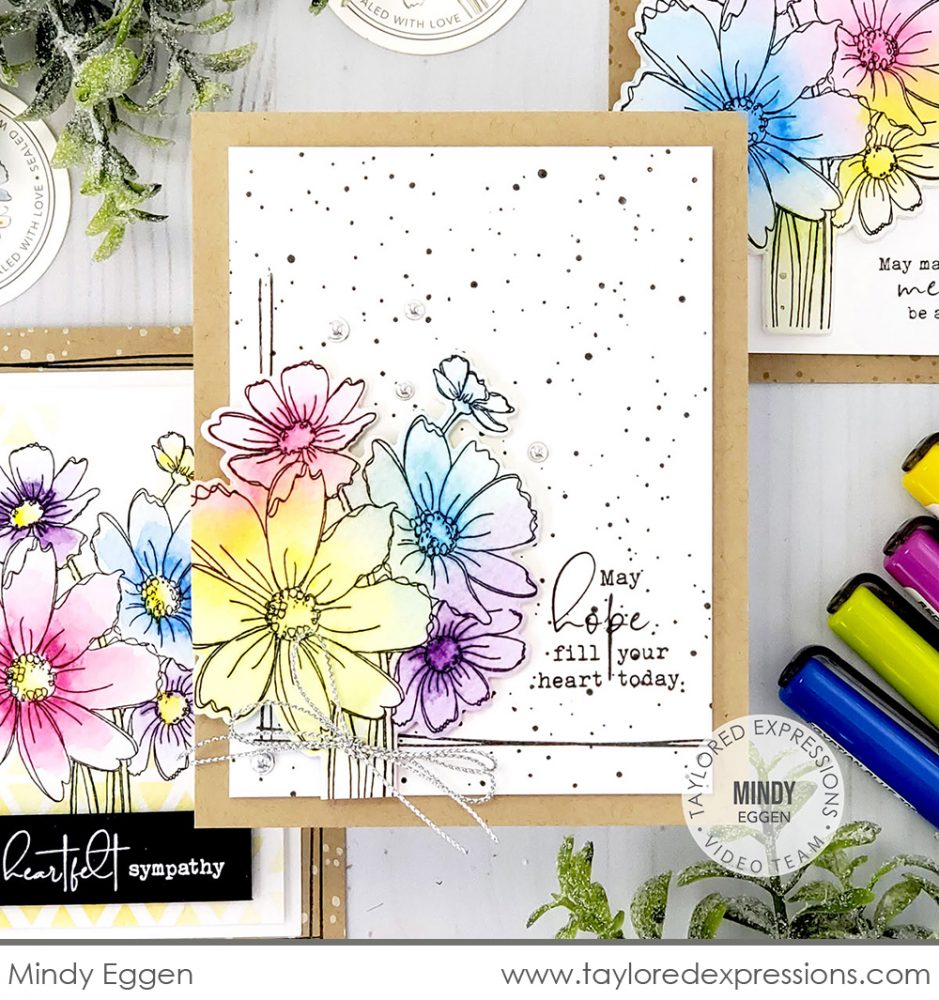
I love the rainbow blends that Mindy painted on the floral bouquet for this card! She let those pretty colors shine by adding them to a neutral background that is stamped with the Splatter Background stamp using Oreo ink on Sugar Cube cardstock. The sketched line stamp adds the perfect landing spot for the flowers and the extra shine from the Bits & Pieces – Silver Drip Drops and silver twine are the perfect touch!
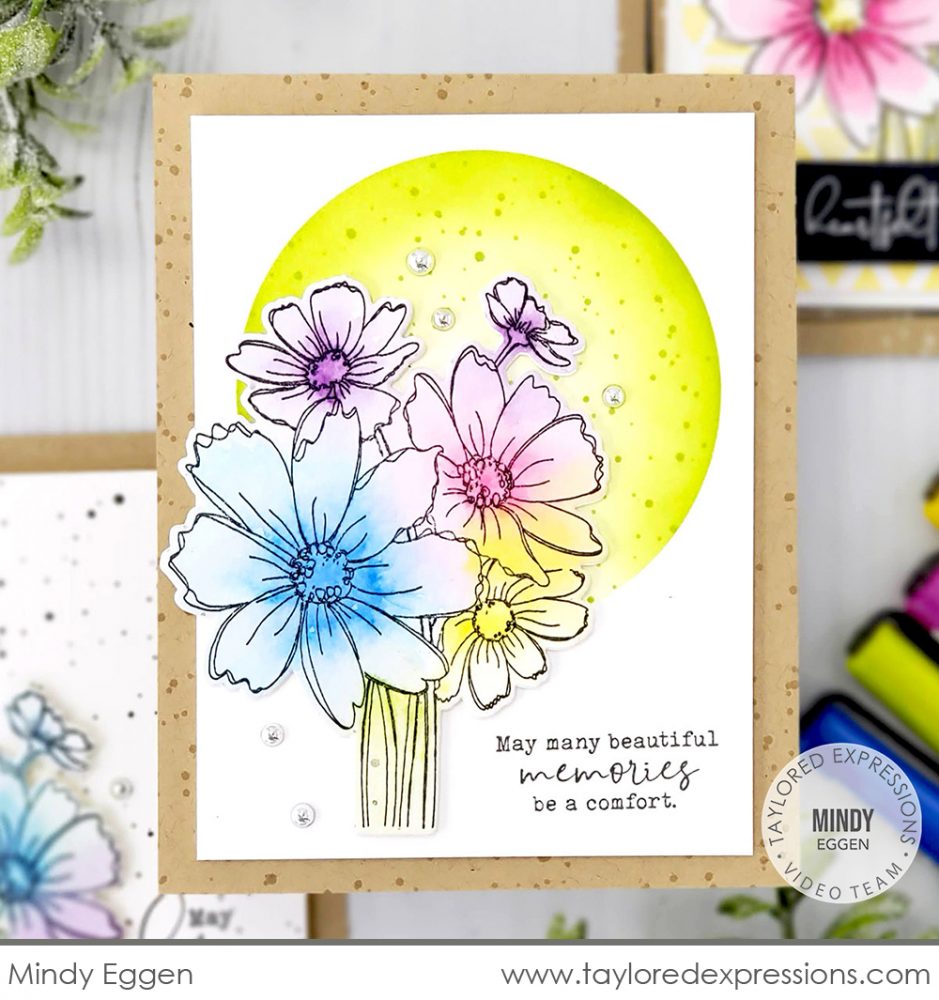
The background on this last card is another great way to highlight a focal image on your card like the floral bouquet from the Sketchbook Bouquet stamp set. Mindy used the larger circle stencil from the Masking Stencils – Circles set to stencil the circle with Lime Zest ink and left the masking stencil in place to add the spatters. It’s such a great look that I can see myself using on many different projects! I spy more Bits & Pieces – Silver Drip Drops on this card too!
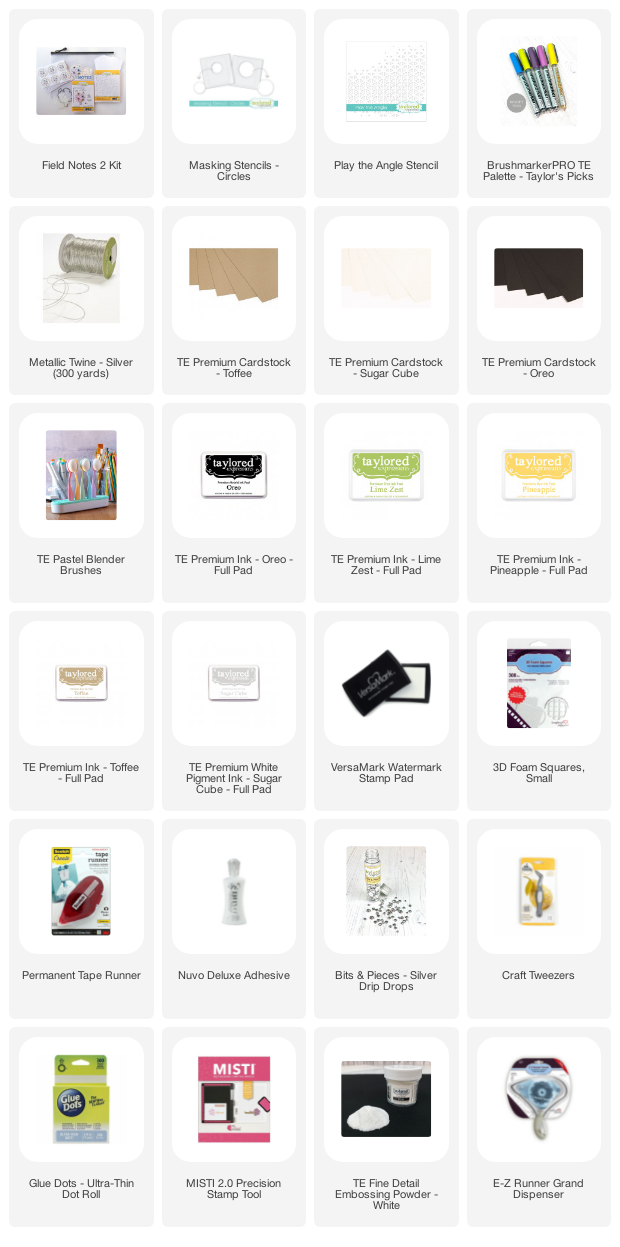
All of the supplies that Mindy used on her projects are included in the list below:

Now, let’s take a closer look at the different elements of the kit as well as more inspiration from the TE Creative Team. Note: Some of these items are only available as part of the Field Notes 2 Kit.
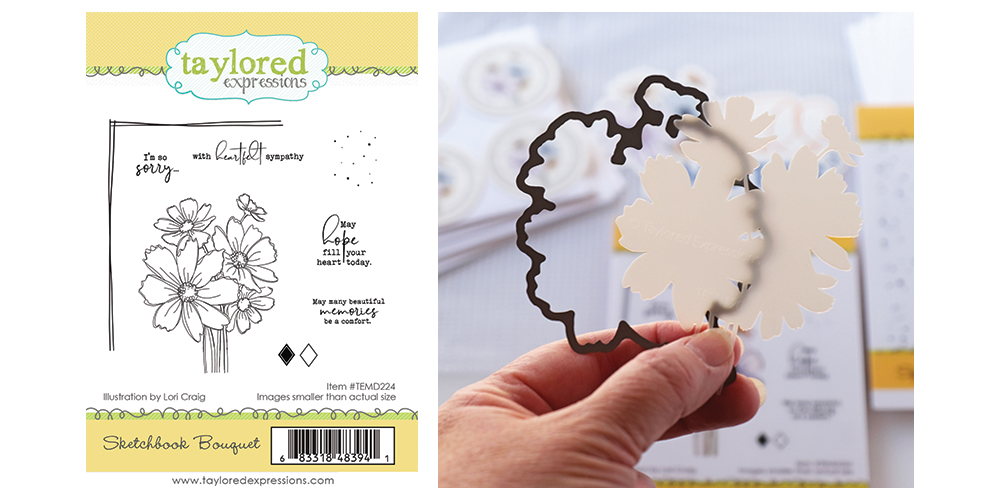
The Sketchbook Bouquet stamp set includes a sketched style bouquet of flowers that you will love coloring with your favorite coloring mediums: watercolor paints, colored pencils, markers, and more. Add the perfect details to your projects using the border lines, diamond accents, and spatter stamps. The set also includes four sentiments to send love and comfort to your loved ones. The coordinating Sketchbook Bouquet die and stencil expand the design possibilities with the flower bouquet on your projects.
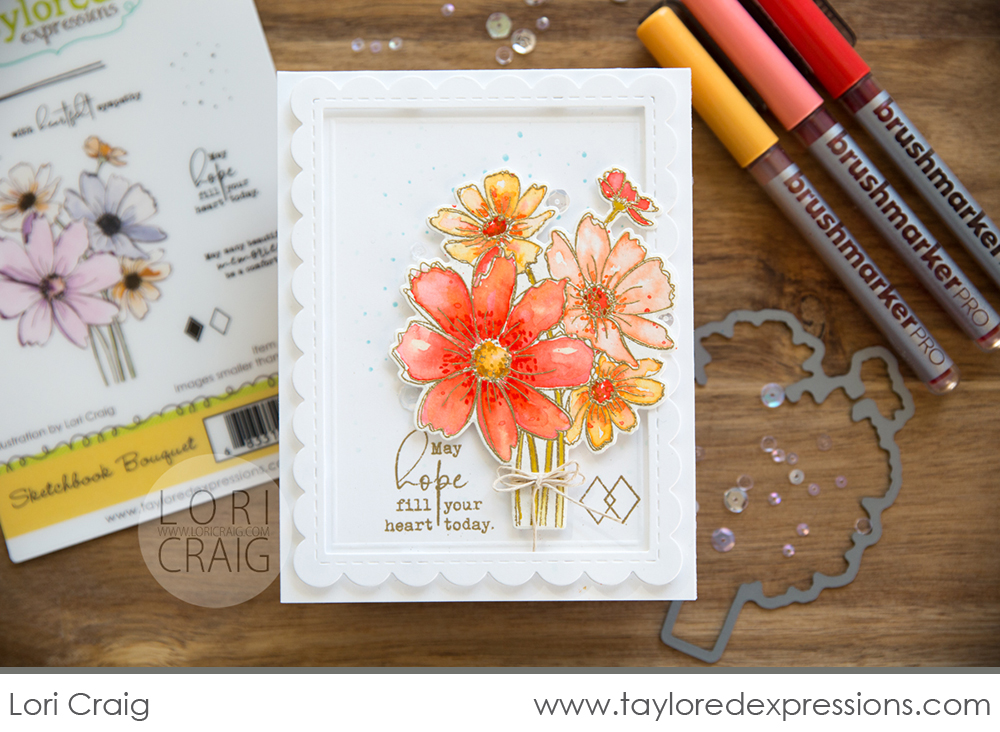
This first card is from our kit illustrator, Lori Craig! Lori embossed the floral bouquet in gold and added color using Karin BrushmarkerPRO markers. I love how she framed her card with a Frame in Frame 2 Cutting Plate die cut that is popped up just a bit to create a shadowbox effect. Lori also embossed the sentiment and diamond details in gold and she stamped the spatters so that they fall behind the die cut floral bouquet image. A few other great details I spy on this card are the embossed lines inside the frame and the twine tied around the bouquet stems!
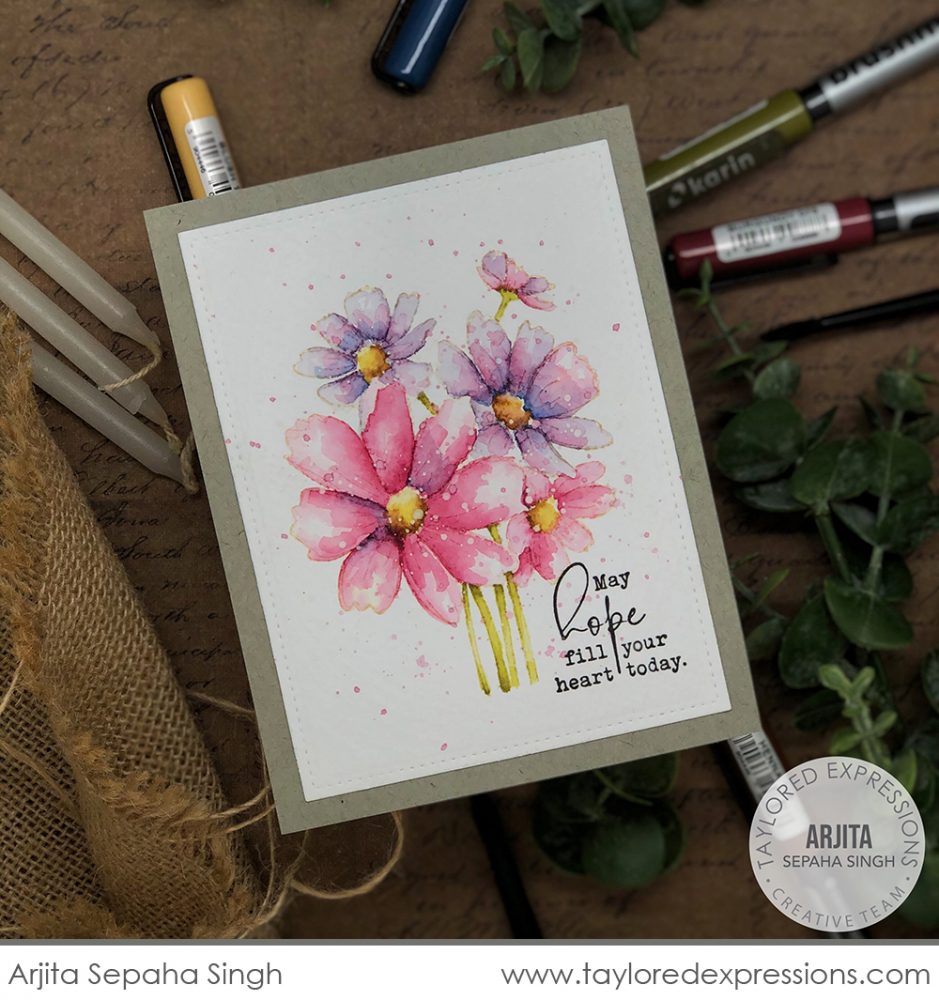
I always anxiously await to see what Arjita Sepaha Singh comes up with when we have new floral sets and my jaw dropped at this amazing no line technique card that she did with the Sketchbook Bouquet stamp set! Arjita stamped the image with a light tones ink (Sea Salt ink is great for this technique) and then added color with the Karin BrushmarkerPRO markers. These markers are so great to use for watercolor techniques!
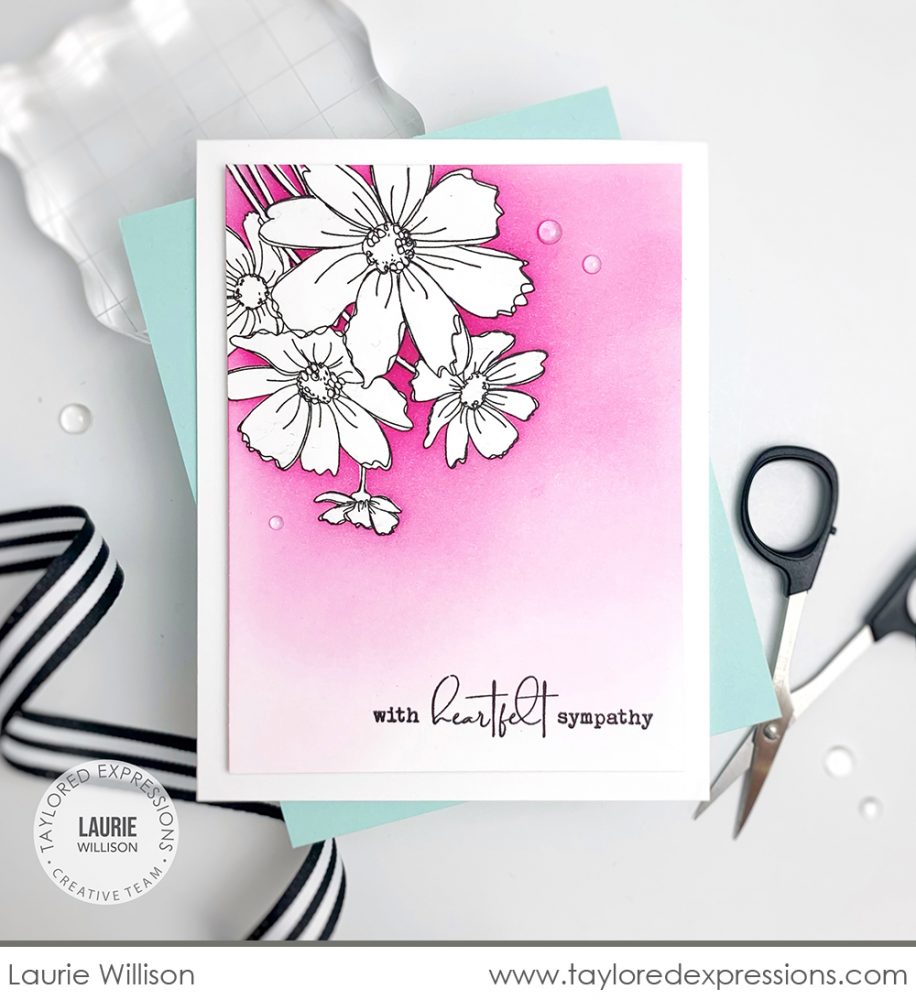
Laurie Willison used the Sketchbook Bouquet stencil to mask the floral bouquet image to create this clean and simple card design. I love how she left the floral bouquet uncolored with the pop of pink color all around it! You could quickly create a set of cards like this in a number of different color variations. Think of the possibilities there are with adding different colors and patterns with stencils, stamps, etc. around the masked floral bouquet image!
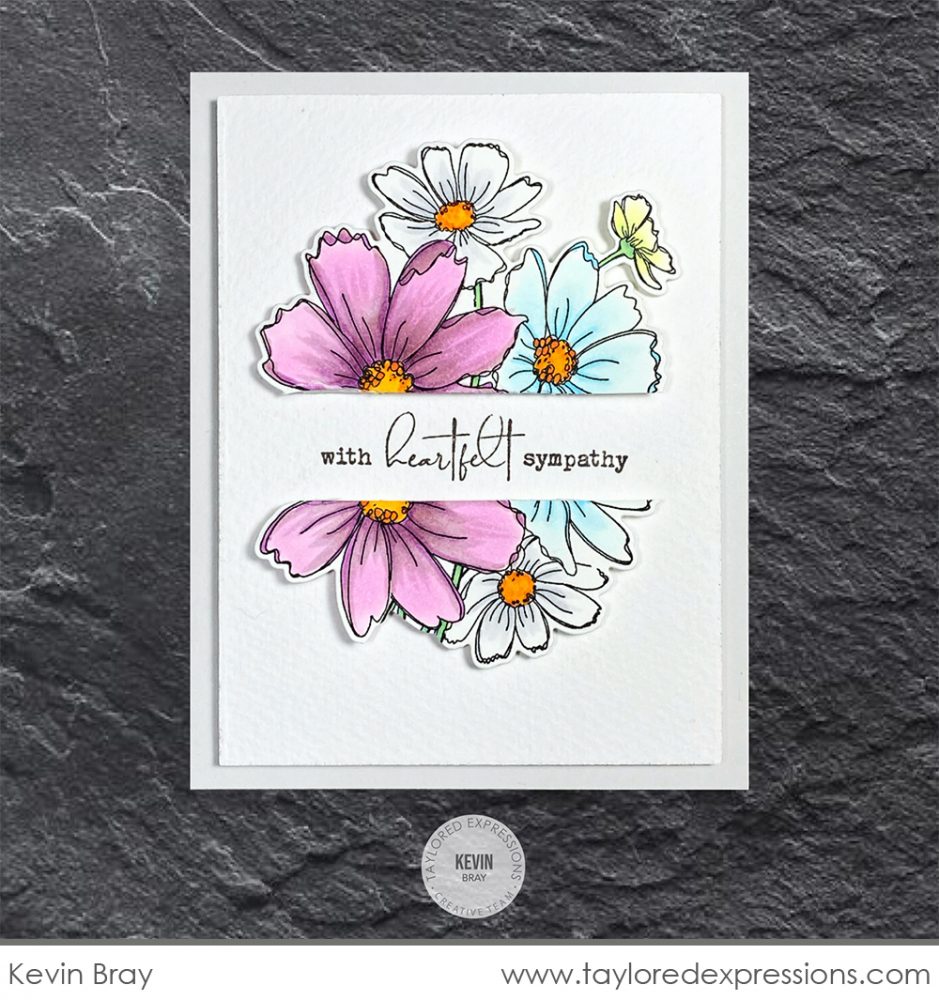
I really like this ingenious idea from Kevin Bray! He colored the floral bouquet from the Sketchbook Bouquet stamp set with Copic markers, cut it out with the coordinating die, trimmed off the stems, and then cut it right through the middle. He took the pieces and attached them to the card front, leaving a space wide enough for the stamped sentiment. Now I am looking at other images in my collection to see what I could use this same idea with!
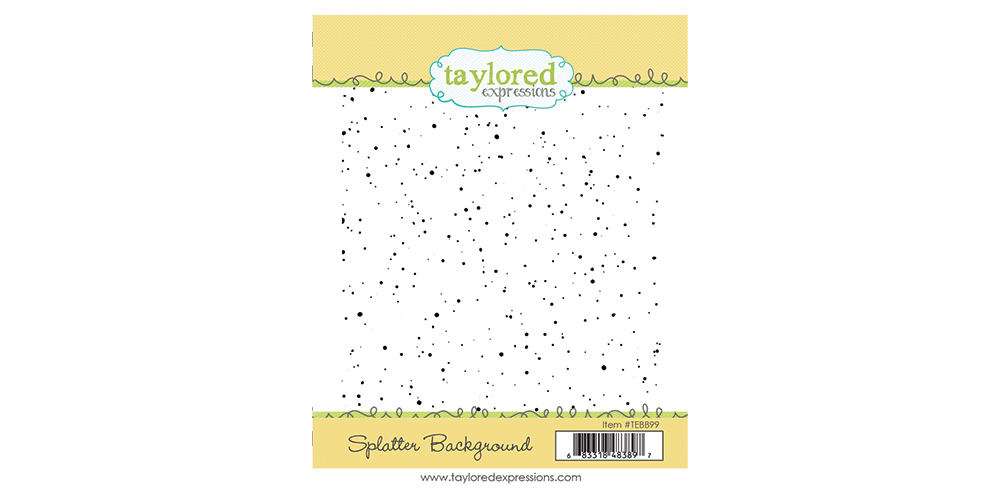
Is adding splatters to your projects a look you want, but a challenge for you to achieve? The new Splatter Background stamp makes adding the perfect splatters to your project so easy! With one impression you can add splatters to your A2 backgrounds without dragging out extra tools to do it. You can even experiment with selective inking and/or using the smaller splatter stamp in the Sketchbook Bouquet stamp set to achieve different looks.
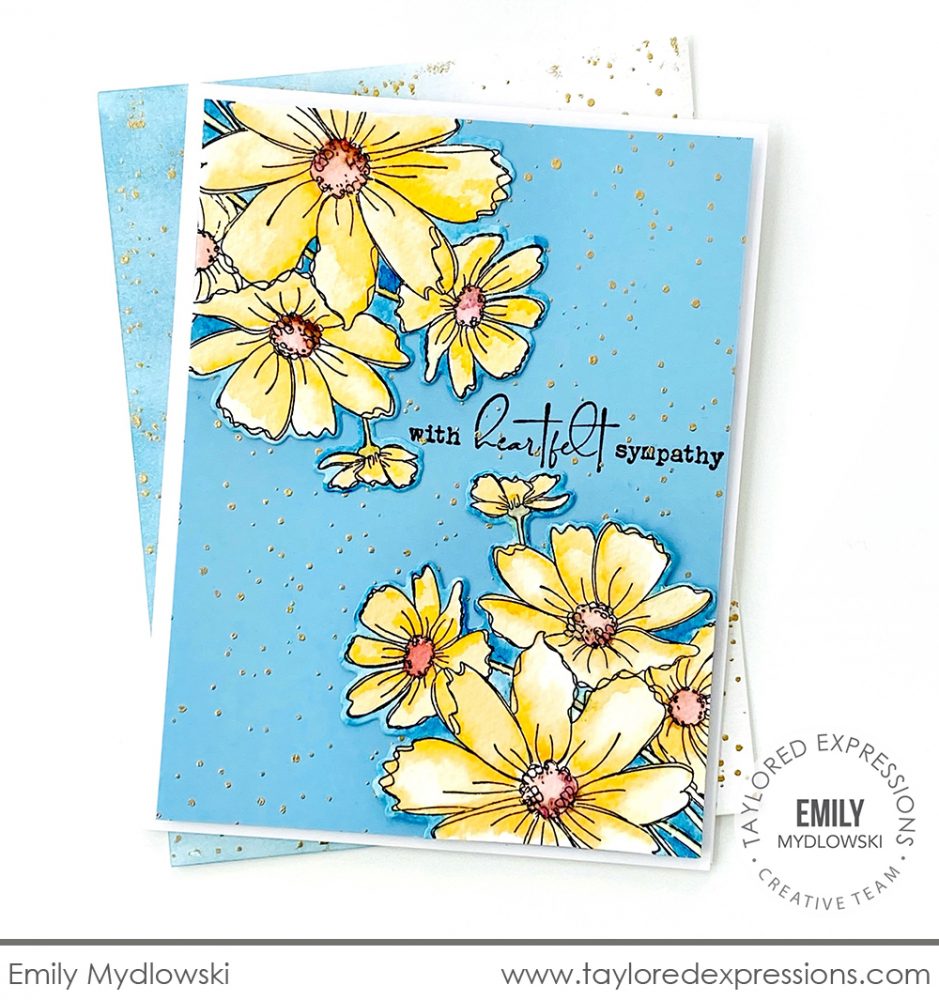
Emily Mydlowski created gold splatters on her project by stamping the Splatter Background stamp in VersaMark Ink, adding gold embossing powder, and heating it with a heat tool until the embossing powder became shiny. The splatters are the perfect elegant touch to her watercolored blooms adorning the corners of this sympathy card.
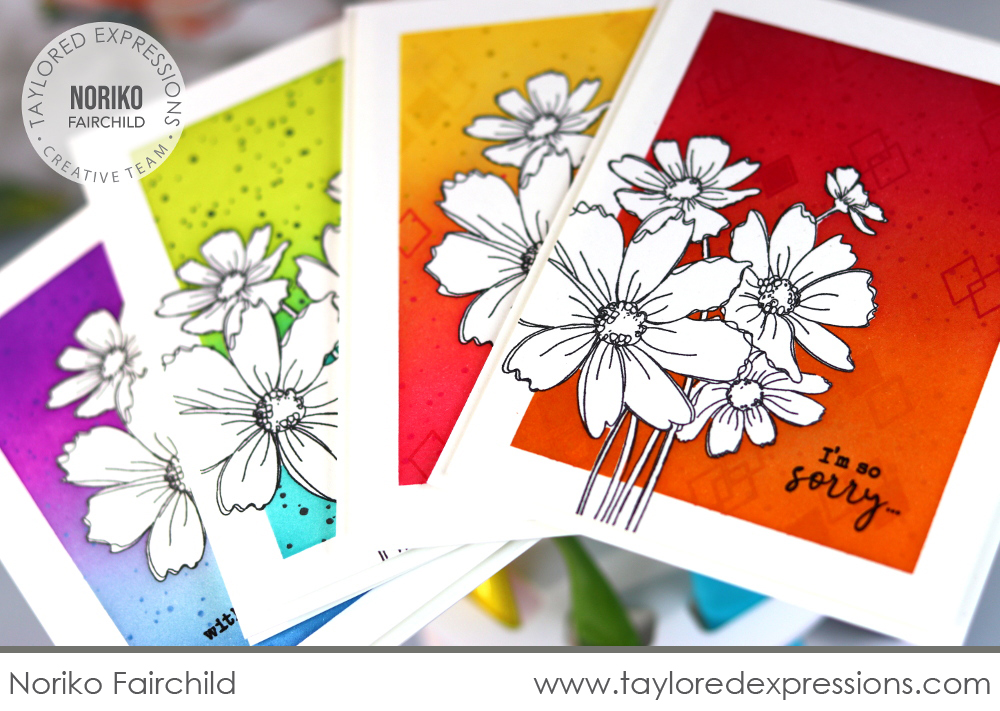
Noriko Fairchild added the Splatter Background to each of the cards in this stunning set. The floral bouquet image is stamped in Oreo ink, masked off with the coordinating stencil, and the color blends are added with the larger rectangle stencil in the Masking Stencils – Rectangles set. Noriko added the splatters and other stamped details while leaving the masking stencil in place to complete the background looks. Make sure to stop by her blog to see a closer look at all of the cards in the set!
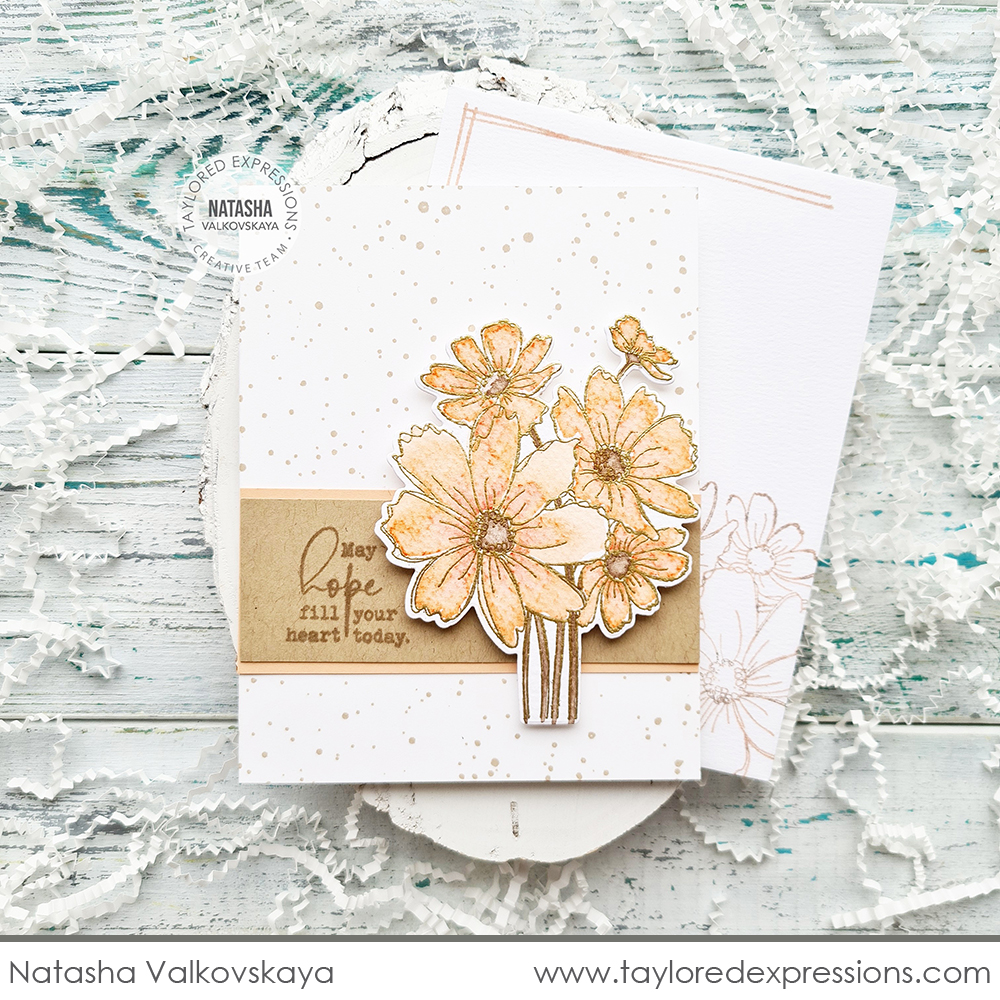
Natasha Valkovskaya created the background for this soft and pretty card by stamping the Splatter Background in Toffee ink on a Sugar Cube card base. The flowers are embossed in gold and colored with soft peachy watercolor tones and the sentiment is stamped on a Toffee cardstock strip in Toffee ink. The overall effect is a calming card to send love and hope to a dear friend.
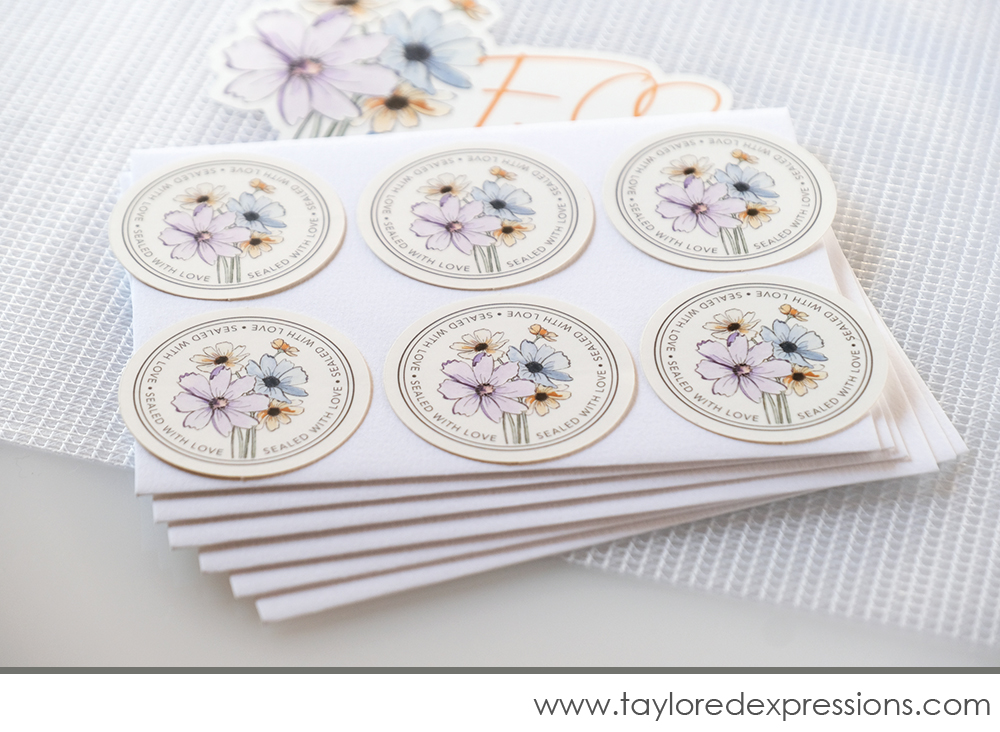
The Field Notes 2 Kit includes 6 envelopes and 6 custom envelope seals that coordinate with the theme of the kit. The six A2 envelopes are a white textured watercolor paper. The coordinating floral envelope seals are made from durable, weatherproof material and are sure to bring a smile to the recipients of your cards. You can purchase additional envelope seals and textured watercolor envelopes (each in packs of 10) in the TE webstore right now!
Not pictured are the 4.25″ x 5.5″ 111lb. watercolor cardstock panels. This is the watercolor cardstock that we recommend for use with the Karin BrushmarkerPRO markers. Use the watercolor cardstock panels to stamp and watercolor the images for your projects using the Field Notes 2 Kit. You can also purchase 8.5″ x 11″ packs of the 111lb. watercolor cardstock in the TE webstore.
In addition to the kit, we are excited to offer several Karin BrushmarkerPRO TE Palette Packs to inspire your bouquet coloring:
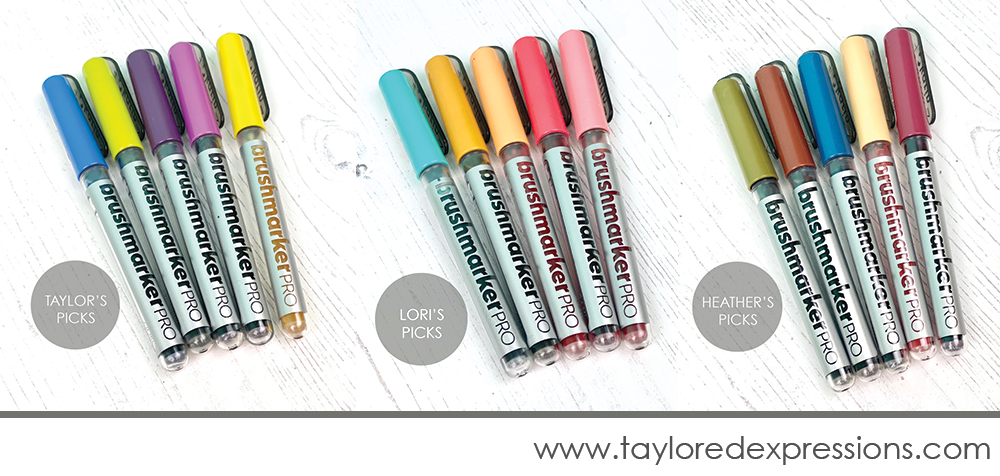
Karin Brushmarkers are a new favorite when it comes to watercoloring stamped images. Choosing colors can be overwhelming, so to get you started we curated three different BrushmarkerPRO TE Palette Packs for you to choose from:
- Taylor’s Picks: Red Lilac, Canary, Lime Green, Egyptian Blue, Lilac
- Lori’s Picks: Cool Aqua, Ochre, Pale Orange, Fire Red, Soft Peach 1 (note: this color was previously called Skin 2)
- Heather’s Picks: Blush, Curry, Burgundy, Henna, and Sapphire Blue
Each of the BrushmarkerPRO TE Palette Packs (5 markers in each) retails for $15.
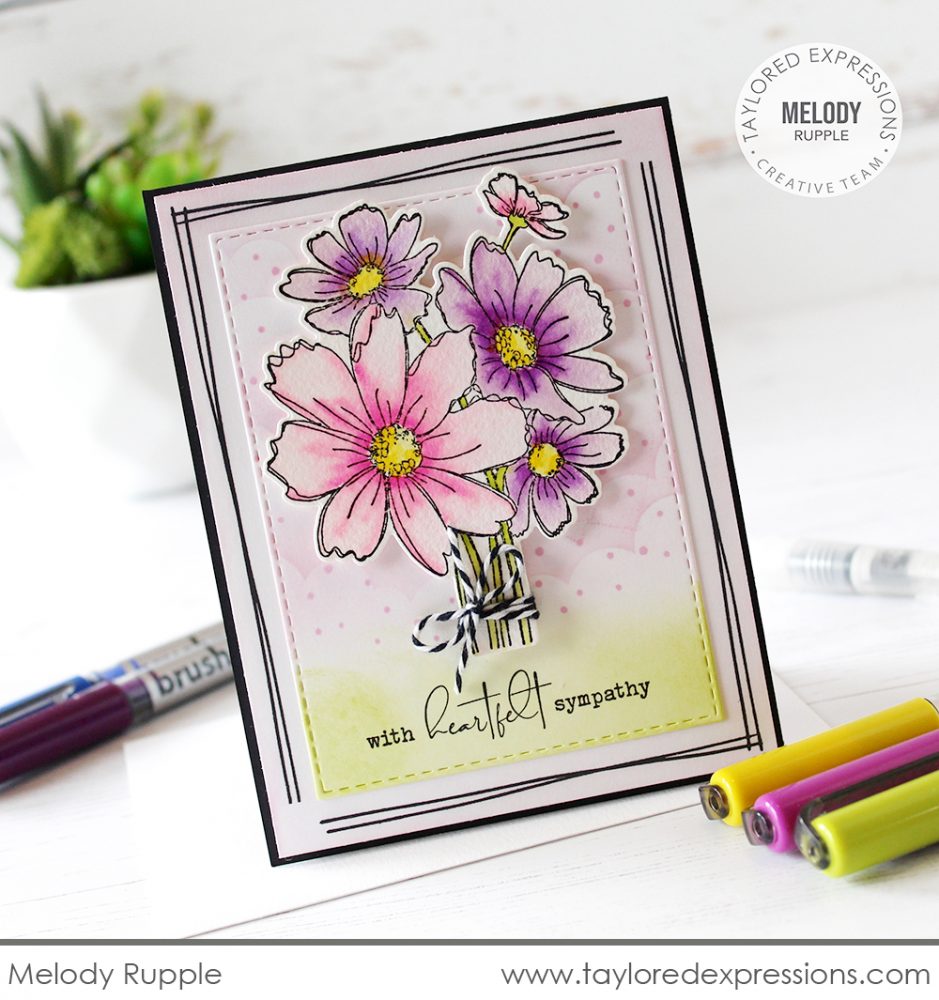
Melody Rupple used Taylor’s palette on this pretty sympathy card. She used Red Lilac and Lilac to create the pink and purple flowers. The centers of the flowers are Canary and the stems are Lime Green. Melody set the watercolored flowers over a blended background and I love how she used the sketched lines from the Sketchbook Bouquet stamp set to frame her card!
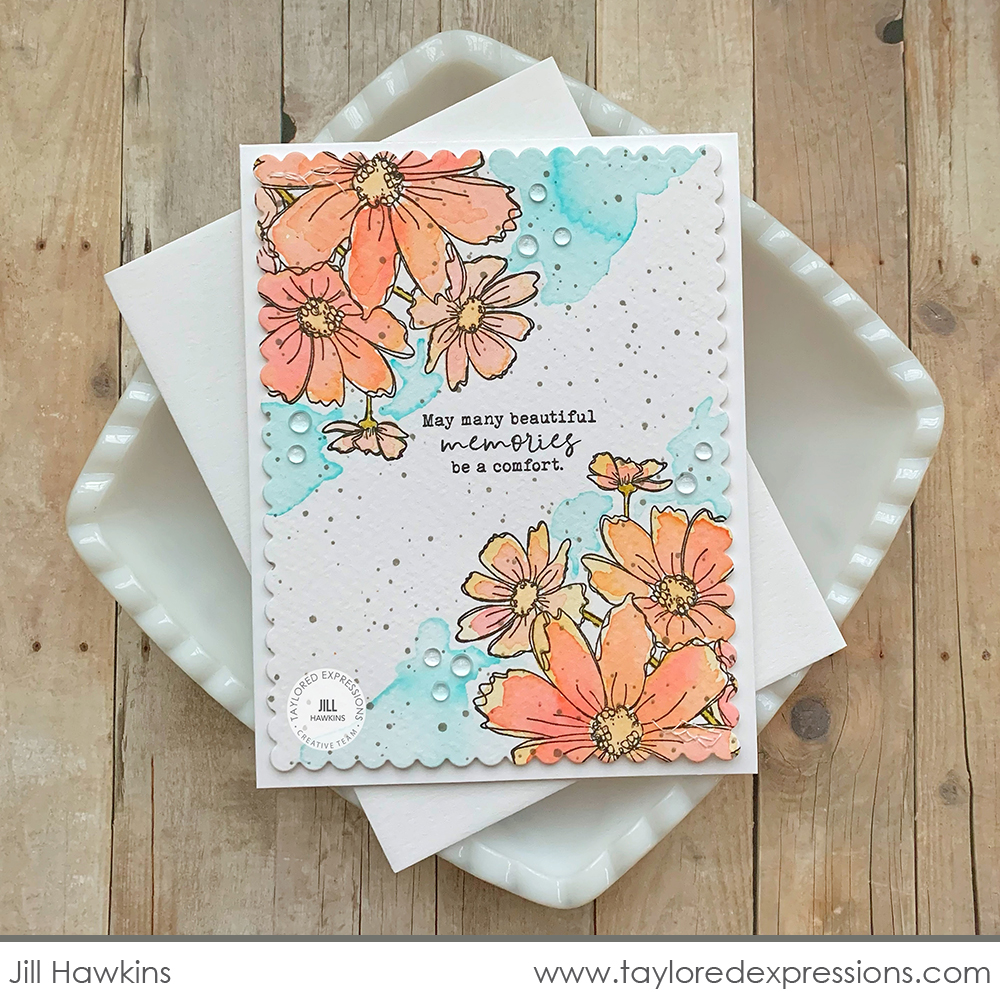
The pretty peach blooms on this card by Jill Hawkins were colored using Lori’s palette. She did a wash on the flowers using the yellow tones in the palette and then went back and added the pink/peach tones to the petals. The wash of Cool Aqua around the flowers add a fresh pop of color. I love how Jill has the flowers coming into the card from opposite corners which adds the perfect spot to stamp the sentiment in the center of the card.
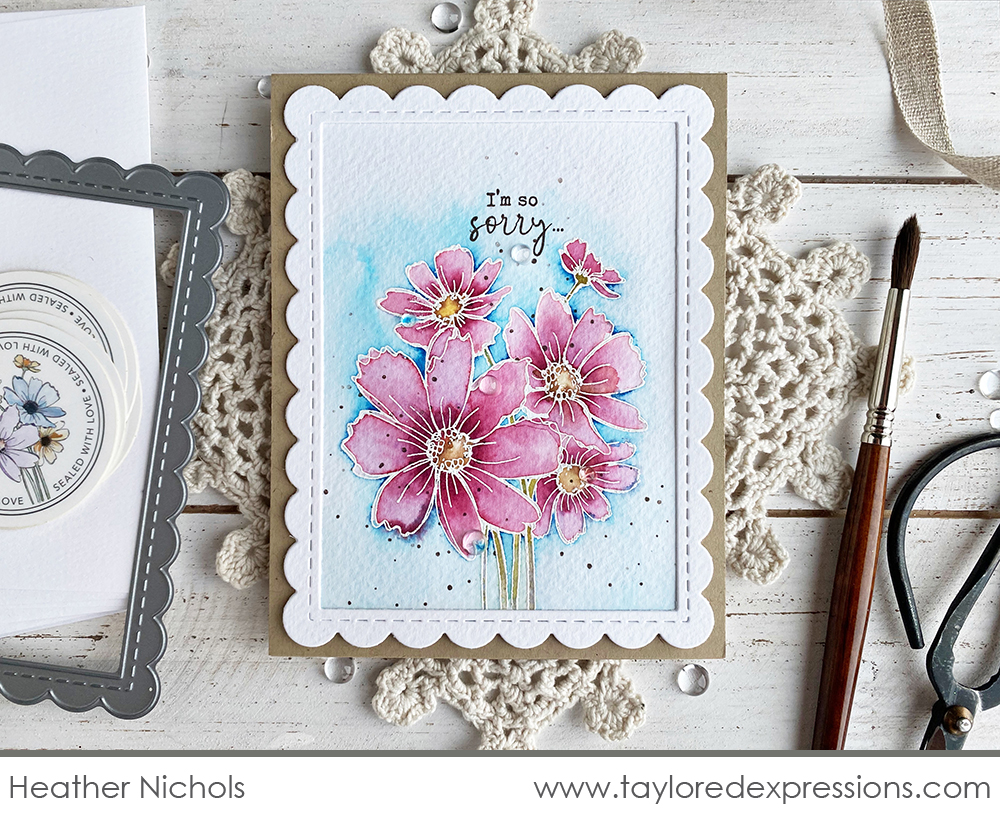
Heather Nichols did the emboss resist technique with her palette on this card created with the Field Notes 2 Kit. The floral bouquet was embossed in white on the watercolor cardstock and then Heather added the color with the markers. She used Burgundy on the flower petals, Curry for the stems, Blush and Henna for the flower centers, and Sapphire Blue for around the outside of the image. I spy splatters stamped with Chocolate Truffle ink on the image too!

Today, I’ll be unboxing the new Field Notes 2 Kit during “T Time” at 1PM Central Time on the Taylored Expressions Facebook Page and would love to have you join me! If you miss the live broadcast, it will be available to view afterward. I hope to see you there!
Make sure to click on the TE Creative Team + our special guest designers links below to hop to each of their blogs and see what they created with the new kit. Stop back to the TE blog this Thursday for more Field Notes 2 Kit inspiration, including a video from Heather! See you then!


