Mar 18, 2008
Do It Yourself – Velvet Brads
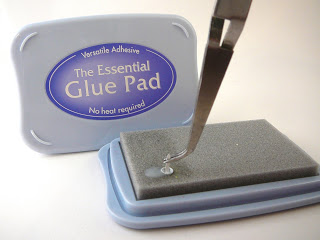
 I’ve seen velvet brads in a lot of product lines lately….like the Making Memories Garden Party velvet flower brads that I used on this card. So I decided to see if I could make my own fuzzy brads and it worked! It’s super easy, and you probably didn’t need pictures, but I enjoy taking step by steps. *grin* I added some glue to my Essential Glue Pad and you’ll see that I didn’t rub it into the pad very well. I wanted to make sure my brad was especially “gluey” so that the fun flock would adhere well. Then I dipped the brad
  directly into the jar of yellow Fun Flock. I think I’ve accumulated almost every color of Fun Flock so now I can have fuzzy brads to match all my cards! If you want a super fuzzy brad, you can dip the brad into the glue pad again and then back into the jar of Fun Flock. You’ll have to clean off your glue pad after the second dip though because a few loose pieces of flock will stick to it. And there
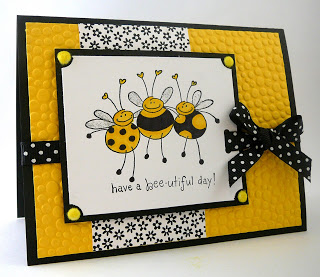
 you have it… a velvet brad! I’m already checking my collection for flower brads and other shapes to try with the Fun Flock. And since you don’t have to dump any of the Fun Flock out of the jar, it was super quick and easy with no clean up! I wanted to use my velvet brads right away so I pulled out another previously un-inked stamp for this card. I just love the Stampendous Bee Happy Collection and it seemed to work perfectly
  with the A Muse beeutiful day sentiment. I colored the bees with Copic markers and highlighted their wings with Silver Stickles. I embossed the yellow piece with the Cuttlebug Tiny Bubbles embossing folder. The patterned paper is from Doodlebug Designs and the ribbon is from Taylored Expressions. Thanks for stopping by today! I hope you all have a wonderful day!


