
Aug 05, 2014
Introducing Made in the Shade 2, Little Bits Summer, and more!
Hey there! So glad you’re back today for another day of sneak peeks before our August Release! The Baker’s Dozen and I are sharing sneak peeks over the next several days before all of the new products are available for purchase at the TE Store on Thursday, August 7th at 7am PST!
Today we’re showcasing a variety of items good for creating cards and capturing those summer memories!
Before I get to my projects, you’ll want to get in on our latest
giveaway! And if you missed yesterday’s giveaway, just scroll down below this post and leave a comment to win!

Today we’re giving away the Made in the Shade 2 stamp set and previously released Shade Tree Cutting Plate!
Enter to win by leaving a comment on this blog post before Wednesday, August 6th at 11:59pm PST. One entry per person. Each comment will also be automatically entered into our Grand Prize drawing for a $50 Gift Certificate to the TE Store! Winners will be chosen at random and announced on Thursday, August 7, 2014.


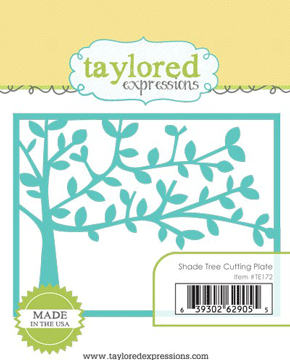


Our original Made in the Shade set has been a popular one so we came up with some more scenes to make your Shade Tree Cutting Plate even more versatile. Here’s a look at the ‘back to school’ scene I created:
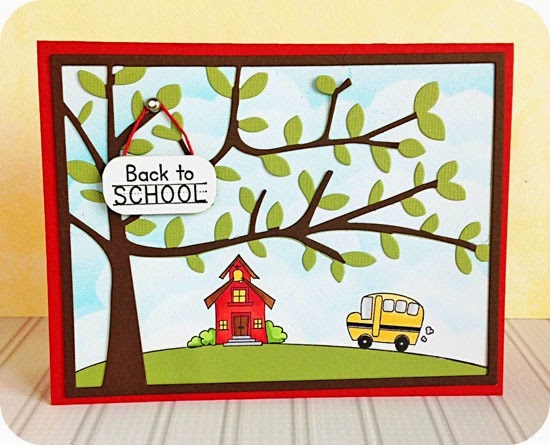
I stamped the school bus scene onto Choice Snow White paper, colored it with Copics, and masked the school and schoolhouse while sponging the cloudy backdrop. The I die cut the Shade Tree Cutting Plate and placed it over the top of the scene.

Taylor’s Tip: Cut the Shade Tree Cutting Plate from both green and brown cardstock. Cut all of the leaves off of the brown die cut and glue over the top of the green die cut. Because your brown leaves are missing, the green will show from the die cut behind it. An easier way to get a two-tone tree without piecing each of the leaves individually!
For my second project I wanted to get creative with the Little Bits again! As we release more of these I’m finding it’s fun to mix and match them in some unexpected ways. I used the new Picnic Basket die here with the previously released Little Bits – Flowers & Stems to create this cute arrangement:

I started by cutting the picnic basket from Kraft cardstock and distressing the basket and handles with Tim Holtz Antique Linen Distress Ink. I attached the handles to the basket using a brushed copper brad. Then I cut several stems from two different green cardstock and flowers from three colors of our 100% wool felt: Lilac, Raspberry Jam, and Aqua Mist.
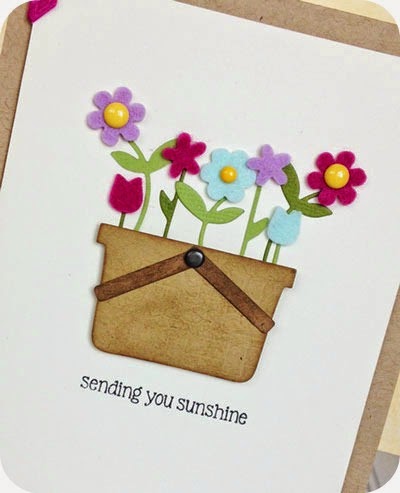
Taylor’s Tip: Draw a line with pencil to mark the where you want the top of the basket to be. Then arrange the flowers along the pencil line. Finally, pop the basket up over the top of the pencil line with foam tape. Add sprinkles to select flower centers for definition.
Those are the two projects I have to share with you today! You don’t
want to miss a thing so travel along to see what the rest of the Baker’s
Dozen gals have created with today’s featured products:


Back to School


Picnic Flowers


