Good morning, crafty friends! It’s Day 3 of our sneak peek party and I’m glad you’re here. Get ready to ‘feel the love’ (and smell the bacon!) as the Baker’s Dozen and I share the last of our sneak peek projects today! We also have another awesome prize up for grabs today so check out the comment to win details below:
All of our new products will be available for purchase at the TE web store on Thursday, December 11th at 7am PST. There’s still time to enter Monday and Tuesday’s ‘comment to win’ drawing. And here’s what will be making a new home with one lucky commenter from today (could it be you!?):
Today we’re giving away the Hearts A Flutter Cutting Plate!
Enter to win by leaving a comment on this blog post before Wednesday, December 10th at 11:59pm PST. One entry per person. Each comment will be automatically entered into our Grand Prize drawing for a $50 Gift Certificate to the TE Store! Winners will be chosen at random and announced on Thursday, December 11th, 2014.
Introducing:
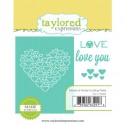
Love You More with coordinating die
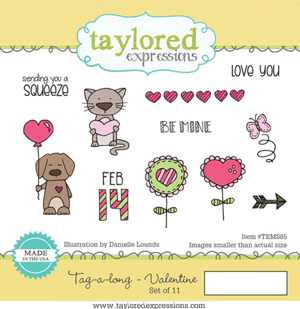
Tag-A-Long Valentine
Tag-A-Long Valentine coordinating dies
Perfect Pairs – Milk & Cookies
Perfect Pairs – Eggs & Bacon
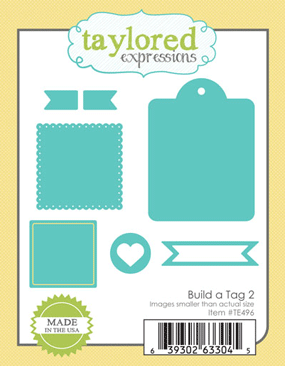
Build a Tag 2
You’ve Been Framed – Valentine
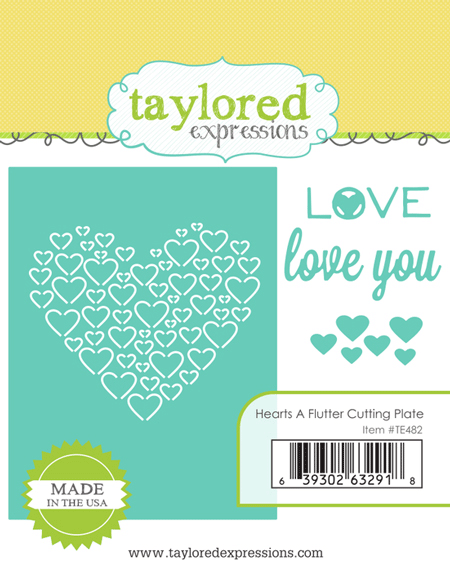
Hearts a Flutter Cutting Plate
So there you have the rest of the products in our December release! See any new favorites!? I’ve been waiting all week to share my favorite project with you and here it is!
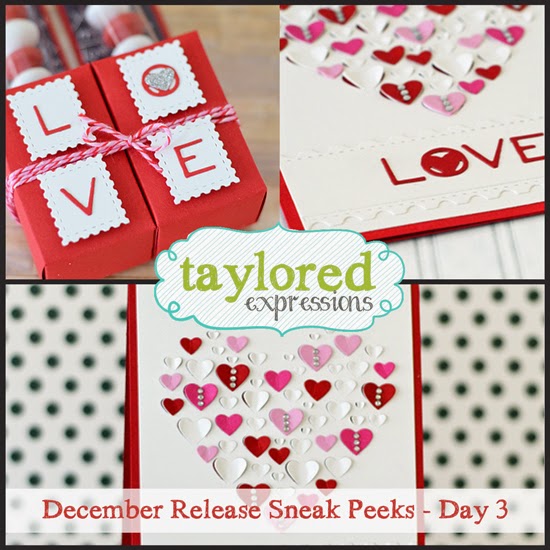
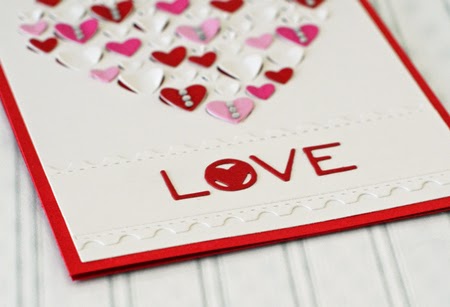
My heart is a flutter with beautiful Hearts a Flutter Cutting Plate! It was designed to work in the same way as our In Flight Cutting Plate as the hearts remain connected to the base at the center, but the ends can be folded inward to achieve the cool texture/three dimensional look.
I’d highly recommend the Sizzix Flower Tool Kit. It was really helpful for pushing the hearts up from behind and forming them. There are additional dies that come with the Hearts a Flutter Cutting Plate to make it easy to layer multiple colors and sizes of hearts over the top of the heart base as I did with the red, hot pink, and light pink hearts. Then as a bonus we included two more word dies (LOVE & love you) that can be used underneath the hearts a flutter. To set the sentiment apart from the card base, I cut off the two longest sides of the largest Postage Stamp Stacklet shape and adhered them to the back of my sentiment strip.
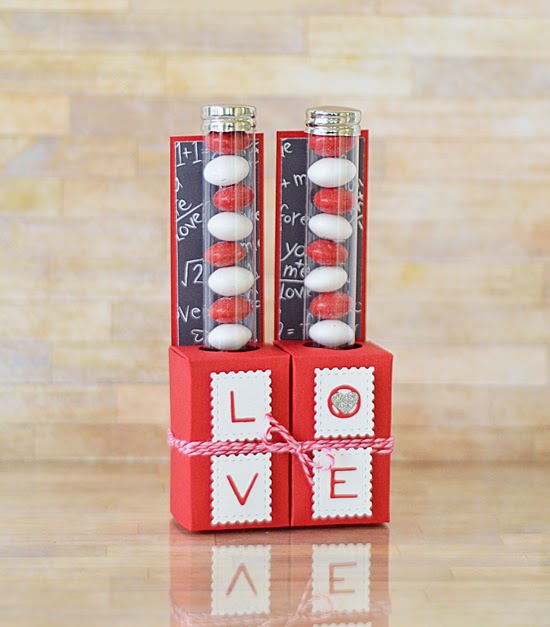
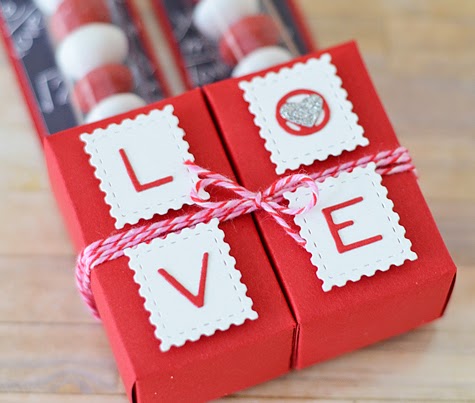
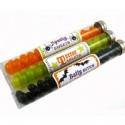
For my next project I set out with the intention of using the You’ve Been Framed Valentine set, but then inspiration struck and instead I ended up using the Hearts a Flutter Cutting Plate again!
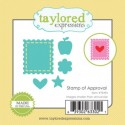
I started by die cutting two of the Test Tube Caddies from Cherry Pop cardstock and adhering them together. I had a vision to create a sentiment for the front of the caddy using the LOVE letters and the Little Bits – Stamp of Approval die. The patterned paper on the back of the caddy is from the Formula for Love 6×6 Paper Pack.
After adhering the sentiment with foam tape, I tied the two caddies together with Valentine twine, although you wouldn’t have to add the twine as the two caddies are already glued together. Tip: Apply glue to each caddy and then let the glue dry for about 2 minutes before sticking the two caddies together. They will go together much easier if you wait until the glue is more ‘sticky’ than ‘runny’.
That’s all I have to share today, but I know the rest of the Baker’s Dozen has some scrumptious projects to share with you including milk & cookies, eggs & bacon, and more! Check out all of their creations by clicking the links below: