
Dec 23, 2014
Blog Design Team: Instant Gift Bag!
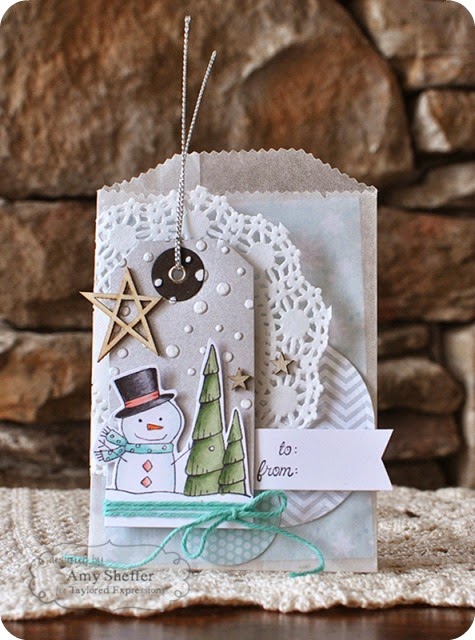
It’s only two days until Christmas and for those of you in need of a last minute gift, Blog Team Member Amy Sheffer shares how to take a glassine bag from simple to simply adorable! Check it out…

Amy’s Notes: Only days until Christmas! Are you ready? It seems no matter how much I
prepare and how many lists I make, I either forget someone, or something
doesn’t quite get done on time. That’s where today’s little gift bag
comes in handy! I have a few of these already put together, so that I
can quickly slip in a gift card or a hot cocoa packet for an instant
last-minute gift. The handmade packaging makes even the most mundane
contents more special. The design is intentionally a winter theme, as
opposed to something Christmas-specific, so if I run out of time or
don’t get everything delivered ahead of time, it will still work in the
days and weeks after Christmas Day itself, too.
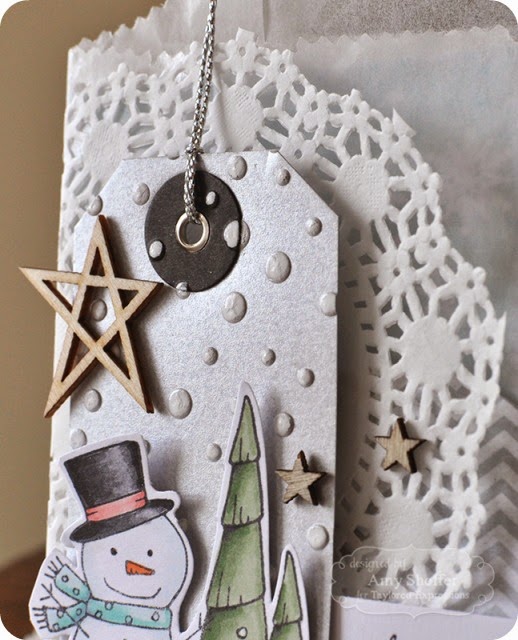
Amy’s Notes: To start, I dry-embossed a silver metallic tag using the Snowfall Embossing Folder, then colored the raised areas with a white gel pen.
(Amy’s Tip: If your tag has reinforcement/eyelet, I don’t recommend running that end through
your cutting/embossing machine. I did, and the eyelet left a slight
indentation in my folder. You can run the rest of the tag through, but
stop just short of sending the reinforced end through the rollers.
Instead, use a stylus to manually dry emboss that area.) Or, create your own tag with TE’s Tag Stacklets and you can run the entire tag through before adding your Tag Reinforcements or eyelets!
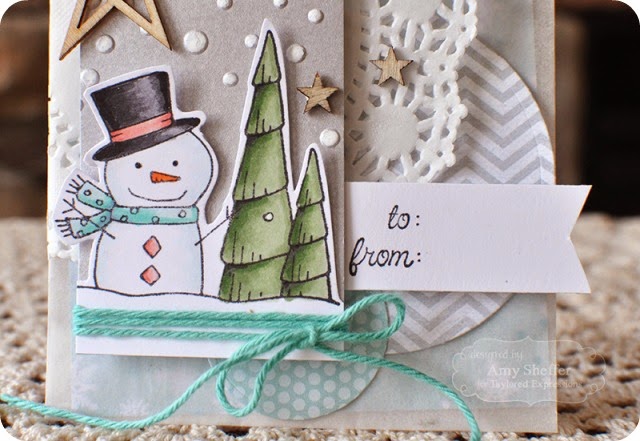
Amy’s Notes: I stamped the sweet snowman image from Ready, Set, Snow, colored it with
Copics, trimmed it out, adhered it to the bottom of the tag, then added
some color and texture with some aqua twine.

Amy’s Notes: I selectively inked the words “to” and “from” from the “from our house
to yours” sentiment from the Wings of Joy stamp set onto a small banner strip, which I
tucked underneath the tag.
more, I added a doily and two paper circles to the background, and some
wood veneer stars for embellishments.
Thanks so much, Amy, for inspiring us to create something handy for last minute holiday (and post-holiday) gifts! You can find more of Amy’s wonderful work on her blog, Pickled Paper Designs. Tune in tomorrow as Kay Miller shares how she created the perfect little winter scene.


