Jul 22, 2021
Create Cards for Christmas with the NEW Merry Blooms Kit!
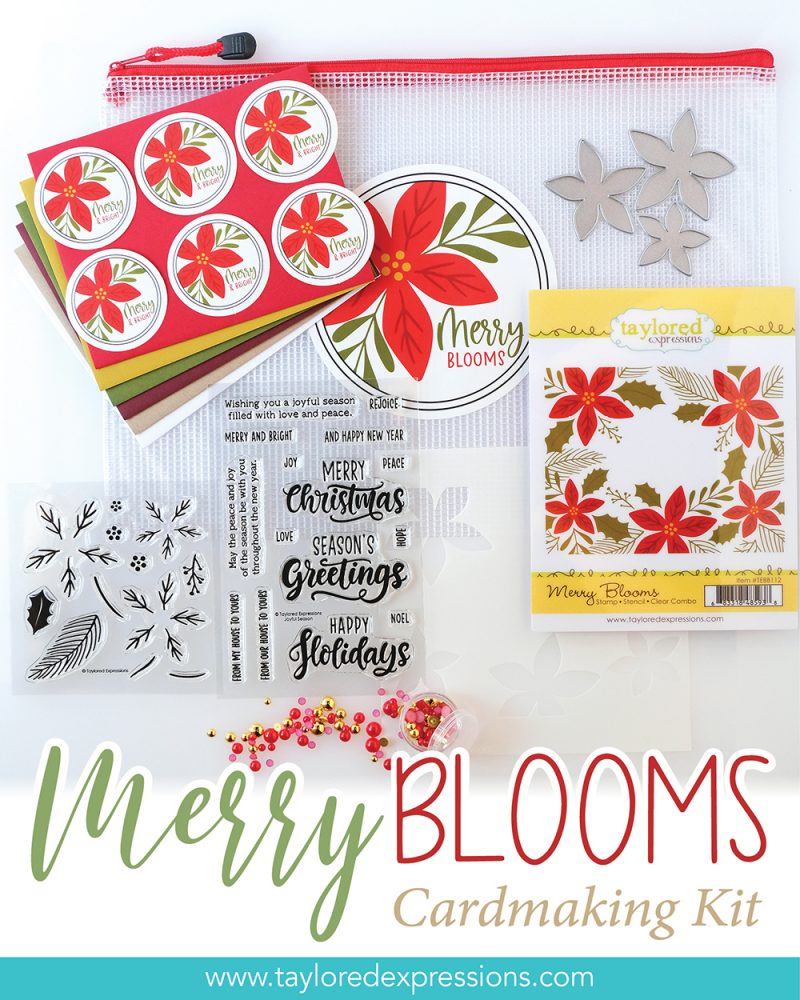
Hey, crafty friends! It’s Heather here today to share more inspiration with all of you using the new Merry Blooms Kit that we released this week. This kit is beautiful and I have loved seeing all of the inspiration from the TE Creative Team – especially all of the different color combinations that they used! I personally tend to gravitate towards more traditional colors for the holidays, but have definitely been inspired to try a few new color combinations out on future projects (like those purple poinsettias from Emily Mydlowski – wow!)
If you haven’t checked out the new kit, click below to go to the TE webstore. Then keep scrolling for more holiday card and tag making inspiration using the Merry Blooms Kit – including a video from Emily Leiphart!
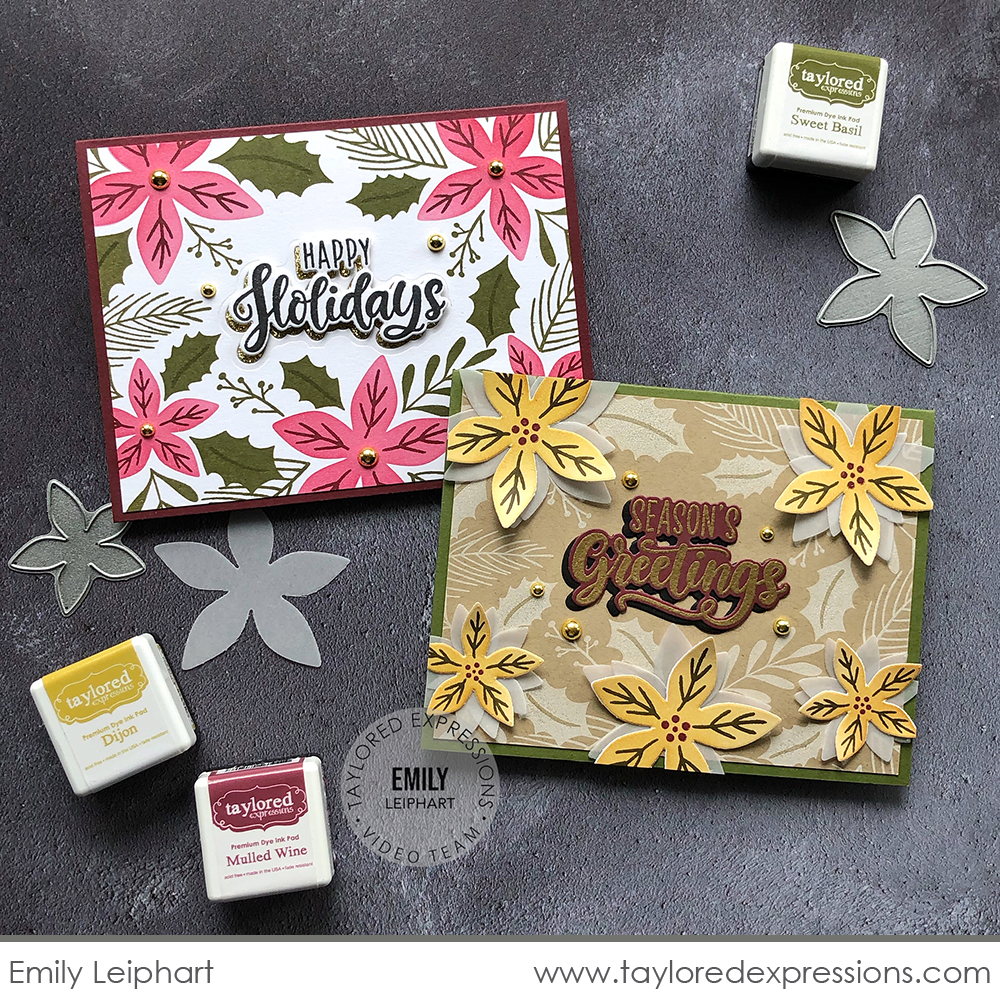
Get ready for holiday card making inspiration from Emily Leiphart! Watch the video below to see how she created the two cards pictured above with the Merry Blooms Kit from start to finish:
In the video, Emily shares two different card designs that she created with the Merry Blooms Kit. The first card uses traditional holiday colors and is a design that would be easy to create multiples of. The second card features a non-traditional holiday color scheme and Emily stepped up the card design by doing extra layers, embossing, and more!
Here is a closer look at the cards that Emily created in the video:

For this card, Emily stamped the greenery with Sweet Basil ink, stenciled the poinsettias with Watermelon ink, and added details with the clear stamps: Mulled Wine ink for the poinsettias and Sweet Basil ink for the holly leaves. The sentiment is stamped into the center opening and then Emily cut it out using the coordinating die (please note that the sentiment dies are available as an add-on purchase). I love how she added gold glitter cardstock into the die cut opening and then added the sentiment offset just a bit to show a peek of sparkle. She finished off her design with Bits & Pieces – Gold Drip Drops for the flower centers and around the sentiment.
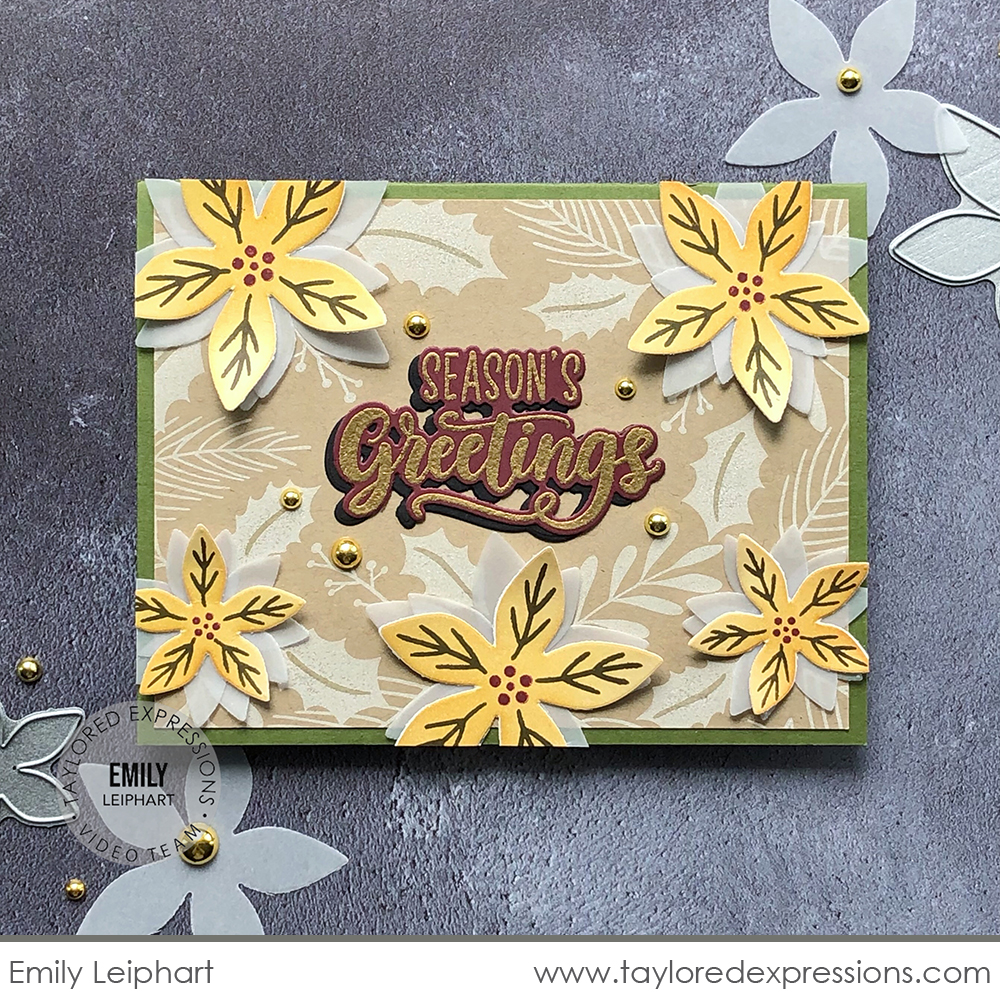
I love the unexpected colors and rustic charm of this second card that Emily created! Emily stamped the greenery onto Toffee cardstock with Sugar Cube ink and then added poinsettias that she layered up for extra dimension. The top layer of the poinsettias are stenciled with Djion ink, cut out with the Perfect Poinsettia dies, and details added with the clear stamps. The bottom layers of the poinsettias are cut from vellum. The sentiment is embossed in gold on Mulled Wine cardstock, cut out with the coordinating die, layered over an Oreo cardstock die cut, and added to the center opening. Bits & Pieces – Gold Drip Drops are the perfect finishing touch scattered around the card!
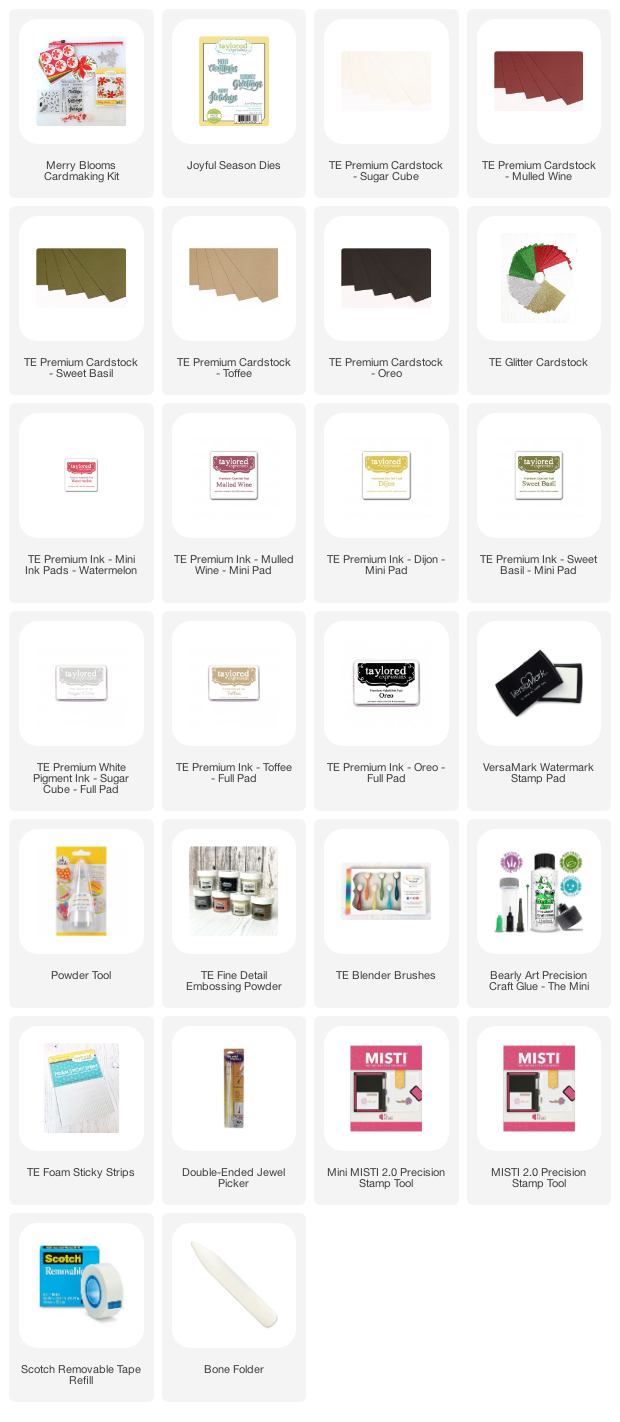
Check out the list below for the supplies that Emily used on both of her cards:

Here’s a look at a few more holiday projects from the TE Creative Team that are created with the Merry Blooms Kit:
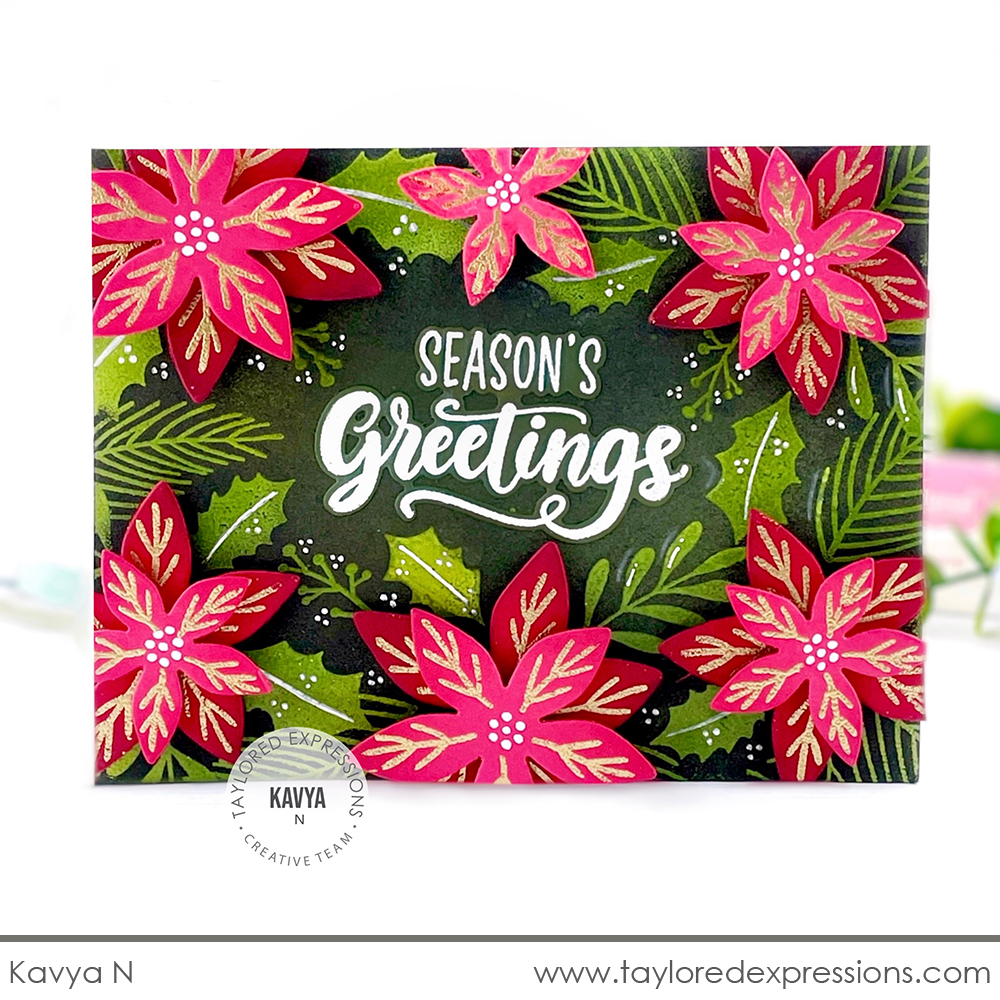
Look at all the dimension and color on this card that Kavya created! I love the greenery background and how Kavya did a light green color on a dark green background by doing the emboss resist technique. She embossed the greenery with clear embossing powder on Granny Smith Cardstock and then used Blender Brushes to apply Sweet Basil ink. Wherever the image is embossed, it resists the ink blending and the light green color shows through the embossed design! The poinsettias are die cut from Watermelon and Cherry Pop cardstock using the Perfect Poinsettia dies, the vein details on the petals are embossed in gold, the centers are added with a white gel pen, and the poinsettias are adhered to the card with foam adhesive to pop them up!

The monochromatic look on this card by Noriko Fairchild is stunning! You could create this design in any color you want! Noriko did her card using Poblano Pepper cardstock and ink with the Merry Blooms Stamp, Stencil, & Clear Combo set and then embossed the sentiment into the center opening in gold. The background is cut out with a Stitched Rectangle Stacklets die and added to the card base with foam tape for extra dimension. This simple design would be so easy to mass produce to send out for the holidays!
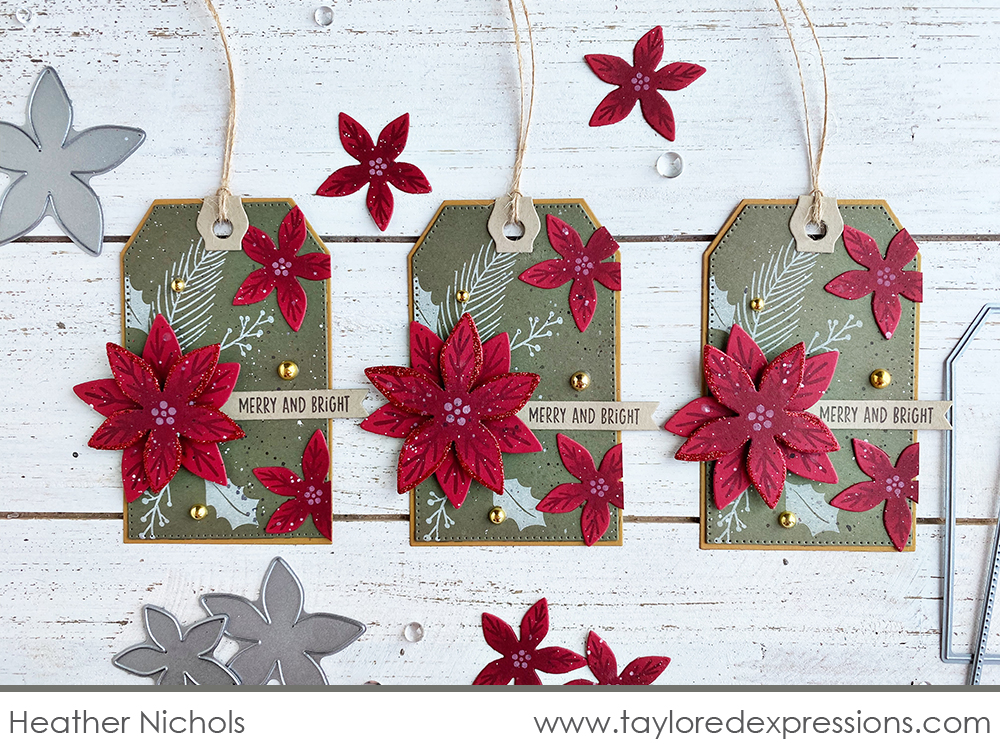
I created this set of holiday tags with the Merry Blooms Kit (Heather Nichols). The tag bases are created with the Tag Stacklets 2 and Pierced Tag Stacklets 2 die collections and the greenery is stamped onto the tags with Sugar Cube ink. I cut out the poinsettias with the Perfect Poinsettia dies from Cherry Pop cardstock, added shading and details with Mulled Wine ink, and added Cherry Pop glitter to the edges of the top layer to add a bit of sparkle. The ‘merry & bright’ sentiment is stamped onto a Double-Ended Flag Stacklets die and tucked behind the large poinsettia on the tag. I can’t wait to add these tags to holiday packages!
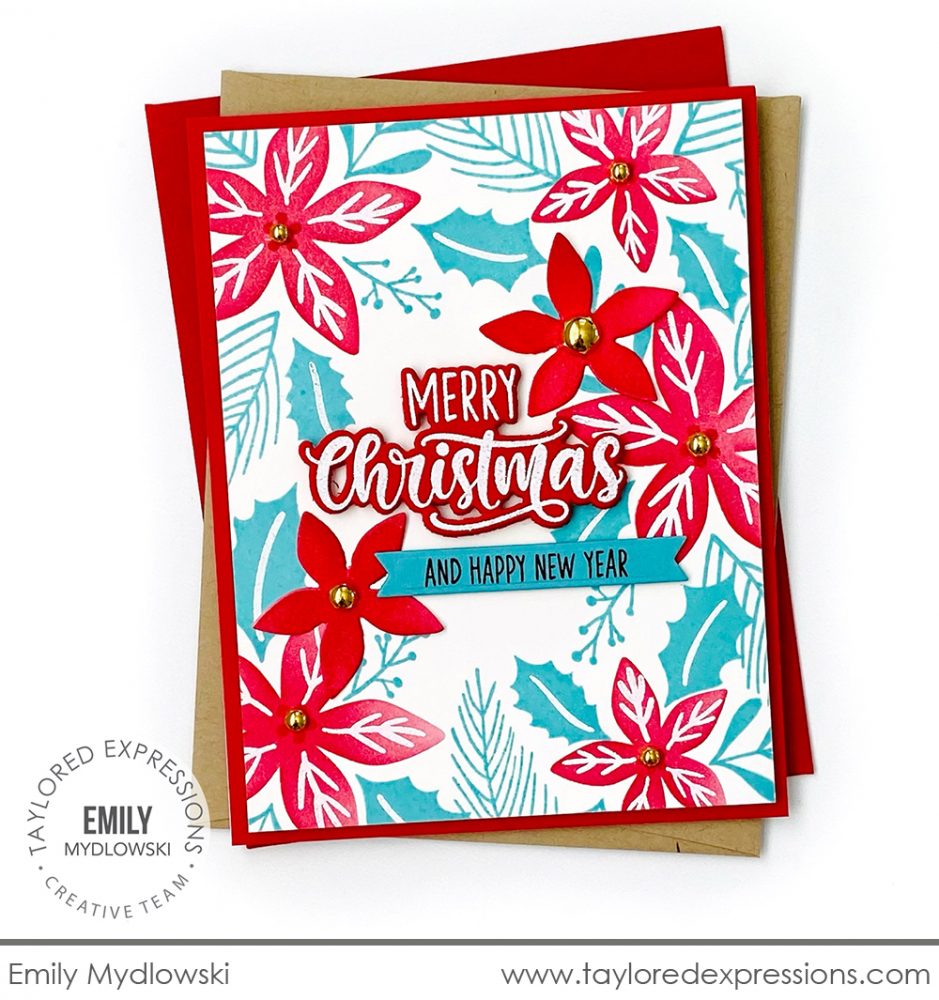
Isn’t this a fun color combination that Emily Mydlowski did with Cookie Monster and Watermelon inks? It has such a fun vintage look! I also love how Emily did her card in a vertical format with the Merry Blooms Stamp, Stencil, & Clear Combo set. All of the details and the sentiment are embossed in white and Emily added a few extra poinsettias tucked around the sentiment that she cut out with the Perfect Poinsettia dies. To finish off her card, Emily added Bits & Pieces – Gold Drip Drops to the poinsettia centers.
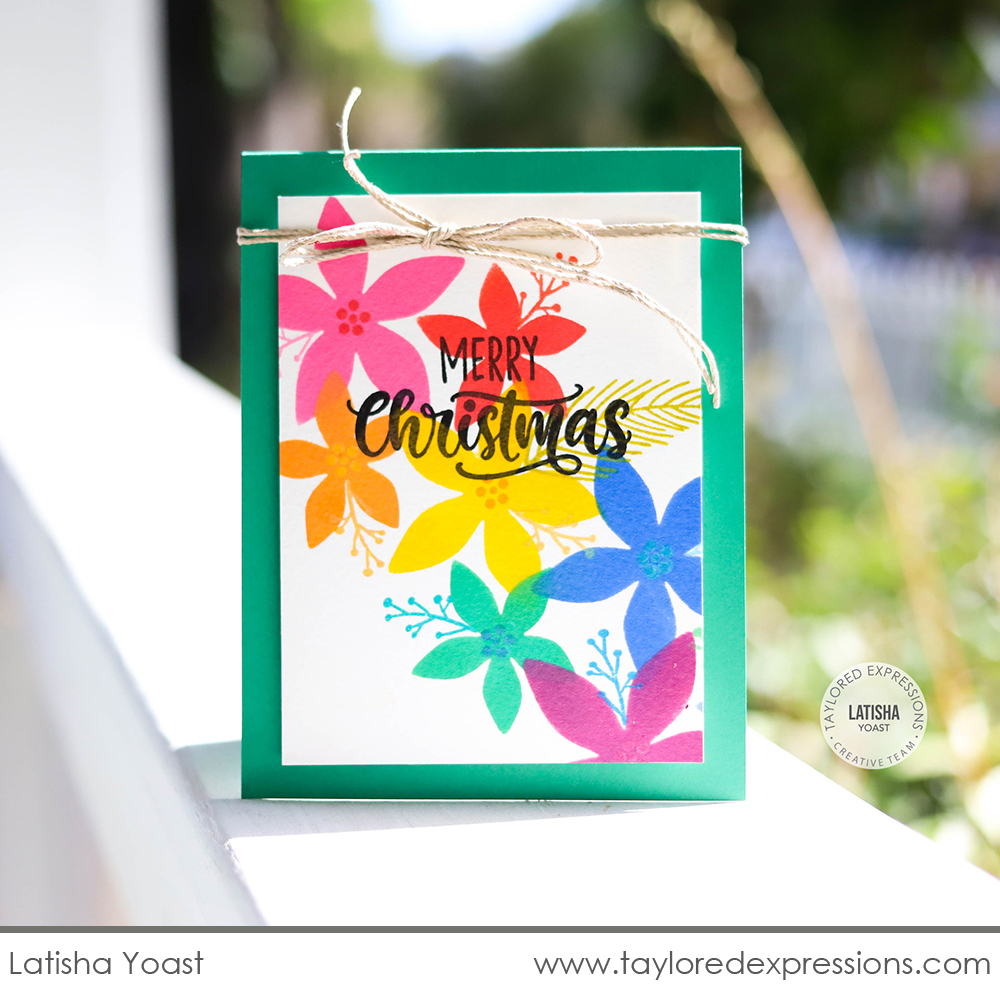
Latisha Yoast created a whole rainbow of poinsettia flowers across her Christmas card. She positioned the stencil to add the flowers one at a time in the different colors across the card. You can use the stencil in the Merry Blooms Stamp, Stencil & Clear Combo set or you could create your own stencil using the Perfect Poinsettia dies. Latisha stamped berry branches, the flower centers, and the pine sprig onto her design and then added the ‘Merry Christmas’ sentiment stamped over the flowers with Oreo Ink.
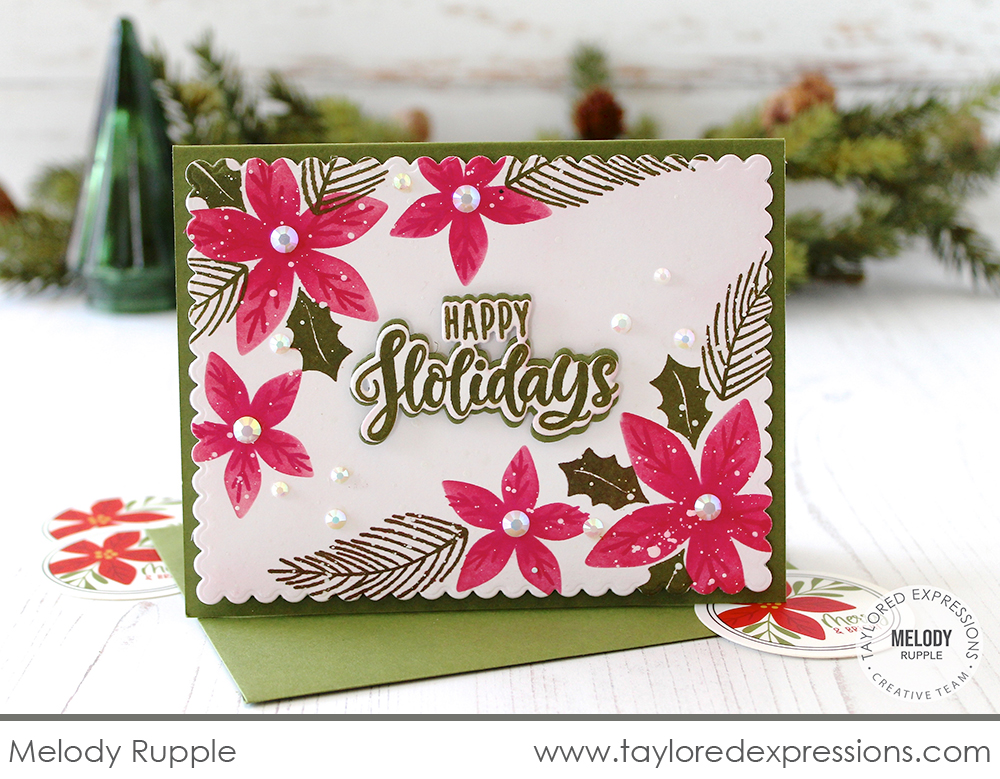
Instead of creating the background using all of the pieces how they were designed from the Merry Blooms Stamp, Stencil, & Clear Combo set, Melody Rupple created her own background design with the set. She stenciled the poinsettias into the corners of a piece of Sugar Cube Cardstock, added details with the clear stamps, and added greenery around the poinsettias from the clear stamp set. The background is cut out with a Petite Scallop Rectangle Stacklets die, the ‘Happy Holidays’ sentiment is added to the middle of the card, and Melody sprinkled Bits & Pieces – White Rhinestones throughout the design to add sparkle.

Natasha Valkovskaya created a whole set of cards with the Merry Blooms set! She created background in all sorts of different color combinations with the Merry Bloom Stamp, Stencil, & Clear Combo set and I love all of the different looks. The sentiments are embossed in gold on a number of different cardstock colors, cut out with the Joyful Season dies, and added to the cards with foam adhesive to pop them up a bit. Natasha packaged up the cards in a clear card box and added a box wrap that she created with the Noteworthy Belly Band and embellished with a poinsettia made using the Perfect Poinsettia dies. The card set is beautiful and will make a wonderful gift!
That wraps up for the inspiration for this week for the new Merry Blooms Kit! We can’t wait to see what all of you create with it! You can share your creations over on the Fans of Taylored Expressions Facebook Page. Thank you for stopping by the TE blog this week. Make plans to visit again next week for more crafty inspiration and to learn about a few new crafty tools we have coming your way – we can’t wait to share more!
Did you know that you can subscribe to our blog and get our posts right in your inbox? Just sign up right HERE – that’s all there is to it to make sure you don’t miss any of our crafty inspiration!


