Jul 20, 2021
NEW! Merry Blooms Kit for Christmas!
Hey, crafty friends! It’s Taylor here! Merry Christmas (in July!). I felt a little confused as I got dressed this morning in shorts and a sleeveless top knowing that I’d be chatting with you about Christmas cards today! But, our Christmas in July kit is fast becoming one of my favorite annual traditions. I know many of us like to get a jump start on holiday cards and our Christmas in July kit gives you the perfect opportunity! Our Merry Blooms kit is perfect for mass-production if that’s your jam for holiday cards, or it can be stepped up to make stunning one-of-kind card creations! I can’t wait to show you all the inspiration from our amazing Creative Team!
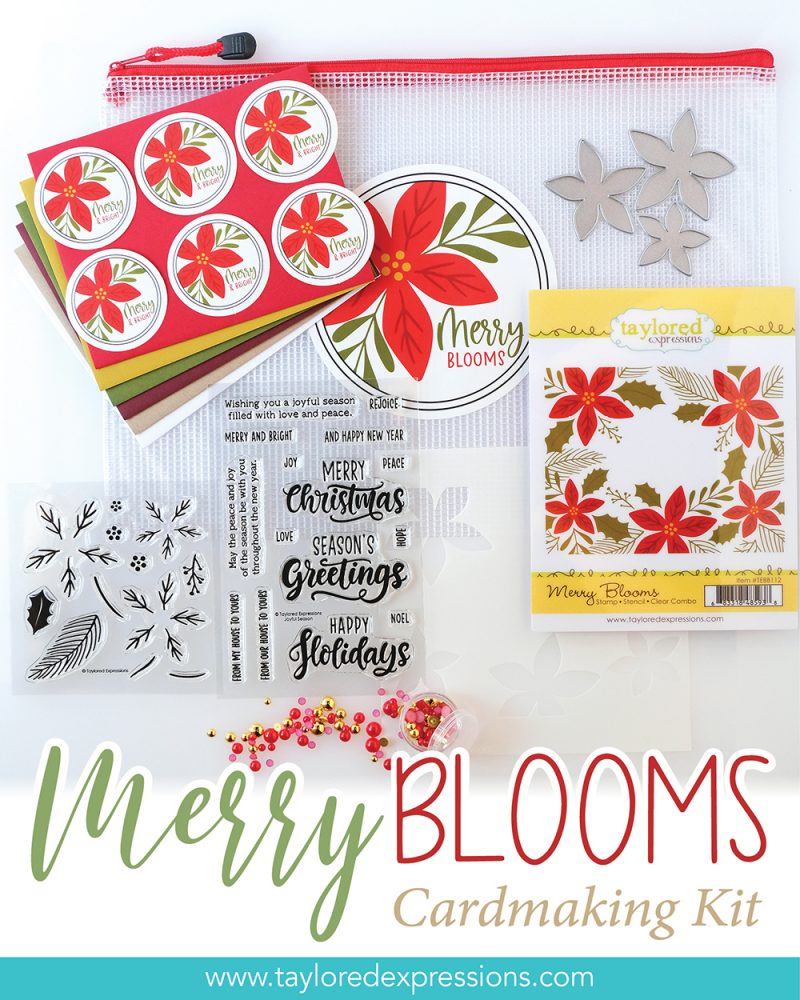
So what’s unique about our kits? First, there’s no subscription necessary. Also, in keeping with our mission to Share Joy, we encourage you to send the cards you create by including six envelopes along with six custom envelope seals to match the theme of the kit. Each kit comes packaged in a zippered pouch with a coordinating vinyl sticker making it easy to keep the supplies together.
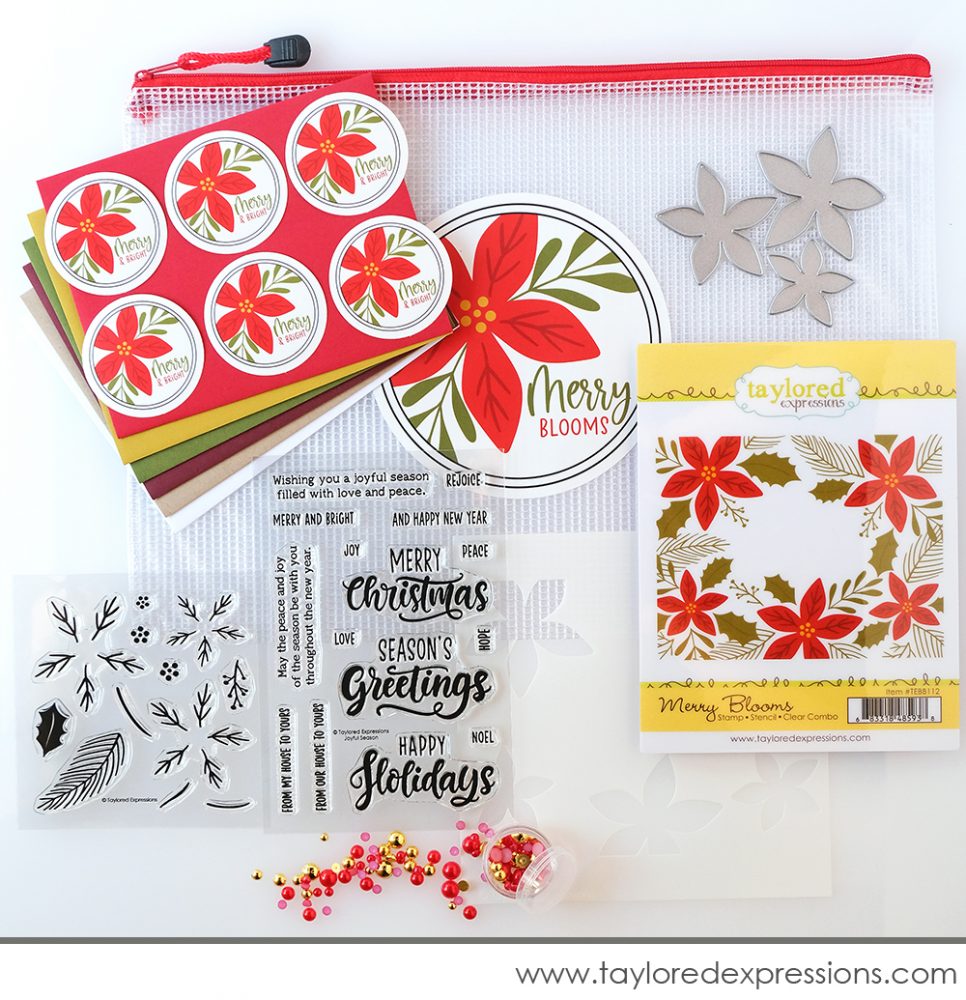
Here’s everything included in the Merry Blooms Kit – which is available for $69:
- Merry Blooms Stamp, Stencil, & Clear Combo set
- Perfect Poinsettia die collection
- Clearly Crafty Joyful Season stamp set
- Bits & Pieces – Red Pearl & Gold Drip Drop Mix
- 6 A2 Envelopes: Sugar Cube, Toffee, Cherry Pop, Mulled Wine, Djion, and Cilantro
- Packaged in a zippered pouch with a custom kit label
Limited quantity available. Most items are not available to purchase individually.
You will be able to purchase additional envelope packs, envelope seals, the new Bits & Pieces – Red Pearl Drip Drops, and the Joyful Season die collection separately – keep scrolling for more information!
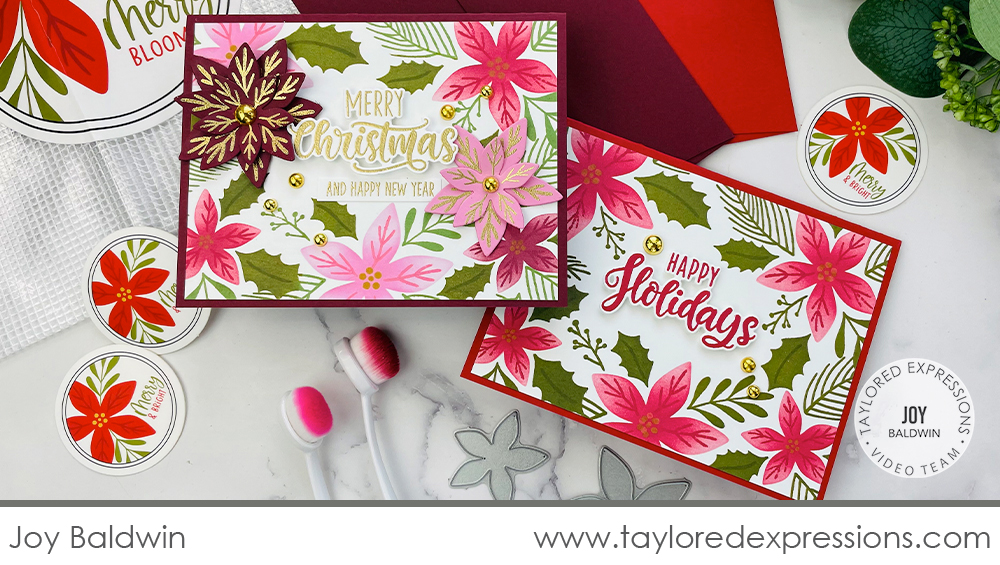
Today’s video is from Joy Baldwin and she is sharing a closer look at the items included the Merry Blooms Kit and how you can use them to create a few different card designs. Watch the video below!
In the video, Joy shares how to use the Merry Blooms Kit to create a card design that is perfect to mass produce and another card design that is stepped up with a few different elements and techniques. I love the versatility of this kit and how you can approach designing and creating cards with it. You can keep things quick and easy or take time to create lots of layer and details for your projects!
Please note that Joyful Season dies (for the sentiments) are not included in the Merry Blooms Kit, but are available to purchase separately in the TE webstore.
Here’s a closer look at the cards that Joy created in the video:

This first card is a design that is easy to mass-produce. Joy shared lots of great tips in the video for mass-producing cards, so make sure to watch! Instead of a bunch of colors, Joy used just one color for the leaves (Sweet Basil) and another for the poinsettias (Cherry Pop). I love how she varied the shading on the flowers by applying more ink to the centers and keeping the ink lighter on the petals. Another tip Joy shared is to do each step of the project for all of the cards you are making at one time: stamp all of the backgrounds first, then stencil all of the poinsettias, stamp the details with the clear stamps, add the backgrounds to the card bases, stamp all the sentiments, die-cut all the sentiments, add the sentiments to the card bases, and then add the Bits & Pieces – Gold Drip Drops to all of the cards to finish things off.
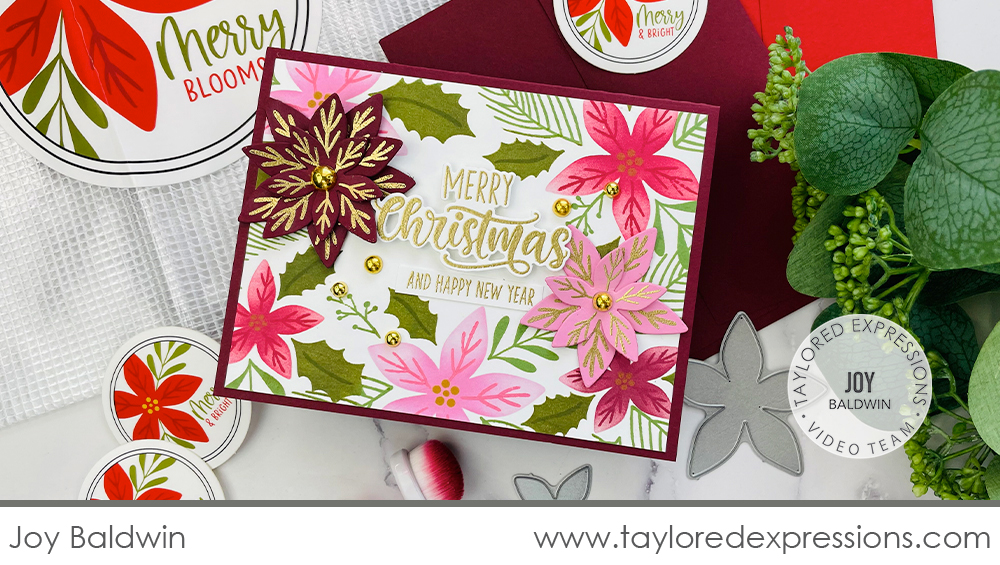
This next card includes a few more techniques and elements that step up the design. This card design isn’t the best to mass produce because of the extra time it will take to add the extra elements and do the embossing (although if you were determined, it could definitely be done!) I love all of the things Joy did to step things up: she used multiple colors for stamping the leaves (Sweet Basil and Peapod) and stenciling the poinsettias (Strawberry Milkshake, Cherry Pop, and Mulled Wine), she created dimensional die cut poinsettias with details embossed in gold, she embossed the sentiments in gold, and added lots of Bits & Pieces – Gold Drip Drops for flower centers and scattered across the card design.
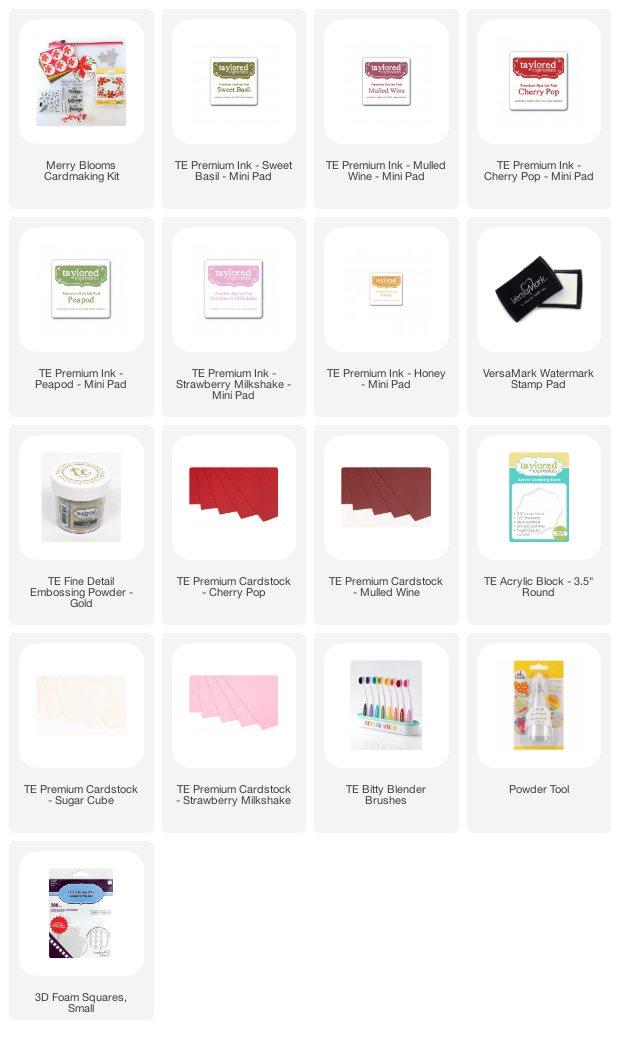
Both of the card designs that Joy shared are wonderful designs that you can create for the holidays. Which design you choose depends on the type of stamping you want to do and who you are creating your cards for. Check out the list below for all of the supplies that Joy used on her card designs:

Now, let’s take a closer look at the different elements of the kit as well as more inspiration from the TE Creative Team. Note: Most of these items are only available as part of the Merry Blooms Kit.
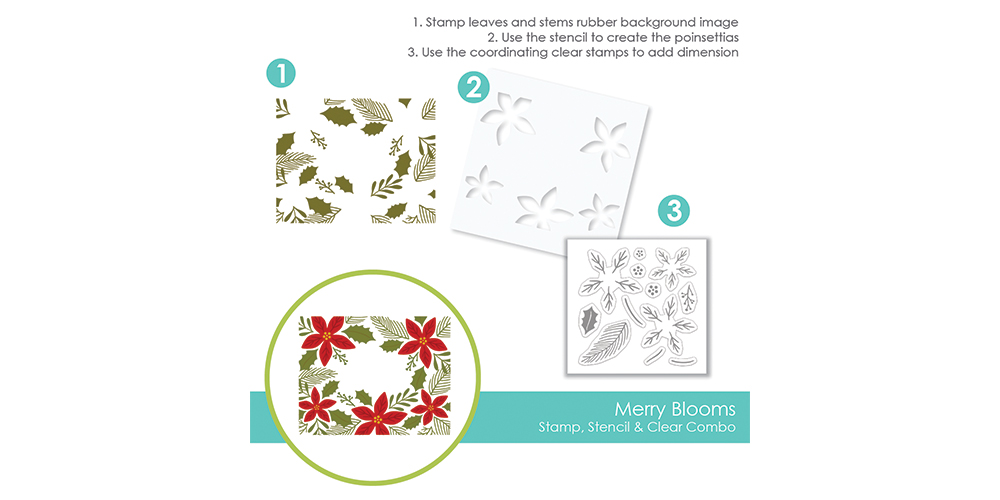
You’ll love how easy it is to mass-produce holiday-themed backgrounds on your cards using the Merry Blooms Stamp, Stencil, & Clear Combo set. Stamp the greenery with the red rubber background stamp, use your blender brushes to add the poinsettias and add details with the included clear stamps. There’s an open space in the middle of the background that is the perfect landing spot for a seasonal sentiment!
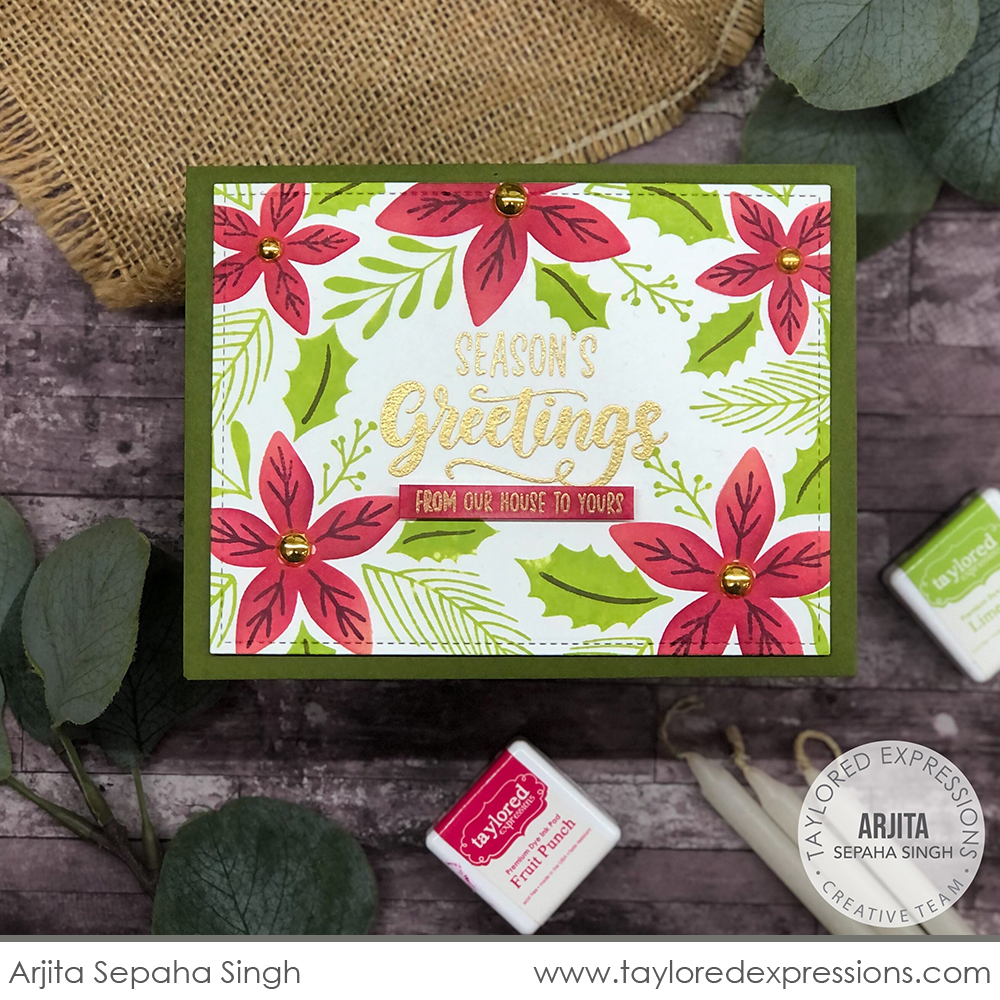
Arjita Sepaha Singh used the Merry Bloom Stamp, Stencil, & Clear Combo set with classic holiday colors to create this holiday card. She stamped the leaves with Lime Zest ink, stenciled the poinsettias with Fruit Punch ink, and added details using the clear stamps. The sentiment is embossed in gold which adds a beautifully elegant look to the card design and Arjita carried that into the poinsettias by using Bits & Pieces – Gold Drip Drops for the flower centers.
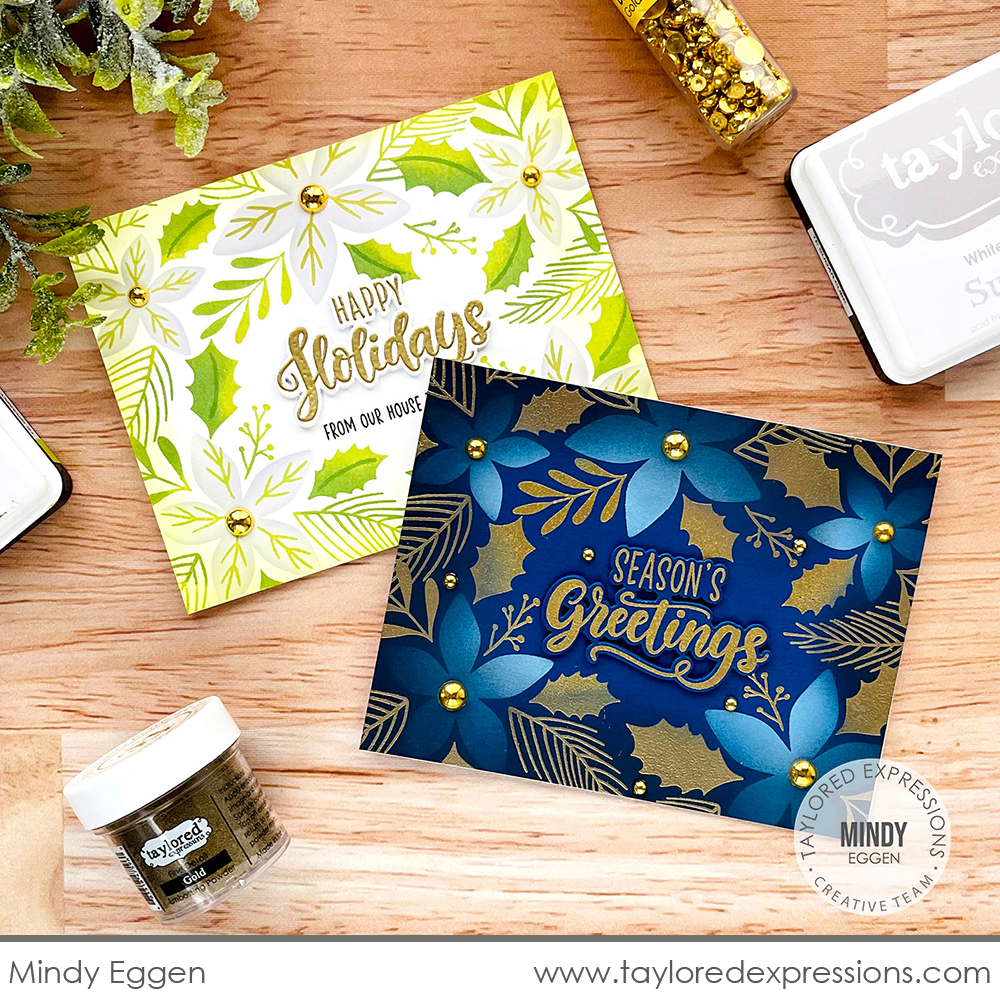
I love the different looks that you can achieve by just changing up the colors that you use with the Merry Blooms Stamp, Stencil, & Clear Combo set. Mindy Eggen has two great examples to share here! The card on the left is stamped with light green inks for the leaves and details and stenciled with Sea Salt ink for the poinsettias. The card on the right, Mindy embossed the background stamp in gold on Blueberry cardstock, stenciled the poinsettias in Sugar Cube ink, and omitted adding the details with the clear stamps. Both looks are just beautiful and the gold for the flower centers and sentiments adds the perfect holiday elegance!
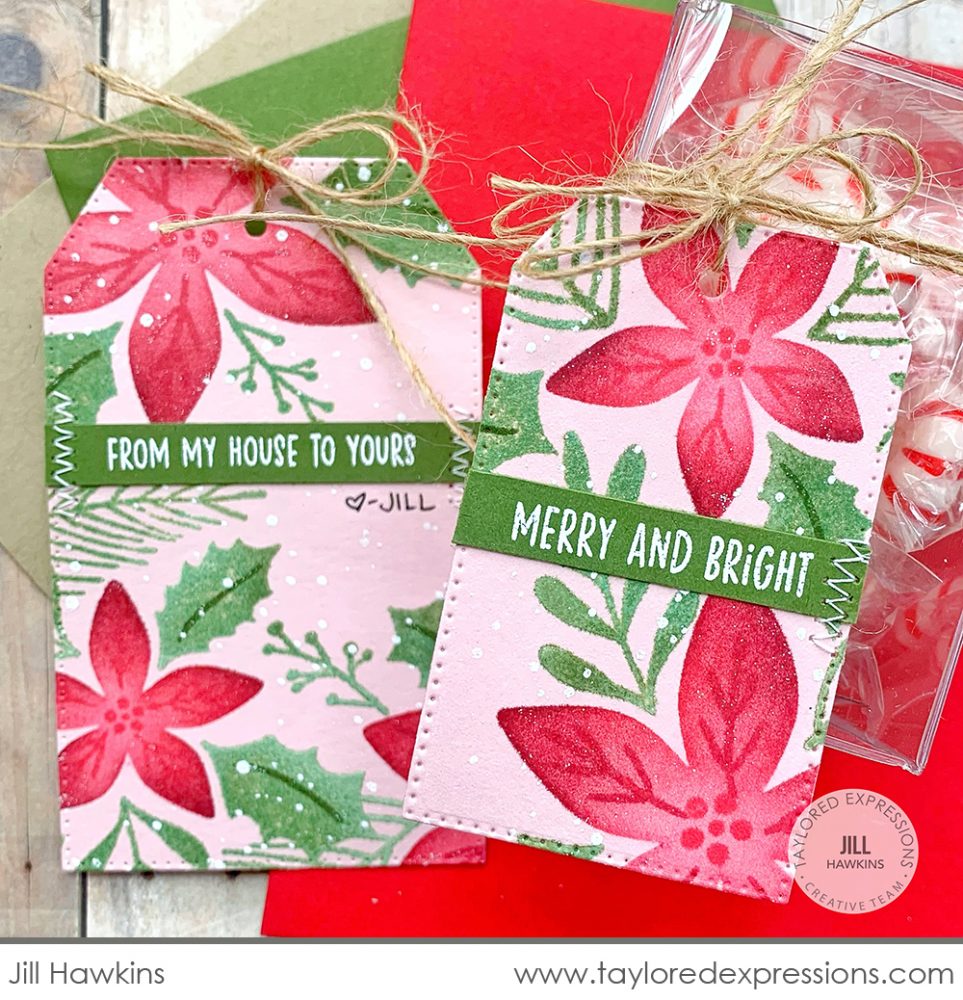
Jill Hawkins used the background she created with the Merry Blooms Stamp, Stencil, & Clear Combo set to create Christmas tags. She stamped and stenciled the design on Cupcake cardstock and cut out the tags using the Pierced Tag Stacklets 2 die collection. The sentiments are embossed in white on Cilantro cardstock strips and I love the white embossed spatters that Jill added to add a snowy effect with the Splatter Background stamp. A bit of burlap twine is perfect for attaching the tags to Christmas packages!

Add dimension to backgrounds created with the Merry Blooms Stamp, Stencil, & Clear Combo set or build your own flowers for your projects with the Perfect Poinsettia die collection. The set includes 3 different sizes of poinsettia style petals that you can layer together or use on their own. Add details to the flowers with the clear stamps from the Merry Blooms Stamp, Stencil, & Clear Combo set!
Please note: the Perfect Poinsettia dies are not intended to cut out the stenciled designs from the Merry Blooms Stamp, Stencil, & Clear Combo set.
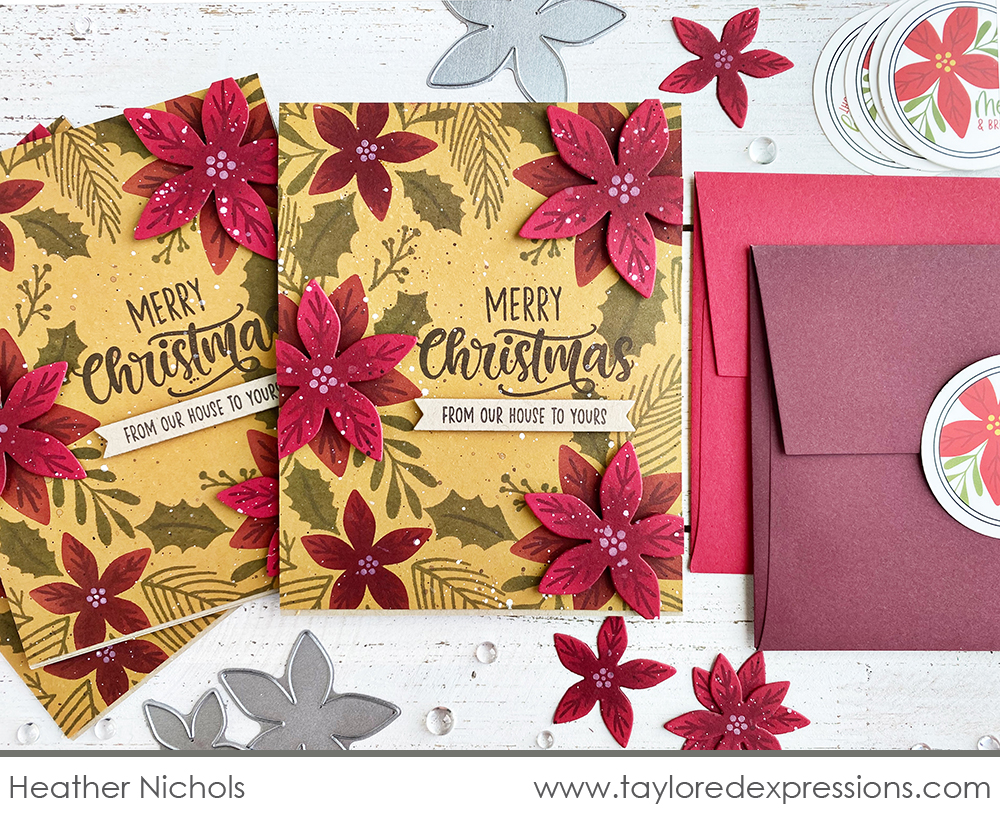
Heather Nichols used the Perfect Poinsettia dies to add extra dimension to the poinsettias on the background created with the Merry Bloom Stamp, Stencil, & Clear Combo set. The background is stamped with Olive ink on Honey cardstock, the poinsettias are stenciled with Cherry Pop ink, and Heather cut out the poinsettias from Cherry Pop cardstock that is shaded with Mulled Wine ink. I love how the poinsettias can be used on their own or layered up depending on the look you want!
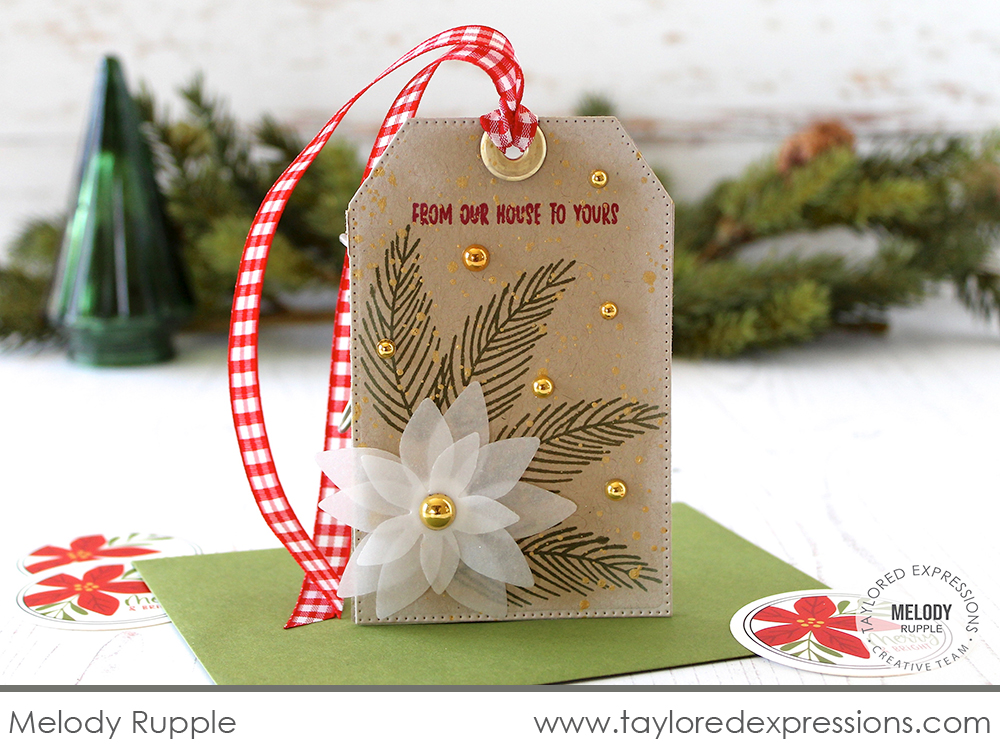
Melody Rupple created a gorgeous poinsettia by cutting out the Perfect Poinsettia dies from vellum and layering the different size flowers together for this Christmas tag. The tag is cut out with the Pierced Tag Stacklets 2 die collection and the poinsettia is layered over pine sprigs stamped with the clear stamps from the Merry Blooms Stamp, Stencil, & Clear Combo set. I love how Melody added lots of gold splatters to her tag to finish it off along with Bits & Pieces – Gold Drip Drops!
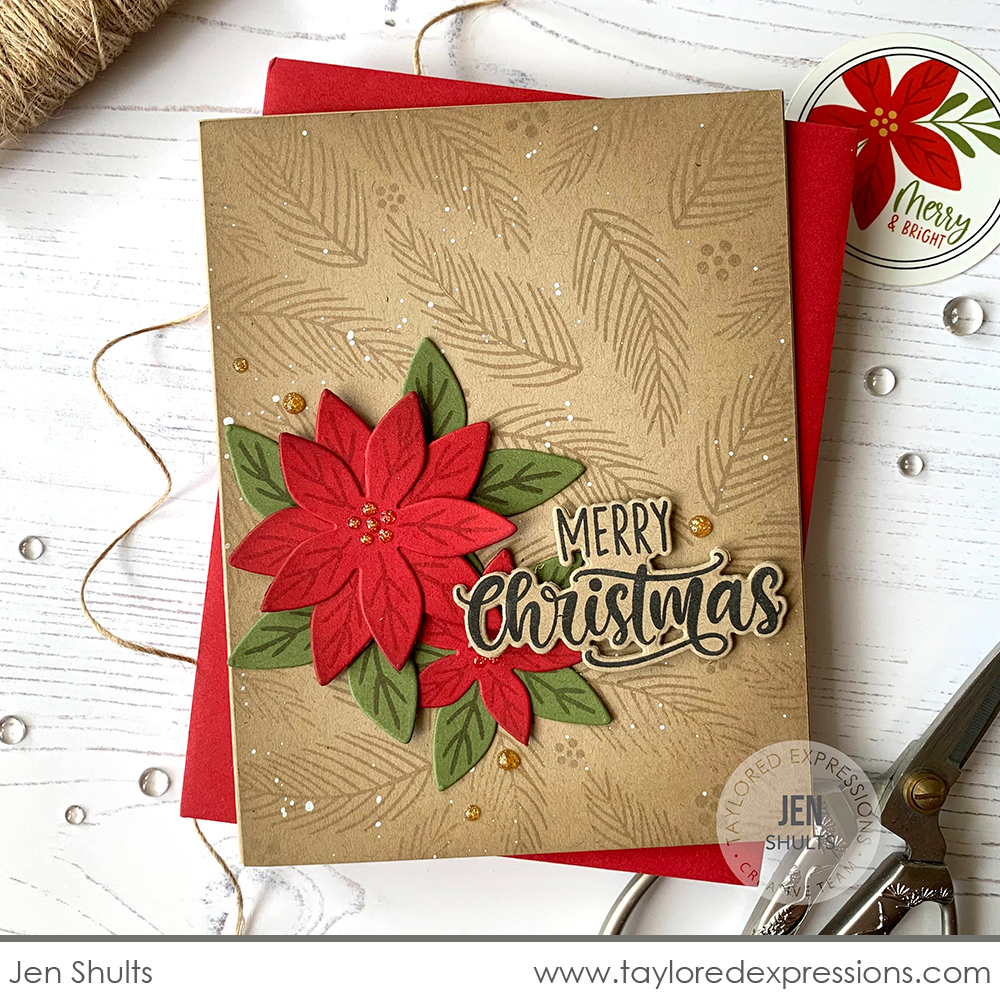
The Perfect Poinsettia dies can also be used to add leaves to your poinsettias! Jen Shults cut out the poinsettias from Cherry Pop and Cilantro cardstock, stamped the details with the clear stamps from the Merry Blooms Stamp, Stencil, & Clear Combo set on both, and assembled them for her card. The background on Jen’s card is stamped using the pine sprig with Toffee ink on Toffee cardstock for a tone on tone effect that allows the poinsettias and sentiment to take center stage!
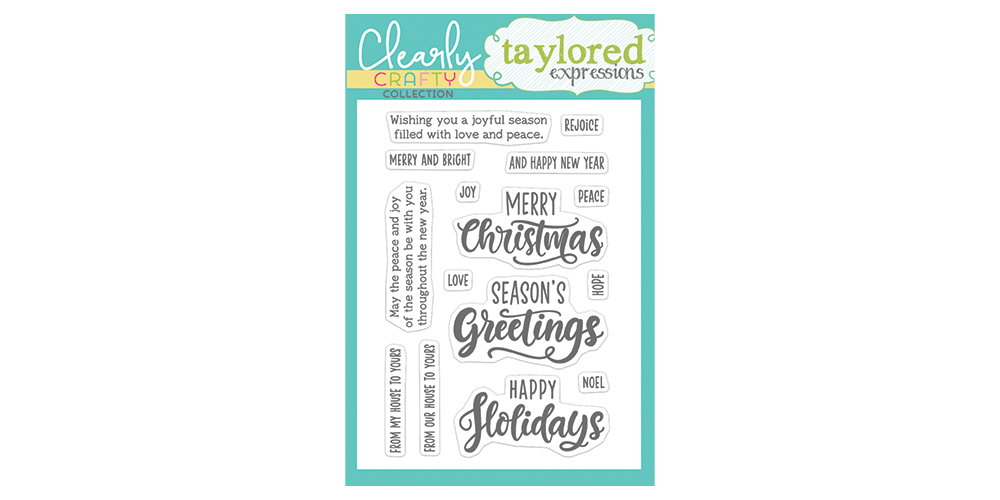
Add Christmas greetings to your holiday cards both on the front and on the inside with the Cleary Crafty Joyful Season stamp set. There are three large sentiments (Merry Christmas, Season’s Greetings, and Happy Holidays), two sentiments perfect for inside your cards, and a variety of seasonal words and phrases.
Please note: coordinating dies for the Joyful Season stamp set are available to purchase separately. The dies are not included in the Merry Blooms kit.
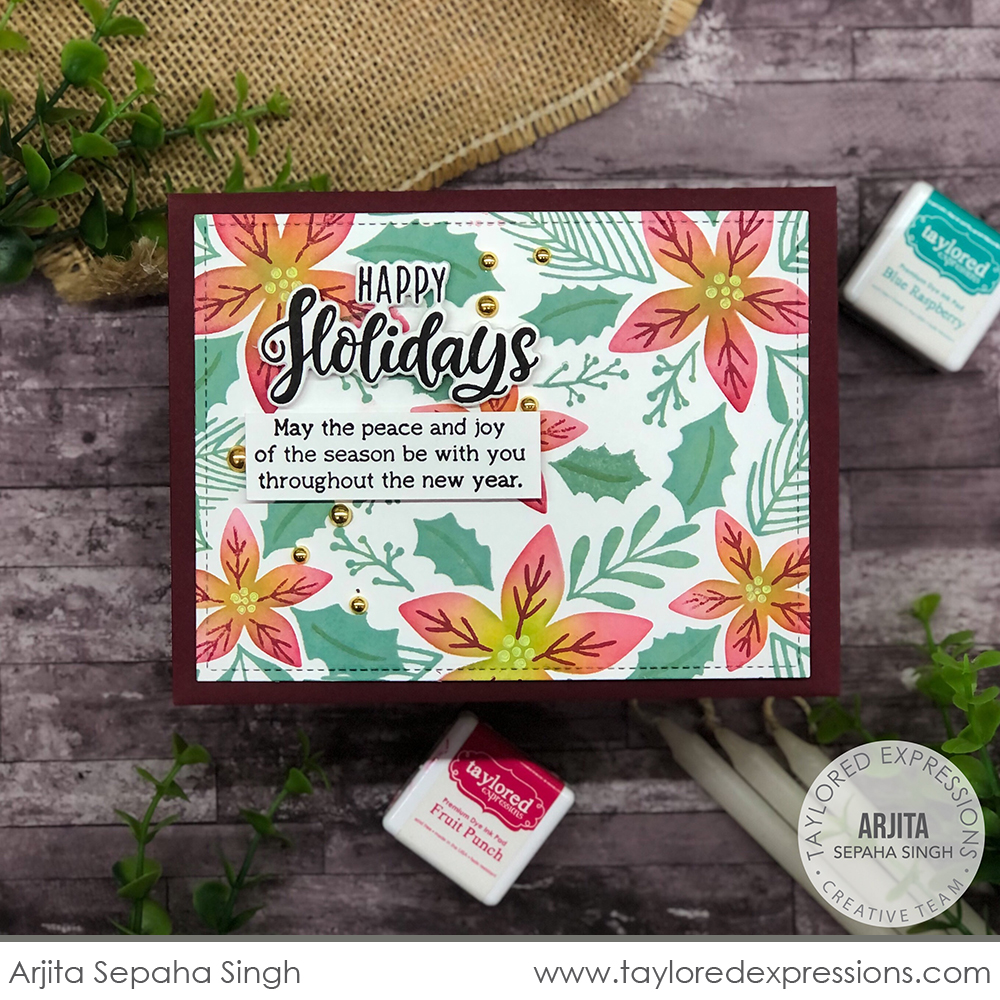
Arjita Sepaha Singh paired the ‘Happy Holidays’ sentiment with the ‘May the peace…’ sentiment from the Joyful Season stamp set on the front of her holiday card. Instead of adding the sentiments to the opening on the background, Arjita filled in the whole card with the Merry Blooms Stamp, Stencil, & Clear Combo set by stenciling an additional small poinsettia into the center opening, adding an extra stamped holly leaf, and then layered the sentiments on the left side of the card design.
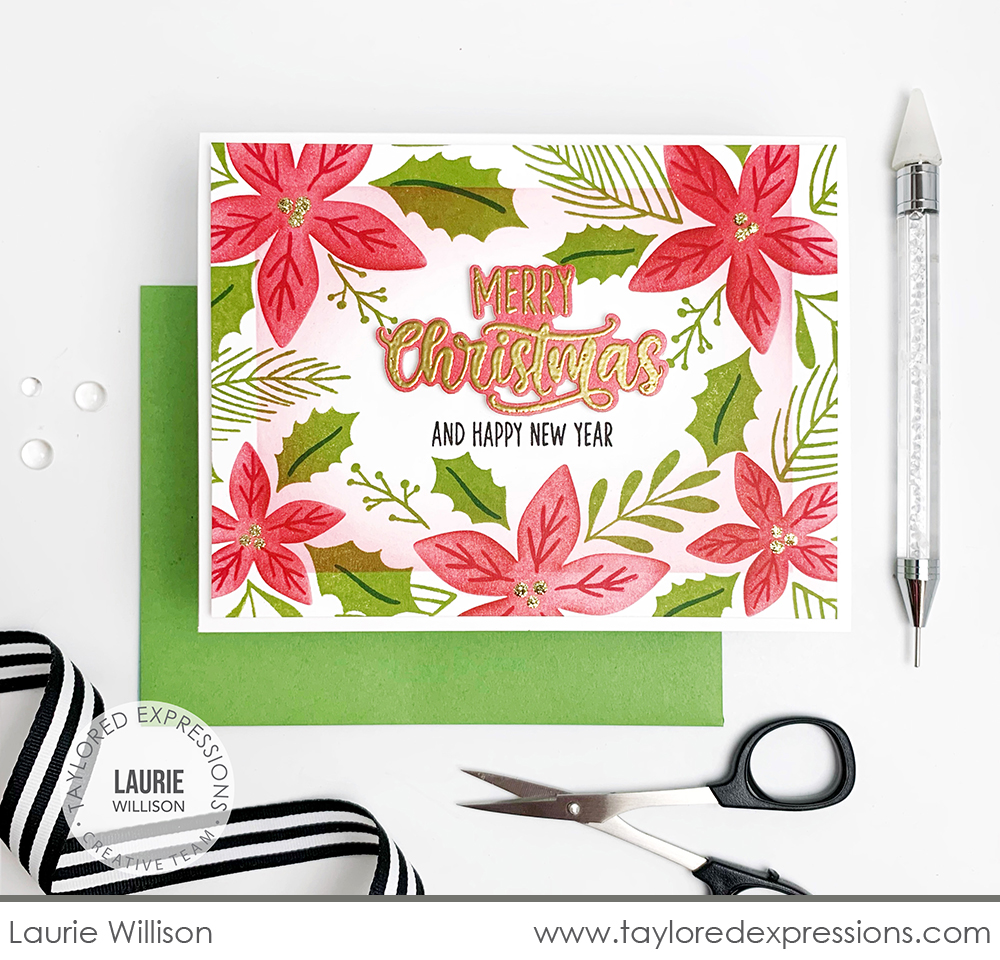
Laurie Willison put the sentiment on her Christmas card together using ‘Merry Christmas’ and coordinating ‘and Happy New Year’ phrase from the Joyful Season stamp set. I love how the sentiment is embossed in gold on Sugar Cube Cardstock blended with Cherry Pop ink to match the stenciled poinsettias on the background. Laurie also subtly framed her design using the Masking Stencils – Rectangles set blended with a very light Cherry Pop ink layer.
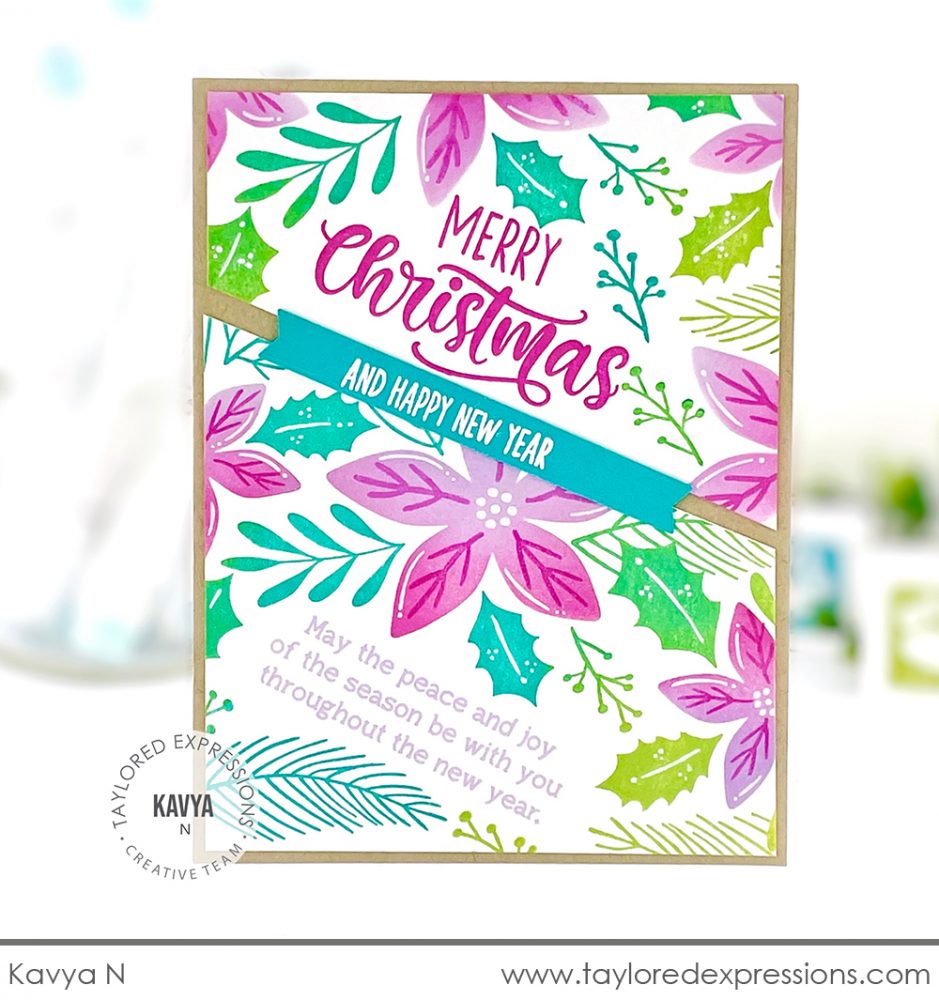
Kavya got creative with sentiments and how she added the background with the Merry Blooms Stamp, Stencil, & Clear Combo set on this Christmas card! The background is pieced together at an angle and then Kavya added the ‘Merry Christmas’ and ‘May the peace…’ sentiments into the open areas. I love the bright, non-traditional colors that Kavya used: Lime Zest, Cookie Monster, Lavender Glaze, and Plum Punch! The ‘and Happy New Year’ sentiment is embossed on a Double-Ended Flag Stacklets die cut and connects the two parts of the card design together.
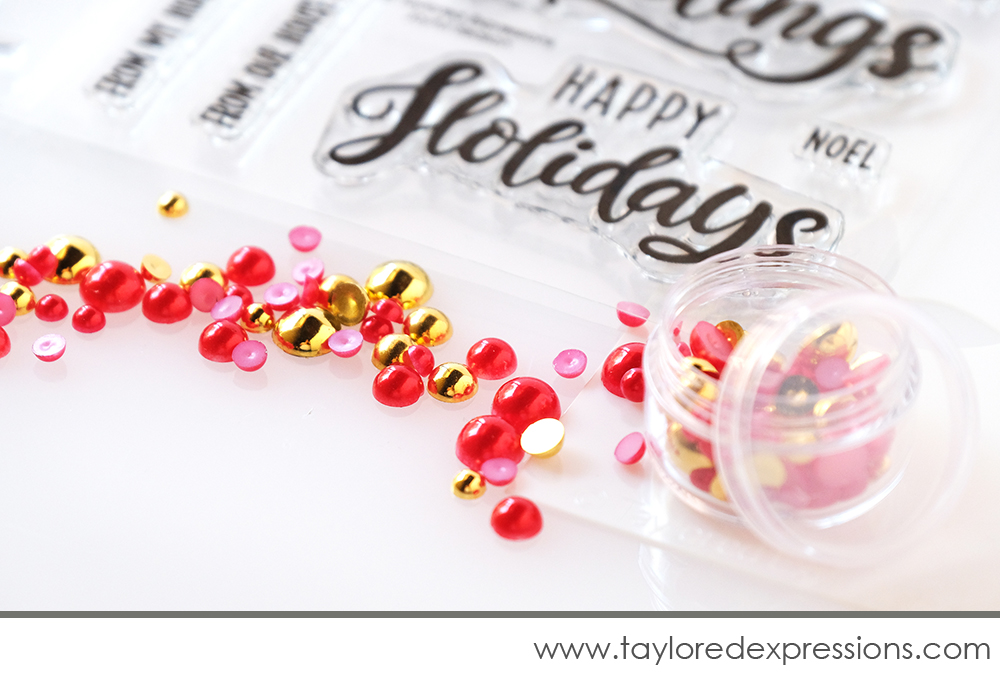
Add shimmer, shine, and dimension to your holiday projects with the Bits & Pieces – Red Pearl & Gold Drip Drop Mix that is exclusive to the Merry Blooms kit. Use the drip drops for the center of the poinsettias or scatter them through your designs!
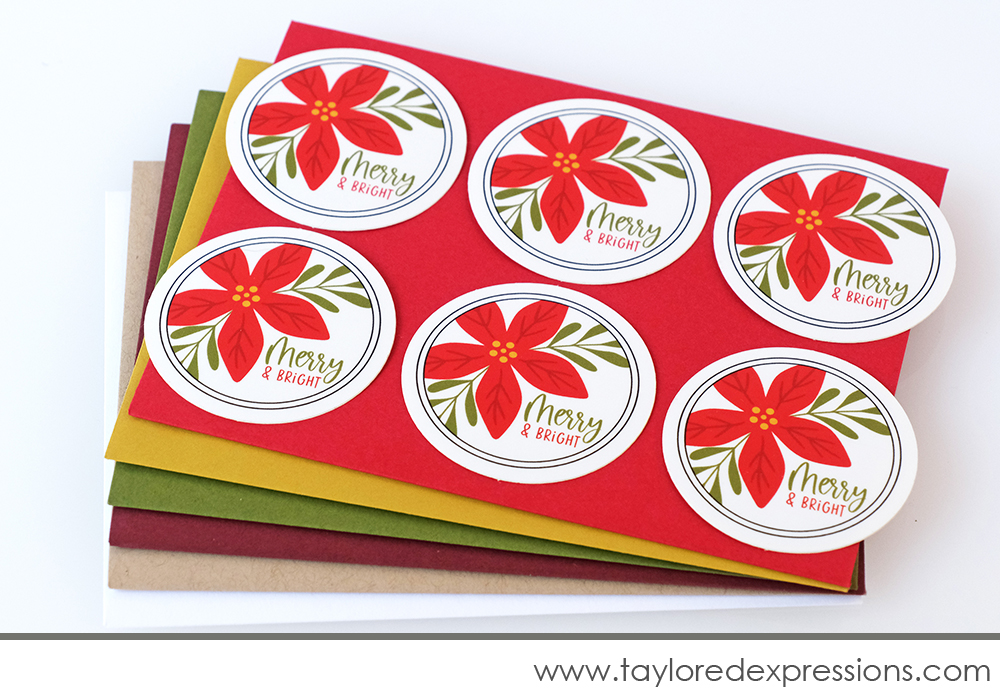
The Merry Blooms Kit includes 6 envelopes and 6 custom envelope seals that coordinate with the theme of the kit. The six A2 envelopes are Sugar Cube, Toffee, Cherry Pop, Mulled Wine, Djion, and Cilantro. and the coordinating envelope seals are made from durable, weatherproof material and are sure to bring a smile to the recipients of your cards.
When it comes to creating cards for the holidays, we know you might want to stock up on extra supplies. Here are the additional kit add-on options for the Merry Blooms Kit:
Just like with all of our kits, additional Merry Blooms envelope seals are available to purchase in packages of 10.

Stock up on envelopes to match the selection included in the Merry Blooms Kit. Additional envelopes are available in a package of 10: 2 each of Toffee, Cherry Pop, Mulled Wine, Djion, and Cilantro.
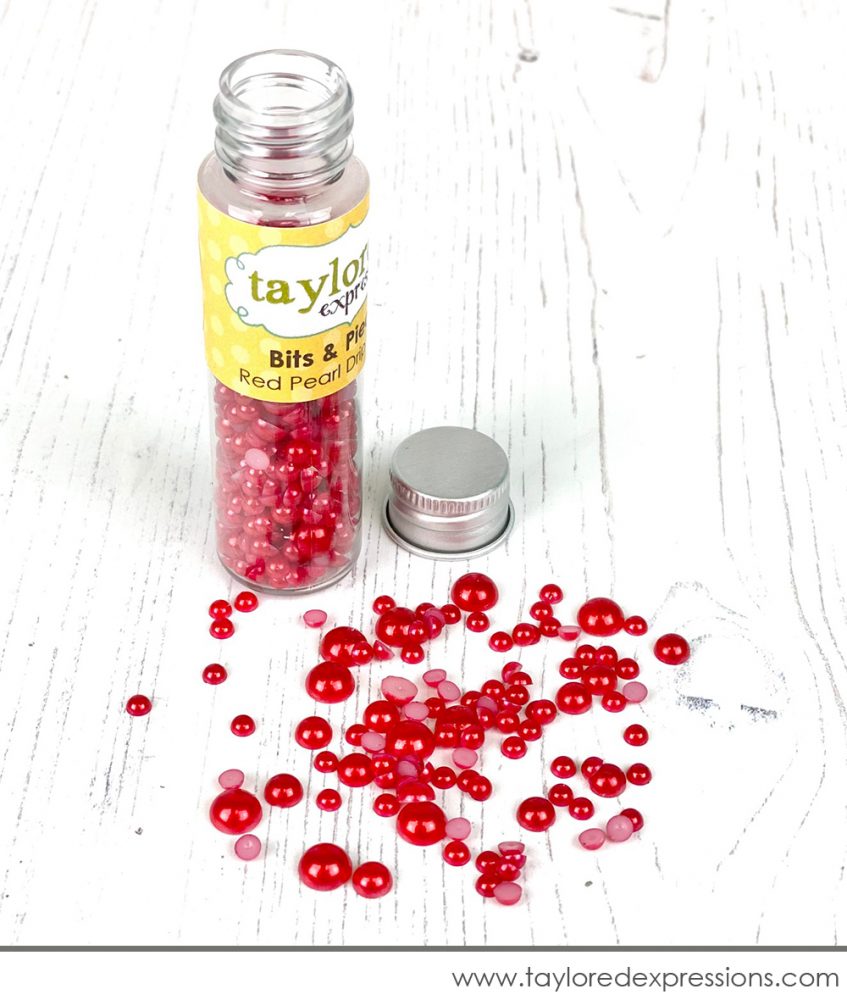
Add the new Bits & Pieces – Red Pearl Drip Drops to your embellishment collection to add the perfect finishing touch to your projects. These opaque, red pearl domes have a flat back and are easy to apply with a drop of glue.
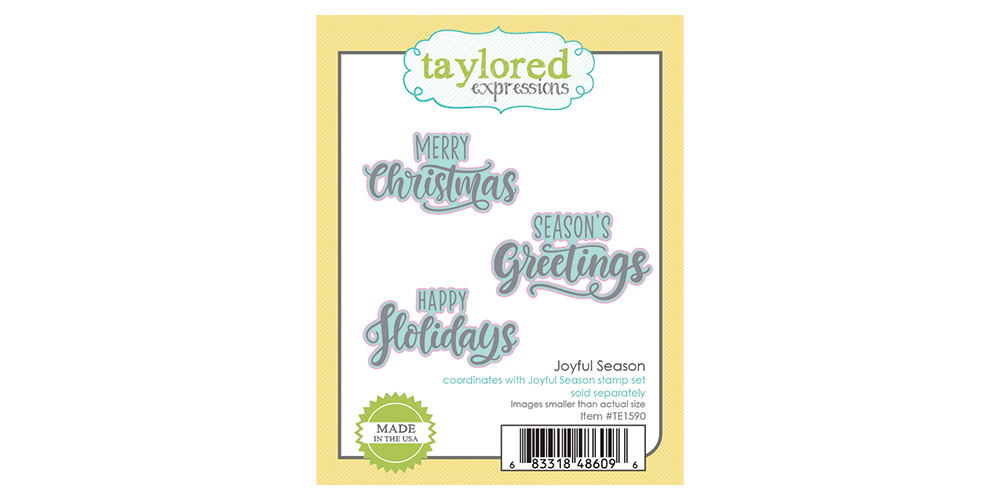
The Joyful Season die collection includes three dies that coordinate with the three large sentiments in the Joyful Season stamp. Cut the sentiments out to add dimension and make your sentiments stand out!
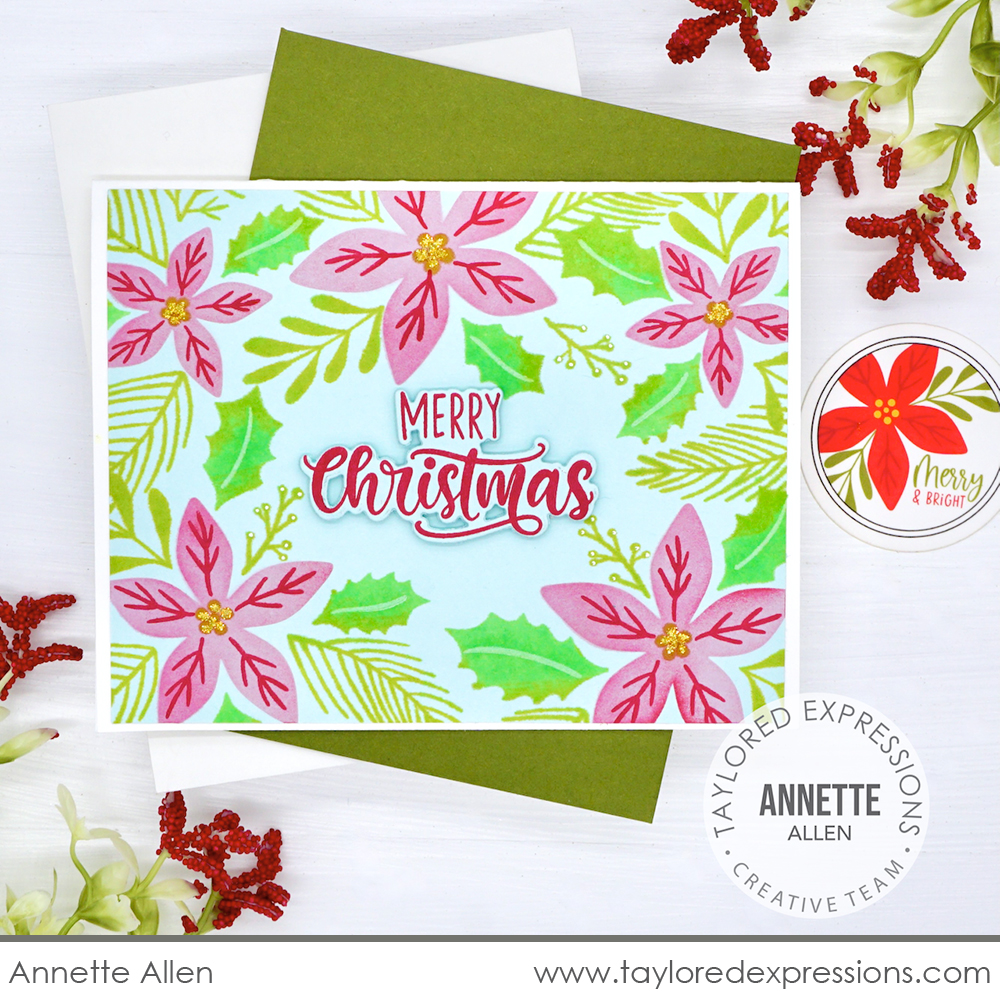
I love how the ‘Merry Christmas’ sentiment on this card by Annette Allen just pops! Annette stamped the sentiment from the Joyful Season stamp set in Cherry pop ink on Stage Cube cardstock, cut it out with the coordinating die, and added just a touch of extra shading with Salt Water Taffy ink behind the die cut sentiment using a Blender Brush on the Salt Water Taffy cardstock.
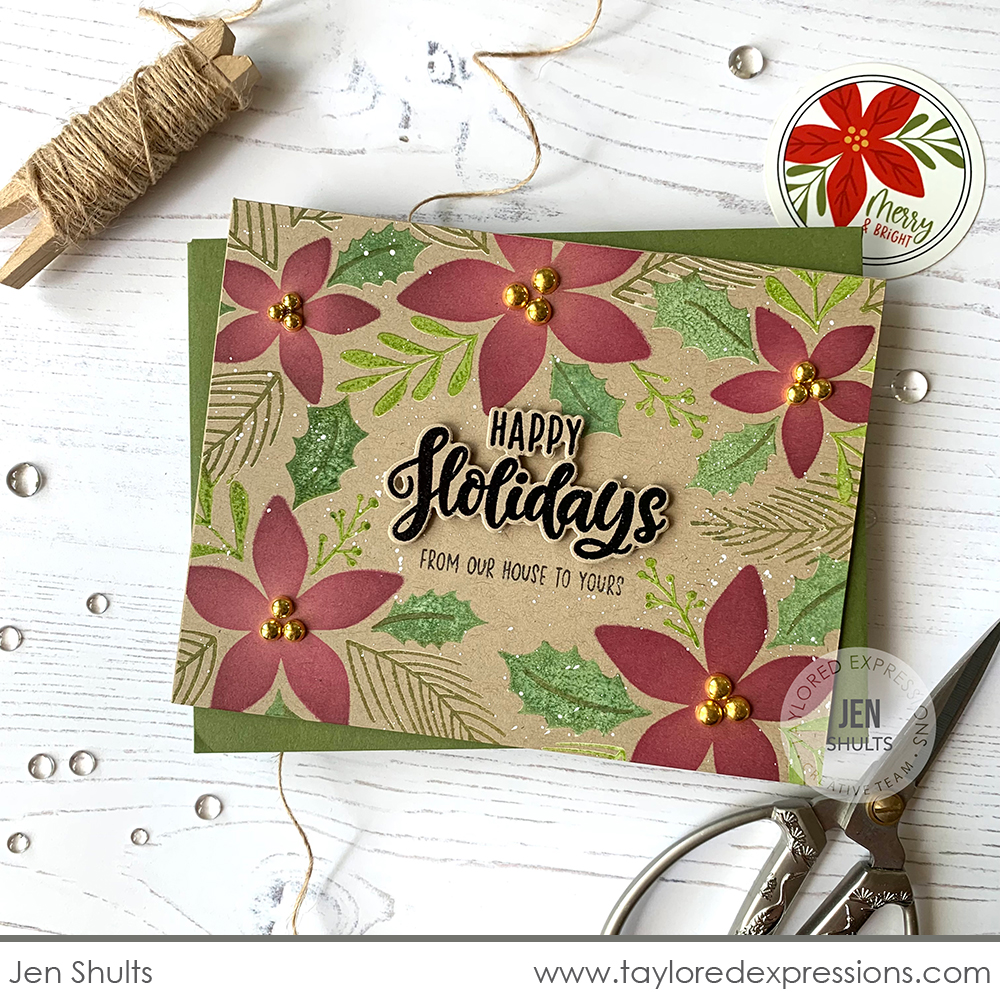
Even when you cut out the sentiment from the same color of cardstock as the background, it still adds extra dimension and pop like on this card by Jen Shults. The ‘Happy Holidays’ sentiment is stamped with Oreo ink on Toffee cardstock, cut out with the coordinating die, and added to the opening on the background created with the Merry Blooms Stamp, Stencil, & Clear Combo set. Jen added the ‘from our house to yours’ stamped underneath in Oreo Ink.
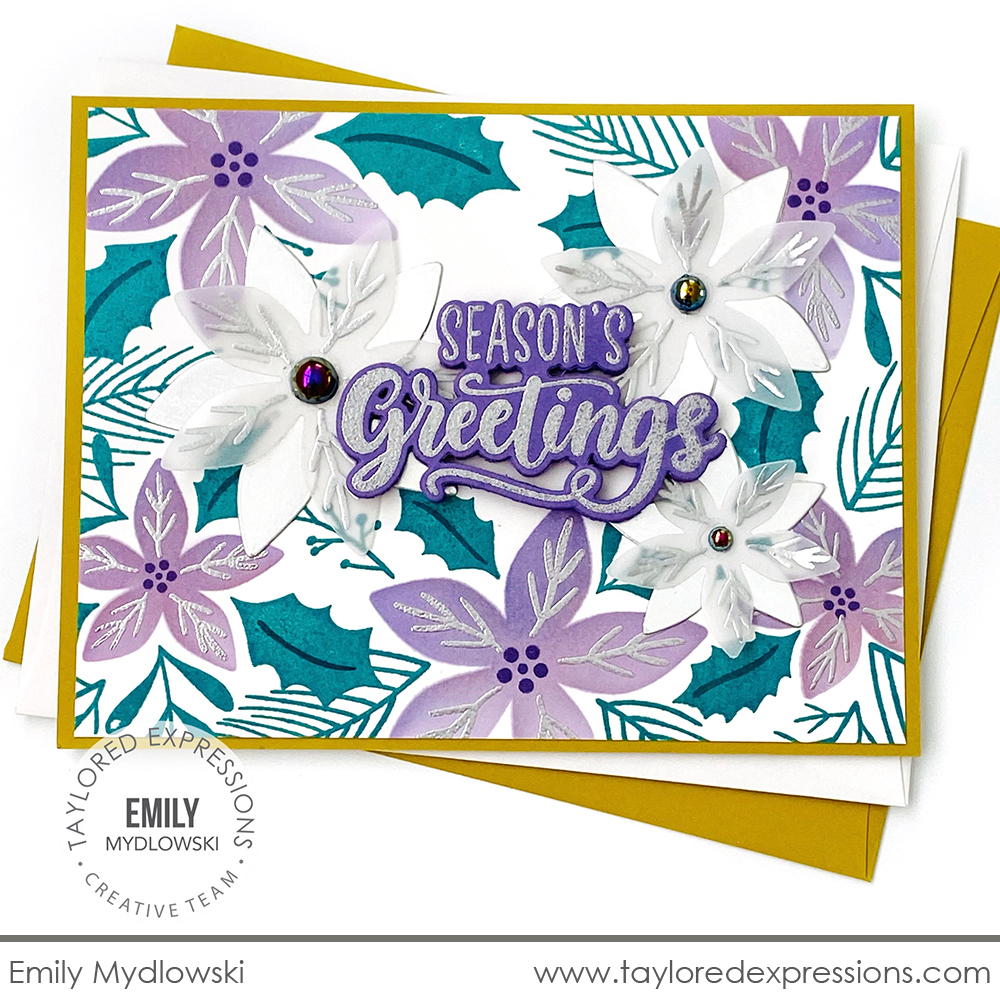
Emily Mydlowski embossed the ‘Season’s Greetings’ sentiment in silver onto Jelly Donut cardstock, cut it out with the coordinating die, and added it to a pretty in purple poinsettia background created with the Merry Blooms Stamp, Stencil, & Clear Combo set. I love the extra poinsettias that Emily tucked around the sentiment that she created with the Perfect Poinsettia dies cut from Sugar Cube cardstock and vellum. They add extra dimension to this showstopper card!

Join me live for “T Time” at 1pm Central today on the Taylored Expressions Facebook Page. I’ll be sharing an unboxing and closer look at the items in the Merry Blooms Kit. We hope to see you there – come join in the fun!
Thank you so much for stopping by today! Make sure you check out the rest of the TE Creative Team projects using the Merry Blooms Kit – click their faces below to hop to their blogs! Stop back again here on the TE blog on Thursday for more inspiration, including a video from Emily Leiphart. See you then!


