Oct 07, 2021
Stamp Joy Spring Exclusives Available NOW!
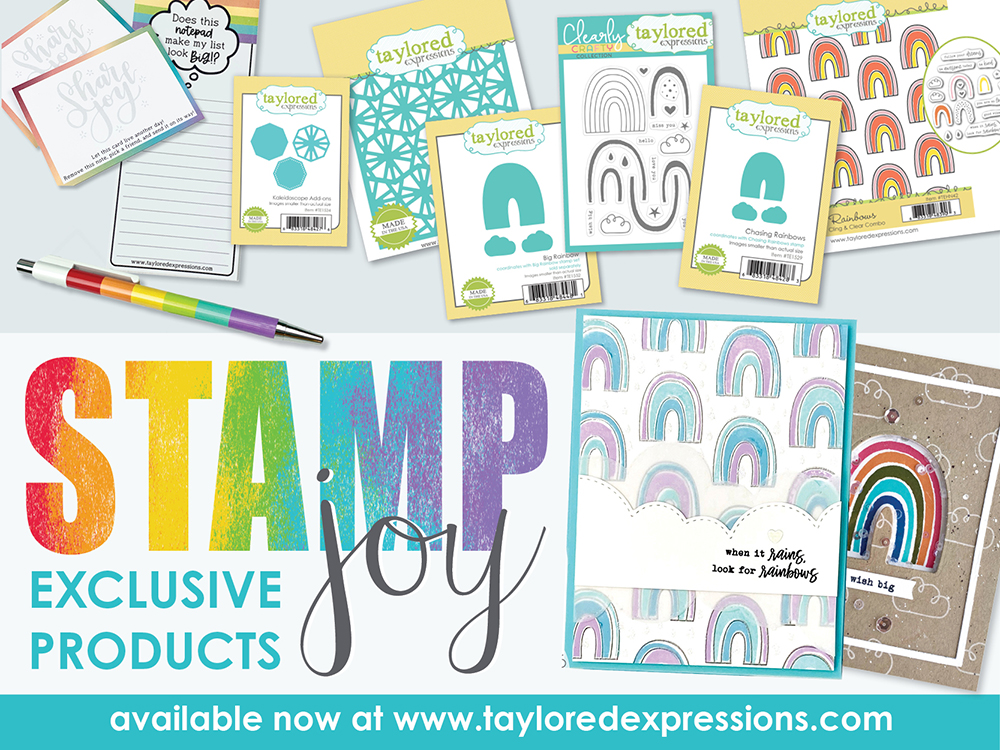
Hey, crafty friends! It’s Heather here! Today is another release day, this time for the products that were exclusively part of our Stamp Joy Spring 2021 virtual event. If you were a part of that event and own the products we are releasing today, get ready for fresh inspiration. If you weren’t a part of the event, you now have the option to purchase the products. Next time, if you want to get exclusive products like these in your hands right away, make plans to join us for future Stamp Joy events!
In fact, we are setting up today for our in person Stamp Joy event in Des Moines, Iowa. If you are joining us, we can’t wait to see you! It’s going to be great!
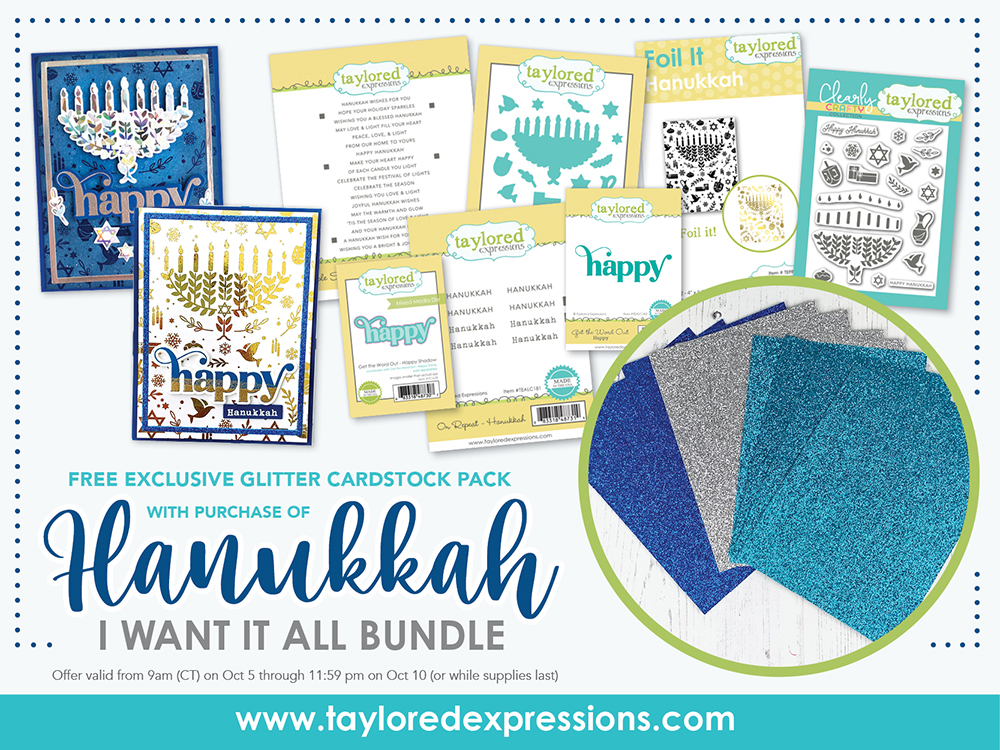
Before I get to today’s inspiration and a closer look at the Stamp Joy Exclusives that are releasing today, here’s one last reminder about the ‘I Want it All Bundle’ promotion for the Hanukkah products that we released in the TE webstore on Tuesday:
Right now through Sunday, October 10th you can get all of the new Hanukkah products in one click! The ‘I Want it All Bundle‘ retails for $82.50 and includes:
- Foil It – Hanukkah
- Bright Hanukkah
- Bright Hanukkah Dies
- Simple Strips – Hanukkah
- Get the Word Out – Happy
- Get the Word Out – Happy Shadow
- On Repeat – Hanukkah
- Exclusive Glitter Cardstock Pack (4 sheets each of Dark Blue, Light Blue and Silver)
Offer valid from 9am (CT) on Oct 5 through 11:59 pm on Oct 10 (or while supplies last)
To take a look at the new Stamp Joy Spring Exclusive products and new Hanukkah products that are now available in the TE webstore, click below. Then keep scrolling for today’s inspiration!

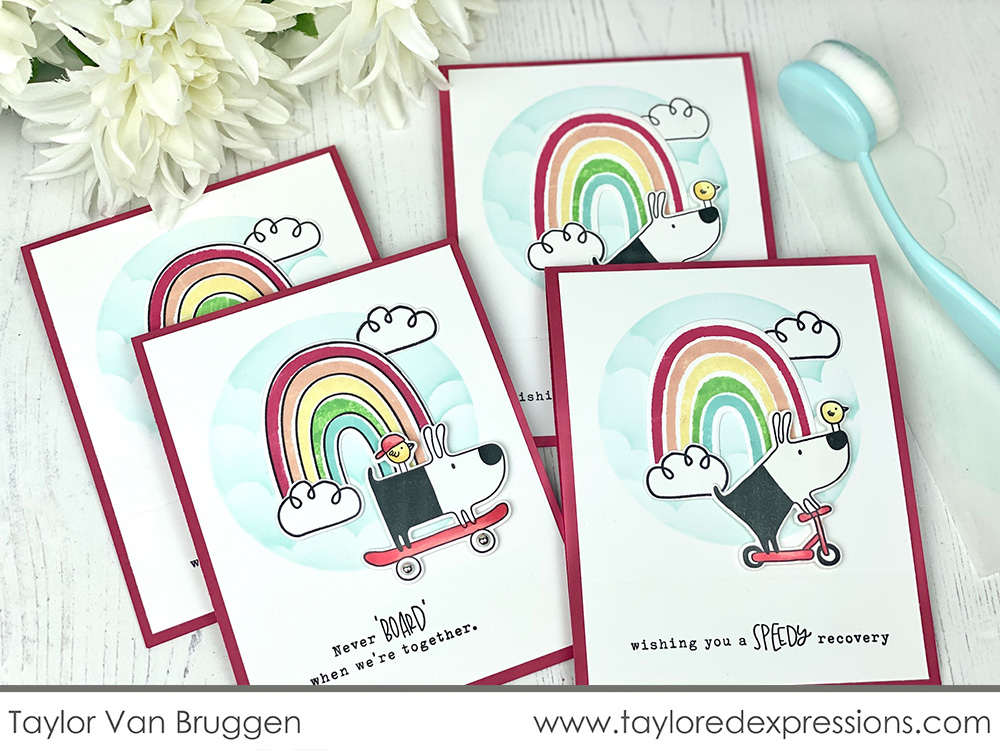
Today’s video is from Taylor! She paired the Big Rainbow stamp set with the ever cute and adorable Gus & Gertie. Watch the video below to see how she created this set of cards:
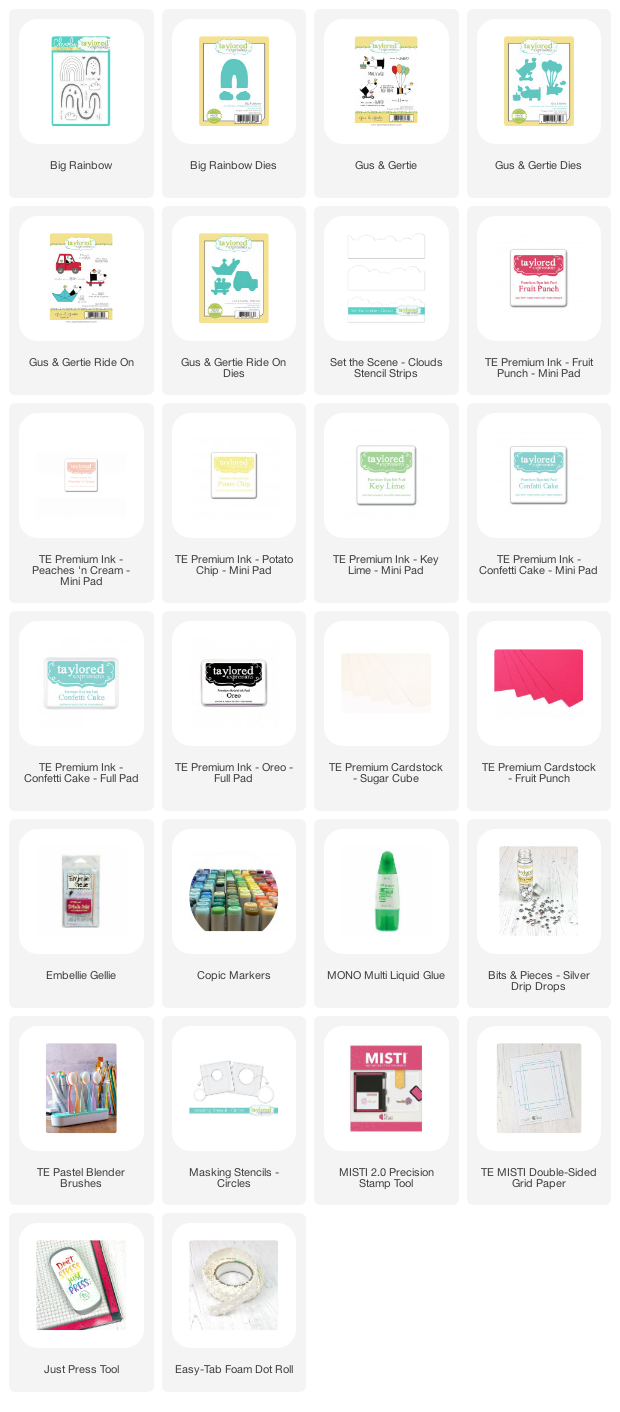
In the video, Taylor shows you how to stamp rainbow and cloud images from the Big Rainbow stamp set both with the outline image and without. She has some great tips for setting up your MISTI to stamp multiple rainbows for card mass production. The card backgrounds are stenciled with the Set the Scene – Clouds Stencil Strips set with the largest circle stencil in the Masking Stencils – Circle set. The Gus & Gertie images are from the original Gus & Gertie stamp set (Gus on the scooter) and Gus & Gertie Ride On stamp set (Gus on the skateboard). The images are colored with Copic markers and cut out with the coordinating dies.

I love that Taylor showed how the rainbow looks stamped both with the outline and on its own – both turn out super cute and I really can’t pick a favorite! Taylor added the rainbows to the cloud background, adding one cloud to the bottom left of the rainbow arcs and the other tucked behind the rainbow on the upper right. That left the perfect landing spot for Gus & Gertie at the other end of the rainbow! She stamped the sentiments under the images and now these cards are ready to deliver!
Check out the list below for all of the supplies that Taylor used on her cards:

Here’s a closer look at the new products now available to purchase that were originally a part of our Stamp Joy Spring 2021 event + inspiration from the TE Creative Team:
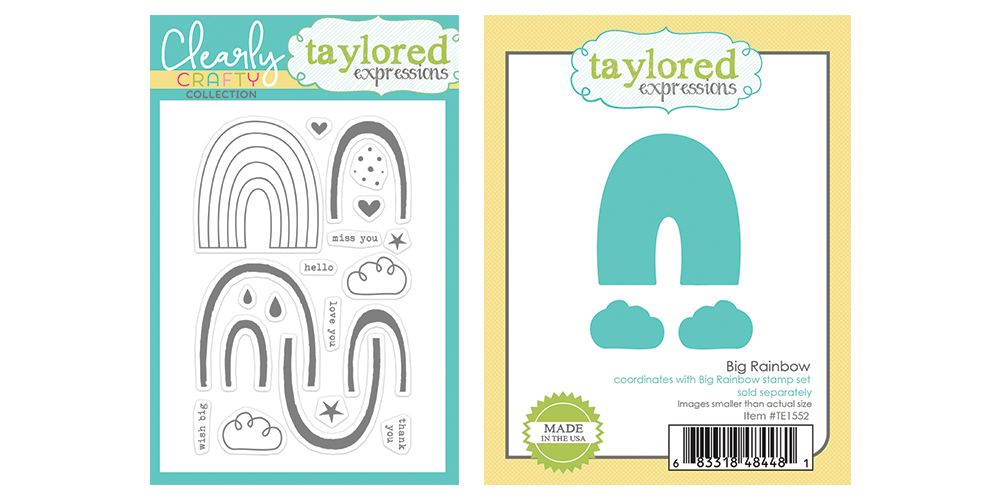
The Clearly Crafty Big Rainbow stamp set (+ coordinating dies) includes all of the elements to add extra color to your world! Add colorful arcs to the outline rainbow image (or stamp the rainbow without the outline like Taylor did in the video above!), stamp a few puffy clouds, add fun details using the small images, and/or add tiny typed sentiments using the stamps in the set.
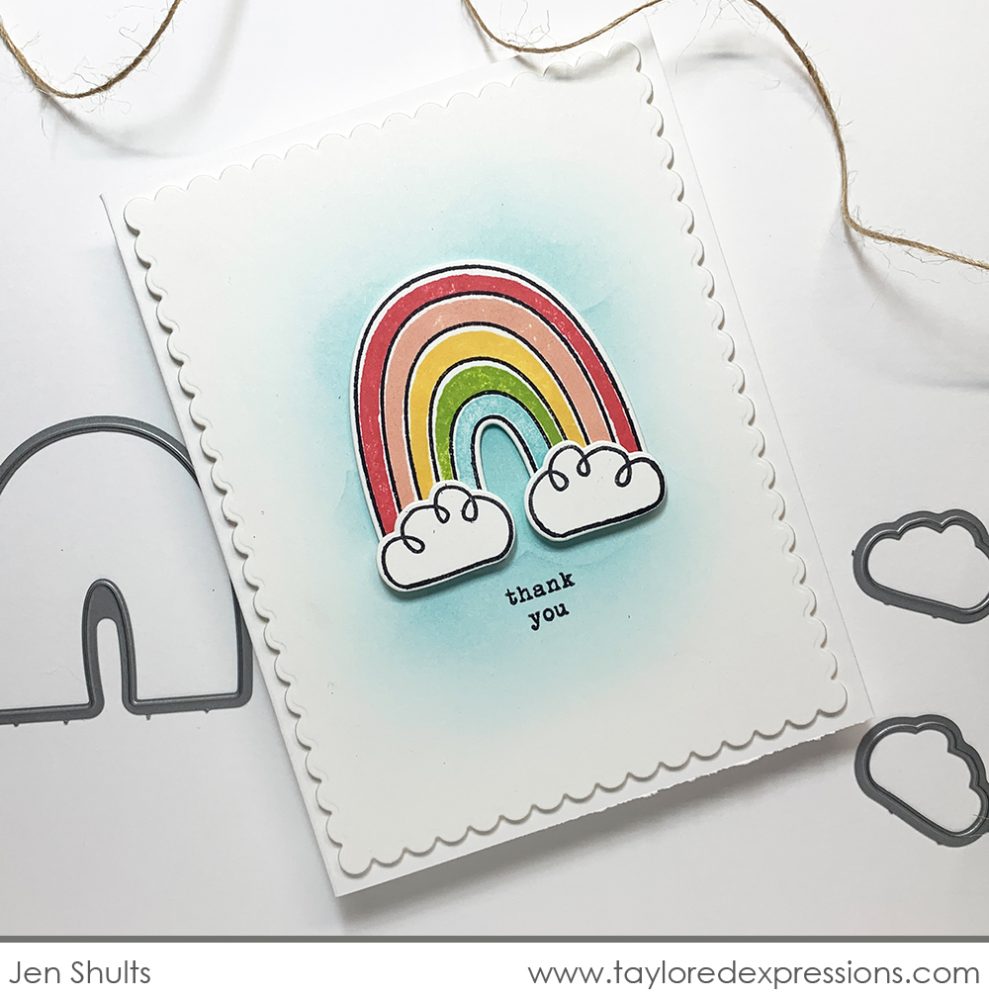
It’s easy to create clean and simple card designs with the Big Rainbow stamp set like Jen Shults did here! Jen added the rainbow using foam adhesive over Confetti Cake ink blending with a few cloudy poofs added using the Set the Scene – Clouds Stencil Strips set. The background panel is cut out with a Petite Scallop Rectangle Stacklets die and the ‘thank you’ sentiment is stamped in Oreo ink under the rainbow.
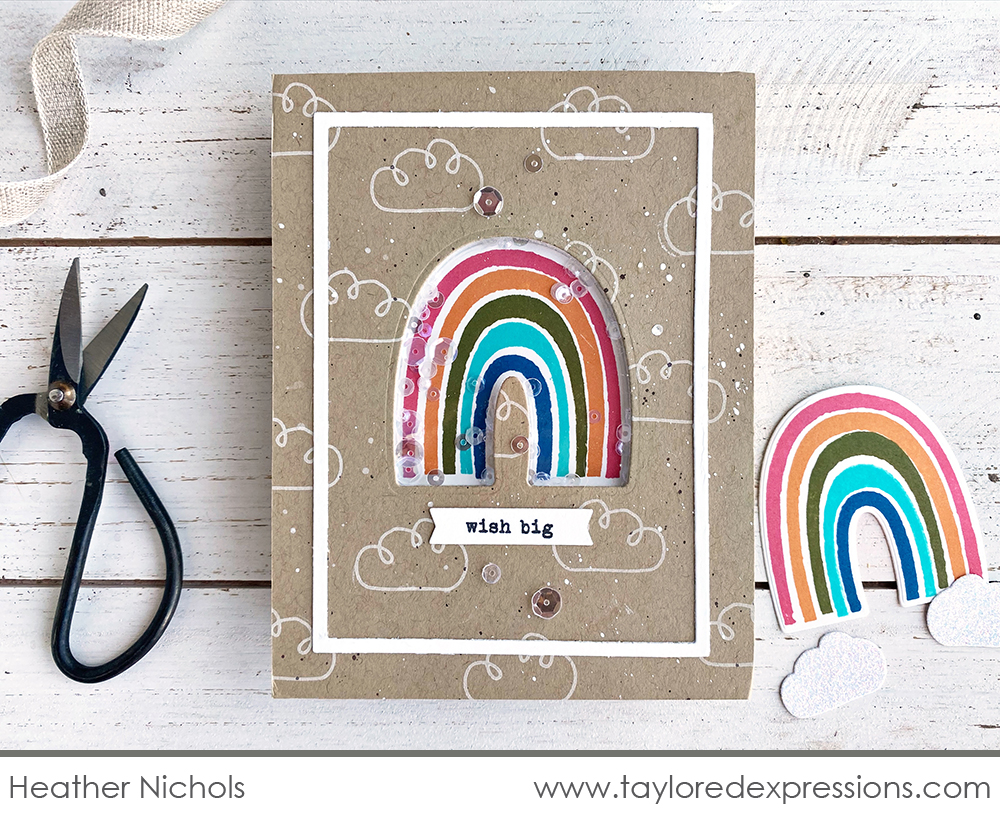
I used the Big Rainbow stamp set (+ coordinating die) to create a shaker card (Heather Nichols)! The rainbow shape is cut out from a piece of Toffee cardstock that is stamped all over with the cloud images in Sugar Cube ink. I set the rainbow image behind the opening and popped up the panel, creating the shaker with a piece of window acetate, Foam Sticky Strips, and filling the shaker with Snow Flurries sequins. The ‘wish big’ sentiment is stamped on an On Repeat die cut strip, I added a frame cut out with the A2 Thin Frame Cutting Plate die, and finished off the design with a few more sequins sprinkled down the card.
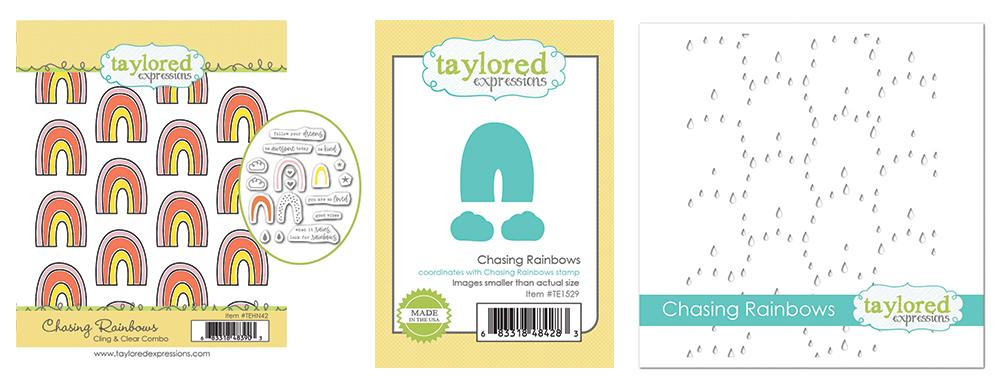
Stamp a whole bunch of of tiny rainbows using the Chasing Rainbows Cling & Clear Combo set! The background stamp features an all over pattern of outline rainbow images that you can add color and pattern to with the included clear stamps. The clear stamp set also include cute puffy clouds, sentiments, and a few tiny images to add fun details! Cut out the rainbow and cloud images from the set with the coordinating die to use them individually on your projects. The Chasing Rainbows stencil adds a raindrop pattern between the rainbow images on the background stamp.
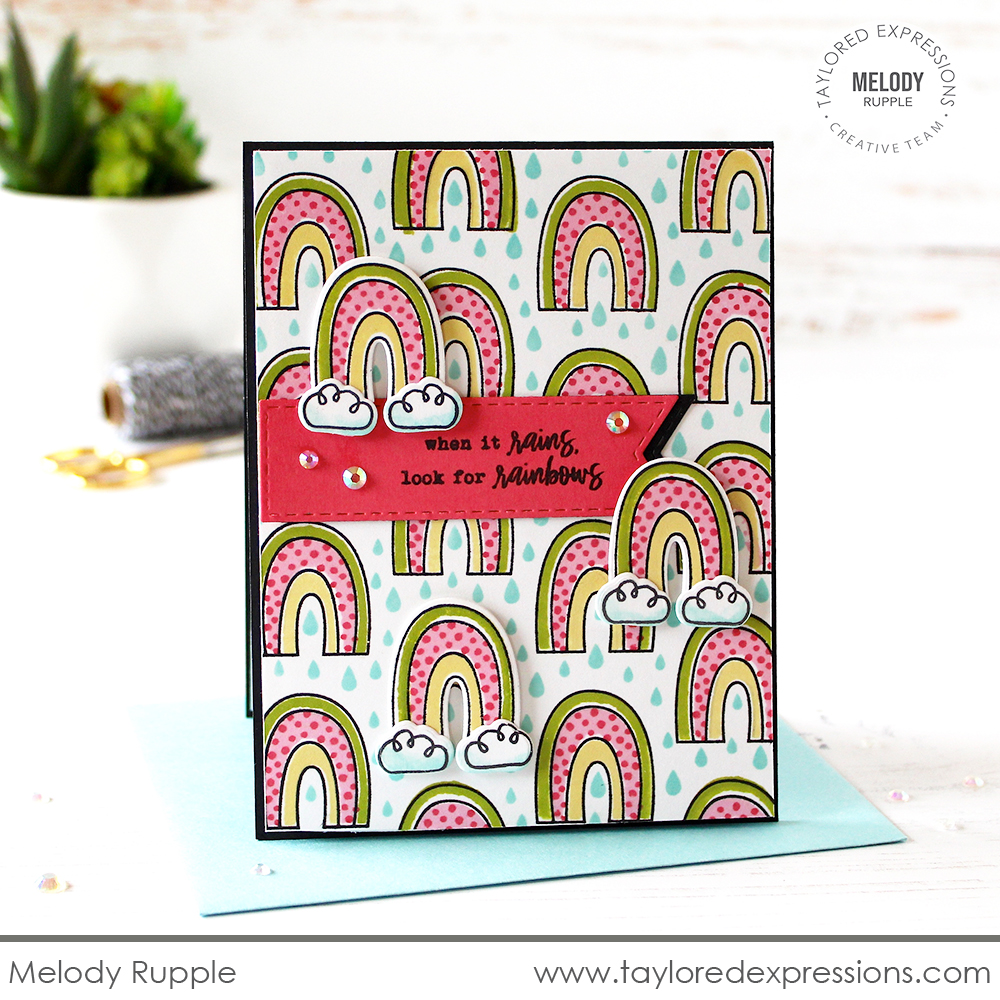
I love the unique colors that Melody Rupple used on the tiny rainbows for this card that she created with the Chasing Rainbows Cling & Clear Combo set! She stamped the background and added color and pattern to the rainbows using the clear stamps. The raindrops around the rainbows are added with the Chasing Rainbows stencil. Melody stamped more rainbows, a few clouds, and cut them out with the coordinating dies to pop up on her card. The sentiment is stamped on a Stitched Banner Stacklets die and Melody added a few Bits & Pieces – Iridescent Rhinestones for a finishing touch.
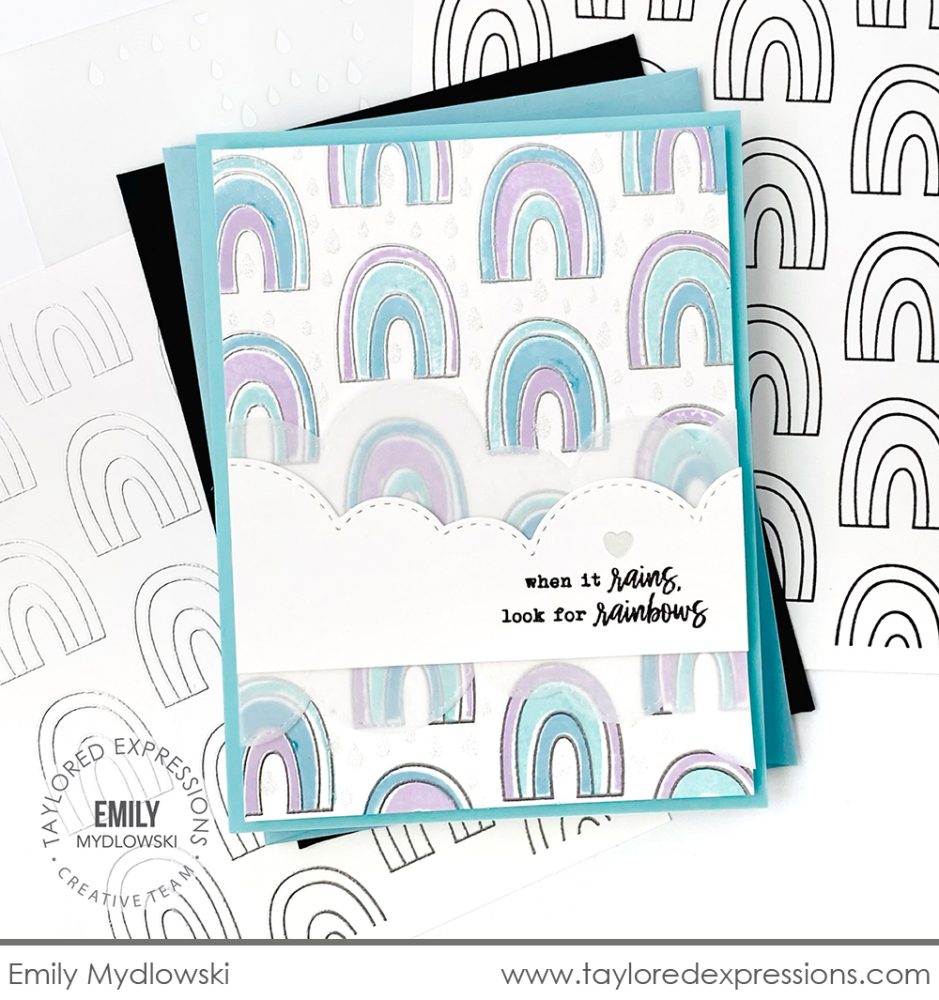
Emily Mydlowski went for pretty pastel shades of blue and purple to color the rainbows on this card created with the Chasing Rainbows Cling & Clear Combo set. She embossed the background stamp in silver, added color to the rainbows with the clear stamps, and added glittery raindrops using the Chasing Rainbow stencil with Happy Medium – Iridescent Glitter. The sentiment is added to a strip of Sugar Cube Cardstock cut across the top with a Build a Scene – Rolling Clouds die. I love how Emily layered an additional cloud layer cut from vellum underneath to add extra texture and interest!

Cut out an all over background design reminiscent of looking through a kaleidoscope with the The Kaleidoscope Cutting Plate die that’s both whimsical and geometric at the same time! We recommend using the Kaleidoscope Cutting Plate die with our Metal Shim (sold separately) to help provide even pressure over the entire cutting plate, ensuring a clear, crisp cut every time.
Add extra detail and layers to the Kaleidoscope Cutting Plate die cut with the Kaleidoscope Add-ons die collection. The set includes three dies that cut out a solid octagon, pierced edge octagon, and an octagon that matches the shapes that repeats in the cutting plate design.
The Clearly Crafty A Few Phrases stamp set includes an octagon border, four sentiments that coordinate with the border image (or you can use them on their own), five sentiments reversed out of solid strips, and a few small images to add fun details.
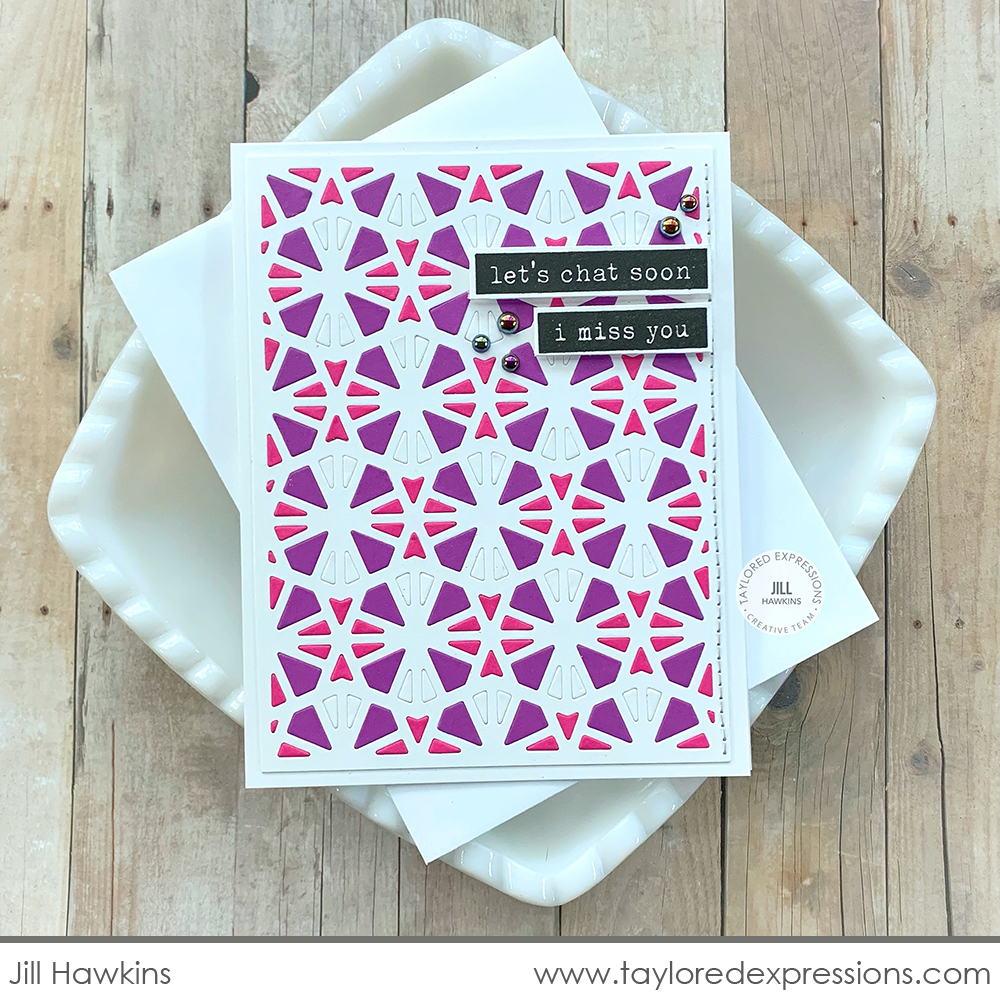
Jill Hawkins had fun playing with shape and color on this card created with the Kaleidoscope Cutting Plate die. She cut out the die from Sugar Cube, Plum Punch, and Lollipop cardstock and then inlaid pieces back into the die cut, creating a unique pattern. Add a sticky sheet to the back of your cardstock before you die cut (leaving the backing paper in place) to make inlaid piece assembly a breeze! She added a few sentiment strips from the A Few Phrases stamp set, a bit of stitching, and a few Bits & Pieces – Cosmic Drip Drops to complete the card.
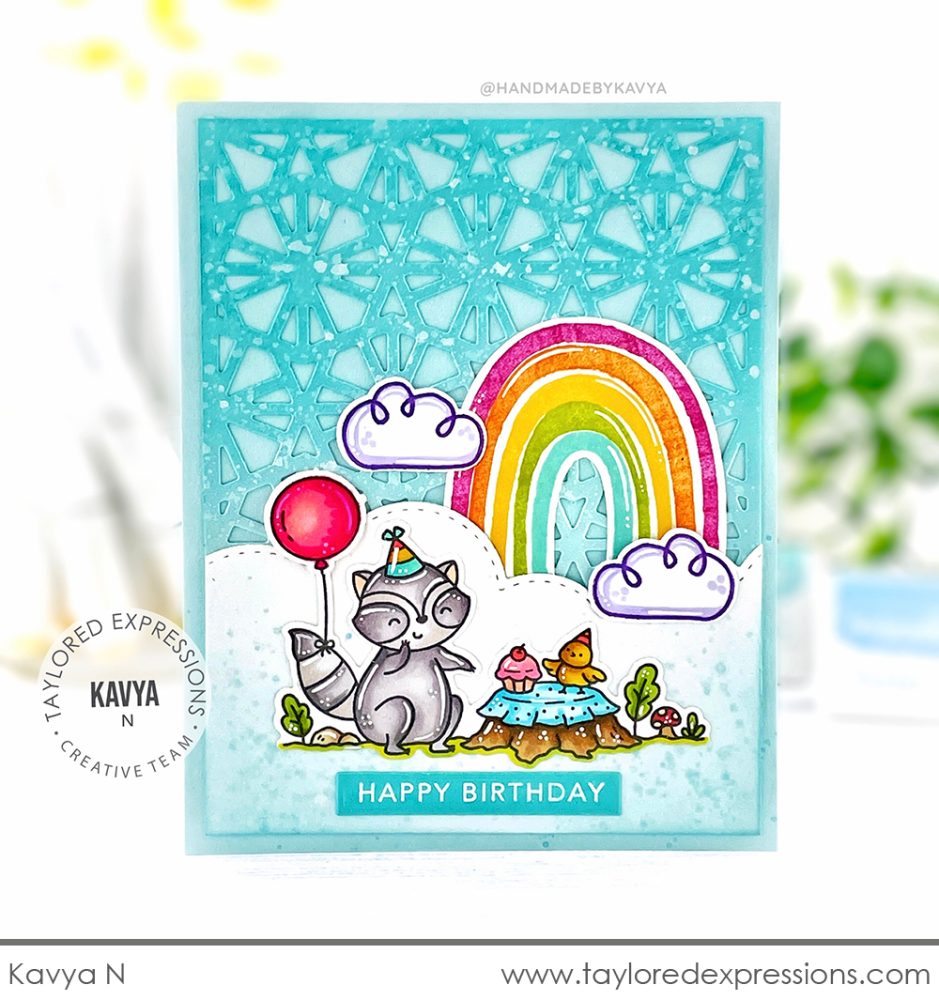
Kavya used the Kaleidoscope Cutting Plate die as a textured background for the cute scene on this birthday card! The scene is stamped with the Chip & Charlie Party Stamp & Die Combo set and colored with Copic markers with white gel pen highlights. I love that Kavya incorporated the rainbow from the Big Rainbow stamp set into the scene too! The sentiment is from the Mini Strips – Birthday stamp and is embossed in white on Cookie Monster cardstock.
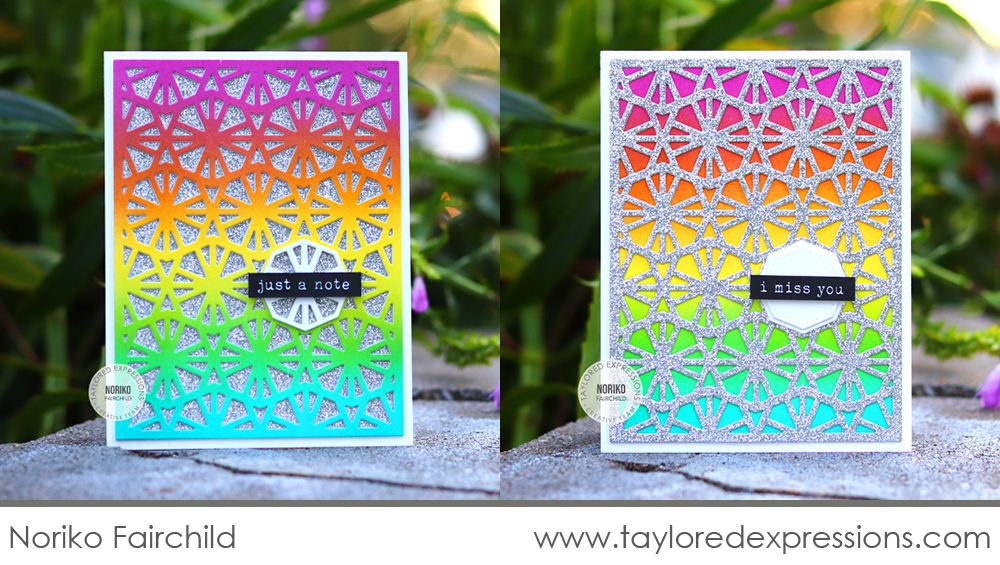
Noriko Fairchild created this colorful and sparkly card duo with the Kaleidoscope Cutting Plate die. For the card on the left, she cut the cutting plate from a piece of cardstock with a rainbow blend and layered it over silver glitter cardstock. For the card on the right she did the opposite, cutting the cutting plate from silver glitter cardstock and layering it over the rainbow blend. The sentiments strips on both cards are highlighted with Sugar Cube cardstock die cuts from the Kaleidoscope Add-ons die collection.
In addition to the crafty supplies, we have a few other basics perfect for sending your handmade cards to loved ones and making your crafty wish lists:

Our Rainbow Share Joy Stickies are a genius way to help you make someone’s day with your handmade cards! Perfectly sized for A2 cards, you can write your messages on these instead of directly on your card and inspire your card recipient to pass the card on to someone else. Joy is multiplied when it’s shared!
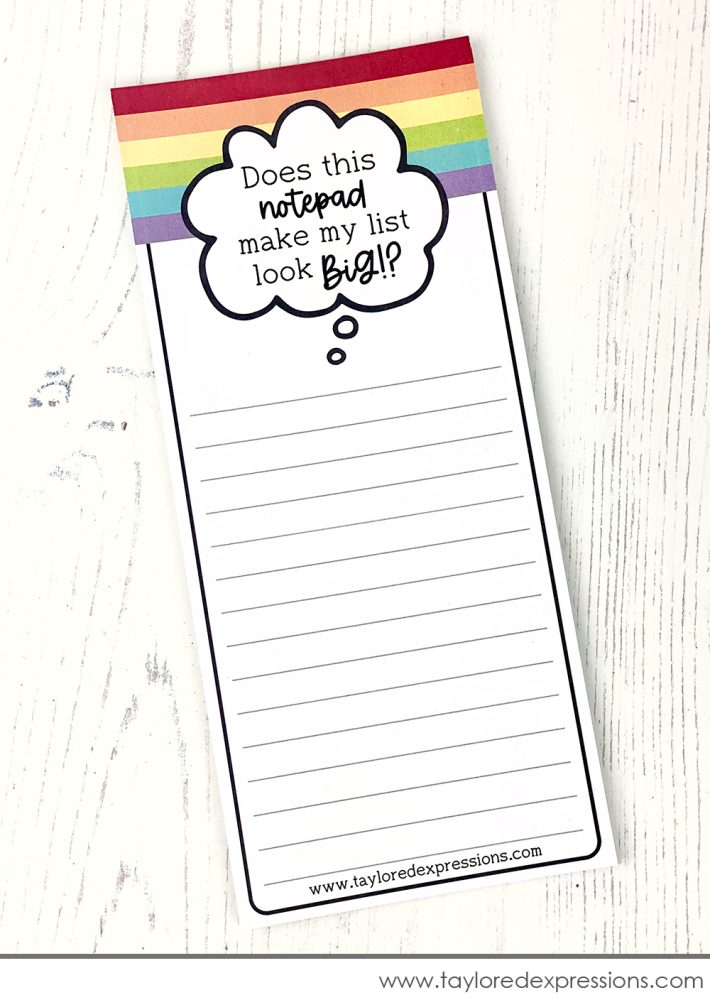
Do you have a crafty wish list? Do you have it written on an extra special crafty wish list notepad? The Big List Notepads are here to fulfill all of your list making needs – crafty or otherwise!
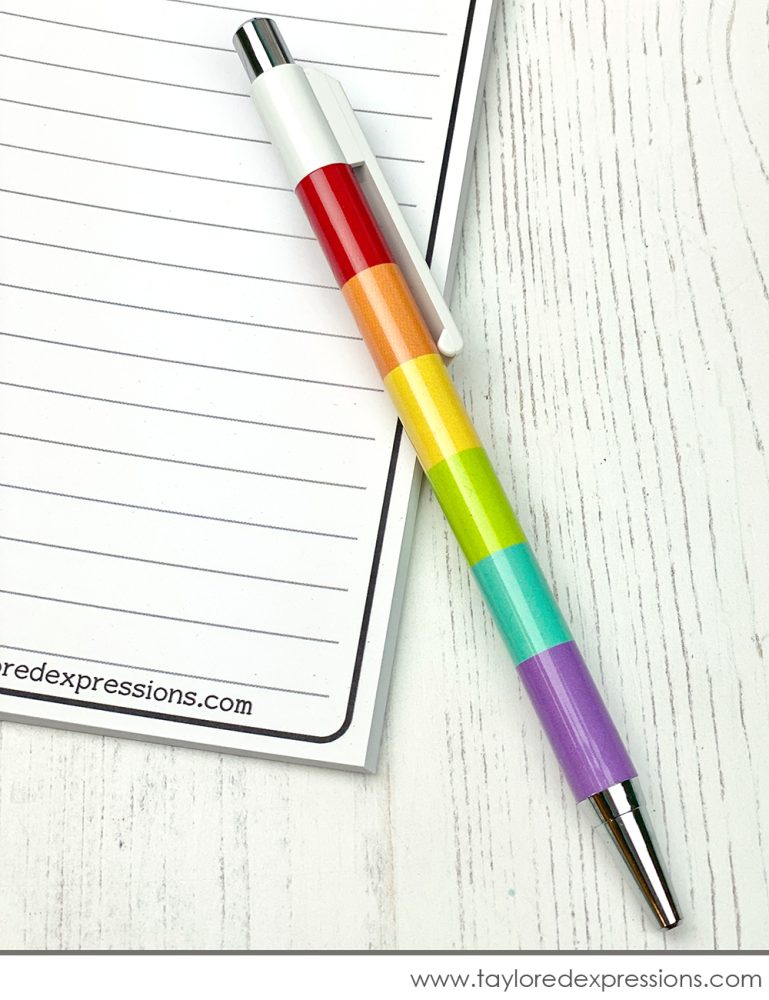
Why address your handmade cards with an ordinary pen when you can sign your name with a Rainbow Pen? Each clickable ballpoint pen has a rainbow striped barrel and is filled with classic black ink and feature a 1.0mm medium tip.
I hope you enjoyed this week of Hanukkah and Stamp Joy Exclusive release inspiration here on the TE blog! We would love to see what you create with the new products from the release – or with any other TE products! You can share your projects over on the Fans of Taylored Expressions Facebook page. There’s such a great community of crafters that are a part of the group. If you aren’t currently a part of it, please join us!
Next week, we have more crafty goodness coming your way. There’s a new kit coming your way that might just have you trying something brand new! We can’t wait to share, so make plans to stop by and check it out. I’ll share a sneak peek this weekend! Also, if you are joining us for our in person Stamp Joy event, we can’t wait to see you soon!
**Just a note that because we are setting up for the in person Stamp Joy event, there will not be a live broadcast this morning on the Taylored Expressions Facebook Page. Please make plans to join us next week!
Did you know that you can subscribe to our blog and get our posts right in your inbox? Just sign up right HERE – that’s all there is to it to make sure you don’t miss any of our crafty inspiration!


