Feb 01, 2022
Organize Your Stencils With Style + NEW Stencil Designs Available NOW!
Hey, crafty friends! It’s Taylor here today! I’ve been waiting a long time to introduce you to this product and the day is finally here! Our Stencil Storage collection was born out of my own need to organize my stencils! I love all the cool things you can do with stencils and I have A LOT of them. Between our 6×6, mini slim, masking, and layering stencils we have over 150 designs right now – and it’s been getting harder and harder to keep everything in order. I know how frustrating it is to sit down to make a card and reach for something you need, only to discover it’s nowhere to be found! So that’s why I came up with what I hope you’ll agree are some fun new ways to store your stencils so they’re always organized and easy to find!

Right now through 11:59PM CT Sunday, February 6th, when you buy more, you save more on stencils! Buy any 4 stencils to save 10%, buy 5-8 stencils to save 15%, and buy 9+ stencils to save 20%! This promotion is limited to in stock items and excludes the Create-in-Quads collection. It’s a great time to pick up those stencil designs that have been on your wish list and stencils make great gifts for your crafty friends!
Watch the video below to take a look at the new and existing stencil storage and organizational products:
In the video, I share a closer look at the new Simple Storage Stencil Sleeves for 6×6 and Mini Slim stencil sizes along with the new Simple Storage Binders. I also share a look at the Stencil Storage Stands that are available to hold both sizes of stencils and the Stencil Storage Stickers that you can order to label the stencils we released in 2019, 2020, and now 2021!
Keep scrolling for a closer look at the new stencils and stencil storage items that are now available to purchase along with inspiration from the TE Creative Team.
First up is a look at the new 6×6 stencils that we are adding to the TE collection:
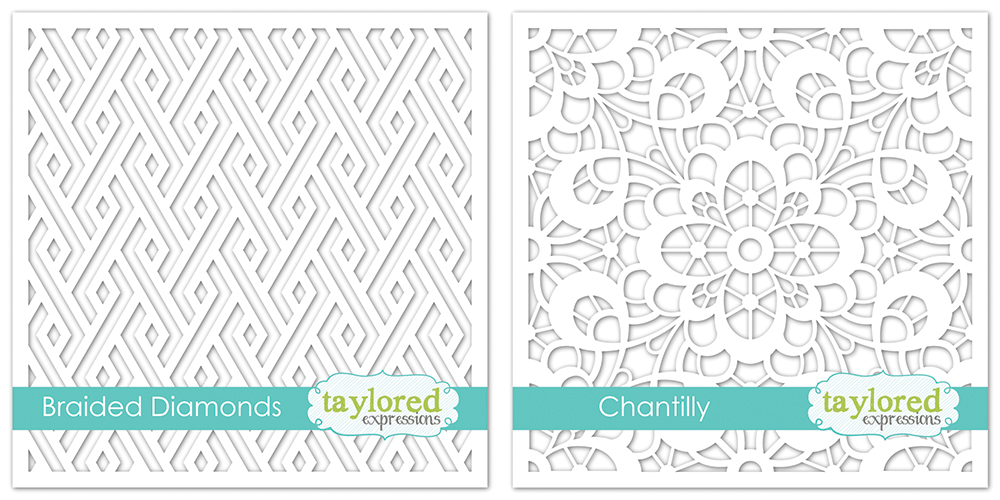
The 6×6 Braided Diamonds stencil creates an intricate intersecting diamond pattern. This geometric design will work well for many different occasions and card themes!
The 6×6 Chantilly stencil features a beautiful lacy design that adds a dainty and elegant touch to your projects. The design will work well for a wedding, sympathy cards, Mother’s Day, and more!
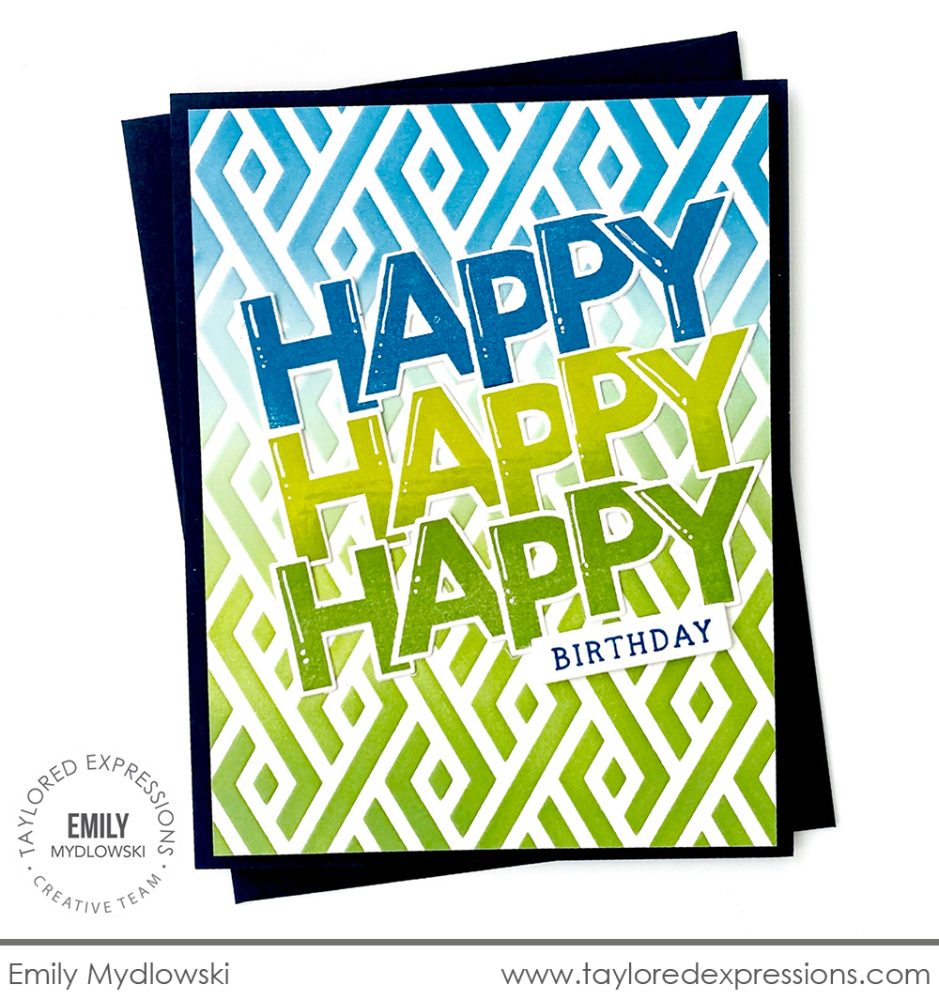
Emily Mydlowski did a pretty color blend with the Braided Diamonds stencil using a combination of inks in blues and greens: Blueberry, Salt Water Taffy, Granny Smith, Peapod, and Cilantro. The sentiment is created with the On the Block – Happy stamp (+ coordinating die) and Emily stamped it multiple times in colors to match the stenciled background. She added the ‘happy’ words at an angle on the card front along with the ‘birthday’ word from the On Repeat – Birthday stamp.
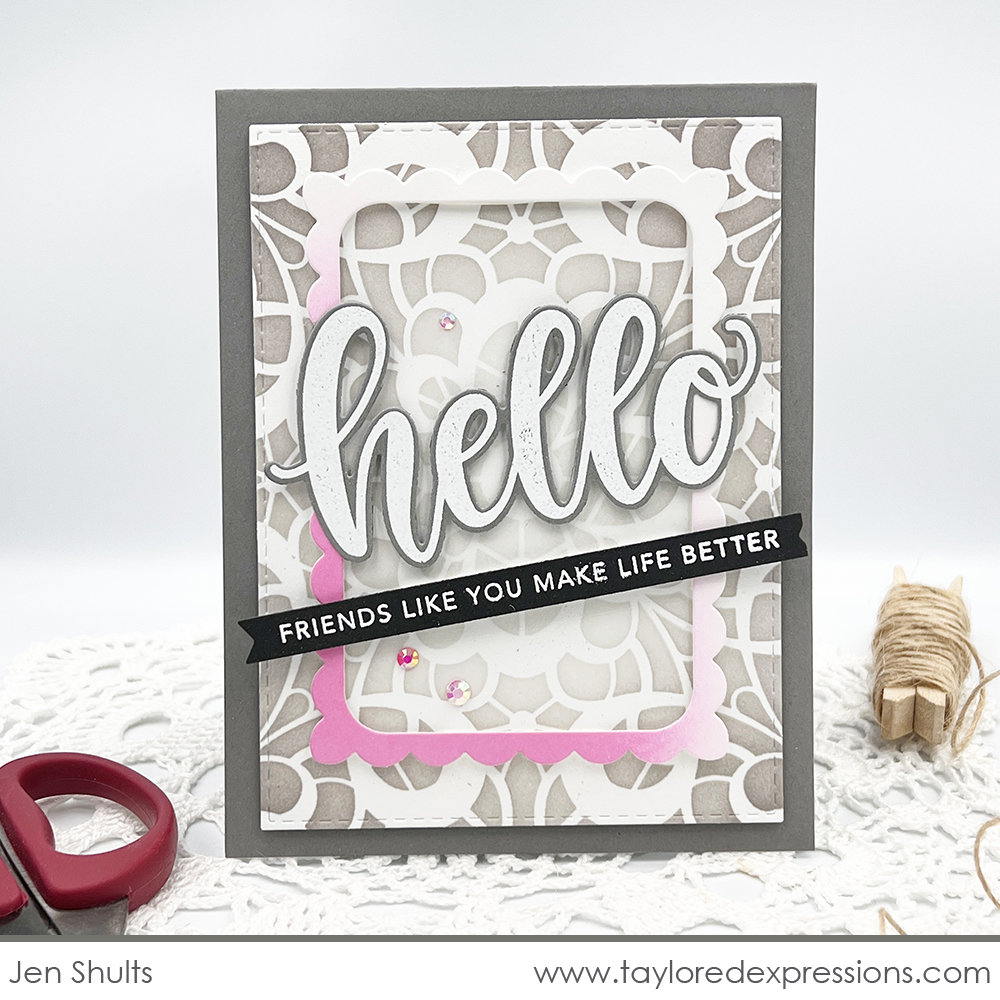
The pretty lace background on this card by Jen Shults is created with the Chantilly stencil. Jen stenciled the design using Sea Salt ink for the center and Earl Gray ink for the outside edges. The ‘hello’ word from the Oh My Word – Hello stamp set is embossed in white on Earl Gray cardstock, cut out with the coordinating die, and paired with a sentiment from the Simple Strips – Friendship stamp. I love the pop of pink that Jen added to the scalloped frame from the Frame in Frame Cutting Plate die and the touch of sparkle that is added with the Bits & Pieces – Iridescent Rhinestones.

The 6×6 Flickering stencil features an overall pattern of flow petal shapes to create an intricate design on your projects. Use this stencil with Happy Medium pastes or Glitter Grab to create dimensional looks with sparkle and shine!
Walk on the wild side with the 6×6 Leopard stencil. Add the leopard pattern to any project using your Blender Brushes and more for instant, exotic flair!
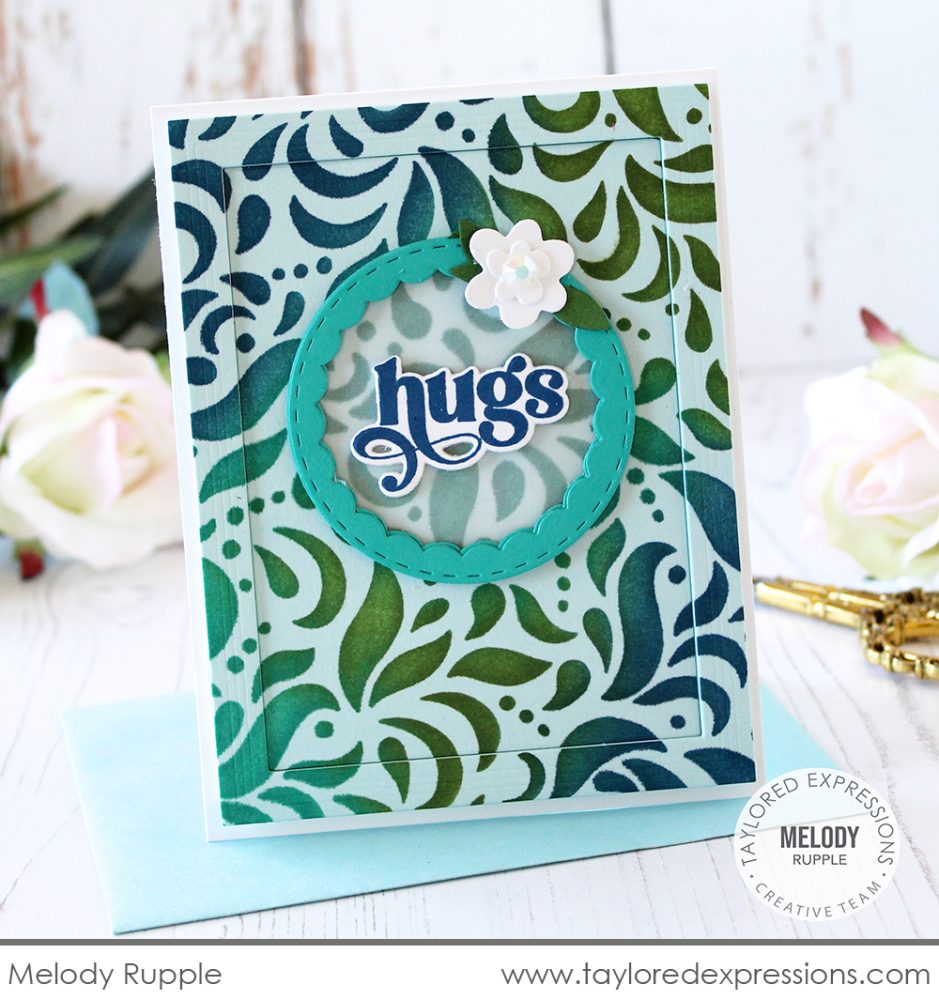
Melody Rupple stenciled an elegant background on this card using the Flickering stencil. The design is stenciled with blues and greens on Salt Water Taffy cardstock. I love the framed effect that Melody created with the largest frame from the Frame in Frame Cutting Plate die! The ‘hugs’ sentiment is from the Love & Hugs stamp set and Melody framed it over a piece of vellum using the one of the Circle Window Frames dies.
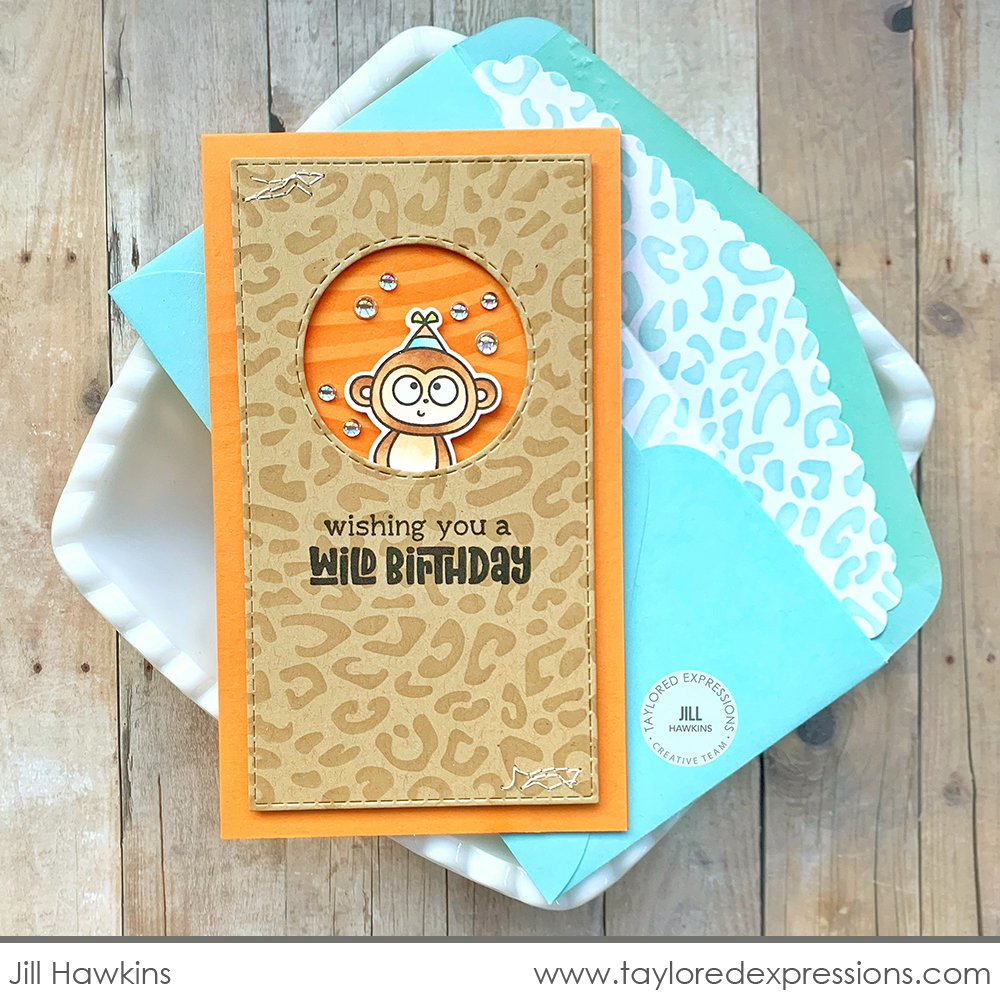
This sweet Mini Slim card by Jill Hawkins to celebrate a birthday just makes me smile! Jill added the Leopard design stenciled onto Toffee cardstock with Toffee ink and cut it out using a Stitched Mini Slim Stacklets die and one of the dies from the Mini Slim Trifold Template + Dies: Circle set to create the window opening. The monkey from the Life of the Party stamp set is peeking through the window and the ‘wishing you…’ sentiment is stamped underneath in Oreo ink. I love the background behind the monkey that is stenciled with another new stencil (more below!) and sprinkled with Bits & Pieces – Drip Drops.
Next up are the new Mini Slim stencil designs that we are adding to our line up:
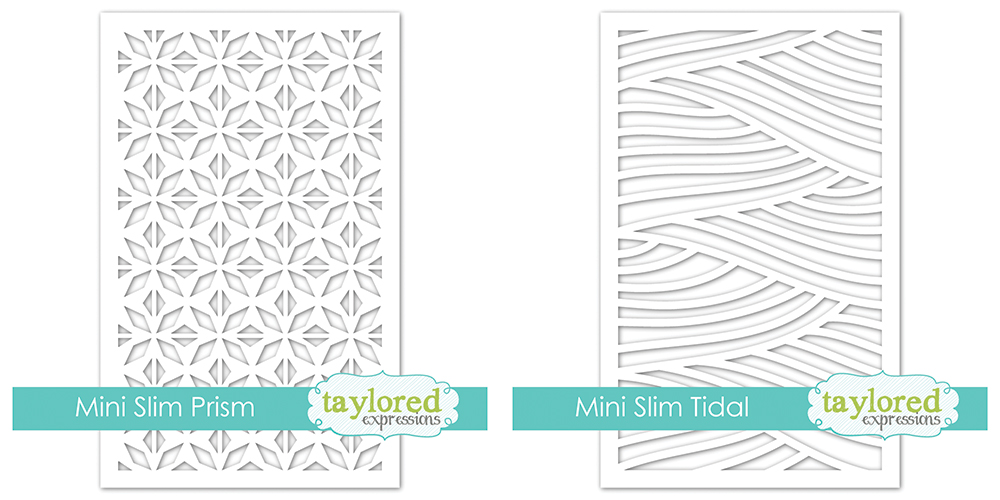
The Mini Slim Prism stencil features a geometric pattern of diamonds and triangles that create a crystal like pattern effect to add to your projects.
The Mini Slim Tidal stencil has a gentle pattern of wavy lines that are reminiscent of water, wind, or rolling hills. It’s the perfect pattern addition for a variety of card themes!

Heather Nichols pulled out her Gel Printing Kit to create with the Mini Slim Prism stencil on this Mini Slim birthday card. She laid down paint on the gel printing press in a pretty teal color, layered the stencil over the top, added blue and green paint over the top of the stencil, pulled off the stencil, and pulled the print. The print is trimmed to fit on the front of a Mini Slim card (3.5″ x 6″). Heather added a frame cut out with the Mini Slim Thin Frame Cutting Plate, added sentiments from the Mini Strips – Birthday stamp, and finished off the card with silver glitter cardstock stars and Bits & Pieces – Silver Drip Drops.

Kavya created a gorgeous sunset scene with the Mini Slim Tidal stencil. She stenciled a piece with orange and pink inks and another piece with blue and green inks. The different color tones are trimmed and pieced together to create the water and layered over a circle that Kavya stenciled for the sun. She used a marker to create the sun rays and added a sentiment from the Mini Strips – Watt’s Up stamp.
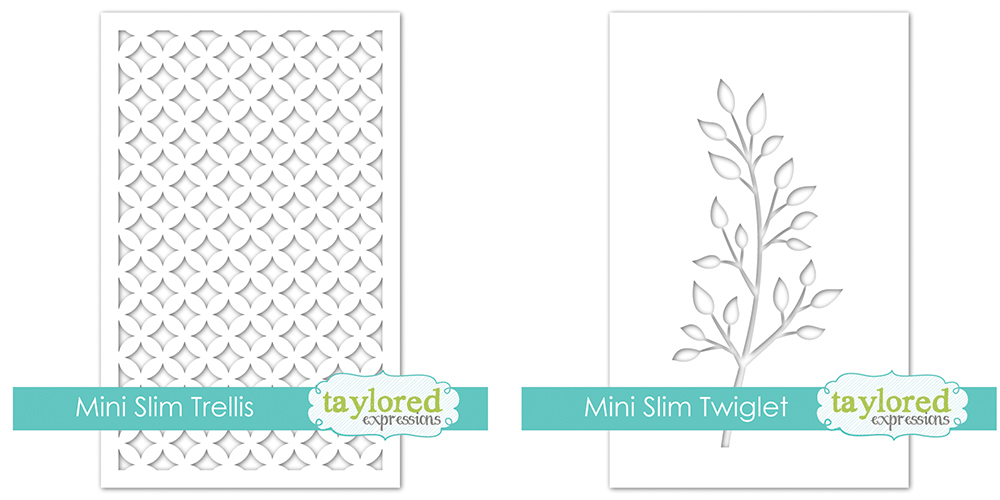
The Mini Slim Trellis stencil features an interlocking circle design that forms a pattern of starburst diamonds. This pattern is very versatile and will work on cards and other projects for a number of occasions.
The Mini Slim Twiglet stencil features a leafy branch that you can use in a number of ways. Use it on its own, stencil multiple branches to create a background pattern, use the branches to frame an image or sentiment, and more!
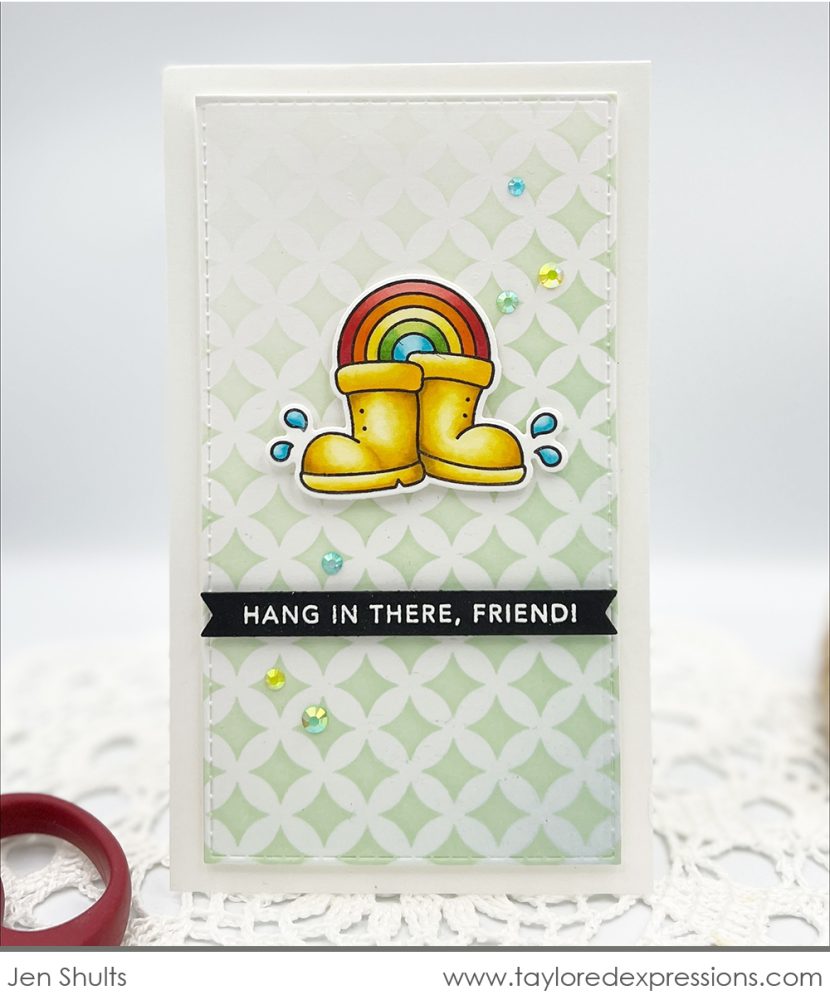
This Mini Slim sized card to encourage a friend was created by Jen Shults. The card background was stenciled with the Mini Slim Trellis stencil with in a light green ink tone. Jen started at the top left corner with a lighter hand and added more pressure as she moved to the lower right corner and the light to dark ombre look that was the result is stunning! The cute rain boots and rainbow image from the Brighter Skies stamp set is colored with Copic markers and added to the card along with a sentiment from the Simple Strips – Friendship stamp.
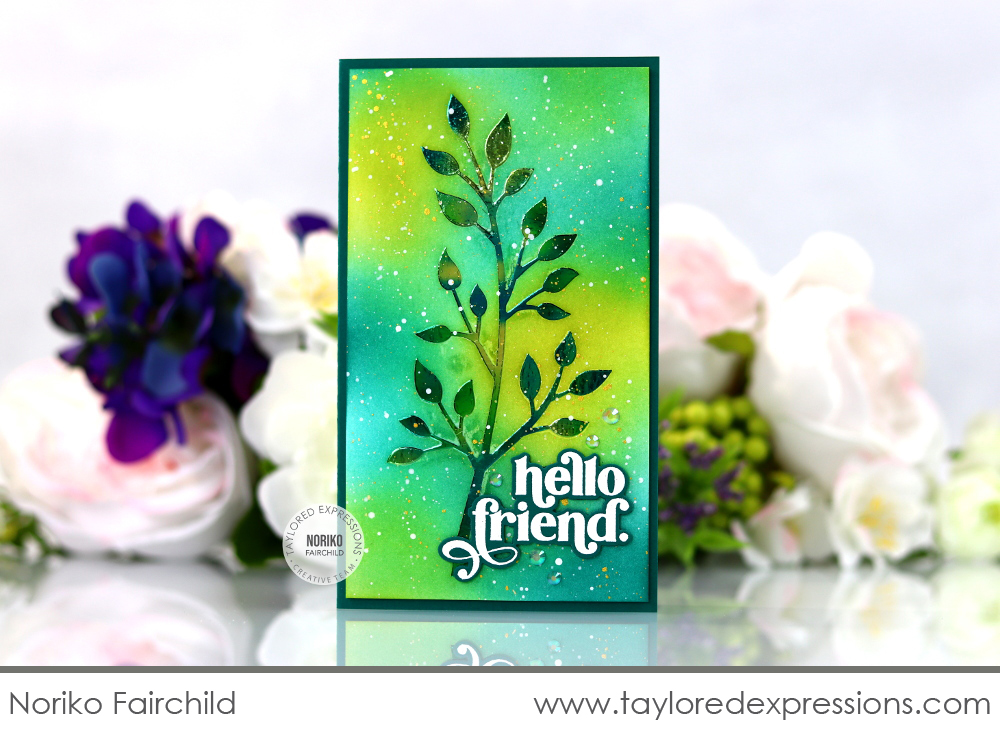
Noriko Fairchild brought her expert foiling skills out for this Mini Slim card featuring the Mini Slim Twiglet stencil. She blended a background with teal and green inks and then stenciled the branch with Glitter Grab over the top. Once the Glitter Grab was completely dry, she foiled the stenciled design with Emerald Watercolor Deco Foil using her Minc machine (a heat laminator works to foil as well). To finish the card design, Noriko added lots of splatters in white and gold, added the ‘hello friend.’ sentiment, and added a few Bits & Pieces – Clear Drip Drops.
…..
Now, here’s a closer look at all of the new Simple Storage options for your stencil collection:
Our Simple Storage Binders are specially designed to make it easy and convenient to organize your stencil collection! The flexible teal binders are made of lightweight, durable plastic and feature the TE logo on the outside and two 1″ metal D rings on the inside to hold your Simple Storage Stencil Sleeves (sold separately) securely in place. Each binder also comes with a sturdy elastic band to keep it closed when you’re on the go!
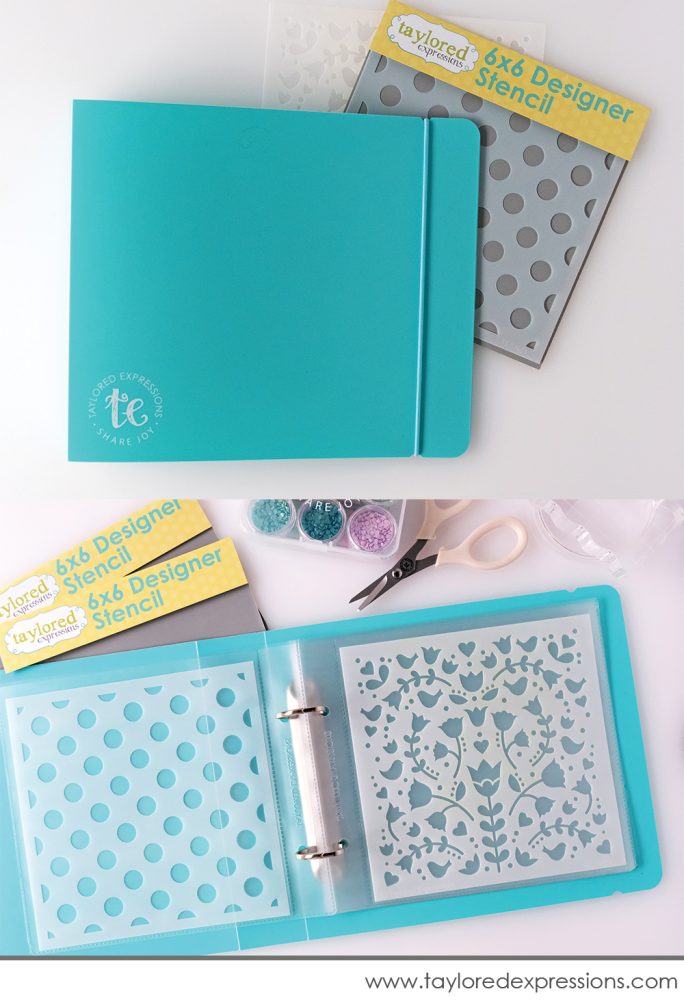
The Simple Storage 6×6 Binder measures 8 1/2″ x 7 1/4″ x 1 3/4″ and can hold up to 40 Simple Storage 6×6 Stencil Sleeves.
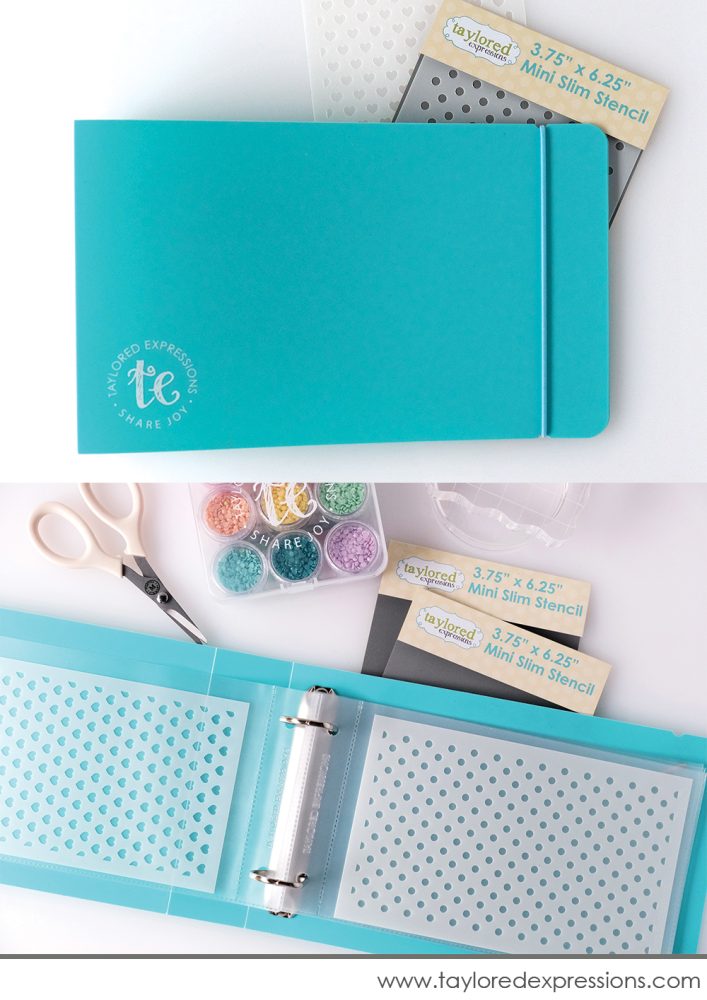
The Simple Storage Mini Slim Binder measures 9 1/4″ x 5 1/2″ x 1 3/4″ and can hold up to 40 Simple Storage Mini Slim Stencil Sleeves.

Our Mini Slim Stencil Storage Stand is the perfect way to organize your Mini Slim stencil collection if you enjoy the convenience of a desktop storage system. Each wooden stand is hand-crafted, sanded and ready to accept a coat of paint or stain, and comes with two metal binder rings to hold Mini Slim Stencil Sleeves (sold separately). Don’t forget that we offer a 6×6 Stencil Storage Stand as well!
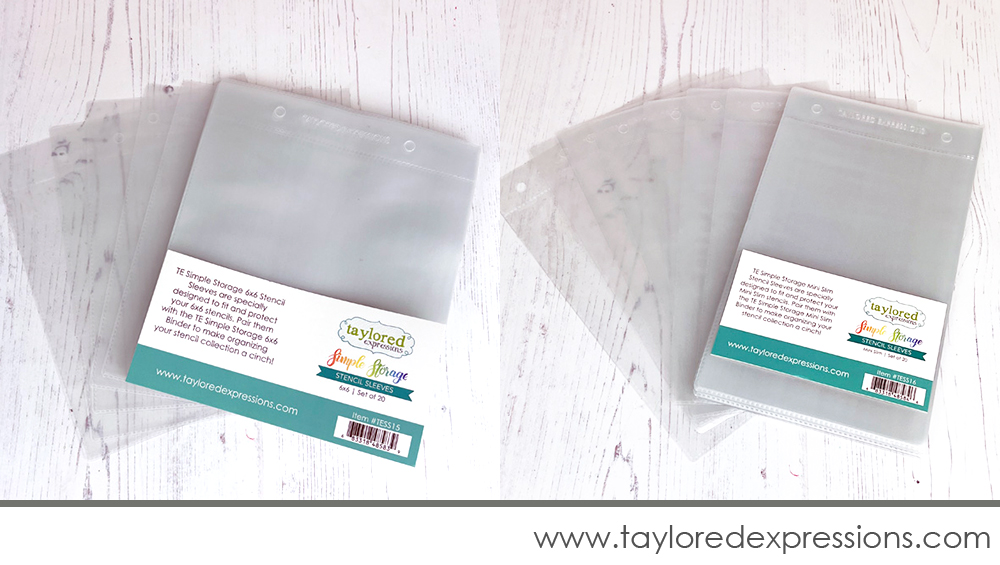
The TE Simple Storage Stencil Sleeves are specifically designed to fit and protect your stencils. Pair them with the TE Simple Storage Binders to make organizing your stencil collections a cinch! The TE Simple Storage Sleeves are available in two sizes (sold separately) to accommodate your 6×6 (left photo above) and Mini Slim (right photo above) stencils and include 20 sleeves in each pack.
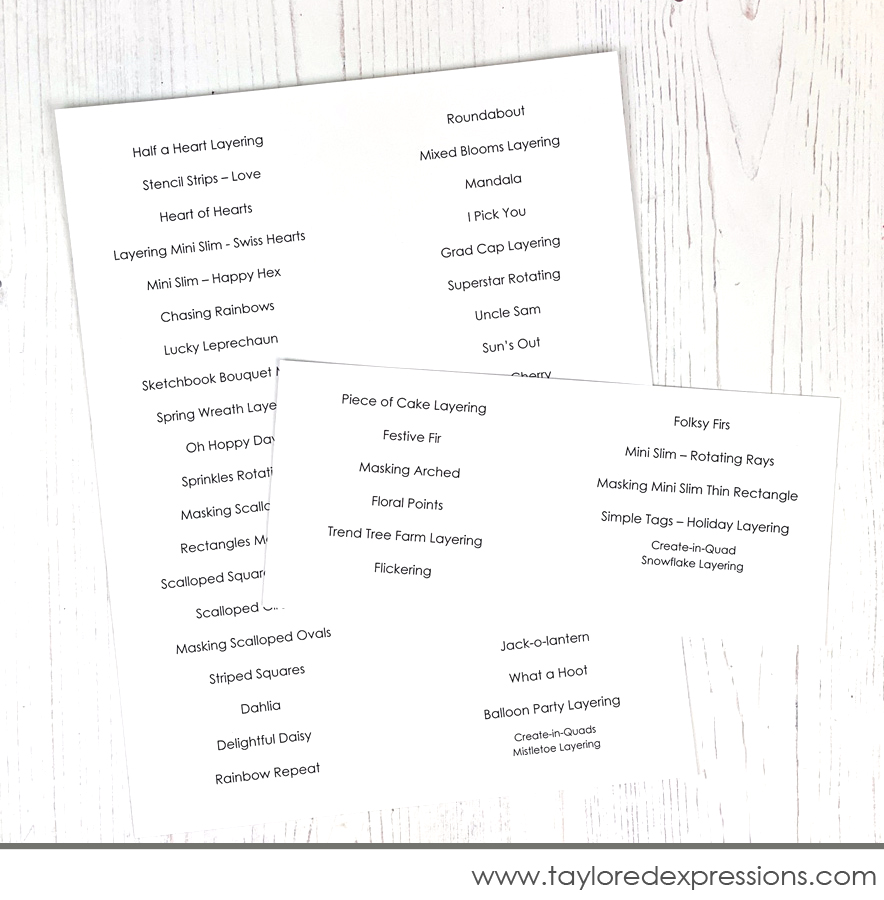
TE’s Label It products are adhesive white matte labels that are perfect for organization. The 2021 Stencil Storage Stickers include a label for every TE stencil released in 2021 that are perfect for adhering to a TE Simple Storage Stencil Sleeve (sold separately) to store neatly on our Stencil Storage Stand or TE Simple Storage Binders (sold separately).

Join me live for “T Time” at 10AM Central (**note the time change for Tuesdays) today on the Taylored Expressions Facebook Page. I’ll be sharing an unboxing and closer look at the items in our Stencil Storage release. We hope to see you there – come join in the fun! (Don’t worry, if you miss the live you can always watch the saved broadcast afterward!)
Thank you so much for stopping by today! Make sure you check out the rest of the TE Creative Team projects using the new stencils that we are releasing today – click their faces below to hop to their blogs! Stop back again here on the TE blog on Thursday for more inspiration – including a video from Heather Nichols. See you then!


