
Mar 27, 2025
Lori Craig: Flick Feather Technique with OLO Markers
Hey, crafty friends, Rachel here! This week, we launched our newest cardmaking kit: Nature’s Canvas! Designed for all things coloring, this kit works beautifully with a variety of mediums, including alcohol markers, watercoloring, and coloring stencil ink blending.
Today, I’m excited to share a tutorial from Lori Craig featuring an OLO Marker technique! While she shares a specific project, this technique works well with the new kit and other TE favorites.
Scroll to watch Nature’s Canvas Cardmaking Kit video inspiration, see Lori’s OLO Marker tutorial, then join Heather Nichols live at 10am central for water coloring crafty fun!

In today’s featured video, Theary Chea-Tran shares her water coloring process as she creates a stunning card and coordinating gift tags with the new Nature’s Canvas Cardmaking Kit. Click below to see it all come together!
Lori’s Flick Feather Technique with OLO Markers
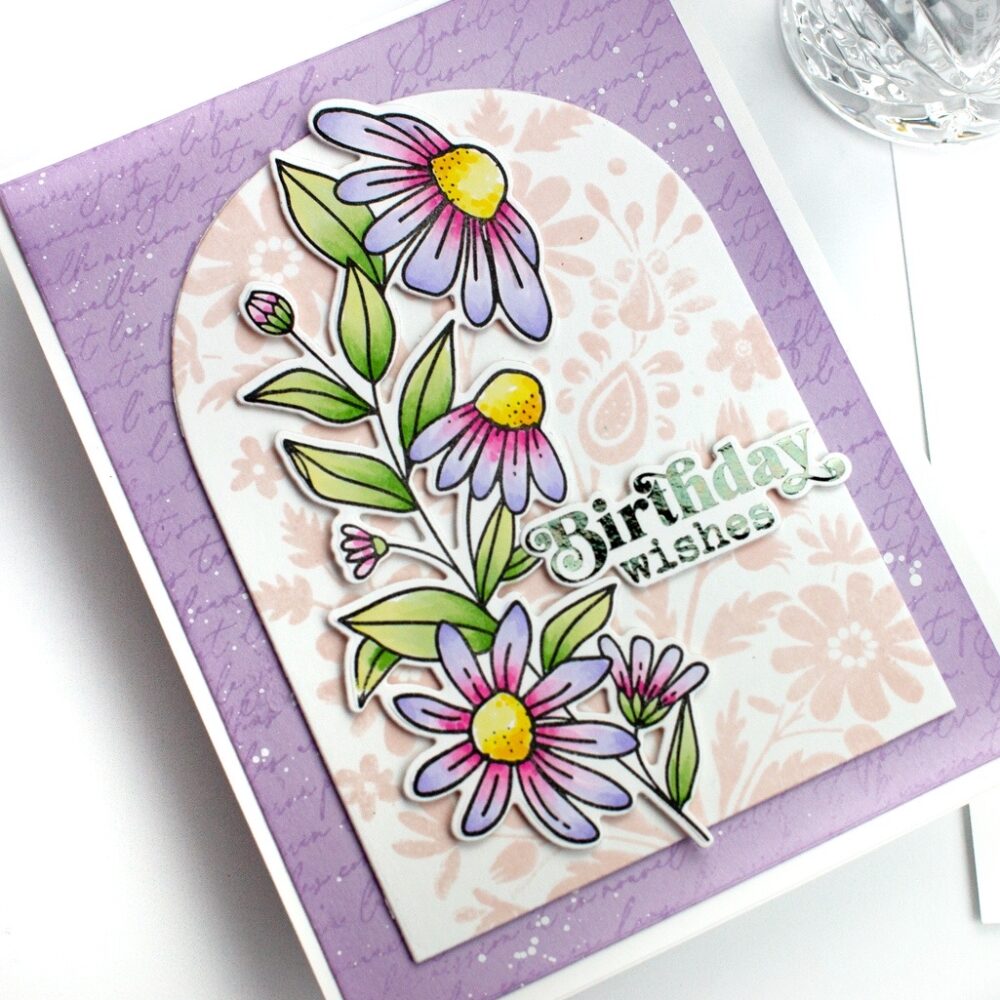
Give images depth and interest with a fun alcohol marker technique. Long and skinny spaces, like leaves and flower petals are the perfect spot to drop the Flick Feather technique with OLO Markers. In this image, the petals are a combination of pink and lavender, while the leaves are a soft green with yellow tips.
Step 1: Choose Your Colors
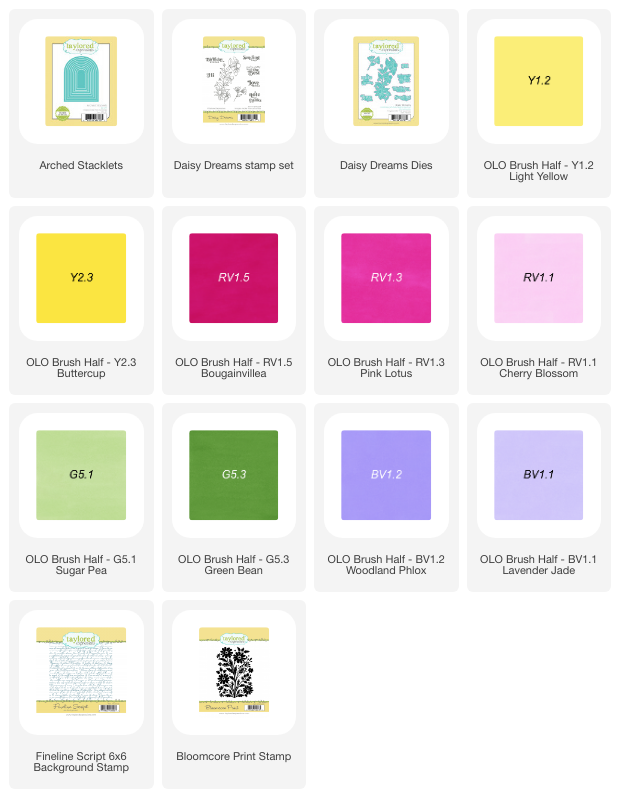
For a smooth, powder-like blend, select two markers of different hues that share the same last number. The technique works with many combinations, but markers ending in .1, .2, or .3 offer the softest transitions. Here’s what I used:
- Petals – RV1.1 (pink) + BV1.1 (lavender)
- Leaves – Y1.1 (yellow) + G5.1 (green)
Step 2: Stamp Your Image
Stamp your design onto Sugar Cube cardstock using Oreo Premium Ink for crisp, clean lines.
Step 3: Apply the Flick Feather Technique
Using the side of your brush tip and a gentle, flicking motion:
- Flick the first color inward from one edge of the space toward the center.
- Flick the second color inward from the opposite edge toward the center.
- Watch the colors blend effortlessly in the middle while keeping the richness of each hue on either side.
Step 4: Build Depth & Dimension
Repeat the flicking process as needed for added depth. To enhance blending, introduce additional shades within the same color family. For example, I layered RV1.3 and RV1.5 over the RV1.1 portions of the petals to deepen the transition.
With just a few flicks of your marker, you’ll achieve a stunning gradient effect—perfect for adding depth and interest to any floral design!
Visit Lori’s blog at https://loricraig.splitcoaststampers.com/ to learn more and see other projects!

Join Heather Nichols live at 10AM Central on the Taylored Expressions Facebook Page or on our Taylored Expressions YouTube Channel as she uses the Nature’s Canvas Cardmaking Kit to create a crafty project! Come join the fun! (Don’t worry, if you miss any of our live broadcasts, you can always watch the live replay afterwards!)
Thanks for visiting the TE blog today. Stop by this weekend for a sneak peek at what’s coming next week!

