
May 16, 2025
Quick Crafting: Daisy Dreams
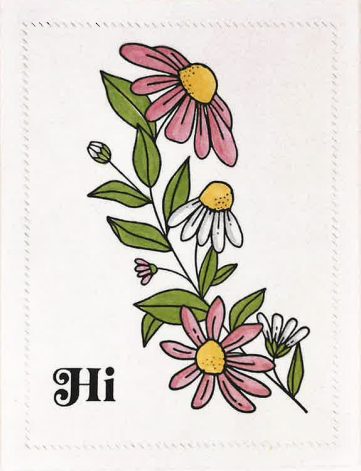
Hey, crafty friends, Rachel here! Spring is all about flowers and now that the weather is warmer, we are seeing them pop up everywhere. Check out this quick card tutorial by Louise Wagner, featuring delicate daisies! Send this clean and simple card to someone to brighten up their day!
Supplies needed for this project:
- Daisy Dreams Stamp Set
- Daisy Dreams Dies
- Sugar Cube Cardstock
- Oreo TE Premium Ink
- OLO Markers in the colors: CG0 Cool Gray, YG2.5 Avocado, Y2.2 Daffodil, and R2.2 Peach Blossom or pick your own combination of colors!
- Diagonal Stitch Rectangle Stacklets Die Set
- Foam Tape
Daisy Dreams Instructions:
1. Stamp the Floral Design
On an A2 size panel of Sugar Cube cardstock, stamp the floral design and sentiment from the Daisy Dreams Stamp Set using Oreo ink.
2. Color the Flowers
Use the following Copic marker colors (or similar) to color the design:
• CG0 – Add soft shading to the white daisy petals.
• YG2.5 – Color the leaves.
• Y2.2 – Fill in the daisy centers.
• R2.2 – Color the daisies.
Coloring Tip: For white daisies, lightly shade just the edges of the petals and add a touch of color near the yellow centers. This gives dimension while keeping the petals bright.
Use the following OLO Markers to color the image:
– Flowers: V2.3, Y2.3, R0.2, R5.3
– Leaves: YG8.3, YG8.5
3. Die Cut the Panel
Use the largest Diagonal Stitch Rectangle Stacklets die to cut out the stamped and colored panel, centering the floral image within the cut.
4. Assemble the Card
Add foam tape to the back of the colored panel and center it onto a Sugar Cube card base.
Thanks for visiting the TE blog! Subscribe to our newsletter to stay up-to-date on our latest product releases and offers.

