
Aug 04, 2026
One Patterned Panel, So Many Happy Possibilities!
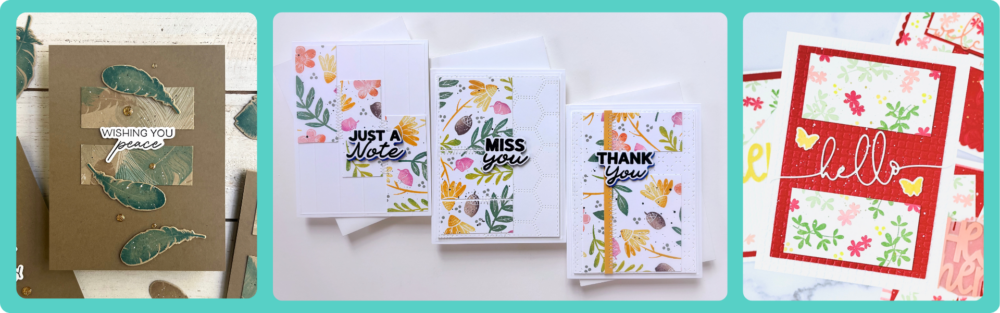
The first cut is only the beginning! With Happy Sheets, one stamped or stenciled 6 x 6-inch panel can become a collection of coordinated cards—and today, we’re sharing plenty of inspiration to help you make each one your own.
Our talented Creative Team paired the new Happy Square Sheets – Volumes 1 and 2 with the Florals & Flutters 6 x 6 Stamp & Stencil Combo to explore different cutting maps, color combinations, layouts and finishing touches. While the maps provide a helpful path from patterned panel to finished cards, every sentiment, layer and embellishment offers another opportunity to personalize your projects.
Take a closer look at how the team used these versatile tools to create more cards with confidence—and discover ideas you can carry into future projects using the stamps, stencils and supplies already in your crafty stash!
More Favorites. More Earning.
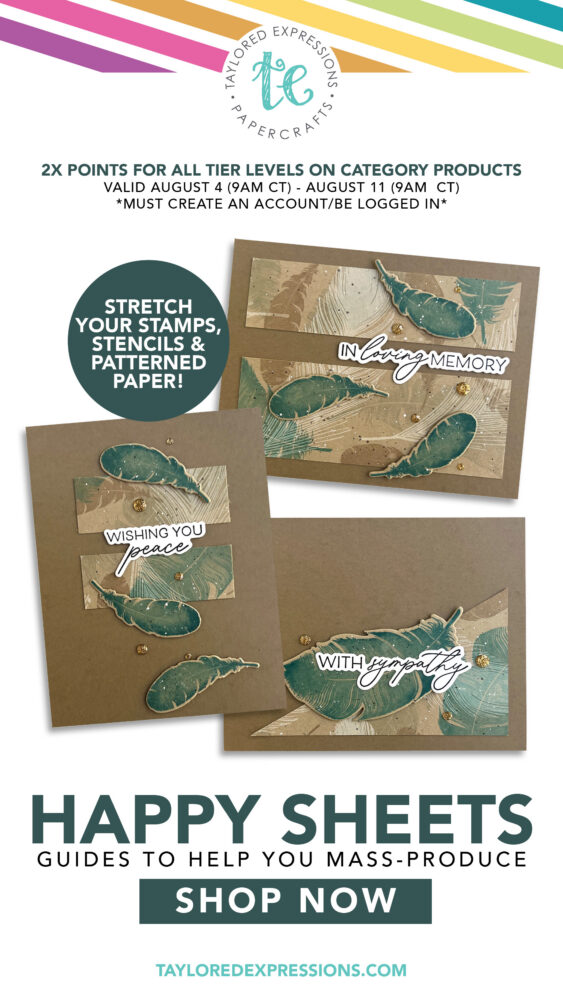
For a limited time, earn DOUBLE CRAFTY REWARDS on everything in the Happy Sheets category! Stock up on products that help you create colorful patterned panels, then use Happy Sheets to confidently cut and arrange them into multiple coordinating card fronts. It’s the perfect time to add new creative possibilities to your stash—and earn a little extra toward your next crafty purchase!
One Patterned Panel, So Many Happy Possibilities!
Happy Sheets make it easy to turn one beautifully stamped or stenciled 6 x 6-inch panel into a collection of coordinated cards—but the cutting map is only the beginning! With different colors, sentiments, layers and finishing touches, every card can still feel completely unique.
Today, our talented Creative Team is sharing fresh inspiration featuring Happy Square Sheets – Volumes 1 and 2 and the Florals & Flutters 6 x 6 Stamp & Stencil Combo. Take a closer look at how they used these helpful maps to make confident cuts, put every colorful piece to use and transform their patterned panels into polished cards for all kinds of occasions!
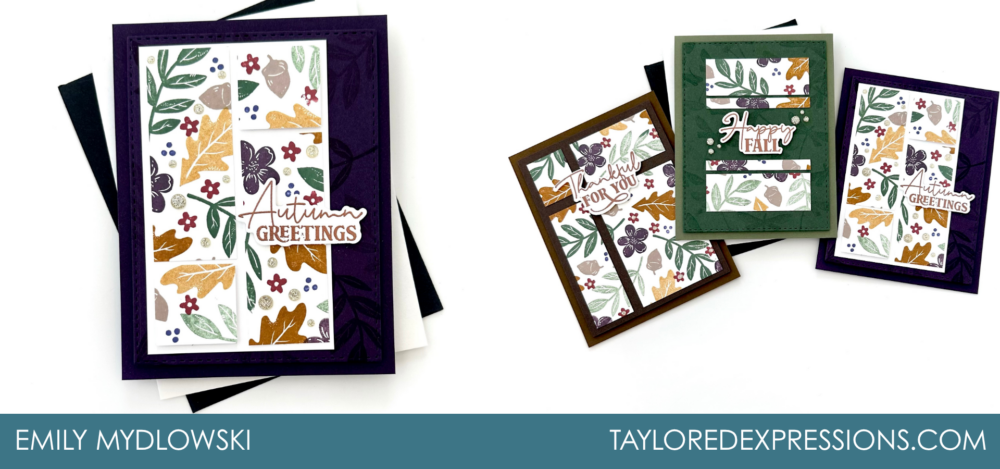
TE Creative Team member Emily Mydlowski embraced the richer colors of autumn with leafy patterned panels in deep green, plum, golden brown and warm neutrals. She used multiple Happy Sheets layouts to divide and rearrange the design, then added seasonal sentiments and subtle sparkling embellishments. The dark, textured card bases frame each pattern beautifully and demonstrate how changing cardstock colors can give every card its own distinctive personality.
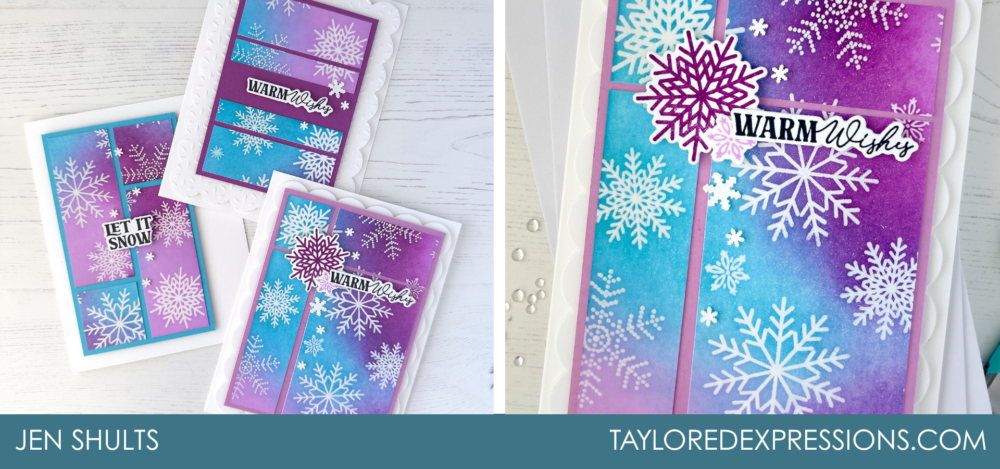
TE Creative Team member Jen Shults filled her Happy Sheets projects with vivid blended color and crisp white snowflakes for a fresh, modern take on winter cards. Shades of turquoise, violet and pink flow across the patterned panels, helping the separate sections feel connected even after they are cut and rearranged. Layered snowflakes, bold sentiments and white scalloped frames add dimension while keeping the colorful backgrounds at the center of each design.
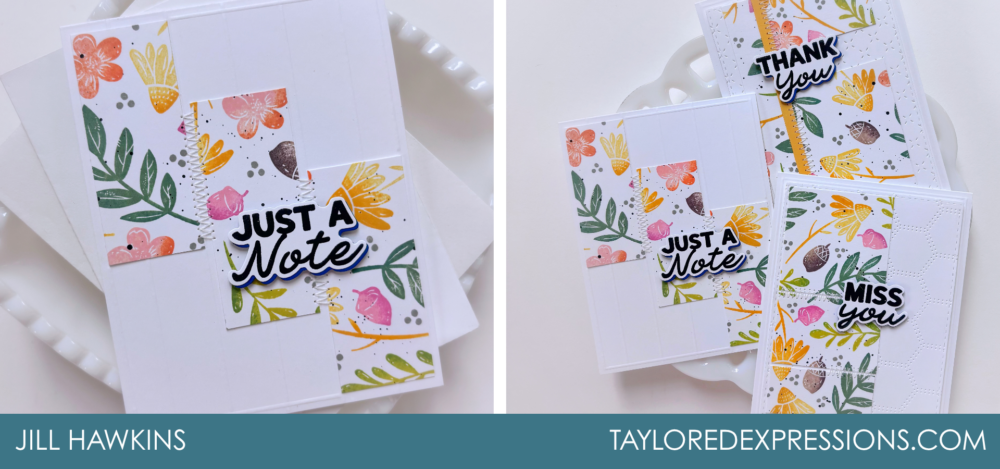
TE Creative Team member Jill Hawkins turned a cheerful floral-and-foliage panel into a modern collection of everyday cards using a variety of rectangular cuts and plenty of crisp white space. Silver stitching adds texture while visually connecting the patterned pieces, and bold layered sentiments give each design a strong focal point. Her projects are a great example of how even small sections of a favorite pattern can make a big impact!
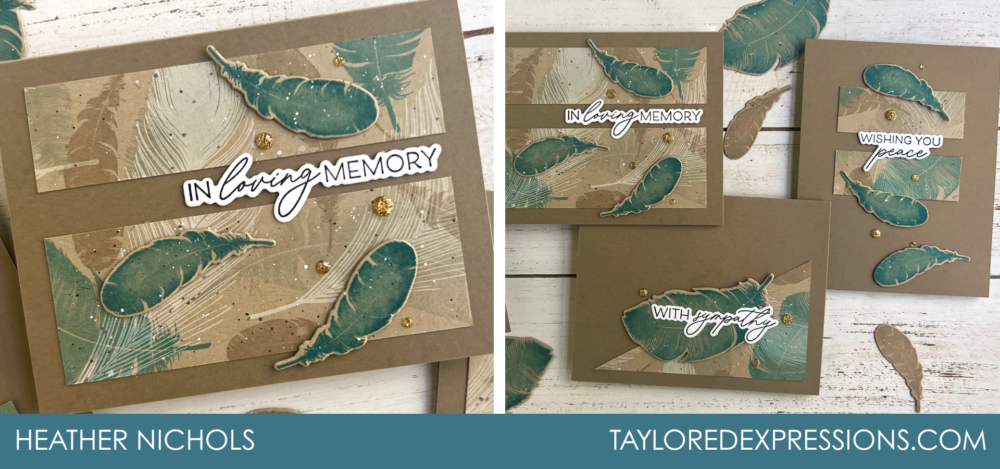
TE Designer Heather Nichols created a peaceful collection of sympathy cards with an earthy palette of kraft, taupe and muted teal. Her tone-on-tone feather pattern provides a soft, textured foundation, while individually stamped and die-cut feathers extend beyond the patterned sections to add movement and dimension. Delicate splatters, thoughtful sentiments and touches of gold complete these comforting designs with understated elegance.
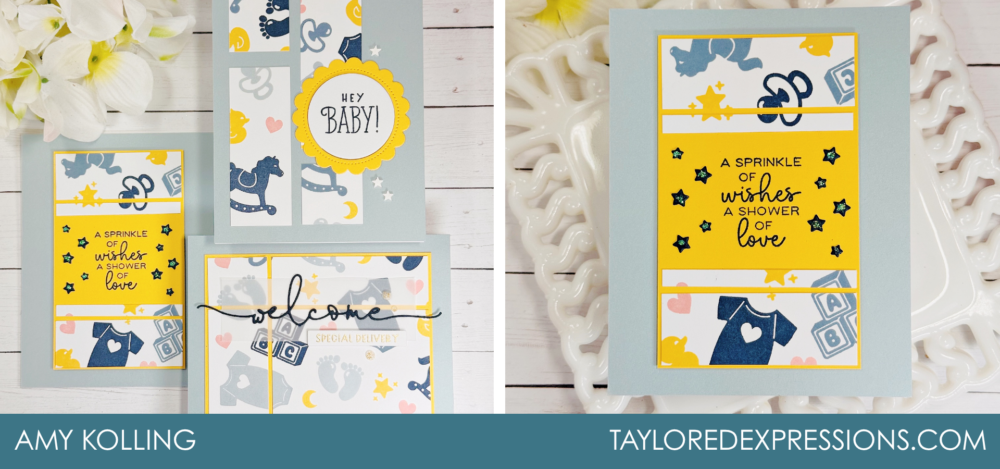
TE Creative Team member Amy Kolling transformed a playful baby-themed panel into a collection of cards ready to celebrate a new arrival. Soft blue, sunny yellow, pale pink and navy create a palette that feels cheerful and versatile, while a mix of narrow strips, larger patterned sections and open cardstock areas gives each card a different look. From layered Stacklets to vellum and delicate die-cut sentiments, Amy shows how finishing details can bring a Happy Sheets layout to life.
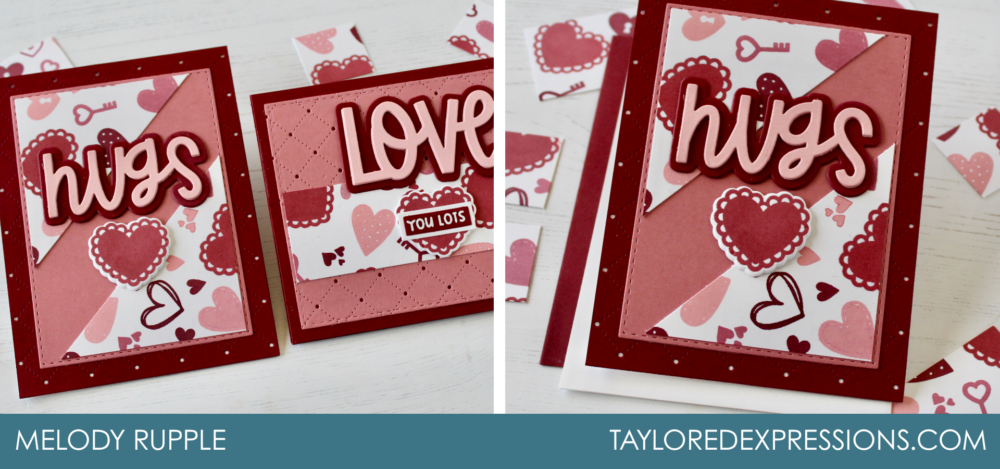
TE Creative Team member Melody Rupple created a sweet Valentine-inspired pattern using hearts, keys and love-themed images in layered shades of pink and red. She paired the patterned sections with pierced backgrounds, oversized die-cut words and dimensional stamped accents to create cards that feel coordinated without looking identical. This monochromatic approach is an easy way to confidently combine patterns while keeping the finished collection cohesive.
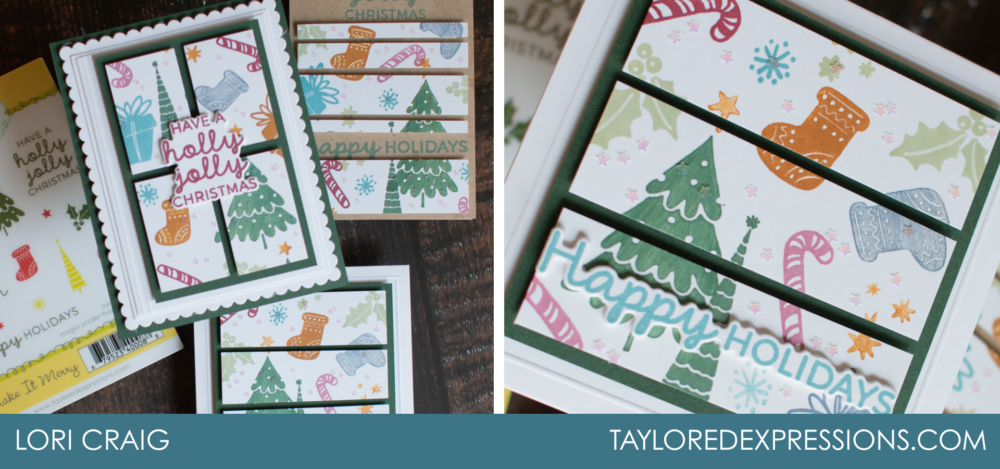
TE Designer Lori Craig gave her Happy Sheets projects a festive twist with a playful pattern filled with Christmas trees, stockings, candy canes and other holiday favorites. Deep green mats define each section and make the soft, cheerful colors pop, while scalloped layers and dimensional sentiments add a polished finish. By changing the arrangement of the patterned pieces, Lori created several distinct cards from one coordinated design.
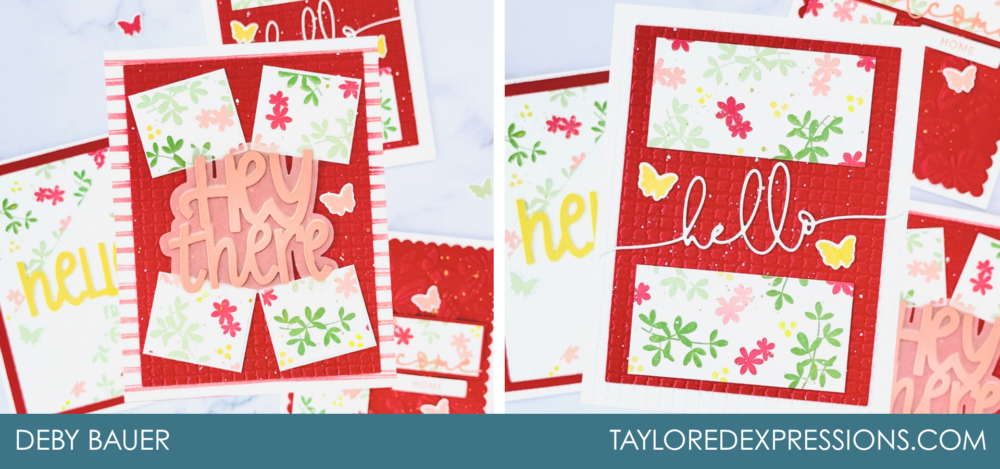
TE Creative Team member Deby Bauer used a fresh floral pattern and a joyful red, pink, green and yellow palette to create bright cards perfect for reconnecting with someone special. She arranged the patterned pieces in several different ways, pairing them with textured cardstock, striped accents, butterflies and bold “hello” sentiments. Her projects show how Happy Sheets can help you create a coordinated card set while still leaving plenty of room to experiment with layers, angles and scale..
Craft With Susan!
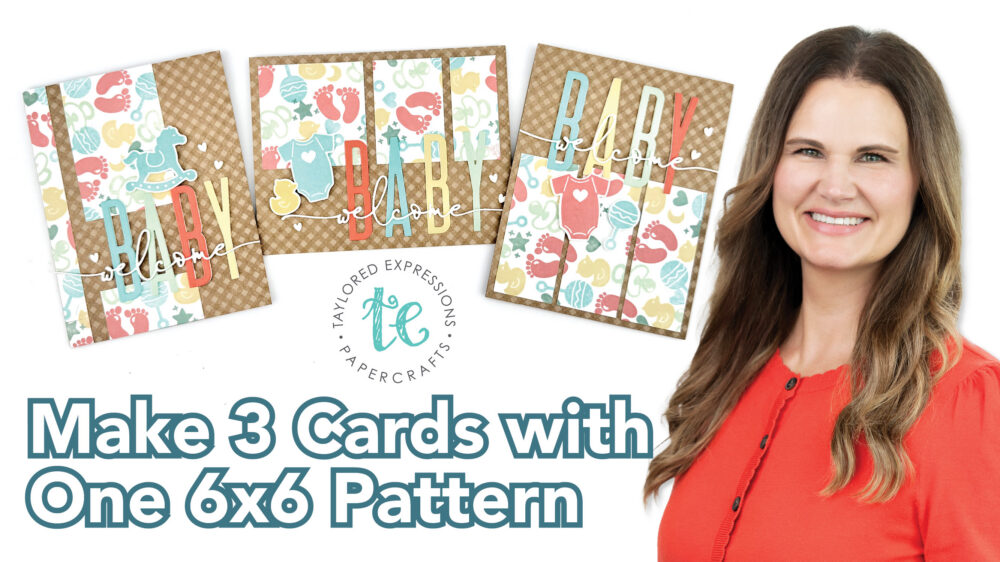
Join TE Owner & Creative Director Taylor VanBruggen at 10 AM CT today as she turns one playful 6 x 6-inch patterned panel into three coordinating baby cards using Happy Square Sheets!
Along the way, she’ll show you how to:
- Create custom patterned paper by combining baby-themed images with a soft, cheerful color palette.
- Follow a Happy Square Sheet cutting map to confidently divide one 6 x 6-inch design and put every patterned piece to use.
- Mix layouts, layered sentiments, die-cut accents, and textured backgrounds to give each coordinating card its own personality.
Whether you’re welcoming a new baby or building a stash of cards for future celebrations, you’ll leave with plenty of ideas for transforming one pattern into multiple polished projects!