Sep 02, 2010
Taylored Expressions Sneak Peeks Day 3
 It’s our last big day of sneak peeks before all of the new stamps are available for purchase on Friday, September 3rd at 8am PST!
Are you ready to see what’s On the Menu today? We’ve been cookin’ up some wildly wicked creations for Halloween! This holiday is one of my absolute favorites. For one thing, I LOVE candy! Primarily the chewy and fruity candies…Hot Tamales, Starburst, Skittles, Banana Laffy Taffy… you name it and I’ll probably eat it! *grin* Not only do I love eating candy, but I love getting dressed up (finding costumes for our cats too!) and handing out candy to trick or treaters. Last year I had fun making special treats for the kids from our neighborhood and our little nephews. So I couldn’t let Halloween pass by without designing a stamp set that represents what Halloween is about for me….the candy! Our Whimsical Wishes illustrator Nancy McKinney has also been busy with a wildly wicked wardrobe and a fabulous A la Carte stamp! Are you ready to be spooked!?
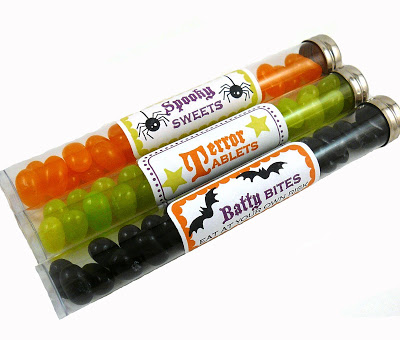 I’m going to start with a sneak peek project using Fright Night Favors. The images are simple and the combinations are endless for creating quick and cute labels for handmade Halloween treats. While these labels will fit on numerous types of candy and other creations, I designed them to fit specifically on our new Test Tubes! I filled each tube with a different color Jelly Belly (another of my favorite candies!). The Test Tubes don’t hold a ton of candy which is great because that makes them an affordable treat to hand out to our special spooks on Halloween. The Fright Night Favors stamp set also has a coordinating Favor Frame Die! If you joined us for our last release, perhaps you caught my introductory video on how to use the Taylored Dies. Today I thought I’d take you through a picture tutorial to show you just how easy they are to use!
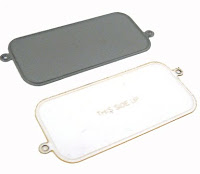 Here’s a picture of the steel-backed die and the coordinating alignment tool. The alignment tool is made of hard, clear plastic and will help you get a perfectly trimmed image each time you use the die. If you look closely in the photograph you can see “this side up” etched onto the alignment tool along with an etch of the actual die line around the outside. These are important things to note when you’re using the tool.
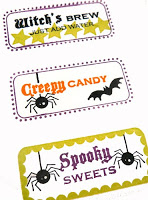 I started by stamping the labels onto a sheet of sticker paper. Each of the elements you see here is a separate stamp which allows you to customize your labels any way you want! I used Tangerine, Tuxedo Black, Lime Pastel, and Sweet Plum inks.
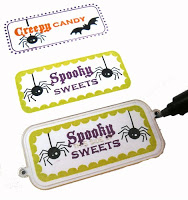 After stamping the images, you’ll align the acetate piece over the top of your stamped image making sure there is even space all the way along the inside of the etched die line on the tool. Then take a fine tip marker and mark the small alignment circles on each side.
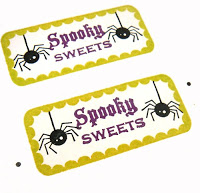 Here you can see that I’ve removed the acetate alignment tool and the two markings remain on each side of the die.
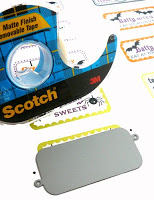 Then you’re going to take the die with the raised die line facing the paper and line up the circular markings with the circles that are built into each side of the die. I’d recommend taping the die down with a small piece of Scotch removable tape before you send it through your die cutting machine.
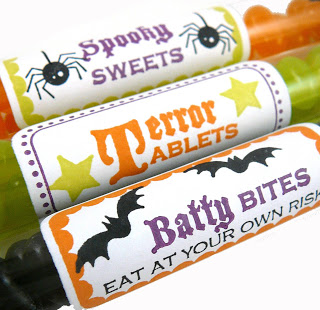 And there you have it…perfectly trimmed labels for your Halloween treats! Just peel the sticker backing off the label and attach it to your packaging. I stamped and trimmed a sheet of 20 labels in about 20 minutes… a quick and cute treat! And I’m already looking forward to exploring other candy covering possibilities!
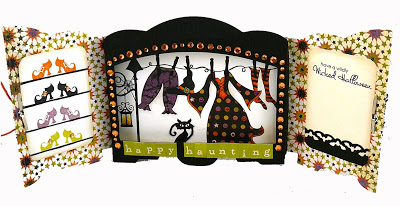 The rest of my projects for today use the latest addition to our Hangin’ Out series called Hangin’ Out Wicked Wardrobe! There are so many
fun possibilities for this stamp set! I love combining images and creating scenes and this first project uses our new Halloween Shadow Box Kit. While I left room to write a message on the right side, I think I’ve changed my mind and will be keeping this project for home decor! *grin* Each card kit comes with the outer wardrobe piece (cut from Basic Grey Eerie patterned paper), the inner shadowbox (cut from black cardstock), three image panels, 2 orange curtains (not pictured on 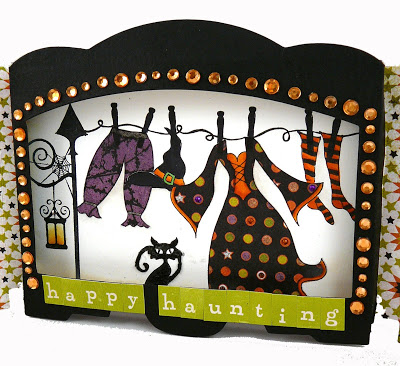 my sample), and mesh trim to decorate the outside. I started by stamping, coloring, and paper piecing the inside scene. I stamped the black cat in Tuxedo Black and then added black liquid applique over the top to make him furry! There are so many little details that are hard to see in the photograph, but I spent a lot of time adding the tiniest details to my Halloween scene. Here’s a closeup…maybe that will help! I added Tiny Twinkles to the dress and Orange Kaisercraft Rhinestones to frame the shadow box. The green letter stickers are from our August Key Ingredients kit.
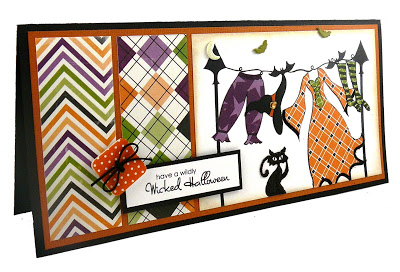 My last card also uses the Hangin’ Out – Wicked Wardrobe set. And now as I see these two cards side by side I’m recognizing that I stamped almost the exact same scene on both of them! *chuckle* Really… the possibilities are endless, but my brain seemed to have been stuck on this one! I found the perfect sketch for this card at Inspirational Card Sketches. It’s a large card measuring 4″ x 8.5″. Not sure where I’ll find an envelope to fit, but where there’s a will there’s a way! I paper pieced the clothes, embellished them with Black Ice glitter, and used more black liquid applique on the cat. To finish it off I added a patterned button and some decorative brads (bats & moon).
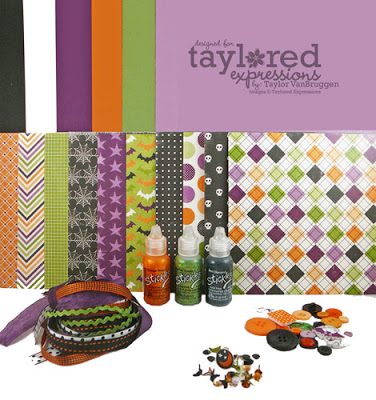 All of the patterned paper, cardstock, and decorative brads on this card are from our new Fright Night Project Pantry featuring the Happy Halloween collection by Echo Park. For $18.95 you’ll receive the following perfectly coordinated supplies:
- 12 sheets of cardstock (10 colored, 2 Choice Snow White)
- 20 sheets of 6×6 double-sided patterned paper from the Echo Park Happy Halloween Collection
- 5 yards of ribbon (1 yard each of 5 different styles)
- 3 bottle of Stickles (Orange Peel, Lime Green, & Black Diamond)
- Assortment of Halloween buttons
- Assortment of Halloween brads and rhinestones
Whew…that was a packed post! The rest of the Baker’s Dozen are sharing their Halloween creations too so you don’t want to miss a spook! Hope to see you right back here tomorrow morning for the big release and lots of Birthday Bash specials!
- Charmaine Ikach
- Danielle Lounds
- Jackie Pedro
- Jami Sibley
- Jodi Collins
- Karen Giron
- Karen Motz
- Melissa Sauls
- Nancy McKinney
- Regina Mangum
- Sankari Wegman
- Tori Wild


