TE BLOG
  • FB Live Schedule
  • Meet Taylor
  • Contact
×
  • The Perfect Kit for Plant Moms & Dads!
  • Introducing the Love Grows Here Cardmaking Kit – Available NOW!
  • NEW Craft Kit Coming SOON!
  • Honor Our Veterans & Celebrate the USA with NEW Products!
  • Celebrate the Red, White, & Blue with NEW Products – Available NOW!
    • What’s New
    • Shop
    • The TE Studio
    • Custom Stamps
    • Our Story
    • TE Blog
      • Placeholder for Dynamic Blog Menu
    • Contact Us
    • FB Live Schedule
    • Meet Taylor
    • Contact

    Jan 22, 2015

    Blog Design Team: Hearts Two Ways

    Hi there, crafty friends! We’re strolling our way toward February and love is in the air. Today, Amy Kolling is sharing two beautiful Valentines using the same products and our Hearts Cutting Plate never looked so good!

    Amy’s Notes: I don’t know about you, but I love being able to use a product more than one way. Enter the Hearts Cutting Plate! I designed two cards, both using this cutting plate and a sponging technique, but different in their own way. 

    Amy’s Notes: Let me share my shaker card first. These are just so much fun to create and to receive and the Hearts Cutting Plate makes a really unique shaker. I began masking off my white card base and sponging ink from the bottom to the top, going from dark at the bottom to light at the top until I had the blended look I wanted.  

    Amy’s Notes: I die-cut the Hearts Cutting Plate from white cardstock and adhered it onto clear acetate to begin assembling my shaker. Onto the back perimeter, small strips of foam adhesive were added. I arranged an assortment of white and clear sequins within the sponged card base adhering random ones so that when you stand the card up, some of the sequins will stay put. 

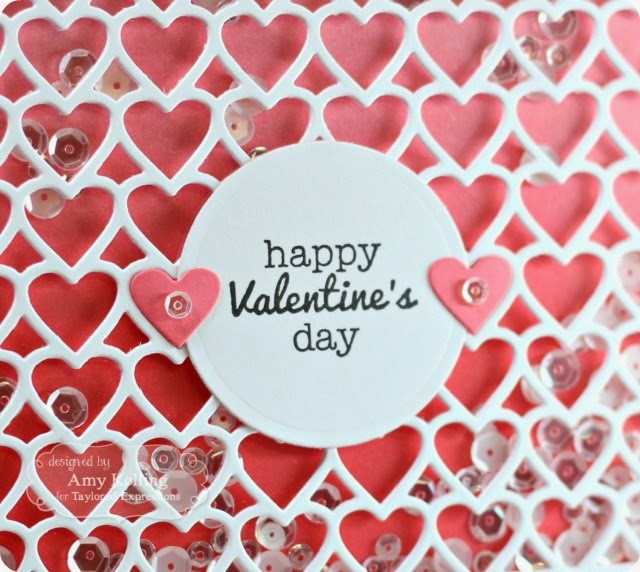
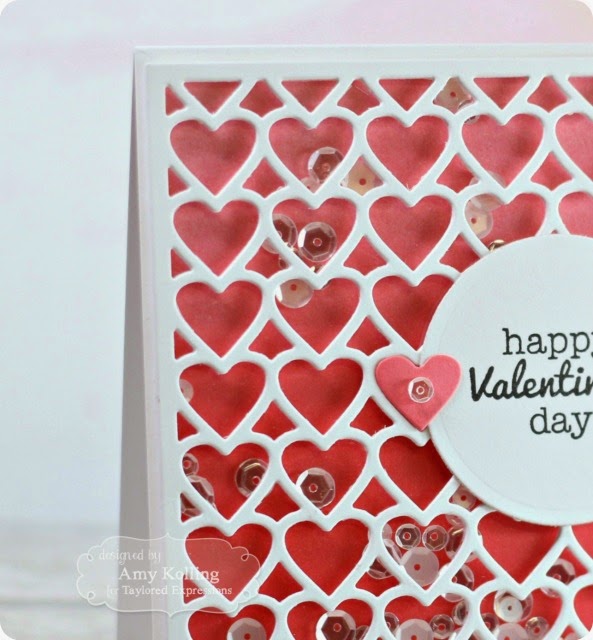
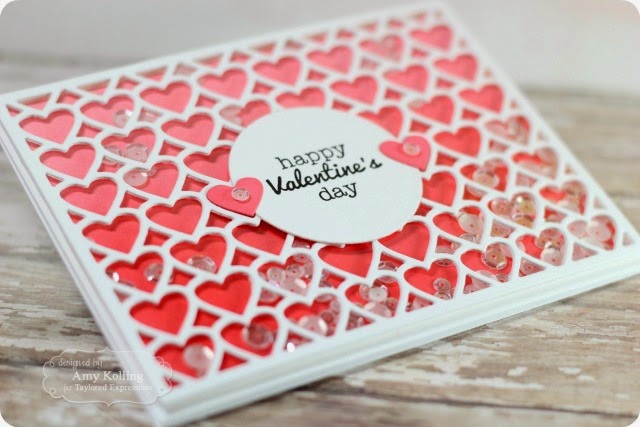
    Amy’s Notes: I layered my Hearts Cutting die-cut panel (the one with the acetate) over the sequins to form my shaker.  My sentiment, from Punny Love, was stamped onto a circle with two heart “leftovers” from the cutting plate colored and adhered at the sides.

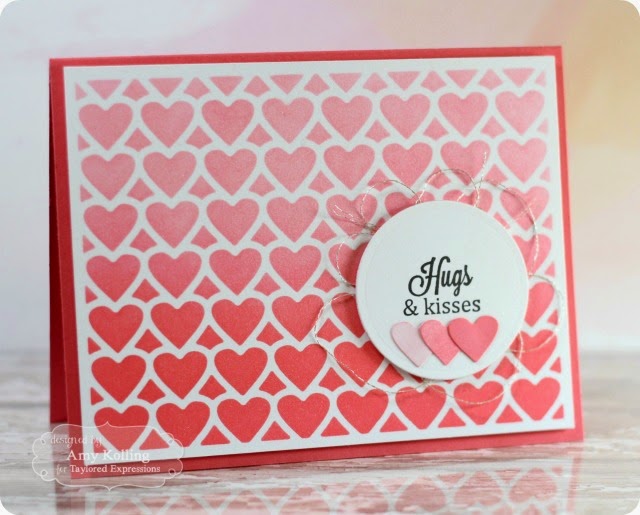
    Amy’s Notes:  Next up, I created a simpler card, but one that I think is just as pretty. Using the Hearts Cutting Plate, I die-cut a stencil from cardstock.  

    Amy’s Notes: Using the stencil, I sponged on ink in a gradient pattern over white cardstock, dark at the bottom and lighter toward the top. When done sponging, I trimmed this panel down and spritzed some fine glitter mist over the top.  

    Amy’s Notes: Keeping with the same products from the first card, I stamped my sentiment from Hugs & Kisses onto a die-cut circle. I tried my hand at layering the circle over some silver thread and added some sponged hearts under the sentiment.  

    Thanks so much, Amy, for showing us how to get creative with our Hearts Cutting Plate! You can catch more of Amy’s design work on her blog, Stamp-n-Paradise. Check back in tomorrow as Wanda Guess sends us off into the weekend!

    *hearts cutting plate
    *ranger mini ink blending tool
    *Ranger Mini Ink Blending Foams
    *foam tape – 1/16″ thick
    Premium Cardstock – Sugar Cube
    *hugs & kisses with coordinating die
    Punny Love

    • Posted by Taylor at 3:00 pm
    • |
    • 16 Comments
    • |
    • Add Comment
    • |
    • Link to this post

    Tags: Blog Team


    PREV
    NEXT

    Subscribe to the TE Blog

    Sign up for all the latest crafty inspiration!

    Powered by FeedBlitz

    Facebook Live

    Tuesday & Thursday @ 10AM CST

    View Schedule
    Taylor with laptop in Ipad

    Navigate

    • About Taylor
    • Contact Us
    • Sitemap

    TE Mobile App

    • Google Play Store
    • Apple App Store

    Subscribe to our newsletter

    Get the latest updates on new products and upcoming sales.

    Powered by FeedBlitz

    Connect with Us

    1955 SE Oak Drive, Ankeny, IA 50021

    © 2015 Taylored Expressions