
Mar 19, 2015
Blog Design Team: Take a Peek!
Hi there, crafty friends! Today, Blog Design Team member Amy Kolling has created the most darling Easter card for your creative enjoyment!

Amy’s Notes: Easter
is right around the corner! I could not
pass up doing a little Copic coloring to the adorable animals from Somebunny Loves You. I was inspired by a design by Laura Bassen for this
layout and thought it was perfect for these images!
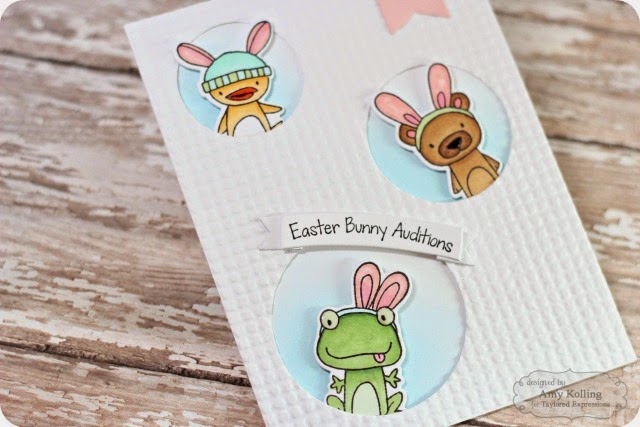
Amy’s Notes: I wanted my images to seem like they were
leaning out of the windows. Using
several sizes of circle dies, I die-cut my panel and then ran it through my Big
Shot using the Burlap Embossing Folder, but used it as an
impression plate so it gave it a softer look than traditional
embossing. This gave just enough texture because I
wanted my colored animals to take center stage!

Amy’s Notes: My little animals were colored using various Copic markers and die-cut
with the coordinating Somebunny Loves
You Dies. From behind the images, I
sponged a little Tumbled Glass Distress Ink and then layered my window panel
onto my sponged white cardstock base. I
simply tucked my little animals into the windows at the bottom and used a small
piece of foam adhesive to pop the top part of the animal up so it looked like
they were leaning out.
Amy’s Notes: My sentiment
“Easter Bunny Auditions” was stamped onto a die-cut banner from Branches, Banner, & Bloom. I added a banner from Hi, Hey, Hello to the right corner to balance out the layout. I created my own little circle heart
embellishment from the center of the telephone die from Hi, Hey, Hello and added it to the center of the banner. Once everything was done, I added a little
shine to each animal with some glossy accents to the beak, nose, and eyes. I can’t help but smile when I see these
cuties!
Thanks so much, Amy, for all the terrific tips on how to create a card using this delightful layout! You can catch more of Amy’s design work on her blog, Stamp-n-Paradise.


