
Mar 28, 2015
Blog Design Team: Vellum Bouquet
Happy Saturday, crafty friends! Today, Blog Team Designer Julia Stainton is sharing tips on how to stamp on vellum with a fresh and pretty springtime bouquet card.

And now, let’s hear from Julia about her project…
Spring is in the air and I, for one, could not be more thrilled! I’m
ready for some fresh air, flowers and light airy designs. One of my
go-to cardstocks is the Sugar Cube cardstock which is a beautiful white
cardstock. While it’s wonderful to have a myriad of beautiful colors,
I’m a huge fan of white on white and it’s amazing what you can do with
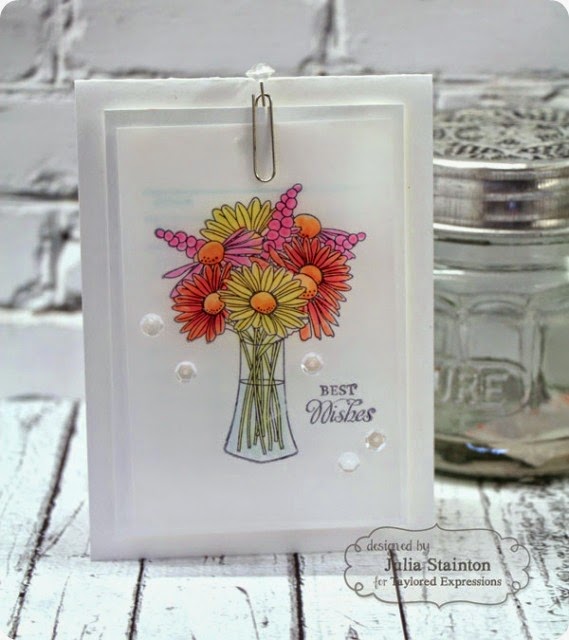
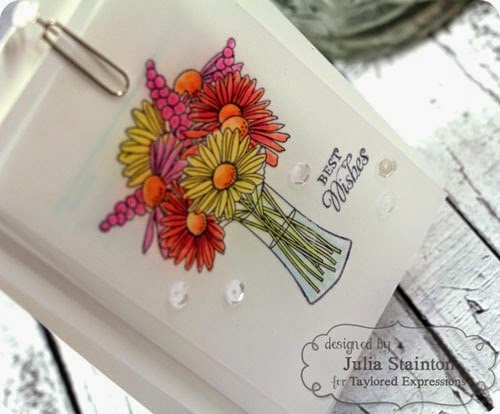
simply white.The Vellum Bouquet card pairs up plain white
cardstock with plain vellum for a soft spring look. All you need are
some stamps, ink and markers for a nice fresh design. The main
design and sentiment are stamped on the front of the vellum panel. Use a
black ink that stamps well on vellum and then heat set it well so that
it doesn’t smear or smudge.The fun part is then adding in color
to the REVERSE side of the vellum with markers. You can use Copic or dye
based markers for this process. I had dye markers on my desk and so
that is what I used. It’s easy to color the reverse side and you
don’t need to be quite as precise as when coloring on the front of an
image. One fun thing about this technique is because you are coloring on
the reverse side, the inks show through the vellum and are softened and
more subtle.Below the vellum layer I stamped the Library Card
stamp image in blue ink. It adds to the dimensional look of the vellum
and depending on how you are looking at the project, shows up well or is
more subtle. After stamping the second panel and adhering it to the
card front, I dabbed on a tiny dot of Glossy Accents to secure the
vellum panel in place and then paper clipped it to the card.


Thanks so much, Julia, for all your terrific tips on stamping on vellum. Be sure to check out Julia’s blog, Belle Papier to see more of her lovely projects. Have a joyful weekend!

       |
