
Mar 30, 2015
Blog Design Team: Wedded Bliss
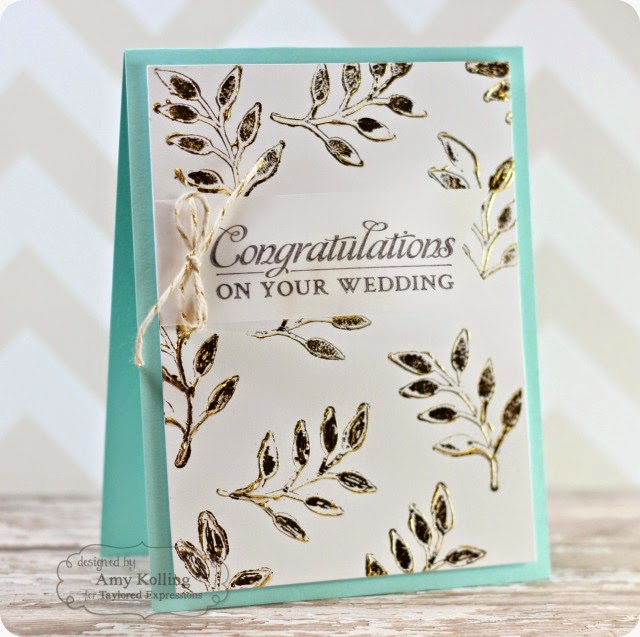
Happy Monday! We hope you had a fabulous weekend, crafty friends! Today, Blog Design Team member Amy Kolling is sharing a gorgeous gold foil wedding card that any couple would treasure.

Now, let’s hear from Amy about her project…
Since
wedding season is right around the corner, I thought I’d try out the very
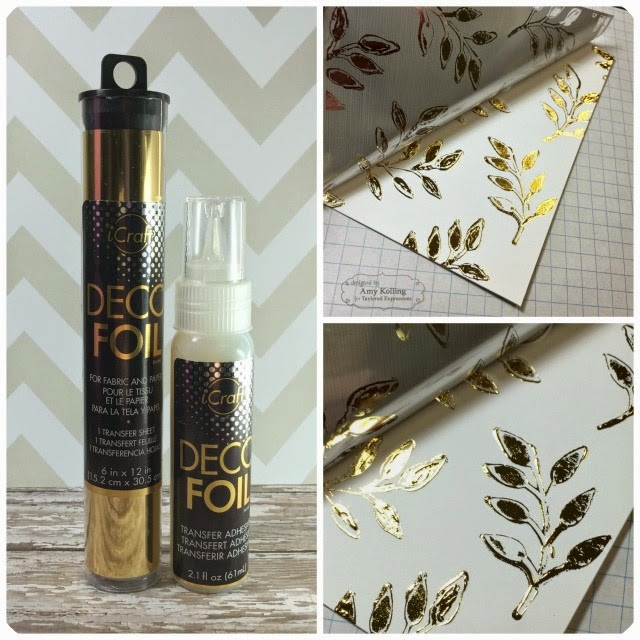
popular “gold foiling” technique for an elegant wedding card.You will need a few things to do this
technique: Deco Foil in gold and Deco
Foil Transfer Adhesive. I used a solid leafy
image from Happily Ever After and
stamped the image using the transfer adhesive that I simply poured onto
my
craft mat. I stamped the image over an
entire white trimmed panel. Some parts
of the leaf images didn’t stamp completely so I added in a little extra
adhesive using the applicator tip. Let
the adhesive dry until its crystal clear (tip: don’t rush this step…walk
away!) Once dry, this panel will be very
sticky. Place a trimmed piece of gold
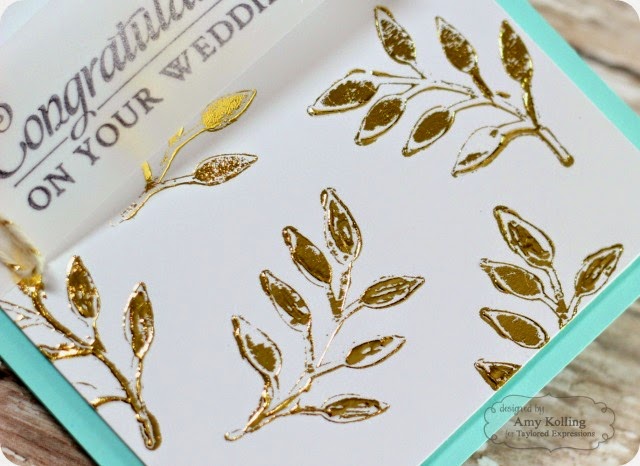
Deco Foil over the sticky panel GOLD SIDE UP.Now is the fun part! I rubbed my
finger over the foil where the stamped images are. Once I felt the foil
had transferred to the
sticky stamped areas, I gently began pulling off the Deco Foil sheet. Magic happened! (Not really but I loved the results!) Remember how I
mentioned that parts of the
images didn’t stamp completely and I filled in with the applicator tip?
The results were “sketchy” looking
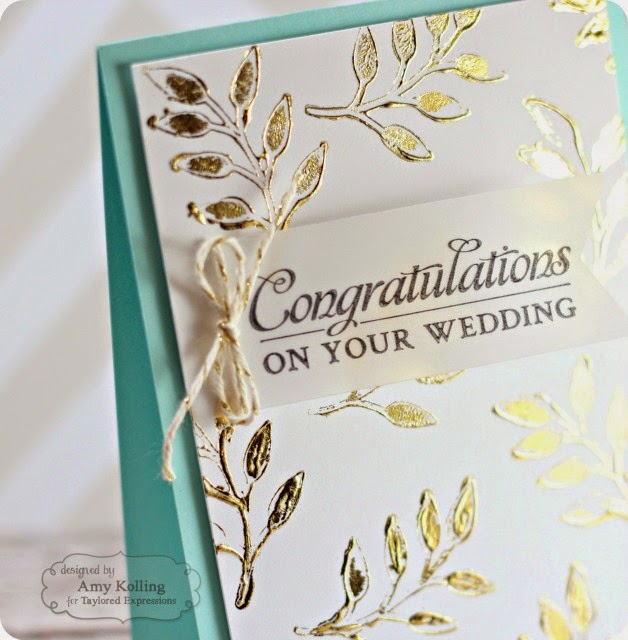
leaves!I didn’t want to cover up my
foiled panel I created so I stamped a sentiment from Happily Ever After
in
Staz-On black ink onto a vellum strip and trimmed into a banner. This
was adhered with a small strip of
Scor-tape and embellished with a tiny twine bow. I hope you think about
trying the “foiling”
technique; it gives gorgeous results!
Thanks so much, Amy, for sharing this beautiful technique. You can catch more of Amy’s design work on her blog, Stamp-n-Paradise.

    |
