
Sep 25, 2015
Blog Design Team: Let’s Celebrate YOU
TGIF! We are looking forward to the weekend and we’re excited to kick off Friday with a beautiful card from Blog Design Team member Amy Kolling. Check it out below…

Now, let’s hear from Amy about her project…
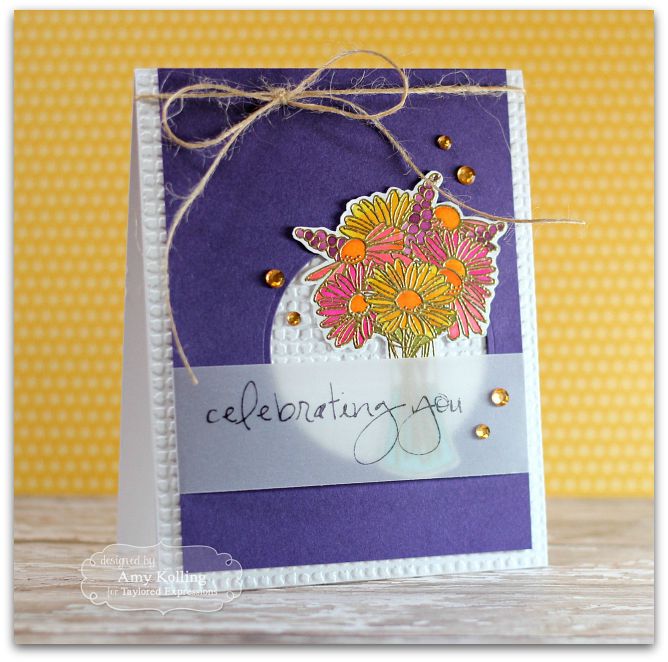
Hello! Do you ever wish you had used a stamp during “its season”? That’s where I am with the Daisy Bouquet stamp. Fall has started here, but this didn’t stop me from using this stamp. The way to use seasonal-looking stamps in the “off-season,” I change things up by using some fall colors.I
started with a scrap of Tim Holtz Watercolor Paper and gold heat-embossed my Daisy Bouquet stamp. Heat embossing is one of my favorite
ways to watercolor, especially with Distress Inks, because it keeps everything so neat and prevents the colors from running. I ‘smooshed’ all the
colors I was going to use onto a large stamp block and used this as my
palette for watercoloring. Adding color with a waterbrush, it makes this so easy to create! After my image was dry, I fussy cut out my Daisy
Bouquet, but you can also use the matching die if you have it.Next, I went to work on my backgrounds. I used the Burlap Embossing Folder
with Sugar Cube Cardstock and adhered this to my top-folding card.
Next, I die-cut a circle out of a dark purple cardstock from my stash
and trimmed it down so it could be mounted with my Burlap embossed
background showing some on the edges. I adhered my Daisy Bouquet over
the circle cutout, but making sure to leave some of the texture showing
through.


My sentiment, from Inside & Out Birthday,
was stamped onto vellum with black StazOn ink. The sentiment panel was
added with adhesive on the back side. To finish, I added some gold rhinestones for a “fall” look. There you have it — my fall
“daisy” bouquet!
Thanks so much, Amy, for sharing this beautifully colored and embossed card with us today! You can catch more of Amy’s design work on her blog, Stamp-n-Paradise. Have a joyful day!


