Nov 19, 2015
Blog Design Team: The Night Before and the Morning Of
Happy Thursday, crafty friends! Our die, Eventful – Night Before Christmas, has become a fast fan favorite and we love how our designers have shown off so many unique and wonderful ways to use it. Today, Blog Team Member Amy Sheffer is sharing tons of terrific ideas on how to take the same card design and change things up just enough to create two completely amazing and beautiful projects!

.gif)
And now, here’s Amy to tell us all about her project…
I rarely make multiples of the same card, however, I can certainly see
and appreciate the wisdom and appeal of mass-production, especially for
holiday cards. Sometimes, you just run out of brain power or mojo or
especially time to conceive of all-new designs each time. One approach
is the in-between approach — make multiples of the same card but change
it up a little bit each time. You get the time-saving benefit of using
the same layout and products, but still retain the fun of making new
creative decisions with each card. What I’ve put together for today are
two versions of the same card, with strikingly different looks. I’ll
share even more ideas at the end.

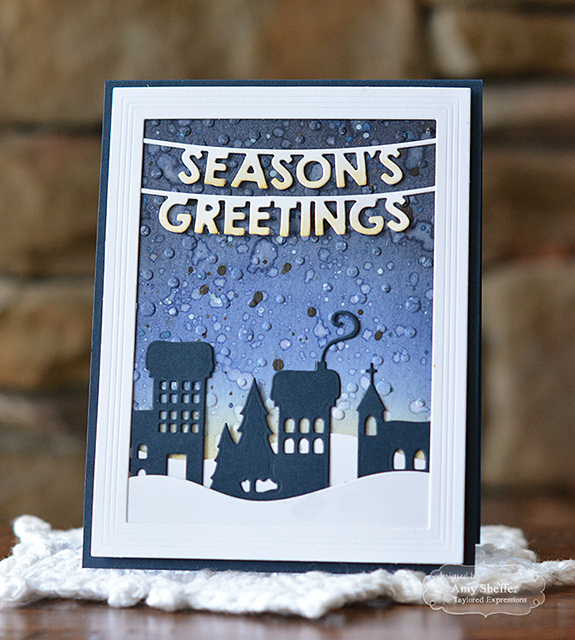
For my first version, I’ve
created a night sky background by sponging Distress Inks onto watercolor
paper, beginning with Scattered Straw Distress Ink at the bottom and
moving on to Stormy Sky, Faded Jeans, Chipped Sapphire, and Black Soot
Distress Inks as I worked my way to the top. I splashed some water onto
the panel, then splattered with navy, black, and white mists (letting
the panel dry in between each color). Last, I ran the panel through the
Snowfall Embossing Folder. Each step builds up more and more interesting
effects.
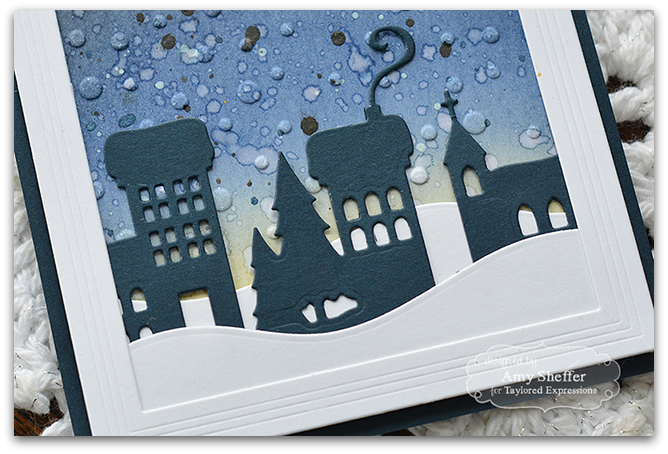
Along the bottom, I created a snowy landscape by
layering two Build A Scene – Rolling Hills die-cuts out of Sugar Cube
cardstock. In between the layers, I nestled an Eventful – Night Before
Christmas die-cut in Blue Corn cardstock.

At the top I added the
Season’s Greetings Banner die-cuts, which are cut from Sugar Cube and
lightly sponged with Scattered Straw Distress Ink.Last, I added a
Sugar Cube frame, die-cut with one of the Frame in Frame Cutting Plate
dies, and mounted the frame to a Blue Corn card base using foam tape.
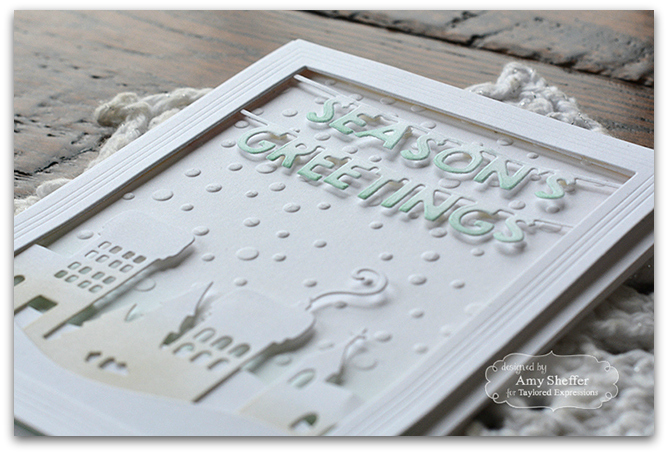
My second version features an all-white design (or nearly all-white), a look I always love. Just like the first version, the background is dry embossed with the Snowfall Embossing Folder.
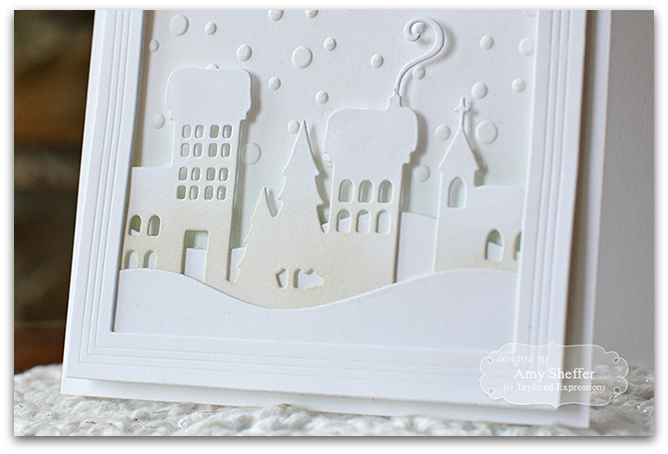
The
Eventful – Night Before Christmas is die-cut from Sugar Cube and
very lightly sponged with Old Paper and Pumice Stone Distress Inks.
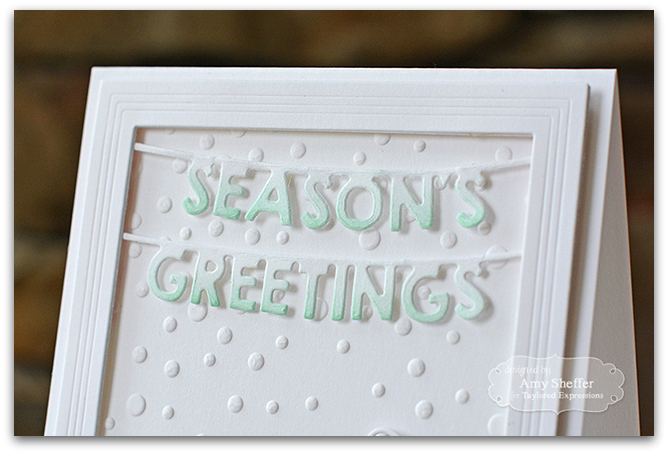
The Season’s Greetings Banner die-cuts are very lightly sponged with Evergreen Bough Distress Ink.
I
finished off, again, with a Sugar Cube Frame In Frame. Because of the
white-on-white layers, I added some foam tape in between the frame in
the scene elements, to heighten the dimension and contrast.I can
imagine so many more possibilities with this same basic design:
watercolor the Night Before Christmas die and layer against an
all-white snowy background; explore unexpected color combos for the
background layer; make a shaker out of the framed landscape; put
together fun patterned paper combinations (a woodgrain background would
be beautiful!); die-cut the border out of vellum; and so much more!
Thank you, Amy, for sharing these two cards and wonderful project ideas with us today! You can find more of Amy’s beautiful work on her blog, Pickled Paper Designs. Have a joyful day!