Jan 04, 2019
Get Creative With Copics & Coloring Florals
Hey, crafty friends! The temperature is pretty chilly here where I live this week and what better way to spend a cold winter day than staying inside where it’s nice and warm and coloring? I am especially excited about the tutorial we have to share with you today as Copic instructor Debbie Olson! will share tips and tricks for coloring one of our popular floral bouquets.
We’ve let you know about the Copic price increase and given you almost two weeks to take advantage of our special offer before the price goes up. So here it is one more time: order 5 or more Copic markers now through January 6, 2019 and receive FREE U.S. shipping (Coupon Code: STOCKUP) or $5 off shipping for international orders (no coupon code necessary). We want to make sure that you are able to get started with Copics (or continue adding to your collection) before the price goes up!

And now on to this gorgeous card from Debbie:
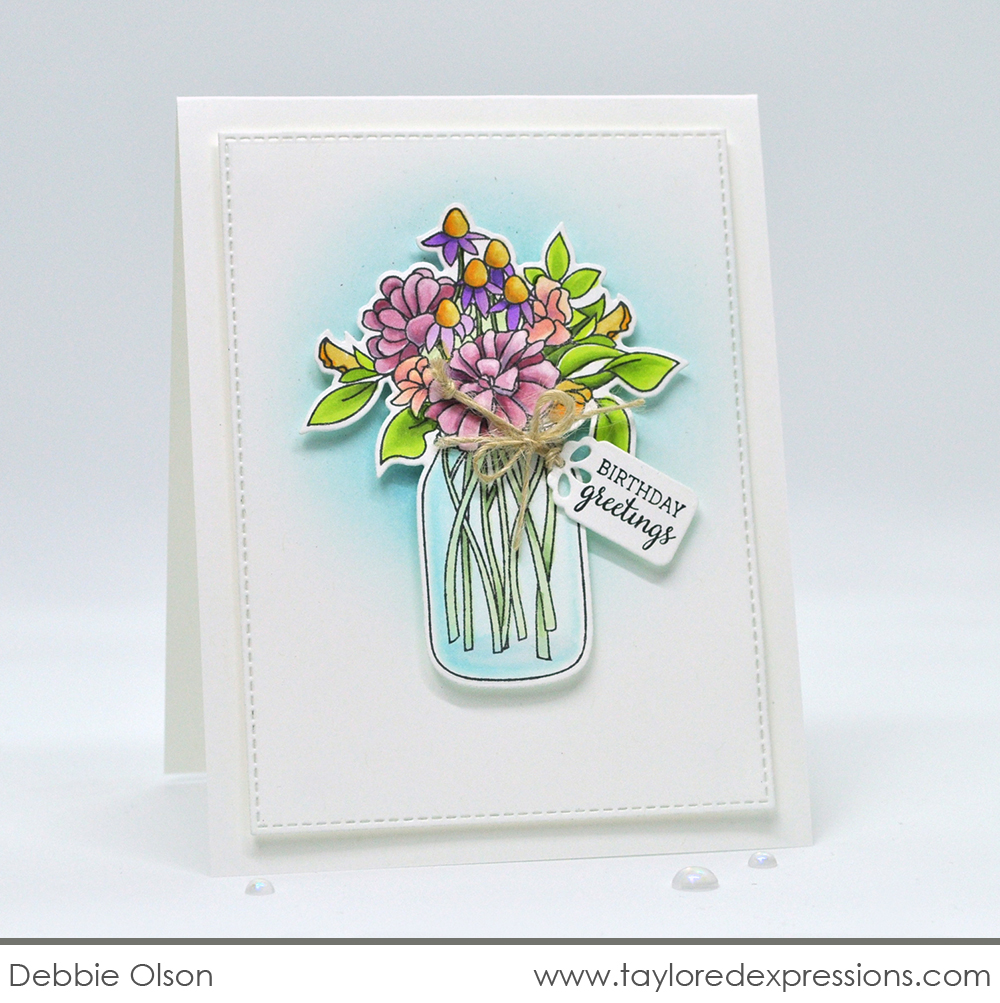
This beautiful card was a part of the Copic marker class that Debbie taught at TE’s Stamp Joy event in 2018. If you are interested in taking classes with industry-leading designers, shopping the TE store in person, connecting with stamping friends, and learning by creating fun make & takes, then click below to find out out how you can join us at one (or both!) of our Stamp Joy events in 2019 (Irvine, CA & Ankeny, IA.)
CLICK HERE for more information about the event in Irvine, CA.
CLICK HERE for more information about the event in Ankeny, IA.
Now let’s get started with some tips and trick for coloring florals – and a few tips on coloring glass too!
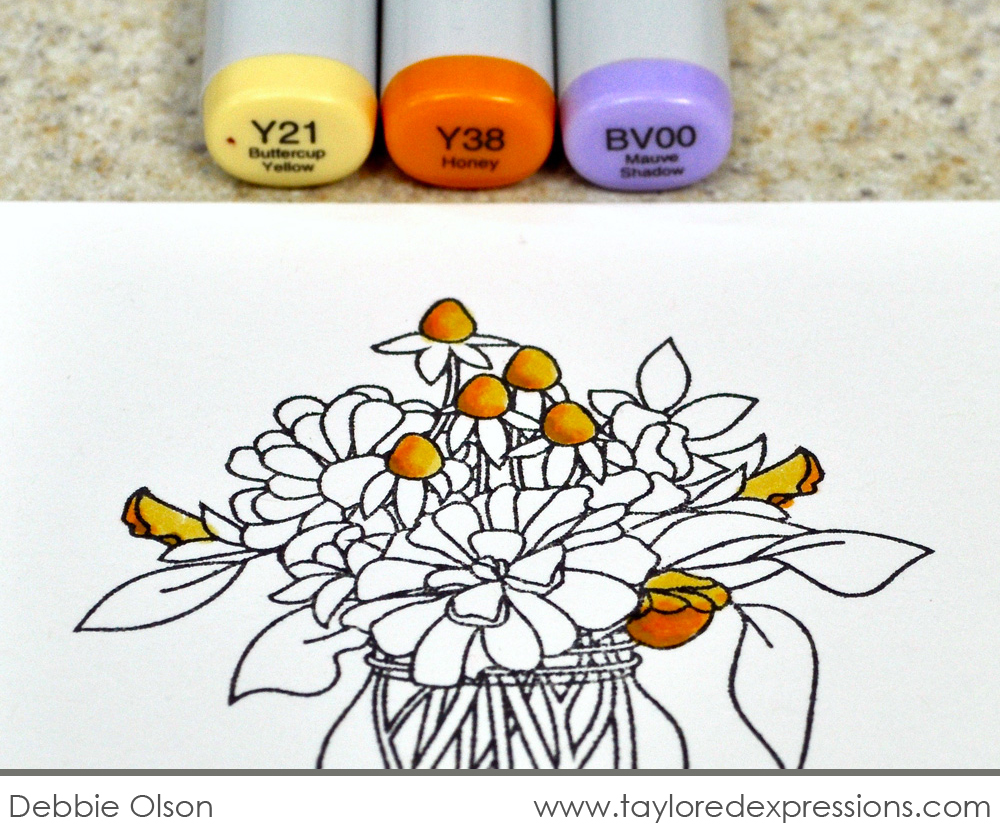
Start with stamping your floral image from the Wildflower Bouquet set onto Sugar Cube cardstock using Oreo ink.
For the flowers shown in the photo, saturate them with Y21 and then add shading on the left with Y38. On the extreme left edge, you can add a bit more shadow using BV00.
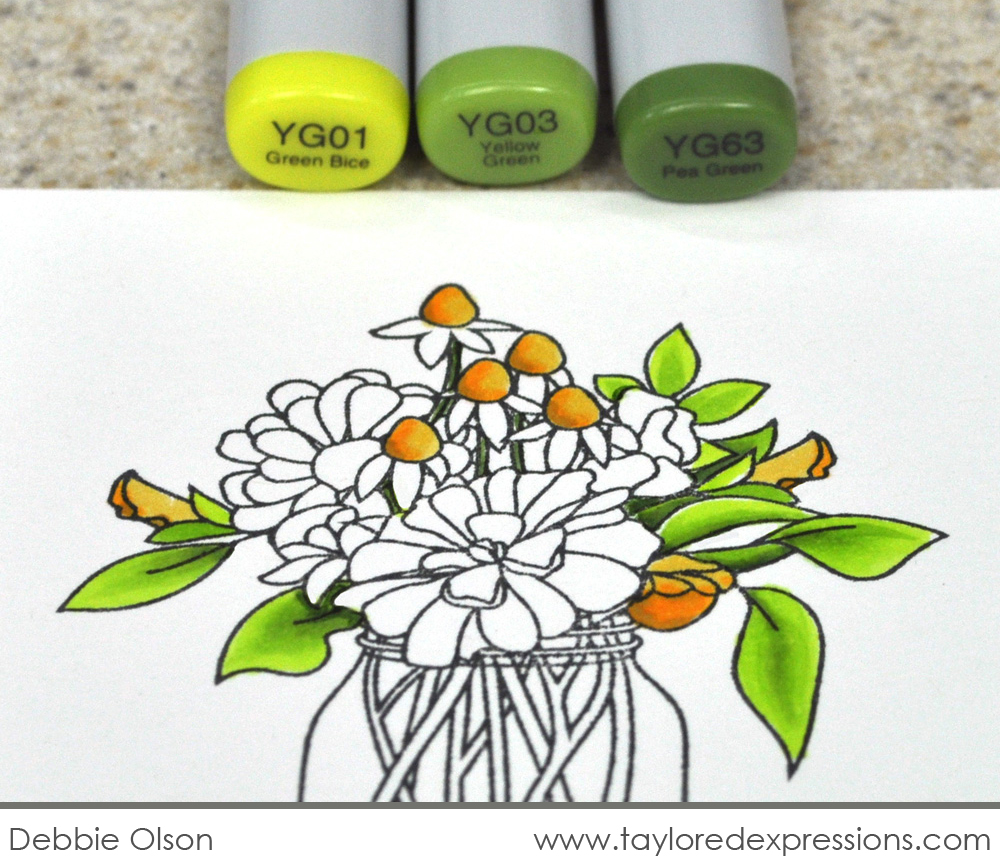
Add a base coat to the leaves with YG01, then add shading with YG03, and the deepest shadows with YG63.
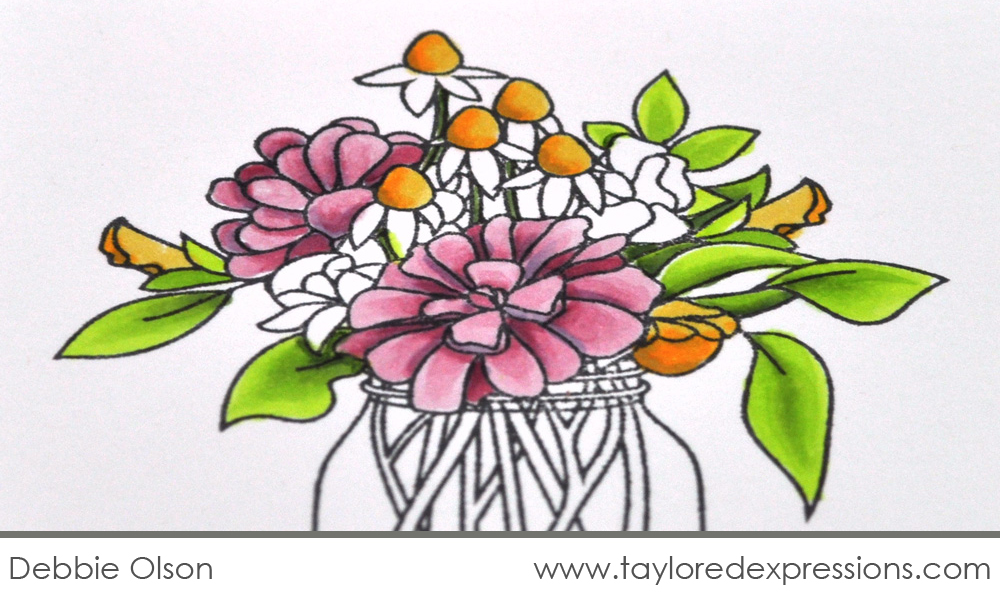
For the larger flowers, add a base coat with R81, shading with R85, and then deepen the shadows with BV00.
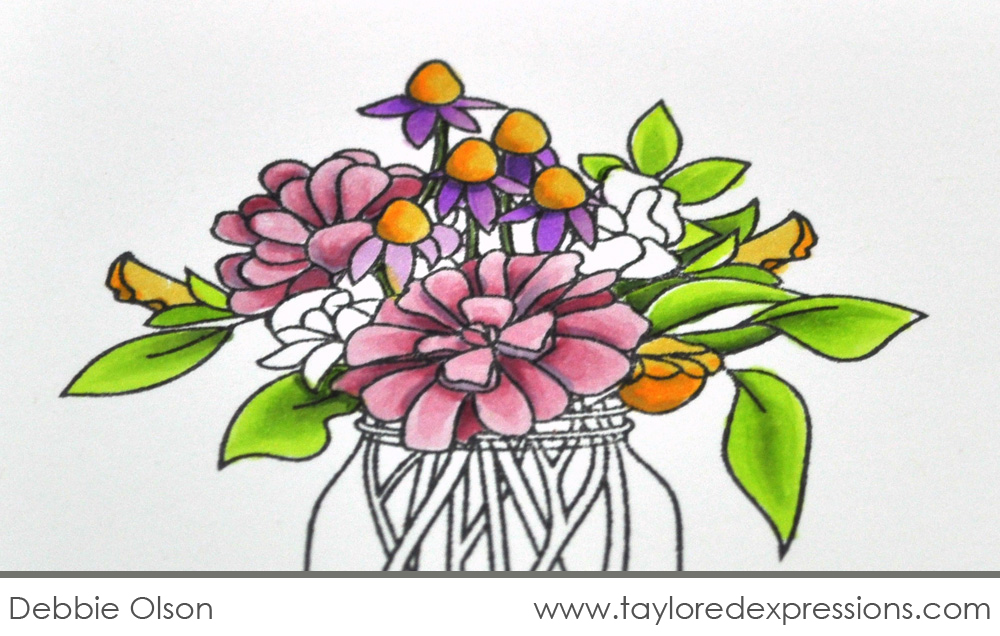
For the cone flowers, use V12 for a base coat, add shading with V04, and add the deepest shadows with V17.
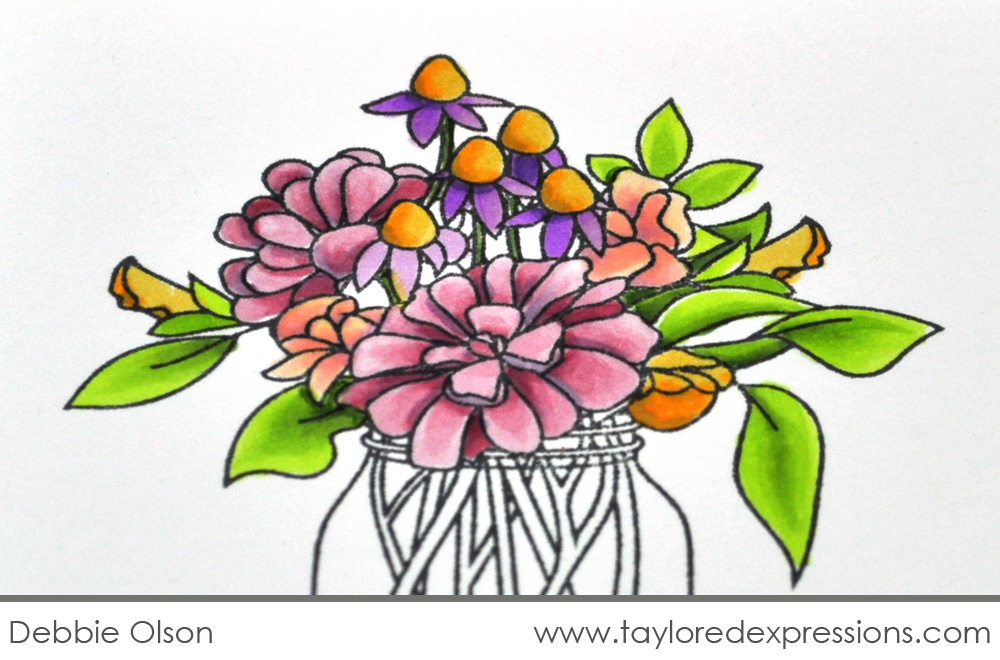
For the remaining flowers, add a base coat with YR000, add shading with R21, and add the deepest shadows with V12.
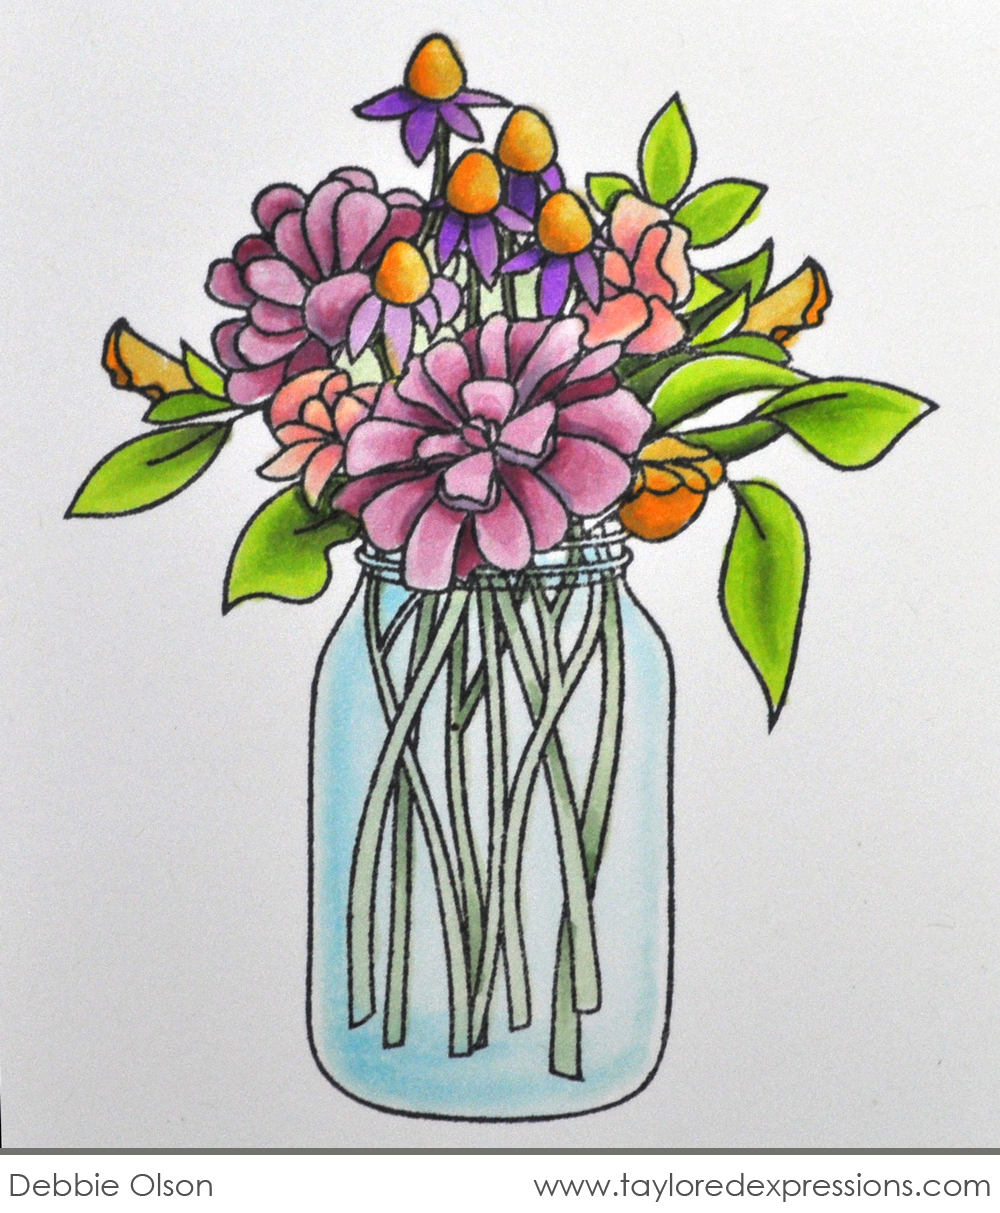
And now a few tips for coloring glass. Start by saturating the center of the jar with 0 – the colorless blender. Then color the jar with BG000, staying back slightly from the edges of the jar. While the BG000 is still wet, use the colorless blender to push the BG000 into the center of the jar outward towards the edges to create a transparent look.
Copic markers used for this project: Y21, Y38, YG01, YG03, YG63, YR000, R21, R81, R85, V04, V12, V17, BV00, BG000, & 0

What a way to wrap up this week’s Copic marker inspiration! I hope you’re feeling inspired to color! As always, we’d love for you to share you projects with us on our Facebook Fan Page. Happy coloring!
Did you know that you can subscribe to our blog and get our posts right in your inbox? Just sign up right HERE – that’s all there is to it to make sure you don’t miss any of our crafty inspiration!


