
Apr 26, 2019
One Product Three Ways With Melody Rupple
Hey, crafty friends! If you take a look at your personal crafty supply stash, do you notice certain themes? Maybe you love to stamp with whimsical looking styles or prefer florals and a more feminine look. What different styles that we all gravitate towards are reflected in the projects that we create. And, of course, it’s way more fun to create with the products that bring us joy!
If you take look at the projects that the members of the Taylored Expressions Creative Team make, each of them has their own personal style and types of projects that they like to create. Because of the wide variety of tasted and styles on the team, we all get to be inspired by the a fabulous selection of project that the team creates to share. Today, we are continuing our One Product Three Ways this week where we took one product (a stamp set or die) and created 3 projects to show you how you can use that product at least 3 different ways.
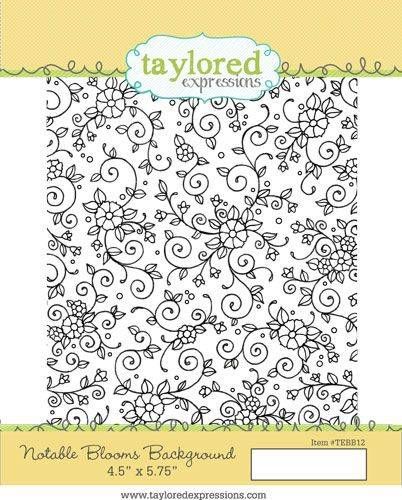
Today, Melody Rupple is featuring the Notable Blooms Background stamp used three different ways on three different projects. The background stamps are sized 4 1/2″ x 5 3/4″ to cover an A2 card size and the Notable Blooms Background stamp features a pretty all over floral design that you can color in with your favorite medium or stamp as it is! This pretty floral background is perfect to add a dainty, feminine touch to your projects for Mother’s Day, a new baby, weddings, and more.
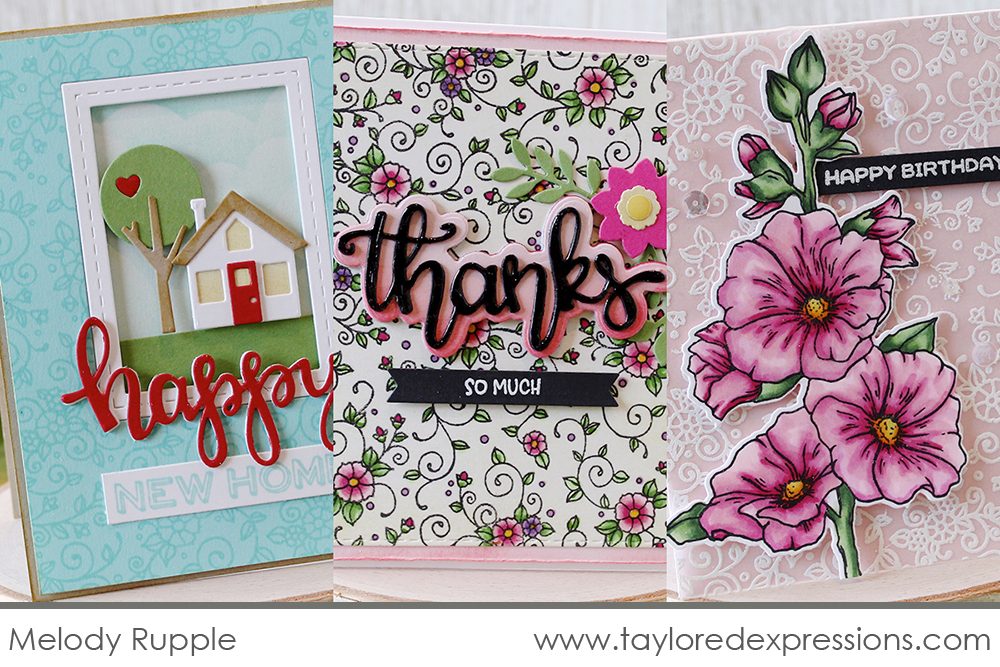
Melody used the Notable Blooms Background stamp on a new home, thank you, and birthday card. Let’s take a closer look at what she created to share:
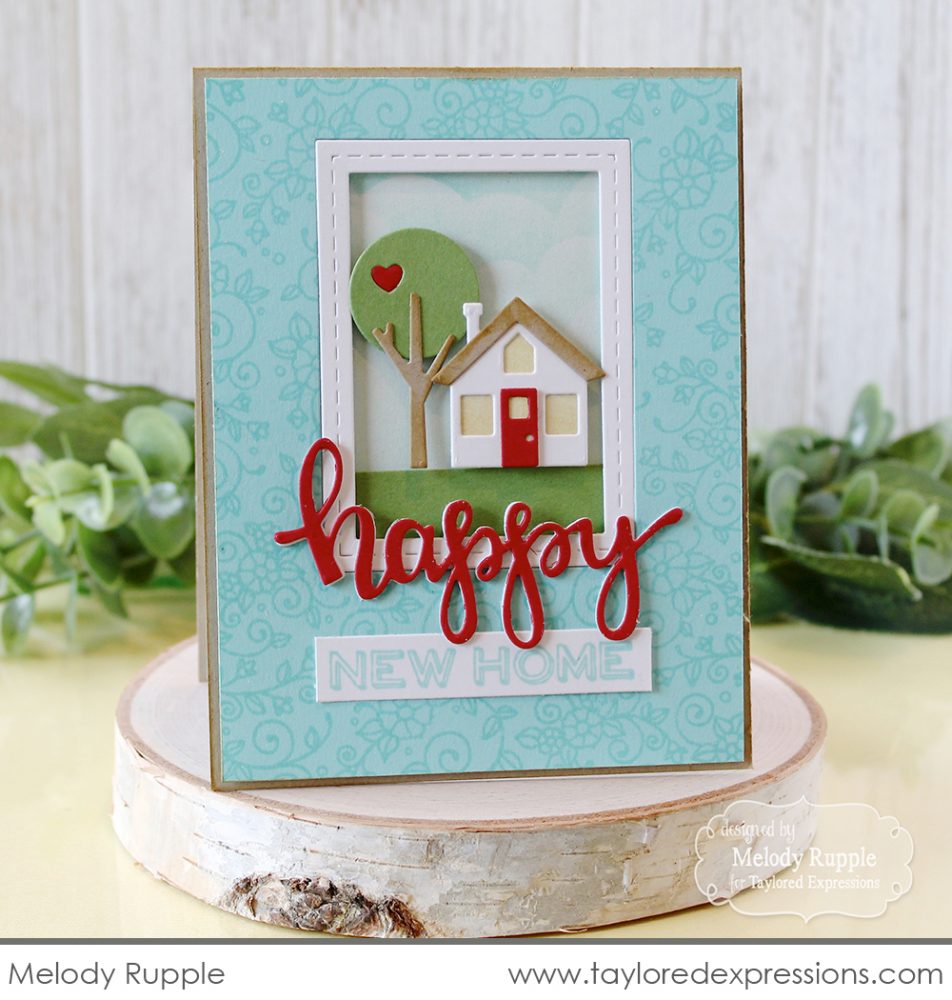
On this first project, Melody stamped the Notable Blooms Background stamp with Confetti Cake ink onto Confetti Cake cardstock to create a tone on tone background for her card to celebrate a new home. Creating a tone on tone background like this is a great way to add texture and detail to your project without overpowering the main image and sentiment on your card.
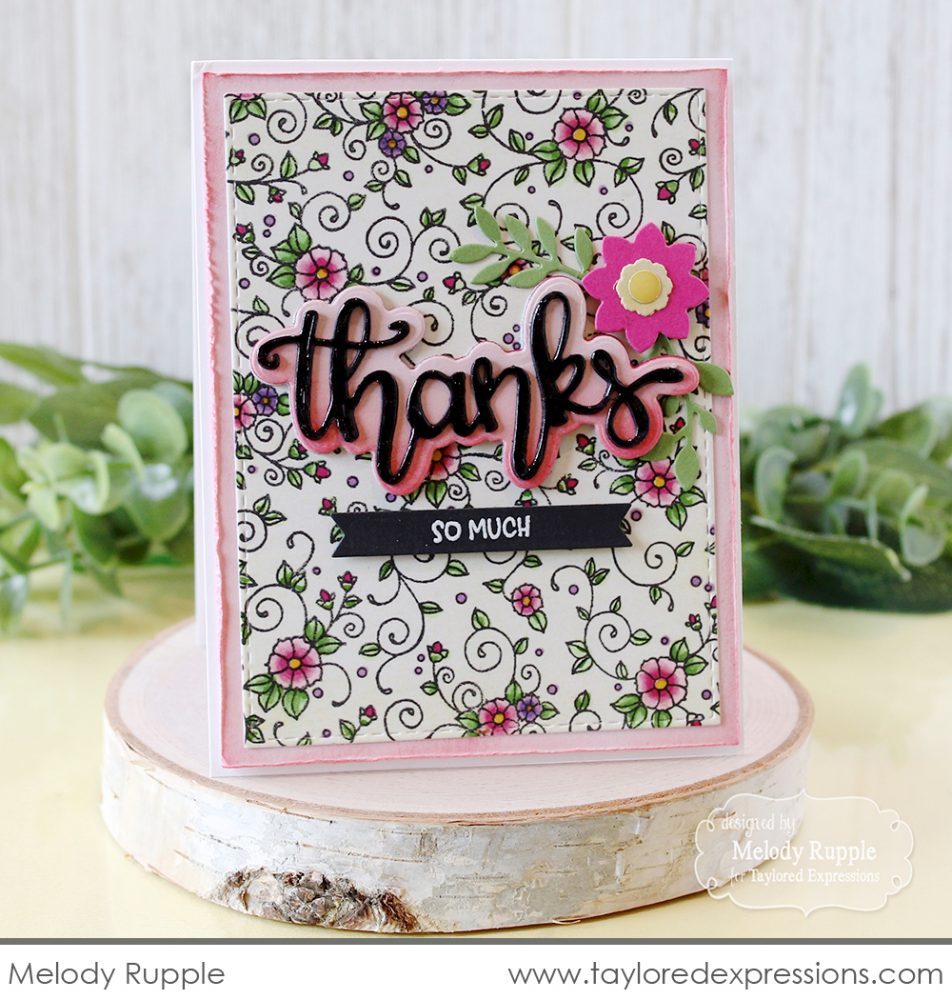
On this next card, Melody stamped the Notable Blooms Background stamp in Oreo ink onto Sugar Cube cardstock and colored in the floral design with Copic markers. Coloring the background image transforms it from just a background to a main focal piece of the project.
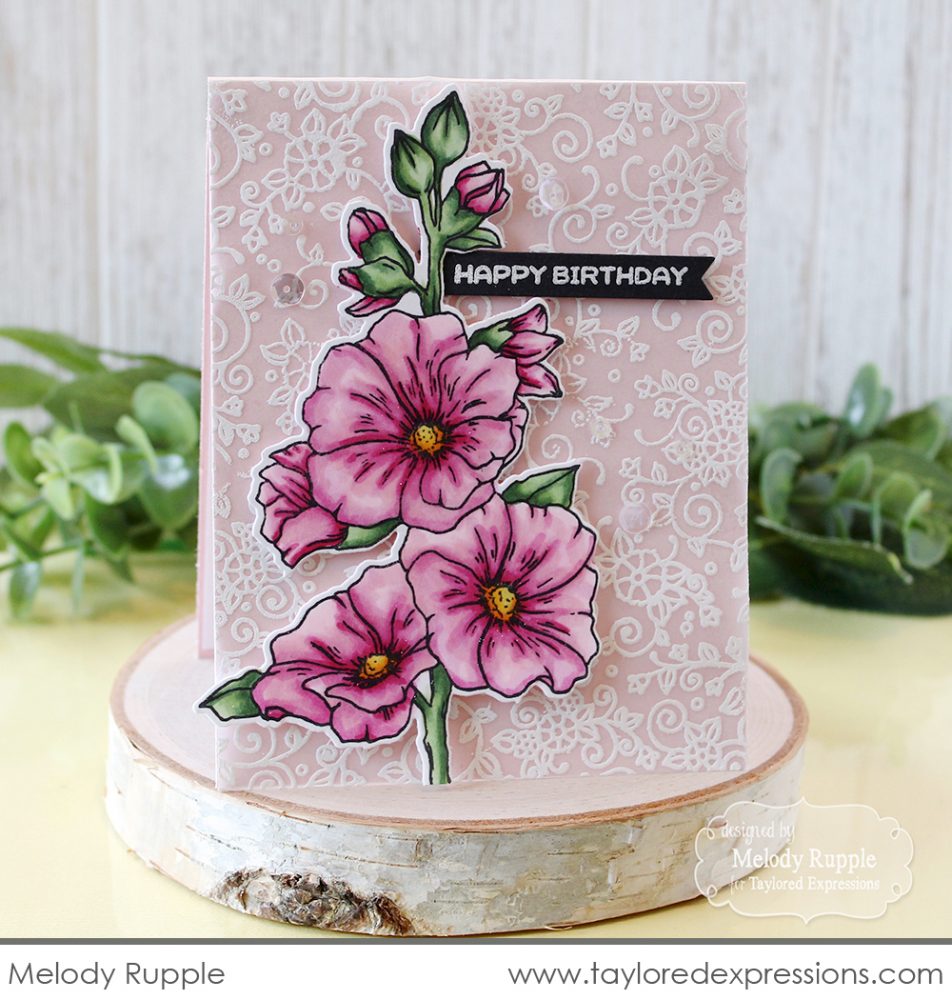
On this last project that Melody created, she embossed the Notable Blooms Background stamp in white on a piece of vellum to create a soft & pretty lace background. It’s the perfect feminine touch for this floral birthday card.
You can create lots of great looks with the Notable Blooms Background stamp for your projects. Here are the different ideas that Melody shared with you today:
- Stamp the background on cardstock with a coordinating ink color to create a tone on tone background.
- Color in the floral design with Copic markers or another medium to make it a stand out feature on your project.
- Emboss the floral design with white embossing powder on vellum to create a soft, lacy look for your project.
Thank you for stopping by today! I will be back again tomorrow with another One Product Three Ways feature from Jen Shults. See you again soon!
Did you know that you can subscribe to our blog and get our posts right in your inbox? Just sign up right HERE – that’s all there is to it to make sure you don’t miss any of our crafty inspiration!
