
Feb 25, 2020
NEW! Mini Media Mat + Double Smooshing?
Hey, crafty friends! Did you have a good and crafty weekend? I personally got the chance to stamp with a few of my dear friends and it was a wonderful time. Do you have some crafty friends that you can spend time with? The great thing about technology is how we can spend time with our crafty friends even when they live far away, but I can tell you there is nothing better than spending quality time with them in person. We love sharing new idea and inspiring projects with each other. We help and encourage each other along with the projects that we brought to do. It is the best!
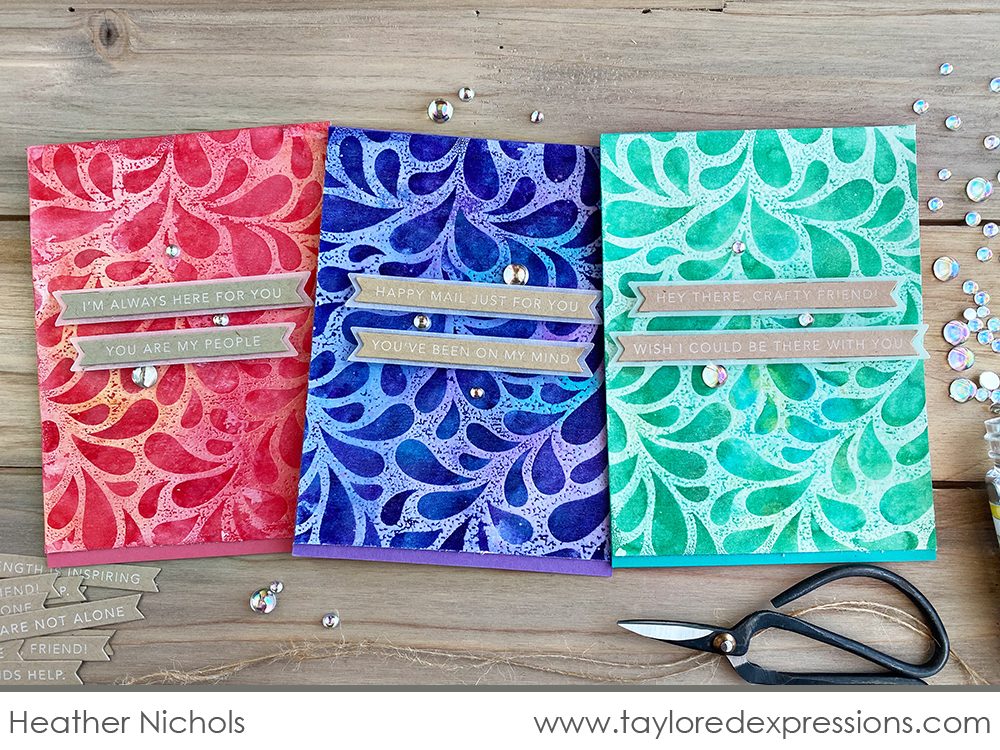
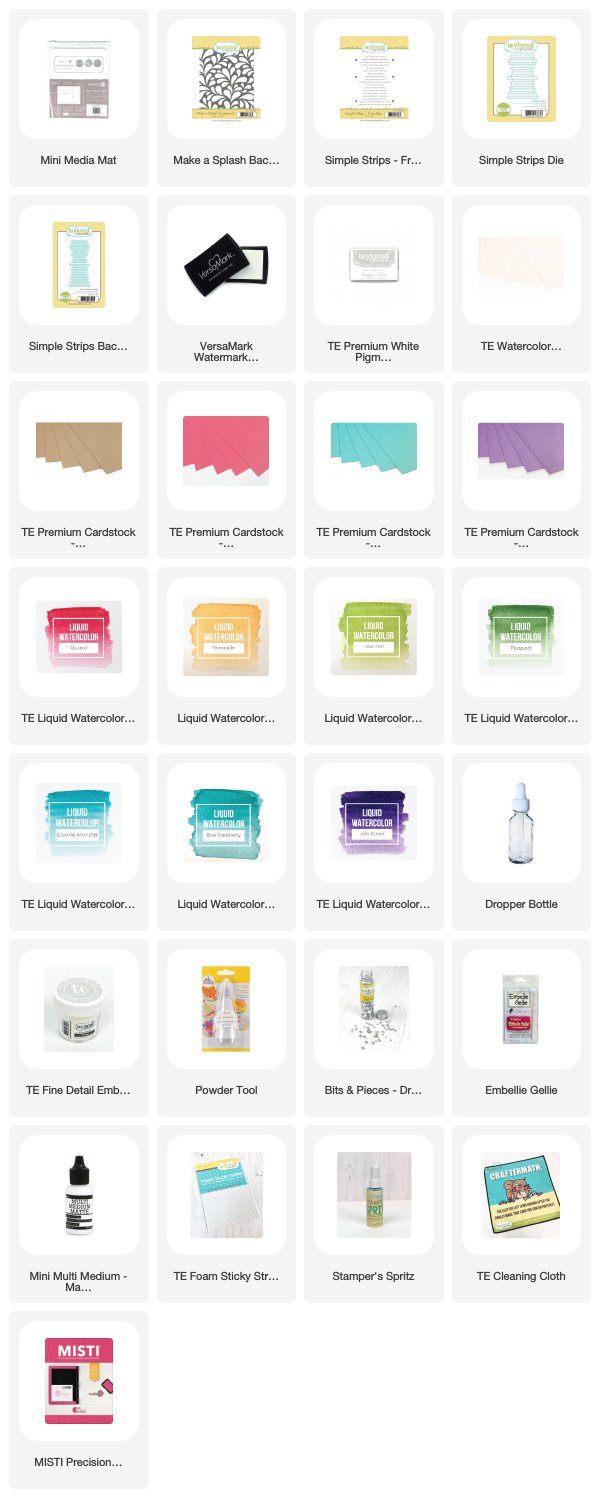
I brought my most recent project with to share which was the result of playing with a new product that’s in the Taylored Expressions webstore: the Mini Media Mat by Waffle Flower. I have used the larger sized Water Media Mat before, but I really love this new smaller size and was inspired to play around with a few different techniques.
Check out what I created by combining the smooshing technique with the emboss resist technique in the video below:
I really love when an idea I have in my head actually works! What I did was “smoosh” watercolors using the Mini Media Mat. I added drops of liquid watercolor to the mat, added a bit of water depending on how saturated I wanted the color to be, and pressed a piece of watercolor cardstock into the colors. It creates a wonderful multicolored effect on your paper!
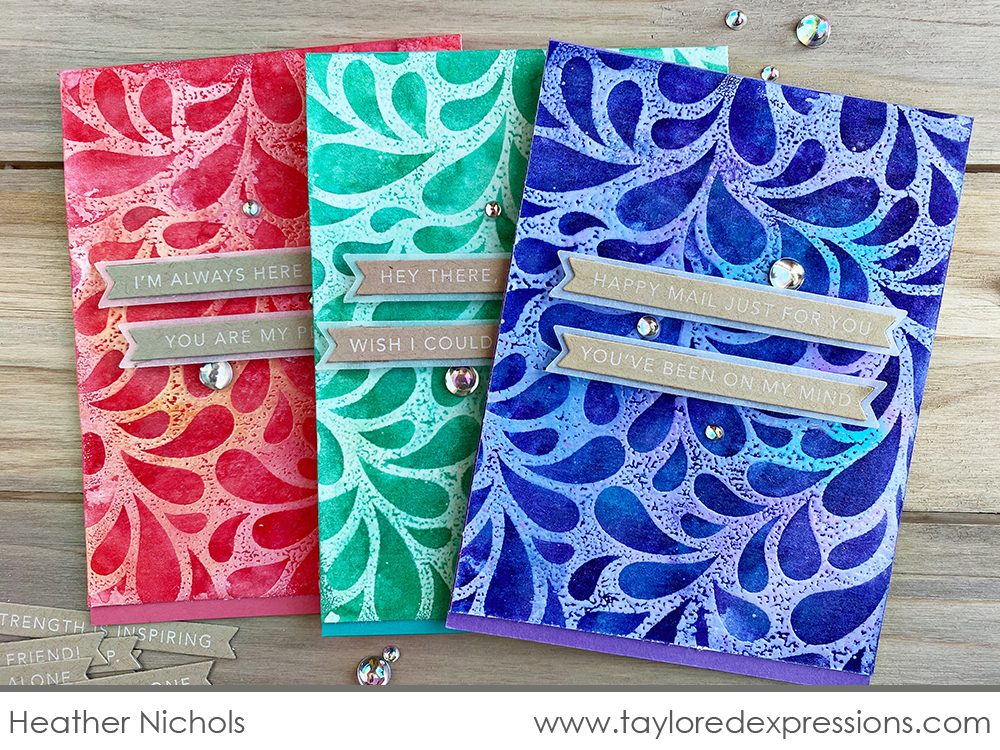
To combine smooshing with emboss resist here’s what I did: smoosh colors onto your watercolor cardstock in lighter tones (add water to dilute your watercolors to get a lighter tone), dry your cardstock completely, stamp an image over the top with Versmark ink and emboss it with clear embossing powder (I used the Make a Splash Background for my project), smoosh colors onto the embossed piece with darker tones (add less water to your watercolors so they are darker and more saturated.) Wherever the image is embossed, it resists the watercolor and also traps the lighter colors that you smooshed first underneath.
The effect is pretty magical and colorful! I did a couple of different color combinations and all of them turned out beautiful.
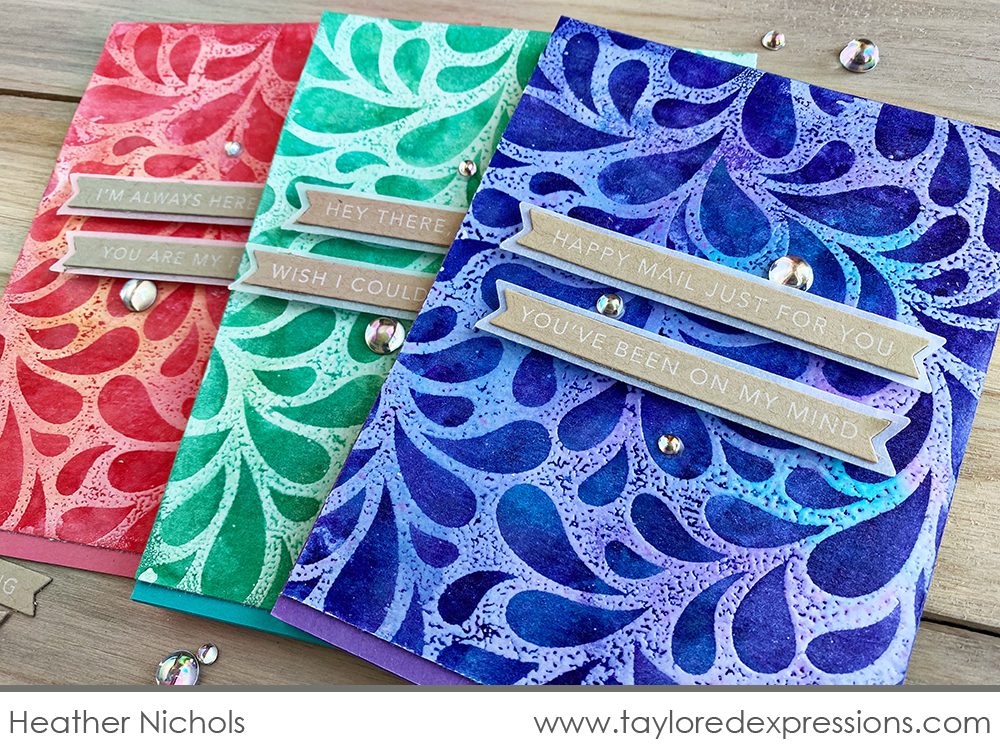
Using Simple Strips for my sentiments was perfect so I could let my fun background design shine. I chose the Simple Strips – Friendship stamp, die cut them out with the coordinating Simple Strips die, and added the borders using the Simple Strips Backer die with vellum.
Speaking of shine, I couldn’t resist adding a few shiny Bits & Pieces – Drip Drops embellishments for a final finishing touch!

The Mini Media Mat is perfect for experimenting and playing around with new techniques. I’ll have more crafty inspiration using the Mini Media Mat coming your way a little later this week. Thank you for stopping by today!
Did you know that you can subscribe to our blog and get our posts right in your inbox? Just sign up right HERE – that’s all there is to it to make sure you don’t miss any of our crafty inspiration!
