Aug 18, 2020
NEW Mini Slim Products – It’s Release Day!
Hey, crafty friends! It’s Heather here today! What do you think of the new Mini Slim size (3.5″ x 6″) for card making? I’m loving this new size and I am with Taylor in the opinion that while I love the slimline look, filling up that card front can be intimidating. This Mini Slim size is the perfect compromise for me!
I have more inspiration to share from myself and the TE Creative Team today using the new Mini Slim products, but before I get to that I want to remind you about the promotion for this release. It’s perfect for stocking up on the Mini Slim Trifold Card Bases and Mini Slim Envelopes!
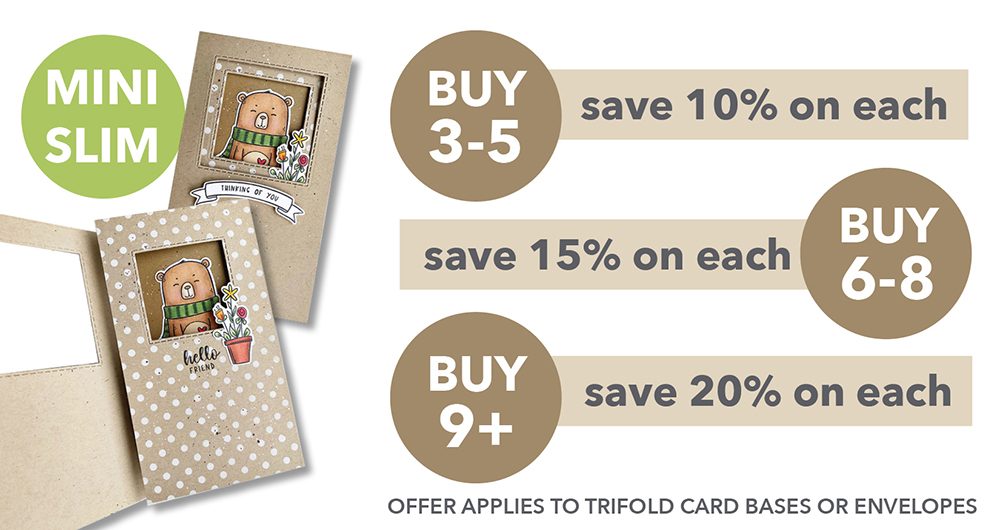

Now through Sunday, August 23rd, the more you purchase of the new Mini Slim Trim-fold Card Bases and/or Mini Slim Envelopes the more you save!
- Buy 3-5 Trifold Card Bases or Envelopes, save 10% on each
- Buy 6-8 Trifold Card Bases or Envelopes, save 15% on each
- Buy 9+ Trifold Card Bases or Envelopes, save 20% on each
Keep scrolling for today’s video and more project inspiration, or click below to head over to the TE webstore to shop for the new products!
- The release has 24 new products including dies, stencils, envelopes, and more that coordinate with our unique Mini Slim size card (3.5″ x 6″).
- Everything is available at the TE webstore RIGHT NOW!
- Receive FREE shipping on orders of $50 or more in the United States!
- Earn a free, exclusive stamp set with purchases of $100 or more. CLICK HERE for more information and a closer look at the exclusive stamp for August: Art From the Heart Background.
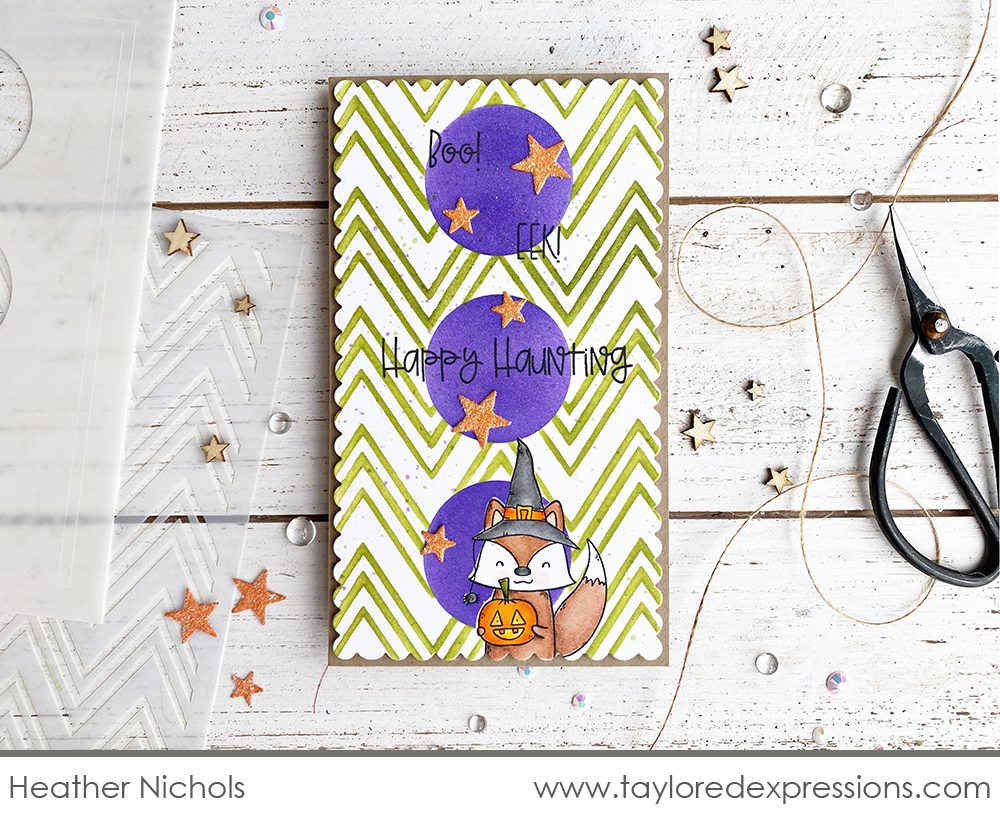
Today’s project is all Halloween! It has been so much fun digging out my past TE sets to create in the new Mini Slim size and I decided to use the Sweet & Spooky stamp set to create this Halloween card. Watch the video below to see how I created this card from start to finish:
In the video, I share how I used Stamping Mask Paper, the new Masking Stencils – Mini Slim Windows set, the new Mini Slim – Zig Zag stencil to create the background and main image on my project.
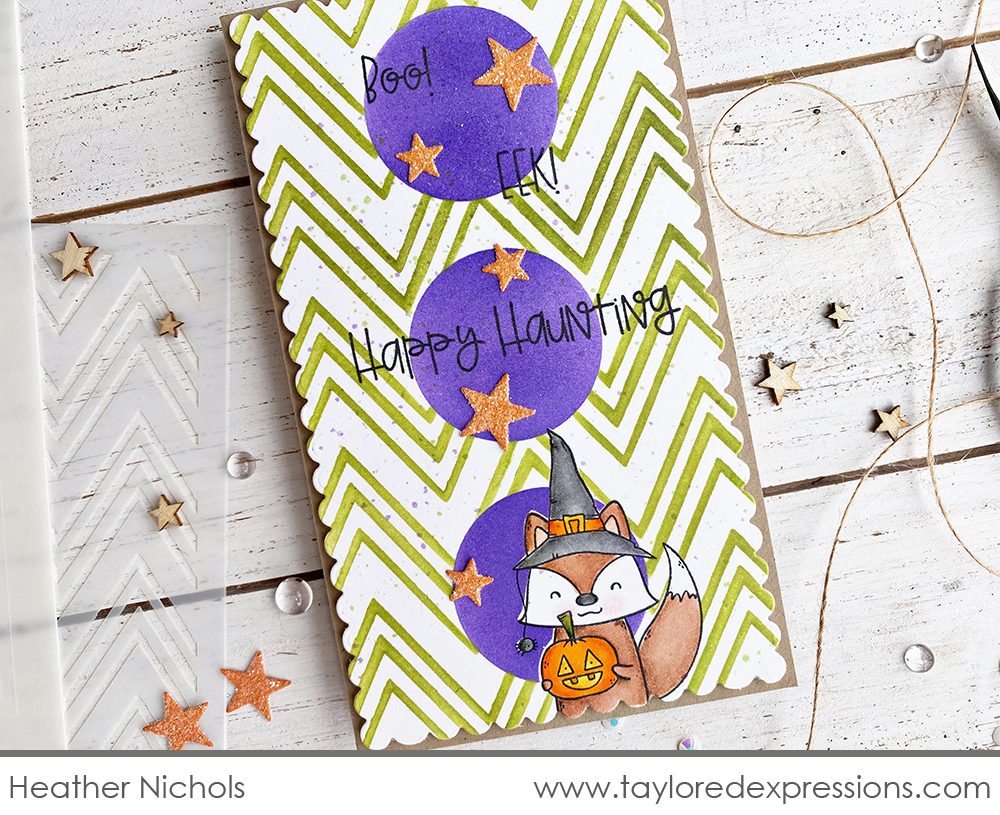
I think you might agree that the best part about using masking techniques is when you get to peel everything off and reveal the results! Once my background was complete, I colored in the fox image with Copic markers and Prismacolor pencils blended with Gamsol. I added the sentiments from the Sweet & Spooky stamp set with Oreo ink and cut out my design using the new Petite Scallop Mini Slim Stacklets die collection.
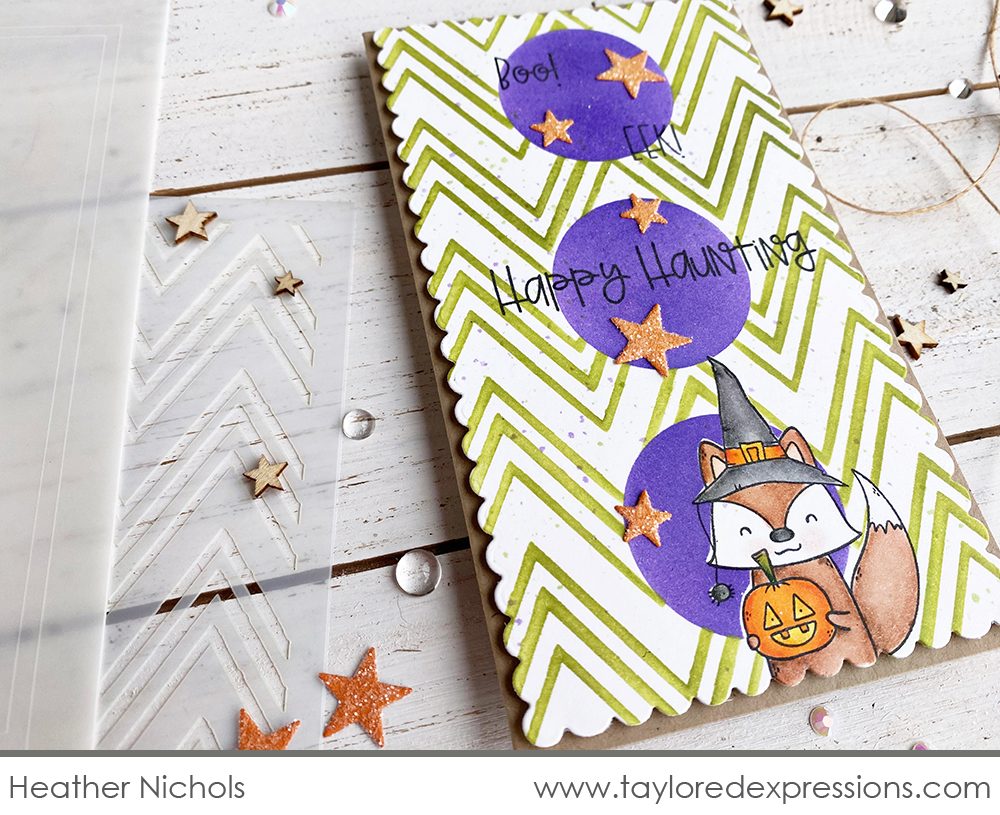
I added the stamped piece to a Mini Slim sized card base that I created with Toffee cardstock. I cut my card stock 6″ x 7″, scored the cardstock at 3.5″ along the longer side, and folded the cardstock in half.
The sparkly star embellishments on the card are die cut using the star dies in the Banner Year – 4th of July set from Candy Corn cardstock that I had covered front and back with Stick-It. I peeled the Stick-It paper off the front of the star, dipped it into glitter, and then peeled the paper off the backing to add the stars to my project.
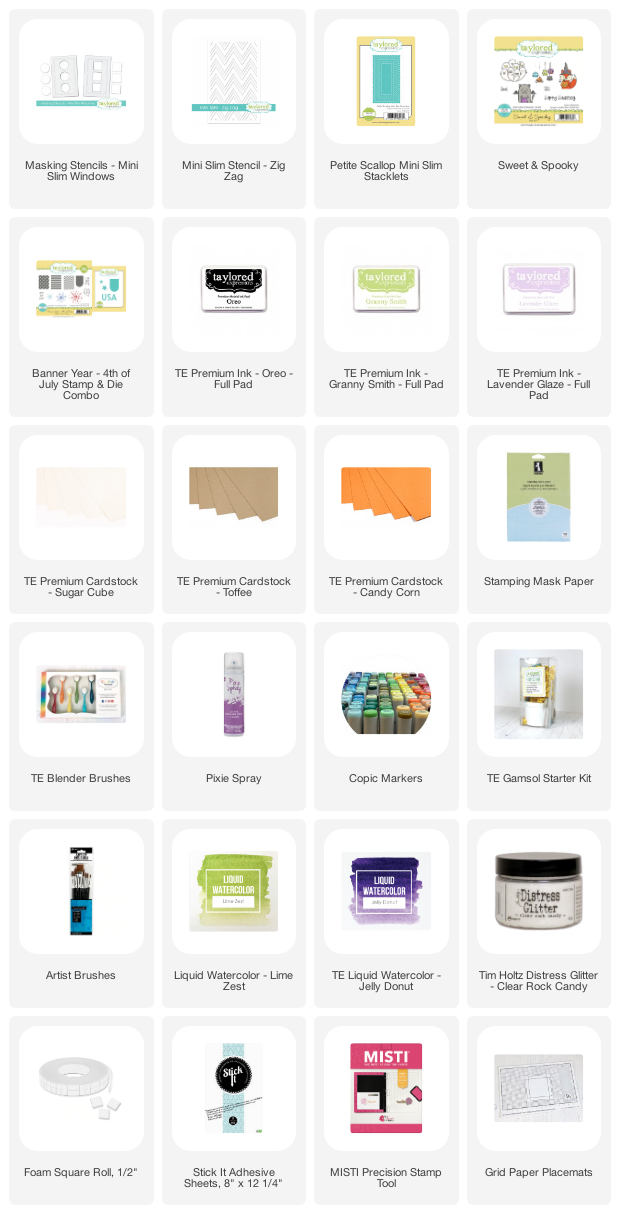
Check out the list below for the supplies that I used on my project:

Here’s more inspiration from members of the TE Creative Team as well as a closer look at the new Mini Slim products that are available to purchase today!
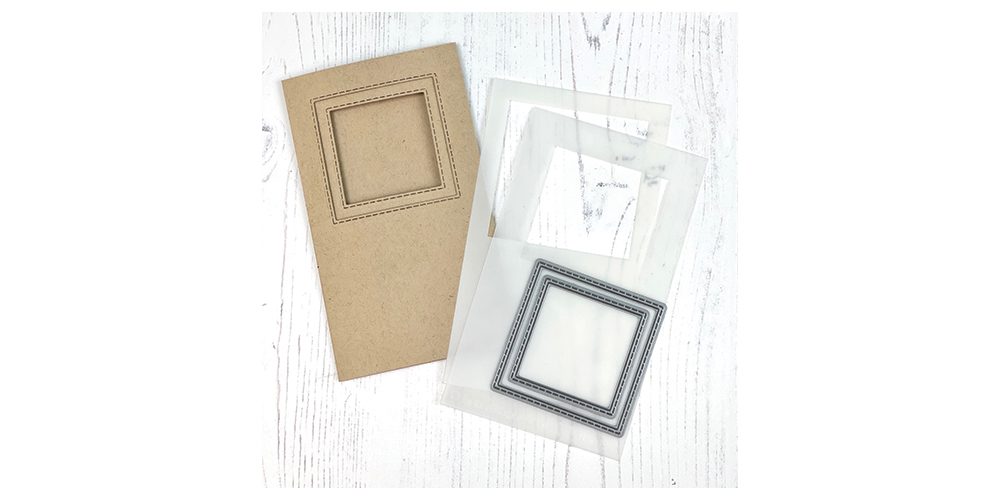
The Mini Slim Trifold Template + Dies set includes 2 stencil templates with two sizes of square openings. The stencils will guide you in die-cutting the layered windows into a Mini Slim Trifold card. You can use this with our pre-scored trifold card bases (available in Toffee & Sugar Cube) or create your own trifold card base. Simply cut a piece of cardstock to 6″ x 10.5″ and score on the long side at 3.5″ and 7″.
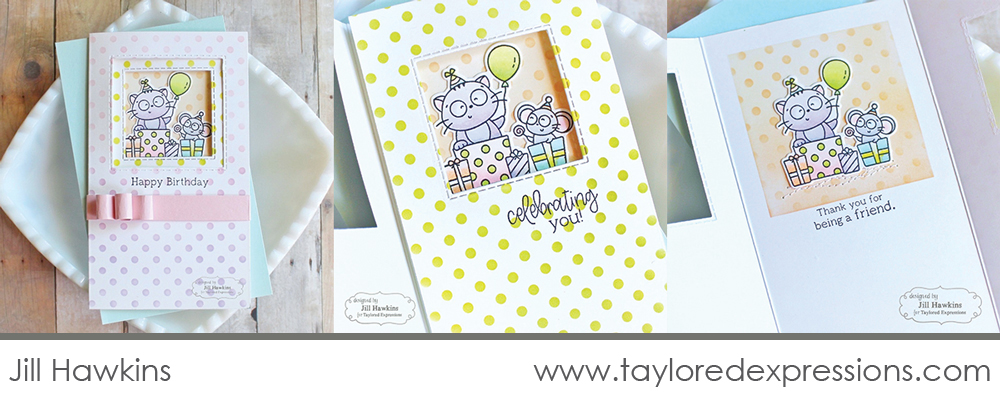
Jill Hawkins created an adorable birthday card using the Max & Millie stamp set with the the new Mini Slim Trifold Template + Dies set and Mini Slim Trifold Card Base in Sugar Cube. Each layer of the card features a different color of blended polka dots Jill created with the new Mini Slim – On the Dot stencil and the layered window perfectly frames the image of Max & Millie at a birthday party!
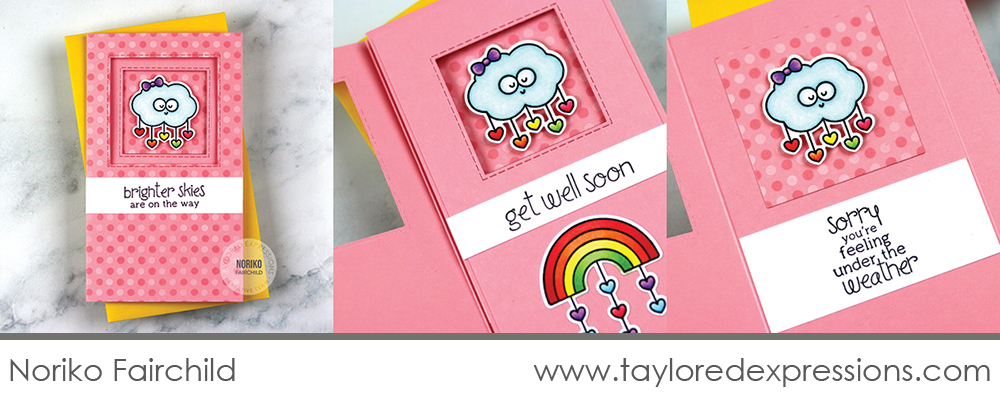
Noriko Fairchild‘s card is perfect to brighten up the day of someone who needs get well wishes. She added images and sentiments from the Brighter Skies stamp set to her trifold card created with a Guava cardstock card base that she created herself and then die cut the layered windows from using the Mini Slim Trifold Template + Dies set. I really love how Noriko created a multicolored polka dot design with the new Mini Slim – On the Dot stencil with Guava and Sugar Cube inks. She used the piece leftover from the layered window opening as a mat behind the cloud on the inside layer of her card – ingenious!
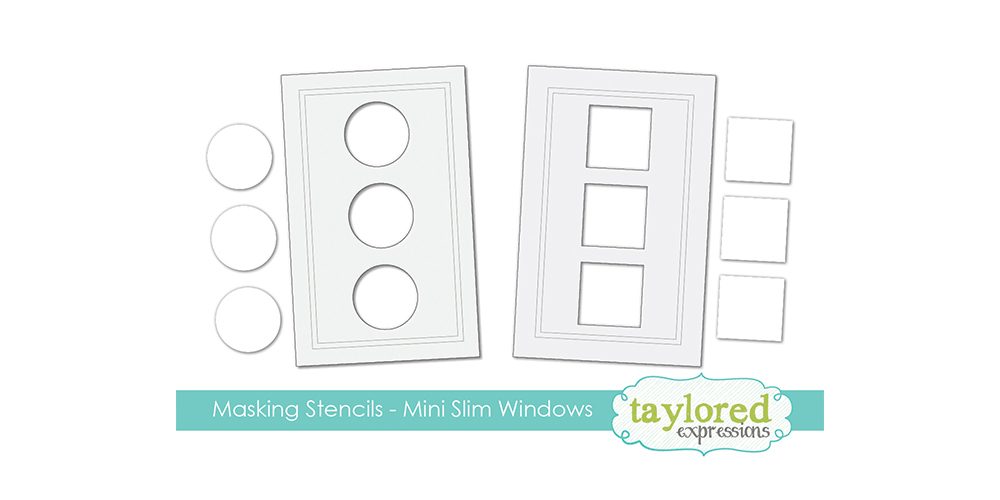
We couldn’t forget about Masking Stencils for the new Mini Slim size so we have this set of square and circle windows with etched alignment guides to line up your mini slim card base. As mentioned above, the Mini Slim card base measures 3.5″ x 6″. After aligning the card base with the etched markings, apply color through the stencil openings to create a lineup of three circles or squares. Use the included solid circles and squares for even more masking options!
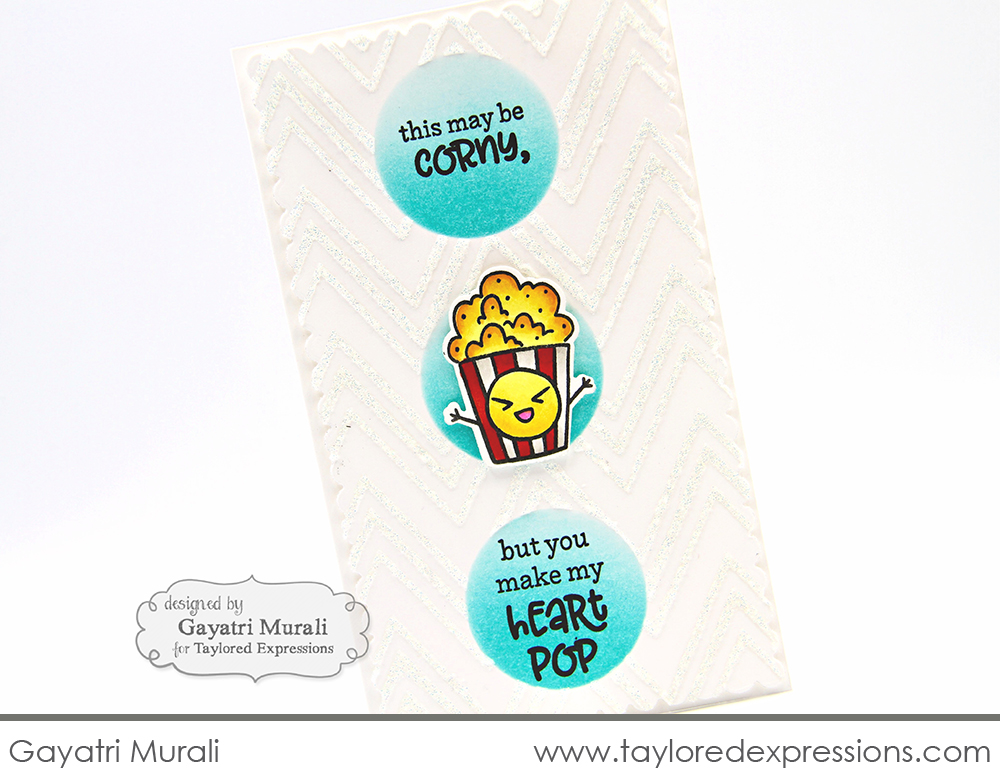
Gayatri Murali used the circle stencil from the Masking Stencils – Mini Slim Windows set on her Mini Slim card featuring the cute popcorn guy and coordinating sentiments from the Matchy Matchy Foodie Friends stamp set. Any of the cute foodie images from this set would be the perfect size and so much fun to use on a card like this! I love the extra sparkle that Gayatri added to her background created with the new Mini Slim – Zig Zag stencil and glitter paste!
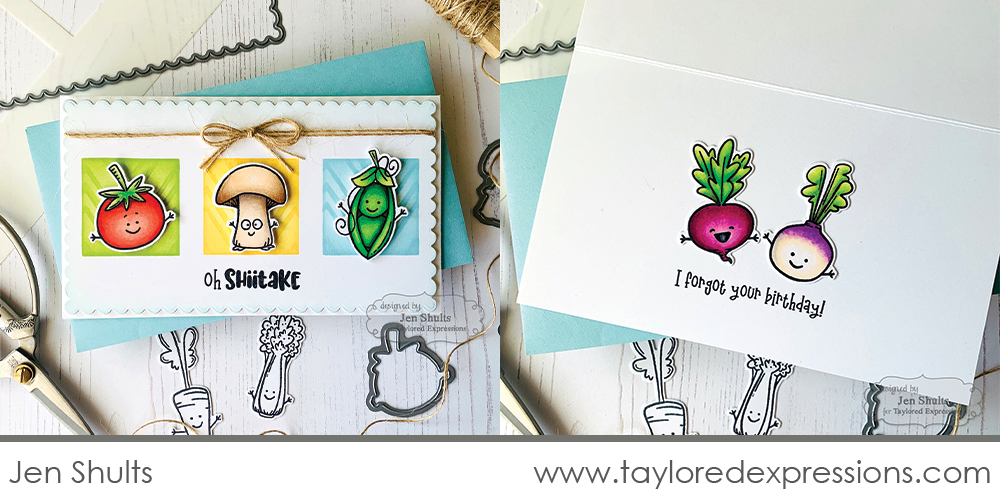
Jen Shults continues the foodie theme with this card that she created with the square stencil from the Masking Stencils – Mini Slim Windows set and Turnip the Beet stamp set. She added the squares in different colors across a piece of Sugar Cube cardstock and added the chevron design on them with the Mini Slim – Zig Zag stencil. Jen’s expert coloring skills shine on the cute vegetable characters and I had to make sure that you got a peek at the adorable inside of Jen’s card too!
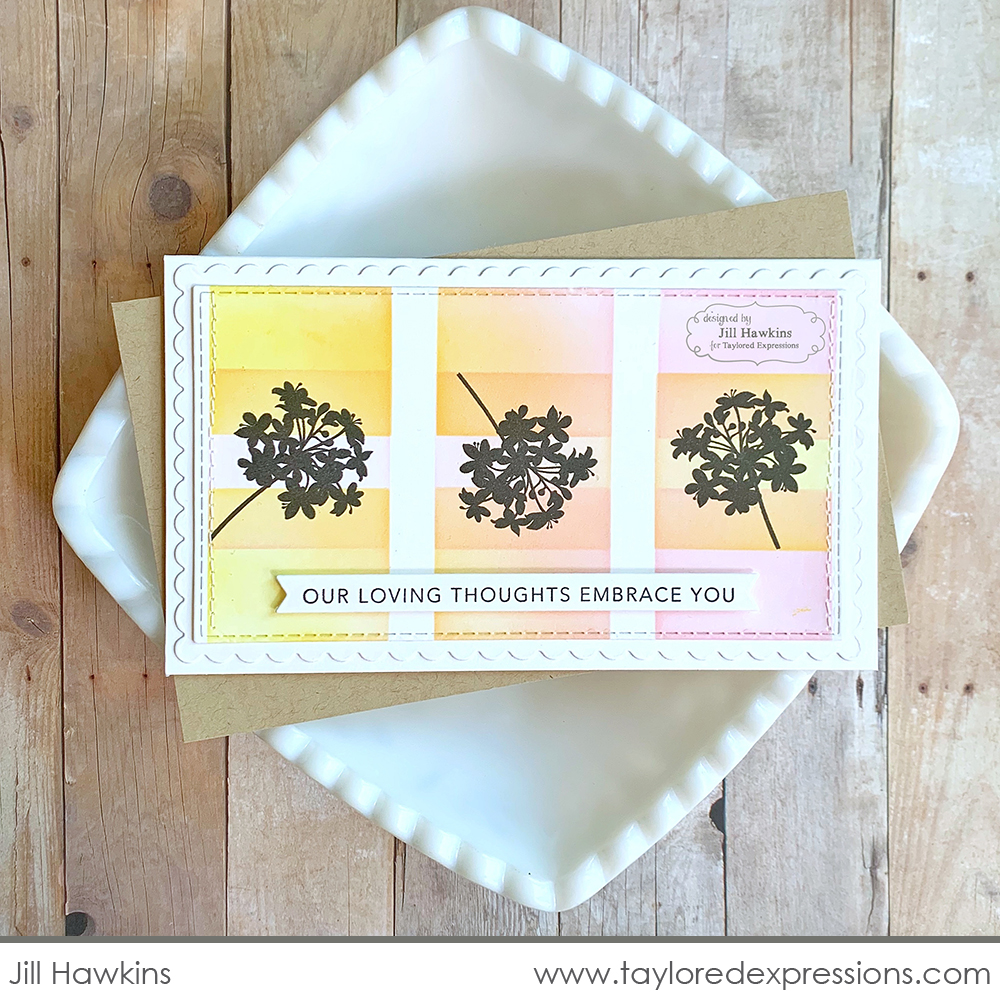
This next card created by Jill Hawkins is one that made my jaw drop when I saw how she used the square stencil from the Masking Stencils – Mini Slim Windows set! Jill shifted the stencil and flip flopped the direction of her colored ink blending to create the effect (I think Jill should do a video on this on, don’t you??) She added a flower silhouette from the Spring Stems stamp set into the center squares and her sentiment is from the Simple Strips – Sympathy stamp.
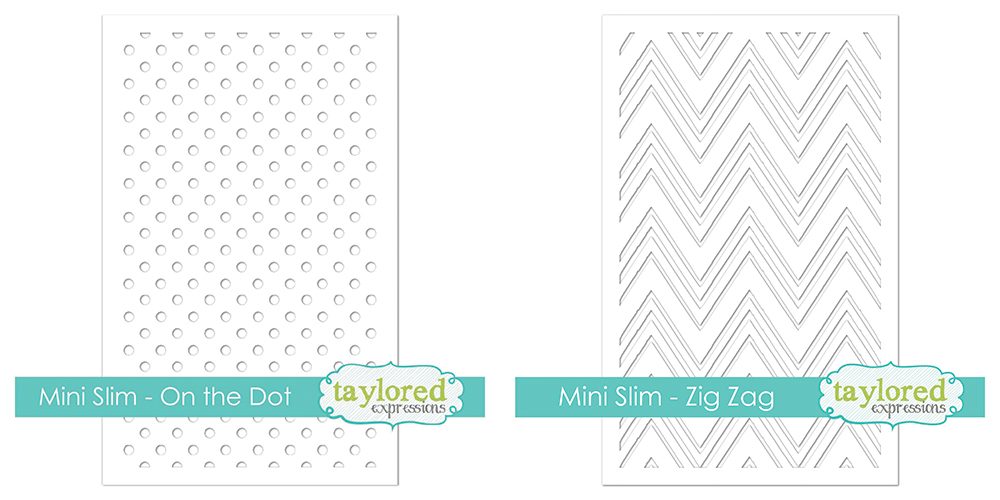
We are starting out the Mini Slim stencil collection with two classic patterns that you will love having in your collection and find yourself reaching for over and over! The Mini Slim – On the Dot stencil features a classic polka dot pattern and the Mini Slim – Zig Zag stencil features a chevron pattern.
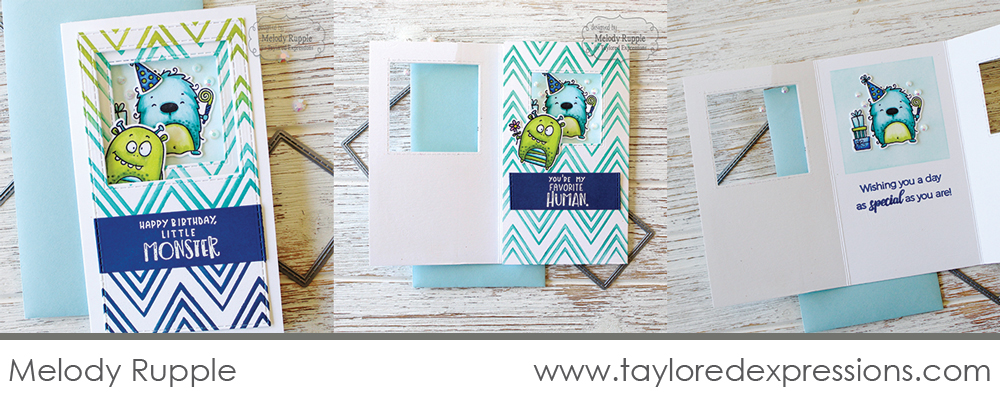
Melody Rupple let the Mini Slim – Zig Zag stencil shine on her cute trifold birthday card! The front panel on her trifold card is blended with multiple colors to coordinate with the cute monsters and sentiments from the Little Monsters set. I am super impressed with how Melody lined up the chevron design just perfectly between the first and second layers on her card on the layered windows. It looks so awesome!
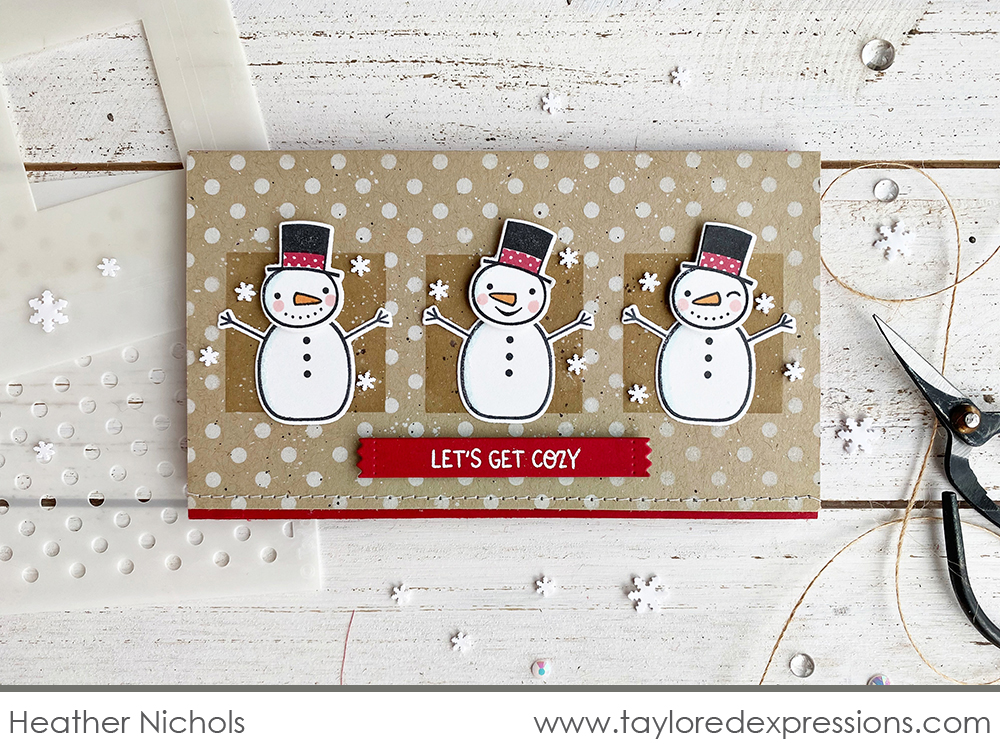
I (Heather Nichols) created this next card and used the Mini Slim – On the Dot stencil for this background on my wintery card featuring the snowmen from the Frosty Kit. I added the polka dots with Sugar Cube ink on Toffee cardstock (surprise!) after adding the blended squares with the square stencil from the Masking Stencils – Mini Slim Windows set. The squares are the perfect place to set the snowmen onto!
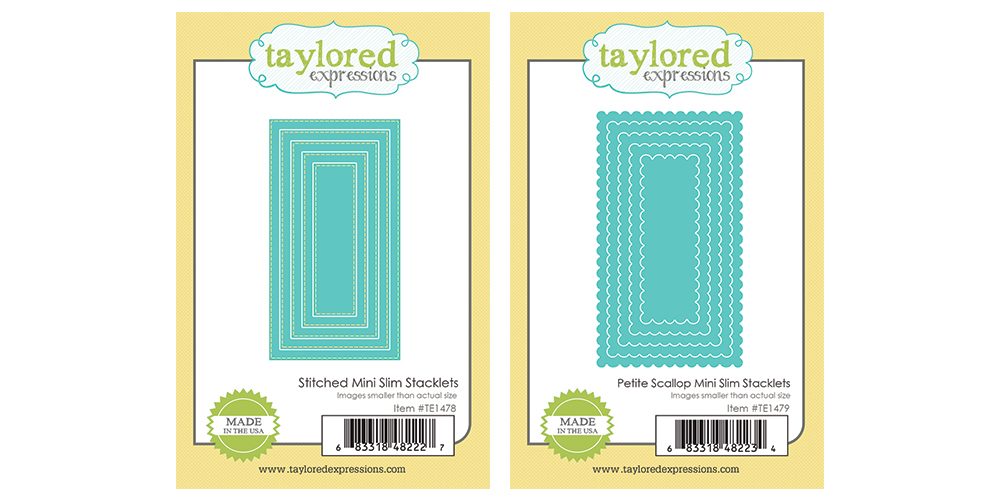
You will love adding perfect layers to your Mini Slim products using these two versatile die collections. The Stitched Mini Slim Stacklets die collection cuts out rectangles with a stitched edge detail and the Petite Scallop Mini Slim Stacklets die collection cuts out rectangles with a delicate scalloped edge.
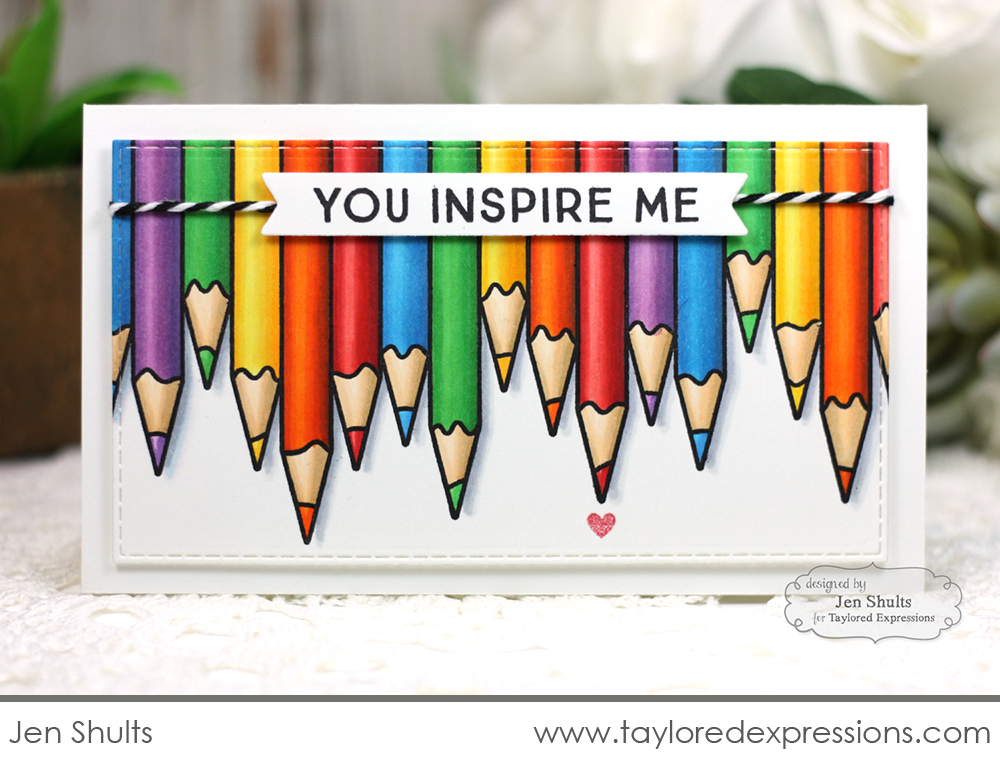
Jen Shults let her coloring skills shine again on this card that she created with the Create in Color Background stamp. After coloring the image, Jen cut it out using the Stitched Mini Slim Stacklet die collection to size it perfectly for the Mini Slim size. The sentiment is from the Tag Team – Teacher stamp set and it works perfectly for sending to a crafty friend! Jen added a few great details like the twine behind her sentiment and the tiny sparkly heart under one of the pencil tips.
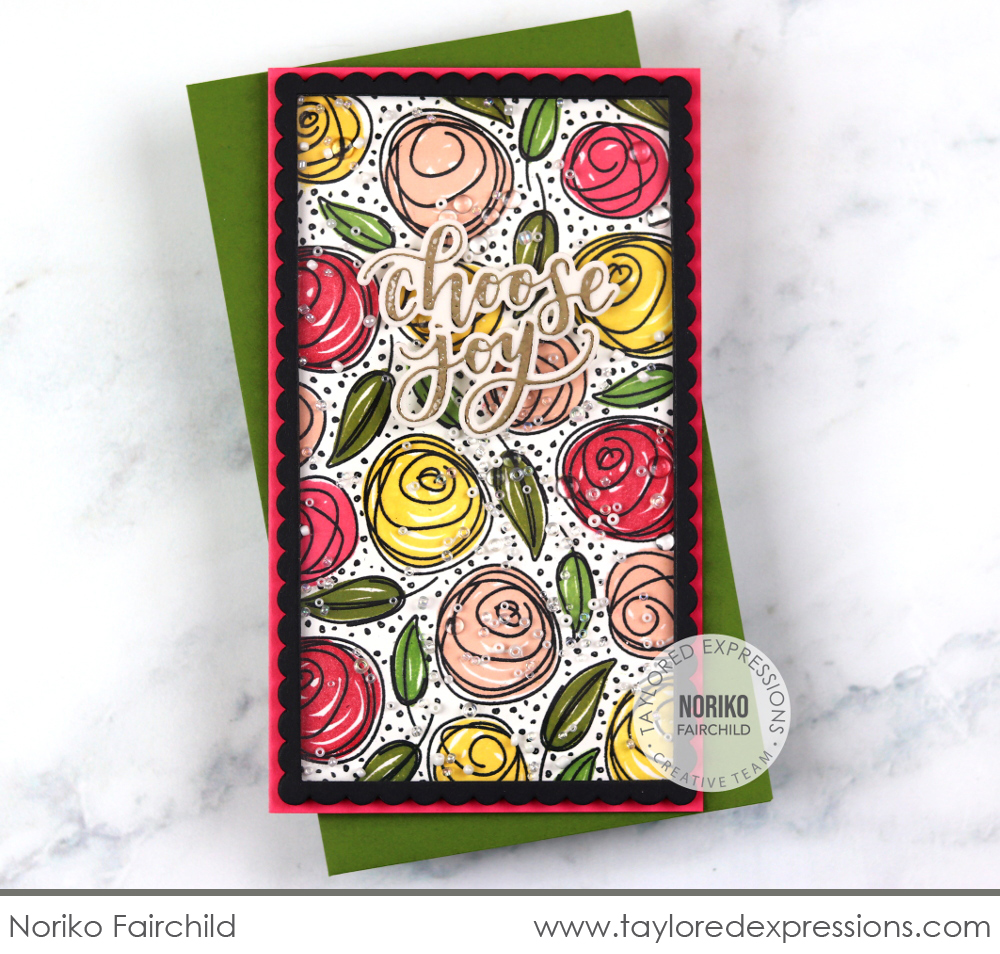
And finally for today is this stunning shaker card created by Noriko Fairchild. She created a frame for her shaker by cutting out an opening in a Petite Scallop Mini Slim Stacklets die cut with a Stitched Mini Slim Stacklet die. She framed the pretty floral image stamped with the Scribbled Rose Cling & Clear Combo set and added beads and the Bits & Pieces – Clear Drip Drops inside her shaker. Noriko finished her card off with a foiled sentiment from the Foil It – Handlettered Sentiments.

And now it’s time to check in with the lucky winners! If you find your name and comment listed below, please contact us with your mailing address and your selected ‘favorite product’ (must be one product, sorry… not a bundle) and we’ll get your prize in the mail right away! Congrats to all the prize winners!


Join Taylor live for “T Time” at 1pm Central today on the Taylored Expressions Facebook Page. She’ll be taking a closer look at all of the new products in this Mini Slim release and we hope to see you there!
That wraps up all of the inspiration that I have to share! We hope you love creating with this new Mini Slim size as much as we have! Stop back soon for more crafty inspiration!


