Oct 05, 2020
It’s the most wonderful time… Holiday Release Sneak Peeks!
Hey, crafty friends! It’s Taylor here today! It’s beginning to look a lot like Christmas here at the TE warehouse these days! I’m already dreaming of a white Christmas (where the ‘white’ part goes away right after the new year!). How about you? Are you in the mood for Christmas? If so, you’re in for a treat this week – perhaps cozy up with some cocoa and keep on scrolling!
The Creative Team and I have been busy little elves creating with the new holiday products! This release includes over 40 new products including 2 new layering stencil sets, stamps, dies, more stencils, new embellishments, and Premium Glitter Cardstock in holiday colors.
Here’s what you’ll find on the blog this week:
- Our blog posts (Monday – Thursday) will feature a video showcasing the new release products.
- New products will be available for purchase starting tomorrow at 9am Central Time at the TE webstore!
- Get a chance to win it before you can buy it by commenting with your answer to my Question of the Day today only (located at the bottom of this blog post)
- Last, but certainly not least – take advantage of our special offer for this release (details below).
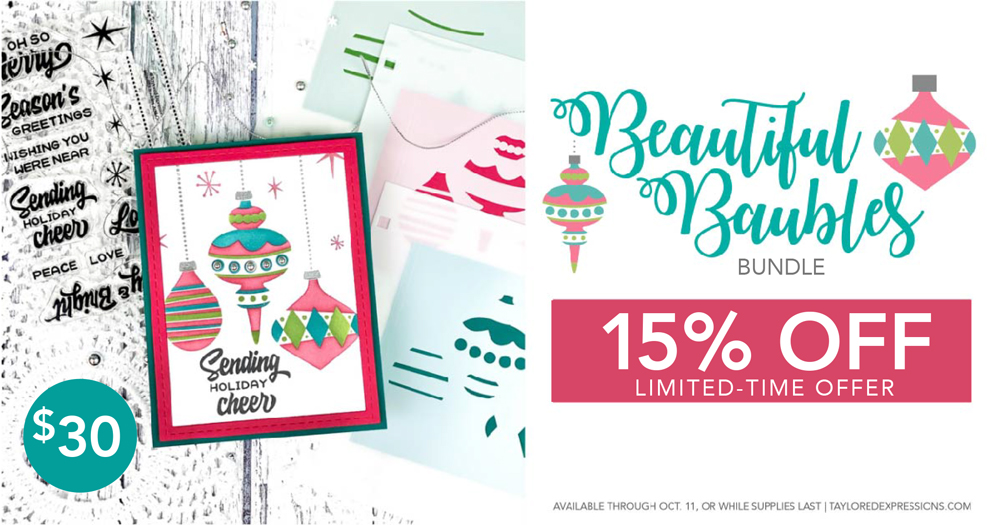
Right now through Sunday, October 11th (or while supplies last), you can get the Beautiful Baubles bundle for 15% off! The bundle includes the Beautiful Baubles Layering Stencil set (regular price $21) and the Beautiful Baubles Add-ons clear stamp set (regular price $15). The discounted price is only available for a limited time through Sunday, October 11.
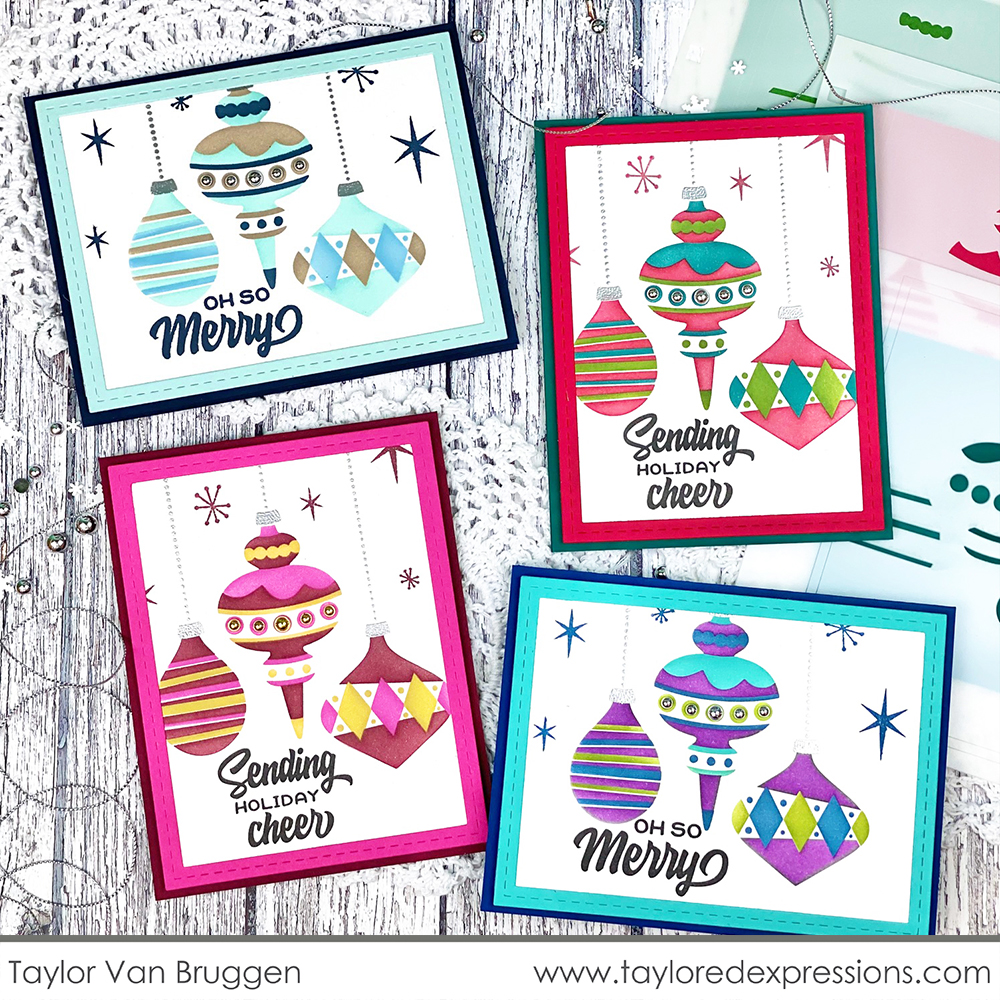
I created the cards above using the two products included in our Beautiful Baubles bundle. I had so much fun choosing multiple color combinations to give these vintage ornaments multiple looks. Do you have a favorite?
In the video, I share how easy it is to create the vintage style ornaments using the Beautiful Baubles Layering Stencil set. I also I added details with the Beautiful Baubles Add-ons clear stamp set and some extra dimension with our NEW Bits & Pieces Drip Drops in gold and silver.
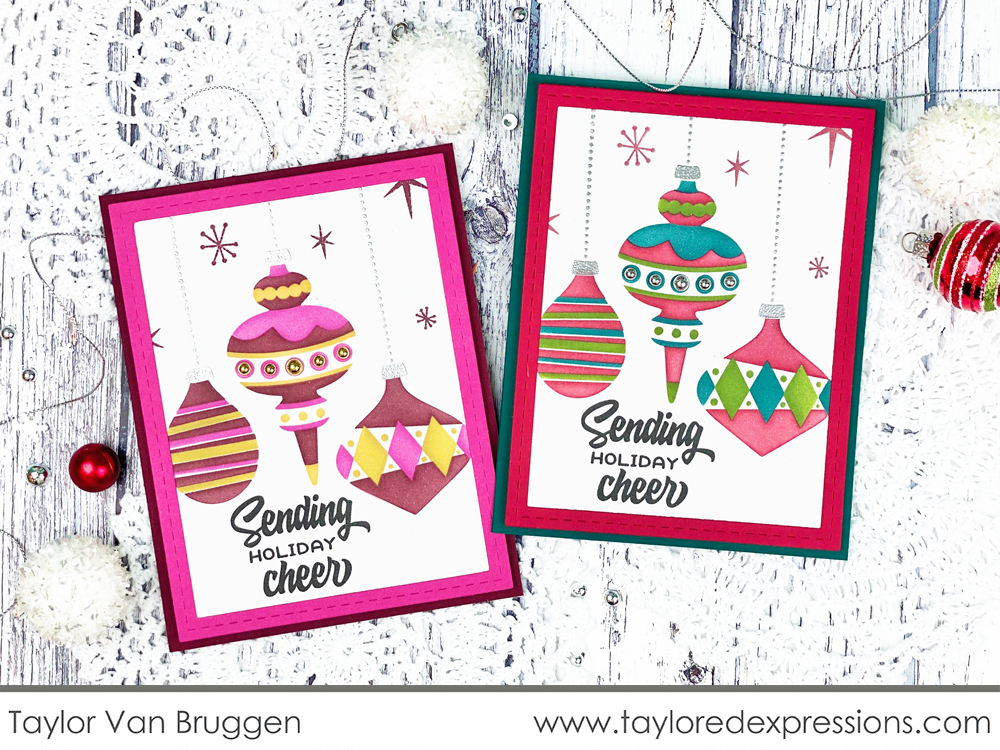
After blender brushing the ornaments in various colors (left: Mulled Wine, Lollipop, Dijon, Pineapple, right: Watermelon, Cilantro, Poblano Pepper) I added the ornament hangers by embossing them with silver embossing powder.
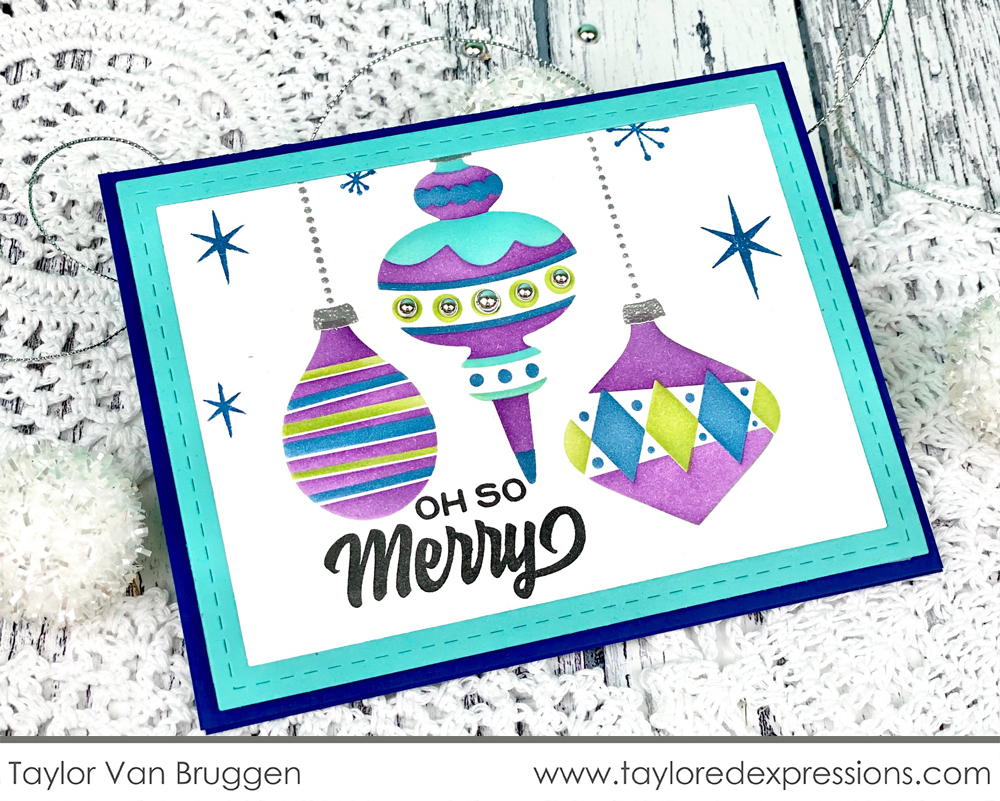
These ornaments were created using Plum Punch, Lime Zest, Cookie Monster, and Blueberry for a bright, bold option. I stamped the retro stars into the background with Blueberry ink and you can also see the Silver Drip Drops embellishments a little more clearly on the center ornament.
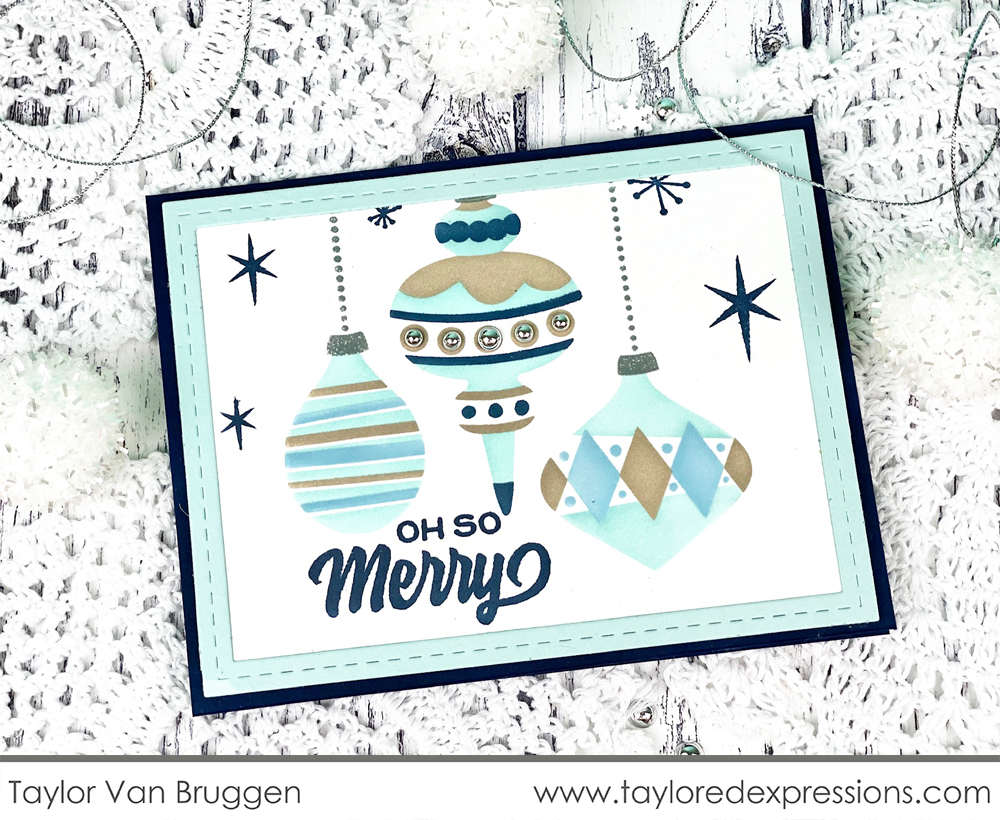
For the last combo I used various blues (Salt Water Taffy, Gumball, Blue Corn) and accented with Toffee. It’s a very soft and wintery combo! I added a frame from Stitched Frame Stacklets 1 around each of the ornament panels choosing a color that coordinates with the ornaments. If you’re looking for more color combo ideas, simply Google ‘vintage Christmas ornaments’ and have fun matching up your TE inks with the inspiration!

Now that I’ve shared my projects, it’s time to settle in and take a look at all of the new Christmas release products (and there’s a lot of them!) along with inspiration from the TE Creative Team!

You just saw these two products in action in my video above! The Beautiful Baubles Layering Stencils includes three stencils that when layered together with the easy alignment guides create three vintage-themed Christmas ornaments. Then pair the stenciled ornaments with the Beautiful Baubles Add-ons clear stamp set to ‘hang’ the ornaments and add holiday sentiments.
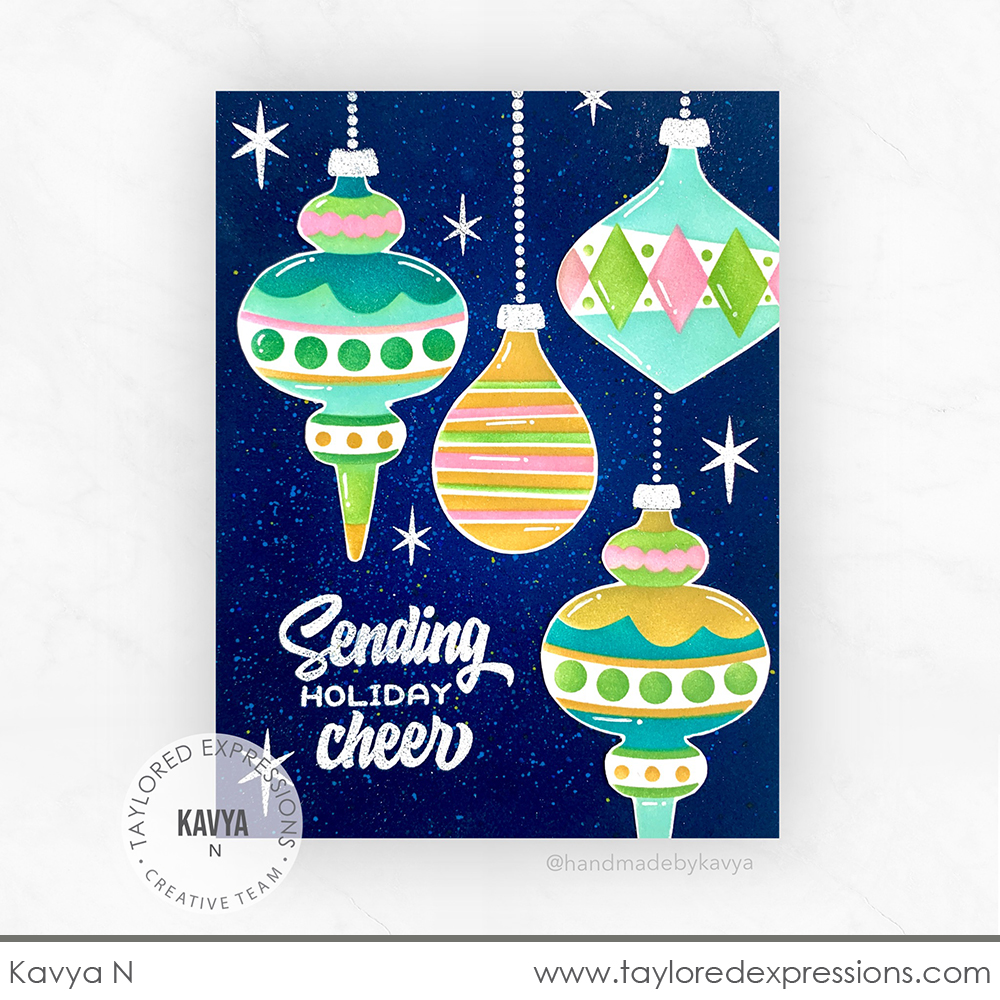
I really love how the colorful ornaments stand out on the dark background on this card created by Kavya with the Beautiful Baubles Layering Stencil set. Kavya cut the ornaments out with scissors after stenciling them onto Sugar Cube cardstock and then added them to the darker background with elements and sentiment embossed in white. Gorgeous!
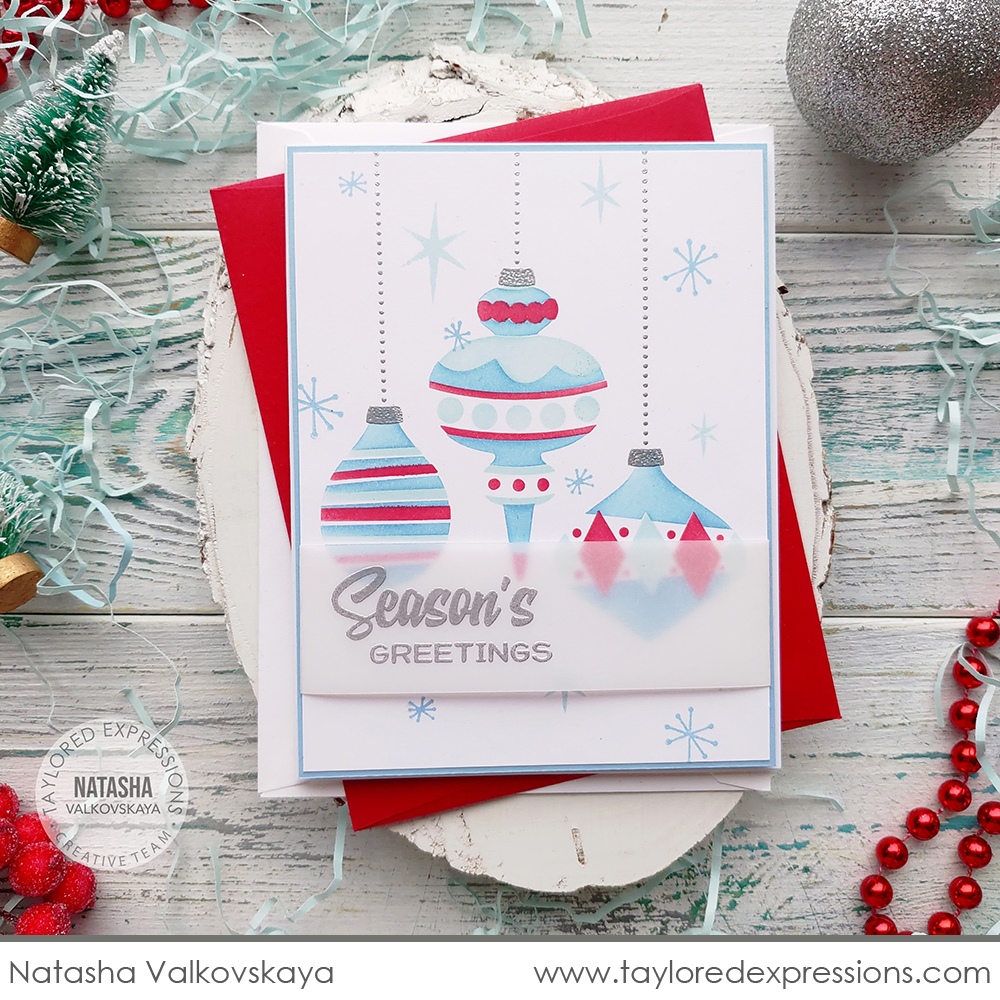
Natasha Valkovskaya did a pretty red, white, and blue color combination on her card created with the Beautiful Baubles Layering Stencils. Think of the different combinations that you can play around with to create the ornaments – it’s truly endless! I love how Natasha added the sentiment for her card embossed in silver on a vellum strip. That allows her sentiment to stand out without completely covering up the ornaments on her card.
Next up are a few of our favorite critters:

The new Gus and Gertie Holiday Adventures stamp set (+ coordinating dies) features our favorite puppy, Gus, and his birdie friend, Gertie, getting festive for the holiday season. There are three cute images and five sentiments perfect for Christmas and winter crafting!
The new Merry Millie stamp set (+ coordinating dies) features that cute mouse, Millie, doing all things Christmas! She goes for a sleigh ride, hangs out with Santa and Rudolph, and more. Pair the images with one of the six sentiments to create super cute holiday cards.
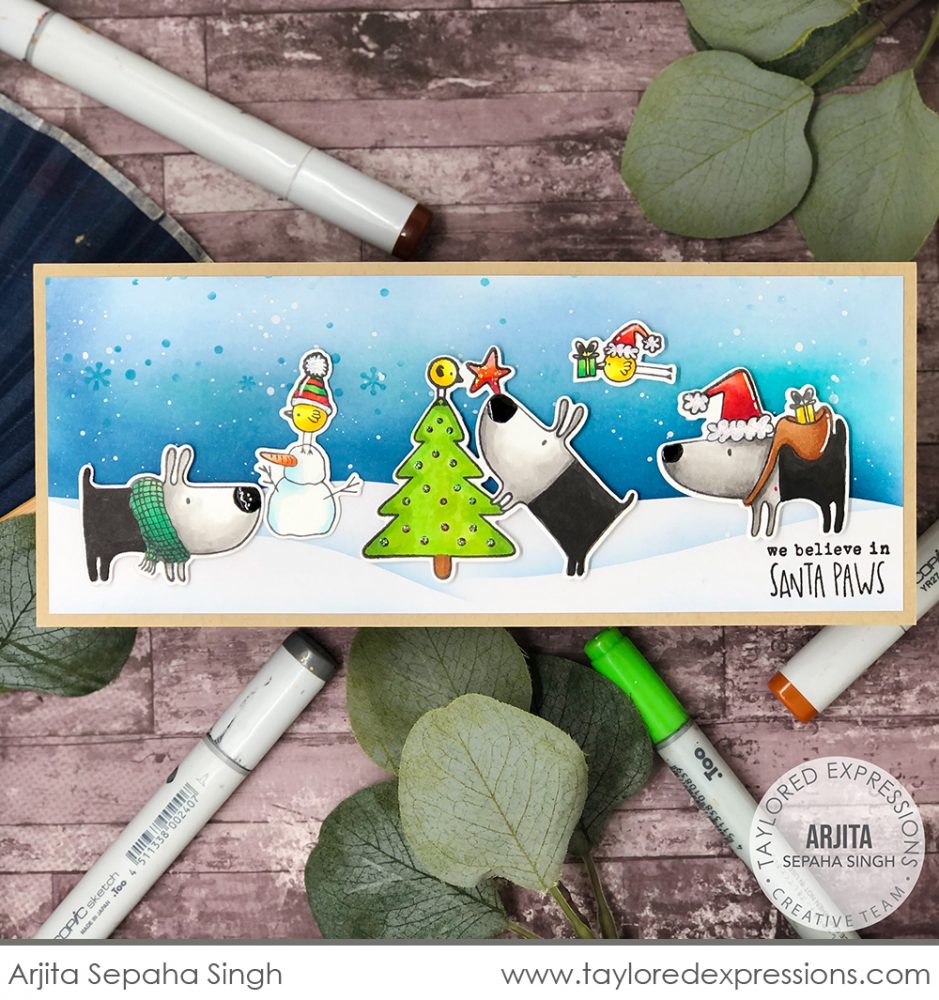
Arjita created a whole scene on this full size slimline card using all of the images from Gus & Gertie Holiday Adventures. Arjita’s coloring skills absolutely shine on her project and I love the scene she created with the snowdrifts and snowy sky!

Noriko Fairchild also created her own snowy scene using images from Merry Millie. Noriko has some awesome coloring skills of her own and the Merry Millie set is perfect for showcasing that! Noriko’s snow drifts are die cut from our new Premium Glitter Cardstock that I’ll share more about a little later in this post!

If you loved the Frosty Kit that we release this past summer, you are going to love the new St. Nick Cling and Clear Combo set. Along with a red rubber stamp featuring a pattern of adorable Santas, the set includes fifteen clear, photopolymer stamps to fill the hats with patterns, add color to Santa’s face, and a rosy nose! Also, use the coordinating stencil to add a star pattern around the Santas or choose to cut out the individual Santas using the St. Nick’s Head die.
The new Fill in the Blank – Christmas Cling & Clear Combo set includes five larger size sentiments that are all missing an ‘O’. Simply fill the open space with a Santa from the St. Nick Background, a snowman from the Frosty Background (see below), or another image from your collection. Complete the sentiments with the photopolymer stamp set that includes seven coordinating words and phrases.
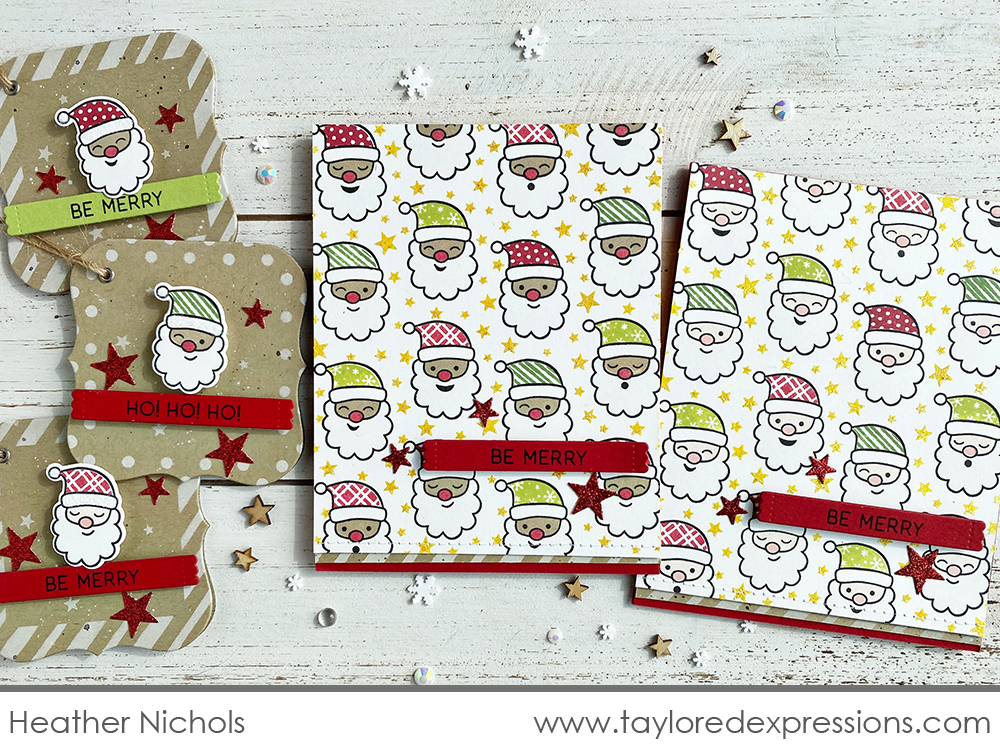
Heather Nichols created a few festive holiday cards using the whole St. Nick Background and colored in the images with the coordinating photopolymer stamps. She surrounded the Santas on the card with sparkly stars using the St. Nick’s Stars stencil, Pineapple ink, and Moondust Stickles Glitter Gel. Heather used the St. Nick’s Head die to cut out a few of the individual Santas to create the coordinating tags.
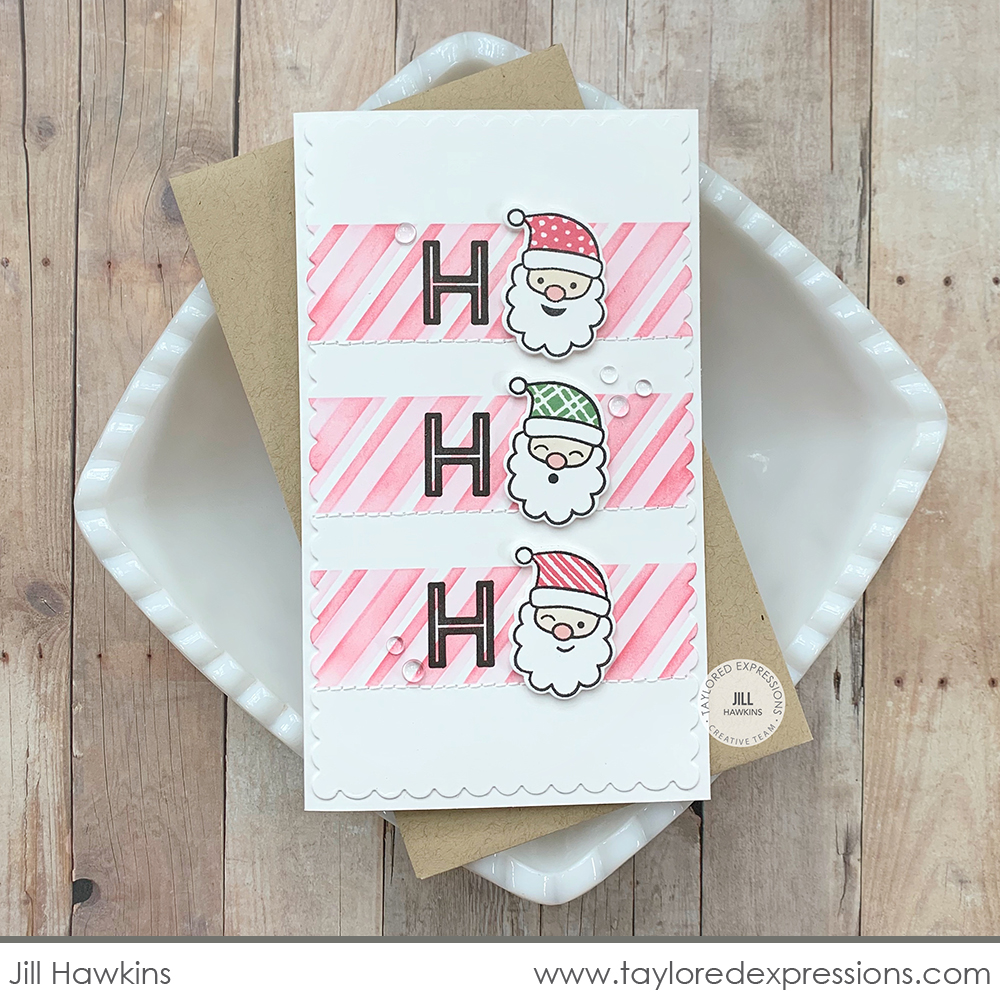
Jill Hawkins paired the St. Nick Cling & Clear Combo with the Ho Ho Ho sentiment from the Fill in the Blank set on this Mini Slim Christmas card. I love how she used the individual Santas as the ‘O’s in the ‘ho, ho, ho’ sentiment! And isn’t that striped background behind each Santa just the cutest? You’ll see that new stencil soon if you keep on scrolling along with me!
Speaking of the Frosty Kit – it’s time! After the original release in July, we are now offering products from the Frosty Kit for purchase individually!

The items being released include: Frosty Background Cling & Clear Combo, Frosty stencil, Frosty’s Head die, Frosty’s Body die, Sentiment Strips Duo dies, and Winter Wishes clear stamp set. To get a closer look at these products and even more inspiration from the original launch, CLICK HERE.
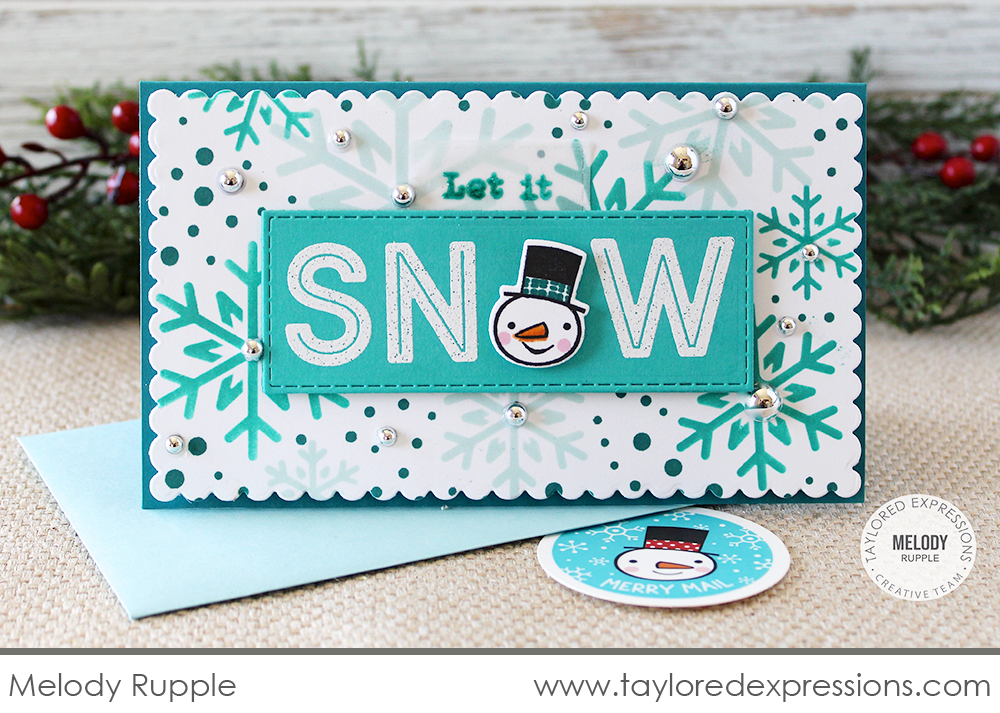
The individual snowmen from the Frosty Cling & Clear Combo are also perfect for “filling in the blank” like Melody Rupple did here! Melody’s multi-colored snowflake background coordinates perfectly with the ‘let it snow’ sentiment and snowman – keep scrolling to see more about that!
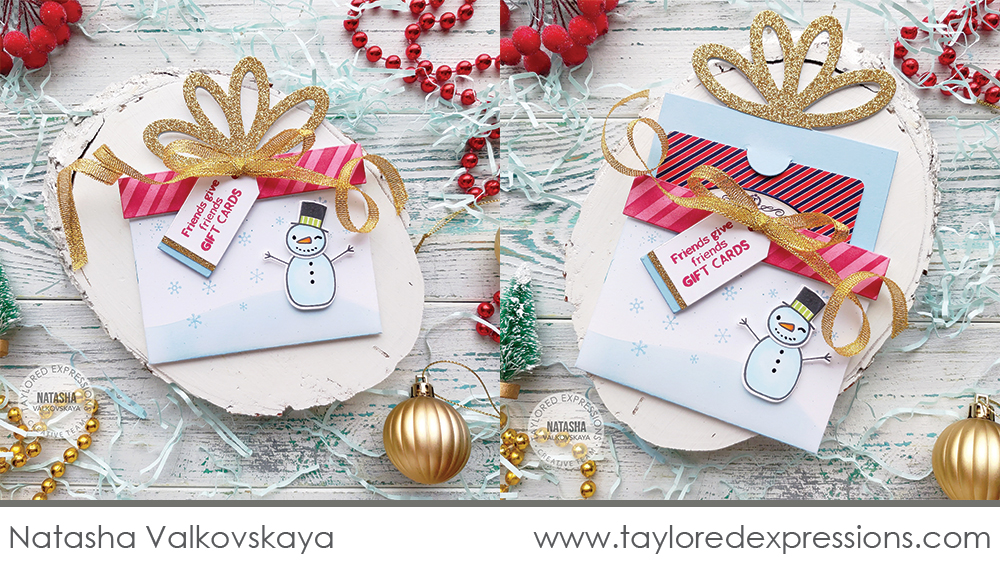
Natasha Valkovskaya used the Frosty Cling & Clear Combo to embellish this cute gift card holder created with the Pretty Package dies. I love the snowy scene she created and I spy some more of our new Premium Glitter Cardstock on the bow of the gift card holder!
Can you ever have enough stencils? No, I don’t think so! There are several stencils mixed throughout our release and here’s more information on a few of them:

The new Let it Snow Layering Stencils set includes three stencils that when layered together create a multi-colored snowflake backdrop – like the one on Melody’s project above!
Masking Stencils are a crafty essential for card making and we’re excited to introduce the first one for the Mini Slim card size. The Mini Slim Masking Rectangle stencil has a rectangular opening with our etched alignment guides to perfectly center the opening on the 3.5″ x 6″ Mini Slim card base or 3.25″ x 5.75″ mini slim card layer. The rectangular insert from the stencil is included for even more masking options.
We are also adding to our Mini Slim stencil collection with the new Mini Slim – Candy Cane Stripes stencil. Stencil the perfect candy cane patterned stripes on your holiday projects using Blender Brushes, embossing paste, glitter gels, and more!
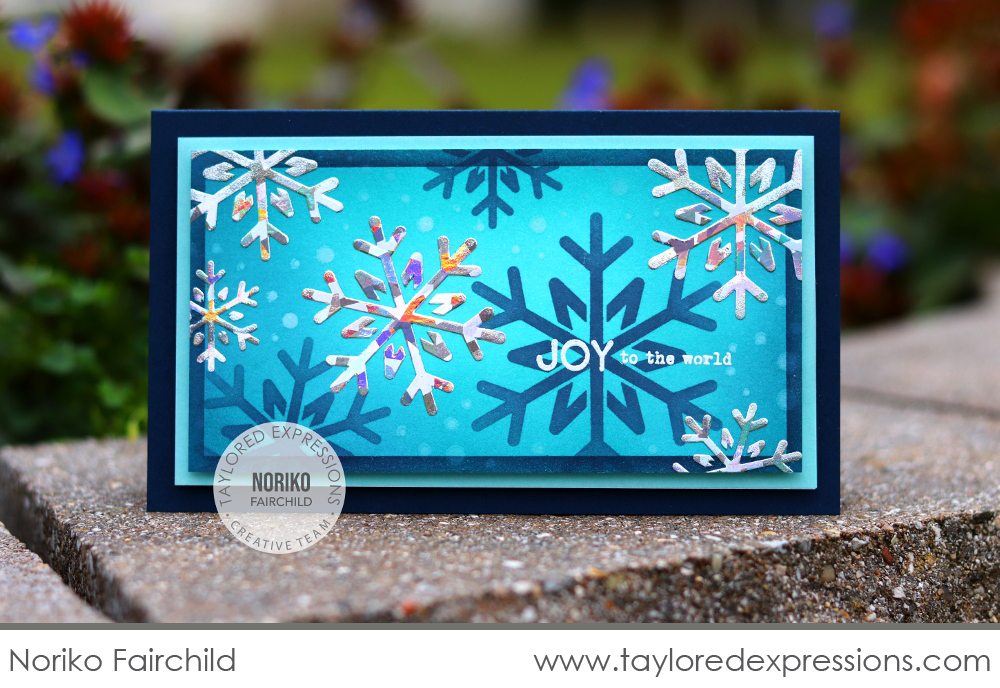
Noriko Fairchild created a stunning look with the Let it Snow Layering Stencils and the Mini Slim Masking Rectangle. She layered several colors of blue ink with the stencils, plus layers of cardstock, and finished it off with a foiled snowflake layer. I love the sparkle of those foiled snowflakes!
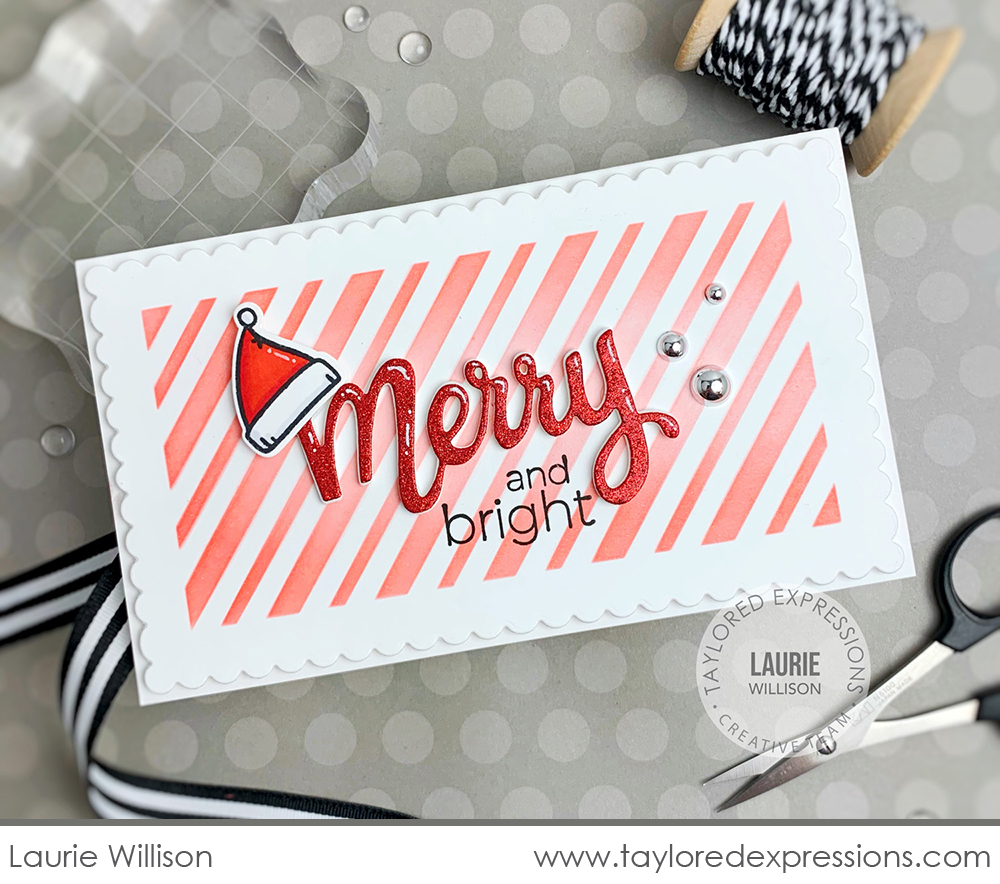
Laurie Willison paired the Mini Slim Masking Rectangle stencil with the Mini Slim – Candy Cane Stripes stencil for the background on this merry mini slim card. She added a sparkling sentiment using the Merry Script die cut from our new glitter cardstock. I also love how she hung the Santa hat on the die cut sentiment!
Next up are new additions to our On the Block and On Repeat collections:

The new On the Block – Merry stamp (+ the coordinating die) features the word ‘merry’ in a block style font with overlapping letters for a bold and graphic look on your projects. Pair the large ‘merry’ word with the On Repeat – Christmas stamp for quick Christmas cards!
The On Repeat stamp sets feature one word repeated eight times. This helps make mass producing those holiday cards quick and easy. Cut out all eight of the words in one pass through your die cut machine using the coordinating On Repeat die and our innovative square alignment guides. This month we’re releasing On Repeat – Christmas designed to pair with On the Block – Merry and On Repeat – Holidays designed to pair with previously released On the Block – Happy!
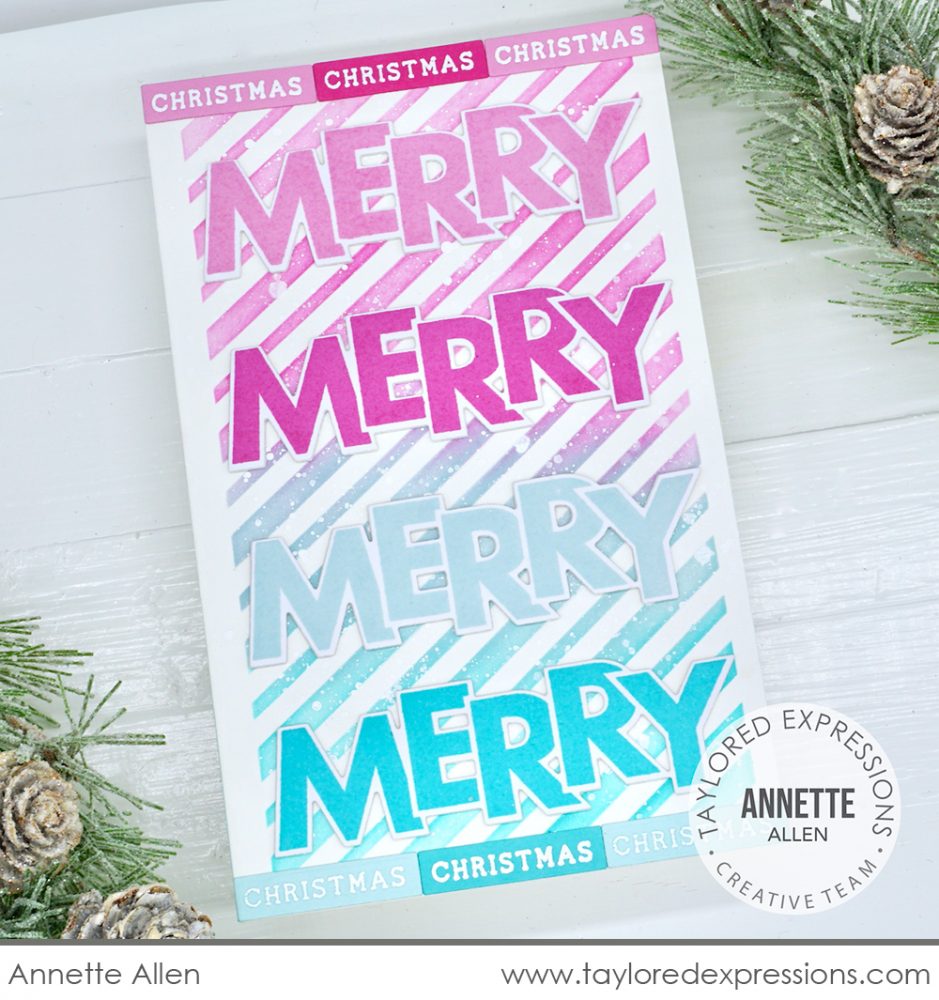
Annette Allen repeated the ‘merry’ word several times in a pretty color gradation on her card. She used the On Repeat – Christmas stamp with the coordinating On Repeat die to create borders on the top and bottom of the mini slim card – so clever!
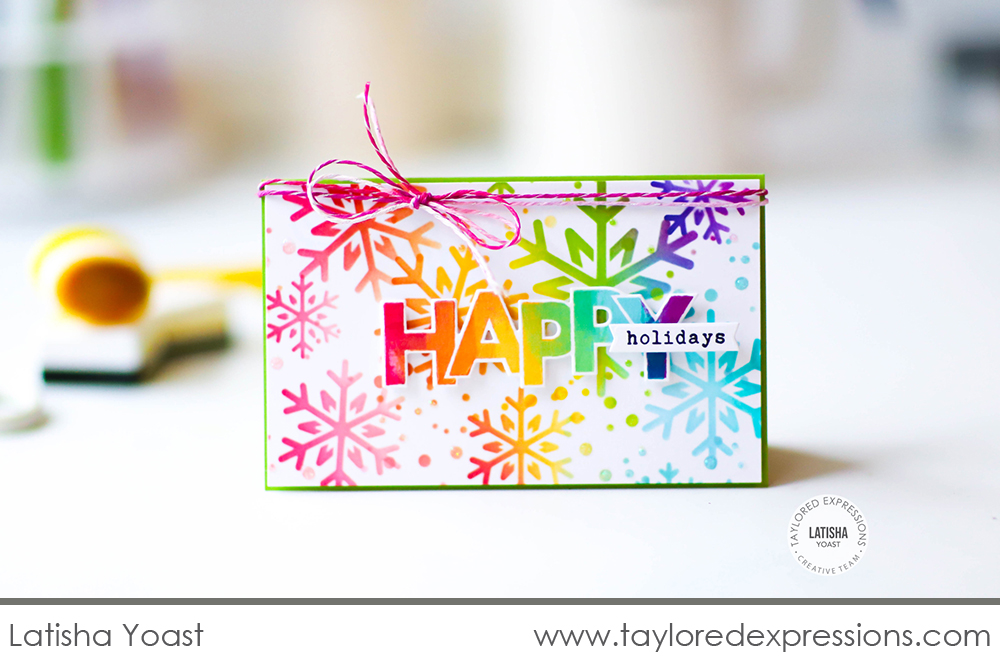
Latisha Yoast created a pretty rainbow effect (and you know how much I LOVE rainbows!) both on the On the Block – Happy stamp and on her background created with the Let it Snow Layering Stencil set. She completed the ‘happy holidays’ sentiment with the On Repeat – Holidays stamp and finished off her card with a pretty twine bow!

The new Seasonal Sprig stamp set features a lovely sketched berry branch perfect for creating a botanical look on your holiday projects along with five seasonal sentiments. Color the berry branch with your favorite medium or quickly add color using the new Seasonal Sprig Stencils. Plus, add the Seasonal Sprig Cutting Plate to your collection for even more dimensational card layouts!
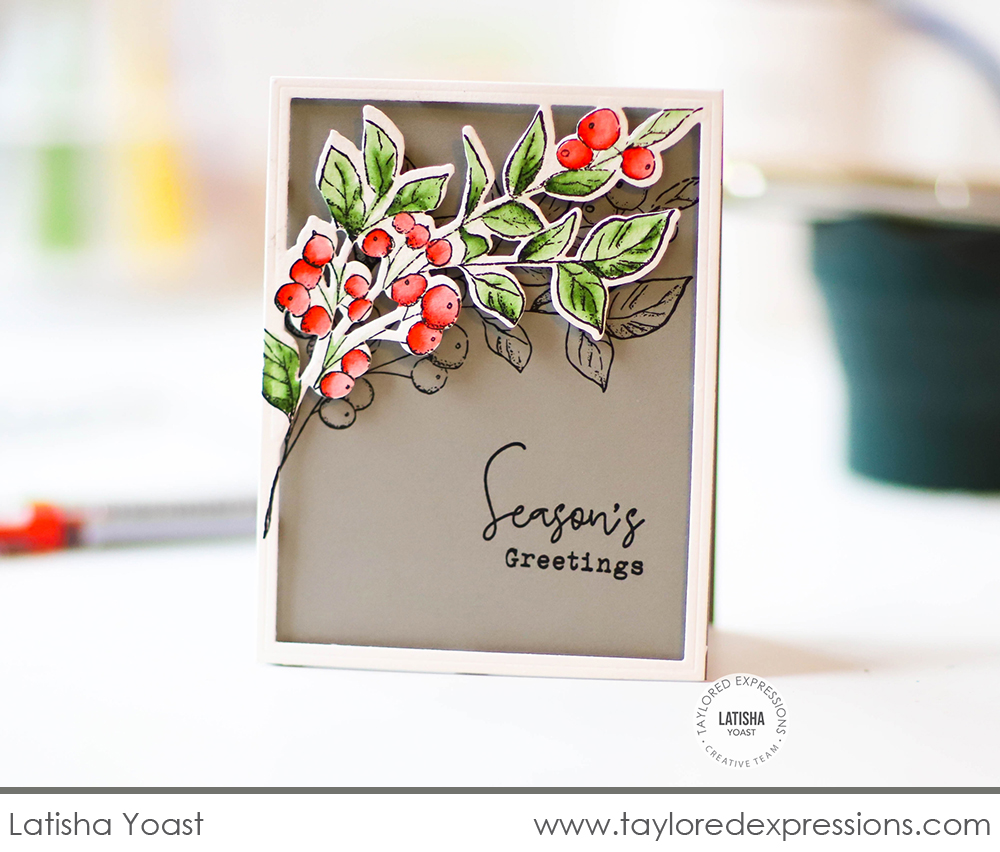
Latisha Yoast used the Seasonal Sprig stamp set along with the Seasonal Sprig Cutting Plate to create this clean and simple holiday card design. I love the detail of stamping the berry branch in Oreo ink on the card base and having it peek out from behind the die-cut branch!
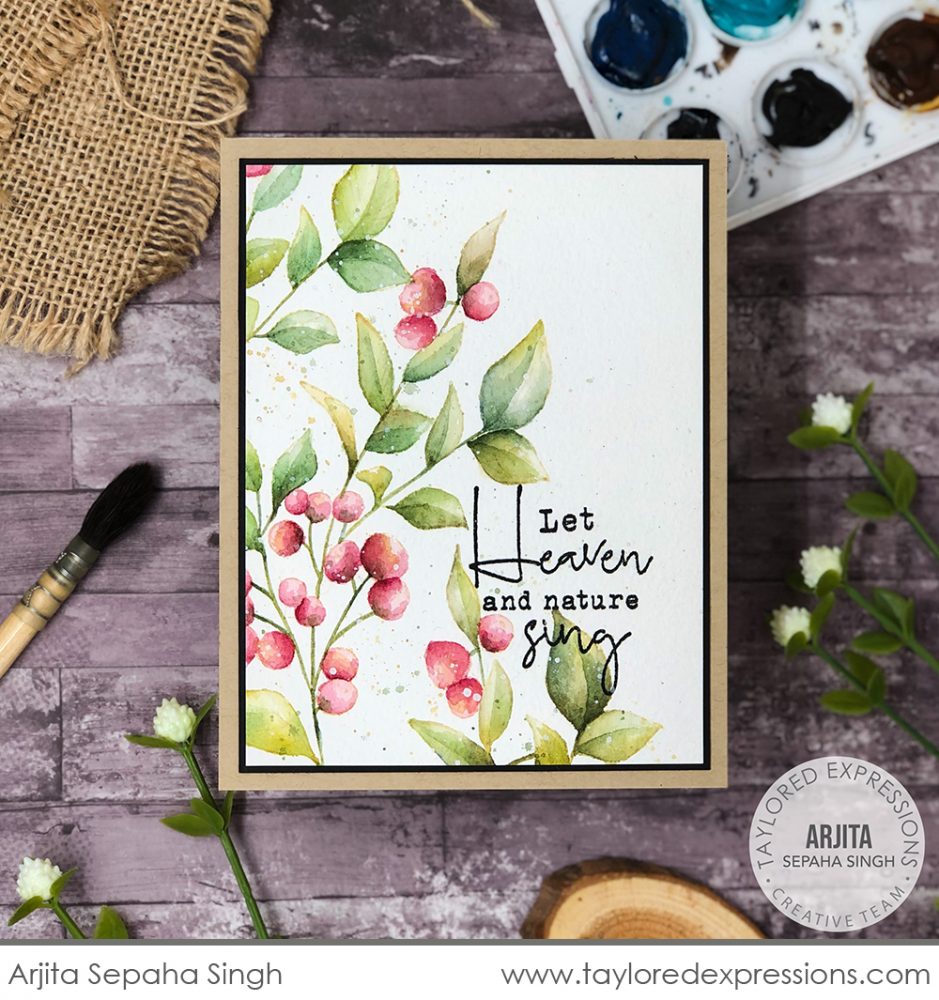
My jaw literally dropped when I saw this gorgeous card by Arjita Sepaha Singh using the Seasonal Sprig stamp set. Arjita did a no line coloring technique by stamping the branch with a light ink tone and then coloring the image with watercolor paints. It’s just beautiful!

Celebrate the reason for the season with the new The Light Shines stamp set. The set includes a sketched Christmas tree with tiny lights to top it and an inspirational sentiment to share the reason for the season with friends and family near and far.
Easily add a border or background of evergreen trees to your holiday or nature-inspired projects using the Endless Evergreens stamp. The stamp is designed to fit entirely across both an A2 size and Mini Slim size card. The coordinating Endless Evergreens Edger cuts along just the top edge of the evergreen border. This one will definitely stay in my stash of supplies for year-round use!
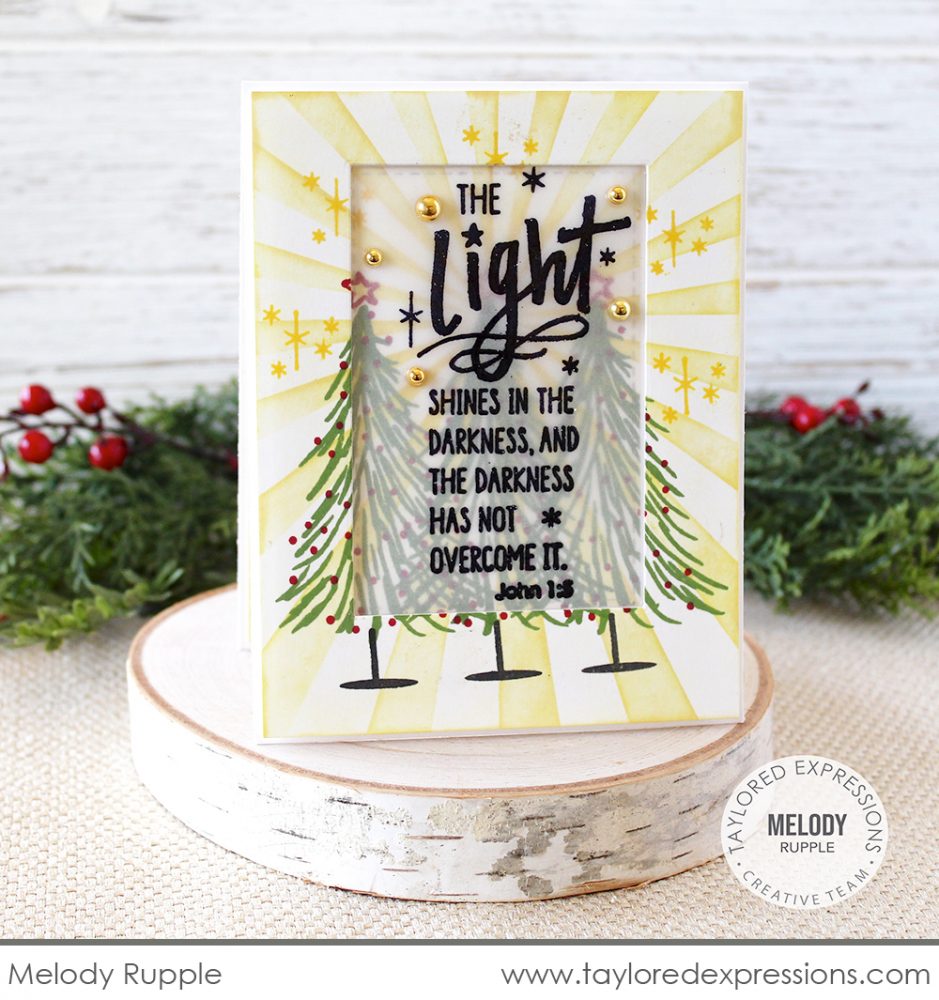
Melody Rupple let the sentiment from The Light Shines stamp set take center stage on this card. She created a background with the Here Comes the Sun stencil and a border of trees. She cut out the center of the background with a Stitched Rectangle Stacklets die and used that to frame the sentiment that is stamped on a piece of vellum.
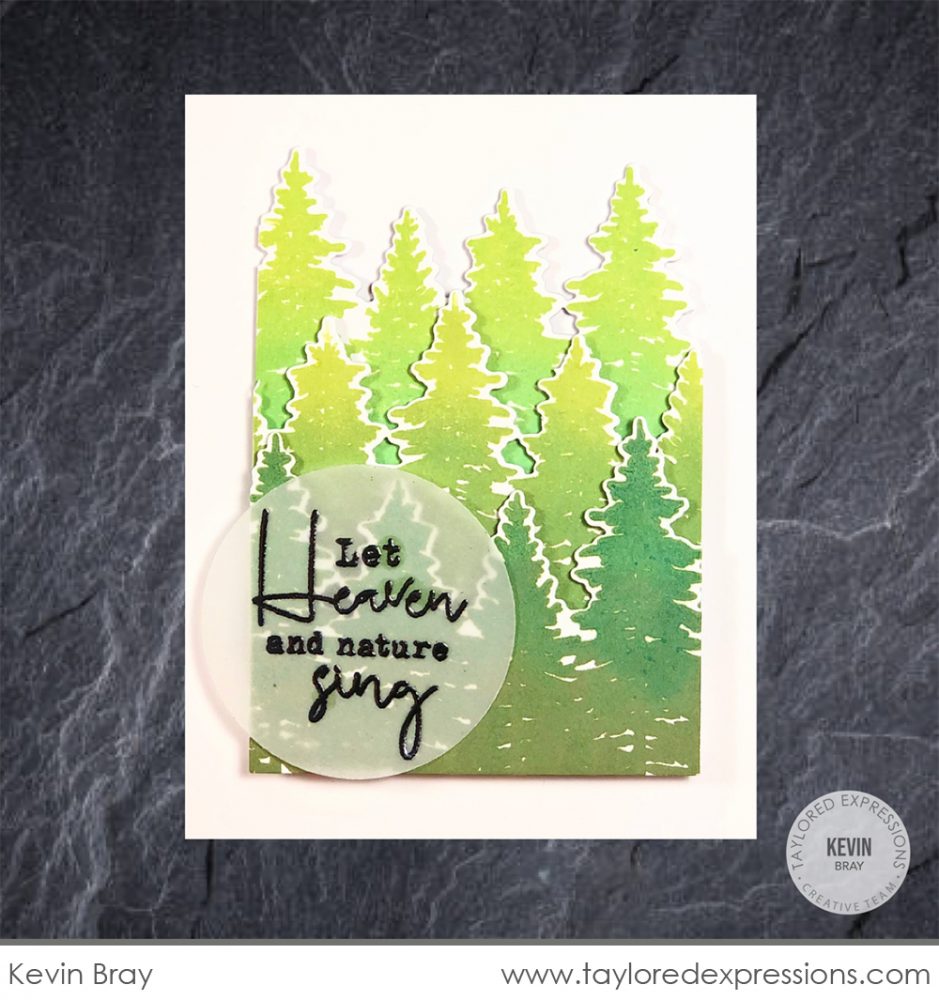
Kevin Bray created a forest of trees for this card with the Endless Evergreens stamp set. He stamped the trees in different shades of green, used the coordinating die to trim across the tree tops, and then layered the strips of trees together. The sentiment on Kevin’s card is from the Seasonal Sprig stamp set and embossed on a piece of vellum.
We can’t leave out Big Grumpy for the holidays – although he wishes we would!

Use the Big Grumpy – Christmas stamp set (+ coordinating dies) to make fun holiday cards with our Big Grumpy and Big Grumpy – Cat stamp & die combo sets (sold separately). The set includes antlers and a Santa hat that Big Grumpy will try to pitch into the fireplace, holiday treats and gifts that Big Grumpy will refuse to share, mittens that he will surely lose, and several sentiments to let you know exactly what Big Grumpy thinks of this time of year!
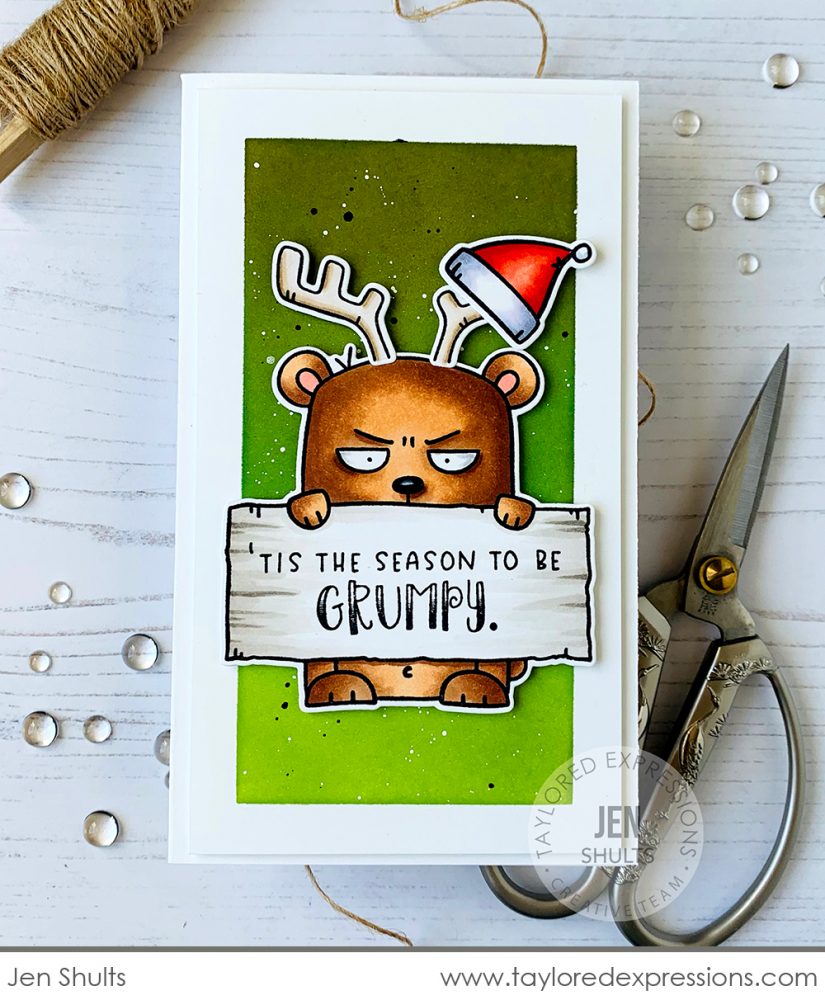
Jen Shults made Big Grumpy wear BOTH the antlers and Santa hat and he is NOT HAPPY. It says so on his sign! Jen colored Big Grumpy and his holiday accessories with Copic markers and I can’t get over how awesome the wooden sign is! The background on Jen’s card is created with the Mini Slim Masking Rectangle stencil with green inks and lots of splatters!
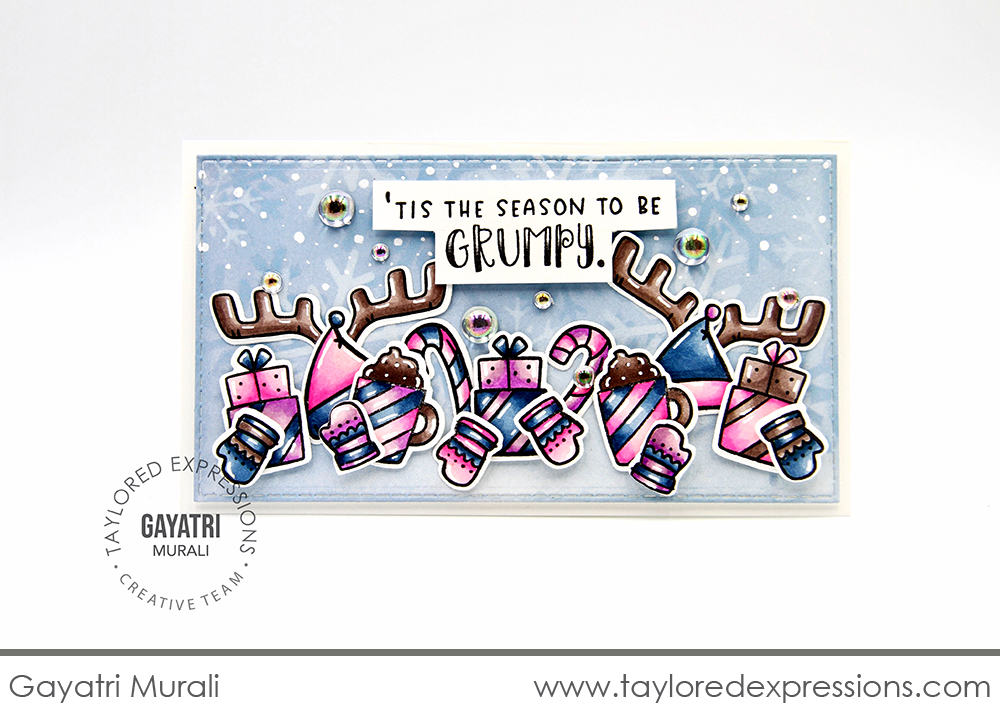
Gayatri Murali left Big Grumpy out of her project using only his holiday accessories – and he’s just fine with that! All of the images in the stamp set can work wonderfully on projects on their own. Even though the sentiment on this card is a bit grumpy, the border that Gayatri put together is really fun and festive and could be used with any holiday sentiment!
We also have new additions to several of our popular and growing collections:

We released the Tag Team – Christmas clear stamp set last year as part of an limited edition kit and now we are releasing the individual stamp set for you to purchase! Use the set along with the coordinating Tag Team dies to create tags for the season. The set includes Christmas themed sentiments along with several small images and three pattern blocks designed to embellish the ends of the tags.
The Pretty Package – Holiday Tags clear stamp set includes nine sentiments and two holiday images designed to embellish the small tag in the Pretty Package die collection. Dress the gift card package up for the holidays with stamps and stencils and finish it off with a holiday-themed tag. Gift card giving for the holidays has never been easier!
The new Pennant Parade – Christmas clear stamp set coordinates with the previously release Pennant Parade Cling & Clear Combo stamp set. There are 5 new pennant options designed with a Christmas theme along with eight sentiments that you’ll find yourself reaching for again and again.
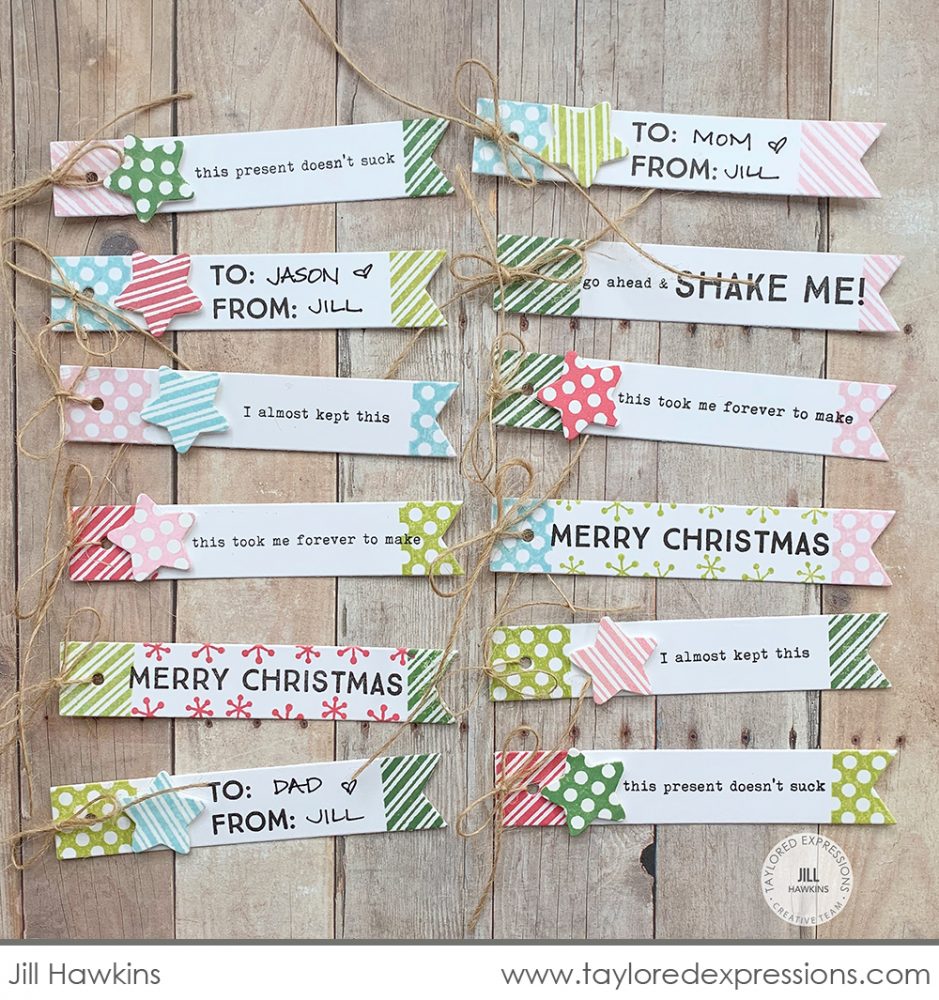
Jill Hawkins is ready to start gift wrapping with this pile of tags that she created with the Tag Team – Christmas stamp set and Tag Team dies. Jill added patterns to both ends of the tags using the pattern blocks in the set, added sentiments, and die-cut stars to embellish the tags. To make the stars, Jill stamped the pattern blocks and die cut them with the Starry Cutting Plate. A bit of burlap twine is perfect for tying the tags onto packages!
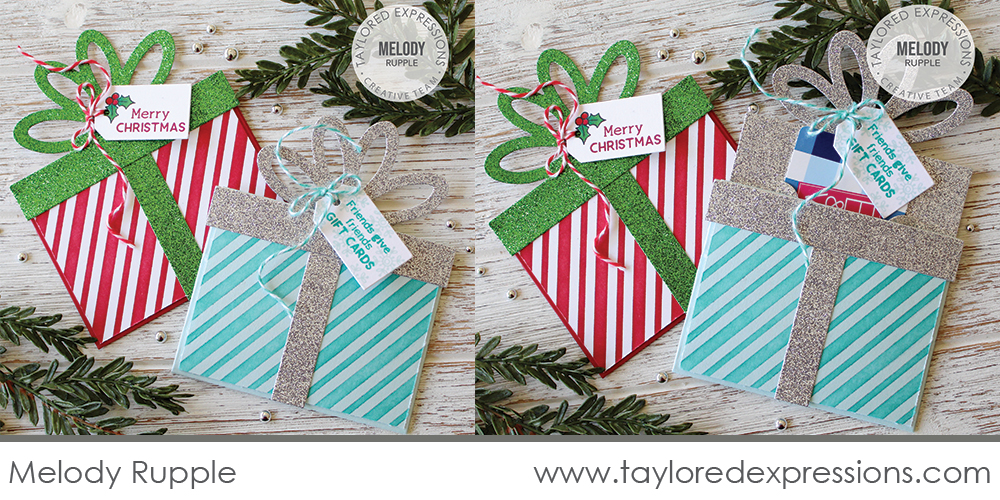
Melody Rupple created a few gift card holders perfect for Christmas with the Pretty Package die collection. She dressed up the wrapping with the Mini Slim – Candy Cane Stripes stencil and used our new glitter cardstock for the insert and package details. Melody stamped the tags for the packages with sentiments and images from the Pretty Package – Holiday Tags stamp set and tied them to the gift card holders with some pretty, coordinating twine.
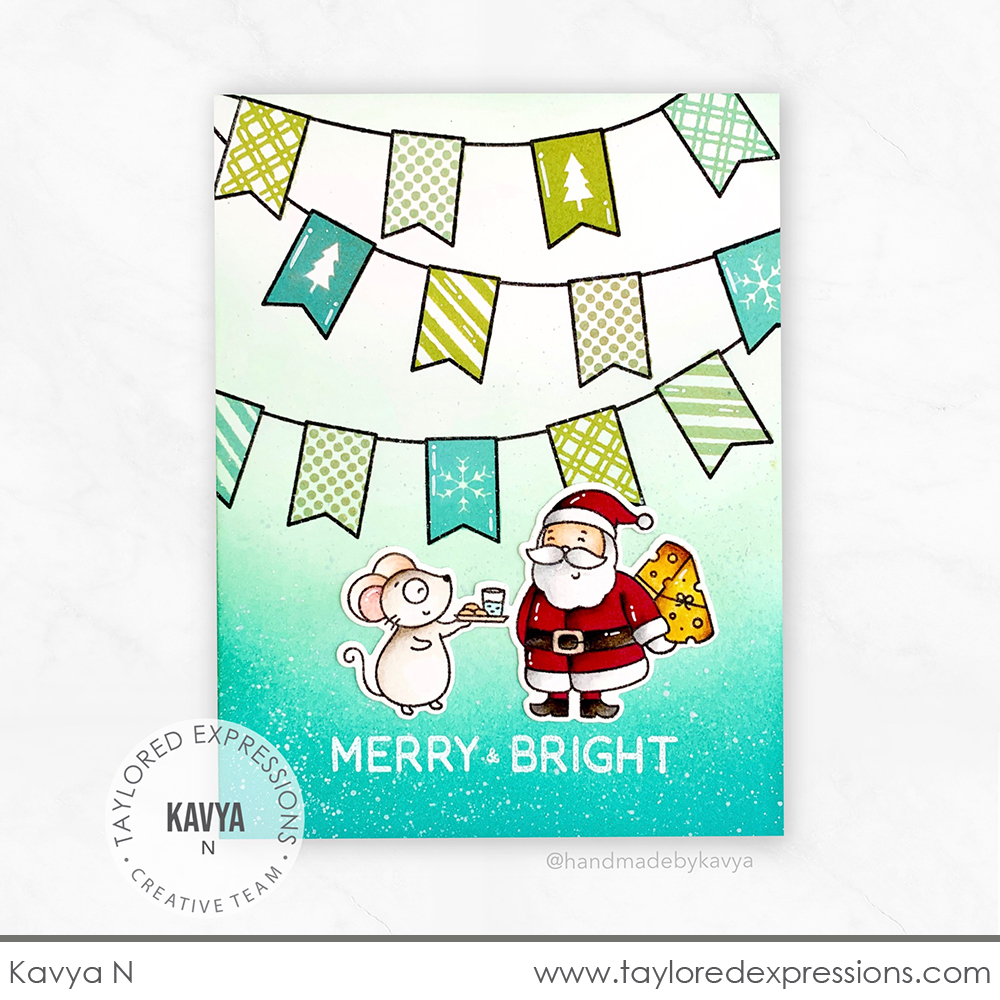
Kavya used the new Pennant Parade – Christmas stamp set to dress up the Pennant Parade Cling & Clear Combo set for the holidays. It’s the perfect backdrop for the cute scene she stamped with the Merry Millie set. The sentiment at the bottom of the card is also from the Pennant Parade – Christmas stamp set. I love this non-traditional color combo!
We have a few new embellishments and more info on the new Premium Glitter Cardstock you’ve seen sprinkled throughout the projects in this release:

Introducing the new Bits & Pieces – Silver Drip Drops and Bits & Pieces – Gold Drip Drops that are perfect for embellishing holiday projects and more with dimension and shine! I am sure you noticed these showing up on many of the projects from the TE Creative Team.

And finally, we are excited to share our new Premium Glitter Cardstock available in five colors: red, green, gold, silver, and white. You will love adding sugary, sparkly details to your projects without the mess! The cardstock is pre-cut in A2 size pieces (4.25″ x 5.5″) and offered in packages of 10 sheets per color.
Whew… did you make it all the way through!? Our new Christmas release will be available for purchase starting tomorrow at 9am Central Time, but before I head out for today, you have a chance to win it before you can buy it! Just comment below and let me know:
What’s your favorite product from our 2020 Christmas release? Or top two favorites? Or top three? However you feel inclined to answer! *wink*
I’ll choose three lucky winners to receive one product of their choice (sorry, not a bundle) from this release!
Simply leave your comment by TONIGHT, Monday, October 5th at 10PM Central Time. One comment per person. Winners are chosen at random and will be announced on the TE blog on release day, tomorrow, October 6th!
Thank you for stopping by for our new Christmas release sneak peeks! Stop back tomorrow for more inspiration from the TE Creative Team and a video from Heather. See you then!


