Apr 21, 2021
Fall in Love With the NEW Bitty Blender Brushes!
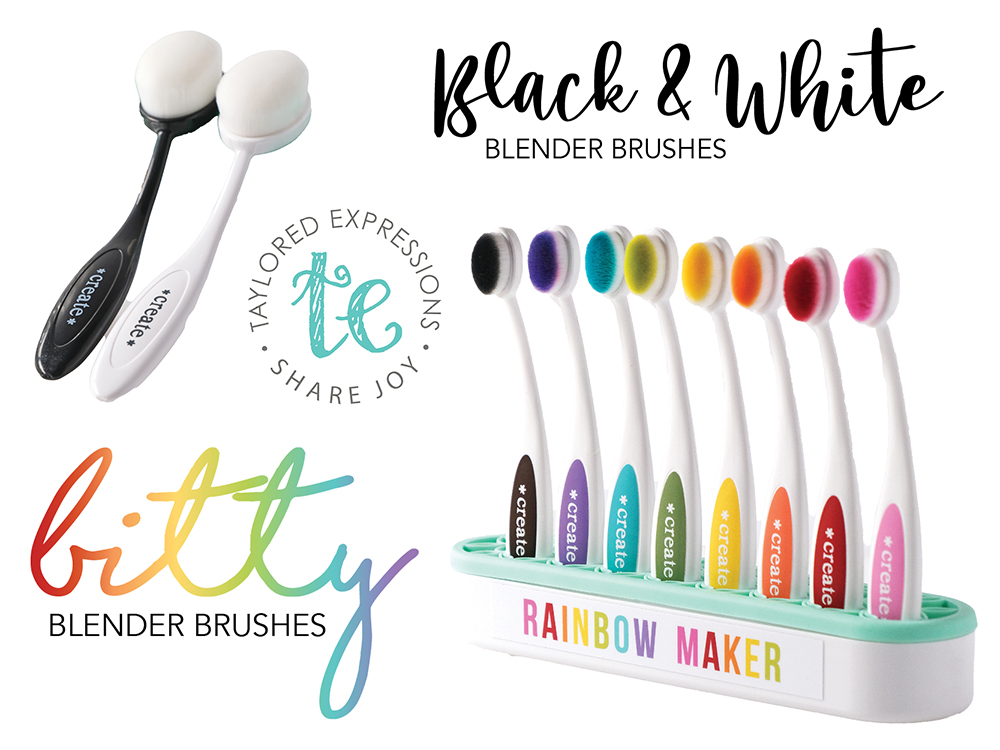
Hey, crafty friends! It’s Heather here today! What do you think of the new Bitty Blender Brushes and Black & White Blender Brushes that we released yesterday in the TE webstore? Personally, I am pretty partial to that new white brush, but I am also in love with the new bitty brushes! They are so much fun to use and I love the possibilities of blending in smaller areas and intricate designs. Don’t forget about the new stencils! You’ll love adding these new designs to your collection and you’ll love using them with the new brushes. I have more inspiration to share with you today from the TE Creative Team and a video from Mindy Eggen using the new products we released yesterday.
Before I get to today’s inspiration, here’s a reminder about the I Want it ALL Bundle that you can take advantage of this week:
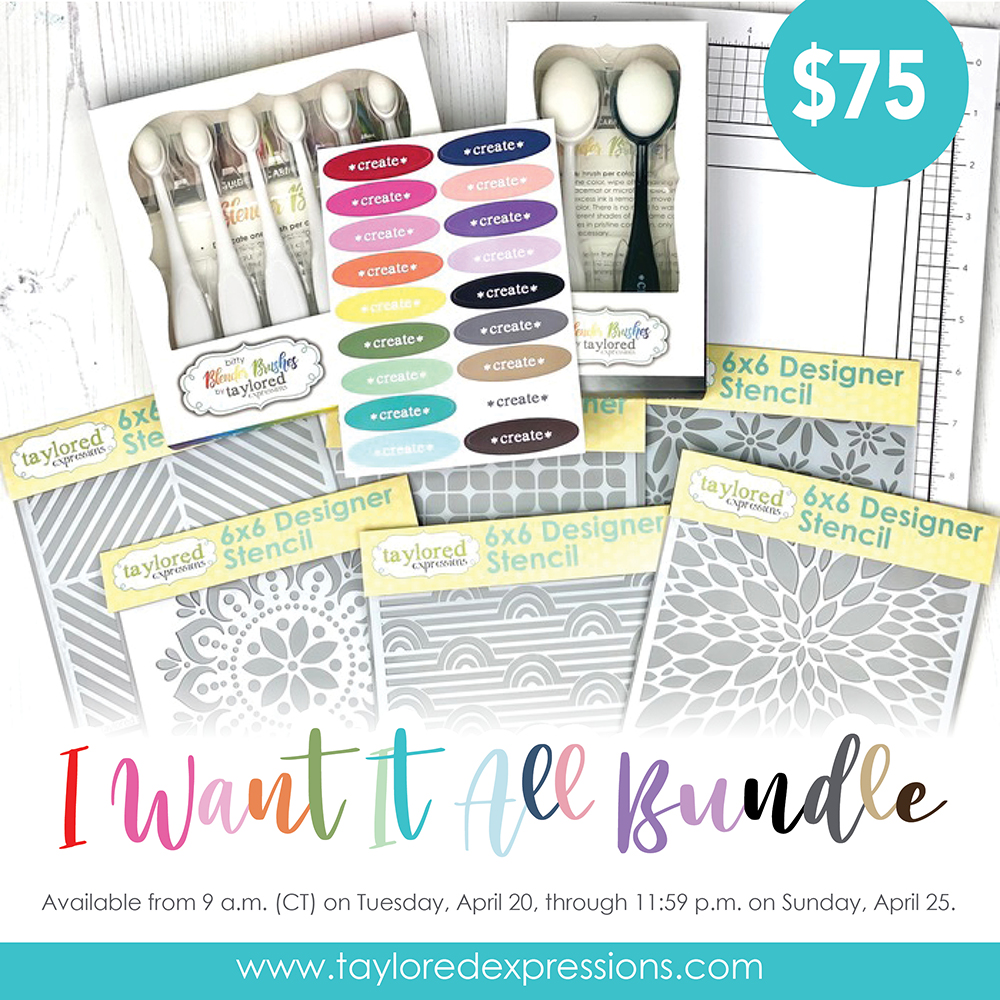
The I Want it ALL Bundle retails for $75 and includes the following:
- Bitty Blender Brushes (set of 6)
- Create Color Labels
- Black & White Blender Brushes (set of 2)
- All 6 new stencils
- 8.5″ x 11″ Grid Paper Placemat Pad
The special introductory price of $75 on the I Want it ALL Bundle is available now through Sunday, April 25th, or while supplies last!
Click below to shop all of the new products that are releasing today and then keep scrolling for inspiration!
- Our blog posts (Tuesday – Thursday) will feature a video showcasing the new release products.
- New products are available to purchase RIGHT NOW in the TE webstore!
- Receive FREE shipping on orders of $50 or more in the United States!
- Earn a free, exclusive stencil set with purchases of $100 or more. CLICK HERE for more information.
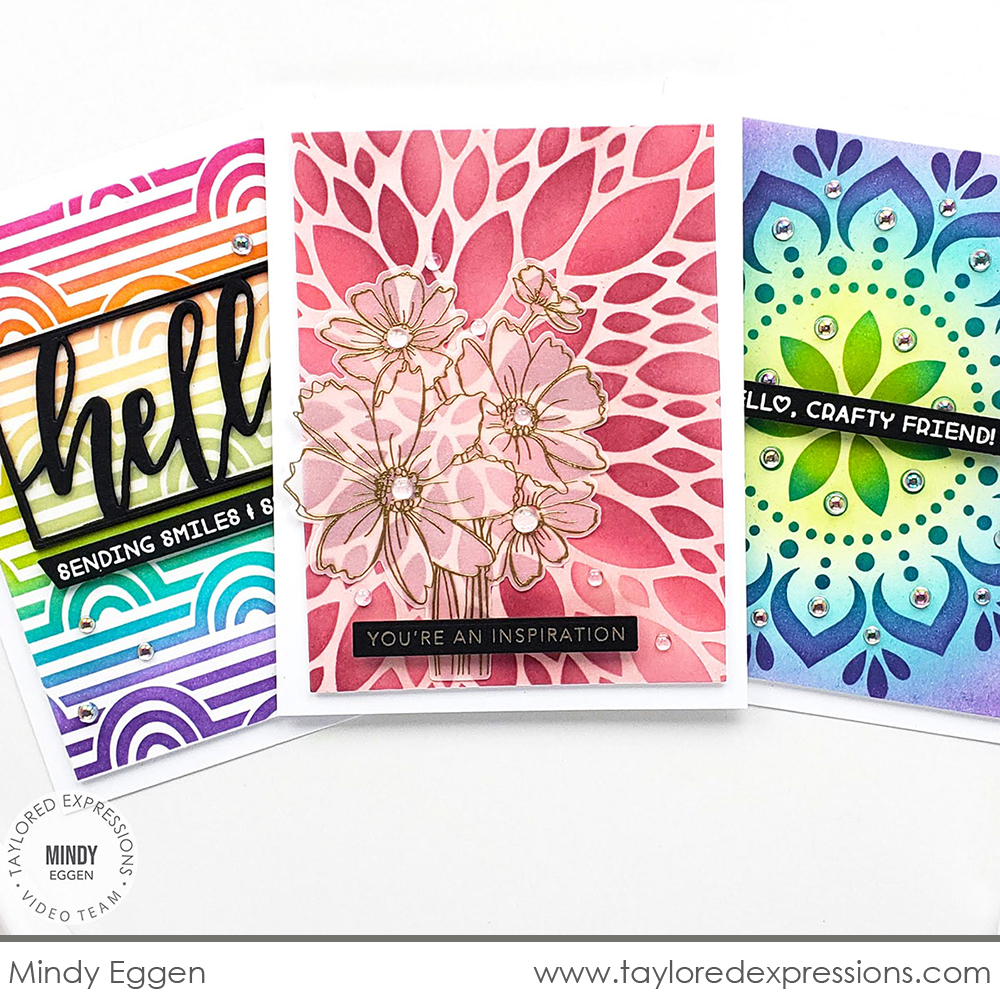
Let’s start thing off with a video from Mindy Eggen. Watch the video below to see how she created three different cards with the new Bitty Blender Brushes and new stencils:
In the video, Mindy shares more about the new Bitty Blender Brushes and the how you can use them for precise blending techniques on your projects. She creates three different cards using several of the new stencils: Rainbow Repeat, Mandala, and Dahlia.
Here’s a closer look at the projects that Mindy created:
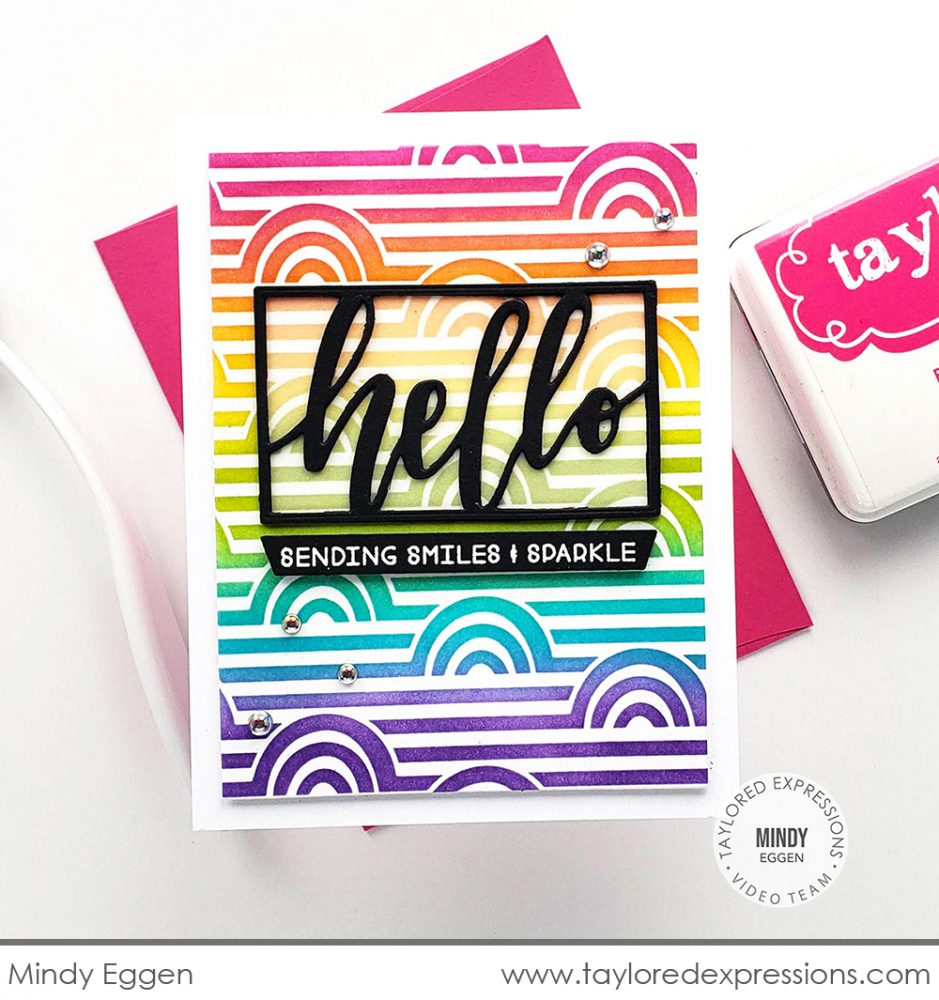
This card is created with the Rainbow Repeat stencil and Mindy did a pretty rainbow blend using the Bitty Blender Brushes. She loved that the Bitty Blender Brushes allowed her to blend thinner strips of color and that gave her room to add the full rainbow spectrum across her card front using Lollipop, Candy Corn, Pineapple, Granny Smith, Cookie Monster, and Jelly Donut inks.
Mindy finished off this card with the Framed Script – Hello die that is cut from Oreo cardstock and backed with a piece of vellum, a sentiment strip from the Simple Strips – Crafty stamp, and a few Bits & Pieces – Drip Drops embellishments.
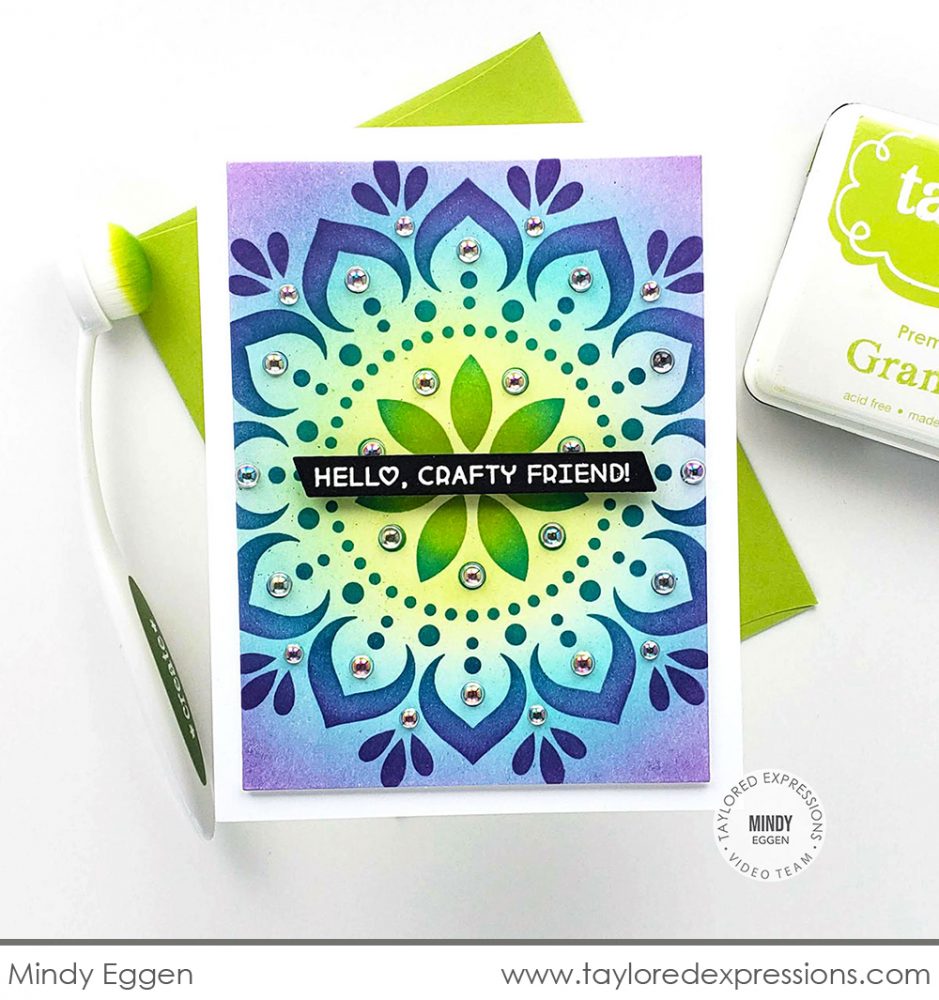
This next card is created with the new Mandala Stencil. Mindy did a color blend with the Bitty Blender Brushes starting in the center of the mandala design and radiating out to the edges using Granny Smith, Blue Raspberry, Blueberry, and Jelly Donut inks. A tip that Mindy shares in the video is to lay down a light layer of ink color first and then build more color on top if you decide you want it darker/brighter. You can always add more color, but you can’t go backwards if your ink is too dark. I also like how Mindy added color to the background of her card with her original Blender Brushes after she stenciled the mandala design. She used most of the same colors that she blended through the stencil and it softened the overall look.
This card is finished with a sentiment strip from the Simple Strips – Crafty stamp that is embossed in white on Oreo cardstock. She also added lots of Bits & Pieces – Drip Drops to the stenciled design and I love all of the shimmer and shine!
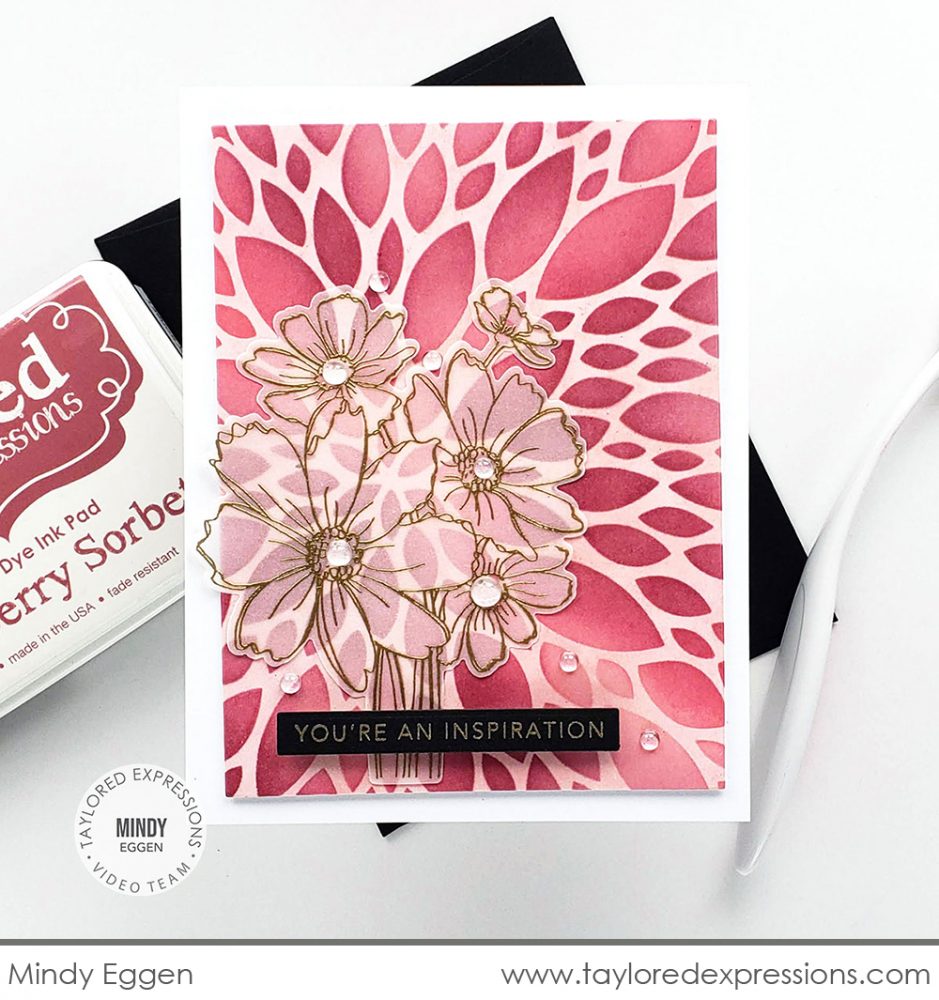
This last card is created with the new Dahlia stencil. Mindy used the Bitty Blender Brushes to do “spot blending” with different shades of pink inks: Pink Champagne, Guava, Raspberry Sorbet, and Mulled Wine. The result is a beautiful tonal look that has a sort of glow/shine effect. Mindy added Pink Champagne ink over the stenciled image with an original Blender Brush to add a touch of softness.
Mindy added the embossed floral bouquet image from the Sketchbook Bouquet stamp set that is a part of the Field Notes 2 Kit (this kit is currently sold out, but you could achieve a similar effect with other floral images in your own collection) in gold on a piece of vellum and layered it over the stenciled design. She added a sentiment to the card from the Mini Strips – Fun & Funny stamp embossed in gold on an Oreo cardstock strip. A few Bits & Pieces – Clear Drip Drops are the perfect finishing touch!

Here are a few more projects from the TE Creative Team using the new Bitty Blender Brushes and stencils:
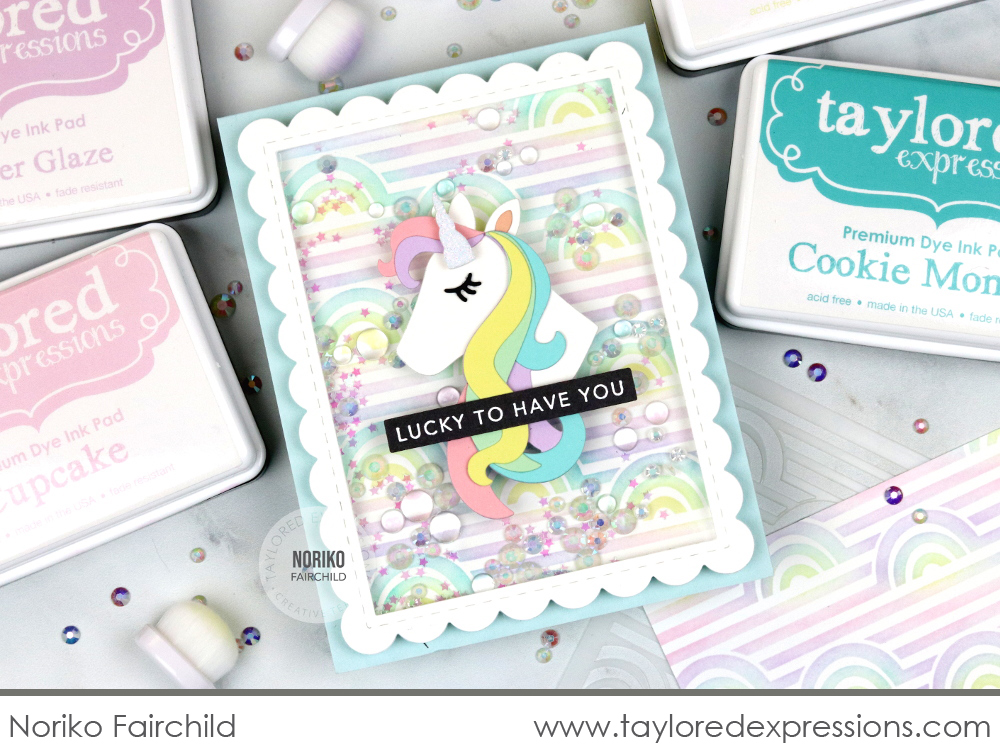
Noriko Fairchild used the Rainbow Repeat stencil to create a pretty pastel rainbow background for this magical unicorn shaker card. She matched the ink colors to the unicorn that she created with the Build a Unicorn die collection and stenciled the background with her Bitty Blender Brushes. She added the scalloped frame from the Frame in Frame 2 Cutting Plate die collection to create the shaker element and filled the shaker with Bits & Pieces – Clear Drip Drops and Bits & Pieces – Sparkly Stars.
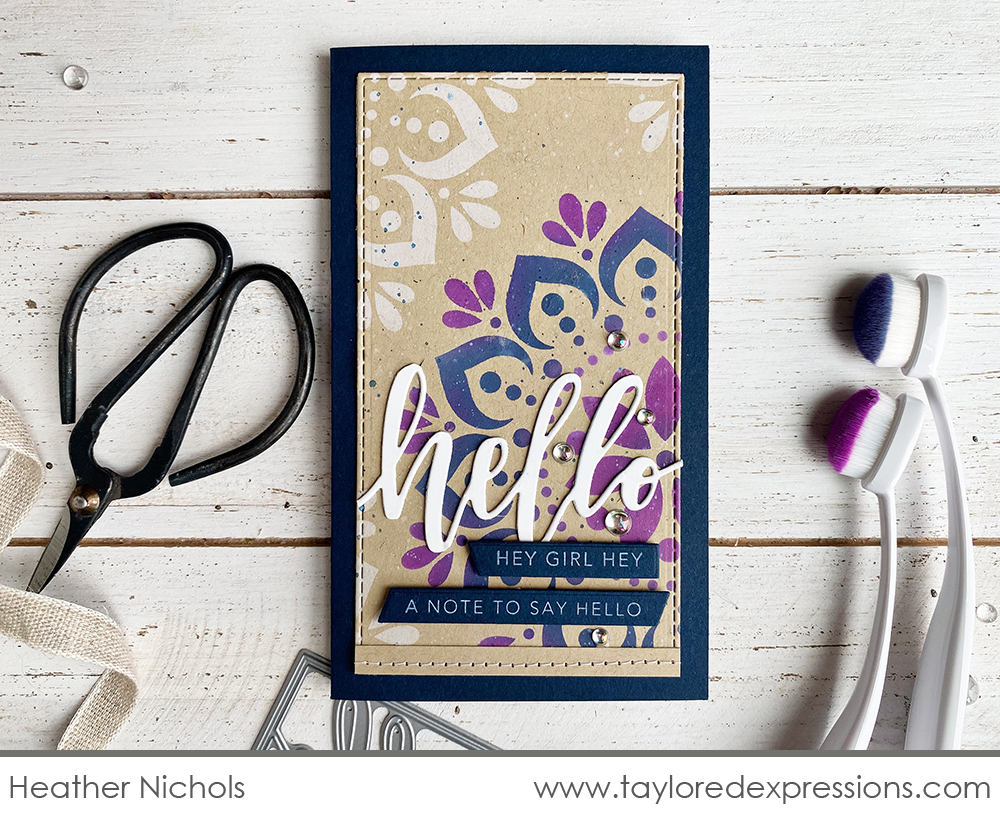
I created this Mini Slim card featuring the new Mandala stencil (Heather Nichols). First, I stenciled the design using Sugar Cube ink and then added Plum Punch and Blue Corn inks over the top with my Bitty Blender Brushes so that the colors would pop on the Toffee cardstock. I added a few more peeks of the mandala design around the background with Sugar Cube ink. The sentiment is created with the Framed Script – Hello die and sentiments from the Mini Strips – Fun & Funny stamp.
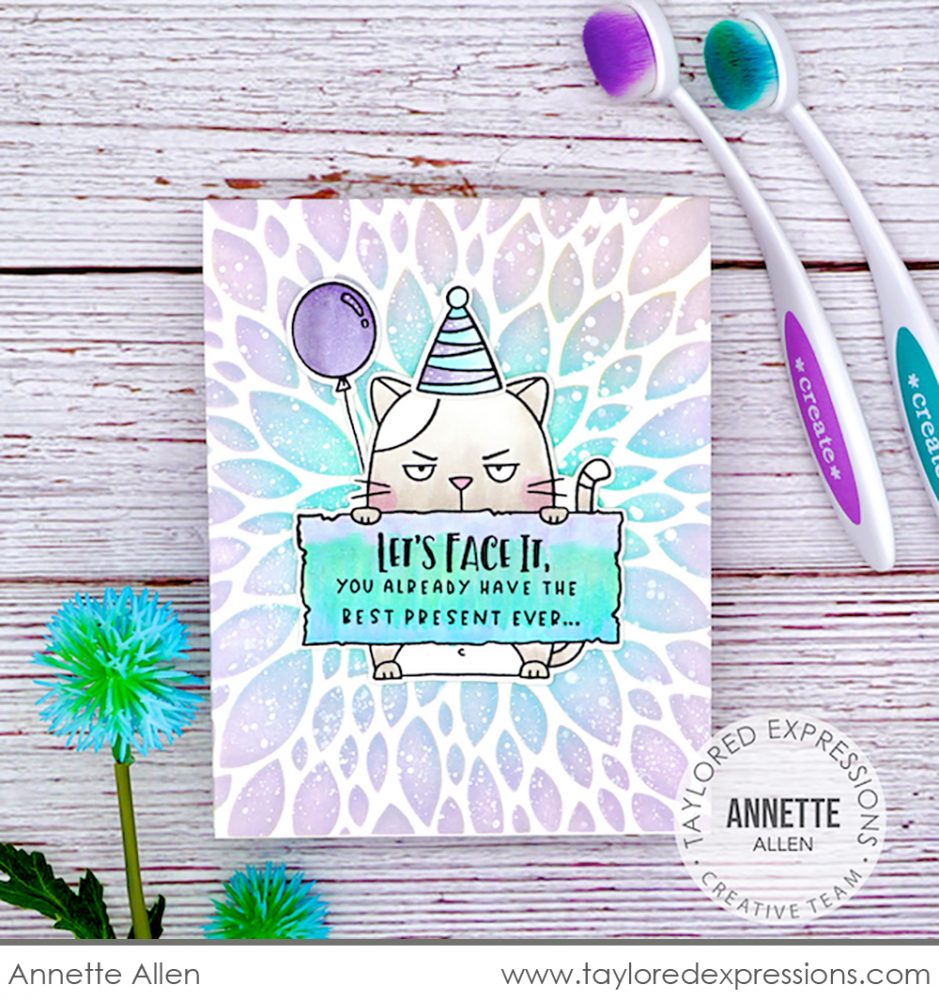
Annette Allen used the Dahlia stencil to create a fun and whimsical background for Big Grumpy – Cat! She used Lavender Glaze and Sprinkles inks with her Bitty Blender Brushes to stencil the design and then added splatters with opaque white Copic ink. Big Grumpy is colored to coordinate with the background using Copic markers and he’s sporting a party hat and balloon from the Big Grumpy – Birthday stamp set.
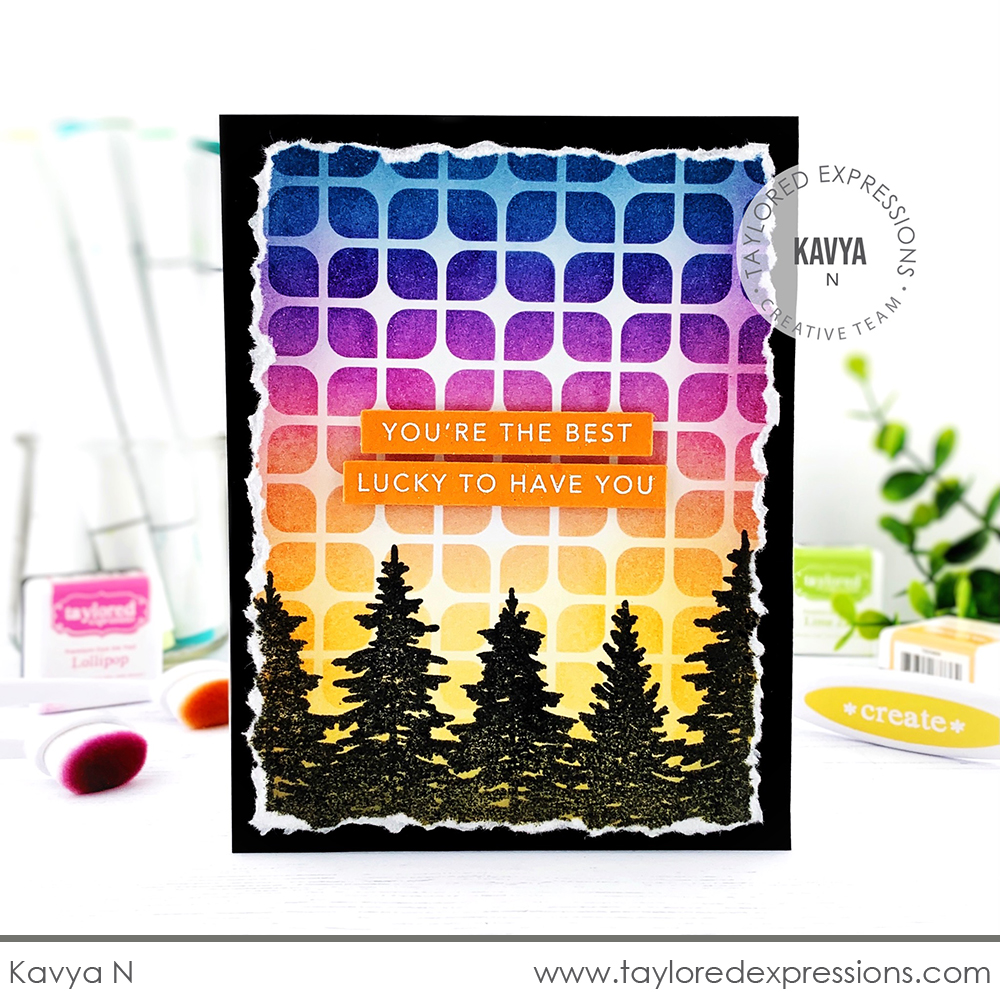
I love how Kavya created a pretty sunset effect on this card using the Roundabout stencil! She used Blueberry, Plum Punch, Lollipop, Candy Corn, and Pineapple inks with her Bitty Blender Brushes to create the look with the stencil and then went back and added the same colors around the edges of the background. Kavya stamped the Endless Evergreens stamp across the bottom of the background in Oreo ink for a great silhouette look and added sentiment strips from the Mini Strips – You’re the Best stamp embossed in white on Candy Corn cardstock.
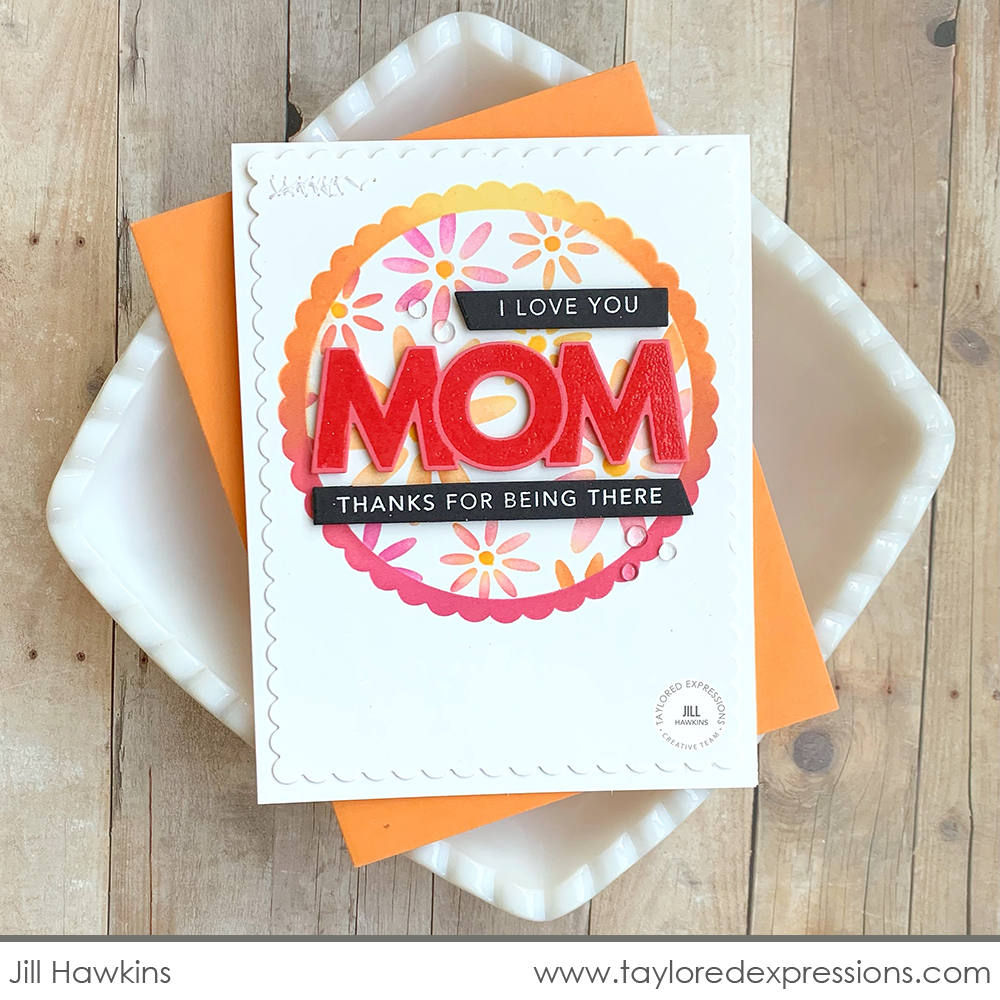
This pretty Mother’s Day card was created by Jill Hawkins with the new Delightful Daisy stencil. She paired the stencil with the Masking Stencils – Circles and Masking Stencil – Scalloped Circles sets. The daisies were stenciled using the Bitty Blender Brushes into the circle opening on the masking stencil, Jill masked off the daisies with the circle insert piece, and then she added the scalloped frame. At first glance it looks like multiple cardstock layers, but it’s really just one layer! The sentiment is created with the On the Block – Mom stamp and sentiments from the Mini Strips – You’re the Best stamp.
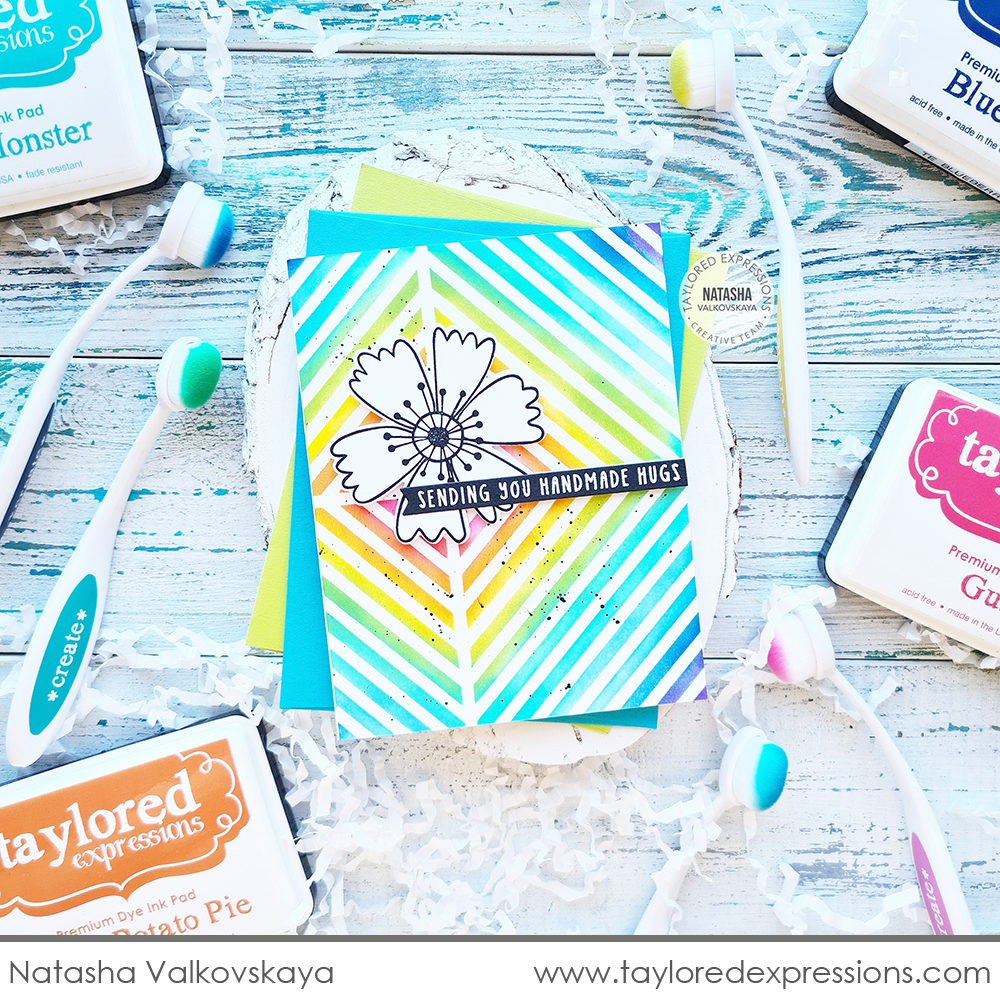
And finally, for today, is this colorful card by Natasha Valkovskaya! She used the Striped Squares stencil with her Bitty Blender Brushes to create a colorful rainbow background! She started at the center of the diamond design and work her way out to the edges of the Sugar Cube cardstock and I love how she offset the stencil design just a bit on her card front. She added a bloom from the Picked Posies stamp set that is simply stamped in Oreo ink on Sugar Cube Cardstock along with a sentiment strips from the Simple Strips – Crafty stamp that is embossed in white on Oreo cardstock.
That wraps up the inspiration for today! Make sure to stop back tomorrow for one more day of crafty inspiration using the new Blender Brushes and stencils that were released this week. I’ll have a video to share from Emily Leiphart along with more inspiration from the TE Creative Team!
Did you know that you can subscribe to our blog and get our posts right in your inbox? Just sign up right HERE – that’s all there is to it to make sure you don’t miss any of our crafty inspiration!


