May 19, 2021
9 More Creative Ideas for Theater Fold Cards Using NEW Products!
Hey, crafty friends! What do yo think of the new products to create theater fold cards that we released this week? This is an interactive card design that I have seen many times, but hadn’t ever taken the time to try out and create on my own. Part of the reason I hadn’t tried this type of card out before is that I knew that I would have do lots of measuring and cutting to create all of the elements that I needed. Using the new dies and cardstock packs made creating this project really easy to do and I know that I will create more of them! Today, on the blog, is all about theater fold card inspiration and I know you are going to love all of the cards that I have to share from the TE Creative Team today plus a video from Emily Leiphart from the TE Video Team!
If you haven’t already, get the Theater Fold Starter Bundle so you can create these interactive cards without all the guesswork:
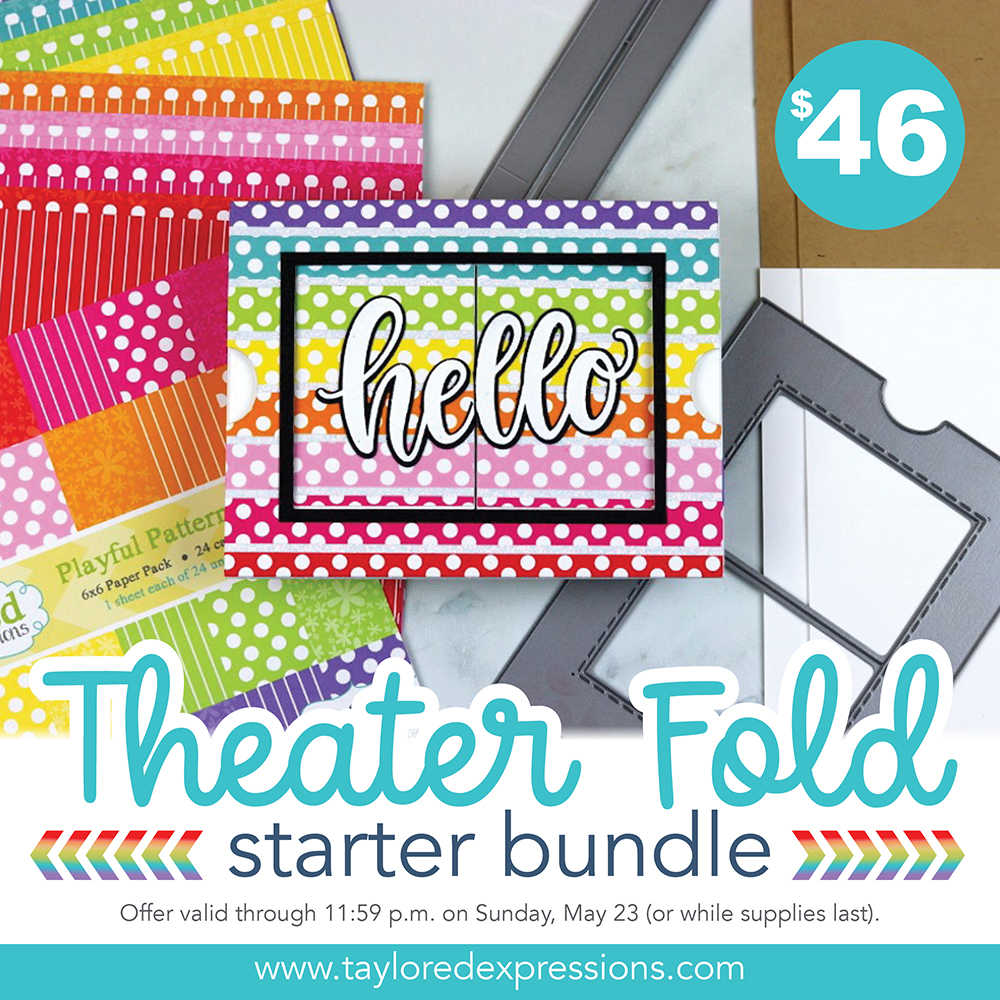
You’ll be ready to start making interactive Theater Fold Cards when you purchase our Theater Fold Starter Bundle, available for a limited time only! The bundle includes one Theater Fold Frame Die and two sets of our Theater Fold Flaps (one each in Sugar Cube and Toffee), as well as a 6×6 Paper Pack in Playful Patterns – Bold! The Theater Fold Starter Bundle is available through Sunday, April 23, or while supplies last.
Click below to shop all of the new products that we released yesterday and then keep scrolling for inspiration!
- Our blog posts (Tuesday – Thursday) will feature a video showcasing the new release products.
- New products are available to purchase RIGHT NOW in the TE webstore!
- Receive FREE shipping on orders of $50 or more in the United States!
- Earn a free, exclusive product with purchases of $100 or more. CLICK HERE for more information.
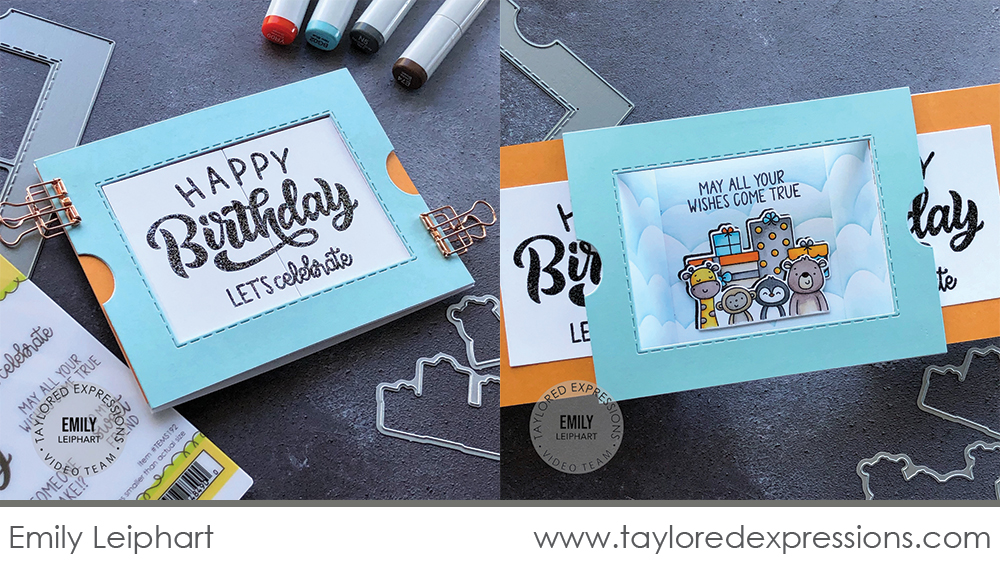
The video today is from Emily Leiphart and she shares how to create this adorable theater fold birthday card using the new products from this release. Watch below to see how she created it!
In the video, Emily shares a closer look at the products you need to create a theater fold card. She shows an example of an assembled card base and then shares the steps to put the theater fold card together using the Theater Fold Frame dies and Theater Fold Flaps packs. On the front of the card, she adds sentiments from the Oh My Word – Happy Birthday stamp set into the frame. On the inside of the card, Emily creates a background with the Set the Scene – Clouds Stencil Strips set and adds a few of the cute images from the Bitty Borders stamp set.
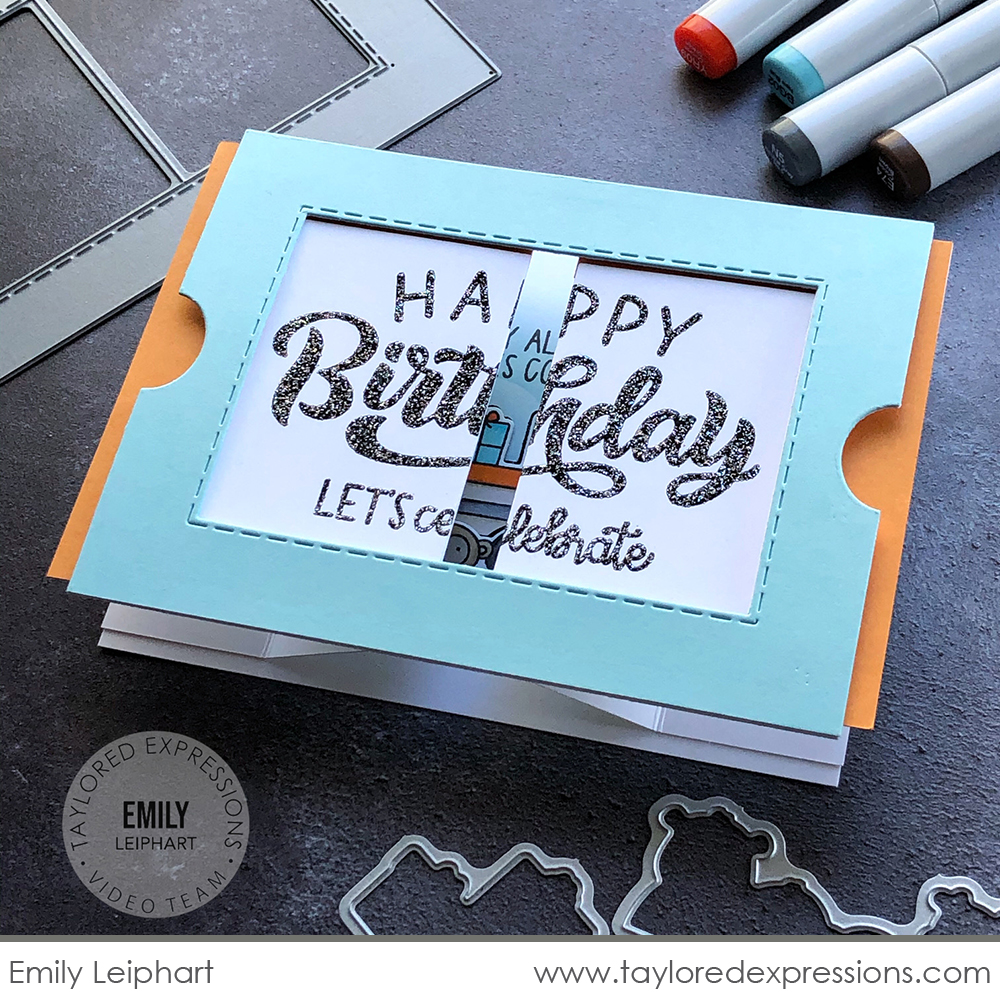
If you watch the video, you’ll see how Emily changes her mind about design elements along the way to add more interest to her design. At first, the main frame is cut out of Sugar Cube cardstock and she changes it to Sprinkles cardstock by simply cutting out another frame and attaching it over the top. She also adds Candy Corn cardstock to the side flaps. This all goes to show how when things aren’t working like you imagined in your head, it’s okay to change things up and adapt your design as you go. Plus those additional layers of cardstock added extra stability to the card!
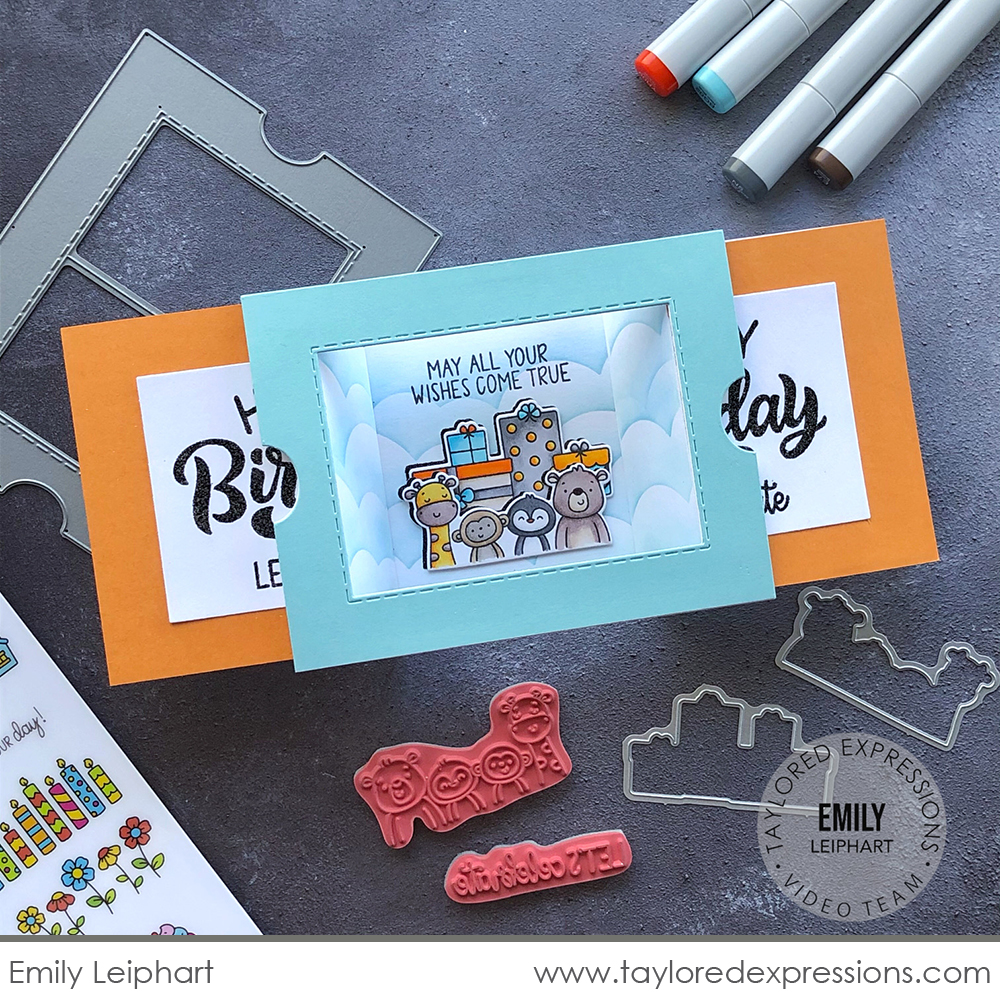
I really love how Emily did the cloud background inside her theater fold card and had it wrap around from both sides to the back – make sure to watch the video to see how she created it on the card base and side flaps. It might take a few more minutes to line things up, but the results are worth it in the end!
Check out the list below for all of the supplies that Emily used on her theater fold card:

Here are more theater fold card examples from the TE Creative Team using the new products from this release:
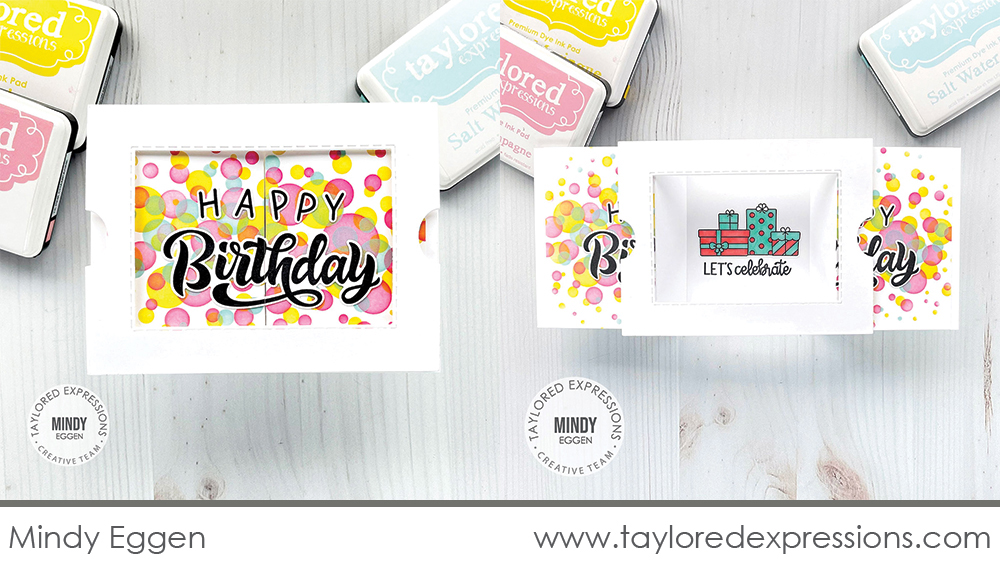
Mindy Eggen created the perfect interactive birthday surprise card with the new theater fold products! She used Sugar Cube Cardstock for the Theater Fold Frame die cut and Theater Fold Flaps. Colorful polka dots are stenciled onto the part of the flaps that show through the frame using the Bokeh Layered Stencil set and then Mindy added the ‘happy birthday’ sentiment from the Oh My Word – Happy Birthday stamp set (+ coordinating die) over the top. When the flaps are pulled open on each side, the ‘let’s celebrate’ sentiment and presents from the Bitty Borders stamp set are revealed.
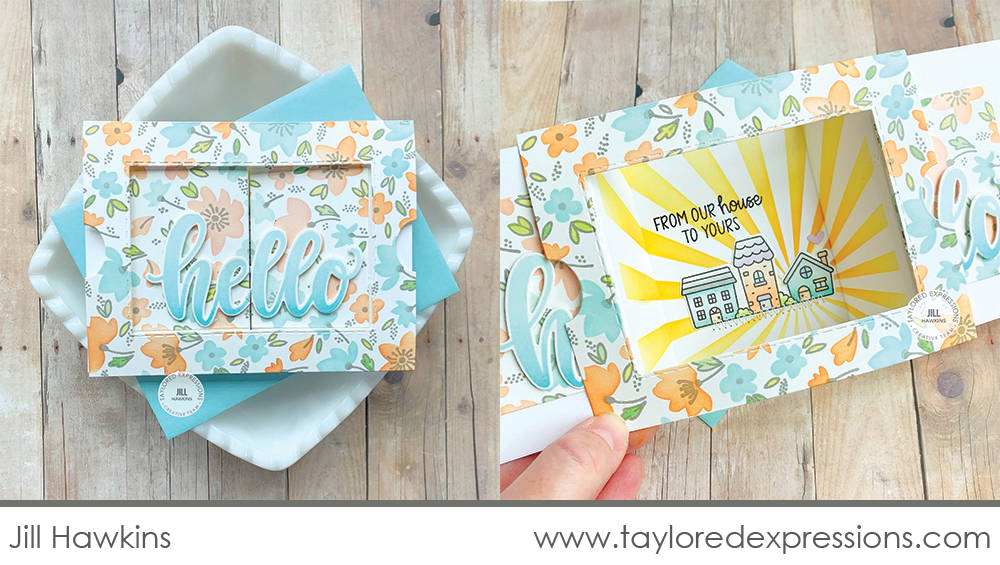
This sweet theater fold card by Jill Hawkins is perfect to send a hello to a friend or welcome a new neighbor. Jill used the Best Buds Stamp & Stencil Combo set to create the floral background and cut it out with the Theater Fold Frame die. She added the ‘hello’ from the Oh My Word – Hello stamp set (+ coordinating die) into the frame and I love the two toned ombre effect on the letters! When the card is opened, it reveals the cute house border image from the Bitty Borders stamp set on a background stenciled with the Here Comes the Sun stencil.
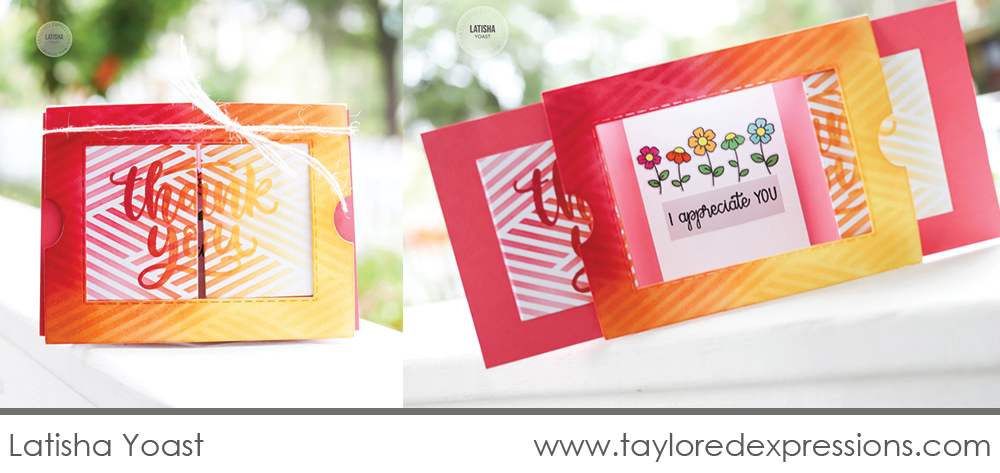
Latisha Yoast created this thank you card with the Theater Fold Frame dies and coordinating products. She stenciled the Criss-cross stencil onto Sugar Cube cardstock, cut it out with the Theater Fold Frame die and then added more ink blending to the frame. The ‘thank you’ from the Oh My Word – Thank You stamp set is inked with multiple colors (mini ink cubes are great for this!) to match the color blend of the stenciling. Latisha cut the flaps for the theater fold card from Guava cardstock and added them to a Sugar Cube base that is stamped with the floral border from the new Bitty Borders stamp set.
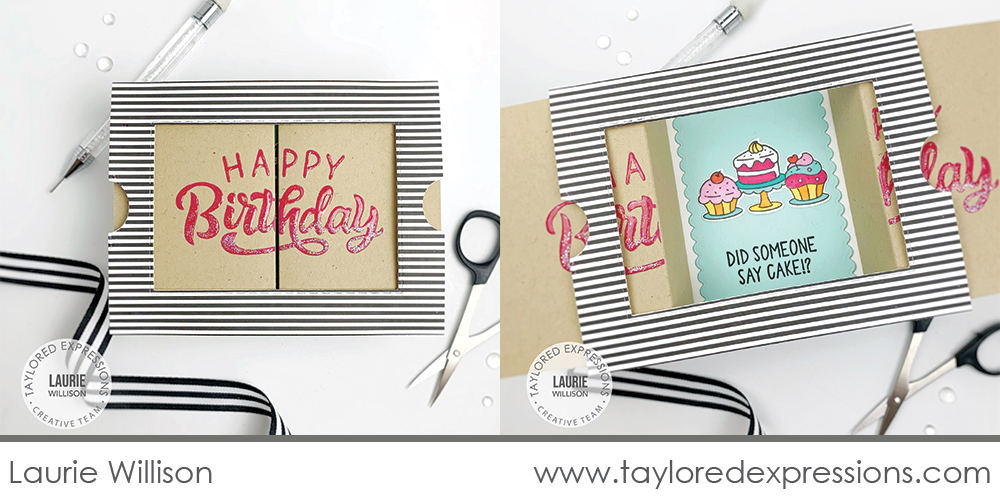
This theater fold birthday card is created by Laurie Willison. She cut the Theater Fold Frame die from black and white striped patterned paper and used the Toffee cardstock Theater Fold Flaps to fill the frame. She added the ‘happy birthday’ from the Oh My Word – Happy Birthday stamp set in red in the frame, covered it with Glossy Accents, and added bit of glitter to just the bottom of the sentiment for a fun effect! I love the pop of color when the card is opened from the Confetti Cake cardstock background and brightly colored cupcakes from the Bitty Borders stamp set.
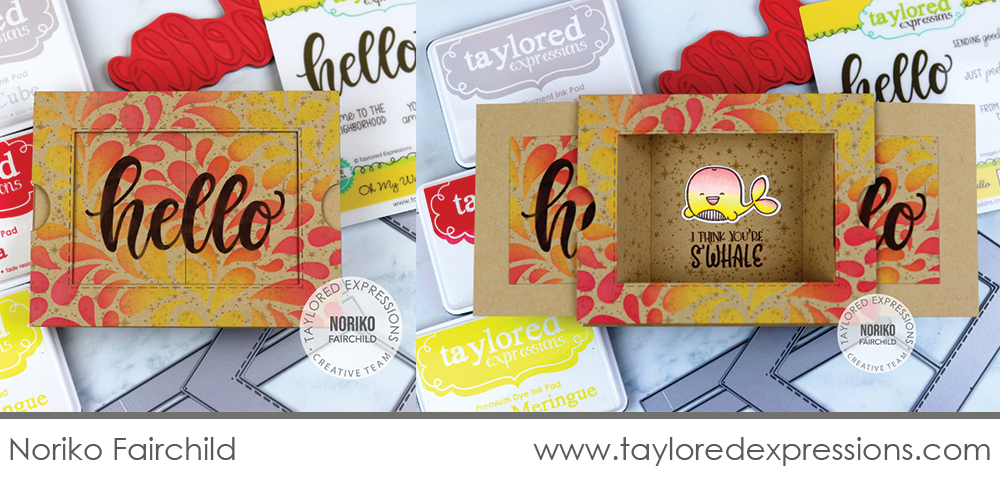
Noriko Fairchild used the Splash stencil paired with the Twinkle Twinkle Background on Toffee cardstock to create a fun background pattern for the Theater Fold Frame. The ‘hello’ sentiment from the Oh My Word – Hello stamp set is stamped into the frame and when the card is opened, it reveals the cutest whale and sentiment from the O-Fish-Ally Awesome stamp set. The tone on tone background inside the card is stamped onto Toffee Theater Fold Flaps with the Twinkle Twinkle Background using Toffee ink.
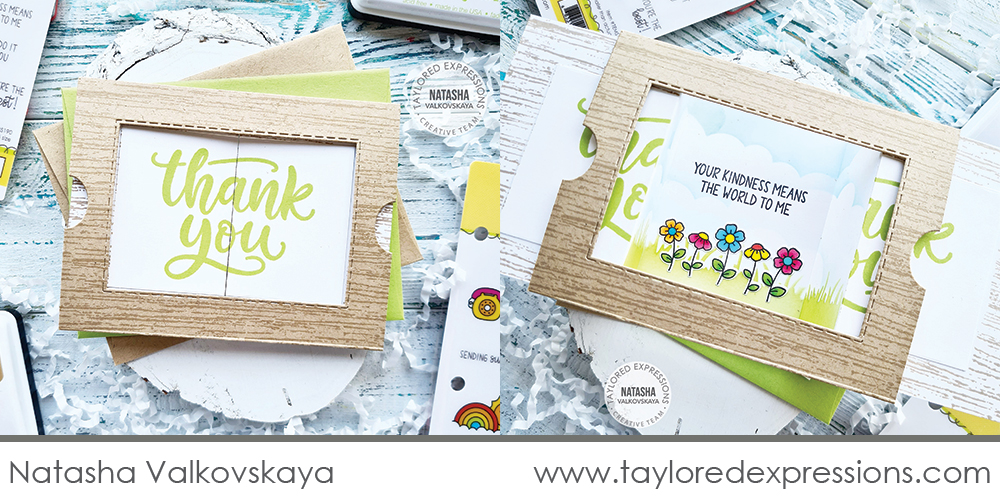
I love the wood frame effect that Natasha Valkovskaya did on her theater fold thank you card! She stamped the Wood Plank Background stamp onto Toffee cardstock with Toffee ink for the frame and added the ‘thank you’ from the Oh My Word – Thank You stamp set into the opening. Inside the card is the cutest scene that Natasha created with the Set the Scene – Clouds and Set the Scene – Grass Stencil Strips sets. She added flowers to the scene from the Bitty Borders stamp set and a sentiment from the Oh My Word – Thank You stamp set.
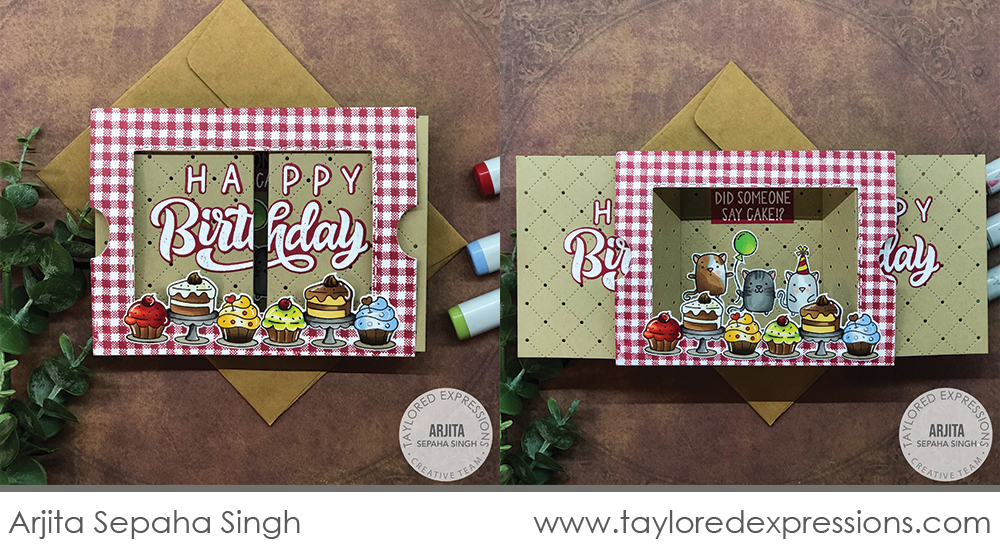
Even before you open this theater fold birthday card by Arjita Sepaha Singh, it’s already a party with the border of cakes across the bottom of the Theater Fold Frame die cut! The frame is stamped with the Gingham Check Background stamp and Arjita added texture to the Toffee Theater Fold Flaps using the Pierced Lattice Cutting Plate die. The ‘happy birthday’ sentiment from the Oh My Word – Happy Birthday stamp set is embossed in white on Cherry Pop cardstock and added into the frame opening. When the card is opened, the birthday party becomes even bigger with the cute cats from the Cattitude stamp set!
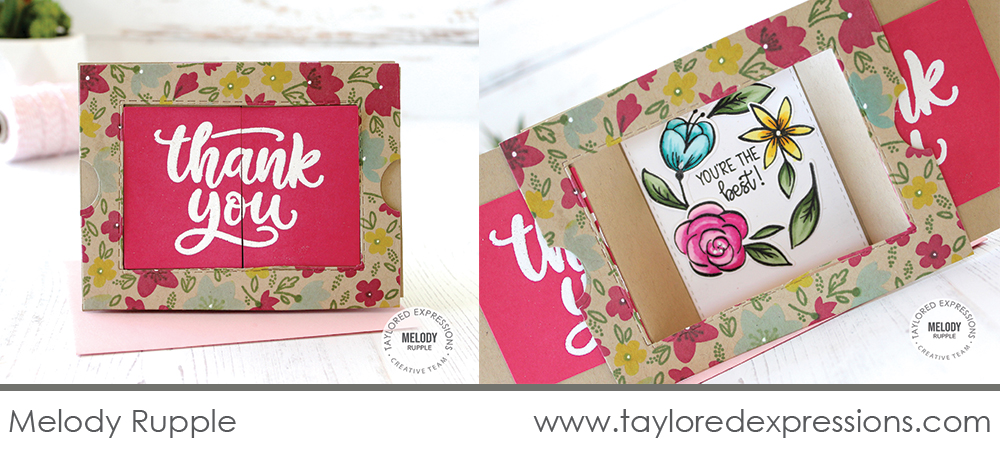
This last theater fold card by Melody Rupple is covered in flowers! She used the Best Buds Stamp & Stencil Combo set on Toffee cardstock for the frame and added Fruit Punch cardstock into the frame, embossed with the ‘thank you’ sentiment from the Oh My Word – Thank You stamp set. Opening the card reveals more colorful blooms inside that are from the Full of Flowers – Singles stamp set. I love how Melody arranged the flowers in a wreath around the ‘you’re the best’ sentiment!
That wraps up the inspiration for today! Make sure to stop back tomorrow for one more day of crafty inspiration using the new Theater Fold products that were released this week. I’ll have a video to share from Joy Baldwin and projects from the TE Creative Team – this time all non-interactive card designs using the new release products!
Did you know that you can subscribe to our blog and get our posts right in your inbox? Just sign up right HERE – that’s all there is to it to make sure you don’t miss any of our crafty inspiration!


