Sep 13, 2021
A Sneak Peek of Our NEW Birthday Release!
Hey, crafty friends! It’s Taylor here today! I hope you had fun participating in our birthday challenges through the weekend! It’s been fun to see all of the entries so far – so much creativity! Remember… you have until Friday, September 17th to upload your card to the appropriate challenge album HERE. And now it’s time to kick off another week of our 13th birthday celebration! This week we’re launching our new birthday products and we’ve got lots of fun planned – scratch-off discounts & freebies, Teal tickets (think Willy Wonka golden ticket!) for FREE registration to our virtual Stamp Joy event, two Live videos, and more!
As always, the Creative Team and I have been busy creating projects with the new birthday goodies from this release (you saw lots of peeks on the TE Creative Team challenge cards!) which includes 19 new products; new stamps, dies, stencils, and colorful embellishments!
Here’s what you’ll find on the blog this week:
- Our blog posts today, Tuesday, and Thursday will feature a video showcasing the new release products. Be sure to tune in!
- New products will be available for purchase starting tomorrow (Tuesday, September 14th) at 9am Central Time at the TE webstore!
- Birthday scratch-off ticket included with every order – and every ticket is a winner!
- 13 randomly selected orders placed between Sept. 14th – 19th will receive a TEAL ticket (think “Golden Ticket” from Willy Wonka!). If you receive a teal ticket in your order you’re entitled to free registration for our Stamp Joy virtual event in the Spring!
- Last, but certainly not least – take advantage of our special offer (details below)!
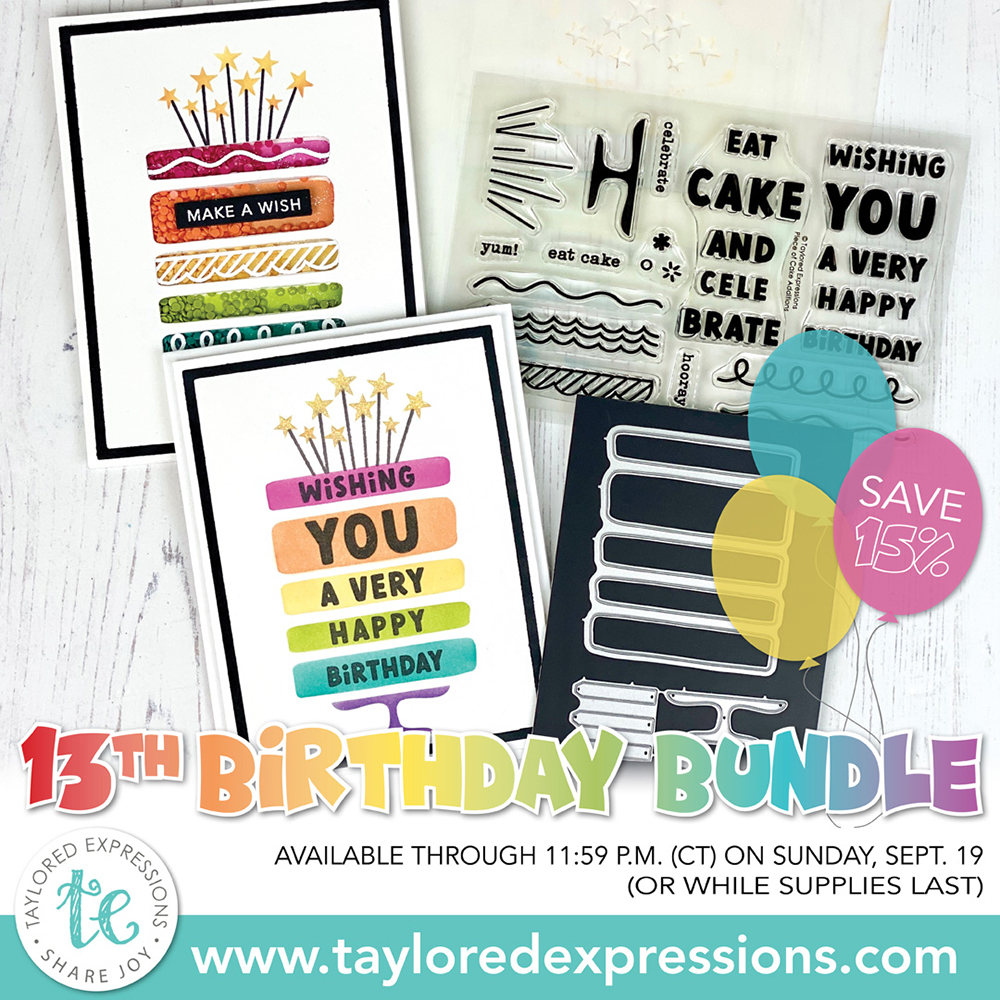
Starting tomorrow (Sept. 14th) through Sunday, September 19th, you can get our 13th Birthday Bundle for 15% off! The bundle includes the Piece of Cake Layered Stencil set, Piece of Cake Additions clear stamp set, and Piece of Cake die collection. The discounted bundle price is only available through 11:59PM Central Time on Sunday, September 19th or while supplies last.
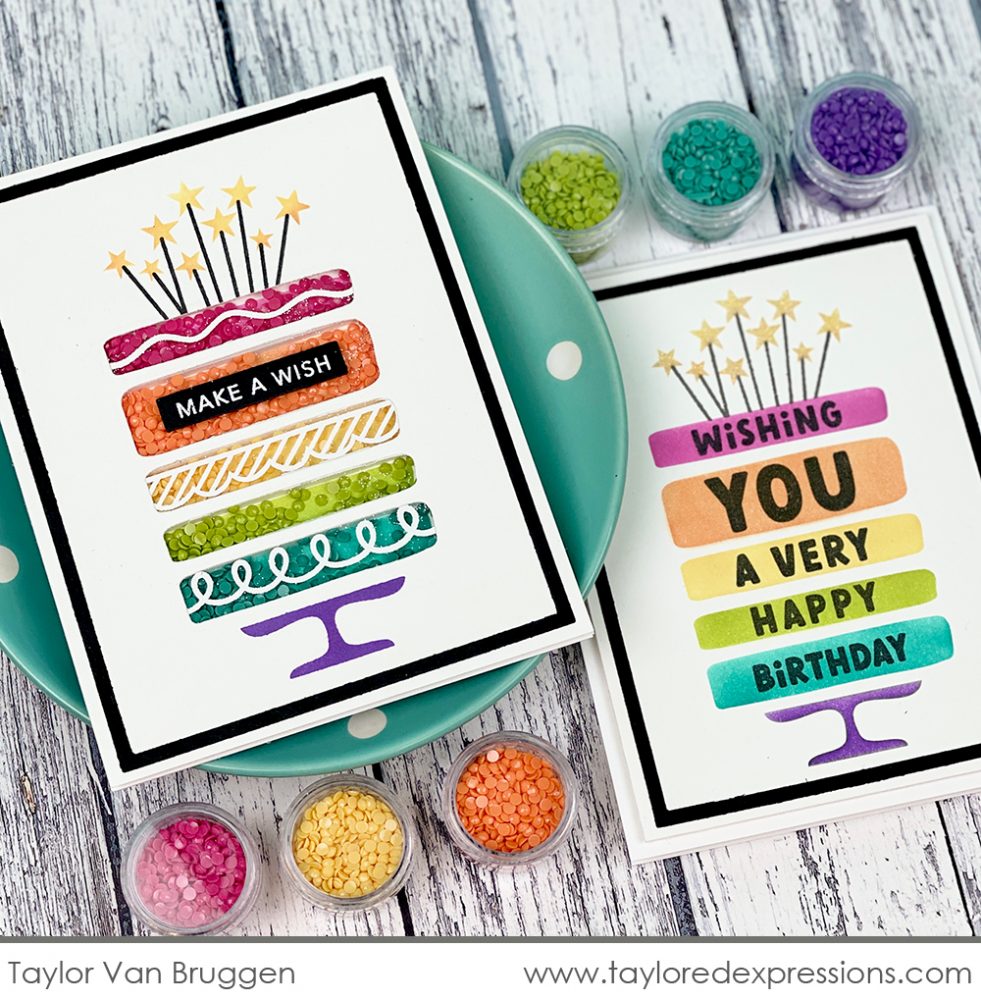
In the video below I’ll walk you through how to use the Piece of Cake collection to create two similar cards. One is more simple and the other a stepped up shaker card!
The simple card on the right is one that would be easy to reproduce in many different color combinations. While it’s no surprise that a rainbow cake was my first choice, an ombre cake in several shades of blue would be the perfect way to personalize this for a boy’s birthday!
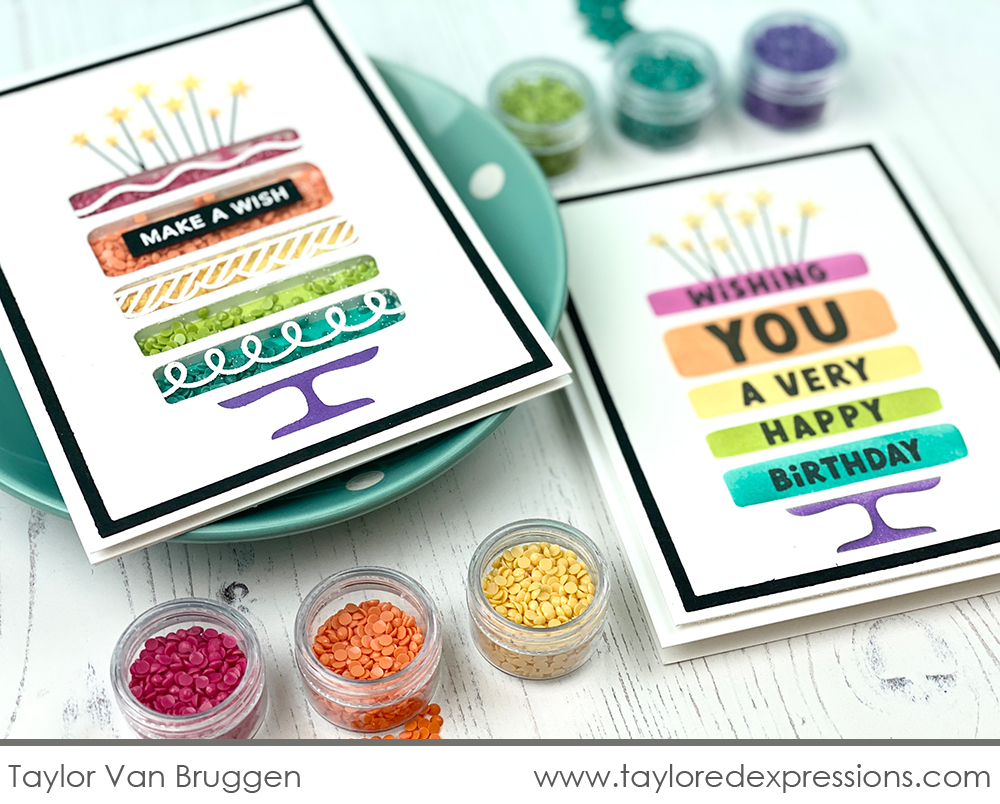
The shaker card was a bit more time-consuming but totally worth the effort with the fun result! The shaker element features our new Tiny Diamonds which you can read more about below!
Now let’s settle in and take a peek at all of the new Birthday release products along with inspiration from the TE Creative Team!
The first group of products is what’s featured in our 13th Birthday Bundle I shared about above and used in my video projects:

Create fun, colorful cards for every birthday with our Piece of Cake Layered Stencil set. The set includes two stencils and creates a fun layered cake on a stand along with stars or flames that you can add at the top of the cake. Fun to use with TE Bitty Blender Brushes (sold separately), each stencil includes etched alignment guides for an A2-sized card to ensure your design lines up perfectly on your project.
Don’t want to get our your blender brushes? Then cut out a layered cake, candles, and cake stand with the Piece of Cake die collection. Add all of the details to your stenciled or die-cut birthday cake designs with the Piece of Cake Additions clear stamp set. There are two larger sentiments perfectly spaced to stamp on all of the cake layers at once, details to decorate the cake, and a few tiny typed birthday sentiments!
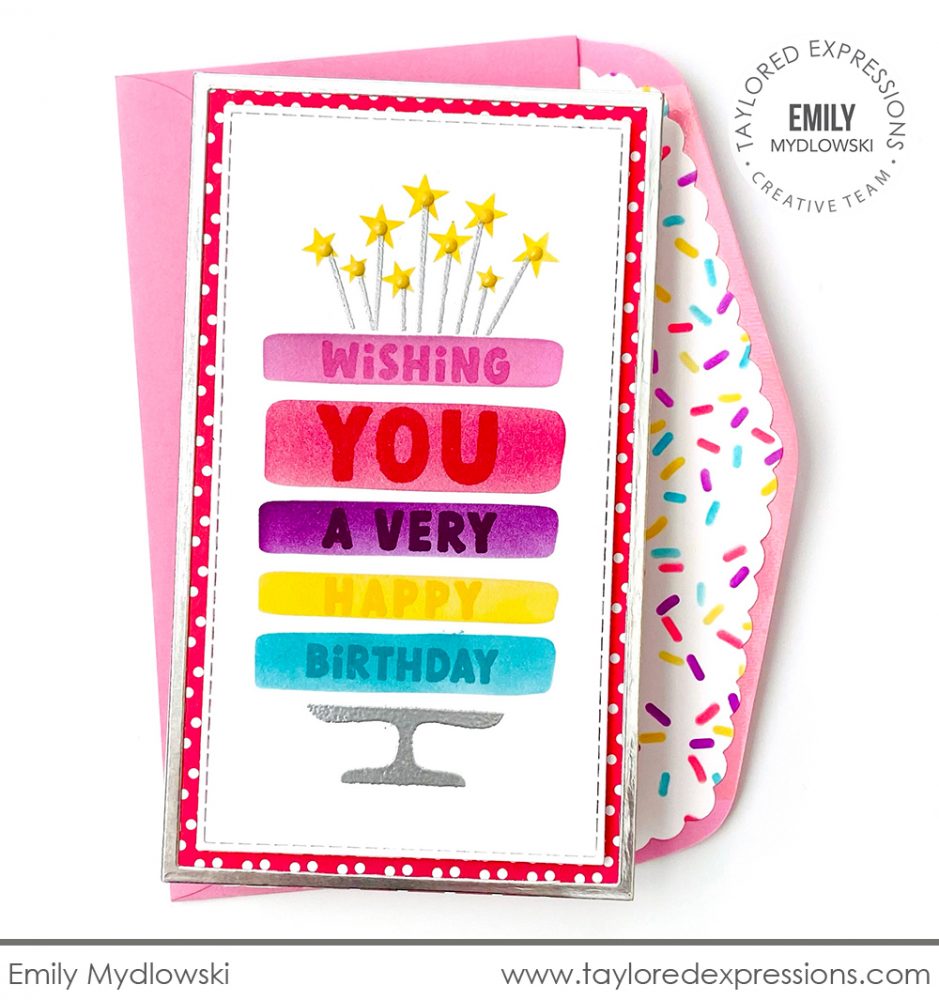
You saw this card created by Emily Mydlowski for the TE Birthday Challenges, but I want to share a little more about it! Emily used the Piece of Cake Layered Stencil set to create her cake in a rainbow of colors and then added the ‘wishing you…’ sentiment from the Piece of Cake Additions stamp set. I love how she added the words in a similar color as each of the cake layers, just in a darker tone. The cake stand and candles are embossed in silver and Emily added Tiny Diamonds to the stars for an extra touch of dimension and sparkle! You learn more about that cute and colorful confetti that is stenciled on the Mini Slim Scalloped Envelope Liner a little bit later in this post!
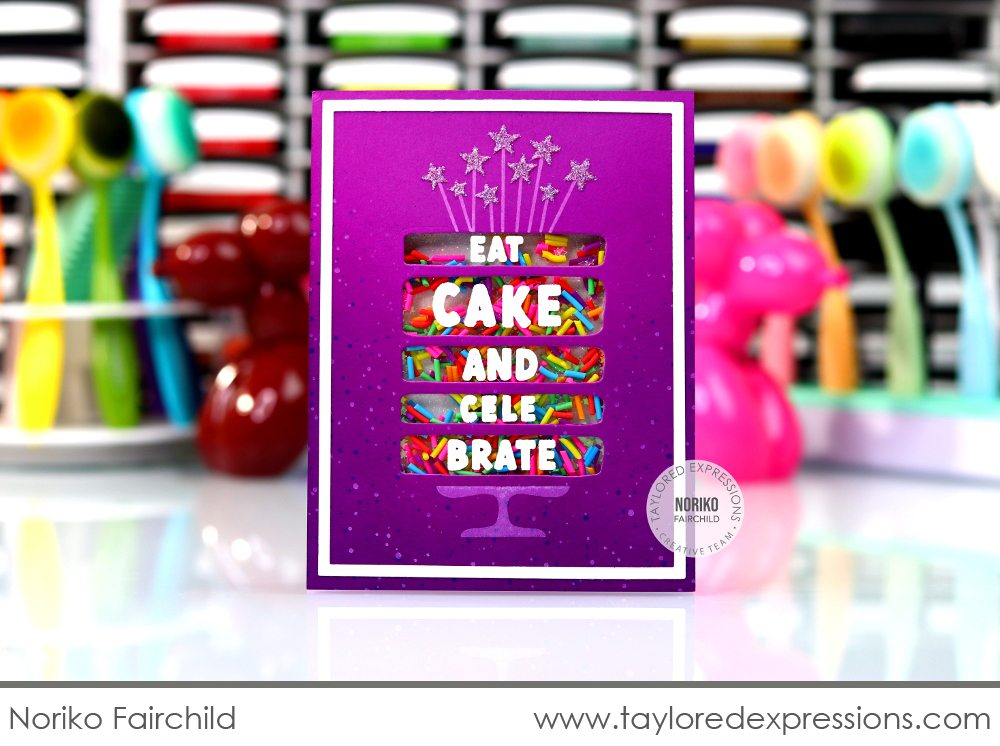
Noriko Fairchild used the Piece of Cake die to create a shaker card, similar to how I showed in my video above. She embossed the ‘eat cake…’ sentiment onto heat-resistant acetate and filled her shaker with a cute new Bits & Pieces embellishment that look like actual cake sprinkles (keep scrolling to learn more!) The Plum Punch background really makes this card pop and I love how Noriko added blending and splatters at the bottom of the background for extra dimension and texture.

It’s not a party without party hats! Use the new Party Time Stamp & Stencil Combo set to fill up your birthday cards with party hats and confetti. The set includes a background stamp, two stencils to add the hat patterns, tops, and brims, and one stencil to add confetti in between the hats. You can create a full festive background or use the coordinating Party Time dies to cut out the hats and use them individually.
Our Fill in the Blank – Birthday Cling & Clear Combo is a fun new twist on our popular Cling & Clear collection. The set features a variety of sentiments to celebrate a birthday: Celebrate, Party, and Yay! Each word or phrase is missing a letter that you can fill in with a party hat to create a one-of-a-kind card! Accent the large sentiments with one or more of the sentiment phrases included in the clear stamp set.
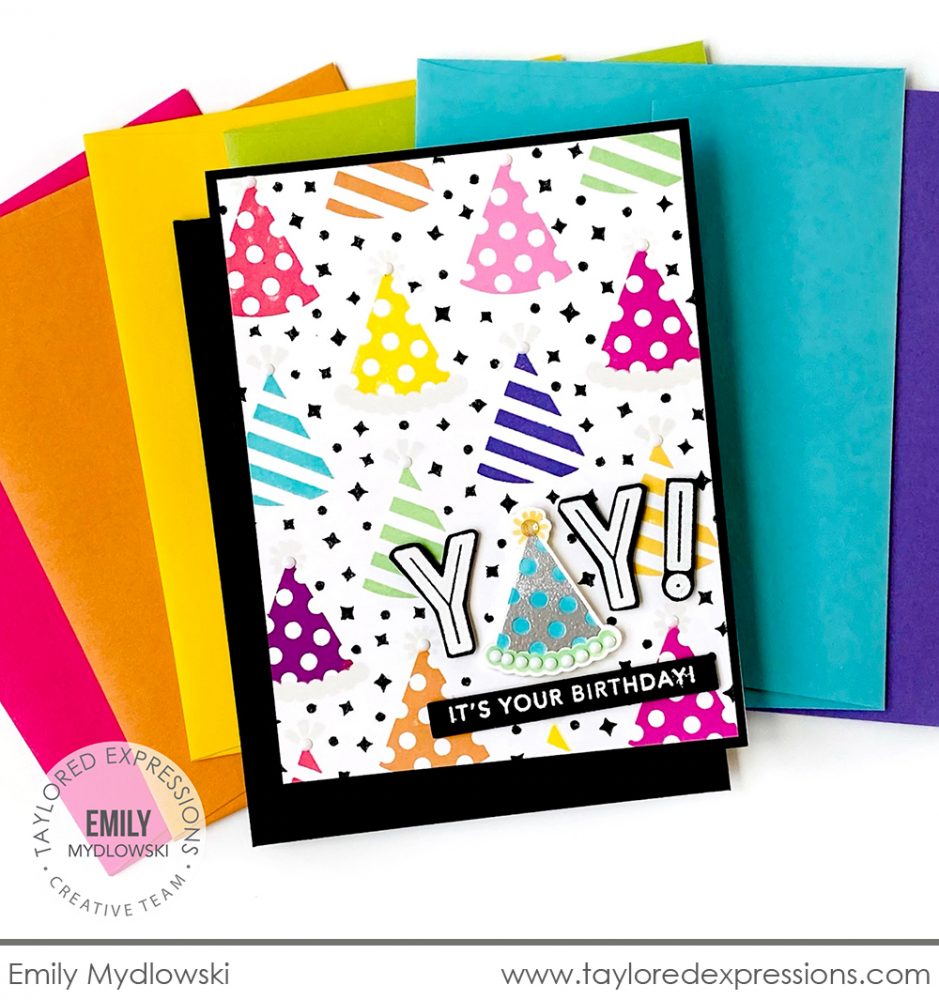
Emily Mydlowski used mini ink cubes to stamp a whole rainbow of hats with the Party Time Stamp & Stencil Combo set! She added the party hat tops and brims with Sea Salt ink, stenciled the confetti with Glitter Grab and Oreo glitter, and added Tiny Diamonds to the tops of the hats. The sentiment is created with the Fill in the Blank – Birthday Cling & Clear Combo set and she used another party hat for the ‘A’ in the ‘Yay!’
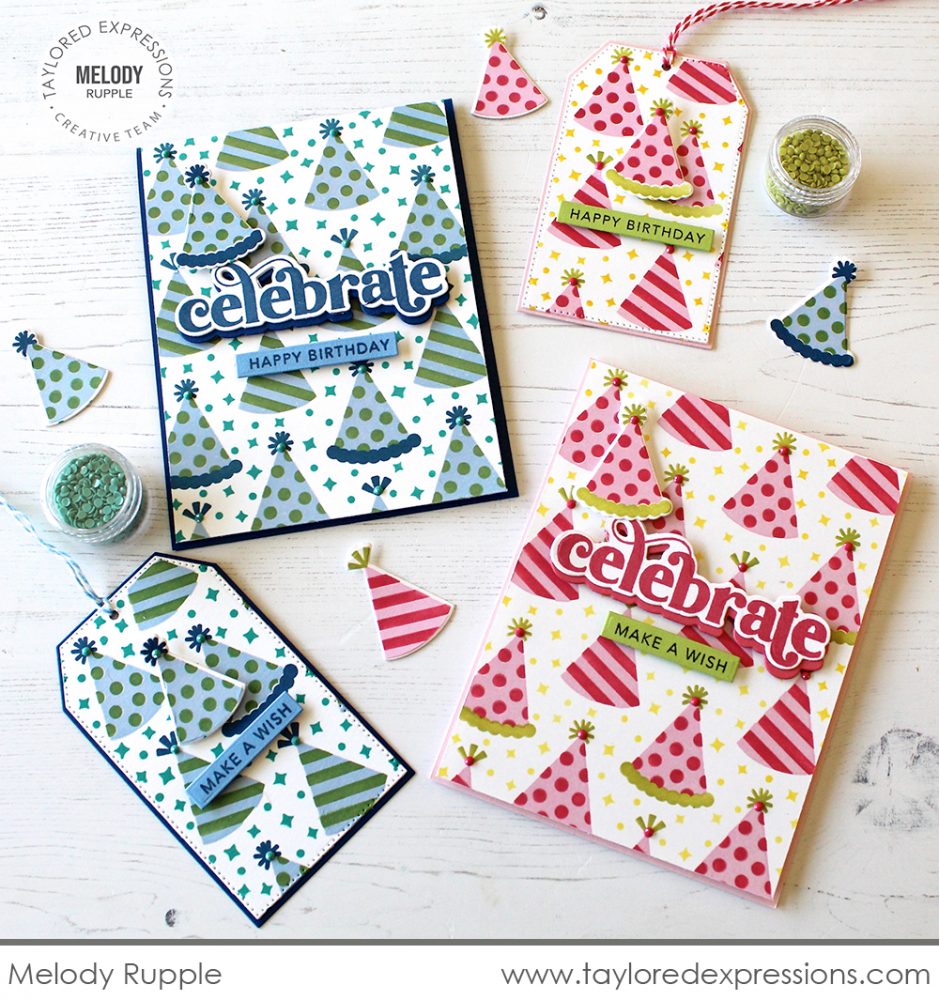
I love the two color combinations that Melody Rupple used with the Party Time Stamp & Stencil Combo set! For the card and tag on the left, Melody used Gumball, Blueberry, and Peapod ink for the hats and Blue Raspberry ink for the confetti in the background. For the card and tag on the right, Melody used Strawberry Milkshake, Fruit Punch, and Lime Zest ink for the hats and Lemon Meringue ink for the confetti. I love the extra hats that are popped up near the sentiments (you’ll learn more about those below!) and I spy more Tiny Diamonds added to the tops of the hats!

The Celebrate You Cutting Plate definitely makes a statement! The sentiment cascades down an A2 card front and you can use it as a background or let it take center stage on a birthday card – or a card to celebrate someone special for any occasion!
Stamp 10 sentiments that celebrate all things birthday with the new Mini Strips – Birthday stamp. Use the sayings individually or combine them together for more possibilities! Cut all of the sentiments with one pass through your die cut machine using our innovative alignment guides with the coordinating Mini Strips or Mini Strips – Asymmetrical dies.
Let everyone know it’s time to celebrate with the Get the Word Out – Celebrate stamp. Layer it over the Get the Word Out – Celebrate Shadow die to add dimension with a variety of materials that are easy to cut using this Mixed-Media die.

Heather Nichols used the Celebrate You Cutting Plate die to create a colorful shaker card! She did a rainbow blend using her Blender Brushes on a piece of Sugar Cube cardstock using Lollipop, Candy Corn, Pineapple, Lime Zest, and Blue Raspberry inks and layered the die-cut over a piece of Toffee cardstock. The shaker card is filled with lots of Bits & Pieces embellishments: Clear Drip Drops, White Rhinestones, Iridescent Rhinestones, and Sparkly Stars. Heather also added a few sentiment strips to her card stamped with the new Mini Strips – Birthday stamp with Sugar Cube ink on Blue Raspberry cardstock and cut out with the Mini Strips – Asymmetrical die.
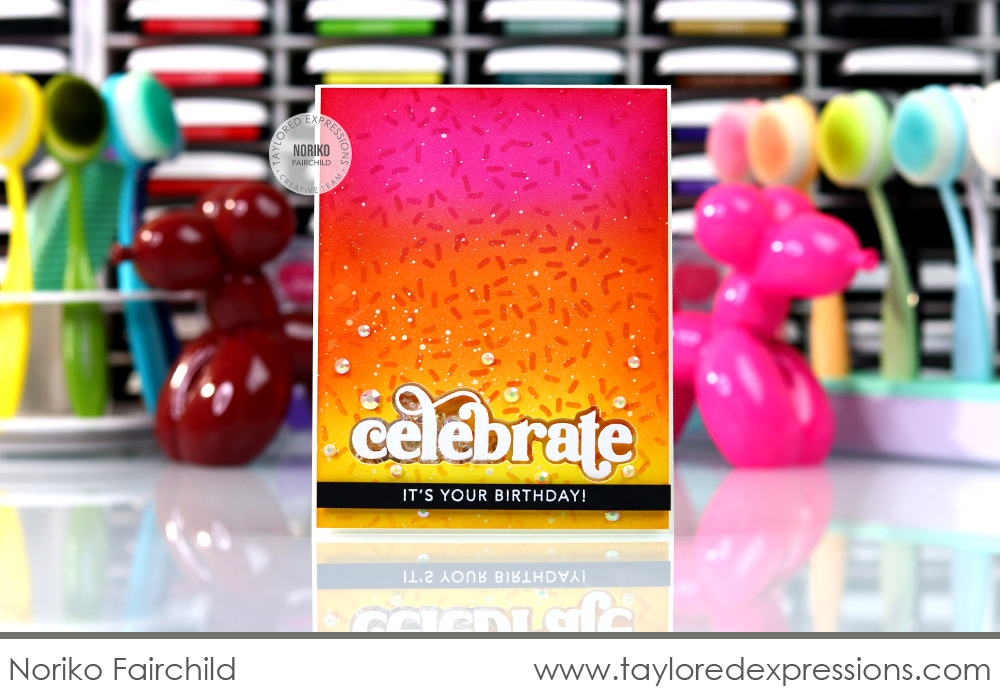
Noriko Fairchild also created a birthday shaker card, but using the new Get the Word Out – Celebrate and Get the Word Out – Celebrate Shadow dies (you also saw this card for the TE Birthday Challenges!) She cut out the shaker window using the shadow die from a background that is color blended with Pineapple, Candy Corn, and Lollipop inks and then stenciled with a new stencil I’ll share more about in just a bit! Underneath the ‘celebrate’ word is a sentiment from the new Mini Strips – Birthday stamp that is embossed in white on an Oreo cardstock strip.

Create cards featuring sweet treats to celebrate birthdays and more with our Sweet Shoppe Stencil & Clear Combo set! The set includes eight layering stencils – four that work together to create a larger single cupcake and four that make a smaller row of cupcakes – plus 10 clear stamps to accent the cupcakes and make them come to life. Use the coordinating Sweet Shoppe dies to cut out the larger cupcakes and the whole row of tiny cupcakes.
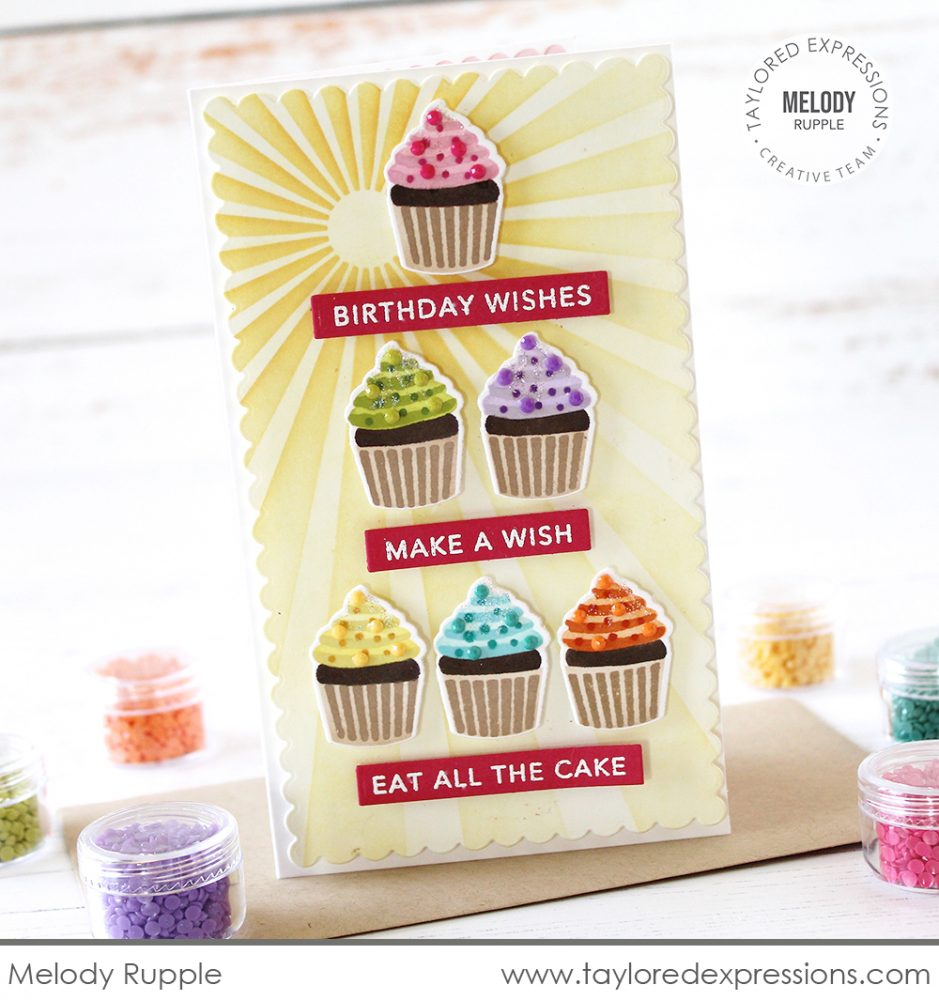
Look at this pile of mini rainbow cupcakes on this Mini Slim card created by Melody Rupple! The cupcakes are stenciled with the stencil strips for the small cupcakes in the Sweet Shoppe Stencil & Clear Combo set and then Melody added details with the clear stamps in the set. She also added glitter and Tiny Diamonds to decorate the cupcakes and added them to a background stenciled with the Mini Slim Sunray stencil. The sentiment strips are embossed in white on Cherry Pop cardstock using the new Mini Strips – Birthday stamp.

We can’t wait to introduce you to Chip and Charlie! This cute raccoon and bird duo are having a birthday party and you are invited to come along with the new Chip & Charlie Party Stamp & Die Combo set. You’ll love coloring the cute scene with your favorite coloring medium to send birthday wishes to your loved ones!
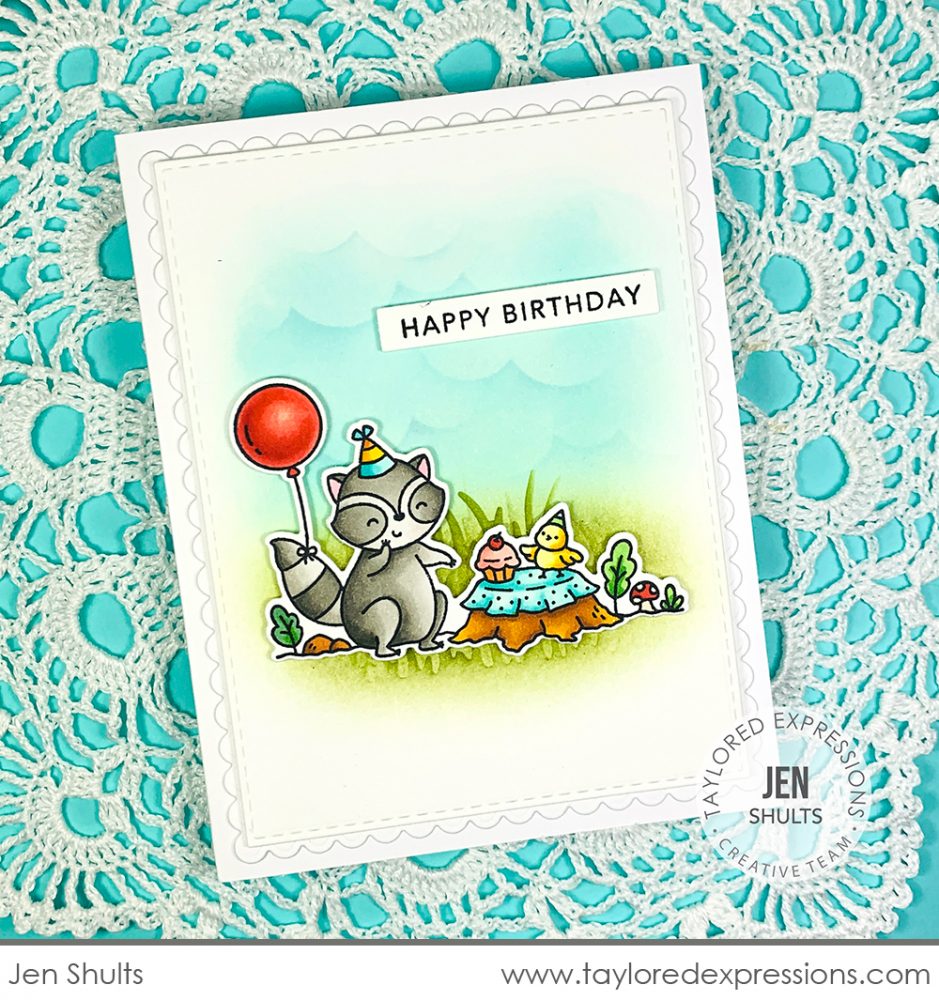
Jen Shults colored the adorable birthday scene from the Chip & Charlie Party Stamp & Die Combo set using Copic markers. She set the colored image onto a background stenciled using the Set the Scene – Clouds Stencil Strips for the sky and the Set the Scene – Grass Stencil Strips for the ground. Jen finished things off with the ‘happy birthday’ sentiment from the Mini Strips – Birthday stamp that is cut out using the Mini Strips die.

Create fun little wraps for lollipops, chocolate squares and other goodies with our Present Treat Wrap dies. The set of 2 dies work together to create a folding wrap in the shape of a present, complete with a bow! Personalize them even more with our Itty Bitty Sentiments stamp set and Itty Bitty Tags 1 and Itty Bitty Tags 2 die collections (sold separately).
Add a random pattern of sprinkles in various colors with the Sprinkles Rotating Stencil. Perfect for cards to celebrate birthdays and more, this stencil allows you to apply one color, rotate it 90 degrees, apply color again, rotate it 90 degrees, apply color again, etc. until you have a multi-colored sprinkles pattern without any overlapping pieces!
Add funny and snarky sentiments to your cards that will have you laughing out loud with our The Inside Scoop – Snarky Birthday stamp set. Part of our The Inside Scoop collection, this set includes a variety of sentiments that are perfect to use on the inside of your cards as well as the outside.
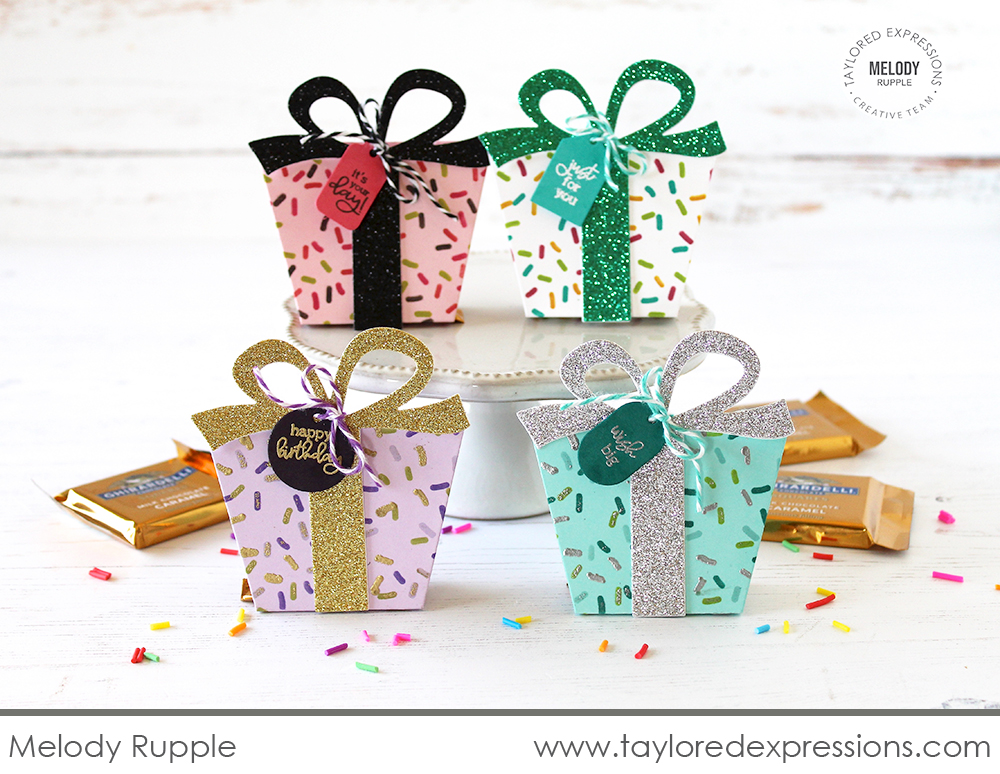
How cute are these sprinkle covered wraps that Melody Rupple created with the Present Treat Wrap die? She stenciled the Sprinkles Rotating Stencil onto several cardstock colors for the main part of the wrap and then added the bows that are cut out from glitter cardstock. Melody added chocolate square candies into the wraps, tied them closed with twine, and added a tiny tag to each one that are cut out using the Itty Bitty Tags 1 die collection and stamped with sentiments from the Itty Bitty Sentiments stamp set. These present wraps are perfect for party favors!
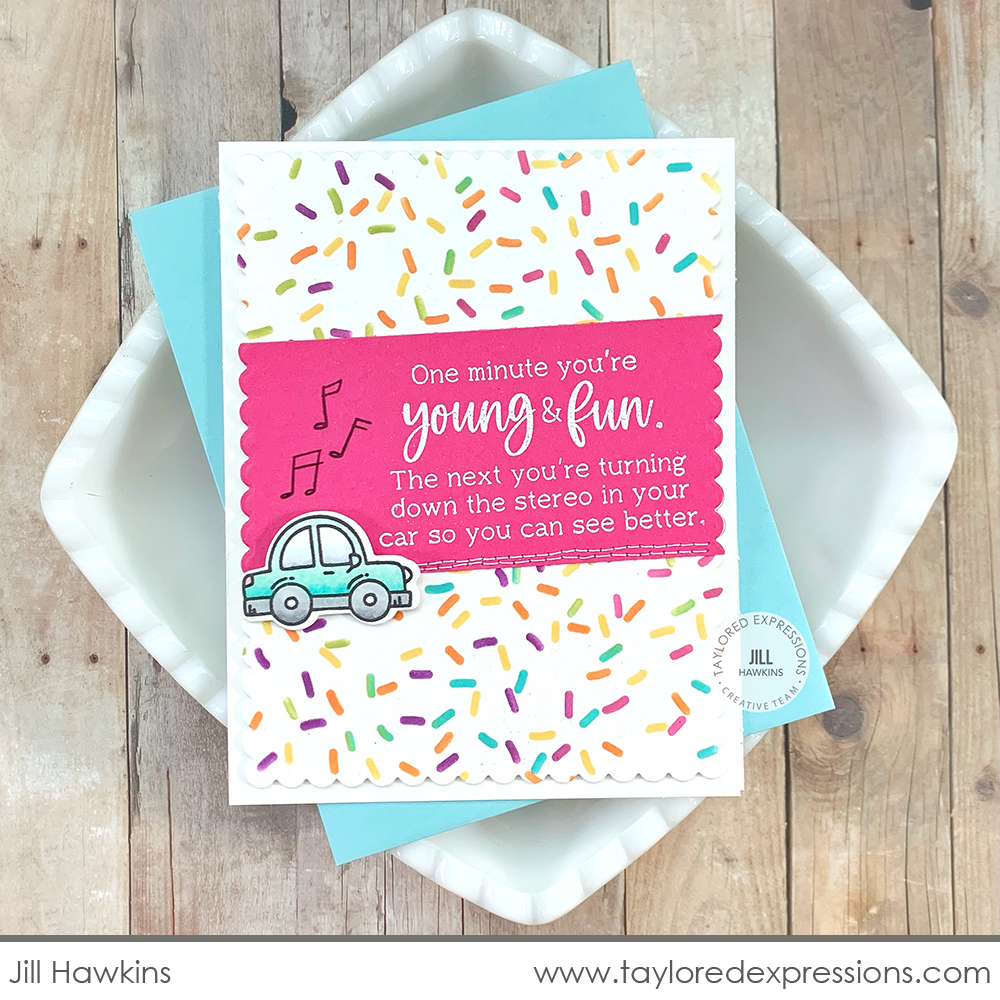
The new sentiments from The Inside Scoop – Snarky Birthday stamp set are just too fun and there are definitely people in my life that will appreciate and find humor in these! Jill Hawkins added one of the snarky sentiments on a card featuring a rainbow of sprinkles stenciled with the new Sprinkles Rotating Stencil using Lollipop, Candy Corn, Pineapple, Lime Zest, Cookie Monster, and Jelly Donut inks (you can use more that 4 colors of ink by applying more than one color with each rotation!) The cute little car image is from the Punny Notes stamp set and is a perfect pair with the sentiment that Jill chose!
And finally for today, here are new embellishment offerings for this release. You have seen peeks of these used on the TE Creative Team projects I shared above!

Instantly add a touch of color and fun to your cards and crafts with Bits & Pieces – Sprinkles. Perfect to use as a fun filling with shaker cards, the confetti consists of cupcake confetti style pieces in a rainbow of colors.
Introducing Tiny Diamonds***! These tiny gems will add sparkle and color to step up your projects and they’re perfectly coordinate with a selection of our favorite TE colors! We’re excited to offer two collections (nine colors in each set). The Tiny Diamonds – Bold set includes Cherry Pop, Lollipop, Strawberry Milkshake, Candy Corn, Pineapple, Lime Zest, Cookie Monster, Jelly Donut, and Sugar Cube. The Tiny Diamonds – Pastel set includes Fruit Punch, Guava, Pink Champagne, Peaches ‘n’ Cream, Potato Chip, Mint Julep, Confetti Cake, Blue Raspberry, and Lavender Glaze.
***Please note that our full shipment of Tiny Diamonds is still on its way to us. We will launch with a very limited quantity of Tiny Diamonds, but we expect more arriving in the next week. If the Tiny Diamonds are sold out, make sure to sign up for restock notifications and you’ll be the first to know when our full shipment arrives! We thank you for your patience!
Thank you for stopping by for our new Birthday release sneak peeks! Do you have a favorite new product!? Our new Birthday release will be available for purchase starting tomorrow at 9am Central Time! Stop back tomorrow for more inspiration from the TE Creative Team and a new video from Heather Nichols. See you then!


