Sep 27, 2021
NEW Christmas Release! A Sneak Peek!
Hey, crafty friends! It’s Taylor here today! It’s beginning to look a lot like Christmas here at Taylored Expressions and all around the crafty community! It’s the most wonderful time of the year and I’m so excited to share what we’ve designed to make your holiday crafting fun as we all spread joy throughout the world this holiday season.
The Creative Team and I have been busy creating projects with our new festive goodies from this release which includes over 30 new products; new stamps, dies, stencils, our exciting new Create-in-Quads Layered Stencil concept that will make card mass-producing a breeze, multiple new Foil It panels, and new glitter paste to add sparkle to your holiday projects!
Here’s what you’ll find on the blog this week:
- Our blog posts today, Tuesday, Thursday, and Saturday will feature a video showcasing the new release products. Be sure to tune in!
- New products will be available for purchase starting tomorrow (Tuesday, September 28th) at 9am Central Time at the TE webstore!
- Get a chance to win it before you can buy it by commenting with your answer to my Question of the Day today only (located at the bottom of this blog post)
- Last, but certainly not least – take advantage of our special offers – we have two happening for this release (details below)!
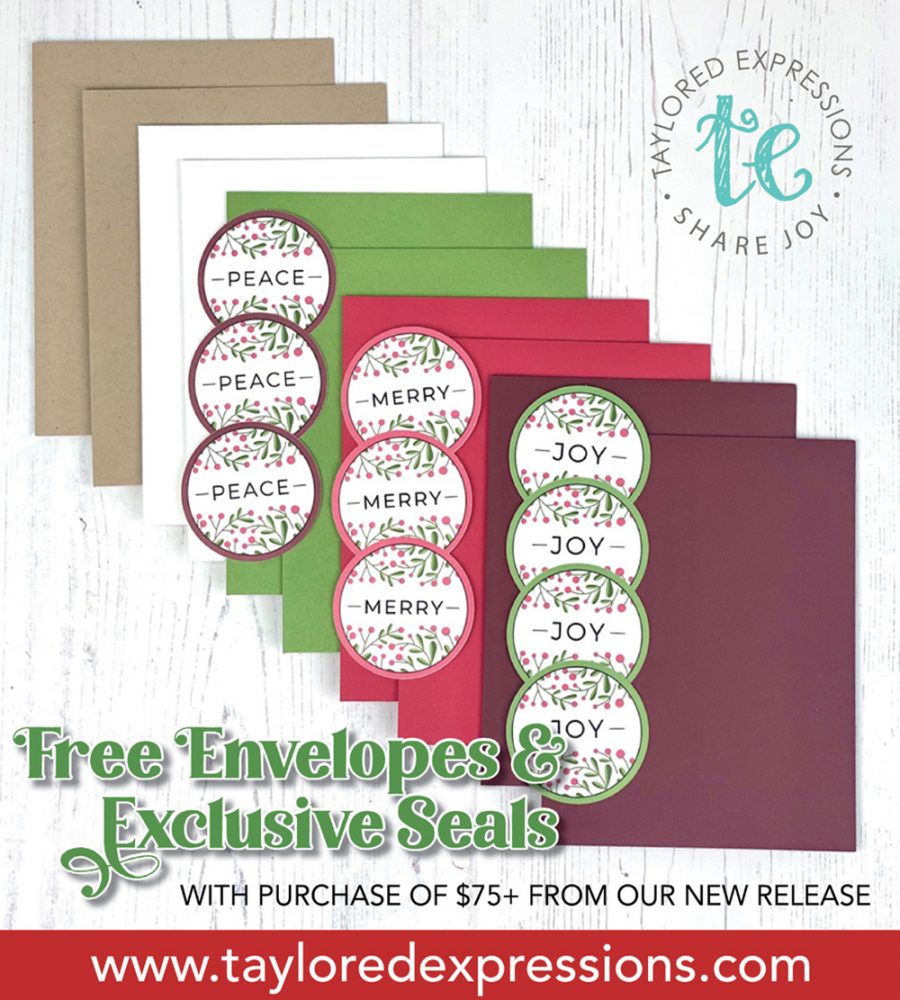
With any purchase of new release products of $75 or more, you will receive a FREE pack of envelopes and custom Mistletoe envelope seals. The pack includes 10 envelopes (2 each of Mulled Wine, Cherry Pop, Peapod, Sugar Cube, and Toffee) and 10 exclusive envelope seals (these seals are not available to purchase). This offer is valid tomorrow through 11:59PM Central Time Sunday, October 3rd, or while supplies last. If your order qualifies you will see the free item in your cart prior to checking out. If you think your order should qualify and you do not see it added to your cart, please contact customer service before checking out.
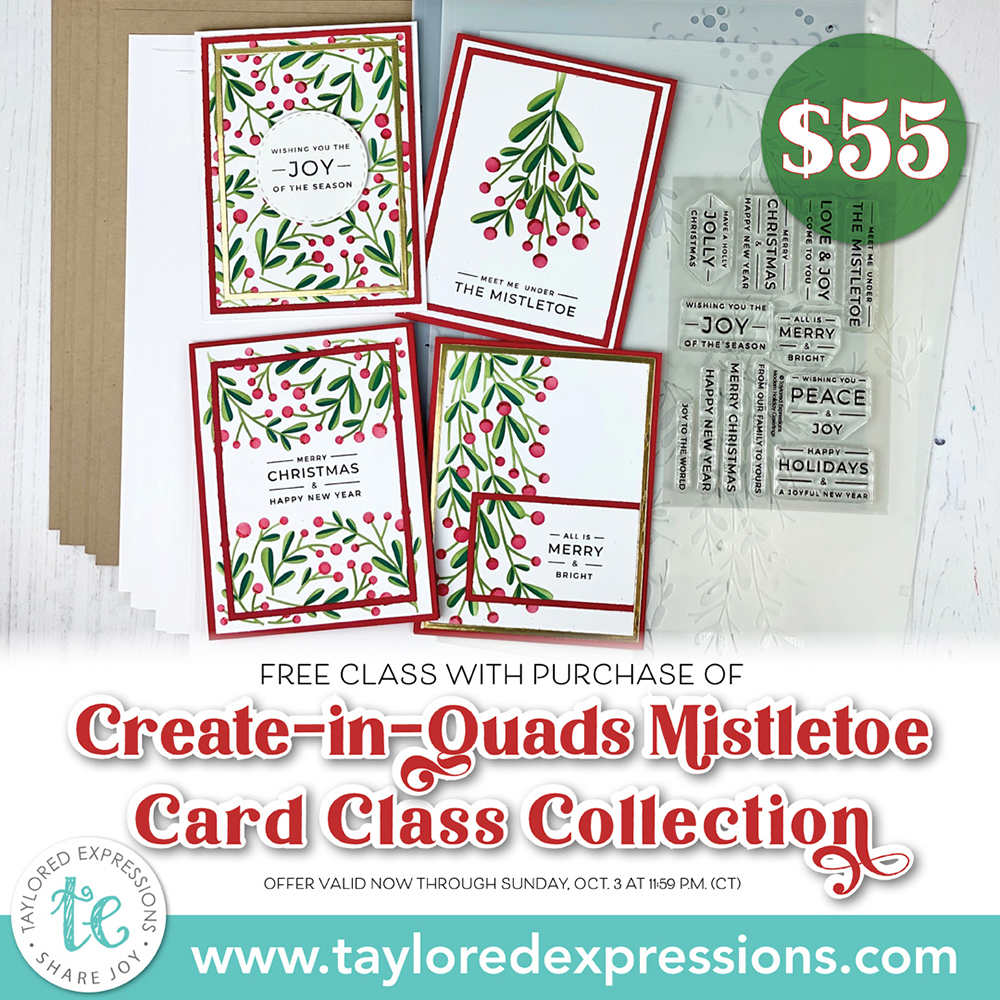
In addition, when you purchase the Create-in-Quads Mistletoe Card Class Collection through Sunday, October 5th, you will receive access to a free exclusive 8-card video craft-along class with Taylor and Heather! The bundle includes the following products: Create-in-Quads – Mistletoe Layered Stencil set, Clearly Crafty Modern Holiday Greetings stamp set, Create-in-Quads Paper Pack – Sugar Cube, and Create-in-Quads Paper Pack – Toffee.
This mini version of our Online Crafty Classes is a great way for you to put your new holiday goodies to use right away making eight (!) different cards at your own pace! Watch the videos as often as you like and learn some new tips and tricks while discovering inspiration for more designs!
Once you complete your purchase, you will receive an email (separate from your order confirmation email) with a link to the exclusive class content on YouTube.
Although Taylor and Heather will recommend colors for ink and cardstock, you can use anything you have to make these projects uniquely yours!
Hurry! This offer is only valid through 11:59 pm (CT) on Sunday, October 3rd, or while supplies last.

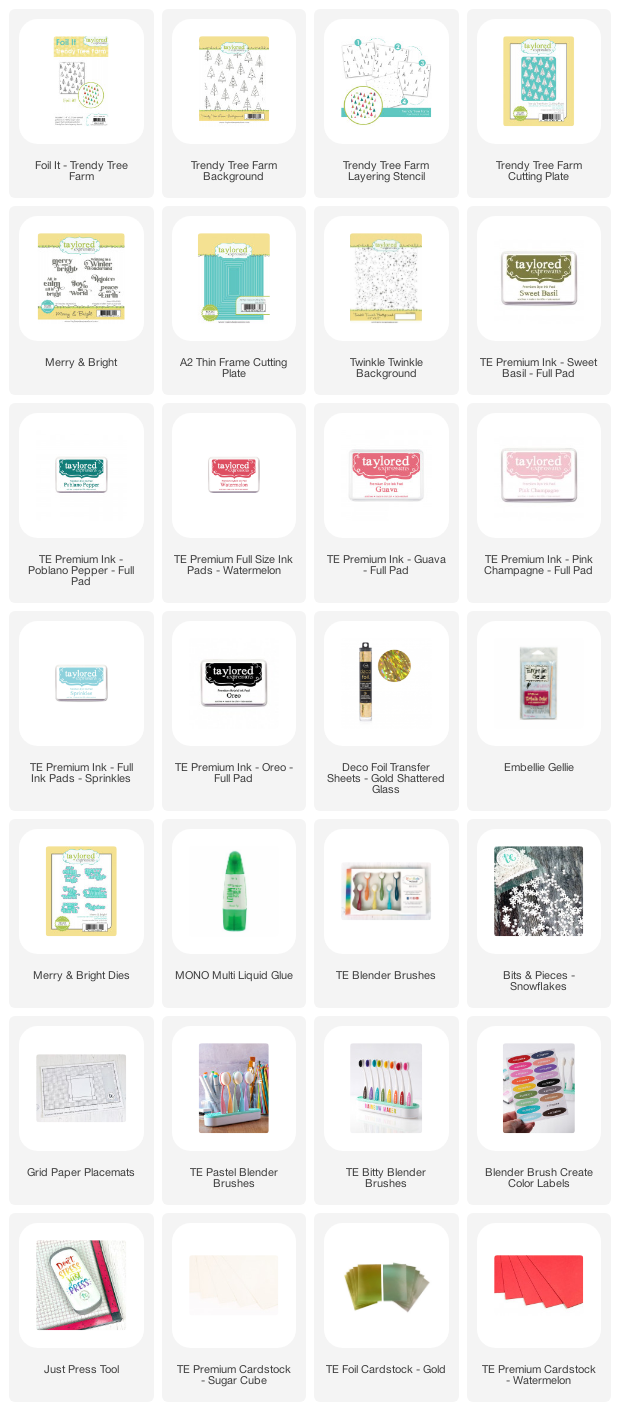
Today’s video features our new Trendy Tree collection and Merry & Bright sentiment set. In the video, I share a how-to using our pre-printed Foil It cards to create the beautifully foiled design on the trees. The layering stencil can be used to add color to the trees in both full and half-trees.
I used the coordinating die to create a design within the negative space of the tree pattern. I die cut the cutting plate from Salt Water Taffy cardstock and stamped the Twinkle Twinkle Background over the top. The trees are recessed within the design when you adhere the cutting plate over the top. It’s a quick and simple way to add interest to the design!

For the second card, I kept it simple and added a thin frame cut from Gold Foil cardstock to match the gold foil on the trees. To finish off both cards, I set off the sentiment over the top of a vellum circle and embellished the card with Bits & Pieces – Snowflakes.

Now let’s settle in and take a peek at all of the new Christmas release products along with inspiration from the TE Creative Team!
First up are the products that are available as part of the Create-in-Quads – Mistletoe Class Collection that I shared above:

Mass-producing cards just got so much easier with our innovative Create-in-Quads concept! The Create-in-Quads – Mistletoe Layered Stencil set includes four 8.5″ x 11″ stencils that will create four different card fronts all at one time, featuring mistletoe leaves and berries. Align an 8″ x 10.5″ piece of cardstock using the etched alignment guides, stencil the designs, trim into quarters, add a sentiment, and your cards are ready to go!
The beautiful seasonal sentiments in the Modern Holiday Greetings clear stamp set are perfect for this modern mistletoe pattern. The set includes 12 sentiments in a classic font that will coordinate with so many different project styles.
We’re offering convenient Create-in-Quads Paper Packs available in Sugar Cube or Toffee. Each pack includes 10 sheets already cut to the 8″ x 10.5″ size that you need for the Create-in-Quads concept. Pick your favorite or grab both colors and start crafting!
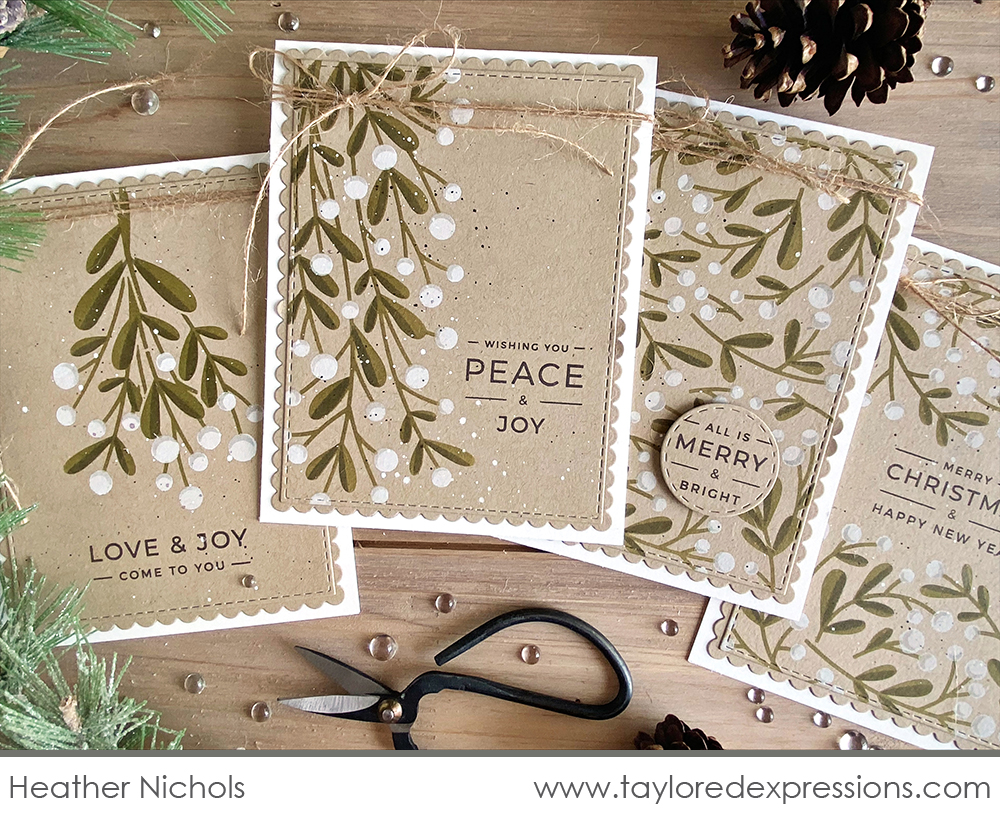
If you purchase the Create-in-Quads Mistletoe Card Making Collection I mentioned above, you’ll also learn how to create this set of cards by Heather Nichols in the exclusive class. Creating on Toffee cardstock gives you a much more rustic look and I love how Heather did the berries using Sugar Cube ink since technically mistletoe berries are actually white! Heather cut out the stenciled backgrounds using a Stitched Rectangle Stacklets die, layered them onto a Petite Scallop Rectangle Stacklets die to add the tiny scallop border around the edge, and then finished off the cards with a bit of burlap twine tied in a bow around the top.

Come pick out your Christmas tree with the Trendy Tree Farm Background stamp. The background image features cute and whimsical Christmas trees that will fill up your card front. Cut out all of the trees from the background using the Trendy Tree Farm Cutting Plate die.
Add color to the trees with the Trendy Tree Farm Background stamp using the treetop stencils in Trendy Tree Farm Layered Stencil set. Or you can use all four stencils in the set on their own to create a color block tree design for your projects.
Add foiled accents to the cards you create with our Foil It – Trendy Tree Farm panels. Simply top the panel with the foil of your choice and run it through your foiling machine and use the coordinating stencils to add color. Foil It – Trendy Tree Farm is a set of 12 pre-printed panels on TE Premium Cardstock (each measures 4″ x 5 1/4″).
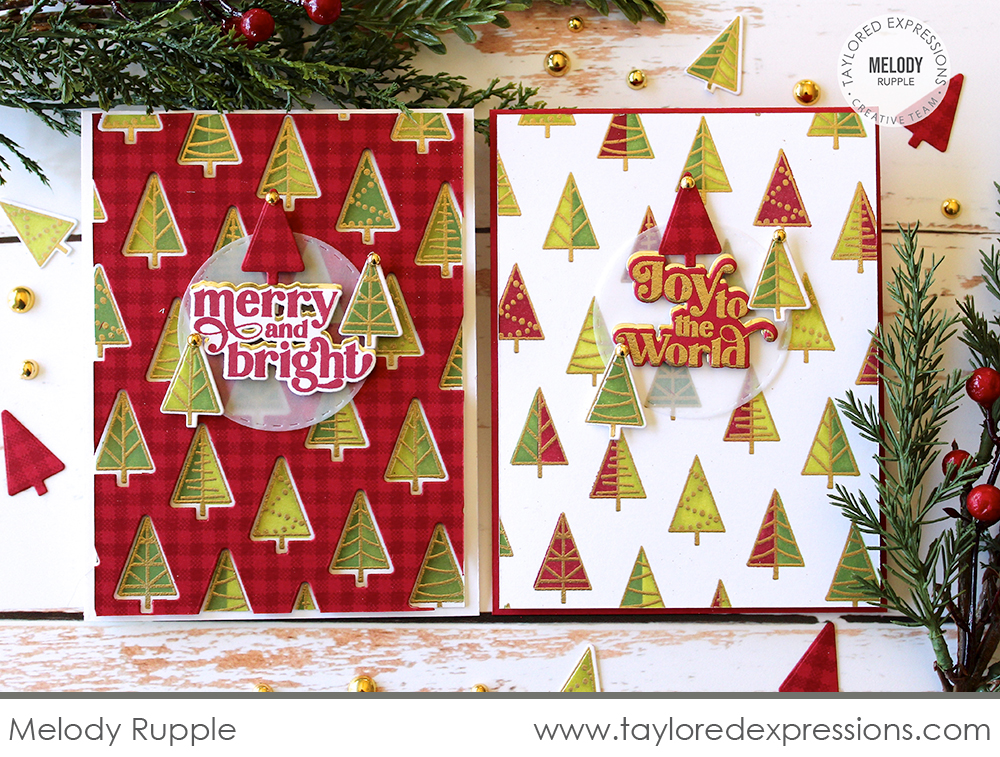
You saw me use the Foil It panels in the video above, but Melody Rupple embossed the Trendy Tree Farm Background stamp in gold for a beautiful look! She added color to the trees using the Trendy Tree Farm Layered Stencil set, creating a few panels to use for card backgrounds and cutting trees out from another panel to use individually. For the card on the left, Melody cut out the Trendy Tree Farm Cutting Plate from a piece of Cherry Pop cardstock that is stamped with the Gingham Check Background stamp and layered it on her card so the colored trees show through the openings – I love how this looks so much!

We have two new additions to coordinate with the Beautiful Baubles Layered Stencil set and Beautiful Baubles Add-ons stamp set that we released last year! Cut out your stenciled ornaments, add ornament toppers, and add a string to hang the ornaments with the Beautiful Baubles die collection. Add sparkle and shine to your stenciled ornament designs with the Foil It – Beautiful Baubles panels.
The Festive Fir die & Festive Fir stencil feature an elegant Christmas tree design and they are designed with exactly the same placement and spacing. Use them on their own or combine them together using fun color combinations and techniques (like Glitter Grab & Foil!).
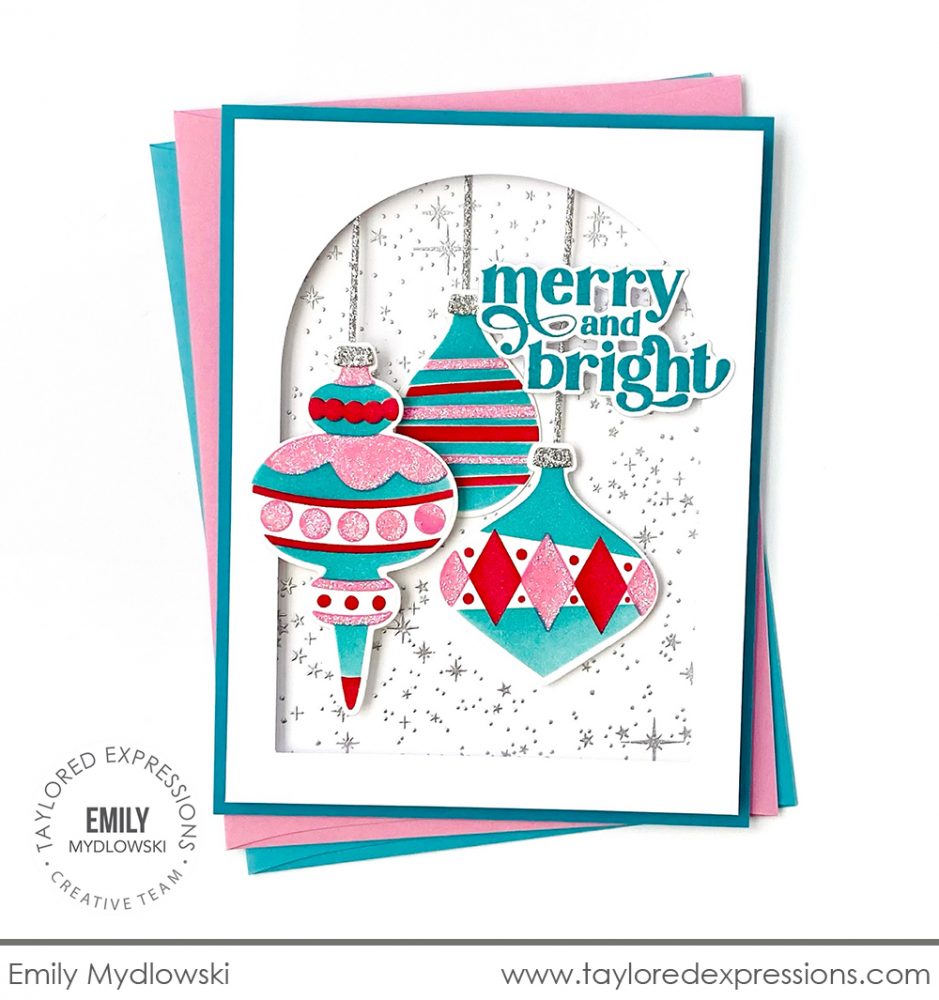
Emily Mydlowski stenciled the ornaments using the Beautiful Baubles Layered Stencil set in fun retro-like colors: Cookie Monster, Strawberry Milkshake, and Cherry Pop. I love how Emily added iridescent glitter over the Strawberry Milkshake layer for extra sparkle (you’ll learn more about our new glitter mediums later on in this post!) She cut them out with the new Beautiful Baubles dies, adding the ornament toppers and hanging strings cut from silver glitter cardstock. She set the ornaments over the Twinkle Twinkle Background stamp embossed in silver and framed with a new arched die that I will share more about in a little bit!
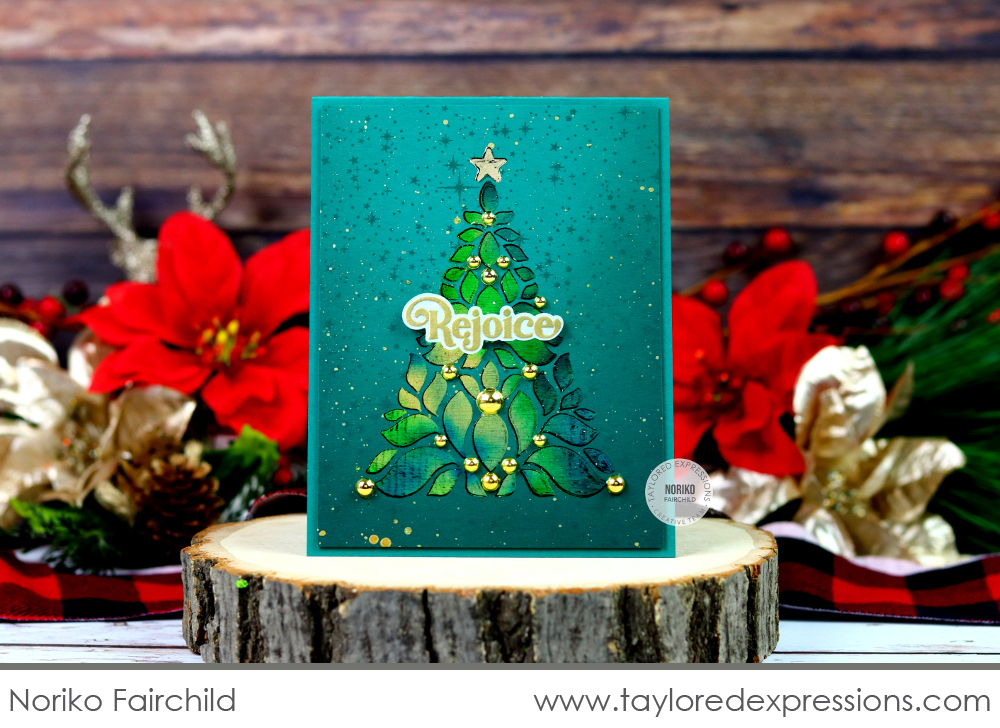
This stunning card was created by Noriko Fairchild using the Festive Fir stencil! Noriko applied Glitter Grab through the stencil onto a background stamped with the Twinkle Twinkle Background stamp. Once the Glitter Grab was dry, Noriko foiled the design using Emerald Watercolor foil for the tree and Champagne Deco Foil for the star. I love all of the extra gold touches that are added to finish off this beautiful design: Bits & Pieces – Gold Drip Drops, gold paint splatters, and a gold embossed sentiment.

The Arched Nativity Cutting Plate die features a silhouette of the nativity scene in an arched opening. This new cutting plate die is designed to coordinate with the previously released Follow the Star dies to build an intricate scene to celebrate the birth of Jesus. Cut out graduated arched layers using the Arched Stacklets die collection to layer with the cutting plate or pair with the new Masking Stencils – Arched set for more blending and masking options.
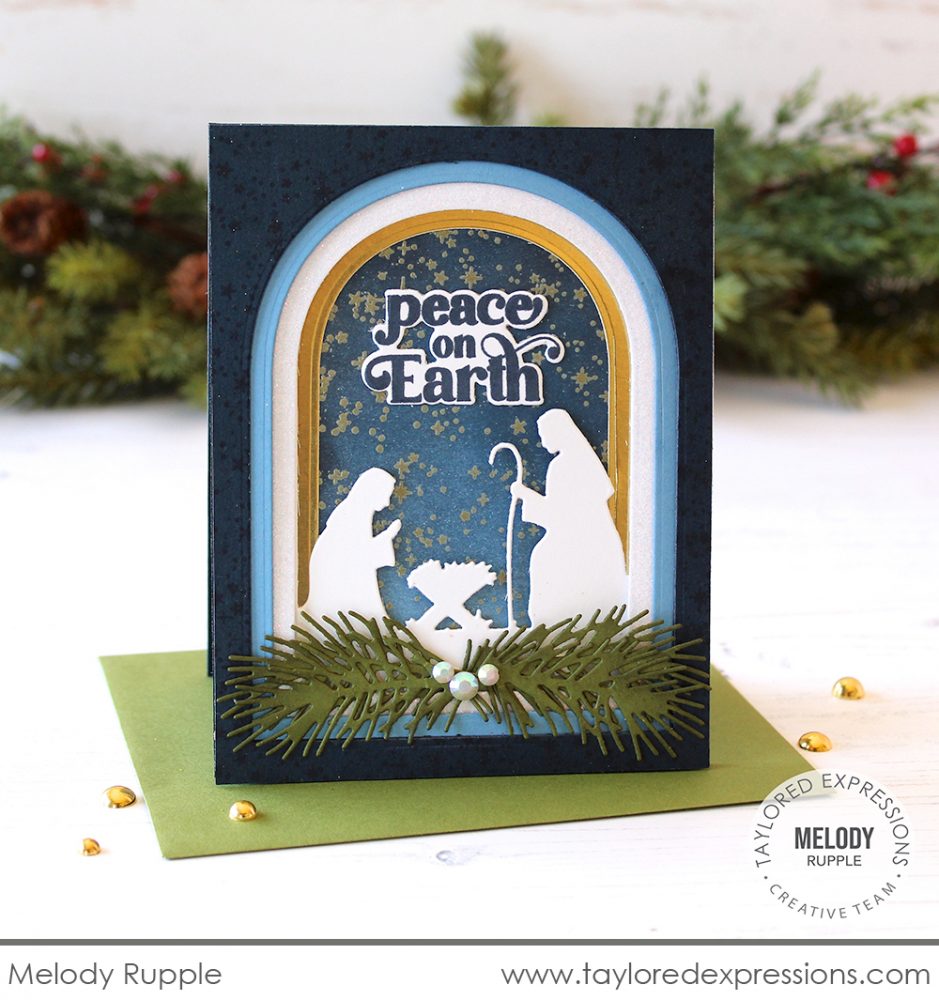
The gorgeous nativity scene on this card was created by Melody Rupple using the Arched Nativity Cutting Plate die. Melody cut out the main image from Sugar Cube cardstock and added arched layers around it cut out with the Arched Stacklets dies from Blue Corn, Gumball, and gold foil cardstock. The background of the card is blended using the Masking Stencils – Arched set using blue inks with the Twinkle Twinkle Background stamp embossed in gold over the top for the perfect night sky. The pine bough spray at the base of the card is created with the Pine Clippings die collection and a few Bits & Pieces – White Rhinestones.

Find the perfect holiday character for your Christmas card in our Little Critters – Christmas stamp set (+ coordinating dies). Perfectly sized to fit in the peek-a-boo windows created by our Mini Slim templates, stencils and cutting plates, this group of adorable holiday critters features Santa Claus, Mrs. Claus, reindeer, elf, snowman, moose, penguin, fox, and polar bear – along with a few seasonal sentiments.
If you need a stamp set full of holiday sentiments in a fun, all-caps font, you’ll definitely want to check out the new Just Saying – Christmas stamp set. This collection of 11 sayings are perfect for Christmas crafting and coordinate well with our Little Critters- Christmas stamp set.
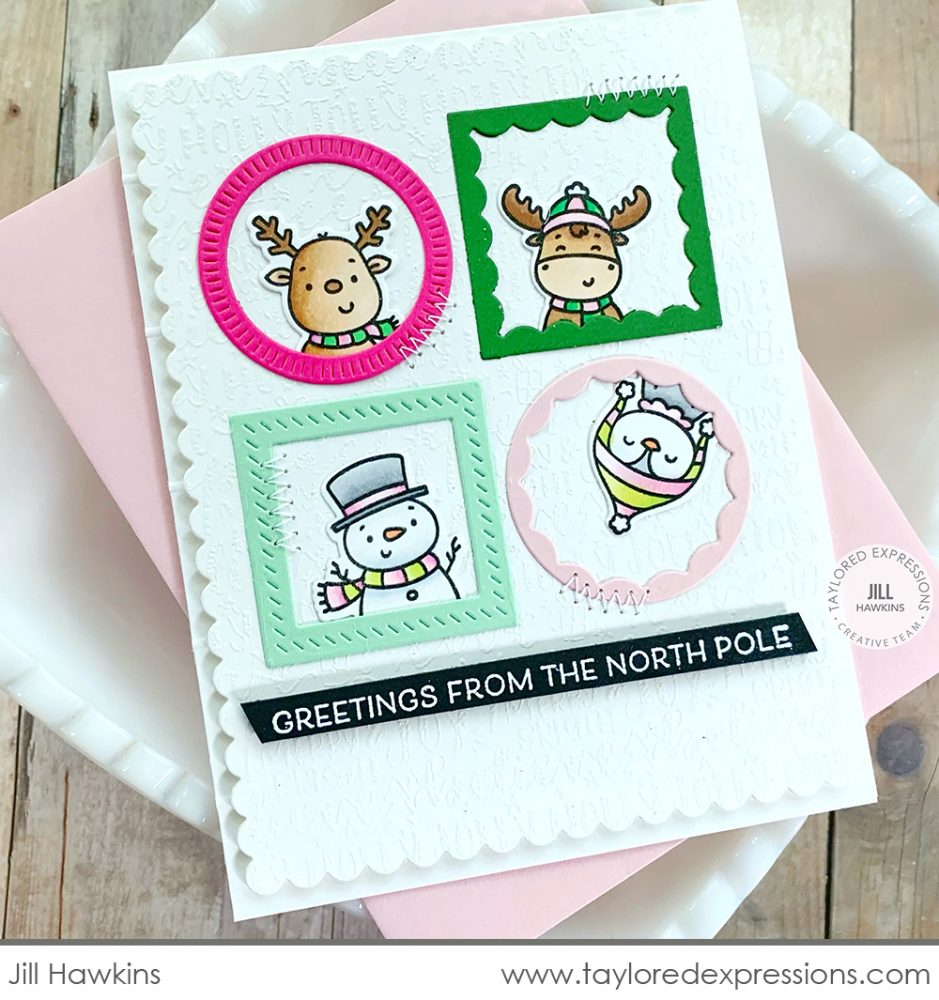
Jill Hawkins has several of the critters from the Little Critters – Christmas stamp set peeking through colorful window frames cut out using the Circle Window Frames and Square Window Frames dies on this fun and whimsical Christmas card. The critters are colored with Copic markers and cut out with the coordinating dies. The ‘greetings…’ sentiment from the Just Saying – Christmas stamp set is embossed in white on an Oreo Cardstock strip and the background of the card is created with the Backstory – Christmas Background stamp embossed in white on Sugar Cube cardstock.

Create cards featuring cozy mittens to celebrate winter with our Cozy Winter Stencil & Clear Combo set! The set includes eight layering stencils – four that work together to create larger, individual mittens and four that make a smaller row of mittens (both left and right-handed!) – plus 12 clear stamps to accent the mittens and make them come to life. A few winter-themed sentiments are included! Use the coordinating dies to cut out the individual larger mittens and the whole line up of smaller mittens at one time.
Make a Christmas card to send holly jolly vibes to your friends and loved ones with the Holly Jolly Christmas Cling & Clear Combo set. The stamp’s large sentiment created with a whimsical and script font pairing make it perfect for a card front, and it can be accented with the holiday images included in the clear stamp set.
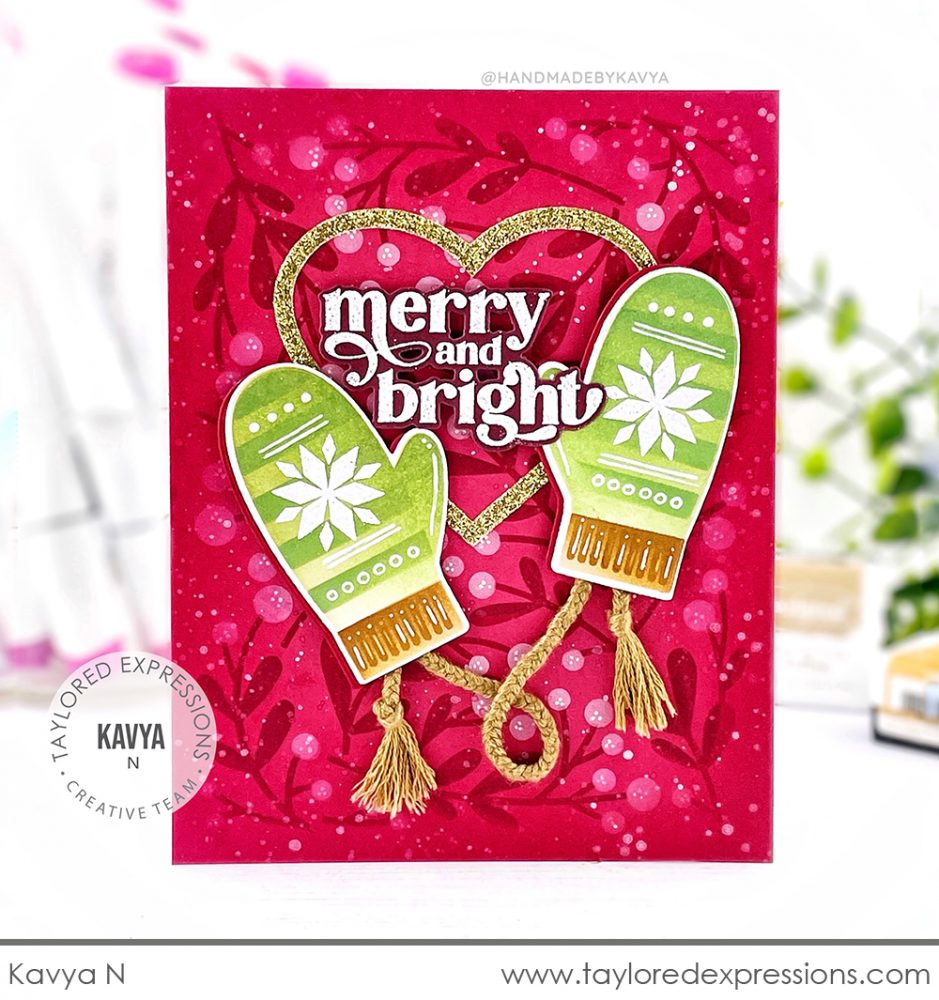
Kavya used the larger mitten from Cozy Winter on this festive holiday card. The mittens are stenciled using Granny Smith and Lime Zest for the main part of the mitten and Honey for the cuff. The nordic star detail is embossed in white and extra details are added with a white gel pen. I love the braided mitten string that Kavya added and check out the background created with the Create-in-Quads – Mistletoe Layered Stencil set!
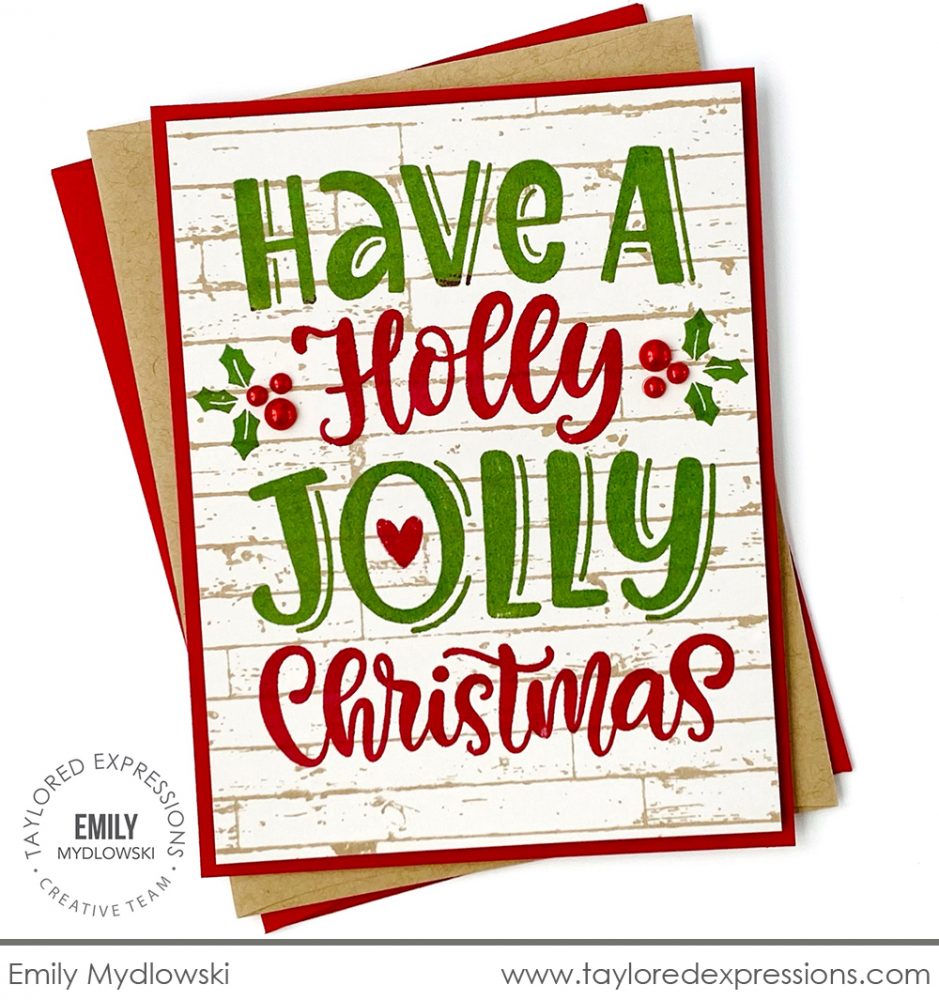
Emily Mydlowski inked up the sentiment from the Holly Jolly Christmas Cling & Clear Combo set in reds and greens using mini ink cubes and stamped it onto a rustic background stamped with the Shiplap Background stamp using Toffee ink on Sugar Cube cardstock. She added a few stamped holly leaves and a heart from the clear stamps in the set and added berries to the holly using Bits & Pieces – Red Pearl Drip Drops. This card design would be an easy one to mass produce for the holidays!
You can never have too many sentiment options, right? Here are a few new Christmas themed offerings for this release:

The Merry & Bright stamp set includes six sentiments to coordinate perfectly with your Christmas creations! The easy-to-read serif font includes tails and swirls that make it extra special, and you can cut the sentiments out using Merry & Bright dies if you’d like to add extra dimension!
Turn everything you know about Simple Strips – Christmas on its head with our Simple Strips In Reverse – Christmas collection! The pre-printed panels come on TE Premium Cardstock and can be cut out as-is using any of the Simple Strips dies (sold separately) to leave you with crisp white sentiments on a black background, or can be topped with foil and run through a foiling machine to create crisp white sentiments on a fancy foiled background! Each panel includes alignment squares to line up with the die and cut out 18 sentiment strips with one pass through your die cut machine.
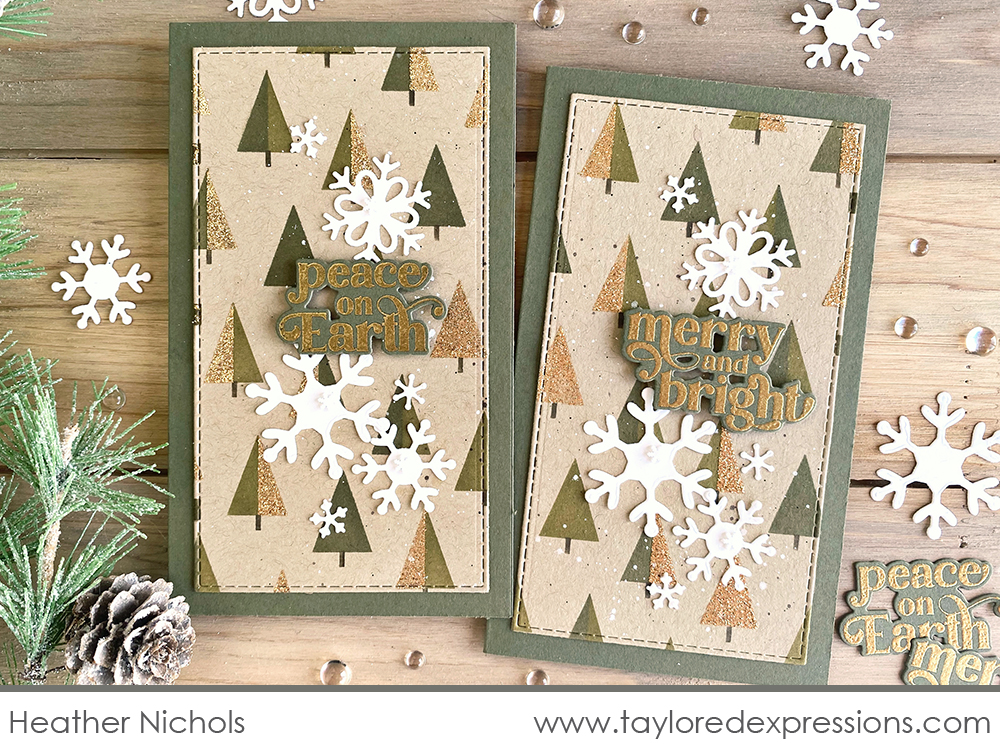
Heather Nichols featured a few of the sentiments from the Merry & Bright stamp set on this pair of Mini Slim Christmas cards. The sentiments are embossed in gold on Olive Cardstock and cut out with the coordinating dies. The card backgrounds are created with the Trendy Tree Farm Layered Stencil set using Olive, Avocado, and Mocha inks along with our new gold glitter medium that I will share more about below. Heather scattered a flurry of snowflakes around the sentiments using the Make a Snowflake dies, Little Bits – Snowflake Confetti die, and Bits & Pieces – Snowflakes.
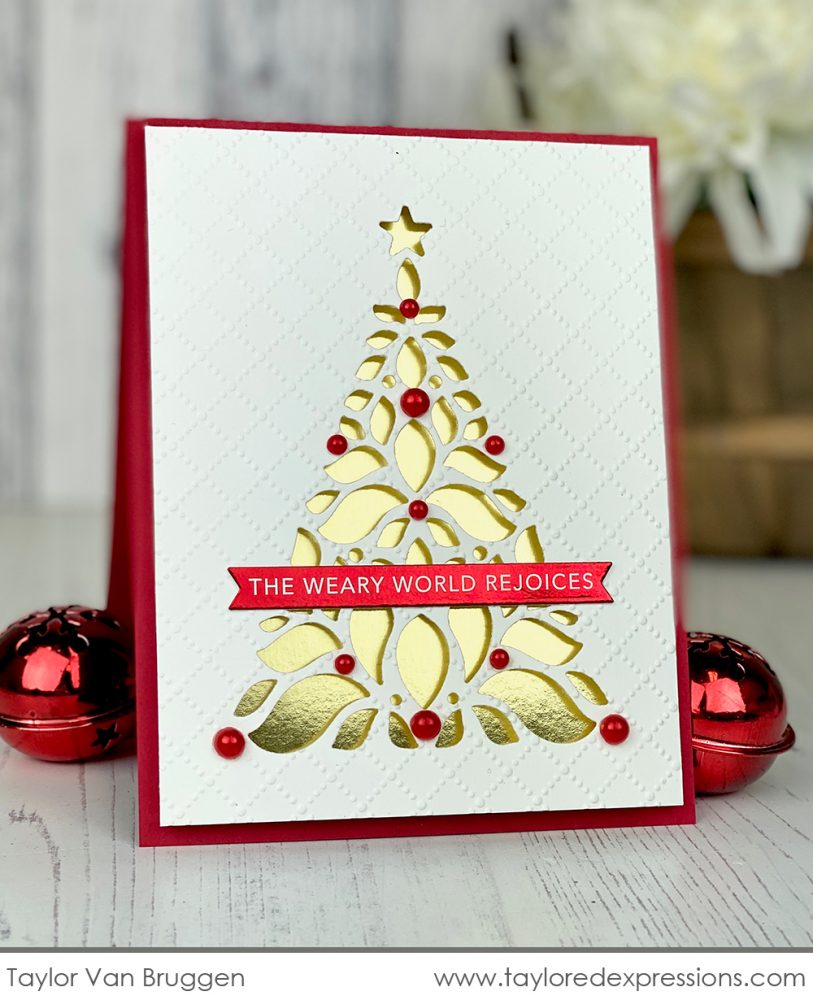
And I created this card using one of the sentiments from the Simple Strips in Reverse – Christmas foiled with red foil for a simple and elegant Christmas card. I layered the sentiment over a tree cut out using the Festive Fir die from a piece of Sugar Cube Cardstock that I then embossed with the Dotted Lattice embossing folder and layered over a piece of gold foil cardstock. The finishing touch on the tree is a few Bits & Pieces – Red Pearl Drip Drops and I added the panel to a Cherry Pop card base.

After the original release in July, we are now offering products from the Merry Blooms Kit for purchase individually! The items being released include: Merry Blooms Stamp, Stencil, & Clear Combo set, Perfect Poinsettia dies, and Clearly Crafty Joyful Season stamp set. The Joyful Season dies are currently available in the TE webstore and coordinate with the Joyful Season stamp set. To get a closer look at these products and even more inspiration from the original launch, CLICK HERE.
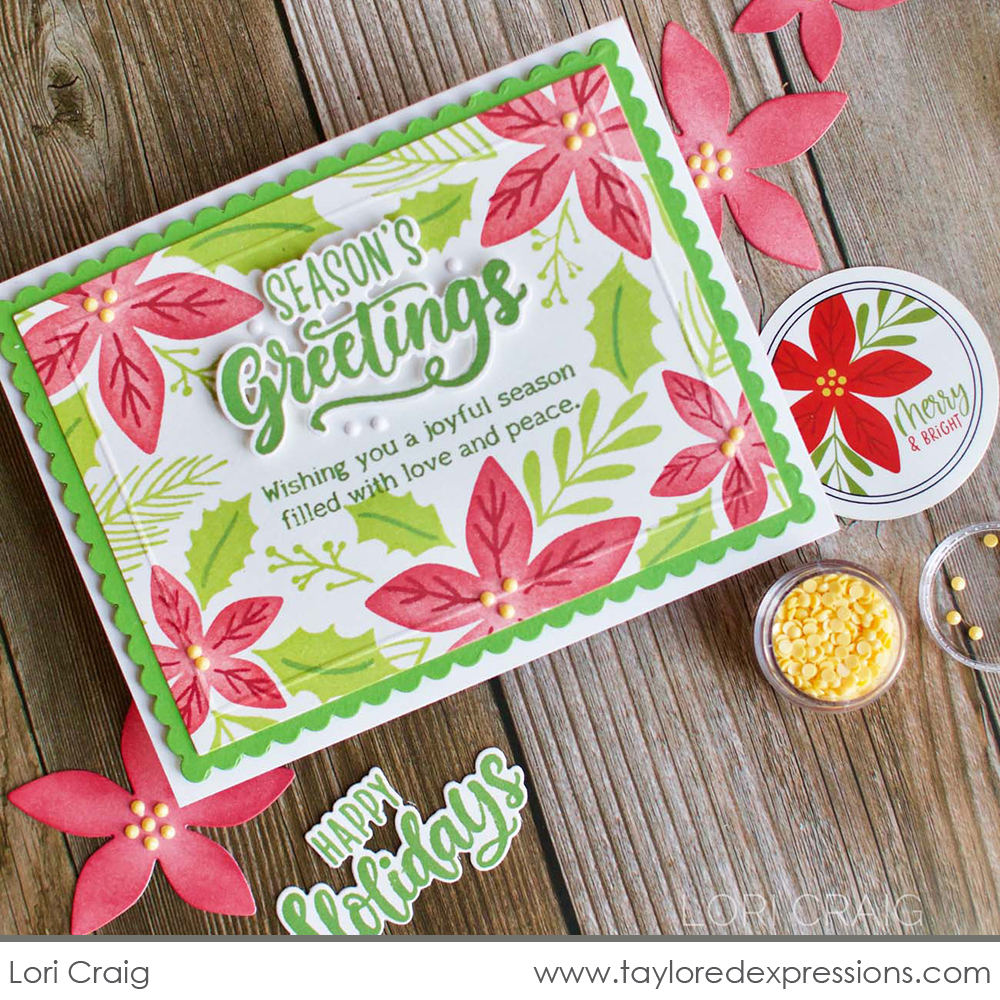
Lori Craig used the Merry Blooms Stamp, Stencil, and Clear Combo set to create this pretty card to celebrate the season. She stamped the greenery in a light green ink, stenciled the poinsettias in a red ink, and then added the stamped details to the poinsettias and leaves using the clear stamps in the set. The sentiment is stamped with the Joyful Season stamp set and Lori cut out the ‘Season’s Greetings’ stamp set with the Joyful Seasons die. To finish off the card, Lori added yellow and white gems from the Tiny Diamonds – Bold set for the flower centers and sprinkled around the die cut sentiment.

We are excited to release four new Happy Medium options for this release: Gold Glitter, Silver Glitter, Red Glitter, and Iridescent Glitter pastes. Our Happy Medium collection is the perfect way to add texture, sparkle, and shine to your projects! Simply select the stencil of your choice and apply a thin layer of the paste over the top with a media spatula. Be sure to wash your stencil and spatula with soap and water immediately after use.
Our new Christmas release will be available for purchase starting tomorrow at 9am Central Time, but before I head out for today, you have a chance to win it before you can buy it! Just comment below and let me know:
What’s your favorite item from our holiday release!?
I’ll choose three lucky winners to receive one product of their choice (sorry, not a bundle) from this release!
Simply leave your comment by TONIGHT, Monday, September 27th at 10PM Central Time. One comment per person. Winners are chosen at random and will be announced on the TE blog on release day, tomorrow, September 28th!
Thank you for stopping by for our new Christmas release sneak peeks! Stop back tomorrow for more inspiration from the TE Creative Team and a new video from Heather Nichols. See you then!


