Sep 28, 2021
It’s Release Day! NEW Christmas Release Products Available NOW!
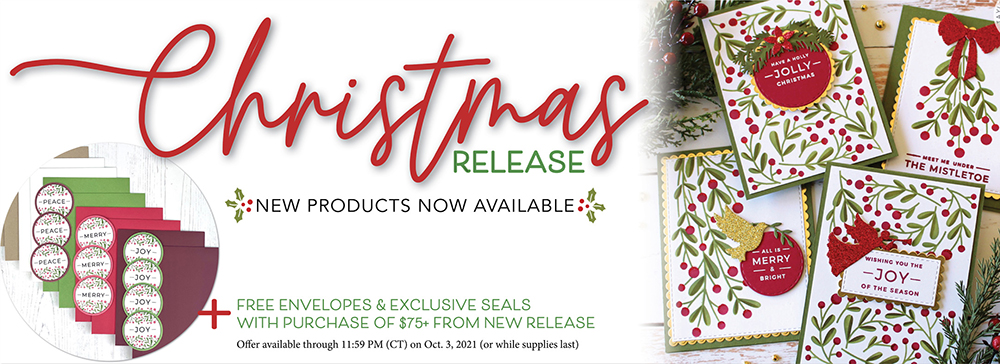
Hey, crafty friends! It’s Heather here and it’s release day! All of the new holiday products that we shared yesterday are now available to purchase in the TE webstore. It’s been fun to switch gears to holiday crafting mode and I love all of the inspiration shared by the TE Creative Team. Make sure to hop to their blogs and check out all of the wonderful projects that they created. There’s a link list down at the bottom of this post that will take you to their blogs as well as the blogs of a few special guest designers! I’ll also feature many of the projects here on the TE blog too and this week we have a bonus Christmas release blog inspiration day on Saturday – make plans to check it out!
Today, I have a video to share featuring the new Cozy Winter products that I designed. I hope you’ll love crafting with the cozy mittens as much as I do! Along with the video, I have more inspiration to share from TE Creative Team members and a closer look at a few of the new products from this release. Sit back, relax, and soak in the holiday inspiration!
Don’t forget that we have two great promotions happening for this week’s release. Here are the details:
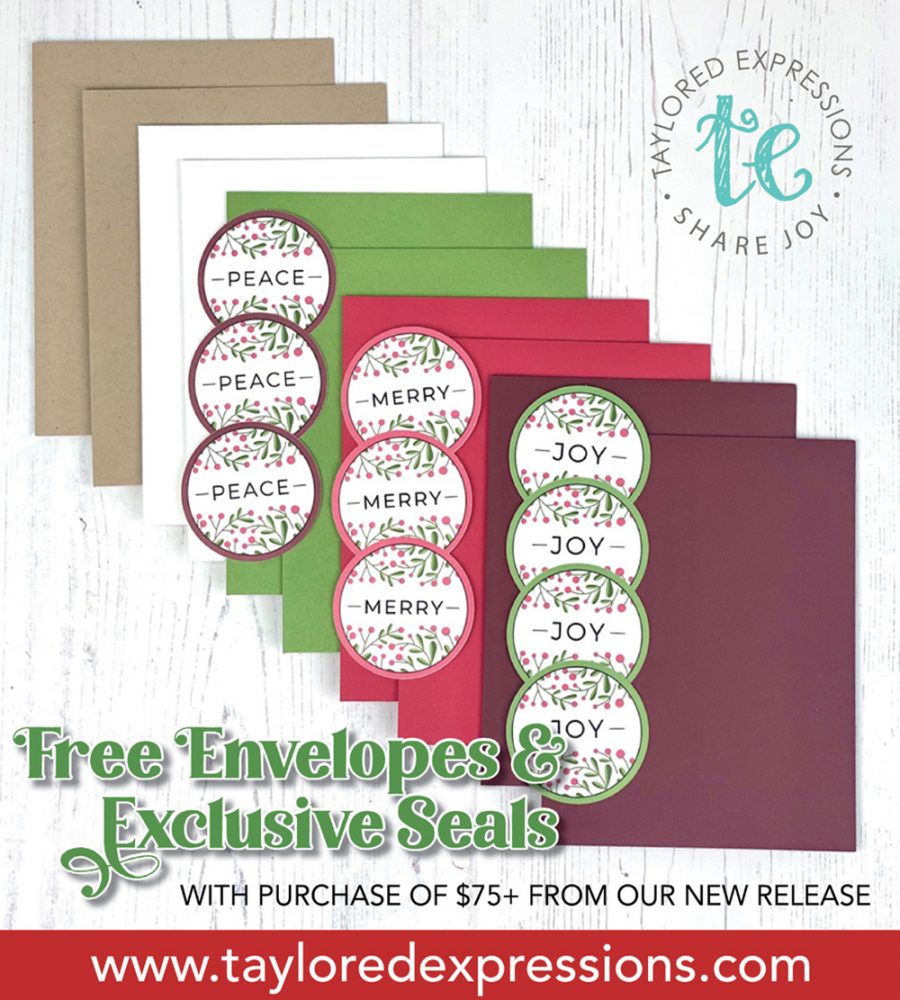
With any purchase of new release products of $75 or more, you will receive a FREE pack of envelopes and custom Mistletoe envelope seals. The pack includes 10 envelopes (2 each of Mulled Wine, Cherry Pop, Peapod, Sugar Cube, and Toffee) and 10 exclusive envelope seals (these seals are not available to purchase). This offer is valid through 11:59PM Central Time Sunday, October 3rd, or while supplies last.
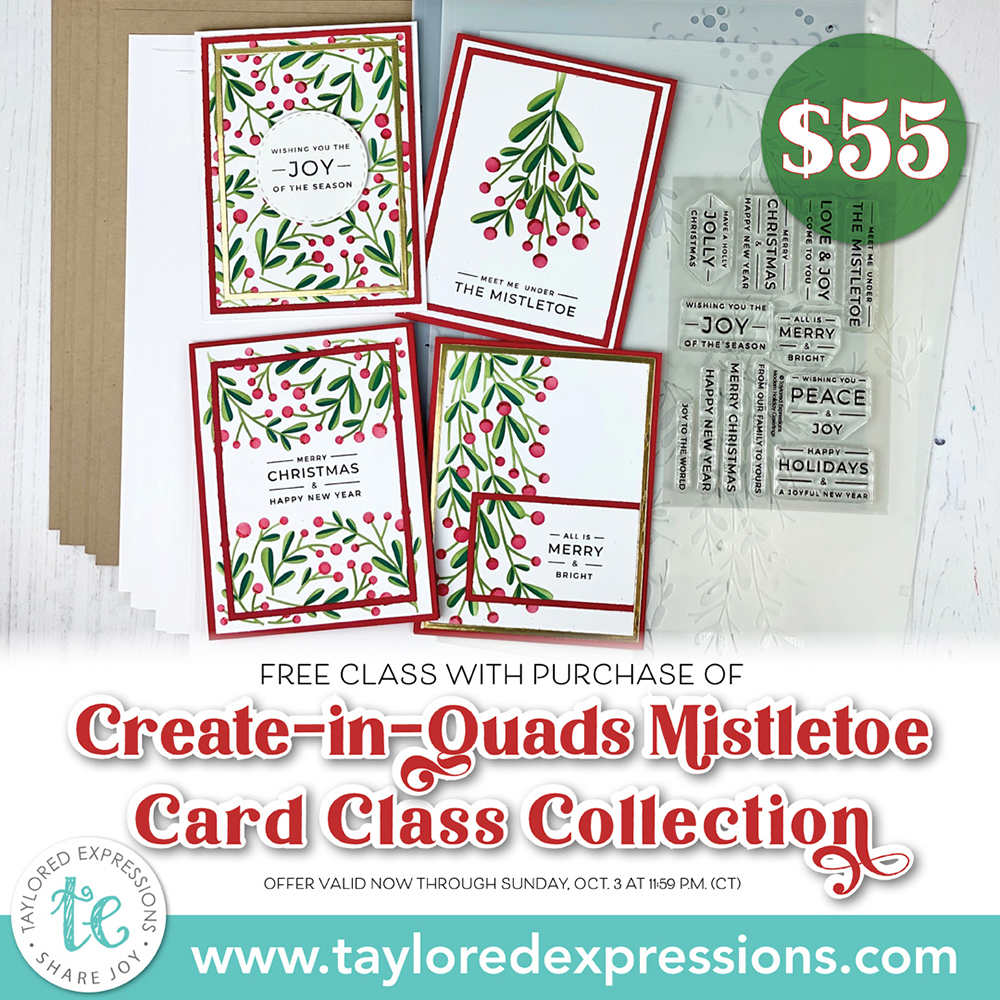
When you purchase the Create-in-Quads Mistletoe Card Class Collection (Create-in-Quads – Mistletoe Layered Stencil set, Clearly Crafty Modern Holiday Greetings stamp set, Create-in-Quads Paper Pack – Sugar Cube, and Create-in-Quads Paper Pack – Toffee ) through Sunday, October 5th, you will get a free exclusive 8-card video craft along class with Taylor and Heather!
This mini version of our Online Crafty Classes is a great way for you to put your new holiday goodies to use right away making eight (!) different cards at your own pace! Watch the videos as often as you like and learn some new card making tips and tricks while discovering inspiration for more designs!
Once you complete your purchase, you will receive an email (separate from your order confirmation email) with links to the class videos on YouTube.
Although Taylor and Heather will recommend colors for ink and cardstock, you can use anything you have to make these projects uniquely yours!
Hurry! This offer is only valid through 11:59 pm (CT) on Sunday, October 3rd, or while supplies last.
- Tune in for new product inspiration: this release includes includes over 30 new products; new stamps, dies, stencils, our exciting new Create-in-Quads Layered Stencil concept that will make card mass-producing a breeze, multiple new Foil It panels, and new glitter paste to add sparkle to your holiday projects!
- Our TE blog posts this week Monday, today, Thursday, and Saturday will feature a new how-to tip, technique, or process video.
- Receive FREE shipping on orders of $50 or more in the United States!
- Earn a free, exclusive stamp with purchases of $100 or more. CLICK HERE for more information.
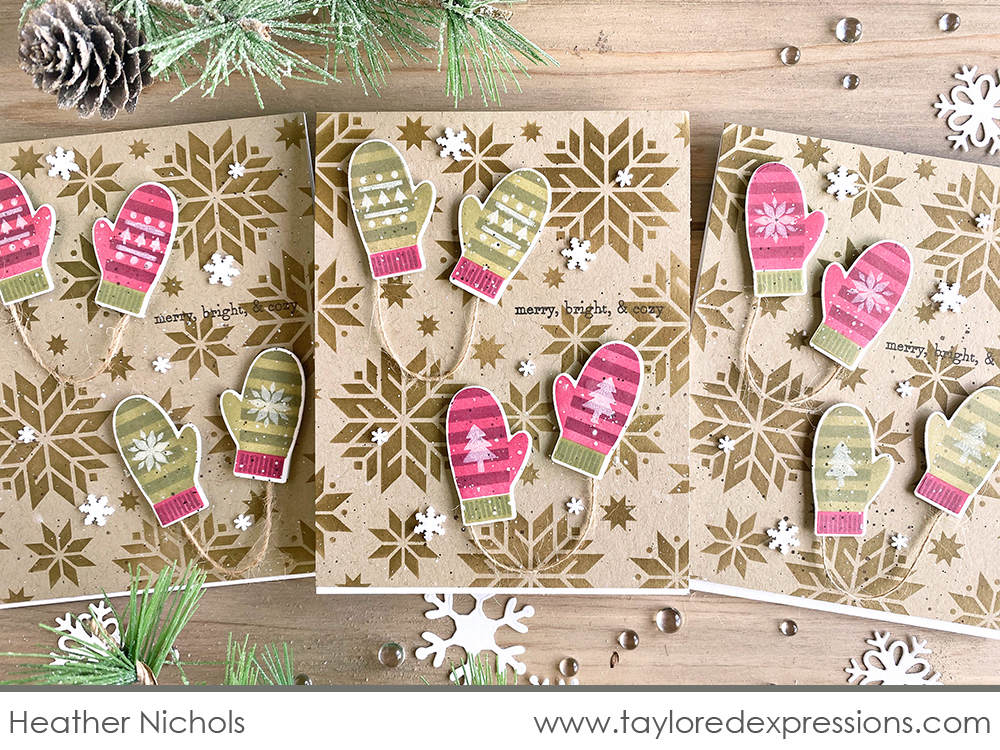
Today’s video from me features the new Cozy Winter Stencil & Clear Combo set (+ coordinating dies). Get your Blender Brushes ready, because there is a whole lot of stenciling going on to create this set of cozy winter cards! Watch the video below:
In the video above, I share how to use the stencils and clear stamps from the Cozy Winter Stencil & Clear Combo set to create cozy winter mittens. I create the small mittens for my set of cards, but the steps are the same to create the larger-sized mittens. I attach the mittens into pairs using burlap twine and add them to backgrounds stenciled with the Nordic Snowflake stencil. Bits & Pieces – Snowflakes are the perfect wintery finishing touch on this set of cards!
Here’s a closer look at the new Cozy Winter products that I used to create the cards in the video:
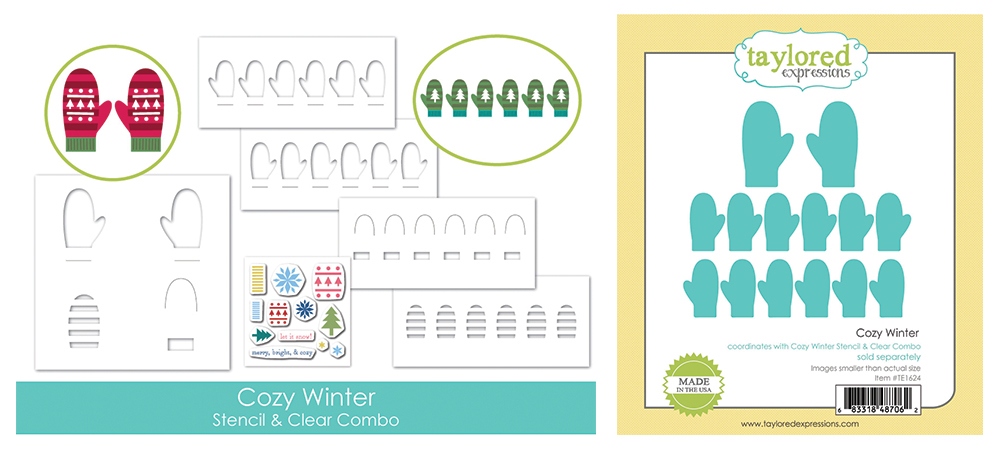
Create cards featuring cozy mittens to celebrate winter with our Cozy Winter Stencil & Clear Combo set! The set includes eight layering stencils – four that work together to create larger, individual mittens and four that make a smaller row of mittens (both left and right-handed!) – plus 12 clear stamps to accent the mittens and make them come to life. A few winter-themed sentiments are included! Use the coordinating dies to cut out the individual larger mittens and the whole lineup of smaller mittens at one time.
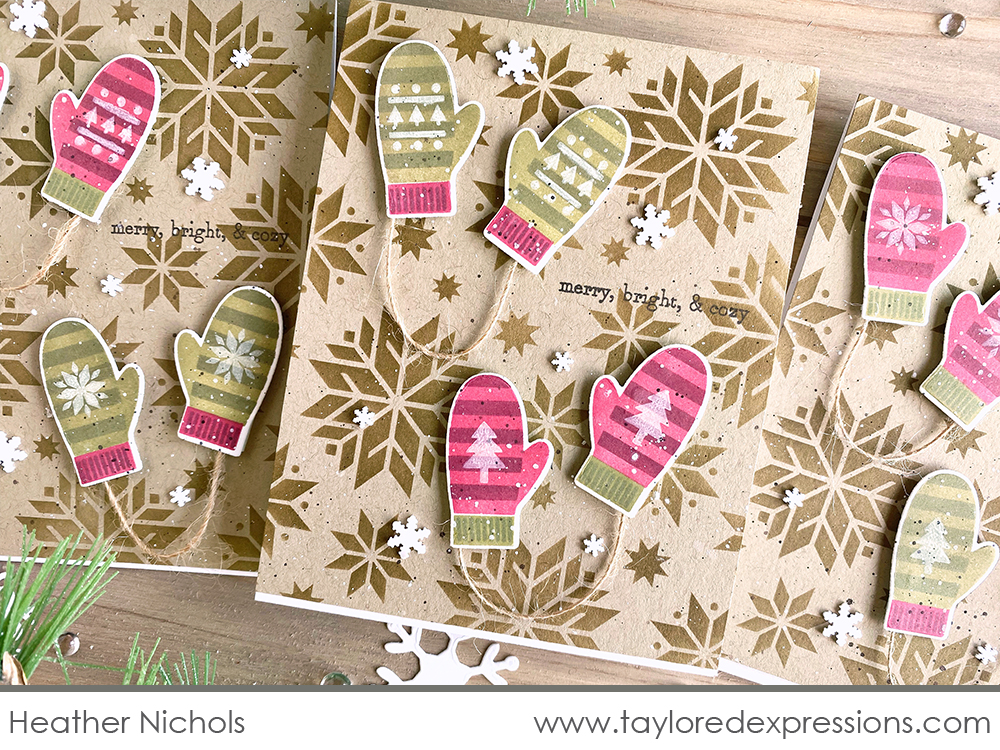
How cute and cozy are these mittens?! I stenciled the small border of mittens in Cherry Pop and Avocado ink, adding the cuffs in the opposite colors. The stripes on the mittens are optional, but such a great texture to add! I added Olive stripes to the Avocado mittens and Mulled Wine to the Cherry Pop mittens. The details on the mittens are stamped using the clear stamps in the Cozy Winter Stencil & Clear Combo set. I stamped the detail on the mitten cuffs using Olive and Mulled Wine inks and then added the patterns to the main part of the mittens stamped with Sugar Cube ink.
The best part about the small mitten is how many you can create in a small amount of time! There are six mittens in the lineup and once you have them stenciled, you can cut them out all at once using the coordinating die. I had six pairs of mittens ready to add to my cards once I stenciled both the right and left-handed mittens! I used a few pairs on each of my cards, but you could stretch that out to more cards by using just one pair on each one. It’s perfect for card mass production!
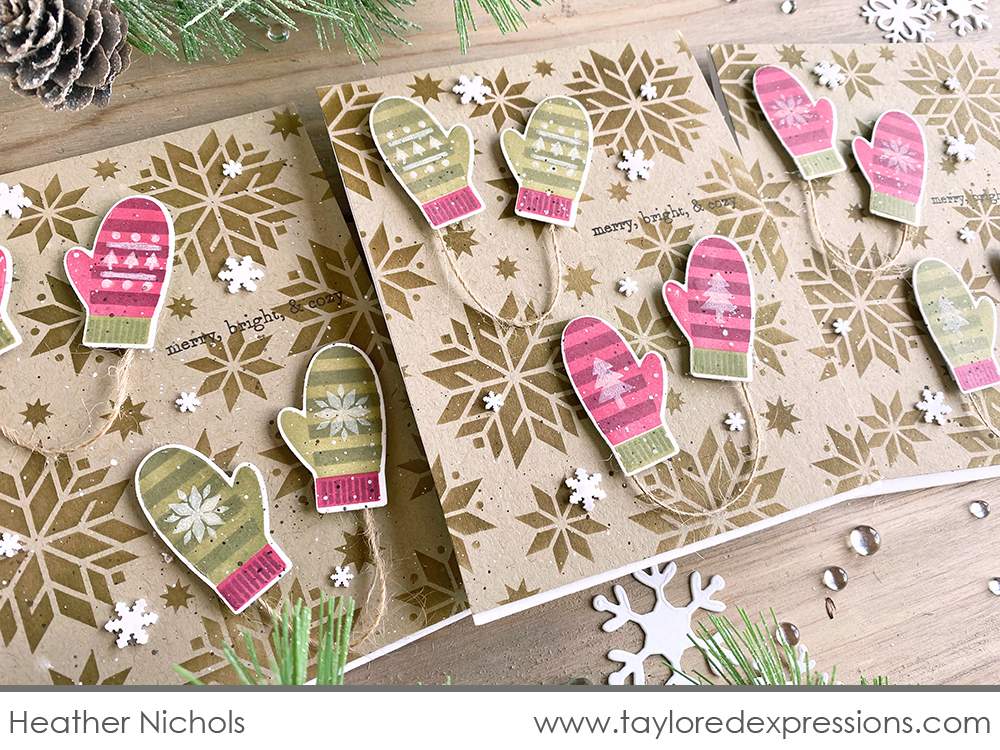
I added the mittens to Toffee cardstock panels stenciled with the Nordic Snowflake stencil using Toffee ink for a tone-on-tone look. The nordic look of the stencil coordinated well with the cute mittens! The ‘merry, bright, & cozy’ sentiment is stamped in Chocolate Truffle ink and I added a flurry of Bits & Pieces – Snowflakes scattered around the card background. I can’t wait to deliver these cute & cozy cards to my friends and loved ones for the holidays!
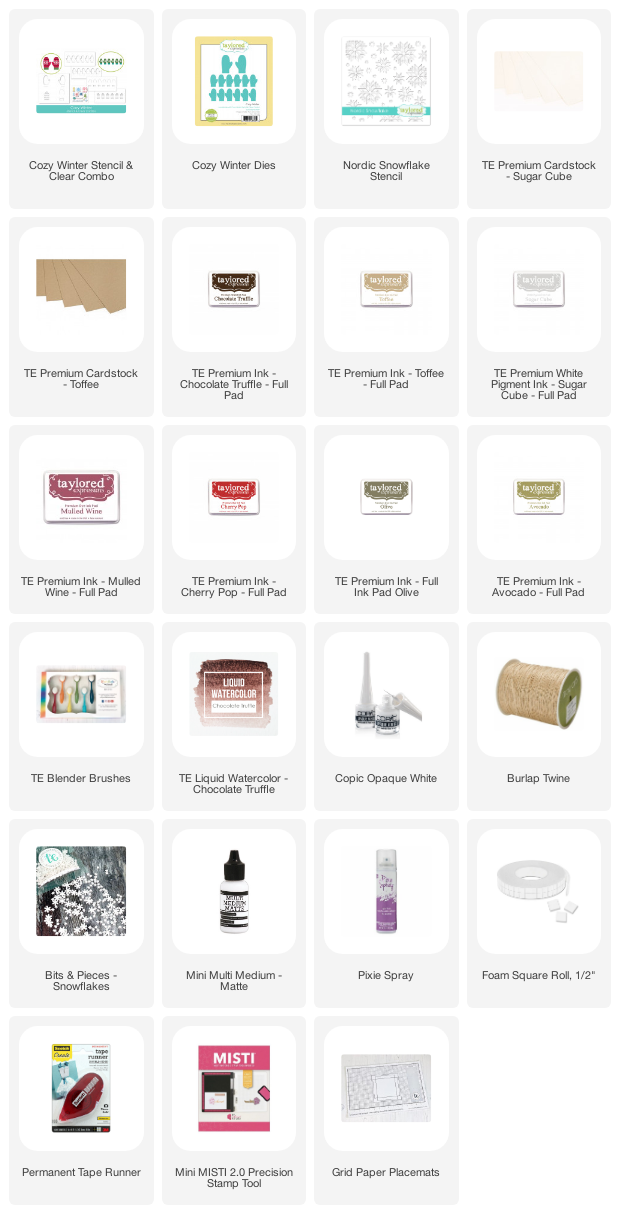
Check out the list below for the supplies that I used on my set of cards:

Now, here’s a look at more inspiration from the TE Creative Team along with a closer look at a few of the new products from the release:
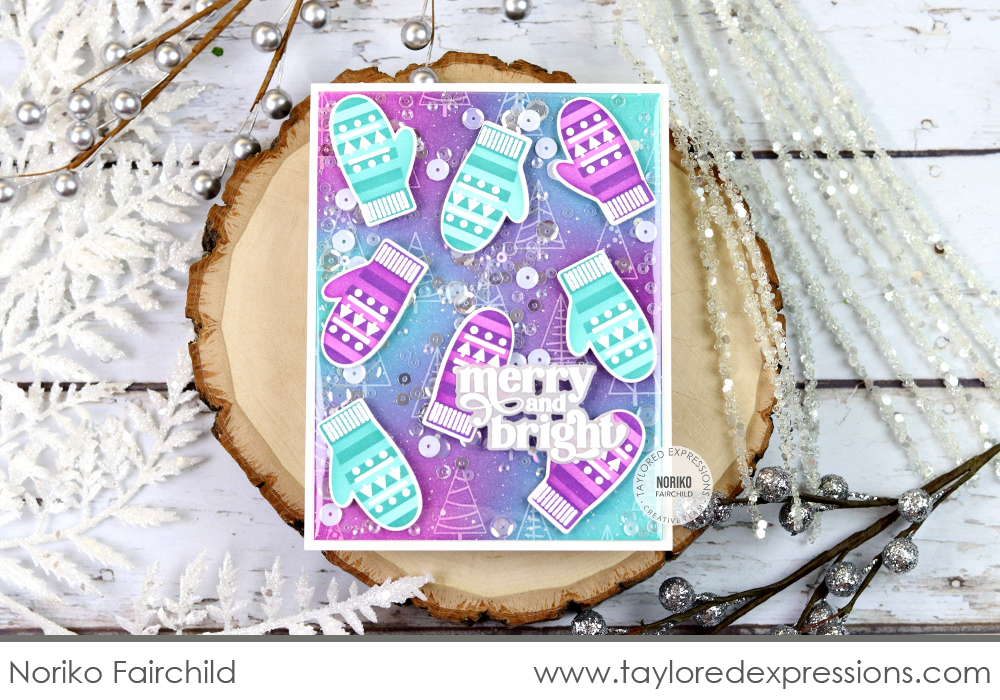
This card by Noriko Fairchild also features the Cozy Winter Stencil & Clear Combo set and love the colors that she used! The mittens are stenciled with Cookie Monster, Blue Raspberry, Plum Punch, and Jelly Donut inks. The details are all embossed in white using the clear stamps in the set. Noriko added the mittens scattered across the top of a shaker card filled with Snow Flurries sequins and a background created with the new Trendy Tree Farm Background stamp.
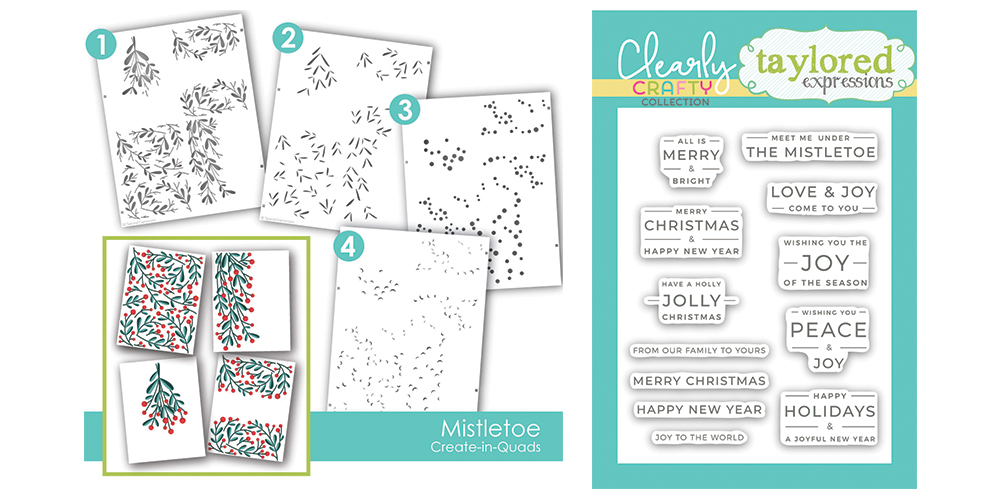
Mass-producing cards just got so much easier with our innovative Create-in-Quads concept! The Create-in-Quads – Mistletoe Layered Stencil set includes four 8.5″ x 11″ stencils that will create four different card fronts all at one time, featuring mistletoe leaves and berries. Align an 8″ x 10.5″ piece of cardstock using the etched alignment guides, stencil the designs, trim into quarters, add a sentiment, and your cards are ready to go!
The beautiful seasonal sentiments in the Modern Holiday Greetings clear stamp set are perfect for this modern mistletoe pattern. The set includes 12 sentiments in a classic font that will coordinate with so many different project styles.
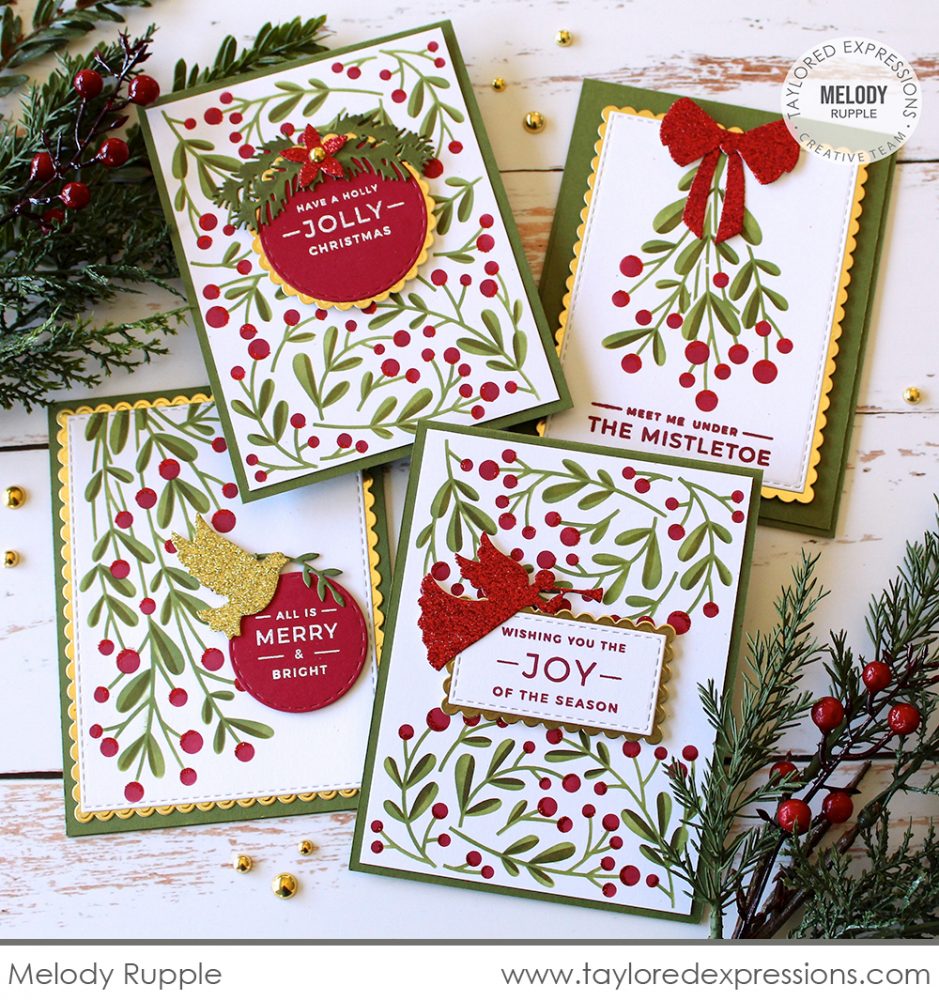
This stunning grouping of cards is created with the Create-in-Quads – Mistletoe Layered Stencil set by Melody Rupple. The mistletoe leaves are stenciled onto Sugar Cube cardstock with Peapod and Sweet Basil inks and then Melody used Cherry Pop ink for the main part of the mistletoe berries and the new Happy Medium – Red Glitter for the shadow. I love the touch of sparkle that it adds to the cards! The scallop details cut out from gold foil cardstock and die cuts that Melody added really step things up and add lots of sparkle and shine. The sentiments from the Modern Holiday Greetings stamp set are added to the cards either embossed in white on Cherry Pop cardstock or stamped in red on Sugar Cube cardstock.
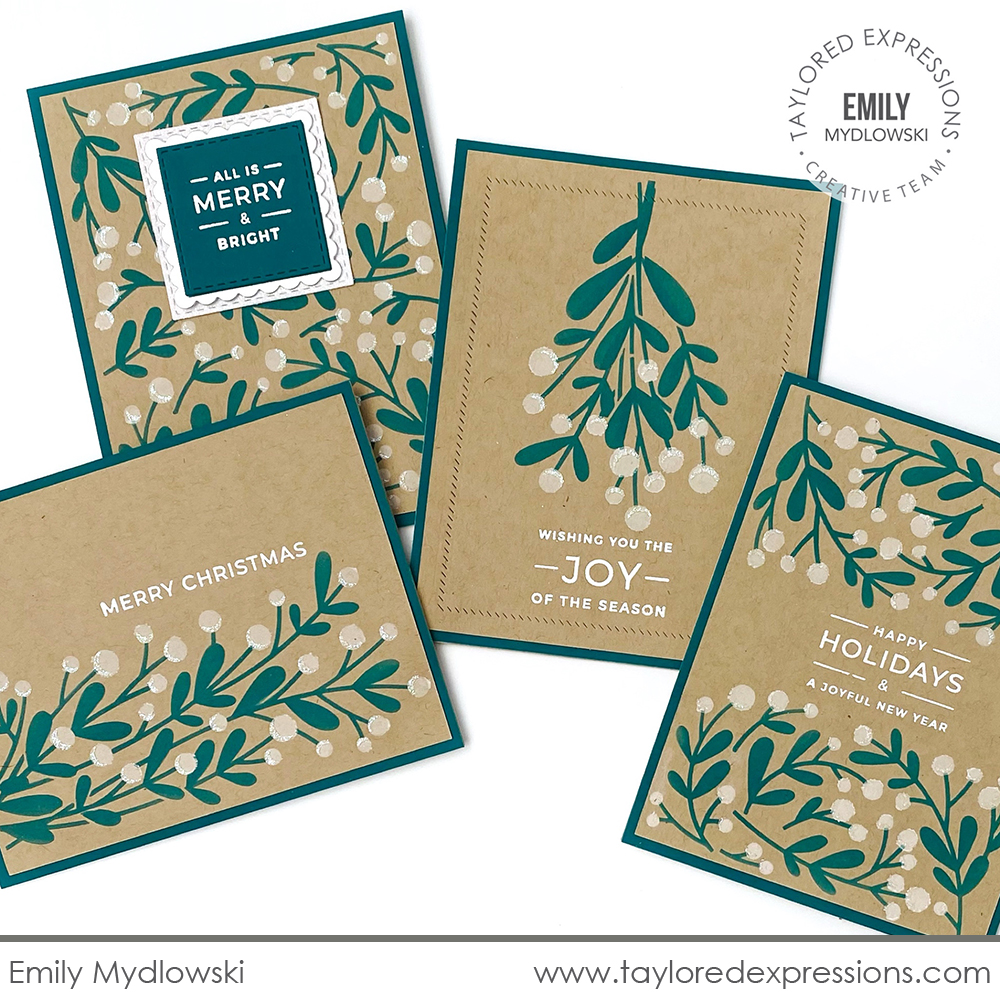
Emily Mydlowski shows off a pretty set of cards created with the Create-in-Quads – Mistletoe on Toffee cardstock. The leaves are stenciled with Blue Raspberry and Poblano Pepper inks and the berries are added using Sugar Cube ink and Happy Medium – Iridescent Glitter. All of the sentiments from the Modern Holiday Greetings stamp set are embossed in white and I love all of the details that Emily added to her set of cards like the Diagonal Stitch Rectangle Stacklets die to frame one of the designs, tipping one of the designs on its side for a landscape card, and pairing the Stitched Square Stacklets and Petite Scallop Square Stacklets for a place to add the sentiment on one of the cards.
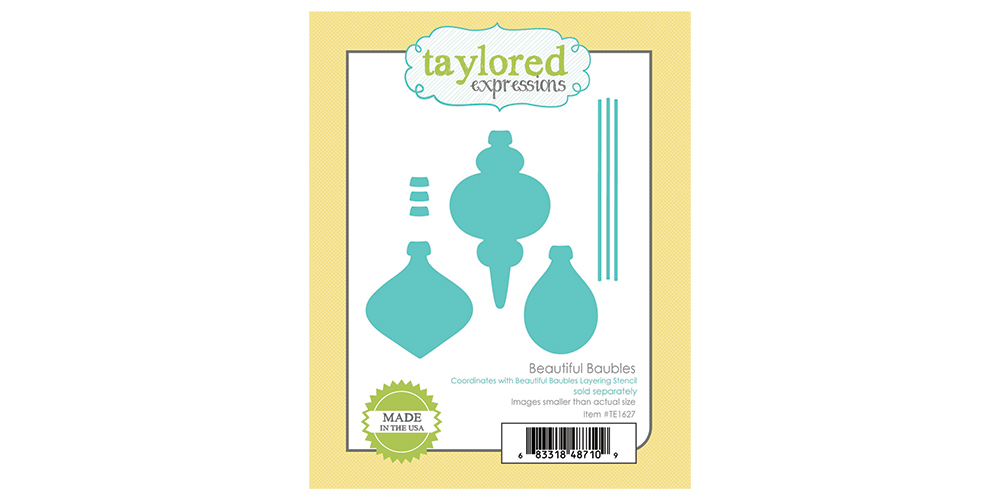
We have a new additions to coordinate with the Beautiful Baubles Layered Stencil set and Beautiful Baubles Add-ons stamp set that we released last year! Now you can cut out your stenciled ornaments, add ornament toppers, and add a string to hang the ornaments with the Beautiful Baubles die collection.
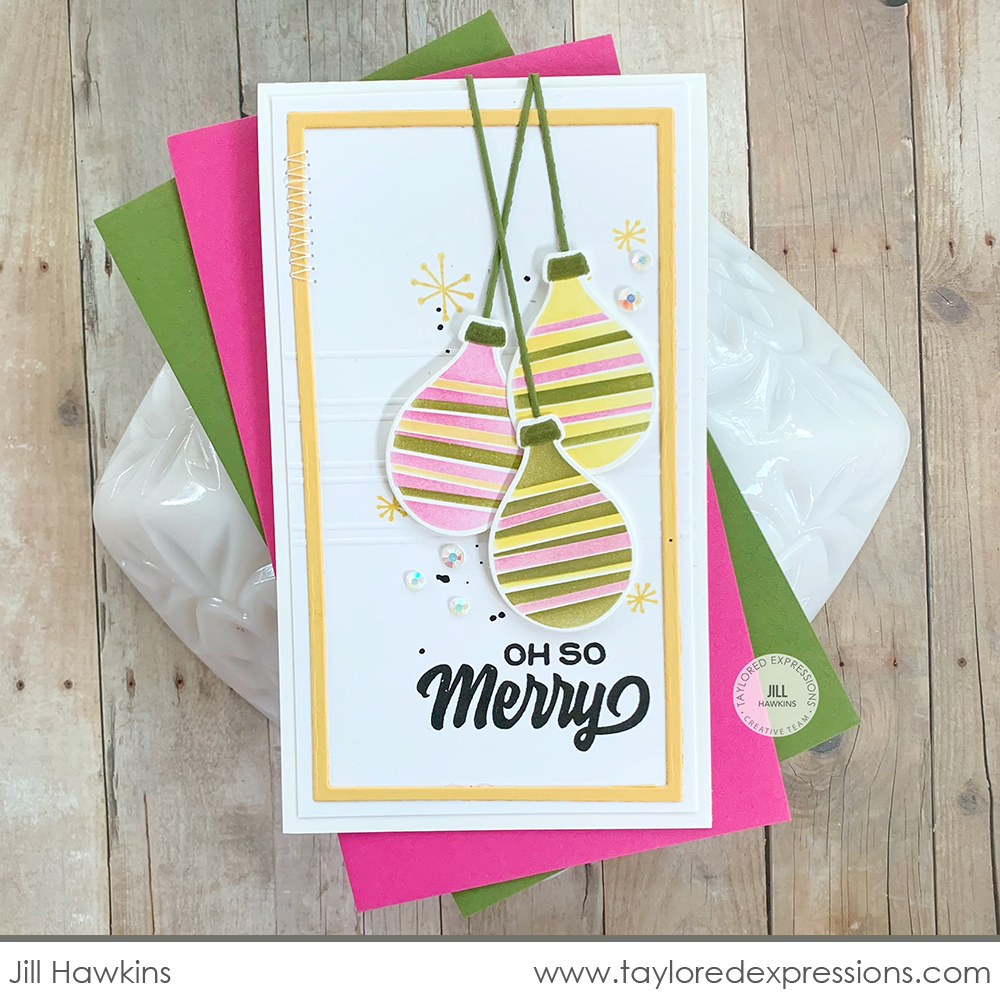
Jill Hawkins stenciled several striped ornaments using the Beautiful Baubles Layered Stencil set and I love the non-traditional, retro colors on this Mini Slim card: Strawberry Milkshake, Pineapple, and Sweet Basil. The ornaments are cut out with the new coordinating dies and Jill also cut out strings to hang the ornaments. The ‘oh so merry’ sentiment and retro starbursts are from the Beautiful Baubles Add-ons stamp set. Jill framed the card with a Pineapple Mini Slim Thin Frame Cutting Plate die cut and added a few Bits & Pieces – White Rhinestones for sparkle.

And now it’s time to check in with the lucky winners! If you find your name and comment listed below, please contact us with your mailing address and your selected ‘favorite product (must be one product, sorry… not a bundle) and we’ll get your prize in the mail right away! Congrats to all the prize winners!



Join Taylor live for “T Time” at 1pm Central today on the Taylored Expressions Facebook Page. She’ll be sharing a closer look at all of the new products in this Christmas release. We hope to see you there – come join in the fun! (Don’t worry, if you miss the live you can always watch the saved broadcast afterward!)
Thank you so much for stopping by today! Make sure you check out the rest of the TE Creative Team and guest designer projects using the new holiday goodies from this release. Click on the faces below to visit their blogs. Stop back Thursday for more inspiration, another video, and a closer look at a few more new products from this release.


