Oct 21, 2021
Creative Gift Ideas Using NEW Handmade for the Holidays Products!
Hey, crafty friends! It’s Heather here again with more inspiration to share with you created with the new Handmade for the Holidays release products. Today is all about creating handmade gifts including card sets, home decor, and more! Do you give handmade gifts? Whether it be something I have stamped, sewn, knitted, etc., the gifts that I have made myself always seem to have more of an impact. When you take the time to make your own gifts, you are also giving a piece of yourself and the love, time, and care that you put into creating for a loved one. I have handmade gift inspiration to share from the TE Creative Team and a video from Joy Baldwin.
Before we get to today’s inspiration, here’s one last reminder about the promotion for this week’s release:
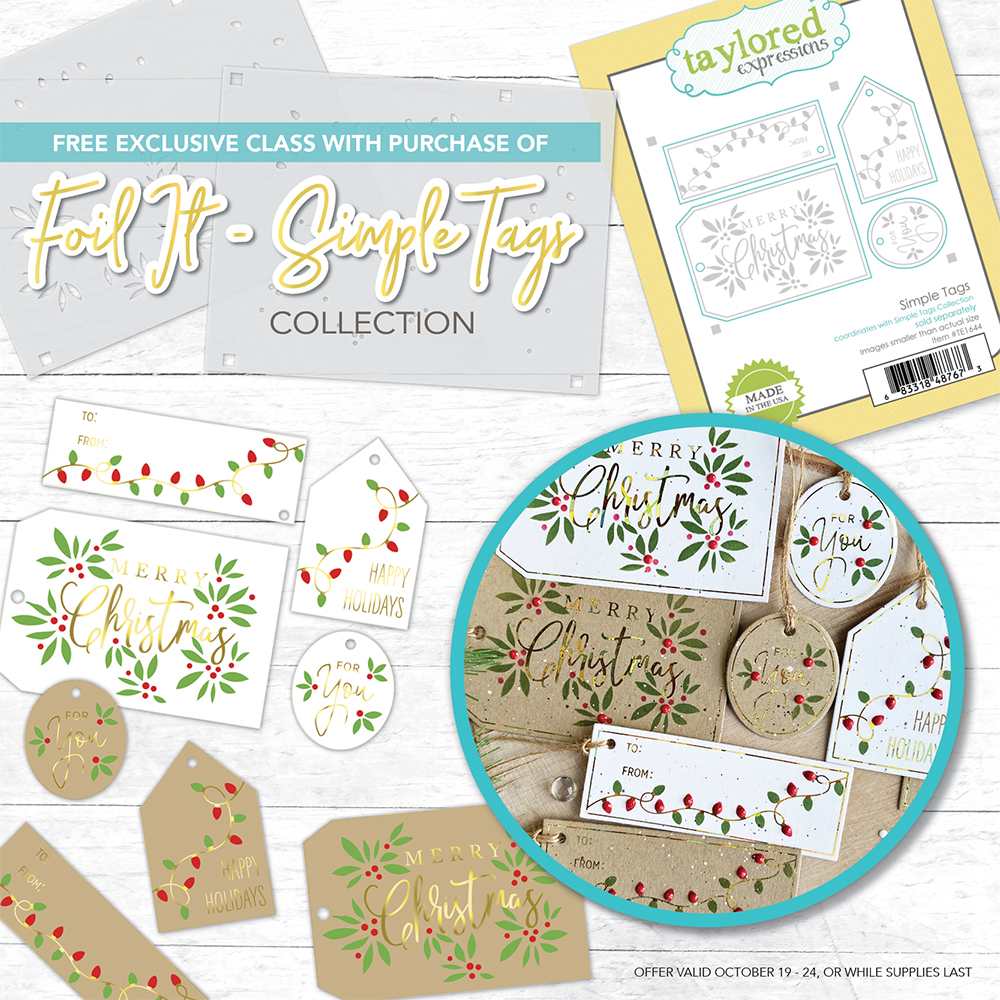
When you purchase the Foil It – Simple Tags Collection (Foil It – Simple Tags Holiday – Sugar Cube, Foil It – Simple Tags Holiday – Toffee, Simple Tags Holiday Layering Stencil set, and Simple Tags die) through Sunday, October 24th, you will get a free exclusive video craft along class with Taylor!
This mini version of our Online Crafty Classes is a great way for you to put your new goodies to use right away making holiday tags at your own pace! Watch the video as often as you like and learn some new tag-making tips and tricks!
Once you complete your purchase, you will receive an email (separate from your order confirmation email) with links to the class video on YouTube.
Although Taylor will recommend extra supplies (ink, foil, embellishments, etc.), you can use anything you have to make these projects uniquely yours!
Hurry! This offer is only valid through 11:59 pm (CT) on Sunday, October 24th, or while supplies last.
Click below to visit the new release products in the TE webstore and then keep scrolling for all of today’s inspiration!
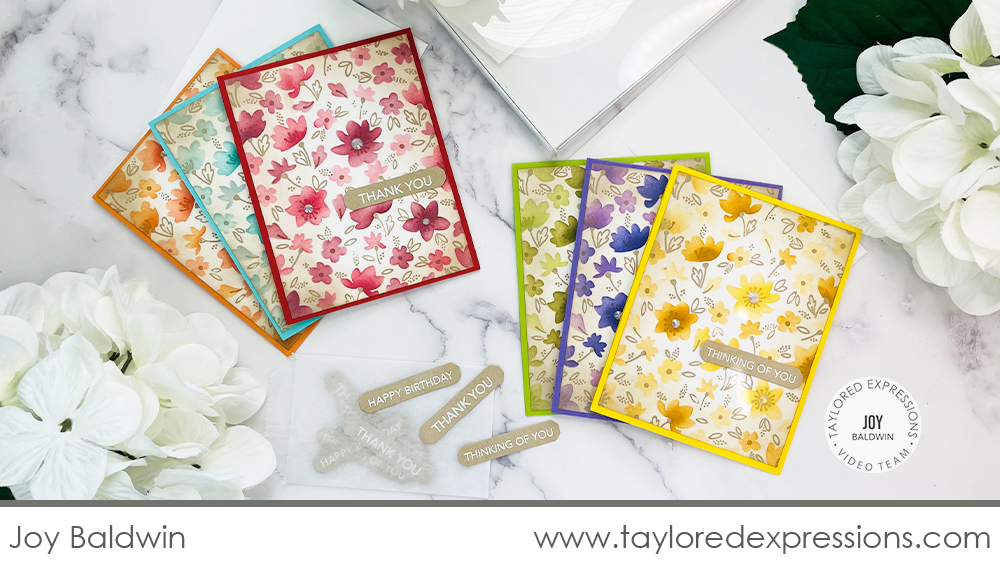
Today’s video from Joy Baldwin highlights the new Stamp & Give kits. Joy creates a card set to give as a gift using one of the kits and the Best Buds Stamp & Stencil Combo set. Watch how the card set comes together below:
In the video, Joy gives you closer look at what is included in the Stamp & Give – Sugar Cube Rainbow kit. She used the Best Buds Stamp & Stencil Combo set to add the flower pattern onto each of the white card panels, stamping the background stamp with Toffee ink and adding the blossoms in a rainbow of ink colors to coordinate with the card bases. For a touch of sparkle, Joy added Bits & Pieces – White Rhinestones to a few of the flower centers on each card. The sentiments from the Group Text – Occasions stamp are embossed in white on Toffee cardstock and cut out with the Group Text die. Joy packaged up the cards, envelopes, bag full of sentiments, and Sticky Strips in a clear card box to give as a gift.
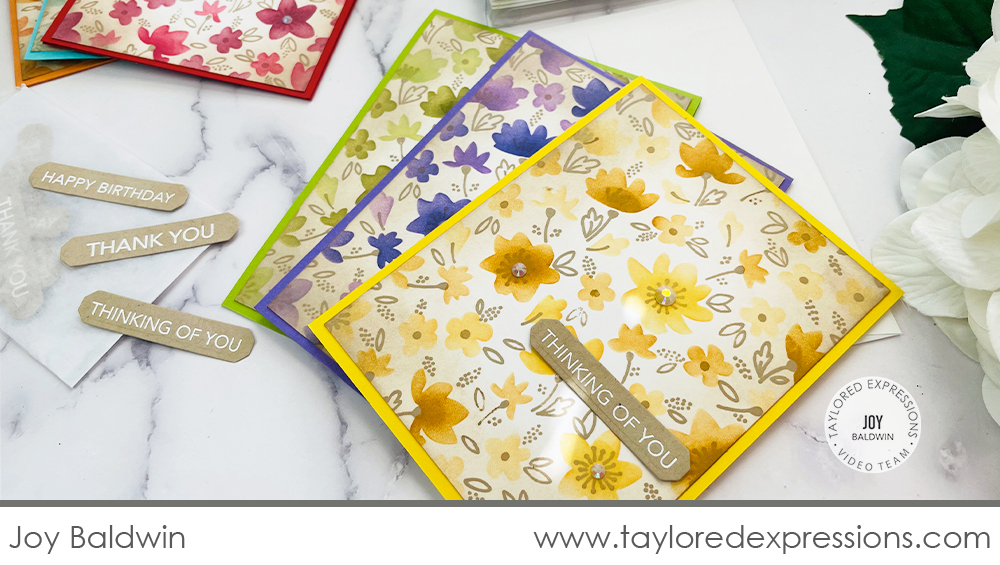
For each card panel, Joy chose a light and dark ink color to coordinate with the rainbow colored card bases (Cherry Pop & Mulled Wine, Candy Corn & Pumpkin, Confetti Cake & Poblano Pepper, Granny Smith & Sweet Basil, Jelly Donut & Eggplant, and Pineapple & Honey). Using her Bitty Blender Brushes, Joy applied the ink colors with both a light hand for lighter shades and a heavier hand for darker shades. She also created a lovely aged/distressed look to the cards by adding shading with Toffee ink around the edges of the card panels. It really softened the bright rainbow colors and the effect is beautiful with the floral design on the panels.
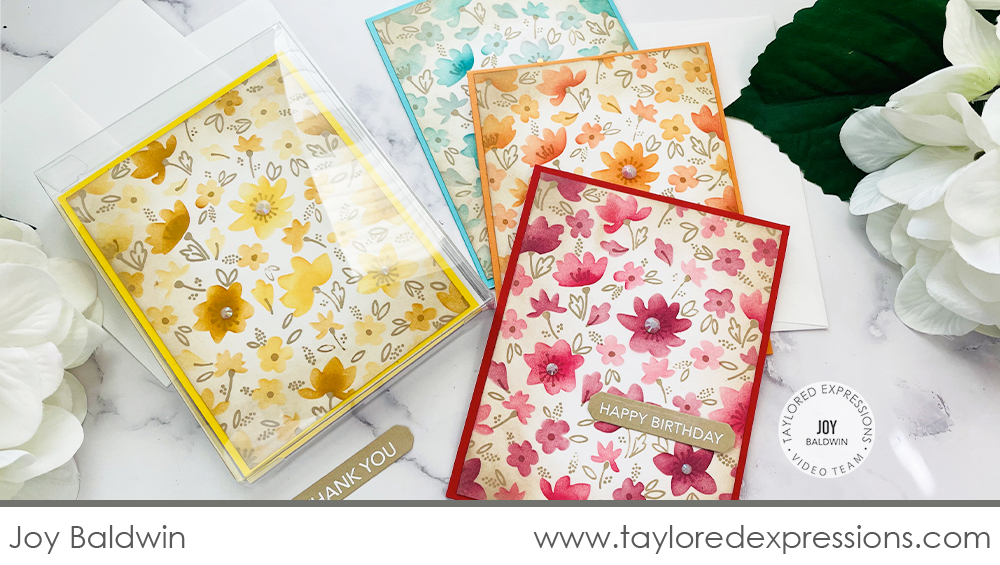
When the recipient of the card set need to send out a card, they can choose whatever sentiment to use and attach it to the card using the Sticky Strips. The white sentiment on the Toffee cardstock is a neutral combination that goes with any of the colors in the card set.
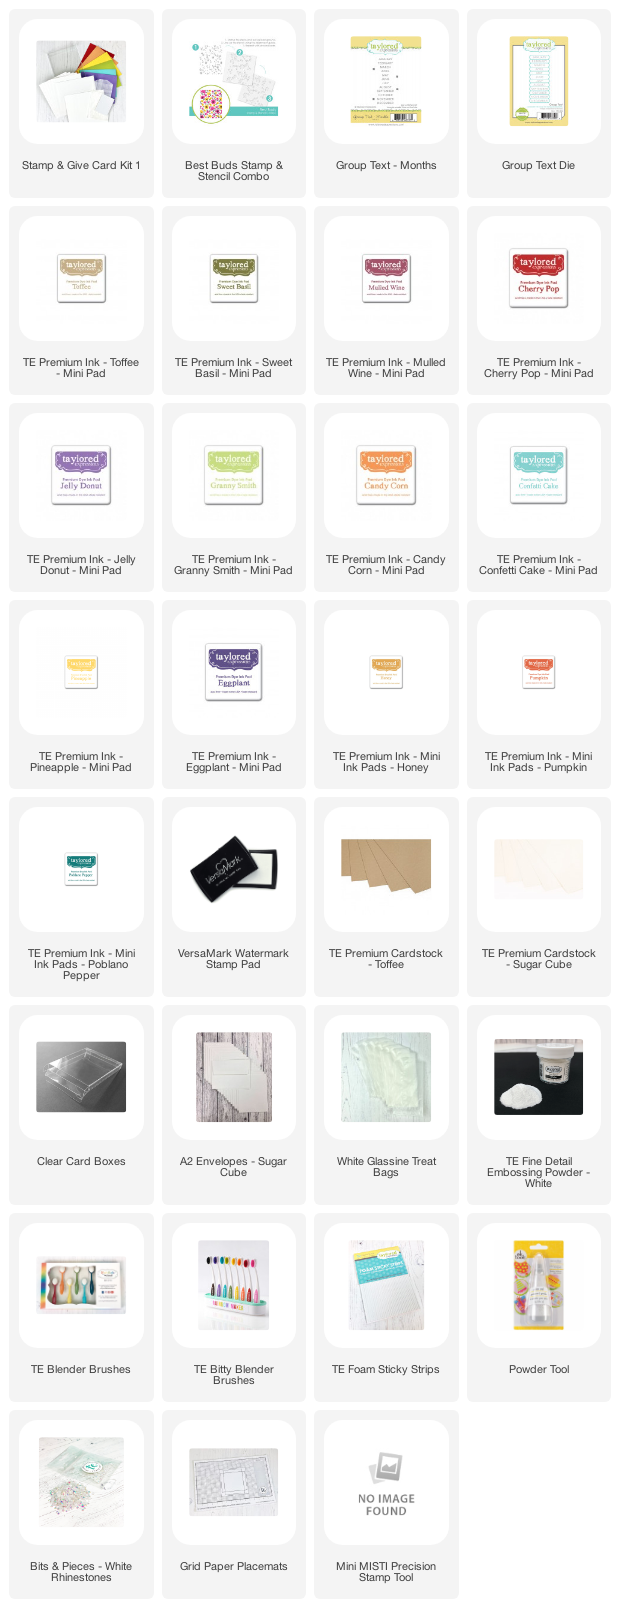
Check out the list below for all of the supplies that Joy used on her card set:

Here is more gift giving inspiration from the TE Creative Team using the new products from the Handmade for the Holidays release, starting with more card sets created with the Stamp & Give kits!
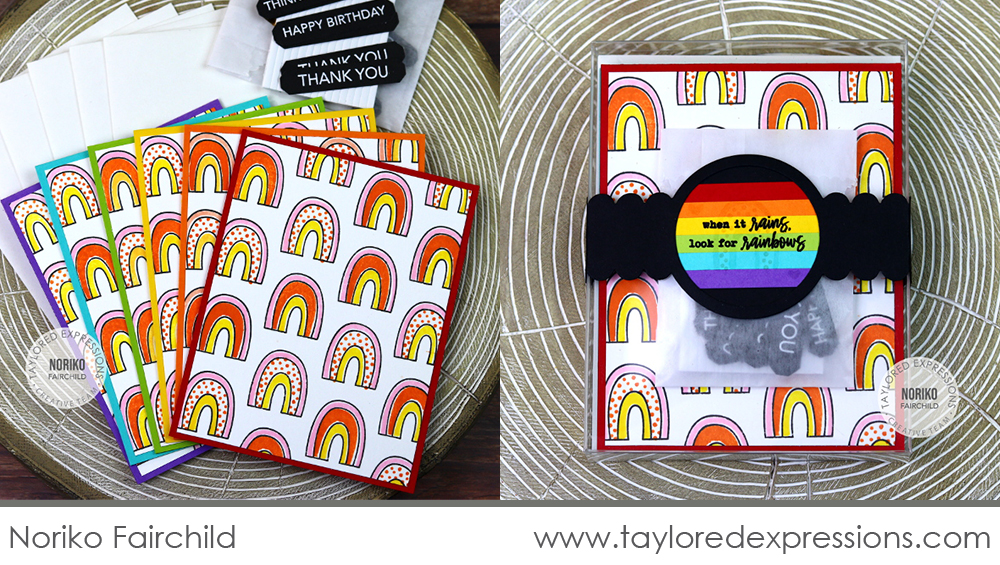
Noriko Fairchild also used the Stamp & Give – Sugar Cube Rainbow kit to create a bright and colorful set of cards. She stamped the panels with the Chasing Rainbows Cling & Clear Combo set for the cards and then embossed the sentiments from the Group Text – Occasions stamp in white on Oreo cardstock to adhere to the cards. Noriko packaged the card sets in the clear card box and added a belly band cut out with the Noteworthy Belly Band dies around the box with a rainbow striped finishing touch!
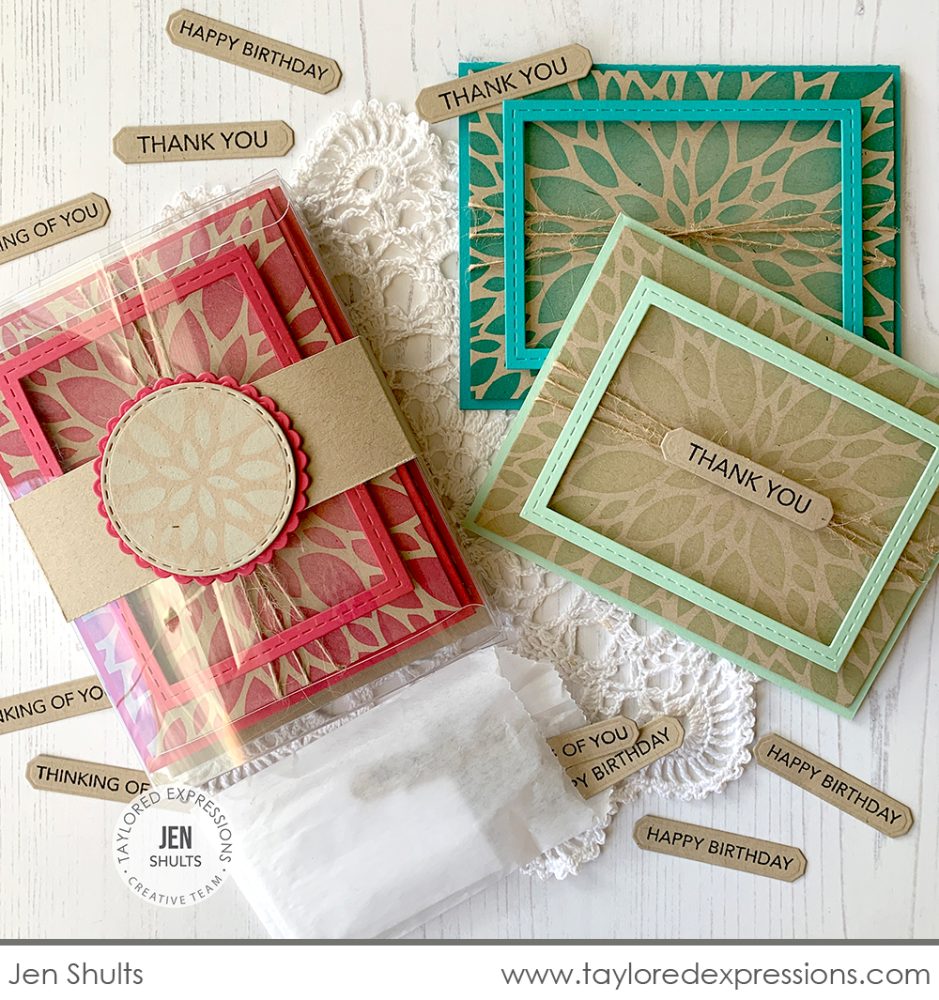
This next card set by Jen Shults features the Dahlia stencil paired with the Stamp & Give – Toffee Rainbow kit. Jen stenciled the Toffee card panels in colors to coordinate with the card bases in the kit, wrapped the panels with burlap twine, and added frames cut out with the Stitched Frame Stacklets 1 die collection. The sentiments from the Group Text – Occasions stamp are stamped onto Toffee cardstock with Oreo ink and cut out with the Group Text die. I love the belly band that Jen added around the clear card box with the dahlia stenciled onto it to coordinate with the card set.
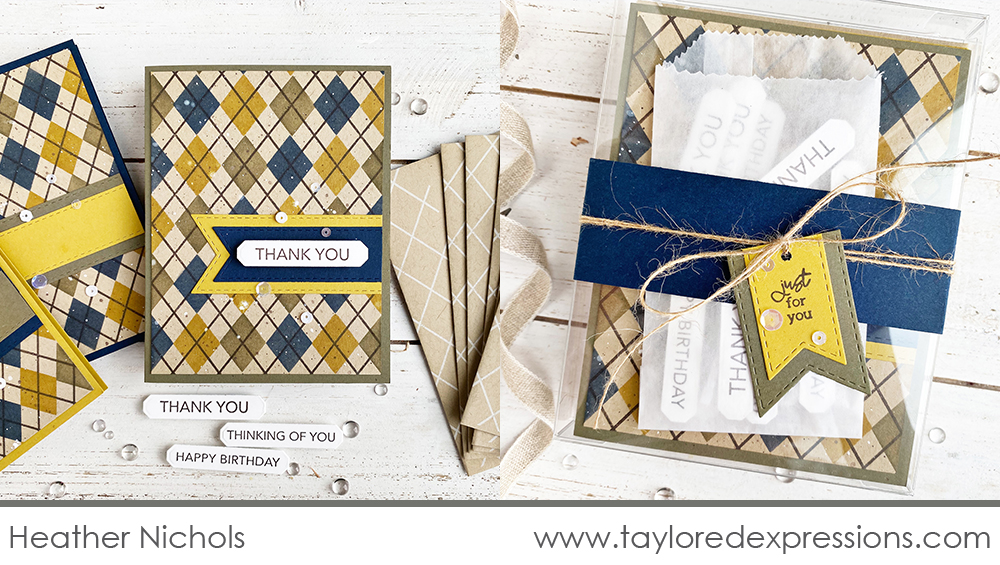
For a more masculine/natural color theme for a card kit, choose the Stamp & Give – Toffee Trio kit. I used the kit (Heather Nichols) to create this set of card with the Argyle Stamp & Stencil Combo set. I stamped and stenciled the pattern onto the Toffee card panel and added Stitched Banner Stacklets die cuts for a place to add the sentiments. I stamped the Group Text – Occasions sentiments in Chocolate Truffle and added the Sticky Strips to the backs of them so they are ready to adhere to the cards. I packed everything into the clear card box, added a belly band cut from Blue Corn cardstock topped with a tag stamped with the ‘just for you’ sentiment from the Itty Bitty Sentiments stamp set.
Now, here are a few more ideas for crafty holiday gifts:
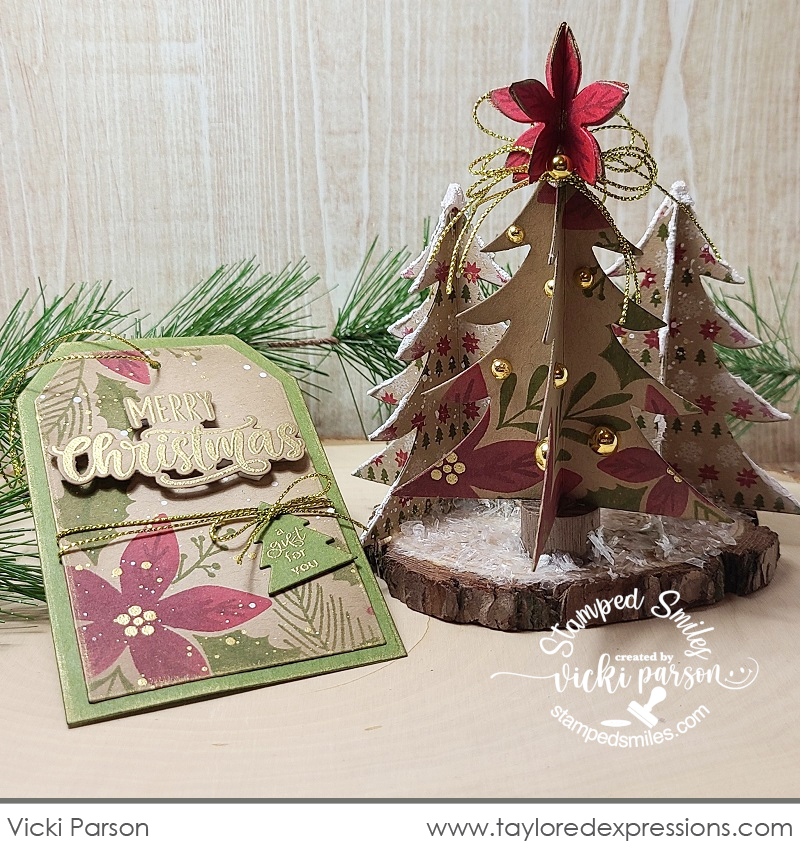
Our guest designer, Vicki Parson, created the prettiest Christmas decor piece using the Accordion Tree dies – and check out that coordinating gift tag! On the taller tree, she stamped Toffee cardstock with the Merry Blooms Stamp, Stencil, & Clear Combo set and then topped the tree with a poinsettia cut out with the Perfect Poinsettia dies. The smaller trees are stamped with the tiny images in the Itty Bitty Sentiments – Holiday stamp set. I love all of the extra details Vicki added like the Bits & Pieces – Gold Drip Drops ornaments and thick white paint ‘snow’!
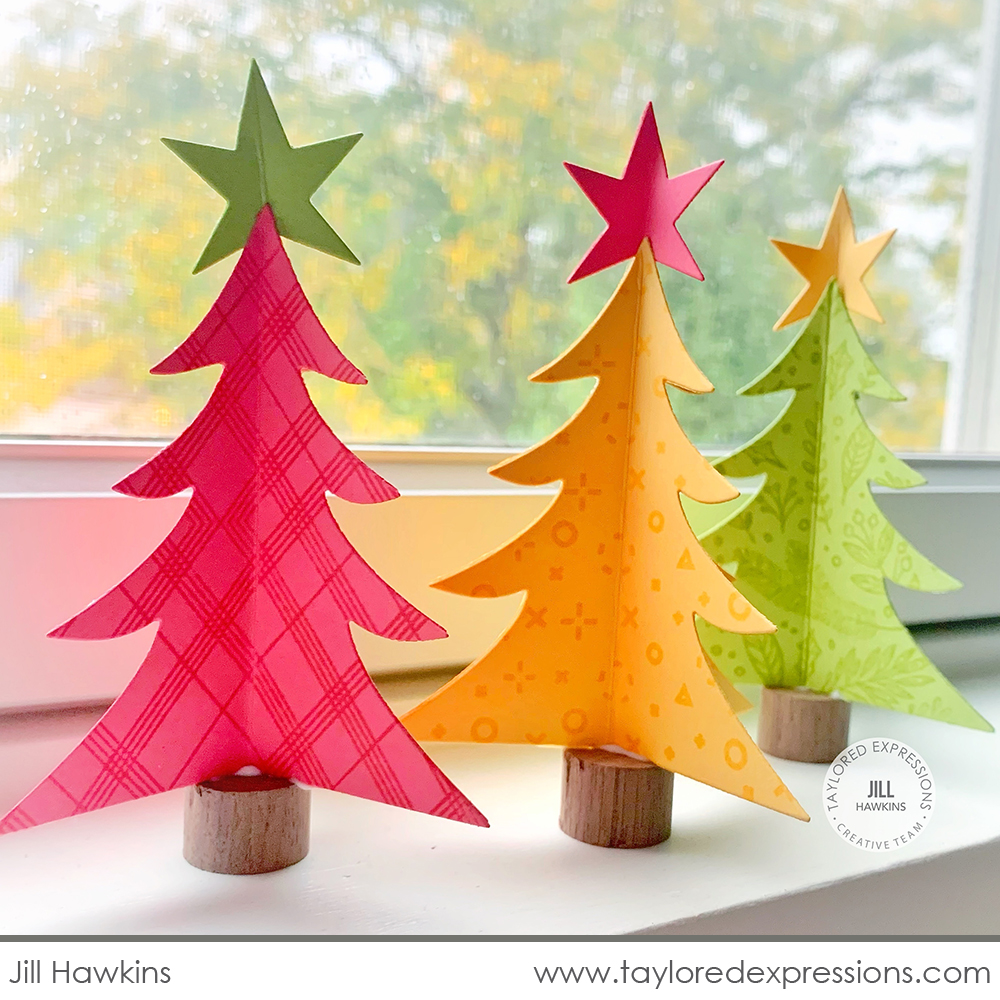
While Vicki’s trees had a more elegant feel, Jill Hawkins created a forest of trees with bright colors for a fun and whimsical look! The trees are cut out with the Accordion Tree dies from Granny Smith, Gauva, and Pineapple cardstock that were stamped with different background stamps: Boughs & Berries, Diagonal Diamonds, and Ticks & Tacks. Once the trees are added to the Accordion Tree Trunks, they are ready to gift and use to decorate for the holidays!
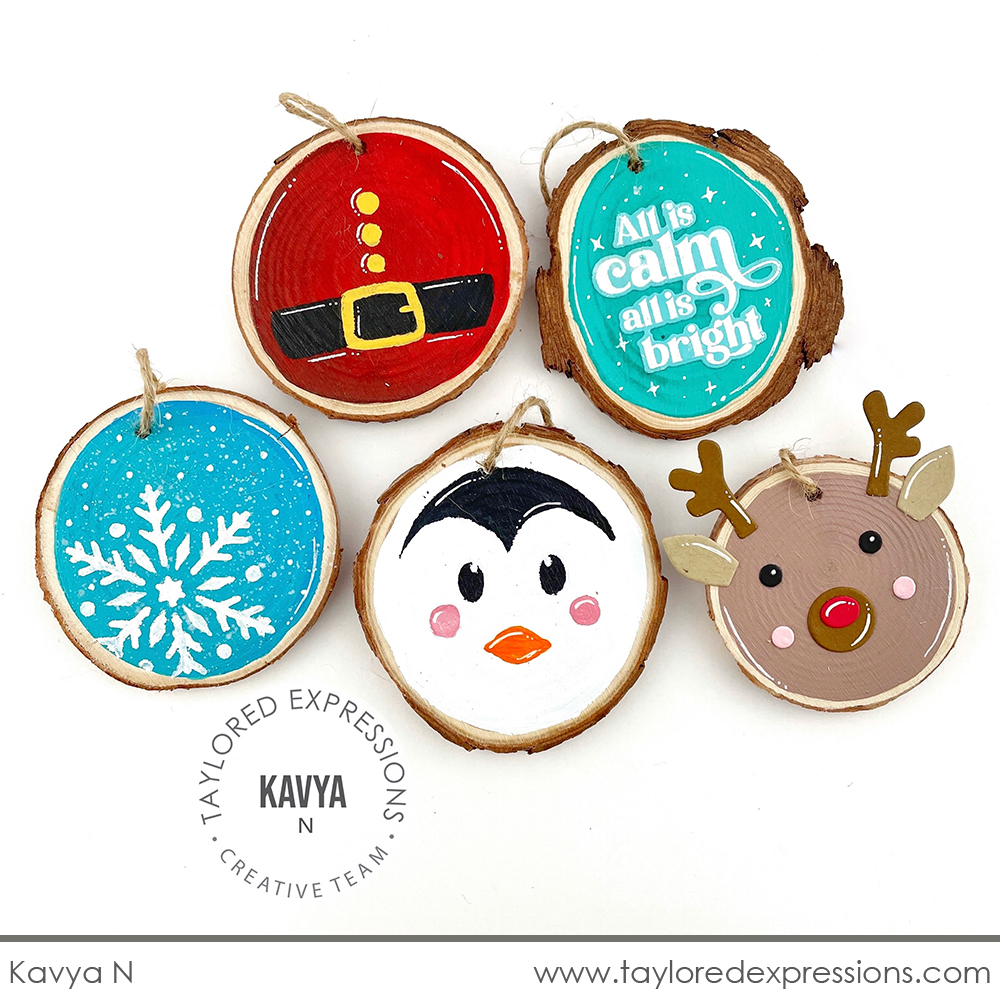
Finally for our holiday gifting ideas, is this set of ornaments created by Kavya using the Deck the Halls Ornament Kit. Kavya used elements from the kit to paint and stencil her ornaments as well as a few other items from her craft stash. The ornament on the top right features a sentiment from the Merry & Bright stamp set and you might recognize the reindeer ornament on the bottom left that is created using pieces cut out with the Critter Clips – Christmas dies. Kavya added plenty of details to her ornament with a white gel pen including highlights, twinlkly stars, and snow splatters!

Today, join Susan Block live for “T Time” at 10AM Central on the Taylored Expressions Facebook Page. She’ll be sharing crafty inspiration – make plans to come join in the fun! (Don’t worry, if you miss the live you can always watch the saved broadcast afterward!)
That wraps up for the inspiration for this week for the new You can share your creations over on the Fans of Taylored Expressions Facebook Page – we love to see what you have been creating with your TE goodies! Thank you so much for stopping by the TE Blog and make plans to stop back again next week for more crafty inspiration!
Did you know that you can subscribe to our blog and get our posts right in your inbox? Just sign up right HERE – that’s all there is to it to make sure you don’t miss any of our crafty inspiration!


