Jan 04, 2022
Send Your Love With Our NEW Valentine Products Available NOW!
Hey, crafty friends! It’s Taylor here! Love is in the air as we move from the holiday season into Valentine’s Day! It’s always a good time to send messages of love and appreciation and that’s one of the reasons Valentine’s Day is one of my favorite releases each year. Oh… and the CANDY! *wink*
Get ready for three days of blog posts (today, Wednesday, and Thursday) with a new video each day and inspiration from the TE Creative Team featuring the new products! Also, purchase the Donut Days Collection to get access to an exclusive video class! Check out the details below:
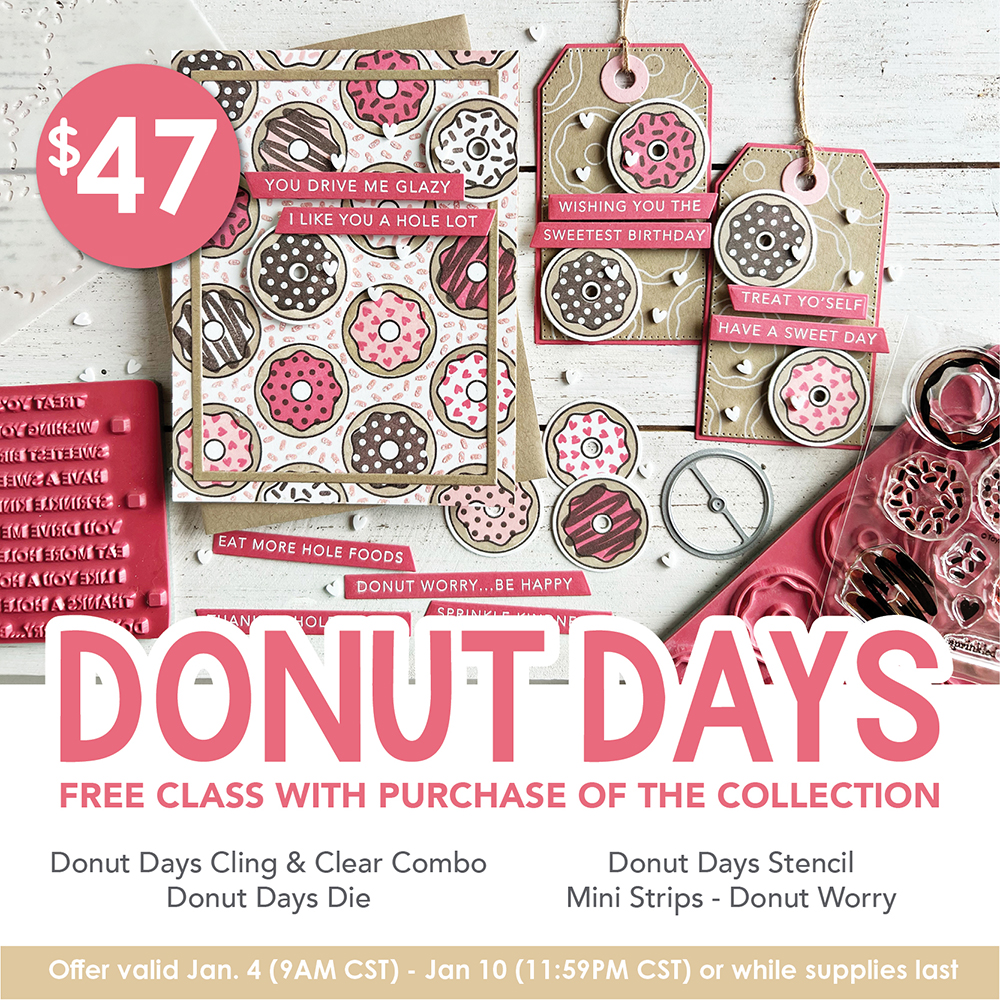
When you purchase the Donut Days Collection (Donut Days Cling & Clear Combo set, Donut Days stencil, Donut Days die, and Mini Strips- Donut Worry stamp) through Sunday, January 9th, you will get a free exclusive video craft along class with Heather!
This mini version of our Online Crafty Classes is a great way for you to put your new goodies to use right away making a card and tag set at your own pace! Watch the video as often as you like and learn some new crafty tips and tricks!
Once you complete your purchase, you will receive an email (separate from your order confirmation email) with links to the class video on YouTube.
Although Heather will recommend extra supplies (ink, cardstock, embellishments, etc.), you can use anything you have to make these projects uniquely yours!
Hurry! This offer is only valid through 11:59 pm (CT) on Sunday, January 9th, or while supplies last.
Click below to visit the new release products in the TE webstore and then keep scrolling for all of the inspiration!
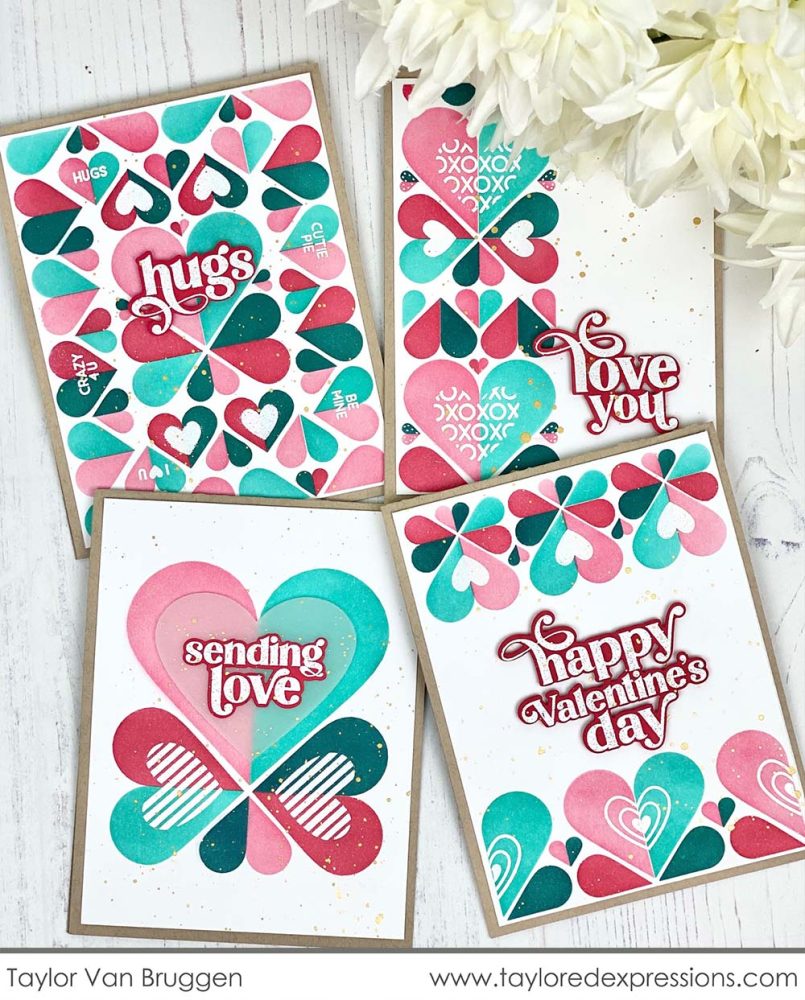
In today’s video I had fun with our newest Create in Quad stencil featuring this fun half-heart pattern. I quickly created 4 card panels with one set of large layering stencils and then stepped up the designs by embossing patterned hearts over the top of the blended colors.
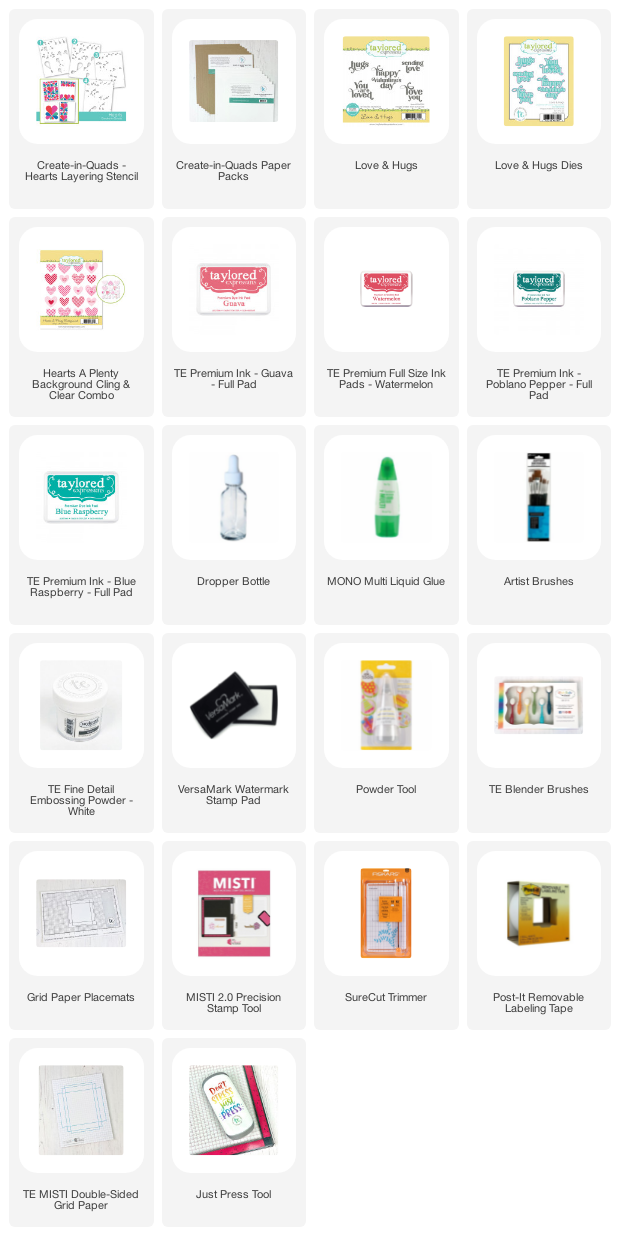
I chose four of my favorite colors for a non-traditional Valentine combo: Blue Raspberry, Poblano Pepper, Guava, and Watermelon. As you may know, I’m not a huge fan of purple so I love coming up with unique no-purple color combos.
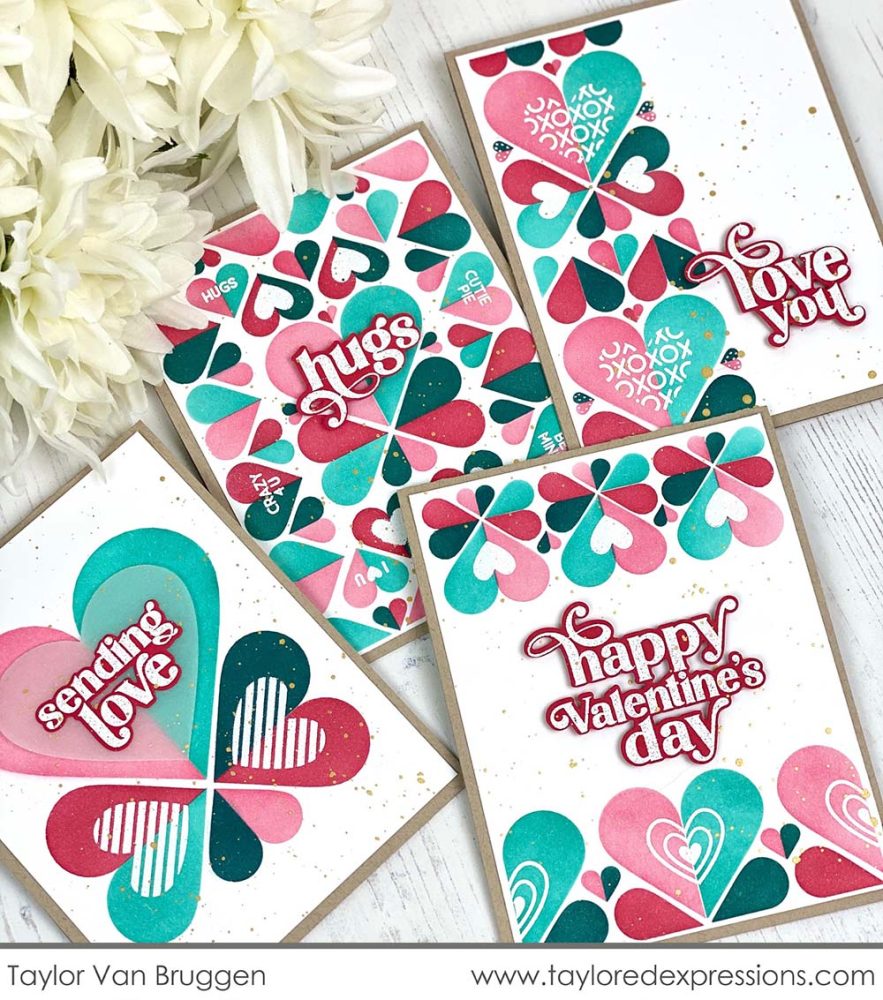
After embossing the patterned hearts in white, I used the same embossing powder to heat emboss the sentiments onto Watermelon cardstock for a perfect contrast. Then I decided to splatter a touch of gold onto each of the card panels using my Gansai Tambii Starry watercolors!

Now, here is a closer look at the new Valentine release products that are available to purchase today, along with inspiration from the TE Creative Team:
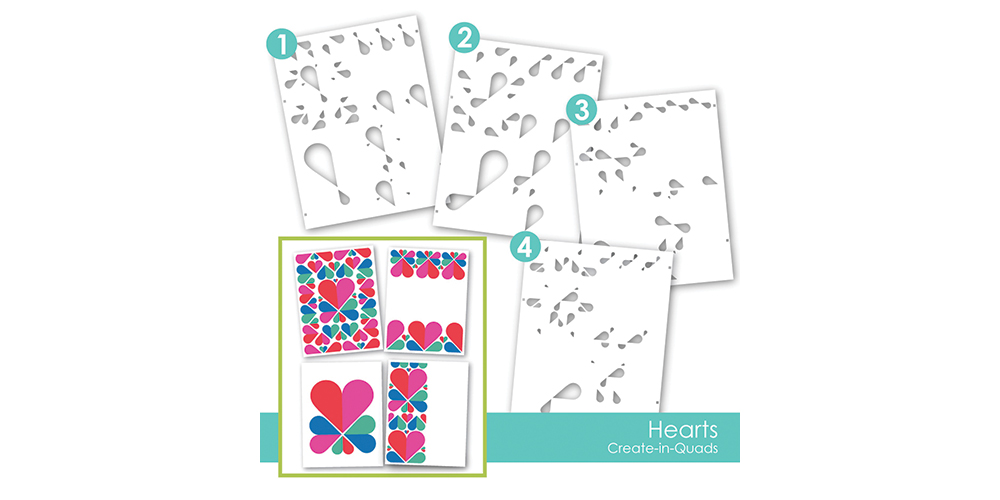
Starting things out is the new Create-in-Quads Hearts Layering Stencil set that you just saw in my video above! Our innovative Create-in-Quads Layering Stencils make it easy to create four different A2 cards in minutes! Simply place your 8″ x 10 1/2″ cardstock panel within the etched guidelines on each stencil and apply the medium of your choice using the alignment squares to make sure everything lines up perfectly. When you’re done, just cut the finished panel into quarters to reveal a family of A2 card fronts!
Use Create-in-Quads Hearts to mass-produce Valentine or love themed cards in four different designs! Each can be used on its own, or you can add sentiments and embellishments to make each one unique!
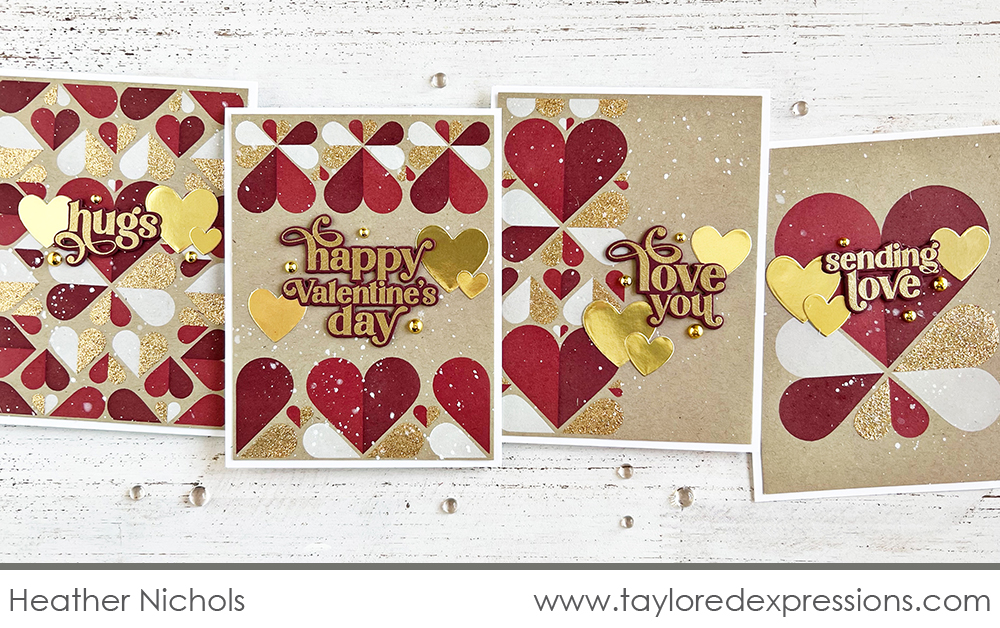
Heather Nichols stenciled the Create-in-Quads Hearts Layering Stencil set onto Toffee cardstock with a more traditional Valentine color combination. She used Cherry Pop, Mulled Wine, and Sugar Cube inks for the first three layers and then Happy Medium – Gold Glitter for the final layer to add the sparkle. There are lots of extra gold touches with the gold embossed sentiments, gold foil cardstock Hearts a Plenty die cuts, and Bits & Pieces – Gold Drip Drops. (Learn more about the sentiments below!)
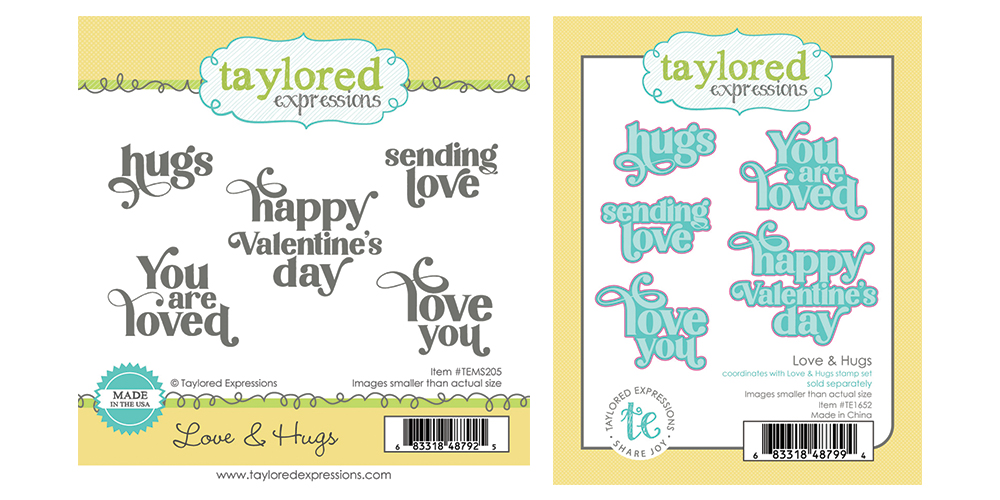
Make a statement with your Valentine cards when you use the pretty sentiments from our Love & Hugs stamp set. Featuring a trendy serif font with extra tails and flourishes, the sentiments include:
- hugs
- happy Valentine’s day
- sending love
- you are loved
- love you
Set coordinates with the Love & Hugs die collection (sold separately).
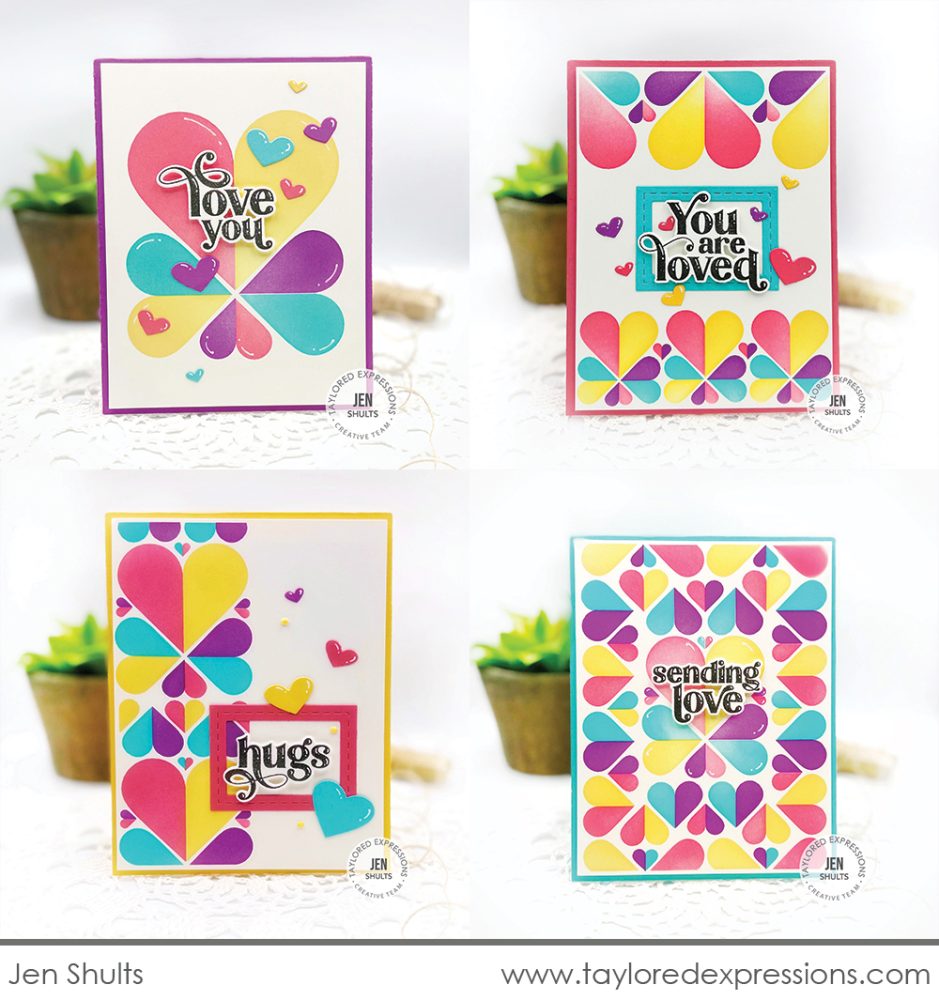
I love the bright colors that Jen Shults used on this set of cards created with the Create-in-Quads Hearts Layering Stencil set. Jen used Fruit Punch, Pineapple, Cookie Monster, and Plum Punch inks for the different layers and then added sentiments from the Love & Hugs stamp set (+ coordinating dies). The sentiments are stamped with Oreo Ink and have highlights added with a white gel pen. A few of the sentiments are framed with Stitched Frame Stacklets 1 die cuts and Jen sprinkled Little Bits – Hearts across the cards that are cut from coordinating cardstock colors.
…..
The products below are all included in the Donut Days collections that is a part of the promotion for this release (scroll to the top of this post for all of the details!)
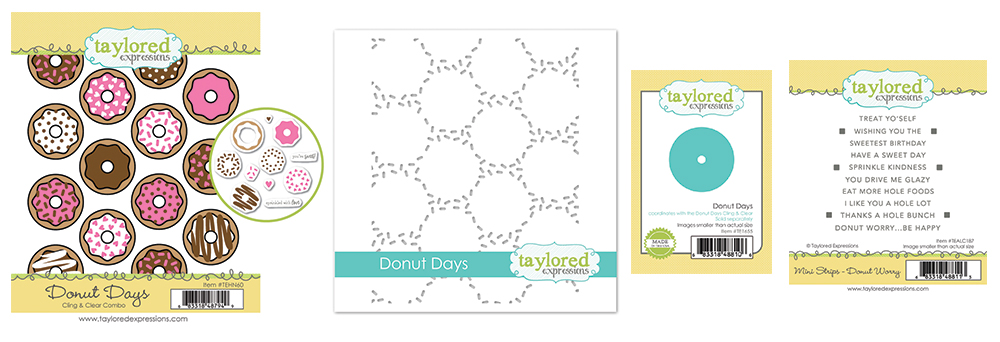
Create the sweetest cards for any occasion with our Donut Days Cling & Clear Combo! This stamp set makes it easy to get to mix up dozens of donuts complete with frosting and sprinkles in minutes! Simply stamp the red rubber background to get the pattern of donut outlines, then use the clear stamps that are included to add fills and sprinkles patterns, extra accents, and even a few sweet sentiments. Add more sprinkles between the stamped donuts with the Donut Days stencil and cut out individual donuts with the Donut Days die.
Stamp 10 sentiments that coordinate with the Donut Days collection or other products featuring sweet treats with the new Mini Strips – Donut Worry stamp. Use the sayings individually or combine them together for more possibilities! Cut all of the sentiments with one pass through your die cut machine using our innovative alignment guides with the coordinating Mini Strips or Mini Strips – Asymmetrical dies.
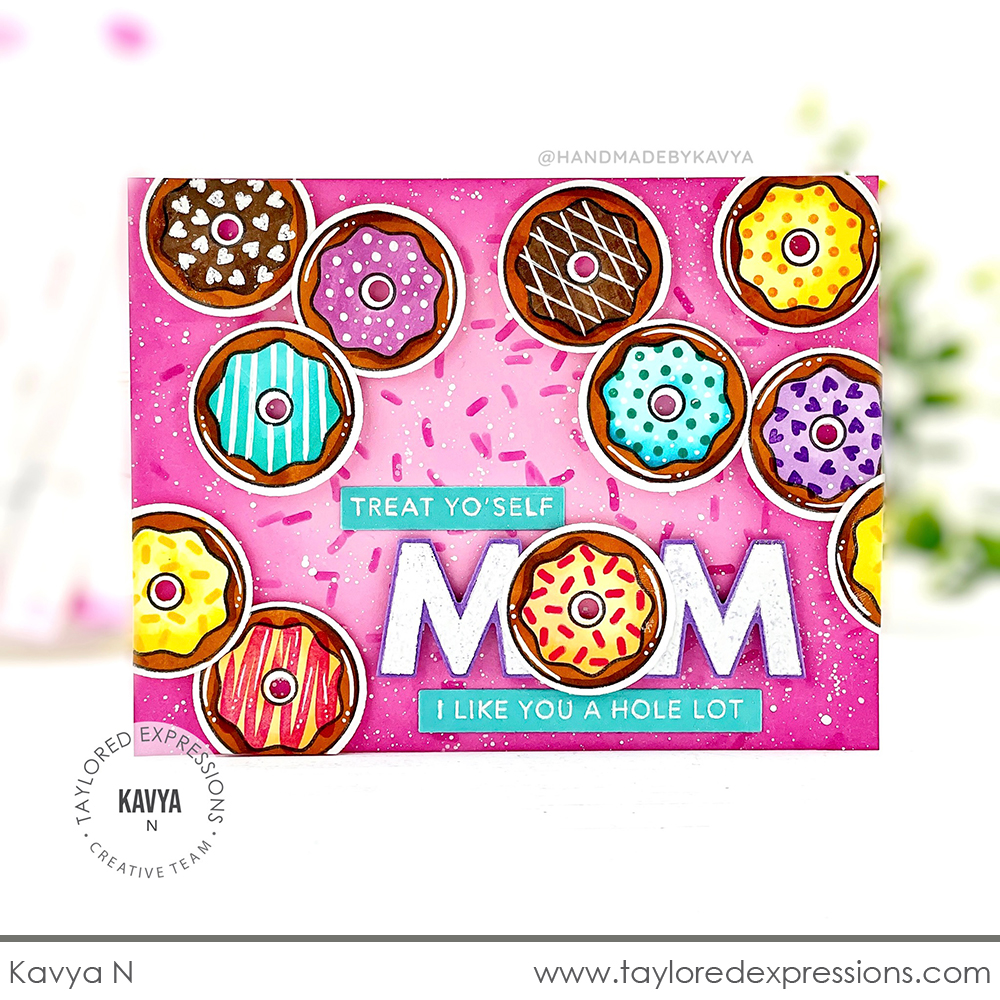
Kavya stamped the donuts from the Donut Days Cling & Clear Combo set, colored them in with Copic markers, added details with the clear stamps in the set, and used a white gel pen to add even more detail! She cut the donuts out with the coordinating die and added them to this card for Mom! I love that the background is created with the Sprinkles Rotating Stencil (it coordinates with the donuts perfectly!) and how Kavya used one of the donuts as the ‘O’ in the word ‘Mom’ that is stamped with the On the Block – Mom stamp! The sentiment strips that complete the sentiment are stamped with the new Mini Strips – Donut Worry stamp.
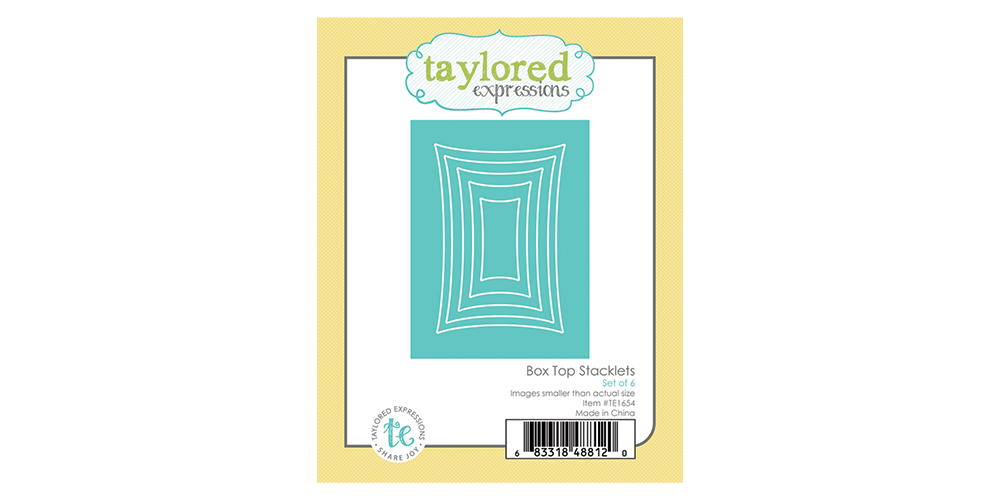
Package up the donuts created with the Donut Days collection on your projects with the Box top Stacklets die collection. Designed to look like a retro/vintage bakery box, this die collection can frame your donuts and is perfect for creating shaker cards (it’s perfect to use with other images and themes too!)
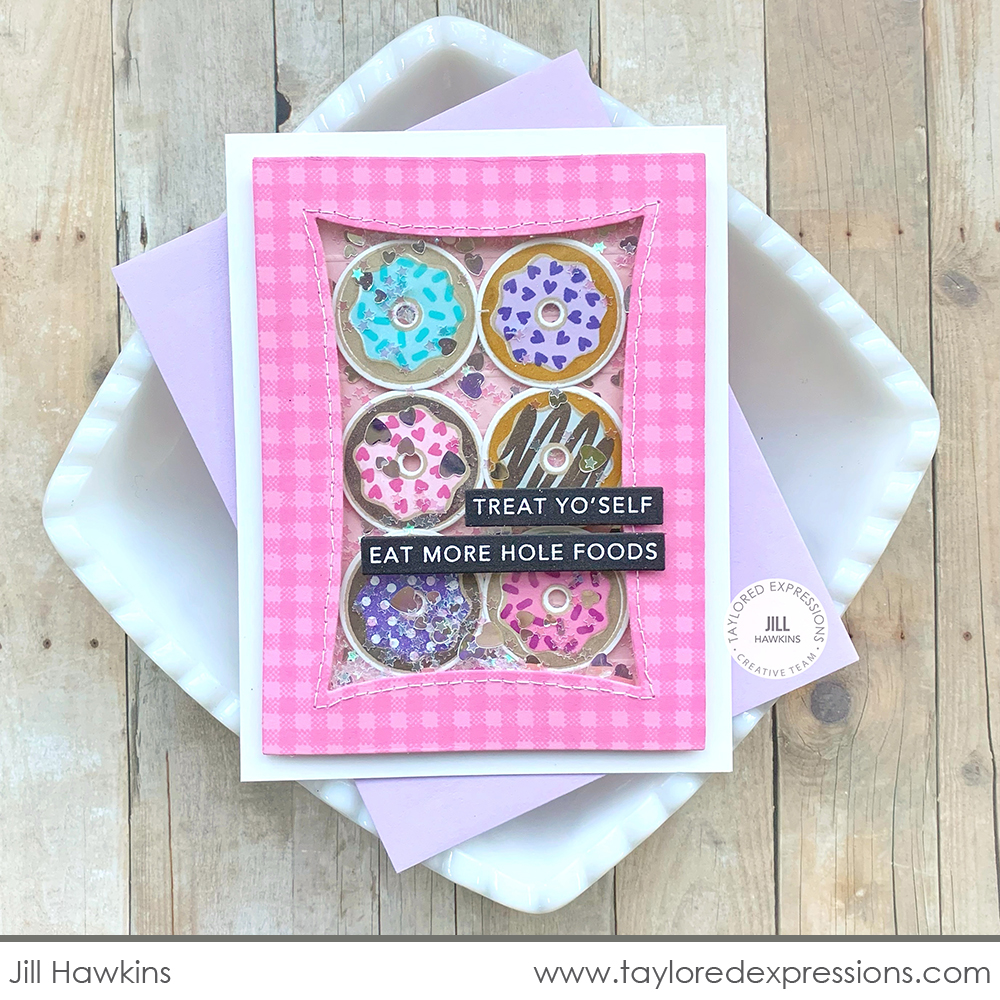
Jill Hawkins created the cutest gingham donut box with the Box Top Stacklets die collection and the Donut Days Cling & Clear Combo set! She stamped a whole bunch of different donuts (don’t they all look delicious?), cut them out with the coordinating die, and then packaged them up underneath the Box Top Stacklets die cut that is stamped with the Gingham Check Background stamp and backed with window acetate. Jill also added Bits & Pieces – Sparkly Stars and Full of Heart as shaker filler inside the donut box! The sentiments from the Mini Strips – Donut Worry stamp are embossed white on Oreo cardstock.
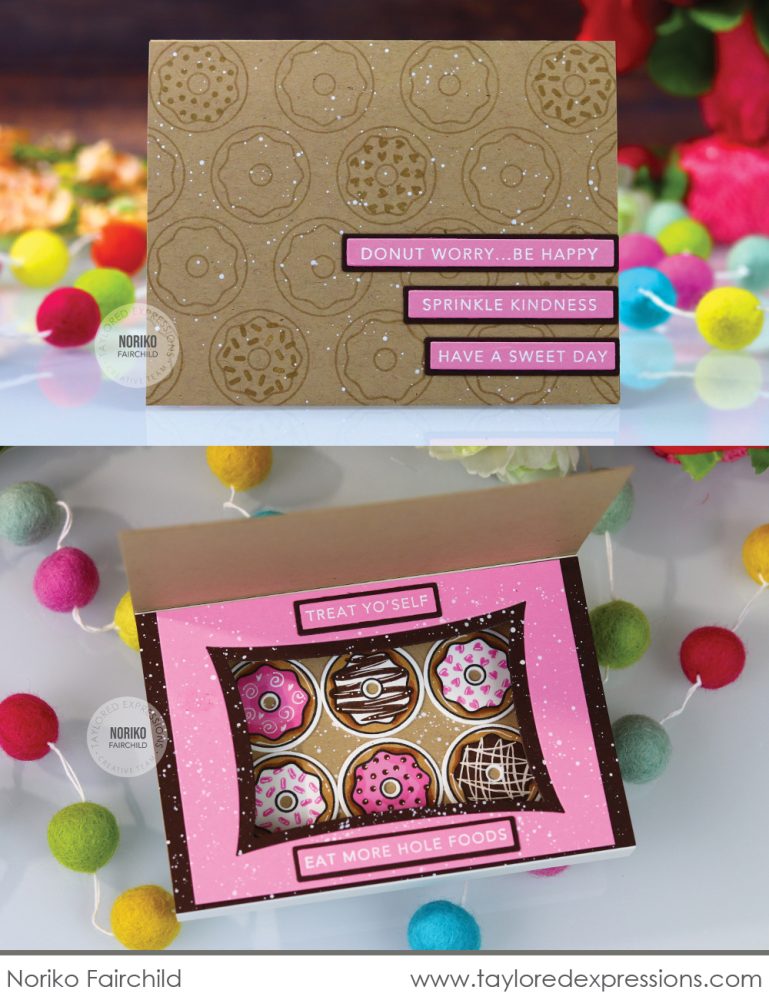
Noriko Fairchild created an interactive donut box on her card created with the Donut Days Cling & Clear Combo set and Box Top Stacklets die collection. The front of the card features the Donut Days background stamped with Toffee ink on Toffee cardstock with details added using the clear stamps. When you open the card, a whole delicious box of donuts is revealed! Chocolate Truffle, Toffee, and Strawberry Milkshake inks are used to stamp the donuts along with lots of details added with a white gel pen. The sentiment strips on the front and inside of the card are embossed in white on Strawberry Milkshake cardstock using the Mini Strips – Donut Worry stamp.

Get ready to blend your love of stamping and stenciling with our Love Lights Stamp & Stencil Combo! This set is a fun way to make a custom background that’s perfect for Valentine’s Day and more! Simply stamp the background of wires and light bulb bases, then use the etched guides on the stencils as alignment guides to add adorable heart shaped light bulbs in multiple colors to the stamped image.
Add foiled accents to the cards you create with our Foil It – Love Lights panels. Simply top the panel with the foil of your choice and run it through your foiling machine and use the coordinating stencils from the Love Lights Stamp & Stencil Combo (sold separately) set to add color. Foil It – Love lights is a set of 12 pre-printed panels on TE Premium Cardstock (each measures 4″ x 5 1/4″).
Stamp 10 sentiments that coordinate with the Love Lights collection or other products in your collection with the new Mini Strips – Watt’s Up stamp. Use the sayings individually or combine them together for more possibilities! Cut all of the sentiments with one pass through your die cut machine using our innovative alignment guides with the coordinating Mini Strips or Mini Strips – Asymmetrical dies.
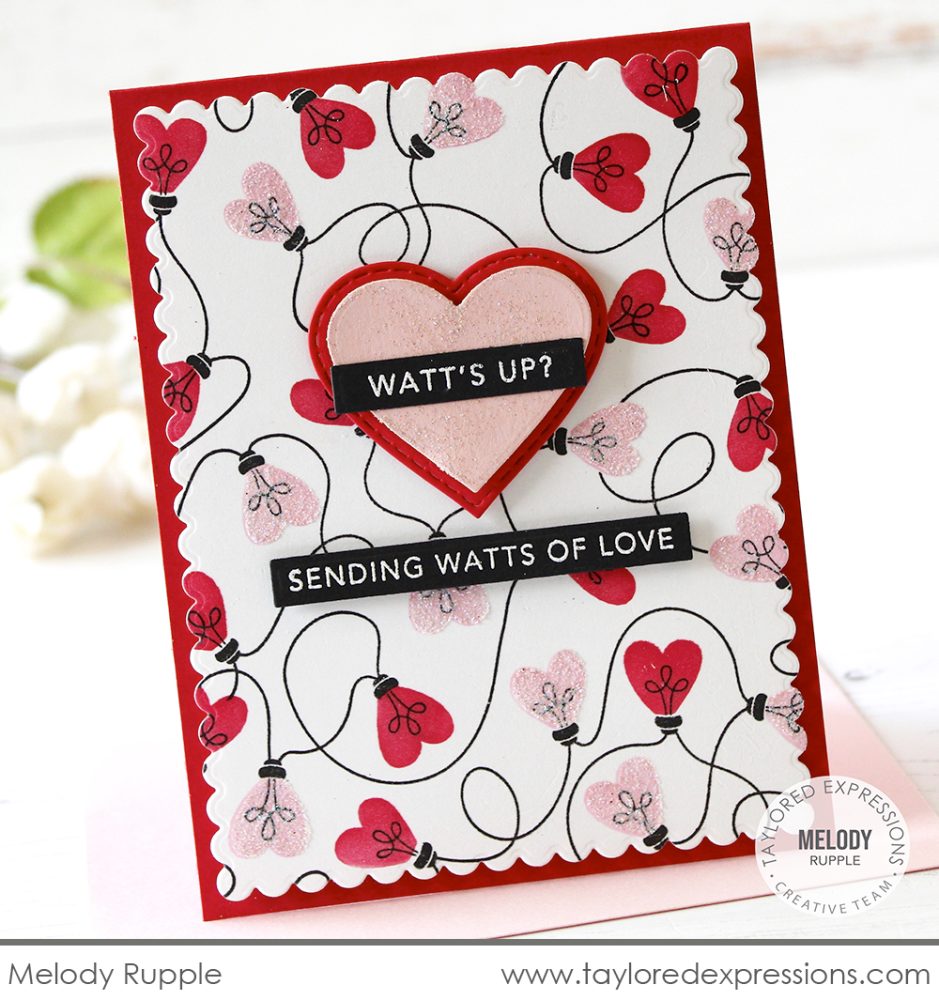
Check out the cute red & pink colored heart lights on this Valentine card by Melody Rupple! The lights are stenciled with Cupcake and Cherry Pop inks over the image stamped with the background stamp in the Love Lights Stamp & Stencil Combo set. Melody added sparkle to the lights by doing a layer of Happy Medium – Iridescent Glitter over the pink lights. The sentiments from the Mini Strips – Watt’s Up stamp are embossed in white on Oreo Cardstock and Melody layered one of the sentiment strips over a heart cut out with the Heart Stacklets and Stitched Heart Stacklets die collection.
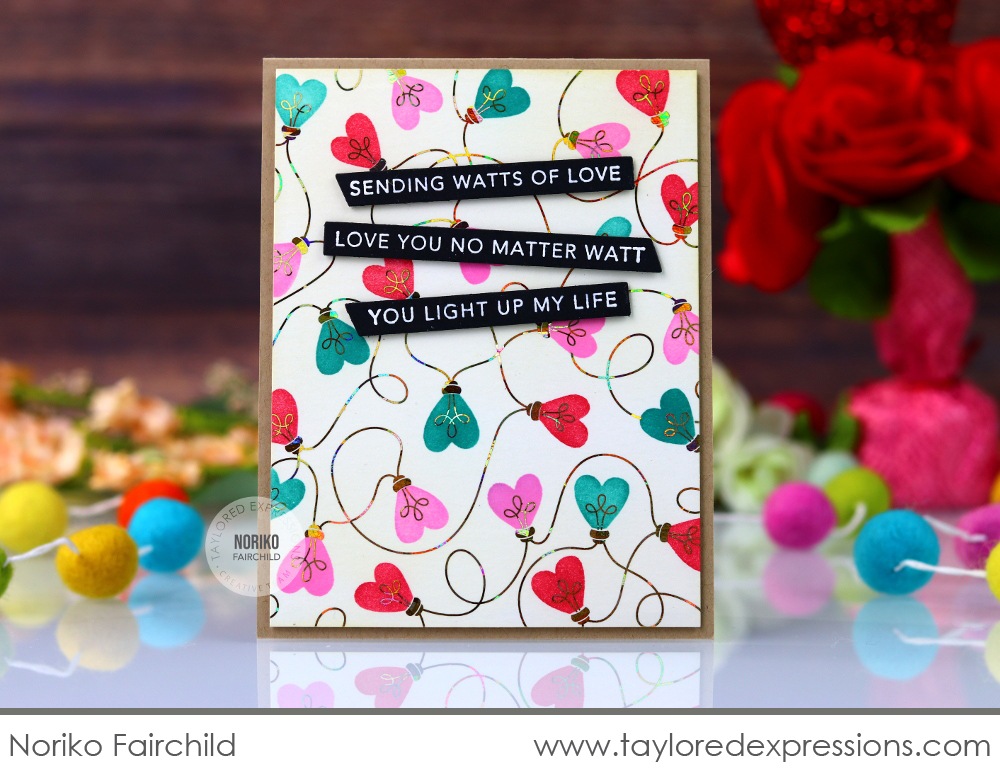
Use the Foil It – Love Lights panels to add shimmer and shine to your Valentine cards like Noriko Fairchild did here! Noriko foiled Gold Shattered Glass Deco Foil over the panel using a Minc machine (a heat laminating machine will also work to foil) and then added color over the top to add the heart lights using the coordinating stencils in the Love Lights Stamp & Stencil Combo set. The panel is added to a Toffee card base and the sentiments from the Mini Strips – Watt’s Up stamp are embossed in white on Oreo cardstock and cut out with the Mini Strips – Asymmetrical die.
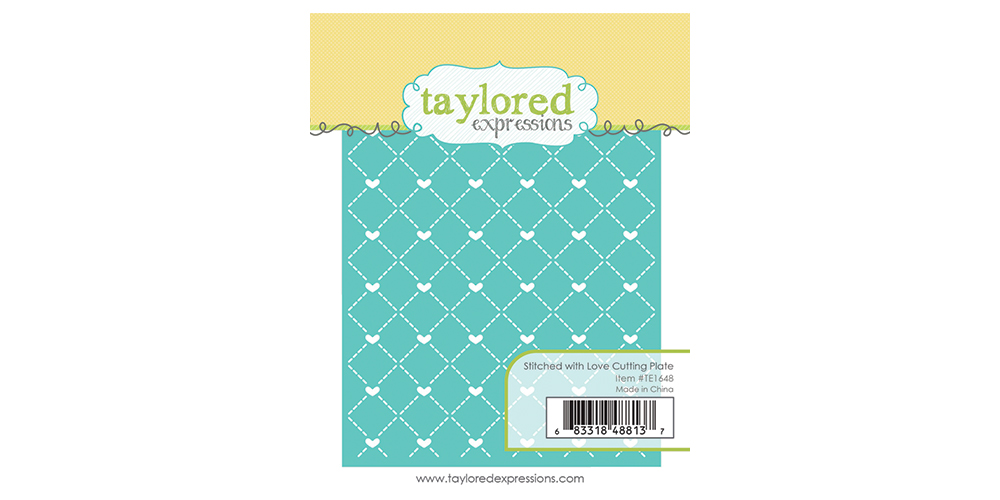
Add a pretty, detailed background to cards and crafts for occasions to express kindness and love with our Stitched with Love Cutting Plate. With its simple pattern of stitched interlocking diamonds and tiny heart cut outs, it will add that perfect touch and texture to your projects!
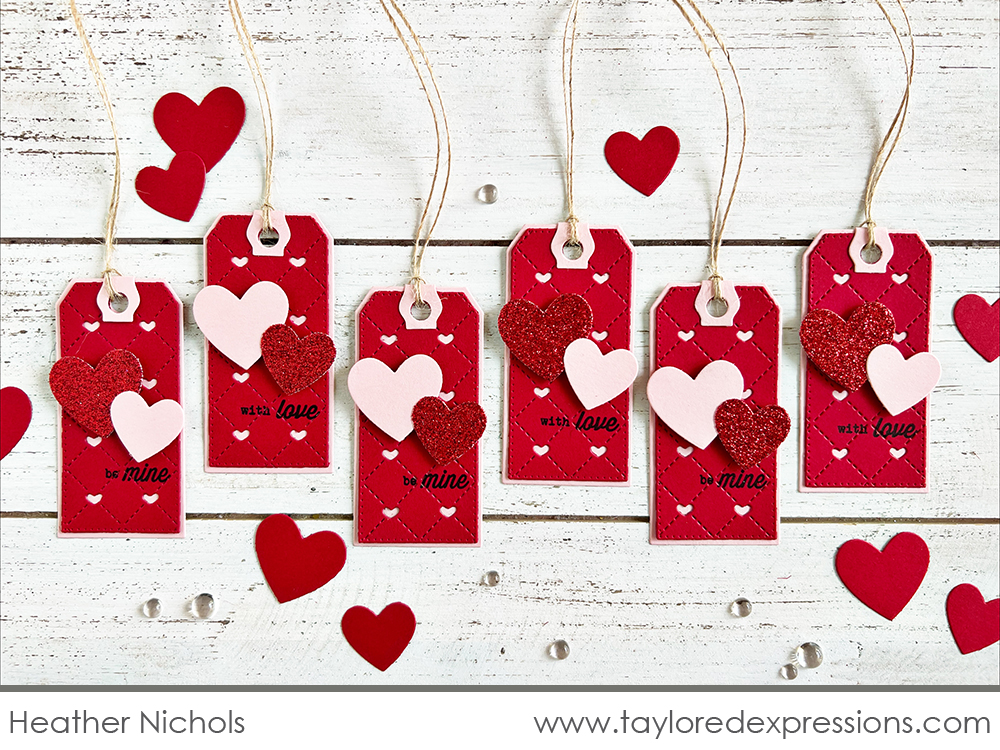
Heather Nichols used the Stitched with Love Cutting Plate for the background on this set of tags for Valentine treats. She used the cutting plate on Cherry Pop cardstock, cut out tags with a Pierced Tag Stacklets 2 die, and layered it over a tag base cut out with the Tag Stacklets 2 die collection from Pink Champagne cardstock. The sentiments on the tags are from the All Tucked In – Valentine stamp set and Heather added hearts to the tags cut out with the Hearts a Plenty dies from Pink Champagne and red glitter cardstock.
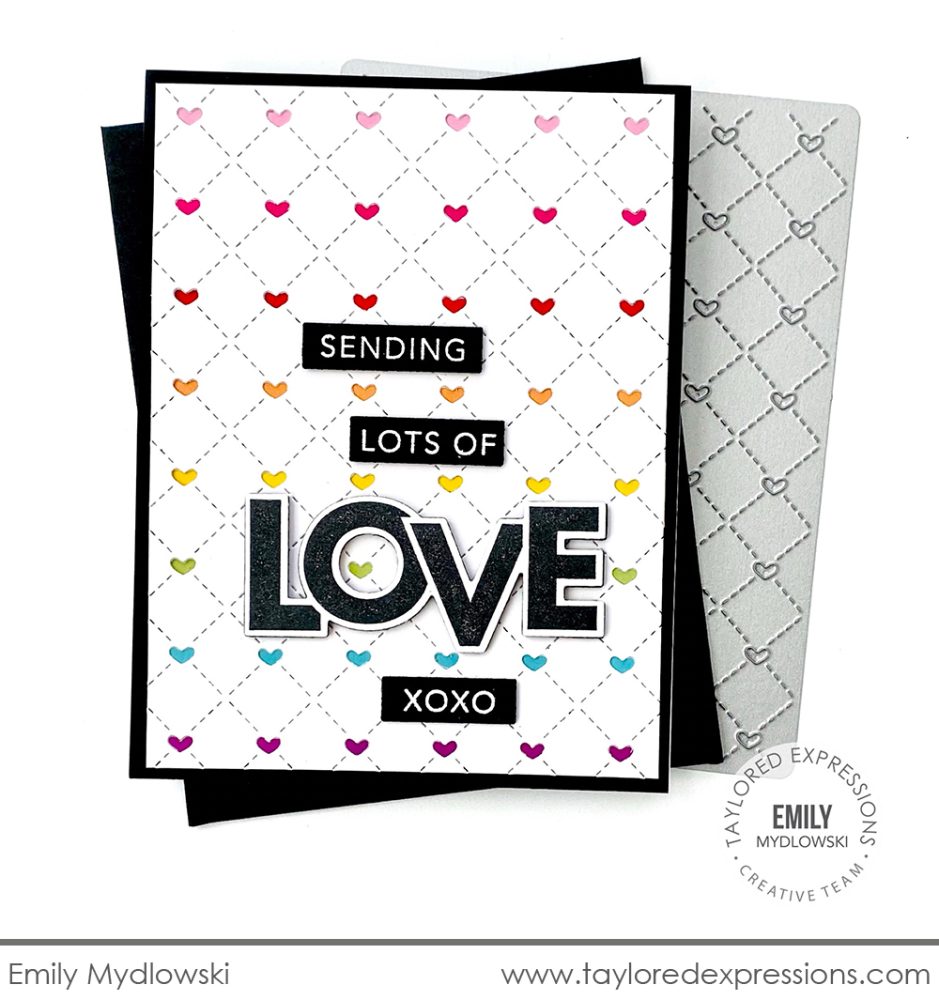
Emily Mydlowski added strips of colored cardstock behind the Sugar Cube card panel that is cut with the Stitched with Love Cutting Plate to create rows of colorful hearts on this Valentine’s Day card. She added the panel to an Oreo card base which really makes the colors pop! The sentiment is put together with the On the Block – Love stamp (+ coordinating die) and sentiments from the Building Blocks – Love Additions stamp that are cut out with the Building Blocks die.
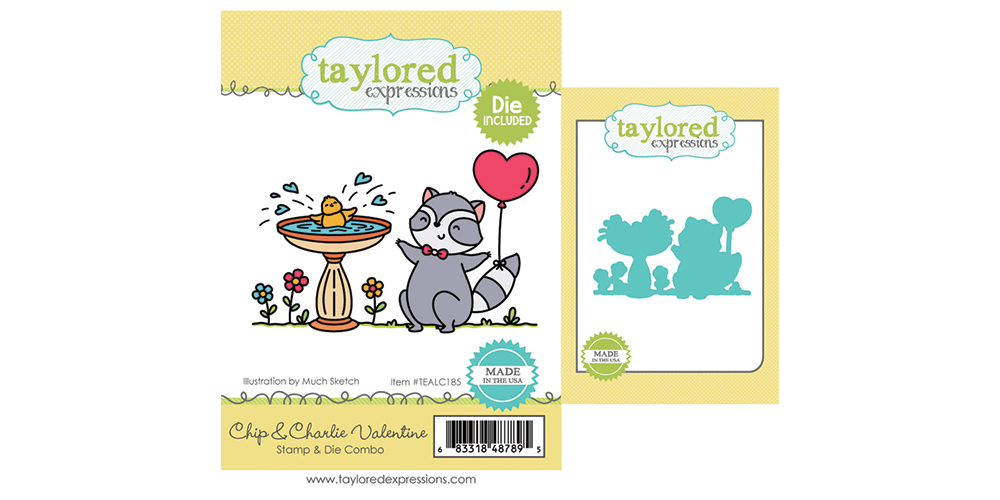
Chip and Charlie are back to celebrate Valentine’s Day! You’ll love coloring this cute scene with Chip holding a cute heart balloon and Charlie splashing in the bird bath from the Chip & Charlie Valentine Stamp & Die Combo set! Use Copic markers, colored pencils, or another favorite coloring medium to bring the scene to life and then add it to Valentine cards and more to share with the special people in your life.
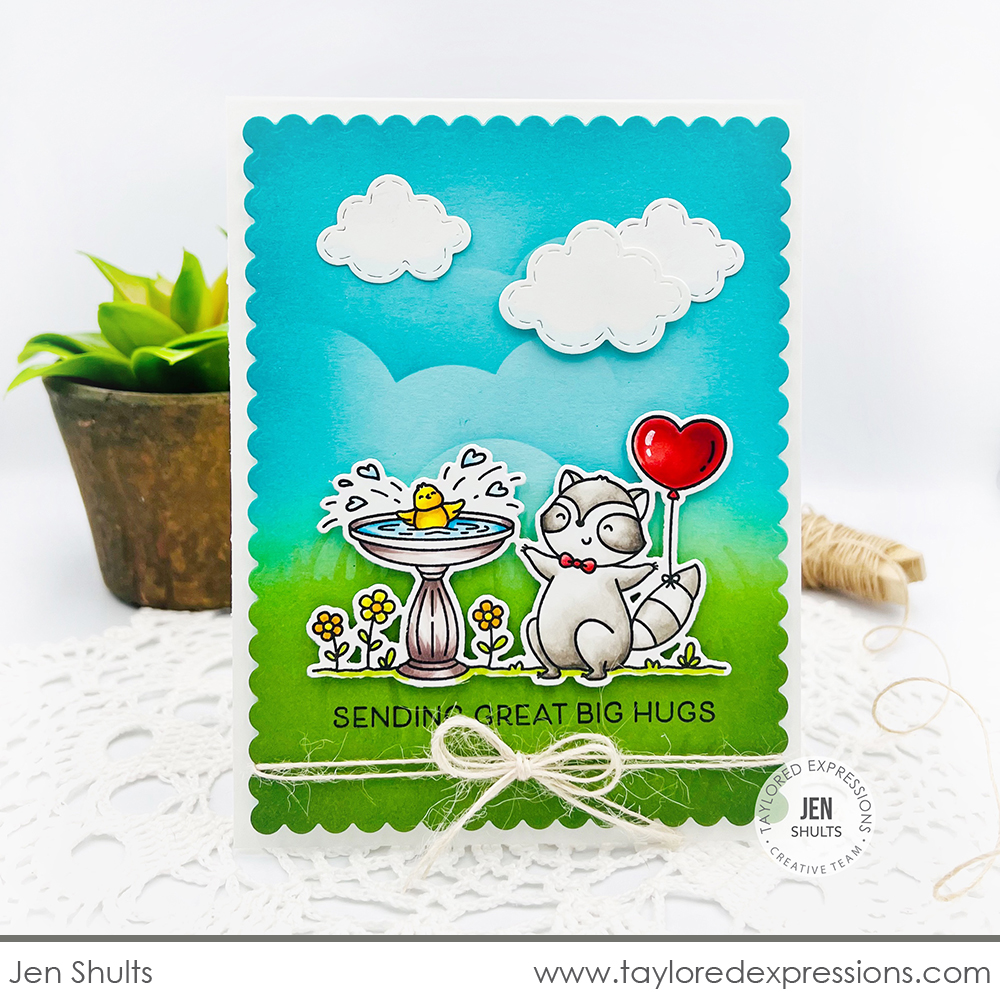
Jen Shults colored the scene from the Chip & Charlie Valentine Stamp & Die Combo set with Copic markers and added it to a background created with the Set the Scene – Clouds and Set the Scene – Grass Stencil Strips sets. A few puffy clouds at the top of the scene cut out with the Stitched Cloud Duo dies, a bit of twine tied around the bottom of the card, and a sentiment from the Just Saying stamp set complete the card.
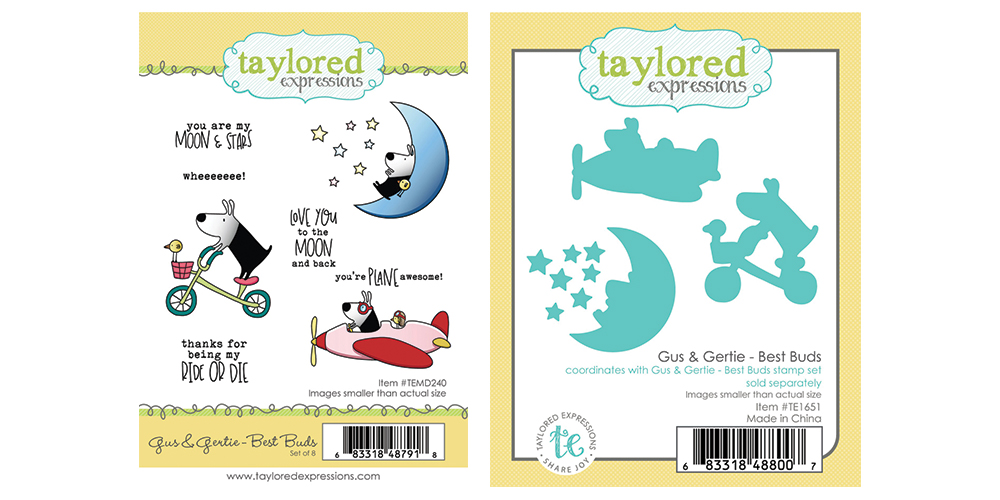
Nothing’s better than hanging out with your bestie, and our Gus & Gertie – Best Buds stamp set (+ coordinating dies) perfectly captures those fun friendship moments! This adorable set features stamps of the dynamic duo riding a bike, flying in an airplane, and stargazing on the moon along with several coordinating sentiments.
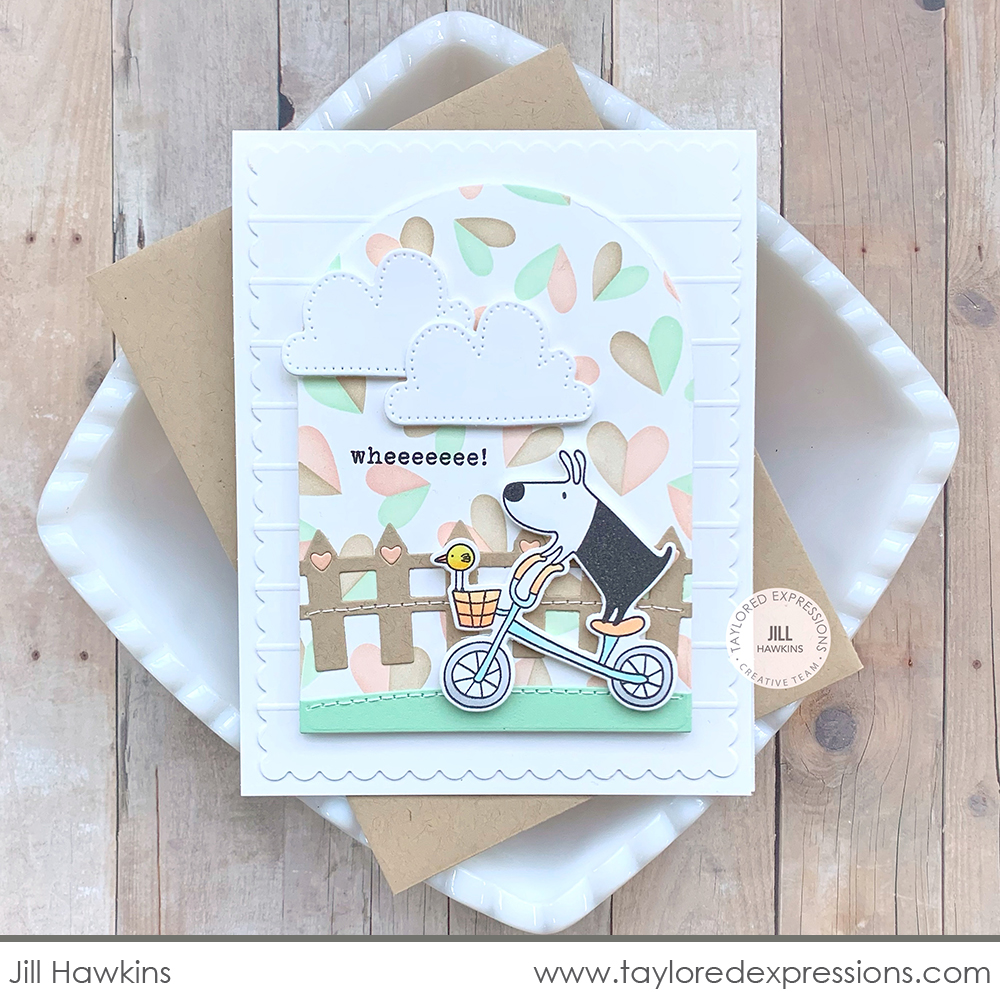
Jill Hawkins created the sweetest scene with Gus on his bike and Gertie in the basket from the Gus & Gertie – Best Buds stamp set. Gus is zooming along by a fence created with the Build a Scene – Heart Fence & Hill that is layered onto a background stenciled with the Half a Heart Layered Stencil set. A few puffy clouds cut out with the Rainbow Cloud Duo dies, Jill’s signature stitching, and the ‘wheeeeeee!’ sentiment finish off the card!
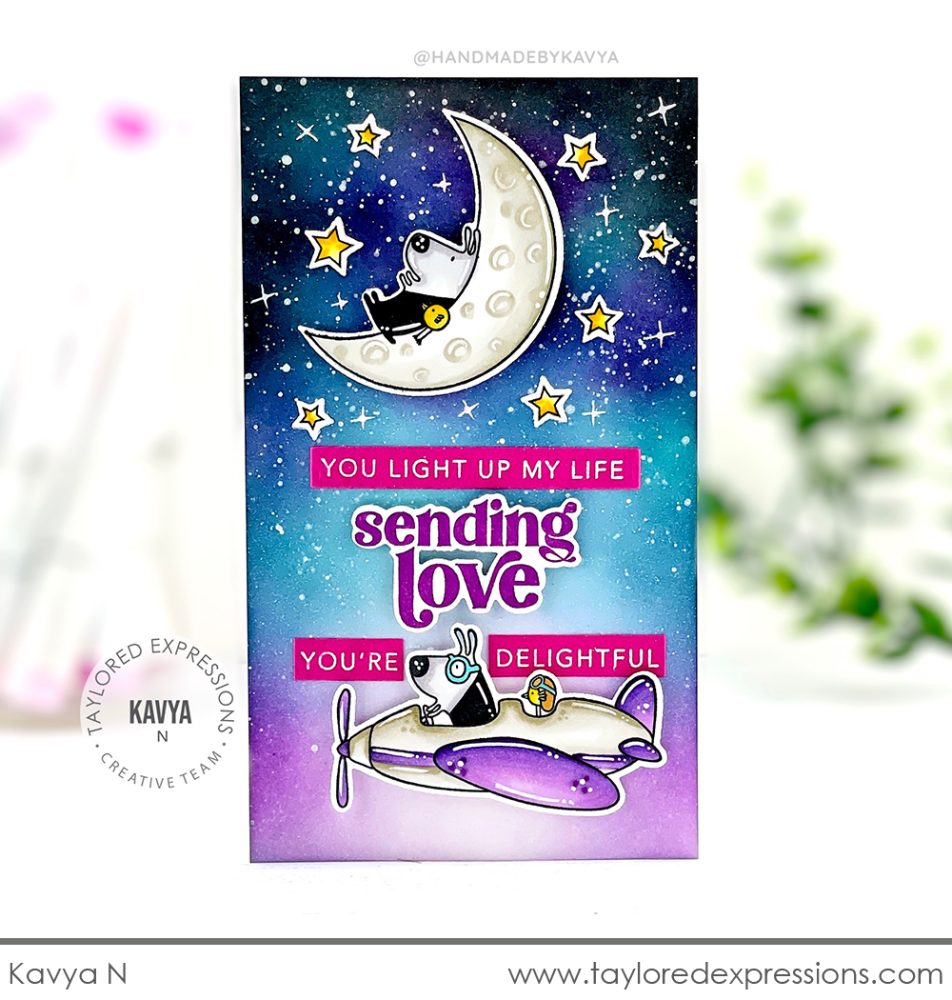
I might have to tease Kavya a bit about not using ALL of the images from the Gus & Gertie – Best Buds stamp set, but I’ll give her a pass because look how cute this sky scene is! Kavya colored the images with Copic markers and added them to a background blended with purple, blue, and back inks to create the night sky along with lots of white splatters for stars! There’s also lots of wonderful highlights and details Kavya added with a white gel pen. The sentiment on the card is put together with the Mini Strips – Watt’s Up stamp and Love & Hugs stamp set.
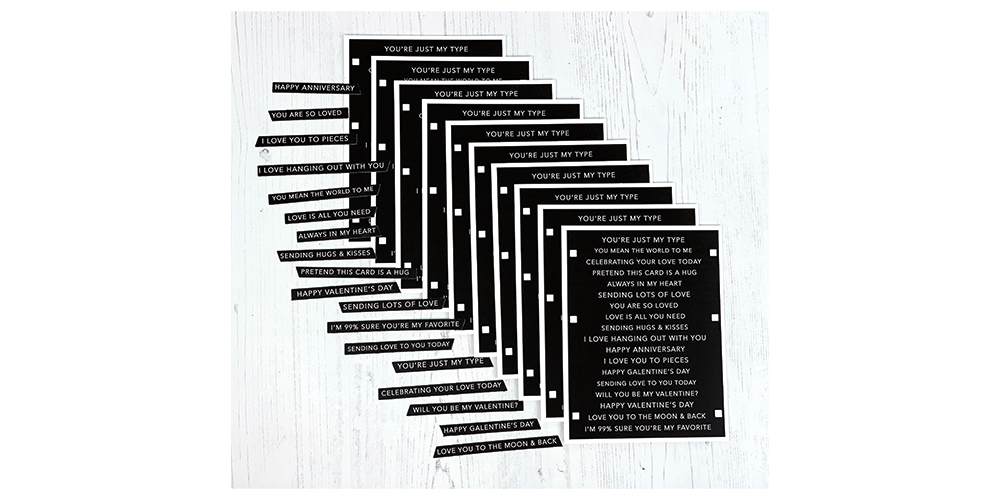
Get ready to turn everything you know about Simple Strips for Valentine and love theme projects on its head with our Simple Strips In Reverse – Love collection! The pre-printed panels come on TE Premium Cardstock and can be cut out as-is using any of the Simple Strips dies (sold separately) to leave you with crisp white sentiments on a black background, or can be topped with foil and run through a foiling machine to create crisp white sentiments on a fancy foiled background! Each panel includes alignment squares to line up with the alignment tabs to cut out 18 sentiment strips.
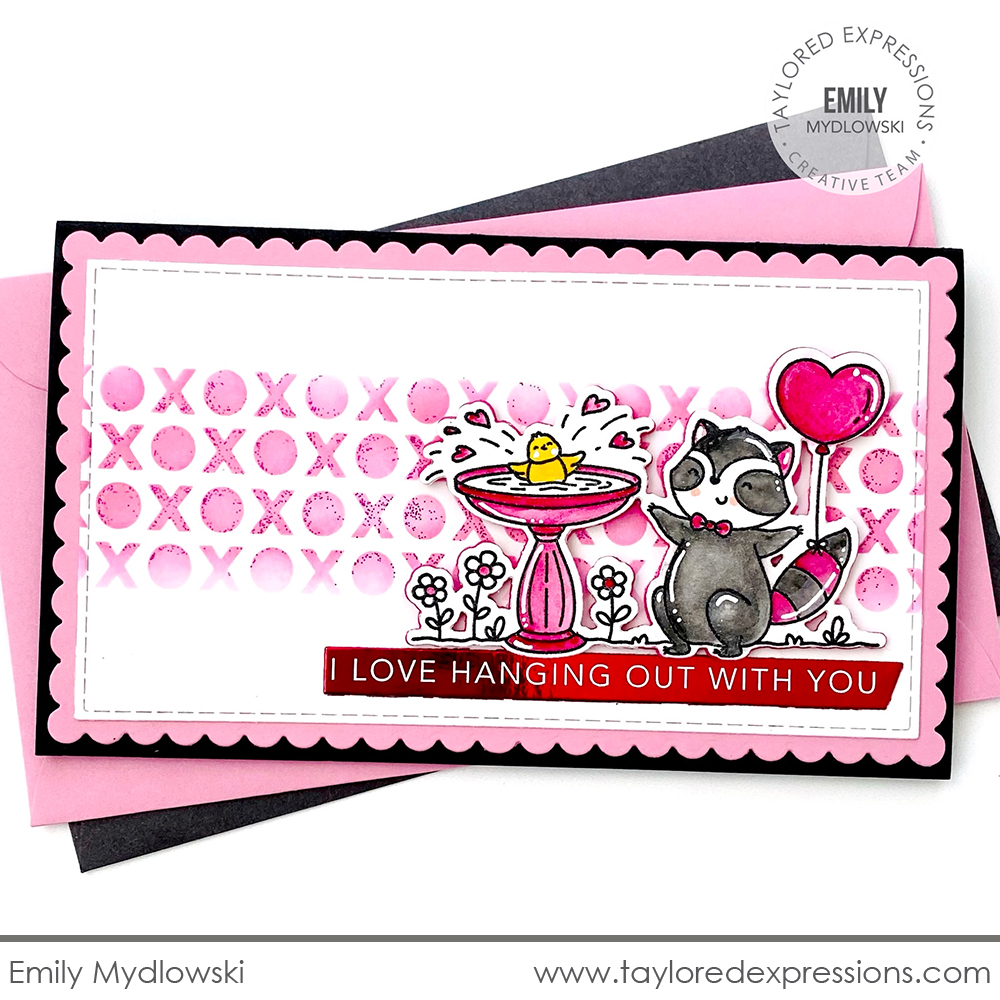
Emily Mydlowski foiled the Simple Strips in Reverse – Love panel with Red Deco Foil using a Minc machine and added it to this Valentine’s Day card that features the adorable image from the new Chip & Charlie Valentine Stamp & Die Combo set. Emily used liquid watercolors to color the image and added details with a white gel pen. The image and sentiment are layered onto a background stenciled with one of the strips from the Stencil Strips – Love set.
…..
And finally for today is a few new color additions to our Happy Medium collection:
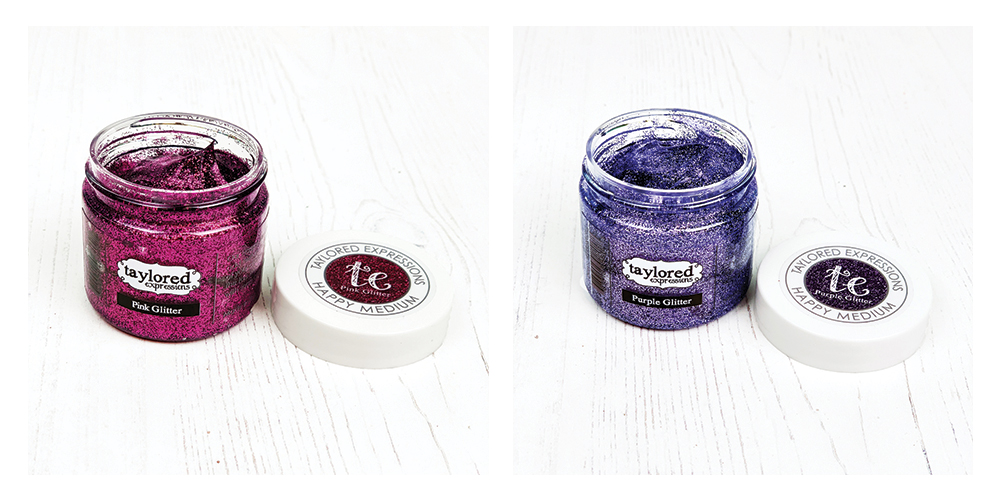
TE Happy Medium – Glitter is the perfect way to add texture, sparkle and a very special touch to any papercrafting project! Simply select the stencil of your choice, then apply a thin layer of paste over the top with a media spatula. (Be sure to wash your stencil and spatula with soap and water immediately after use!)

Join me live for “T Time” at 1pm Central today on the Taylored Expressions Facebook Page. I’ll be sharing a closer look at the items in the Valentine release. We hope to see you there – come join in the fun! (Don’t worry, if you miss the live you can always watch the saved broadcast afterward!)
Thank you so much for stopping by today! Make sure you check out the rest of the TE Creative Team projects using the Valentine release products – click their faces below to hop to their blogs! Stop back again here on the TE blog tomorrow for more inspiration, including a video from Emily Leiphart. See you then!


