
Jun 05, 2025
Spring Create-in-Quad – Mistletoe Tutorial
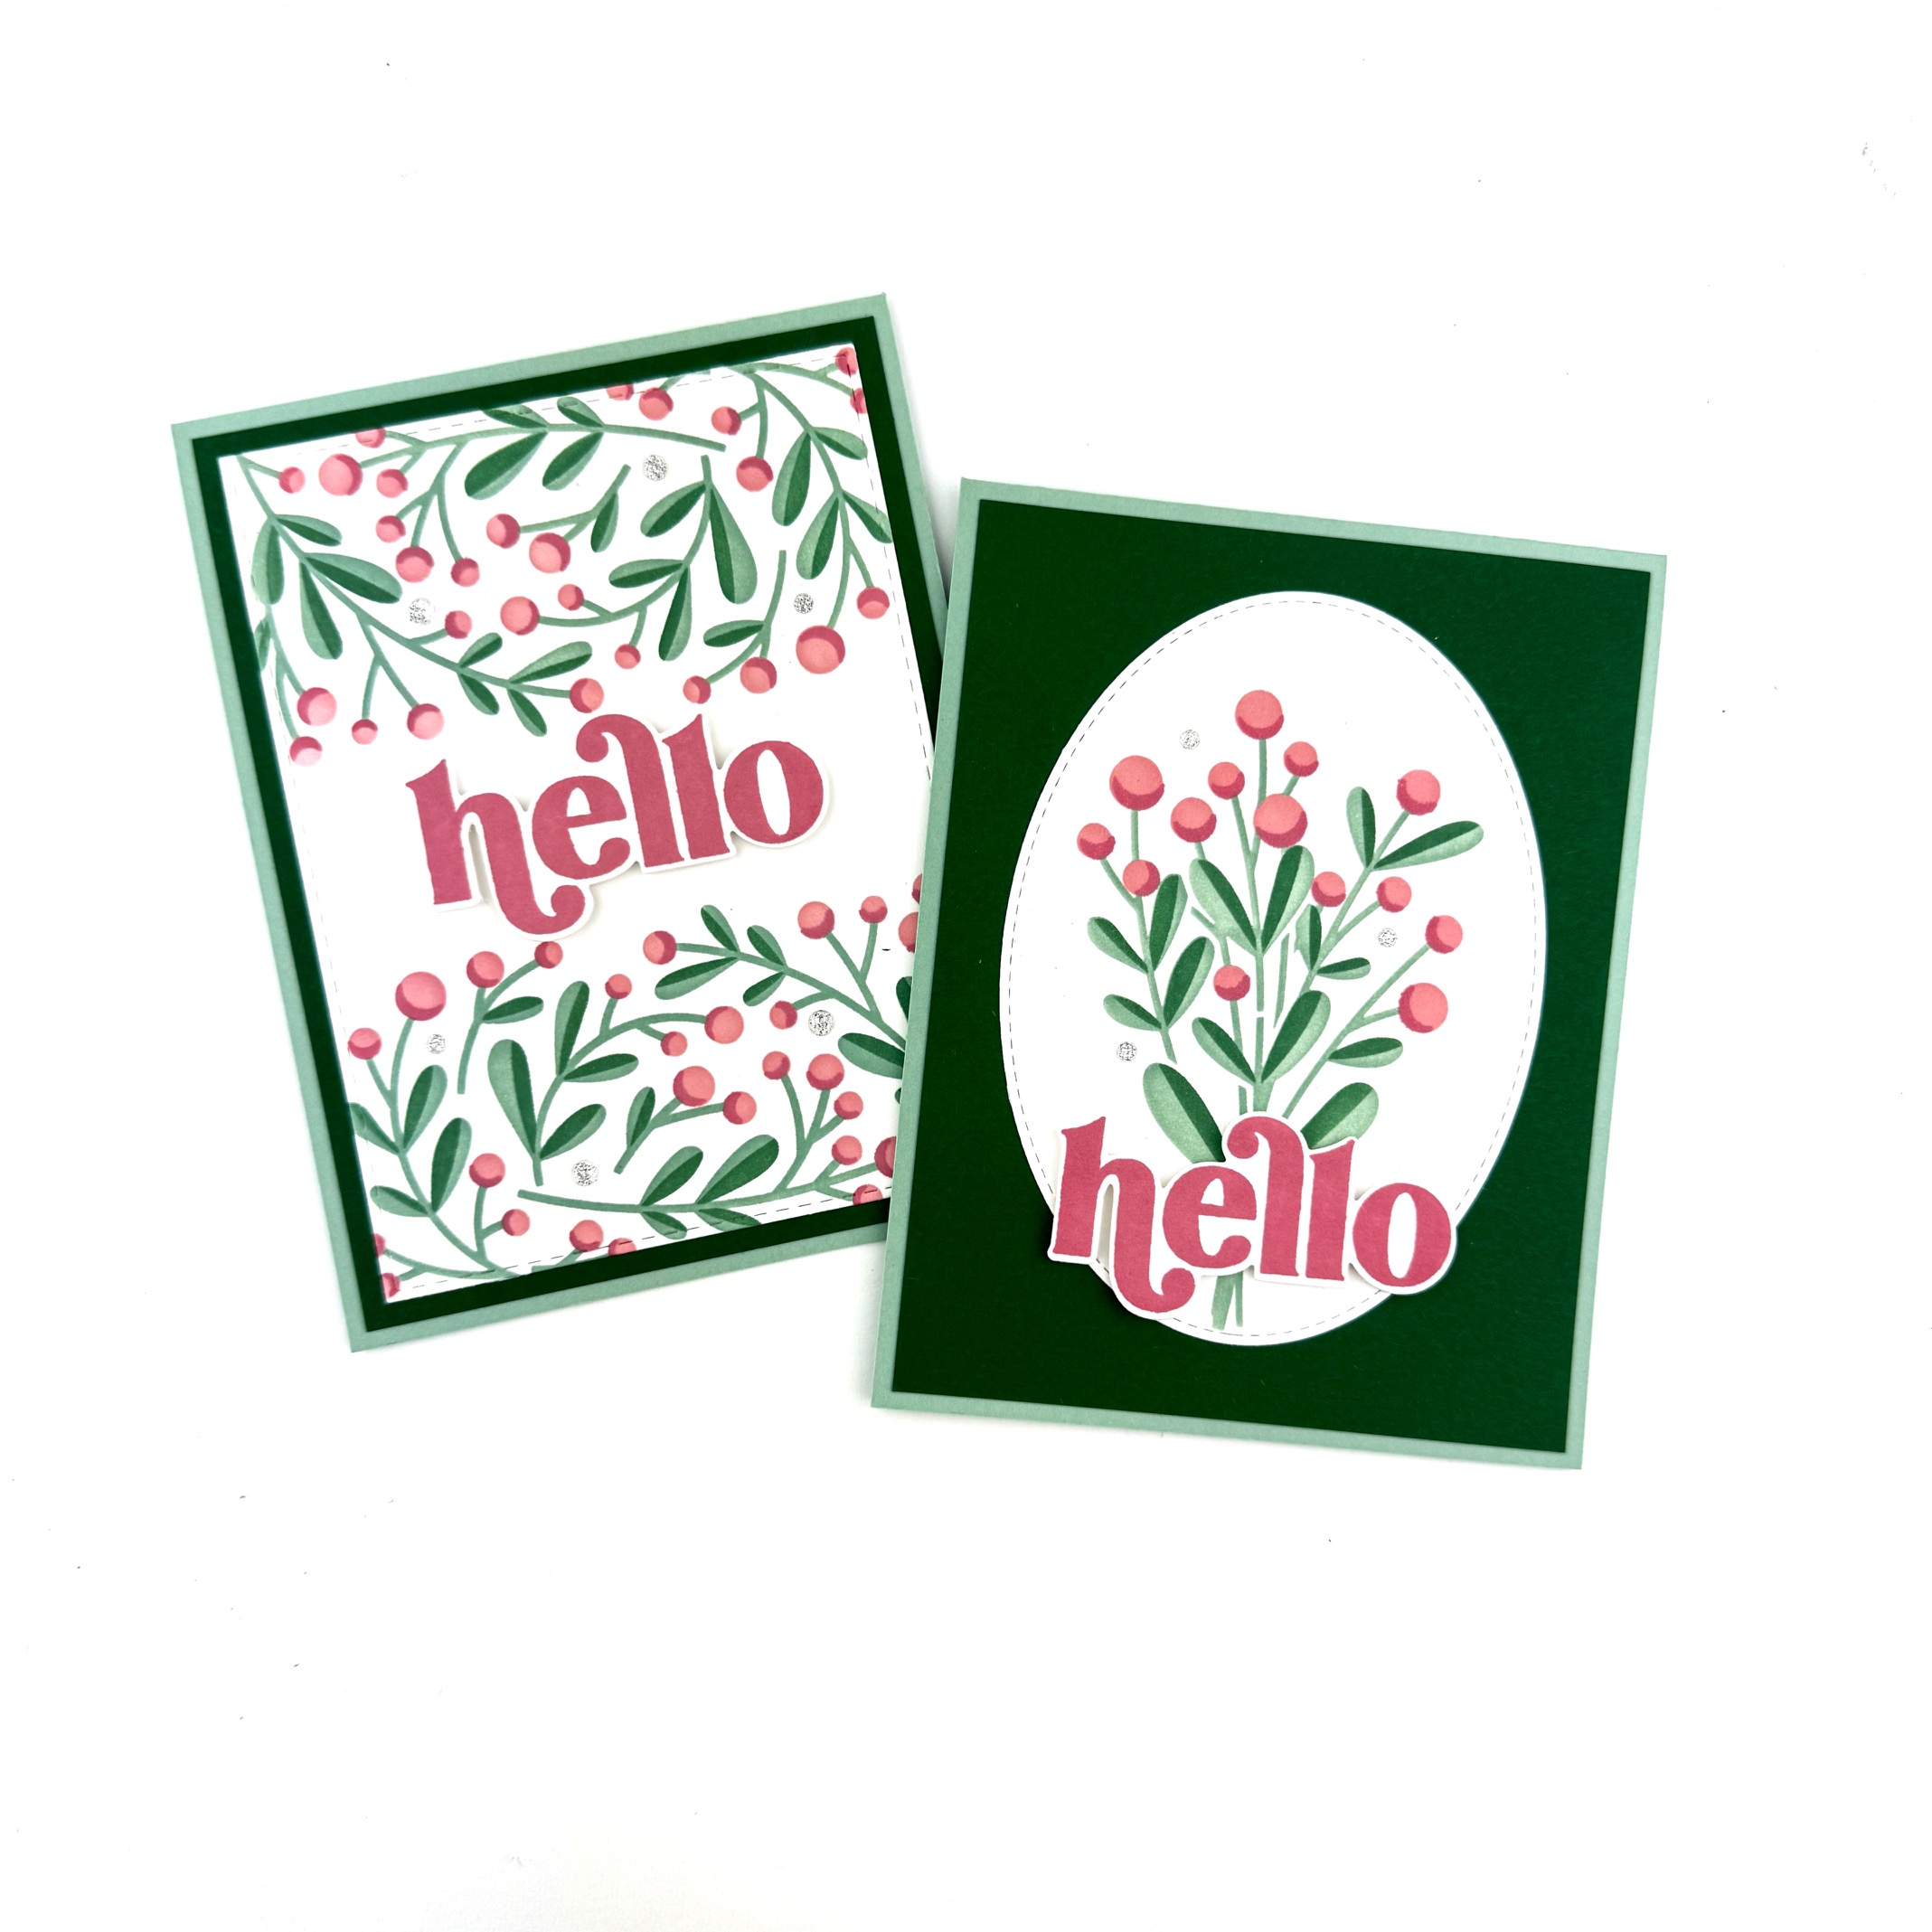
Hey, crafty friends! Rachel here with a Create-in-Quads tutorial that might surprise you. If you thought the Mistletoe Quad was just for the holidays, think again! In this tutorial, Louise Wagner gives it a fresh twist with lighter colors to create two sweet, spring-inspired cards.
Supplies used in this project:
- Create-in-Quads Layering Stencil – Mistletoe
- Get the Word Out Stamp – Hello (or the sentiments of your choice)
- Get the Word Out Die – Hello
- Stitched Oval Stacklets Die
- Stitched Rectangle Stacklets Die Set
- Bits & Pieces – Silver Glitter Drops
- TE Premium Ink – Raspberry Sorbet
- TE Premium Ink – Pink Champagne
- TE Premium Ink – Jalapeño
- TE Premium Ink – Spearmint
- TE Premium Cardstock – Sugar Cube
- TE Premium Cardstock – Jalapeño
- TE Premium Cardstock – Spearmint
- Foam Tape
Plus other tools like a MISTI, die cut machine, blender brushes, and glue.
Spring Create-in-Quad Layering Stencil – Mistletoe Instructions
1. Stencil the Mistletoe Panel
- Tape an 8.5 x 11 in. piece of Sugar Cube cardstock to your work surface.
- Align and secure Layer 1 of the Mistletoe stencil
- Blend Spearmint ink through the stencil using a blending brush.
- Remove Layer 1 and align Layer 2. Blend with Jalapeño ink.
- Remove Layer 2 and align Layer 3. Blend with Pink Champagne ink.
- Remove Layer 3 and align Layer 4. Blend with Raspberry Sorbet ink.
- Remove the stencil from your cardstock.
2. Stamp the Sentiment
- Place a small piece of Sugar Cube cardstock into a MISTI
- Align your sentiment stamp over the cardstock and press onto the MISTI door.
- Ink the stamp with Raspberry Sorbet ink.
- Press the stamp onto the cardstock.
3. Trim & Die Cut
- Trim your Create-in-Quad into four A2 sized panels
- Die cut the stamped sentiment with the coordinating die.
- Die cut your quad panel with a small grouping of branches with the second largest Stitched Oval Stacklet Die.
- Die cut your quad panel with branches on the top and bottom with the second largest Stitched Rectangle Stacklet Die.
(save the other two panels for other cards) - Cut a two pieces of Jalapeño cardstock to 5 ⅜ x 4 ⅛ in.
- Cut two Spearmint card bases.
4. Assemble the Cards
- Glue the two Jalapeno cardstock panels to the Spearmint card bases.
- Glue the rectangle and oval blended cardstock pieces to the Jalapeño panel.
- Add foam tape to the back of your sentiment and pop it up over the mistletoe panel as shown in the photo.
- Finish your cards with a few Bits & Pieces – Silver Glitter Drops for a sparkly finishing touch!
Thanks for visiting the TE blog! Subscribe to our newsletter to stay up-to-date on our latest product releases and offers.

