
Jun 03, 2025
How-To: Foil Glitter Grab with Jen Shults
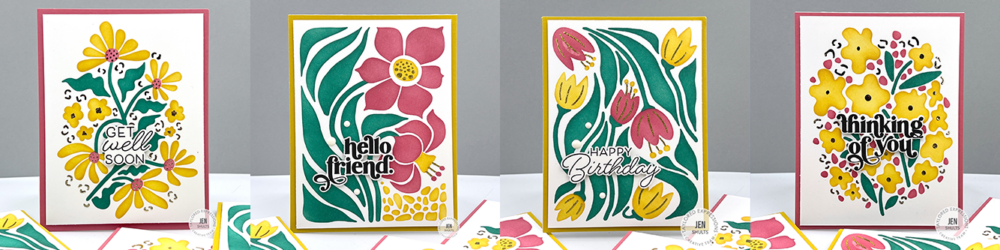
Hey, crafty friends! Rachel here with a technique tutorial from Jen Shults. In this how-to, Jen shows you how to foil with Glitter Grab using the Create-in-Quads – Poster Print stencil! With bold color, a touch of sparkle, and a few thoughtful sentiments, you’ll turn one stenciled sheet into four eye-catching cards.
Supplies used in this project:
- Create-in-Quads Layering Stencil – Poster Prints
- On Occasion Dies
- On Occasion Stamp Set (or the sentiments of your choice)
- Sentiment Staples Stamp Set (or the sentiments of your choice)
- TE Premium Ink – Guava
- TE Premium Ink – Gumdrop
- TE Premium Ink – Sweet Corn
- TE Premium Ink – Oreo
- TE Premium Cardstock – Guava
- TE Premium Cardstock – Sweet Corn
- TE Premium Cardstock – Sugar Cube
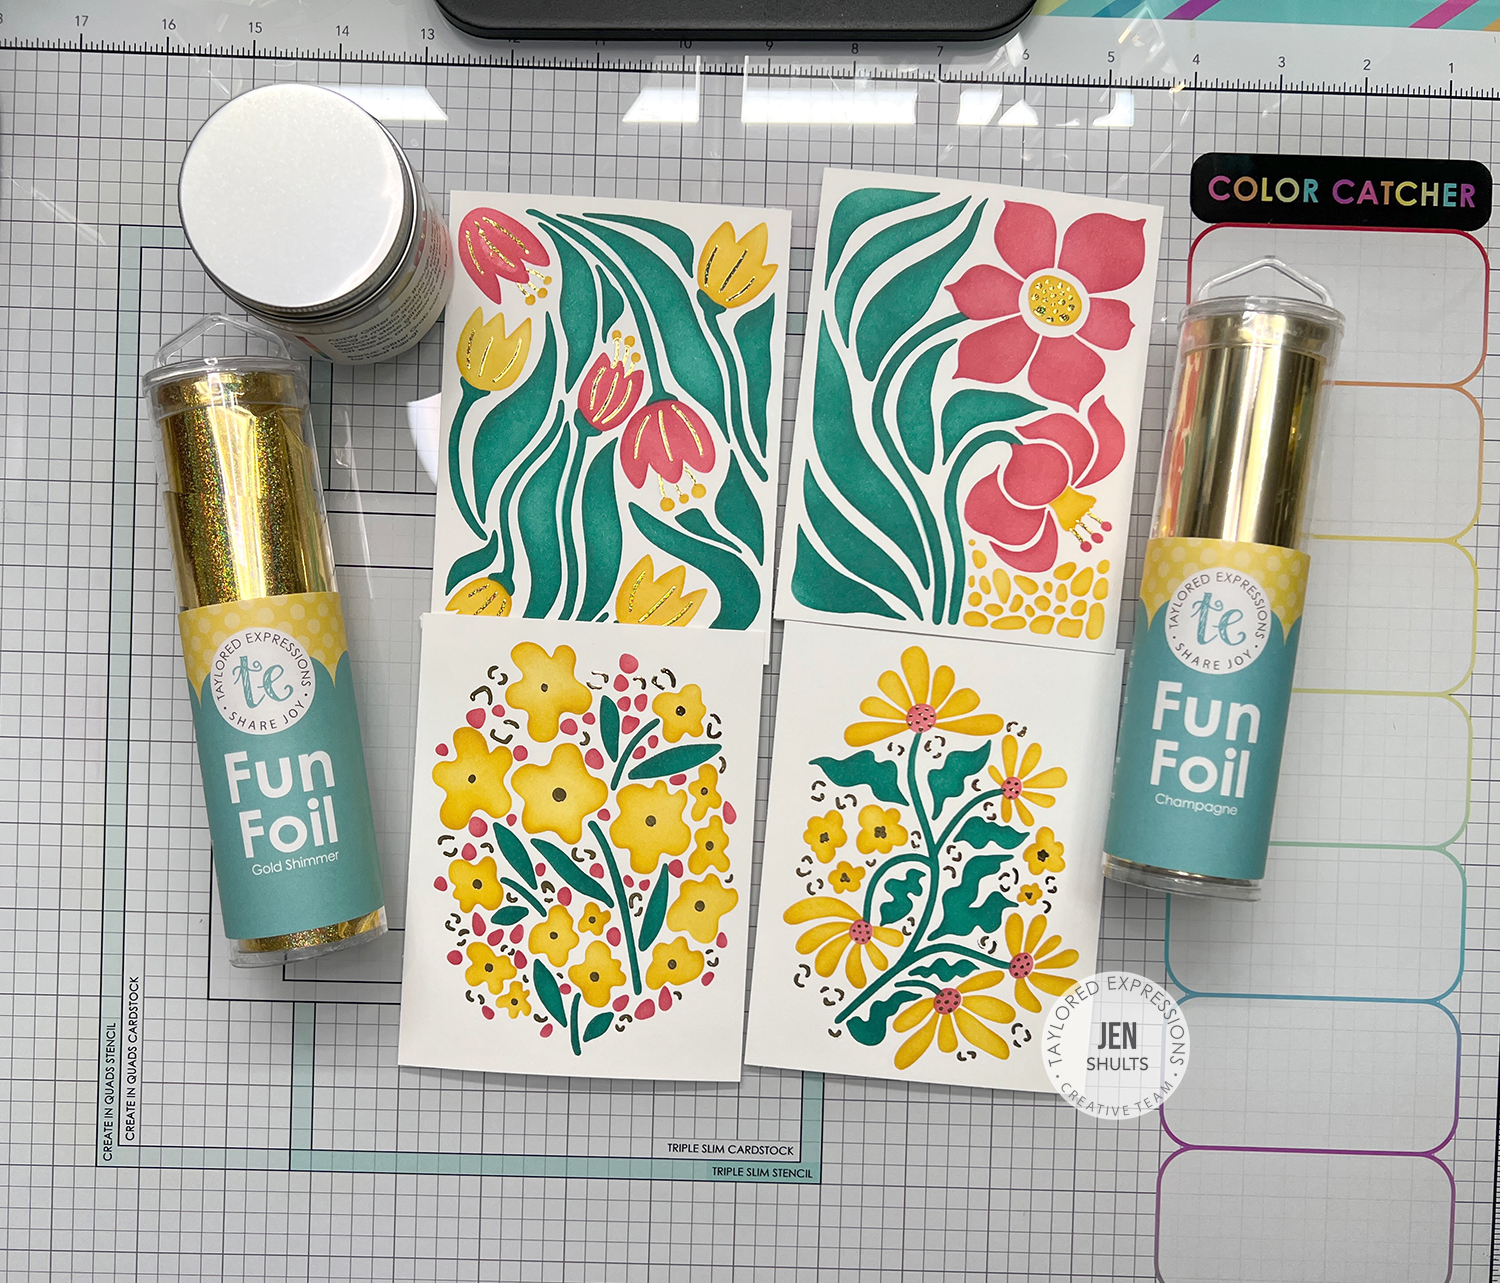
- TE Glitter Grab
- TE Fun Foil – Champagne
- TE Fun Foil – Gold Shimmer
- Nuvo Media Spatulas
- Deco Foil Stencil Pal
- Mini Minc
- Sugar Cube Enamel Dots
- Foam Tape
Plus other tools like a MISTI, die cut machine, blender brushes, and glue.
Create-in-Quads: Poster Print Foiled Cards Instructions
1. Stencil the Create-in-Quad
- Tape an 8.5 x 11 in. piece of Sugar Cube cardstock to your work surface.
- Align and secure Layer 1 of the Poster Print stencil.
- Blend Gumdrop ink through the stencil using a blending brush.
- Remove Layer 1 and align Layer 2. Blend with Guava ink.
- Remove Layer 2 and align Layer 3. Blend with Sweet Corn ink.
- Remove Layer 3 and align Layer 4. For extra hold, lightly mist with Pixie Spray if desired.
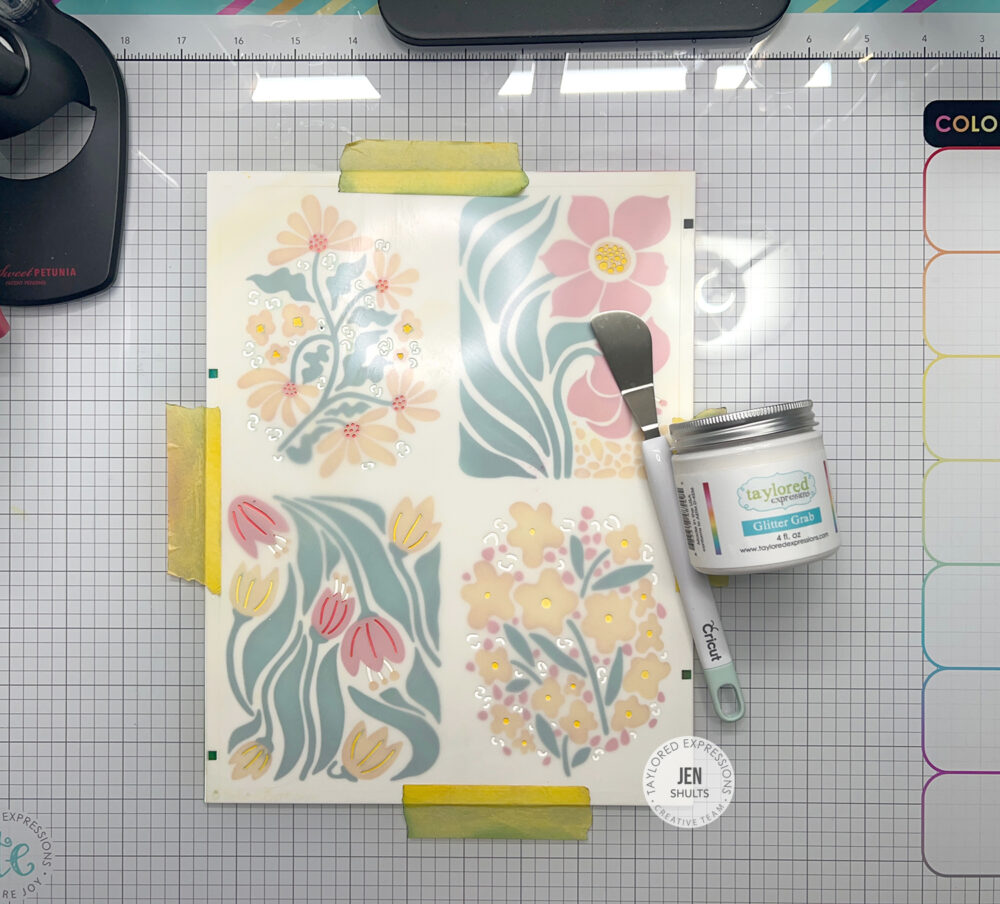
- Use a palette knife to apply Glitter Grab through Layer 4, then smooth with the TE Stencil Scraper.
- Carefully remove and clean the stencil.
- Allow the Glitter Grab to dry completely until clear (about 1 hour, depending on application).
2. Trim & Foil
- Trim the stenciled sheet into four A2-sized panels:
- Cut at 4.25” on the short side, then cut each half at 5.5”.
- Trim ¼” off each of the remaining two edges of all four panels.
- Cut two pieces of Champagne Fun Foil and two pieces of Gold Shimmer Fun Foil to fit the four panels.
- Place each panel on the TE Foiling Shim with foil (color side up), sandwich inside the Minc Carrier, and run through the Minc machine set to 3.
- Let cool slightly, then peel to reveal the shine!
For more help foiling, click to read our How-To: Foil with a Mini Minc blog post.
3. Stamp & Die Cut Sentiments
- Stamp your choice of sentiments onto Sugar Cube cardstock using Oreo ink.
- Die cut with the coordinating dies.
4. Assemble the Cards
- Cut:
- Two A2-sized panels from Guava cardstock
- Two A2-sized panels from Sweet Corn cardstock
- Four Sugar Cube card bases
- Attach the Guava and Sweet Corn panels each to a Sugar Cube card base.
- Use foam tape to attach the foiled panels centered on each card.
- Use foam tape again to pop up the sentiments on each panel.
- Finish off each card with a few Sugar Cube Enamel Dots around the sentiment for a polished look.
For more inspiration from Jen Shults, visit her blog by clicking here.
Thanks for visiting the TE blog! Subscribe to our newsletter to stay up-to-date on our latest product releases and offers.

