Jan 03, 2008
New Year’s Resolution – Getting Organized Part 2
Good morning! I’m glad some of you enjoyed my organization post yesterday! I took a few more pictures last night, but you’ll have to forgive me for the quality. It was dark outside so I didn’t have any natural light to work with… thus, the dark shadows from the flash. First, I’ll answer the questions you asked yesterday:
1. How big is your stamp area/room/studio? It’s about 12′ x 12′, but I share about a third of the space with our computer/printer/filing cabinet and other officey stuff.
2. About the clip it up… Do you buy plastic envelopes to hold the items? Or do you use the plastic they come in? That’s the beauty of the Clip it Up! It will clip to anything! I just use the original packaging of the embellishment.
3. How long did it take you to do that and how long will it stay that way!? Haha… well, it probably took me about 8 hours to re-organize. Once it’s well-organized I find it so much easier to keep it clean because everything has its place! Don’t get me wrong though… my tabletop often looks like a tornado just blew through!
Here are a few more of my storage solutions: 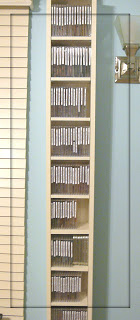 I purchased this *really tall* CD storage shelf at IKEA… can you tell I live at IKEA!? LOL! I chose this particular storage because it was very tall and not very wide. Wall space is a premium in my stamp room so I would much prefer to go vertical with the storage than horizontal. I use CD cases to store all of my acrylic and unmounted stamps. If given the choice I will almost always choose unmounted/acrylic over mounted stamps. A couple years ago I never thought I’d hear myself say that, but as my collection continues to grow storage is a struggle and acrylic/unmounted make more sense in saving space. They’re also less expensive which is a huge plus to me! All that to say, I definitely won’t stop buying my favorite brands of wood-mounted stamps just because they don’t offer unmounted! Bottom line… I love stamps no matter how they’re mounted or what they’re made of!
 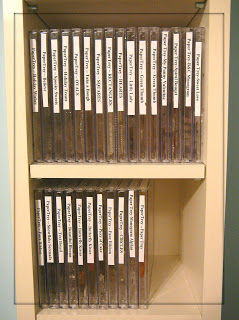 This is a closeup of my acrylic stamp storage. I print the manufacturer and set name on an address label. I can print four set names on one address label. Then I cut the label apart and adhere it to the spine of the CD case. If the sets are small I will put two sets in one case. The sets are shelved by manufacturer.
 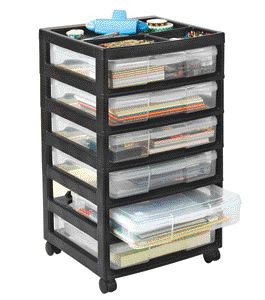 I use an Iris Scrapbooking cart to store all my 12×12 cardstock. I have each drawer separated by color (Black-White-Brown, Orange-Yellow, Blue, Purple, Pink-Red, Green).
 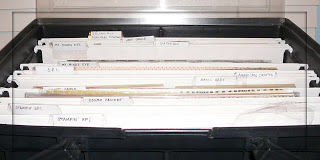 I did a major overhaul on my 12×12 patterned paper! I used have this whole hanging file PLUS the entire Iris Scrapbooking Cart pictured above filled with patterned paper. I’m not sure why I was holding onto paper that I will absolutely never use. I kept only what I actually like and will use. It now fits in this rolling cart with 12×12 hanging files. I separated the paper by manufacturer.
 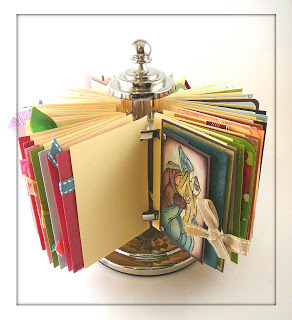 Whenever I host an ATC swap you always have questions about how I store my ATC’s. I have hundreds of them so it has been impossible to find one storage solution that fits all of them. Well… besides a shoe box, but that’s no fun! I got this revolving ATC holder by 7 Gypsies from Star Lit Studio. It comes with 20 manila inserts, but you can purchase packs of 50 to add more. I used double stick tape to adhere 100 of my favorite ATC’s to the manila inserts. This sits right on my tabletop for instant inspiration. The gorgeous ATC pictured here was made by the amazingly talented Mary Jo Albright! The rest of my ATC collection is stored in baseball card holders inside 3-ring binders.


