Mar 21, 2008
Fine Stationery
I love fine stationery. I could browse the aisles of a fine stationery store for hours. Clean, simple, elegant, and high-quality are a few of the words that come to mind. Then I turn the items over and glance at the price… not quite in the budget. So I set out to create my own clean, simple stationery set using Papertrey’s high-quality products. I usually make stationery for my sister, Whitney. She is the only person I know who actually uses the cards that I make for her and I love to replenish her stock!
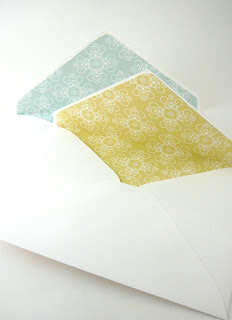
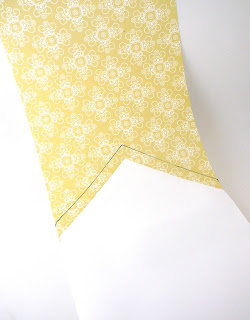 One thing that sets fine stationery apart from other stationery is a lined envelope. I started creating my lined envelopes with the Everyday Blessings Collection of patterned papers. I cut a piece sized to fit inside the envelope. Slide the patterned paper inside and trace around the flap. Make a small mark on the patterned paper where the crease in the envelope flap lands. Use your scoring tool to score the line where the flap folds down over the envelope. Adhere the lining inside your envelope making sure the score lines up with the crease in the envelope. I prefer to use a liquid glue to adhere the lining inside the envelope.
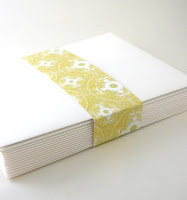
 After lining all of the envelopes I gathered them together and created a band to hold the group of them. I think that gives it a very finished look.
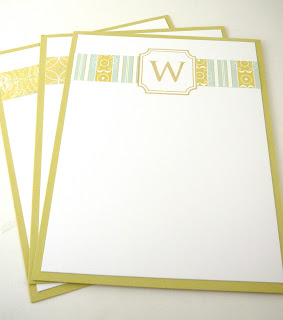 Next I created the flat monogrammed cards. I used Borders and Corners Monogram Edition and the Trajan Monogram Alphabet both stamped in Papertrey Spring Moss ink. I added different patterned paper strips to each card. The smooth, heavyweight cardstock makes excellent high-quality stationery.
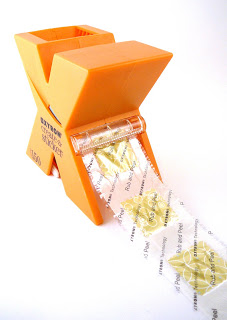 It wouldn’t be fine stationery without custom envelope seals. I started by punching out scalloped squares using the Marvy Uchida Extra Jumbo punch. I stamped the monogram onto each square in Spring Moss ink. Then I inserted them into my Xyron sticker maker and pulled them through to create a
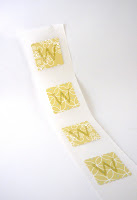 sticker seal on each. Just peel the backing off and you have quick and easy envelope seals!
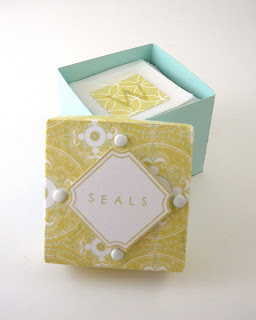 I used the Square Box with Lid to create storage for the envelope seals and postage stamps. I cut each of the envelope seals apart, but left them on the sticker sheet. I used the Borders and Corners Monogram Edition again and the Simple Alphabet to create a label for each box.
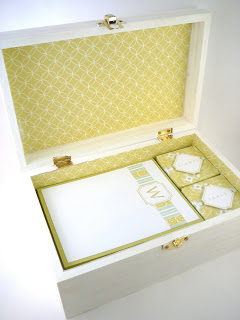 I purchased a wood box from the aisle of unfinished wood products at Michael’s and painted it with white acrylic paint. I kept the outside of the box plain white and covered the inside with more patterns from the Everyday Blessings Collection. You can see the two boxes used to store postage stamps and envelope seals on the right. The envelopes are underneath the monogrammed cards. Thanks for stopping by tonight! I hope you’re inspired to create some stationery of your own!
Fine Stationery Q & A
Q: What size is the stationery? What size are the envelopes?
A: The envelopes are standard A2 size. The stationery is a flat card, it does not fold at all. The Spring Moss piece is 5.5″ x 4.25″ and the Select White piece is 5.25″ x 4″.
Q: Did you stamp the monogram and cut it out to adhere over the pattern paper strip? Or did you stamp the cardstock and just make the strip meet the edges of the image?
A: I stamped the monogram directly onto the white cardstock and then cut and adhered the paper strips to meet the edge of the image.
Q: For the flat monogrammed card, did you use two pieces of regular weight cardstock? Are they scored in the back?
A: I was able to get four pieces of stationery out of one 8.5″ x 11″ sheet of cardstock. The stationery does not fold so there is no scoring. The note would be written directly underneath the monogram on the white layer. Both layers are cardstock weight. I used Papertrey’s Spring Moss and Stamper’s Select White.
I’m so excited that you enjoyed the fine stationery project! Hopefully I have answered your questions, but if you still have questions, leave a comment and I will add to this post!


