
Apr 05, 2011
Taylored Expressions April Sneaks – Day 1
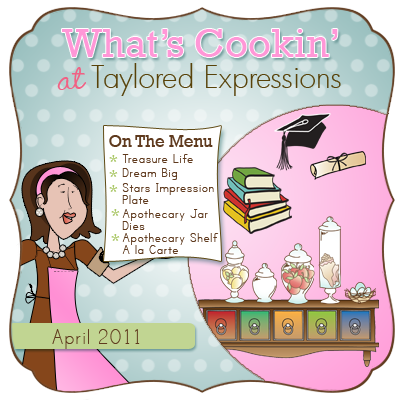
Good morning and welcome to the first day of sneak peeks for the April release at Taylored Expressions! I still can’t believe it’s April already…where do the months go!? Today the Baker’s Dozen and I are excited to share sneak peeks of the fantastic new goodies we have coming your way! All of our new products will be available for purchase at 8am PST on Thursday, April 7th! On the menu today are two versatile sets that are sure to get lots of use! Dream Big will fill your needs for graduation party invitations, cards, and gifts! And Treasure Life fits almost any occasion from Mother’s Day to marriage, and birthday to just because! I’m also excited about the Apothecary Shelf A la Carte to coordinate with Treasure Life! And of course our release wouldn’t be complete without more coordinating dies and a new impression plate. Keep your eyes out for the Stars Impression Plate and Apothecary Jar dies below!
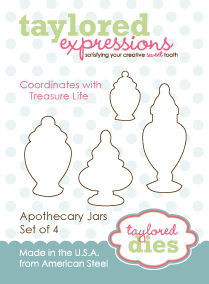
 First, I am bursting with excitement to show you the home decor piece I made for my mom as a Mother’s Day gift (although now that it’s finished I really want to keep it for myself!!). I used the beautiful Treasure Life set, illustrated by Nancy McKinney for the Whimsical Wishes collection. It’s a full-sized set filled with 23 images and sentiments. Apothecary jars are huge in home decor and I wanted some for stamping so after a few chats with Nancy out came this gorgeous set! One of the cool parts about this set is that the jar fillers are separate images which makes the jars even more versatile. And of course we don’t want you to have to hand-trim all of your beautiful jars so we’re offering a set of four Apothecary Jar dies to coordinate with the set. I started my project with the Maya Road Trinket Shadow Box and painted it with white acrylic paint. I covered each of the squares with patterned paper from the
 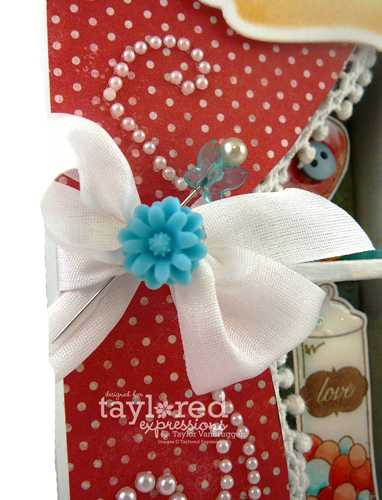 MME Stella Rose Hazel collection and adhered them inside each little box. The patterned paper for the curtains is also from the Hazel collection. I trimmed the curtains by hand, added baby pom pom trim to the edge and embellished them with Want2Scrap Pearl Swirls. You can also see in this closeup that I tied them back with white silk ribbon, added a Sky Blue Whimsie Petal and a sweet little butterfly pin from Webster’s Pages. I stamped all of the images in Memento Rich Cocoa ink, colored them with Copics, and cut them out using the coordinating Apothecary Jar Dies. I added glitter to several images and covered all of them with a coat of glossy accents. After allowing the glossy accents to dry I began arranging the jars within each
  box. I had so much fun mixing and matching the fillers and also embellished some of the boxes with real seashells, mini buttons, and little whimsies. The jars are popped up on varying layers of foam tape to create more dimension. I finished it off with a sentiment stamped onto Spellbinders Labels 4 and sponged with Yellow Ochre chalk ink. The sentiment reads: “Every house where love abides and friendship is a guest, is surely home, and home sweet home for there the heart can rest.” I think my mom is going to love it!
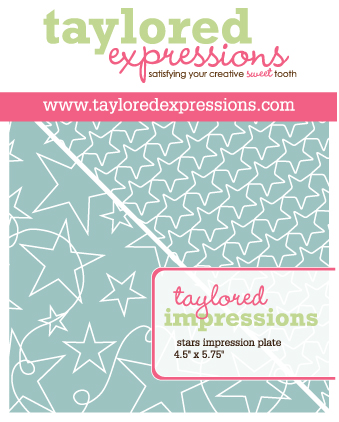
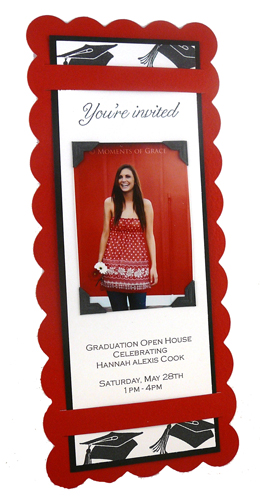 Next up on the menu is Dream Big, illustrated by Nancy McKinney for the Whimsical Wishes collection! Graduation season is such a busy time of planning, preparing, attending parties & ceremonies, etc. Who has time to make a special card for each one of the parties you’ll attend!? You will with the help of the Dream Big set! Or maybe you’re the one planning the graduation open house and you’re thinking of making your own invitations. The only thing getting in your way is that pesky little problem of time. Well, the 26 simple images in this set are perfect for mass-production! I created this graduation invitation for my little ‘sis in a matter of minutes. I used our new Scalloped Invitation (you select the color!), grad cap and You’re Invited stamps, and printed the party details from the computer. Then I just added one of her senior pictures using photo squares. Super quick and cute and fits in a standard No. 10 office envelope for mailing. I also mentioned how easy it is to create personalized cards and gifts using this set. For the card, I started with the school colors and impressed the red background piece with the Stars Impression Plate (which is hard to see in the picture). Then I stamped the grad cap border and added the Eyelet Border on each side for a little more pizazz. The circle element that reads “Congratulations on your Graduation” was stamped in Memento Tuxedo Black and cut out
 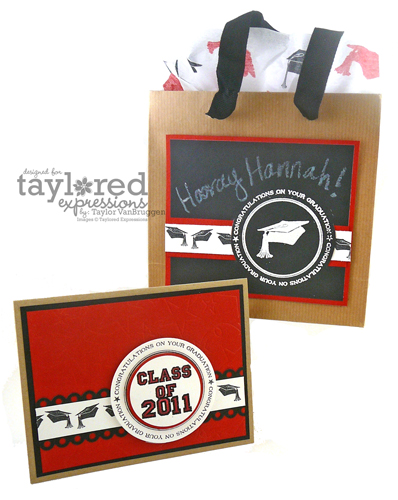 with one of the circles from the Spellbinders Classic Circles – Small set. I embossed the Class of 2011 label in black embossing powder, colored the letters/numbers with a red Copic and punched it out with a 1 3/4″ circle punch. The personalization is made simple by choosing the appropriate school colors and stamping the year of graduation. I was on a roll so I decided to make a coordinating gift bag while all of the supplies were out. I used the same layout as the card, but switched it up a bit by using our new Chalkboard Vinyl. I tried embossing the images directly onto the chalkboard with white embossing powder and it worked! Then I added my own personal message using chalk. I also love the special touch of stamped tissue paper!
Here is the set of dies and impression plate that we’re featuring today. If you’re new to Taylored Dies & Impressions, you can check out our how-to videos and written instructions HERE:
I know the rest of the Baker’s Dozen & Friends have fabulous sneak peeks to share today so make sure you pop in to check them out!
- Charmaine Ikach
- Danielle Lounds
- Jackie Pedro
- Jodi Collins
- Karen Giron
- Karen Motz
- Melissa Sauls
- Regina Mangum
- Sankari Wegman
- Tori Wild
And friends
Hope to see you right back here tomorrow where we’ll be sneak peeking more stamps and new Taylored Card Kits too!

Psst… one more thing! We’d love to have you join us on Facebook! We’ll be giving our Facebook fans an early look at all of our April releases on Wednesday night so make sure you’re there! Head over to our Facebook page and click “like” at the top!

