Feb 17, 2015
Blog Design Team: Happy Thoughts
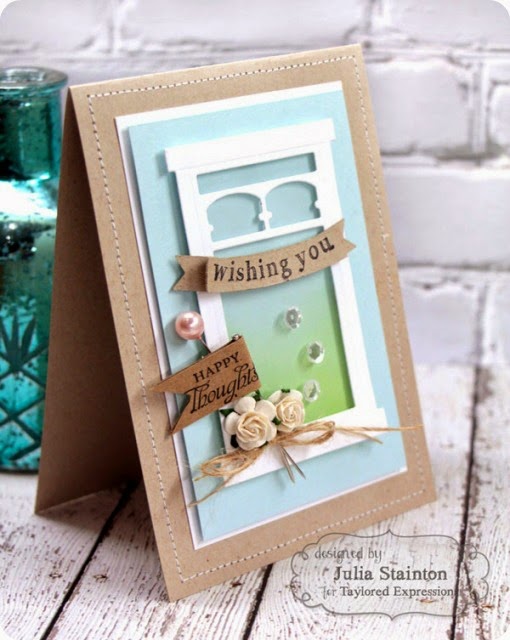
Hey there, crafty friends! Today, Blog Team Designer Julia Stainton has created a beautiful window card that will send you off to your Tuesday with a smile on your face. Check things out below…

Julia’s Notes: There’s something so lovely about a window. It gives you a peek into
another space, and in a card design it can symbolize looking ahead. Today I created a window card that shows off this idea.

Julia’s Notes: I
adore the gorgeous Display Window die from Taylored Expressions. It’s so
elegant and I can think of so many lovely ways to embellish it.
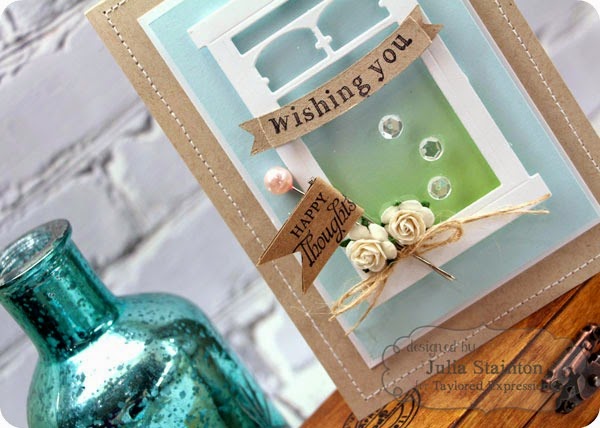
Julia’s Notes: To
create my design today, I’ve added dimension to the window by adhering
it to the card front with 3D foam squares. To make it easy to sponge a
background behind the window, I’ve cut a piece of Salt Water Taffy
cardstock just a tiny bit smaller than the window and then sponged the
lower half of it with green ink.
Julia’s Notes: It’s easy to add “glass” to the
window by cutting a piece of clear plastic acrylic and adhering it behind
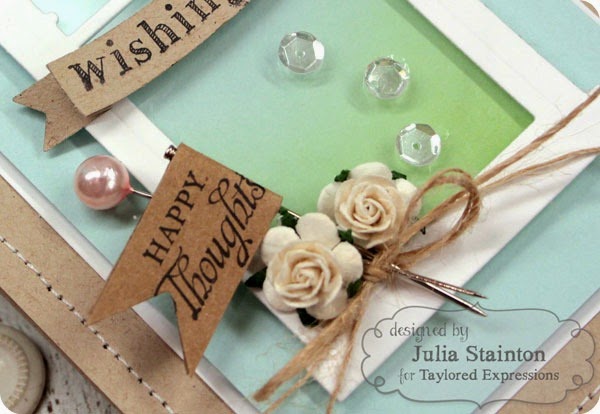
the window. A few clear sequins add a bokeh effect. I used Glossy Accents; it’s clear and forms
a really great bond when adhering small embellishments.

Julia’s Notes: A little
banner for across the window was fun to die cut and fold. It’s also a fun place to add a portion of the sentiment. Tip: The
“Wishing You” stamp from the Chalkboard Elements stamp set will fit on
this banner if you gently stretch it just a tad while placing it on the
acrylic block. Test the curve on a scrap die cut before stamping on your
final project.
Thanks so much, Julia for sharing how you created this winsome window card! Be sure to check out Julia’s blog, Belle Papier to see more of her lovely projects.