Dec 22, 2017
His & Hers: How Udderly Adorable!
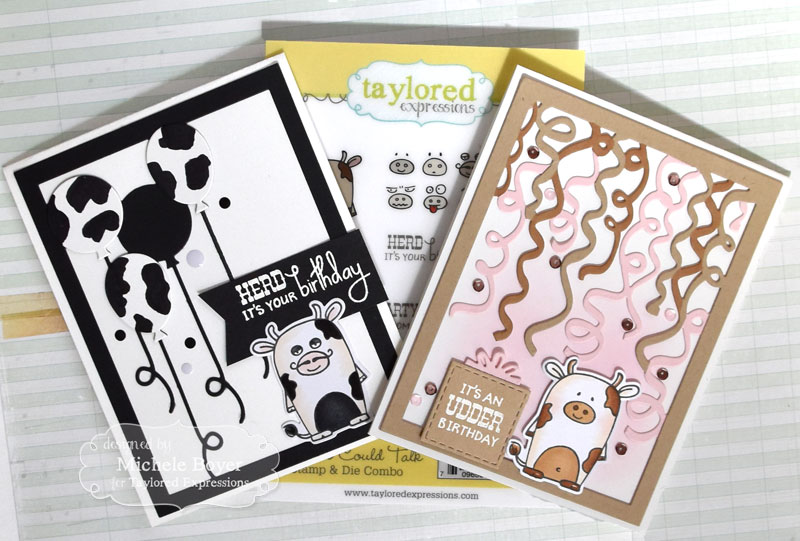
Happy Friday before Christmas, friends! I know many of you will be doing some last minute shopping for holiday parties and dinners, wrapping gifts, and getting in the Christmas spirit, but I just couldn’t resist one more fun project to share with you before I send you off to the weekend. As you know, we’ve been stepping things up and sharing His & Her card ideas this week, and I’ve got one more gal/guy pair of cards from Michele Boyer that are “udderly” wonderful. Check out the step-by-step tutorial she created…

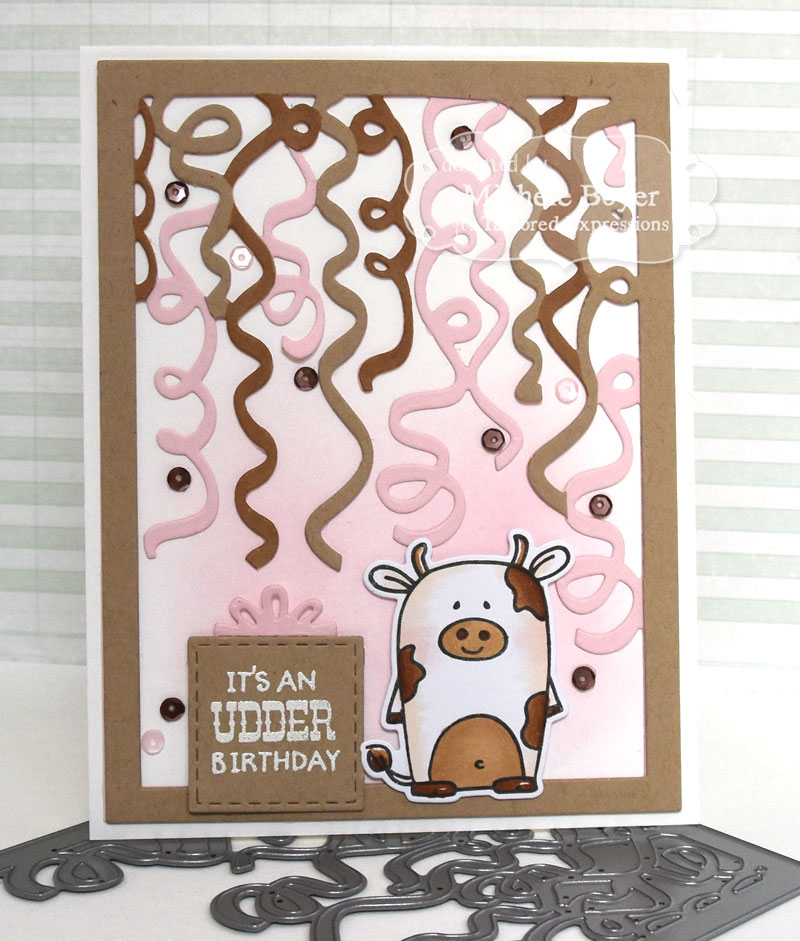
Let’s start with the Hers card!
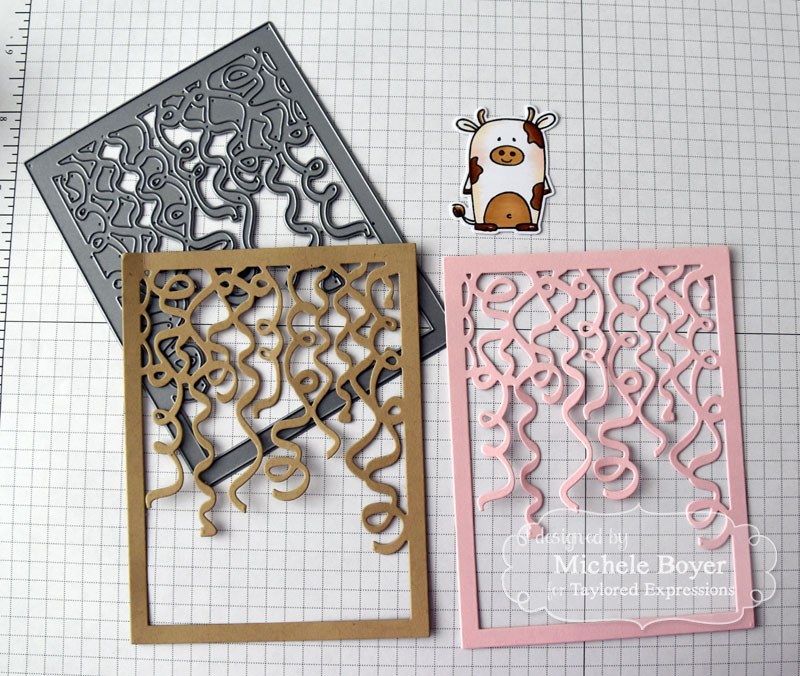
Stamp cow shape and face onto Sugar Cube card stock; color with markers and die-cut. Die-cut Curly Q Cutting Plate from Toffee and Cupcake card stock.
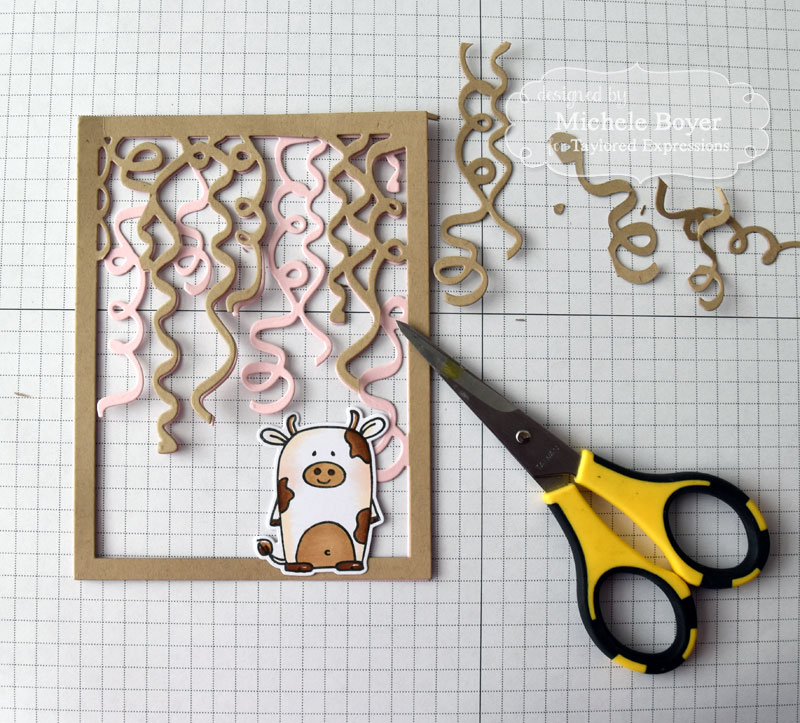
Without adhering, layer Toffee Curly Q over Cupcake Curly Q. From Toffee Curly Q, carefully nip away a few random balloon strings.
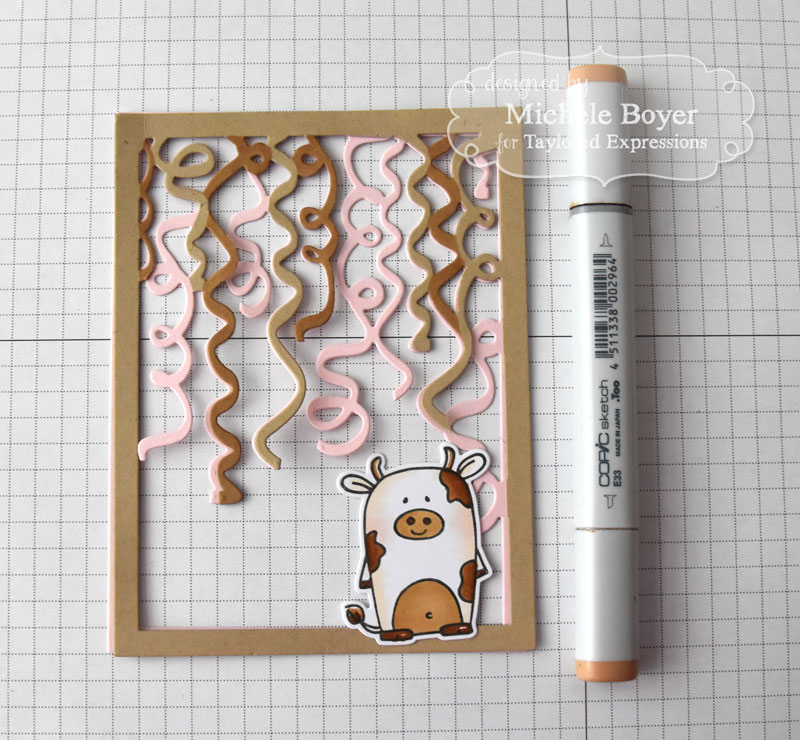
Using an E33 Copic marker, color over a few Toffee strings. Once colored, adhere the Toffee and Cupcake layers together.
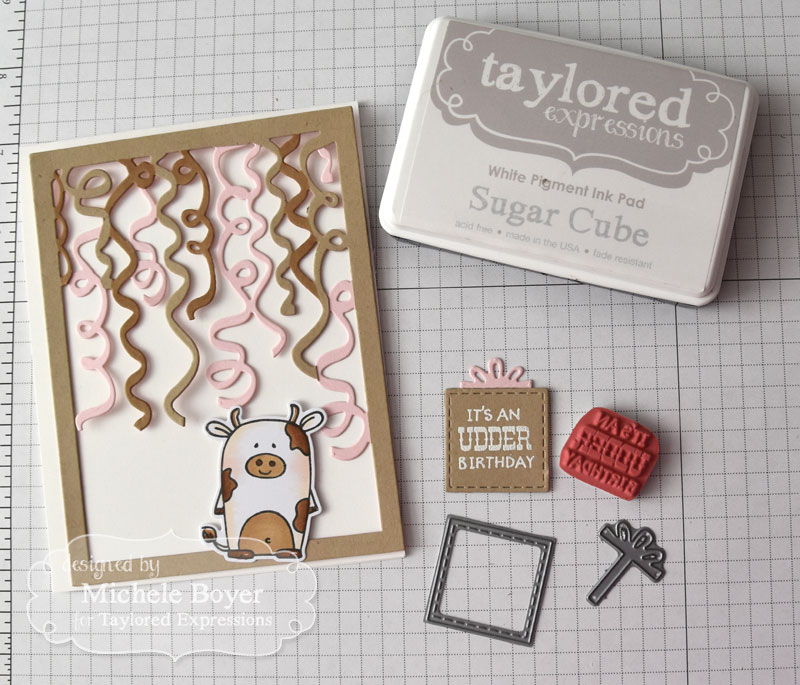
Create Sugar Cube card base. (Do not yet adhere Curly Q panel.) Die-cut smallest Stitched Square from Toffee card stock. Brush over square with Powder Tool then stamp sentiment with Sugar Cube ink. Pour white embossing powder over, tap off excess and heat emboss. Die-cut pink bow and adhere to back.
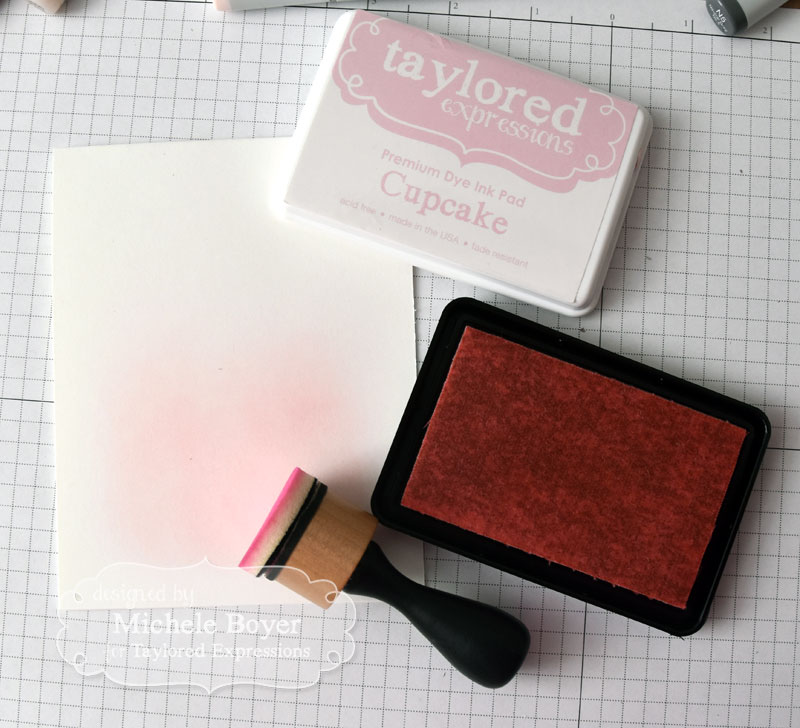
Lightly sponge Cupcake ink onto Sugar Cube card base, concentrating color toward bottom. (Leave approximate ¼”-1/2” border along bottom and sides.)
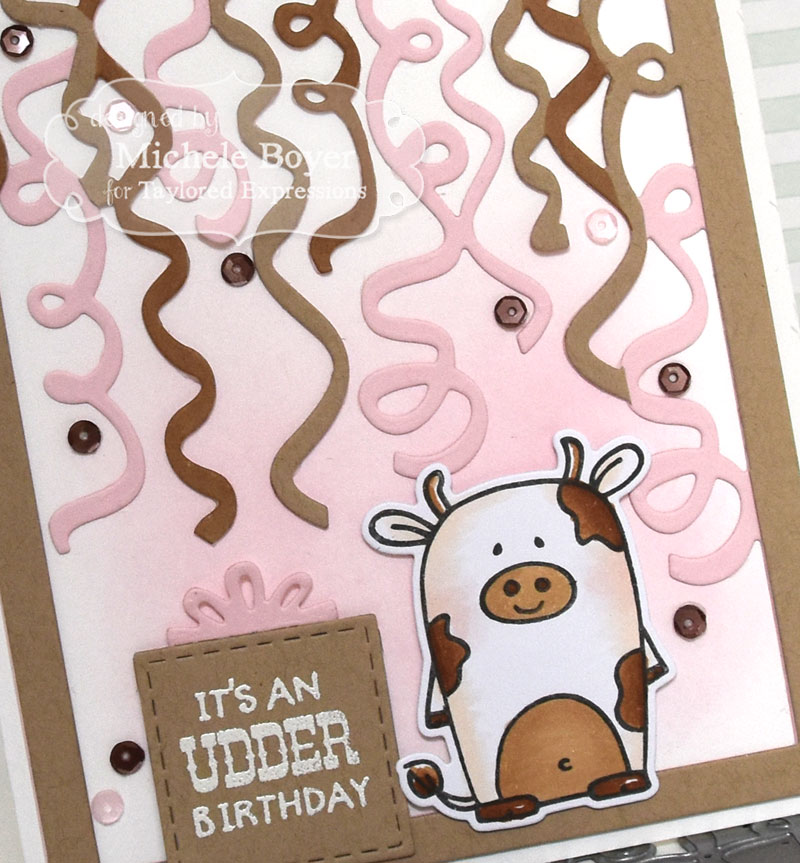
Adhere Curly Q panel to card base. Adhere sentiment and cow using clear foam squares. Adhere sequins. (Note: Shorten second balloon string so that bow does not overlap.)
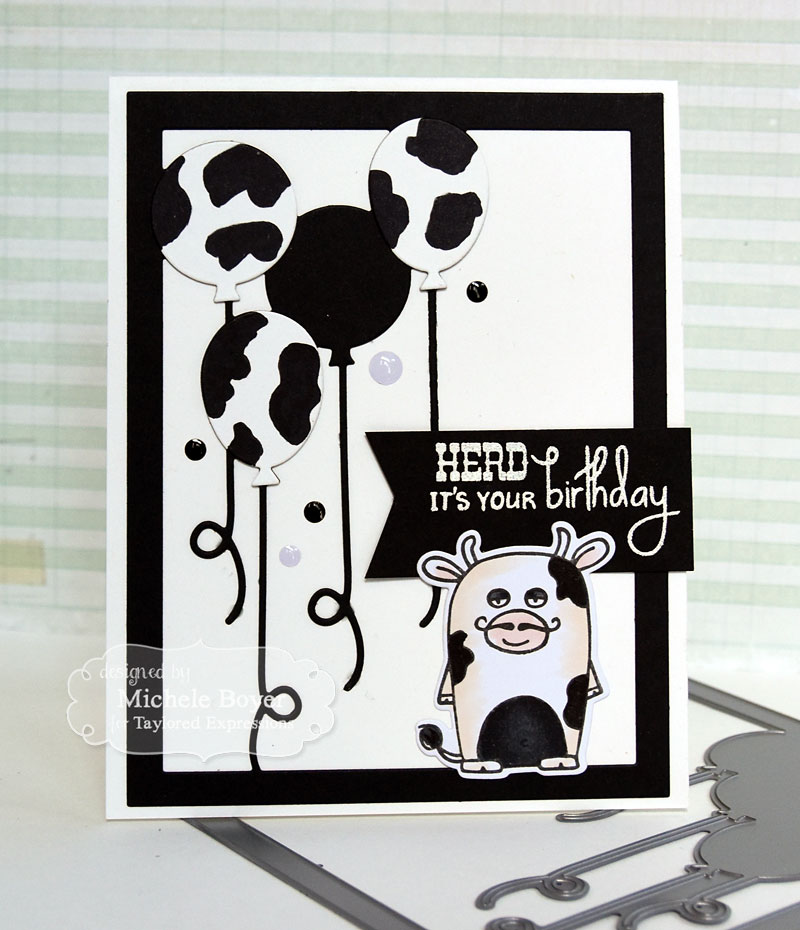
Now it’s the Guys’ turn!
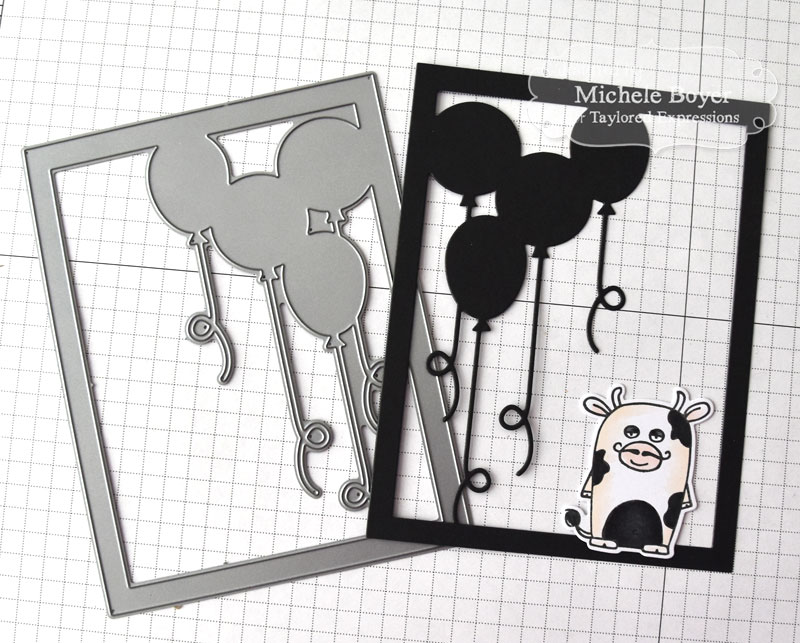
Stamp cow and face onto Sugar Cube card stock; color with markers and die-cut. Die-cut Up, Up & Away Cutting Plate from Oreo card stock.
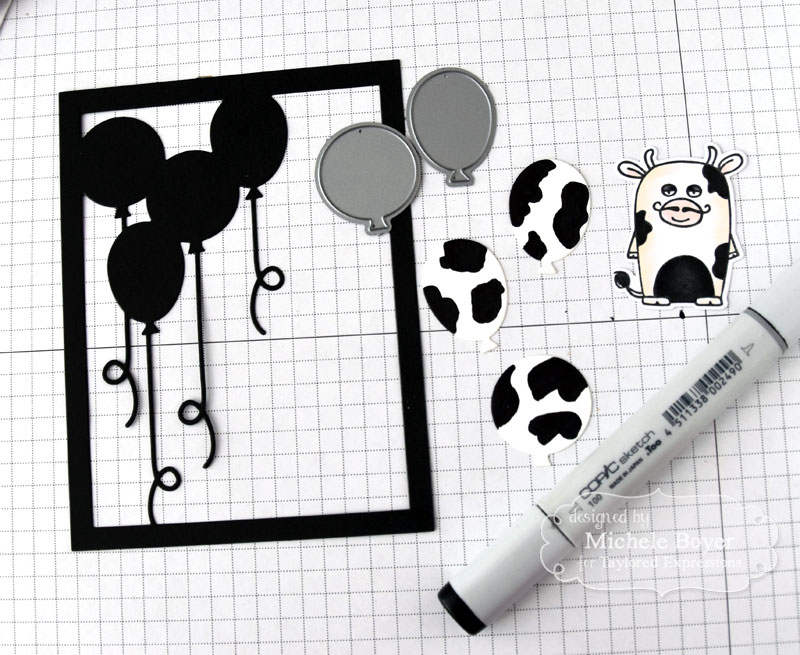
Die-cut two oval and one round balloon from Sugar Cube card stock. Draw in and color cow spots using a 110 (black) Copic marker.
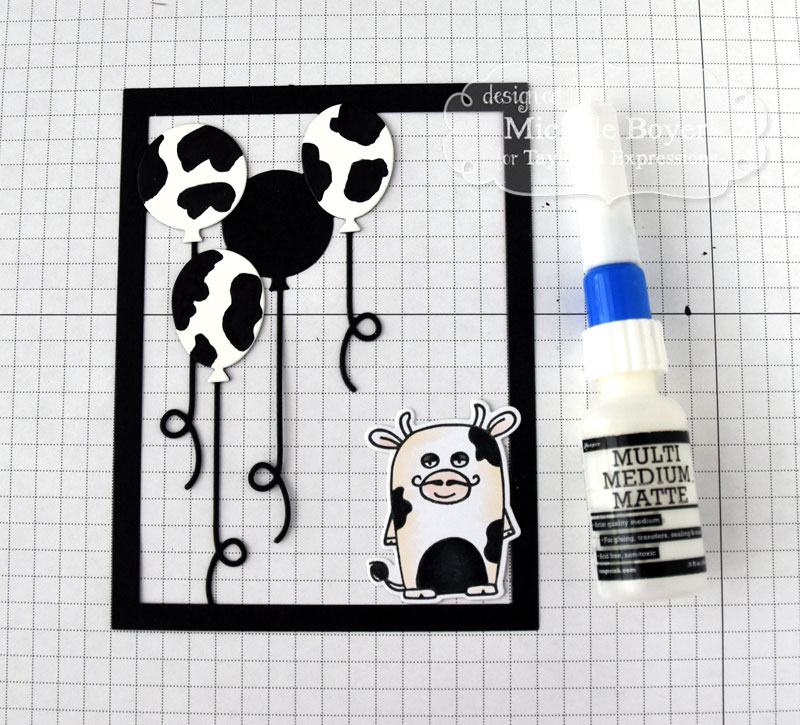
Adhere colored balloons over die-cut panel.
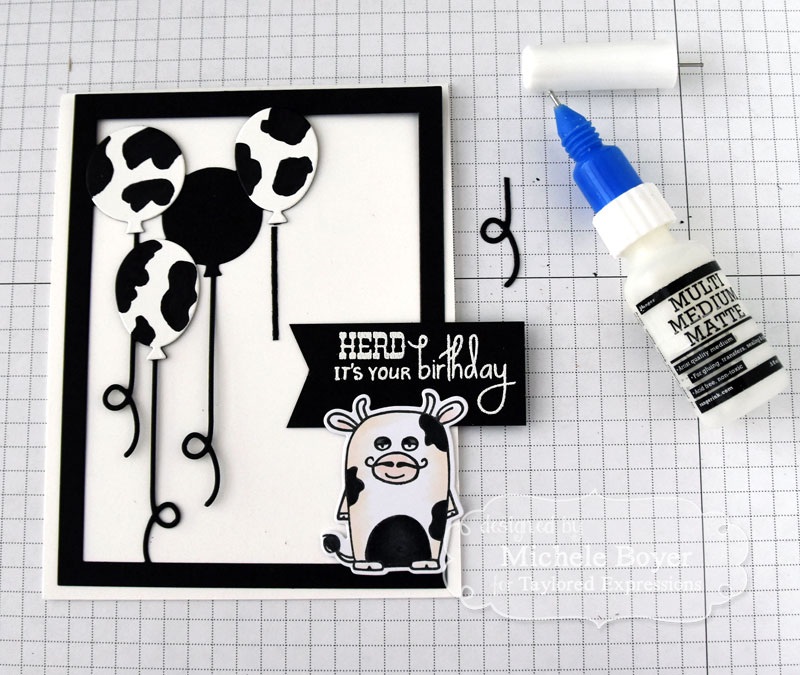
Form card base from Sugar Cube card stock. Layer balloon panel over card base without adhering.
Brush Oreo card stock with Powder Tool. Stamp sentiment in Sugar Cube ink. Pour white embossing powder over, tap off excess and heat emboss. Cut left edge in flag shape.
Using a scrap of Oreo card stock and Up, Up & Away Cutting Plate, die-cut an additional balloon string (third from left). Nip away string from right-most balloon.
Adhere top of cow to sentiment strip. Using this as a guide, replace removed string with longer string and nip away curled end. Adhere balloon panel and replacement (partial/longer) string to card base.
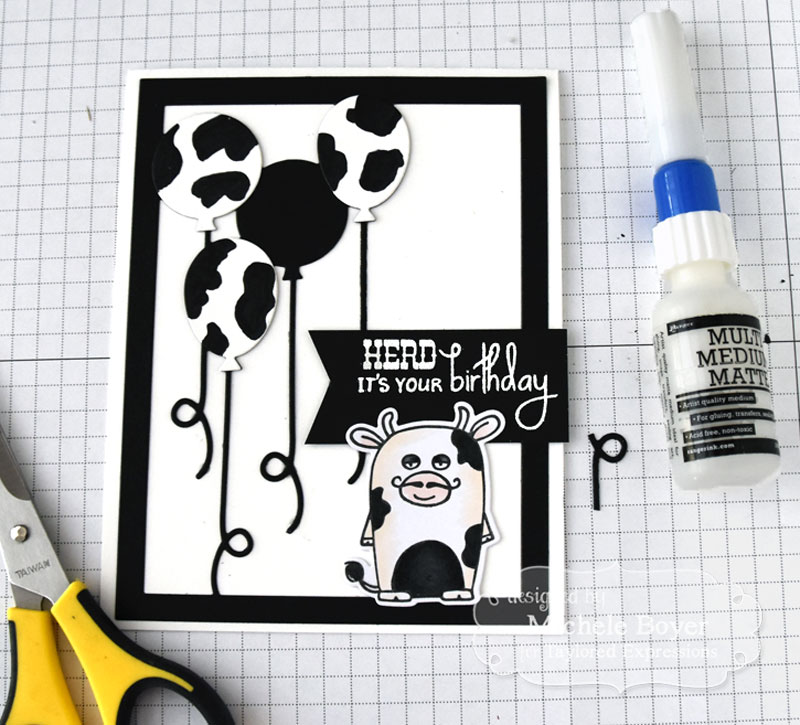
Adhere sentiment strip/cow, placing cow’s feet on bottom border and aligning right edge of sentiment strip with right edge of card. Insert bottom curled edge of balloon string below sentiment panel.
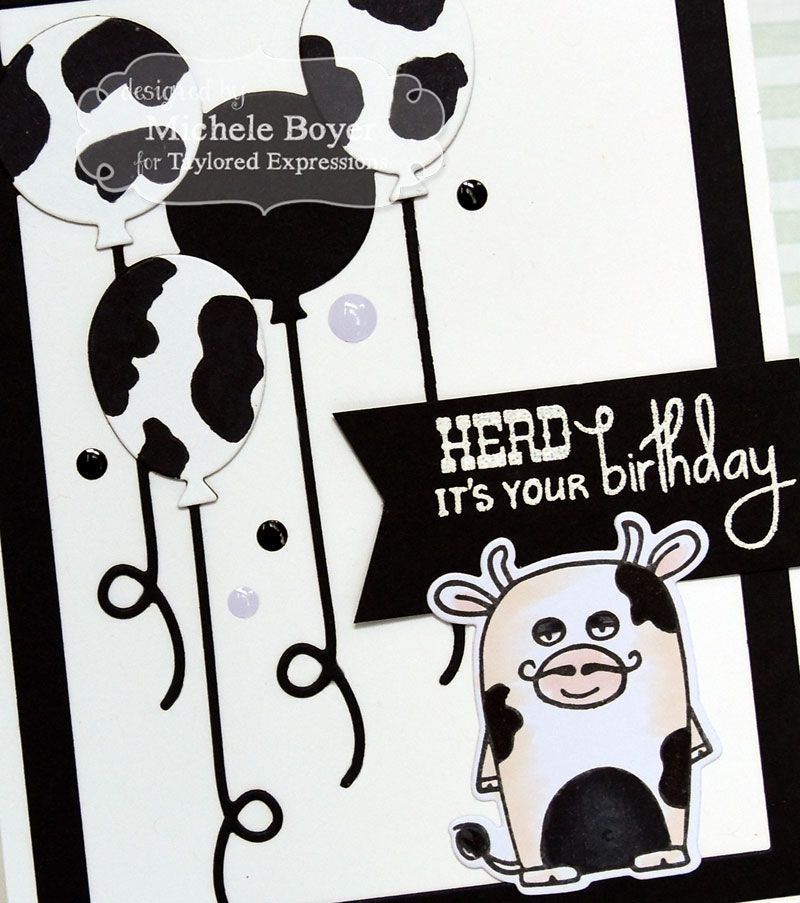
Adhere a few Oreo and Sugar Cube enamel shapes to finish card.
Thanks so much, Michele, for this fab tutorial. I hope you all have a lovely weekend — stay safe and make merry!


