Oct 20, 2020
NEW! Pastel Blender Brushes, Tool Tray, and Stencils!
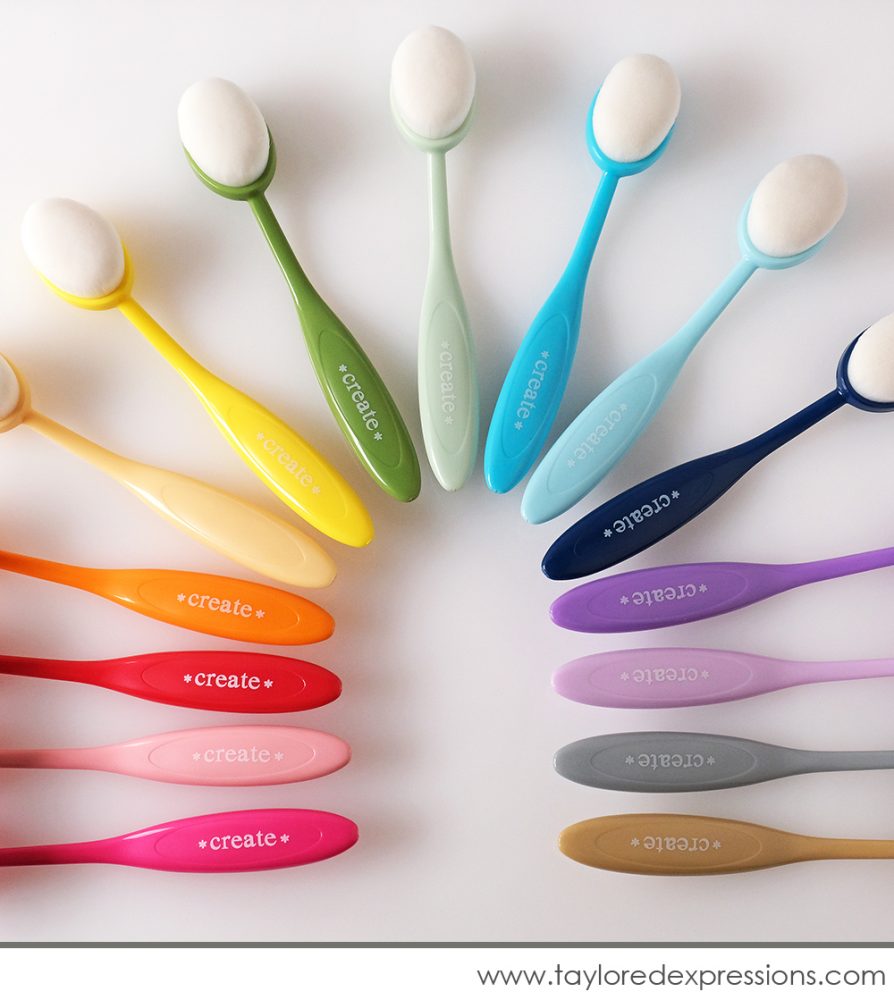
Hey, crafty friends! It’s Taylor here today and I have some super exciting news! This has been a long time in the works (because you know… COVID), but today we’re welcoming FIVE new blender brushes to the family! Say ‘hello’ to our pretty PASTEL brushes! They’re the same size as the original brushes and will give you an option for using with lighter colored inks or as a smaller set to dedicate to using with unique formulations like Distress Oxide ink. The photo above shows all 15 blender brushes together in the perfect rainbow!
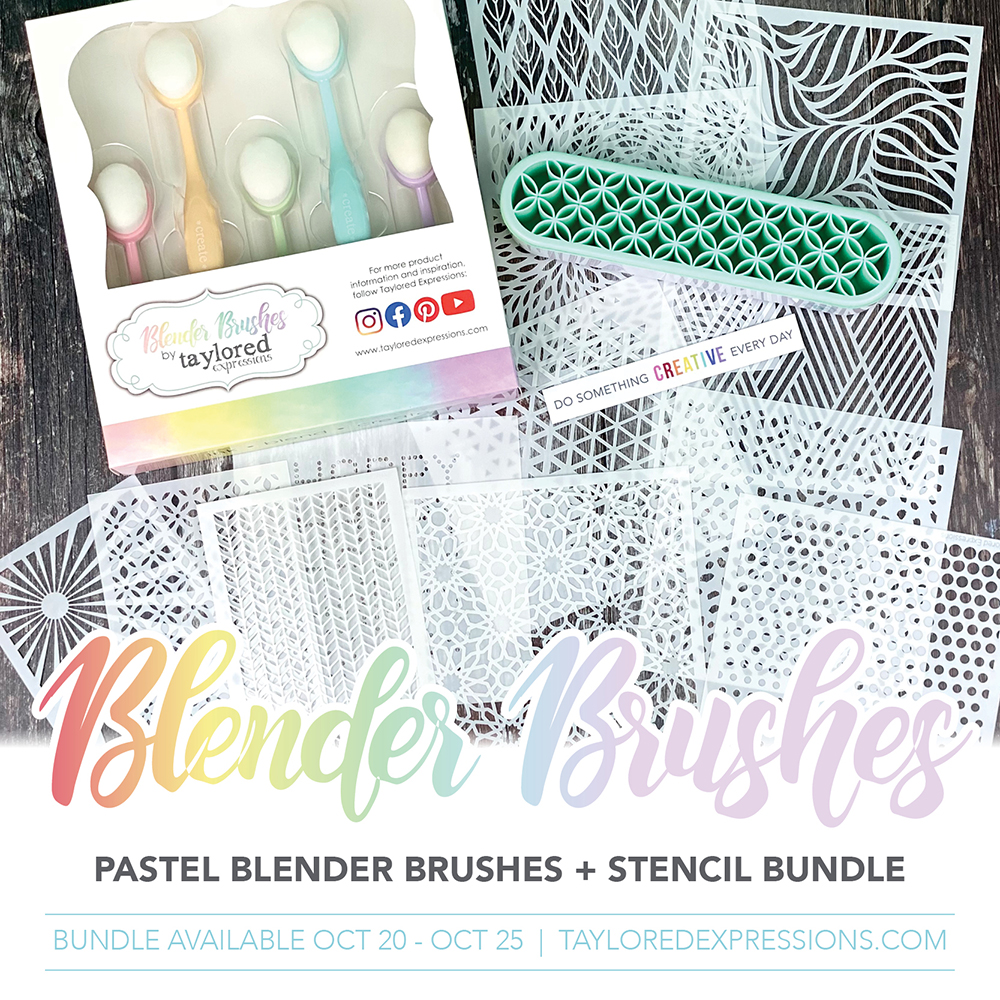
In addition to the pastel blender brushes, I can’t wait for you to see our new Tool Tray, a must-have desktop storage solution for blender brushes and other small crafty tools that you want to keep at your fingertips. Plus, what’s the perfect pairing for blender brushes? STENCILS, of course! So to celebrate the arrival of our new pastel blender brushes, we also have 12 new stencils!
As always, the Creative Team and I have been busy creating with the new goodies and we have lots to show you! Plus, you don’t want to miss out on getting nearly 20% off our “I Want It ALL” bundle offer!
Here’s what you’ll find on the blog this week:
- Our blog posts (Tuesday – Saturday) will feature a video showcasing the new release products.
- New products are available to purchase RIGHT NOW in the TE webstore!
- Receive FREE shipping on orders of $50 or more in the United States!
- Earn a free, exclusive stencil set with purchases of $100 or more. CLICK HERE for more information.
- Last, but certainly not least – take advantage of our “I Want It All” bundle offer (details below).
The I Want It All Bundle retails for $95 (that’s nearly 20% off the retail price of the items individually!) and includes the following:
- Pastel Blender Brushes (set of 5)
- Tool Tray
- All 12 new stencils including: 9 standard (6″ x 6″) stencils and 3 Mini Slim sized stencils.
- Exclusive ‘do something creative everyday’ sticker designed to fit on the Tool Tray. This sticker design is only available with the bundle and not sold separately.
The special introductory price on the I Want It All Bundle is available now through, Sunday, October 25th, or while supplies last.
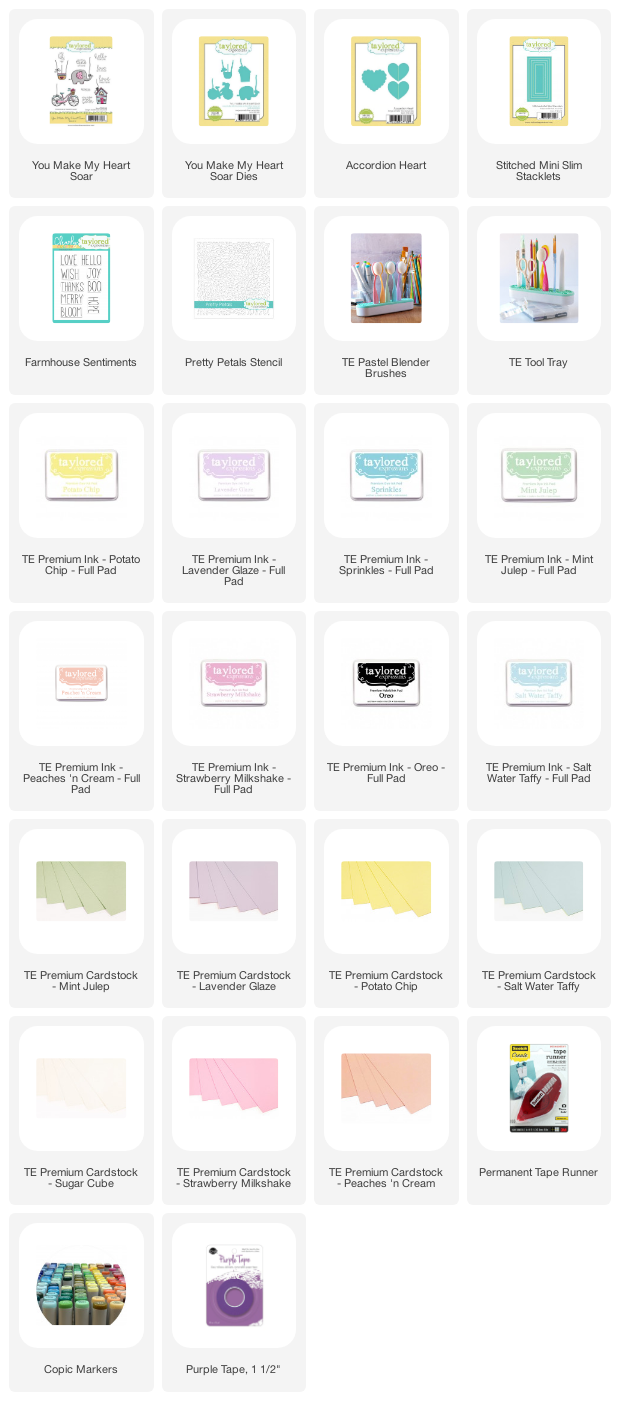
Click below to shop all of the new products that are releasing today and then keep scrolling for inspiration and more!
Are you ready to see the new Pastel Blender Brushes and stencils in action? Here we go!
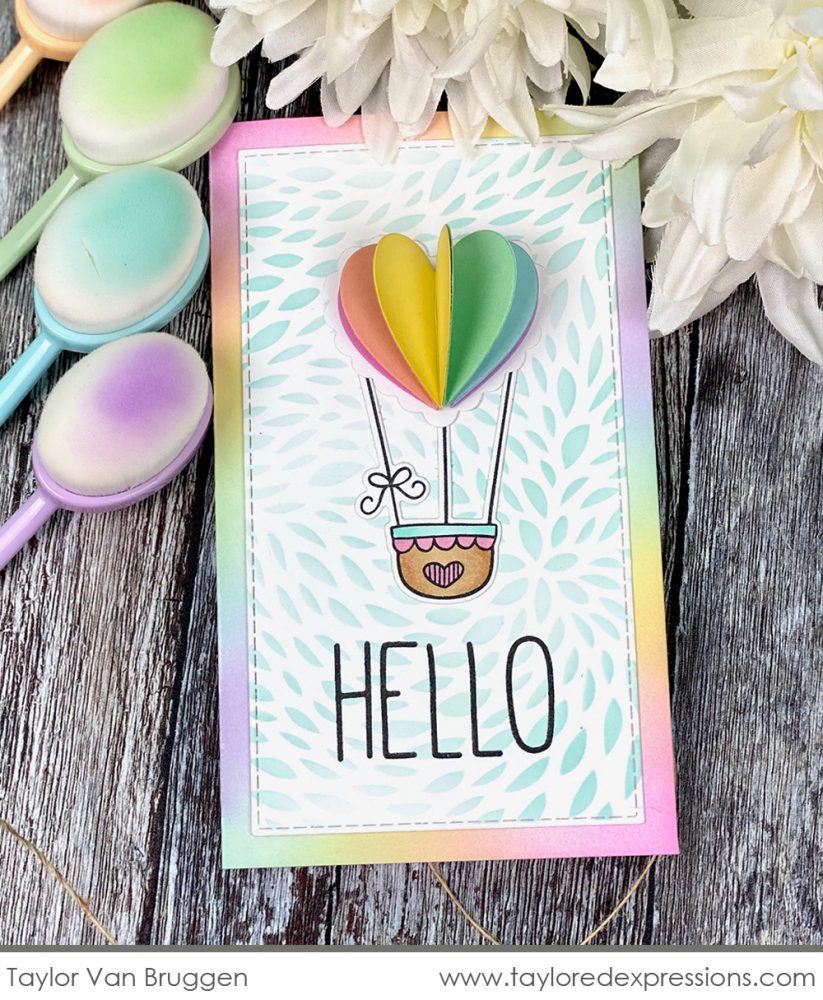
In the video below, I created a pastel rainbow using both ink and cardstock along with the new Pretty Petals stencil:
I started by stenciling the background with the Pretty Petals in two different colors. By using two shades of blue I was able to create more movement and dimension in the background. Then I cut the Accordion Heart from 6 pastel cardstock colors to create the 3-dimensional heart shaped hot air balloon element.
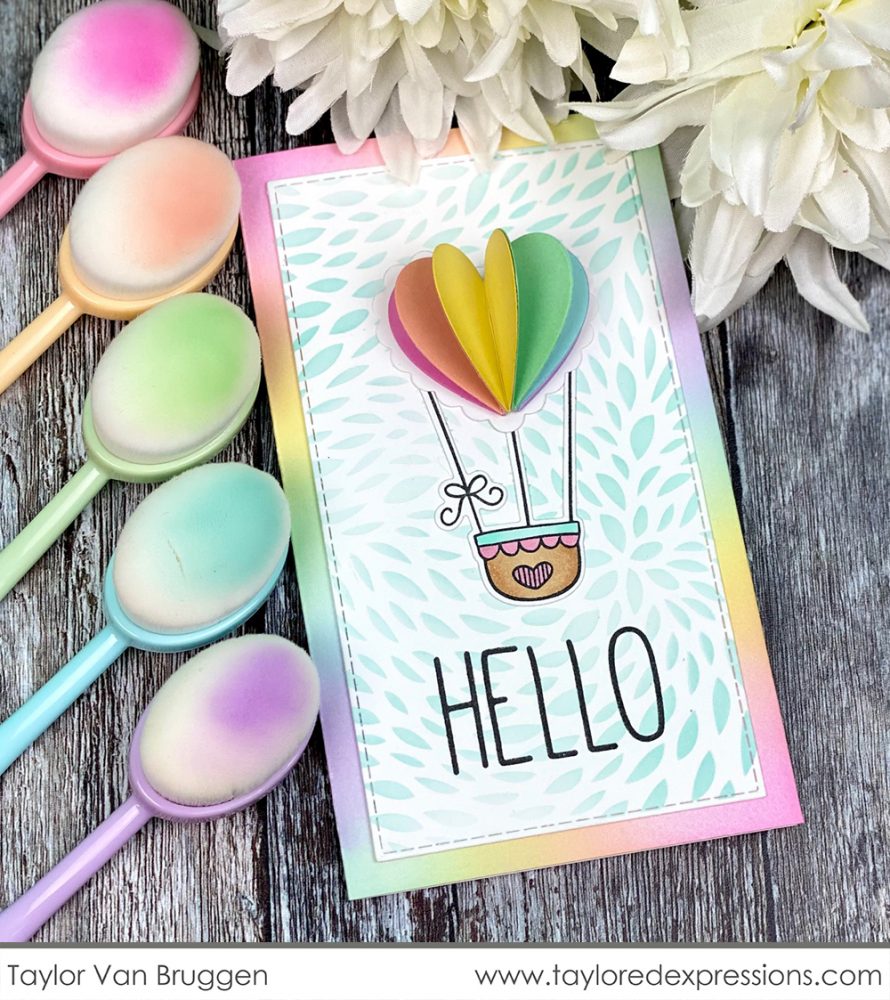
Finally, in order to tie in the rainbow heart element, I used the pastel brushes to blend a rainbow border around the outside of the mini slim card base (3.5″ x 6″).

Now let’s take a closer look at the pretty pastel blender brushes, Tool Tray, stickers, and stencils:
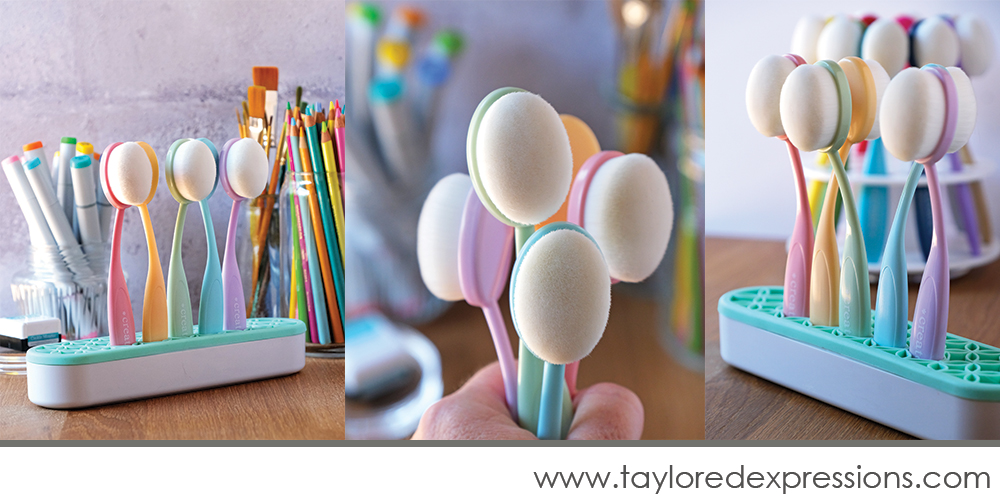
The new set of Blender Brushes features 5 pastel colors (light pink, peach, mint, and lavender)! For those who are curious, the handle colors were chosen specifically to match the following TE ink colors: Strawberry Milkshake, Peaches ‘n Cream, Mint Julep, Salt Water Taffy, and Lavender Glaze). The brush heads are the same size as our original rainbow brushes making them the perfect addition to the rainbow. You have the option of using them with lighter colored inks or dedicating them to use with unique formulations like Distress Oxide ink (so you don’t cross-contaminate your ink pads by switching between formulations).
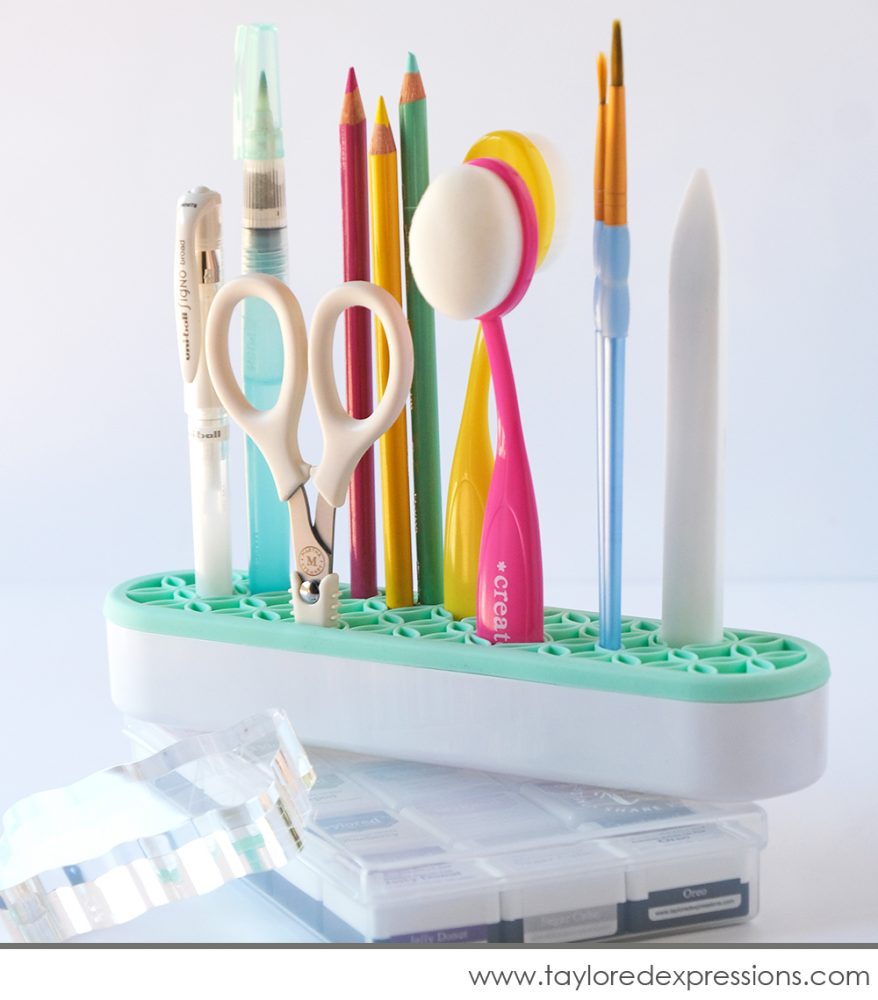
We also excited to introduce a new Tool Tray that works perfectly for storing blender brushes and other small desktop craft tools. We’ve also designed several colorful quote stickers to dress up the desktop storage! The stickers are designed to fit the side of the tray and are sold separately.

Purchase the set of 3 quote stickers are crisply printed on thick, durable vinyl (making them scratch-resistant and weatherproof), and are ready to peel and stick. Dress up your Tool Tray, water bottle, or laptop – and don’t forget to grab a set as a gift for a crafty friend!
Lastly, as a proper introduction for the new blender brushes, we’re releasing 12 new stencil designs! We’ve gotten quite excited recently about all the layering, masking, and stamp/stencil combos, but this release is all about the versatility that can be found with fabulous “regular” stencils! There are (9) standard (6″ x 6″) designs and (3) mini slim (3.75″ x 6.75″) designs.
Here’s a look at all of the new stencil designs plus inspiration from the TE Creative Team:
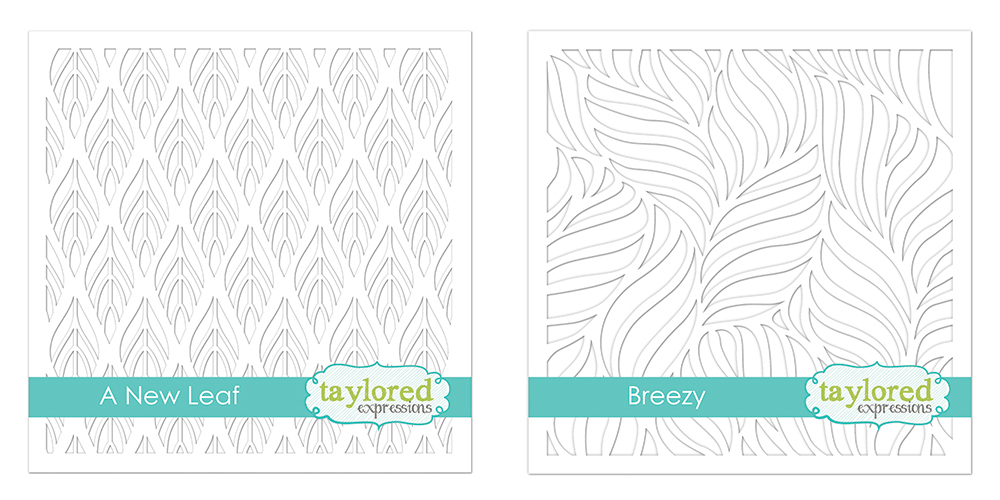
The A New Leaf stencil is the standard size (6″ x 6″) and features a repeating leaf design that is wonderful for autumn or nature inspired projects.
The Breezy stencil is the standard size (6″ x 6″) and features a swirling pattern that could be interpreted as leaves, waves, wind, fire, and more!
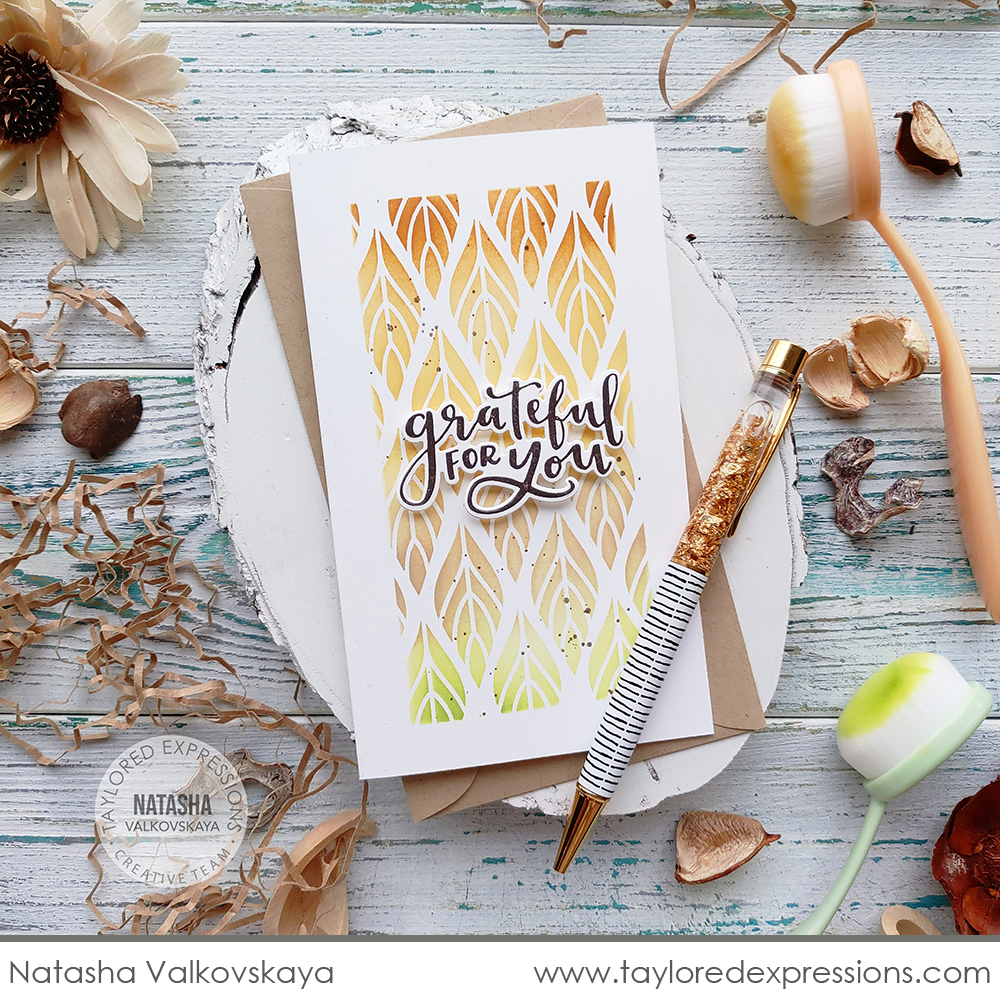
Natasha Valkovskaya combined pastel tones of peach, green, yellow, and tan along with the A New Leaf and Mini Slim Masking Rectangle stencils to create this fall inspired Mini Slim card. The sentiment is from the Handlettered Thanksgiving stamp set and cut out with the coordinating dies to finish off this clean and simple design perfectly!
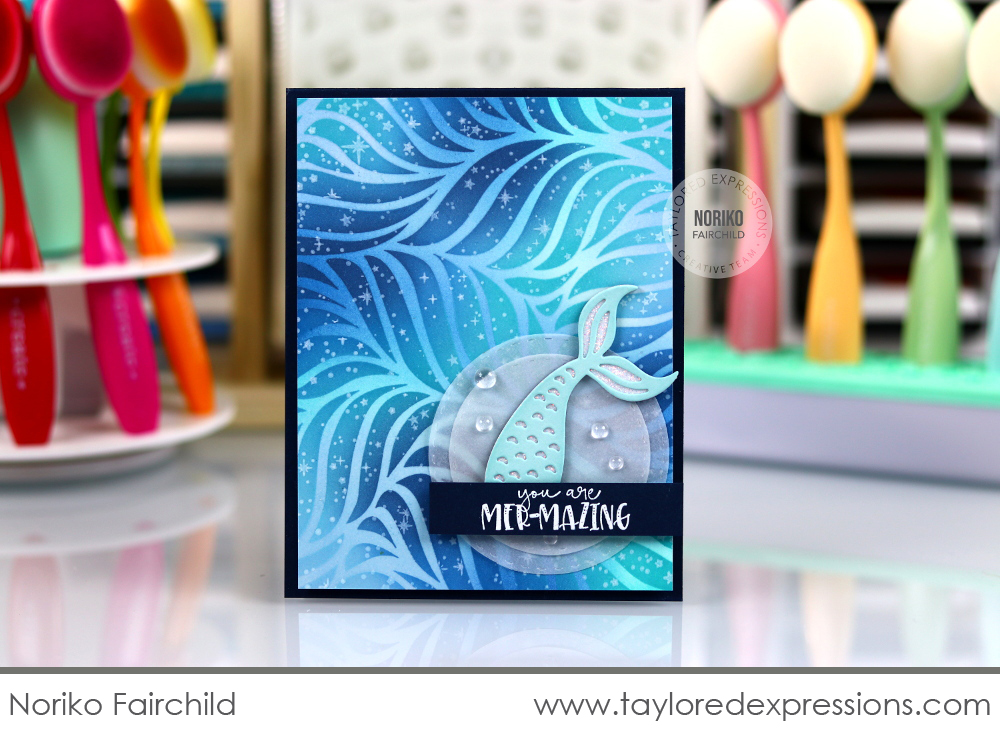
Did your jaw drop like mine did when you saw this amazing mermaid card by Noriko Fairchild? Noriko blended up a background of pastel blue ink tones, then stenciled over the top using the Breezy stencil with darker blue ink tones, and then stamped the Twinkle Twinkle Background through the stencil using Sugar Cube ink. She added the die-cut Be a Mermaid tail onto layered vellum circles along with the ‘you are mer-mazing’ sentiment from the Be a Mermaid stamp set embossed in white to complete her design.
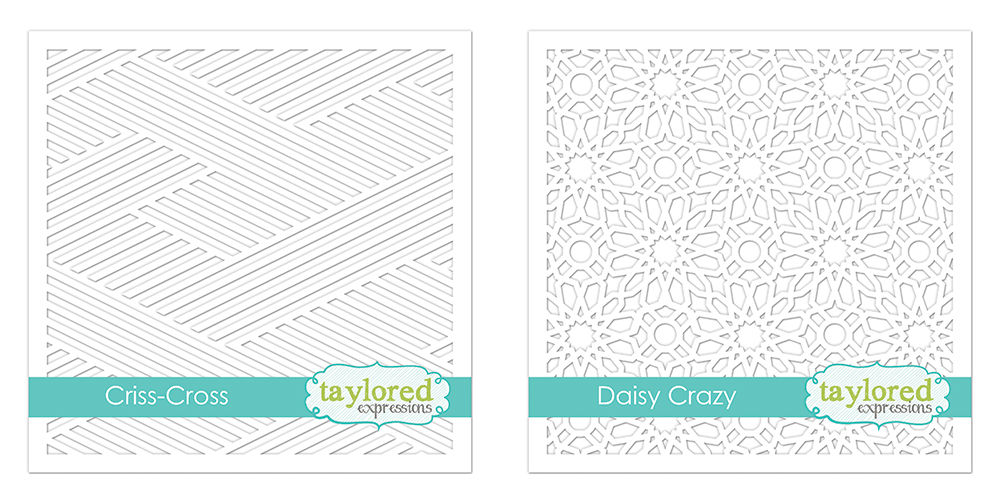
The Criss-Cross stencil is the standard size (6″ x 6″) and features a pattern of overlapping lines. This versatile pattern creates a unique background to use on cards for many occasions and if you know Kris Kross – it’ll make you ‘jump, jump’. And now I’ll set aside my 90’s humor for the rest of this blog post. *grin*
The Daisy Crazy stencil is the standard size (6″ x 6″) and features an all over pattern with a kaleidoscope feel. Use this stencil to add a feminine or whimsical feel to the background of your projects.
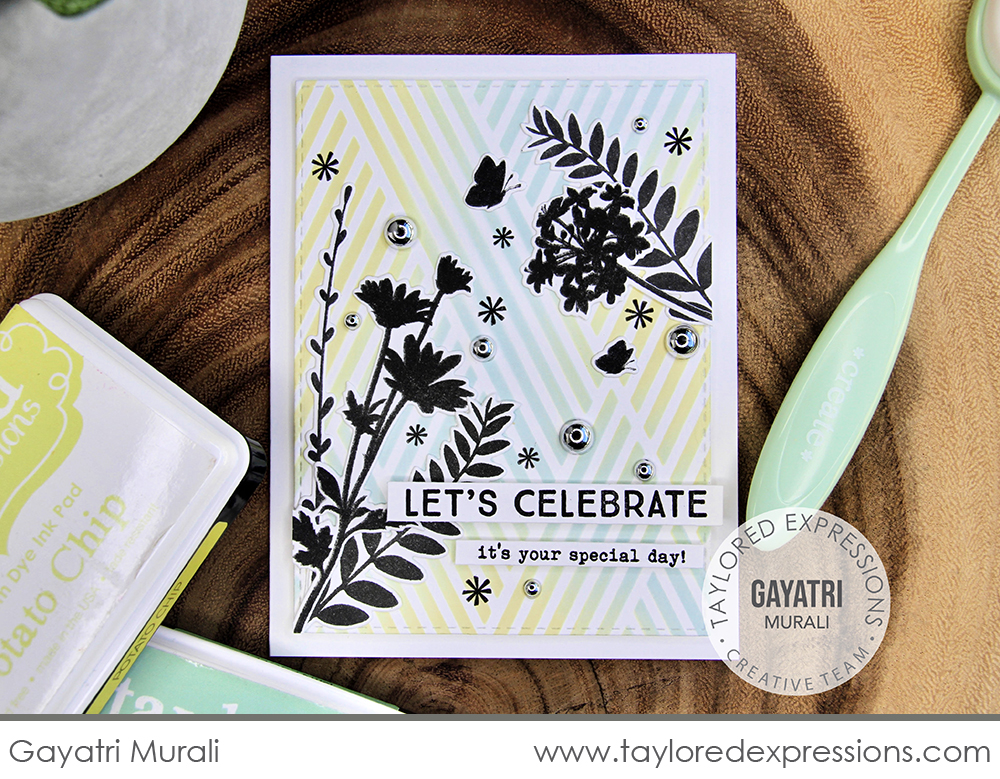
Gayatri Murali used the Criss-Cross stencil with pastel blue, yellow, and green inks to create the background on this card. Over the background, she added floral stems from the Spring Stems stamp set stamped with Oreo ink for a silhouette effect. I love the bold flowers over the soft background! You could use this card design for many different occasions. Gayatri added a birthday sentiment from the Tag Team – Birthday stamp set.
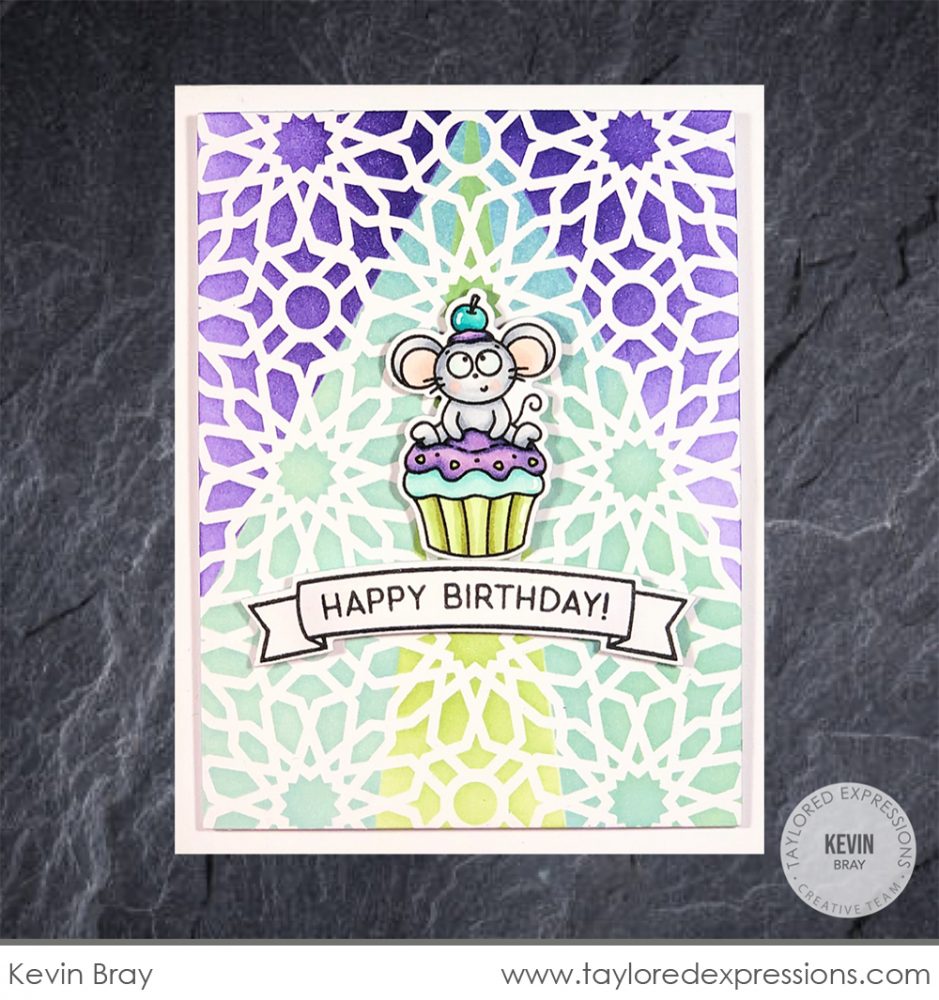
Kevin Bray combined creative masking with the new Daisy Crazy stencil to create a multi-colored spotlight effect on Millie from the Millie’s Birthday Bash stamp set on this birthday card. I really like how Kevin colored the cupcake to match the background colors using Copic markers – you could use this design with so many different color combinations! The sentiment and banner are stamped using the Balloon Bouquet Additions stamp set and cut out with the coordinating banner die.

The Falling Happy stencil is the standard size (6″ x 6″) and features the word ‘happy’ in a dot pattern that falls apart as it repeats down the stencil. Use the stencil to create backgrounds for many different ‘happy’ occasions!
The Hot Spots stencil is the standard size (6″ x 6″) and features a polka dot pattern with graduated dot sizes across the design. Polka dots are so versatile to use on a wide array of projects!
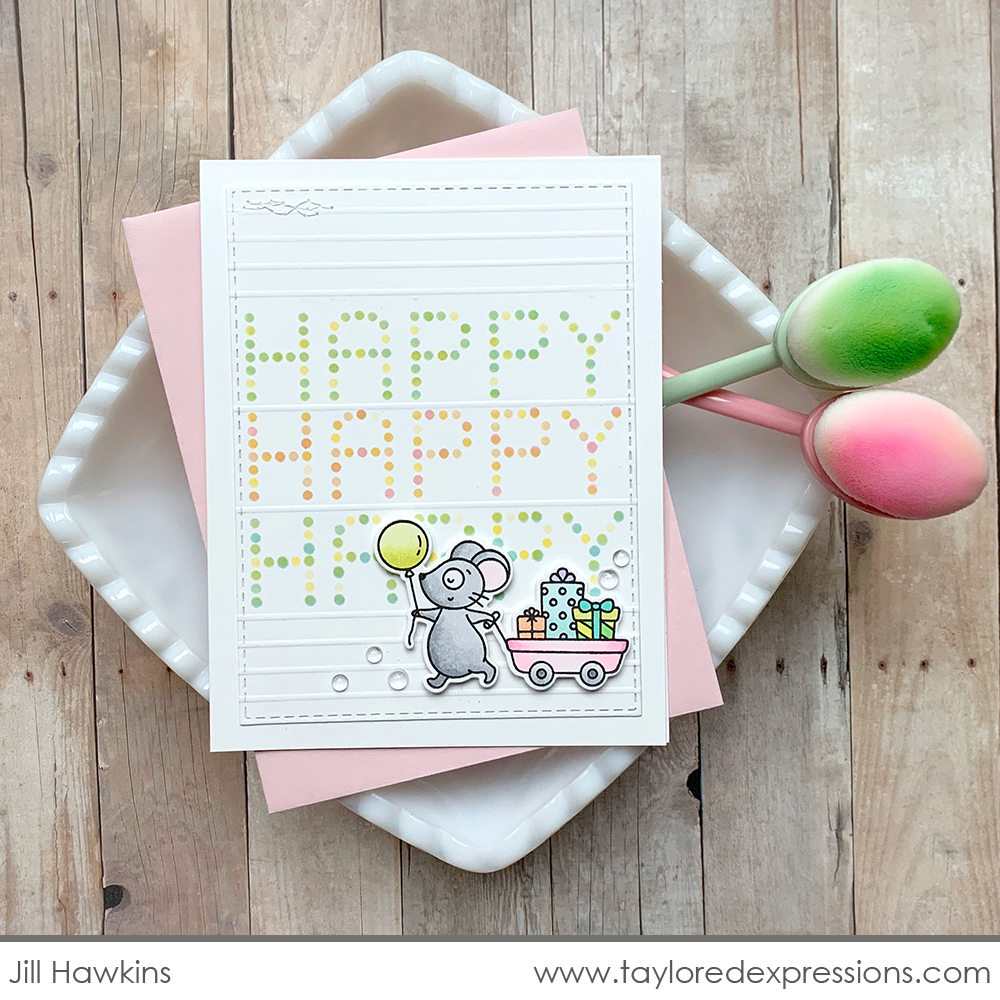
Instead of stenciling the Falling Happy stencil with the falling apart effect, Jill Hawkins lined up the different ‘happy’ words on the stencil to create a multi-colored effect on the ‘happy’ words. She repeated the ‘happy’ three times to create the background on her birthday card featuring Millie pulling her wagon of presents from the Millie’s Birthday Bash stamp set.
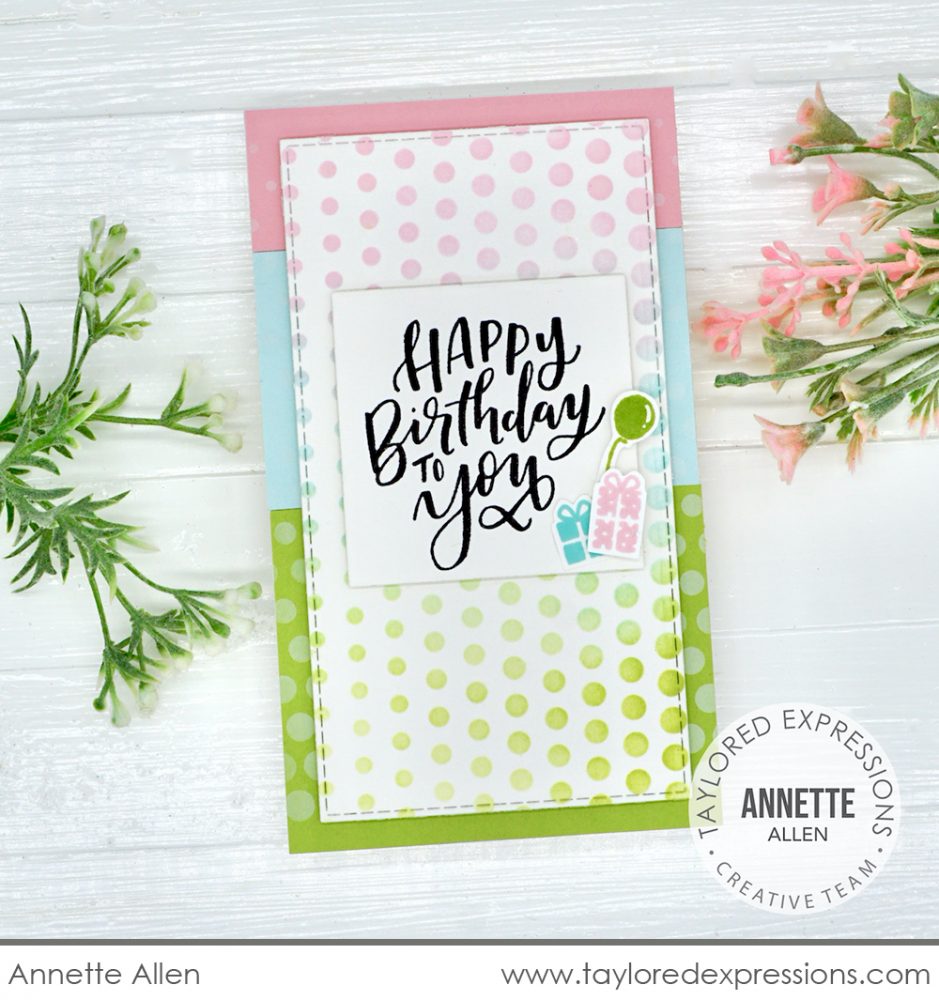
Annette Allen mixed things up with the Hot Spots stencil by using it a few different directions on her Mini Slim birthday card. I love how she color blocked the card base that is stenciled with Sugar Cube ink and added blending to the polka dots in coordinating ink colors to the cardstock blocks on the card background. The sentiment that Annette used is from the Handlettered Sentiments stamp set and the cute little birthday images are from the Tag Team – Birthday stamp set.
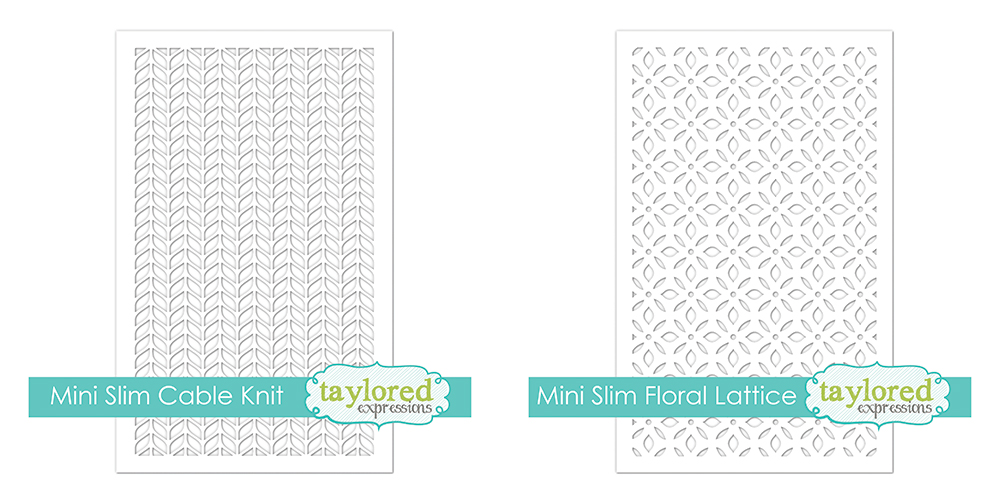
The Mini Slim Cable Knit stencil (3.75″ x 6.75″) features an all-over stockinette knit design. The pattern creates a cozy backdrop for fall, winter, or Christmas themed projects!
The Mini Slim Floral Lattice stencil (3.75″ x 6.75″) features a lattice design that has a soft, feminine feel. The design pairs well with floral designs!
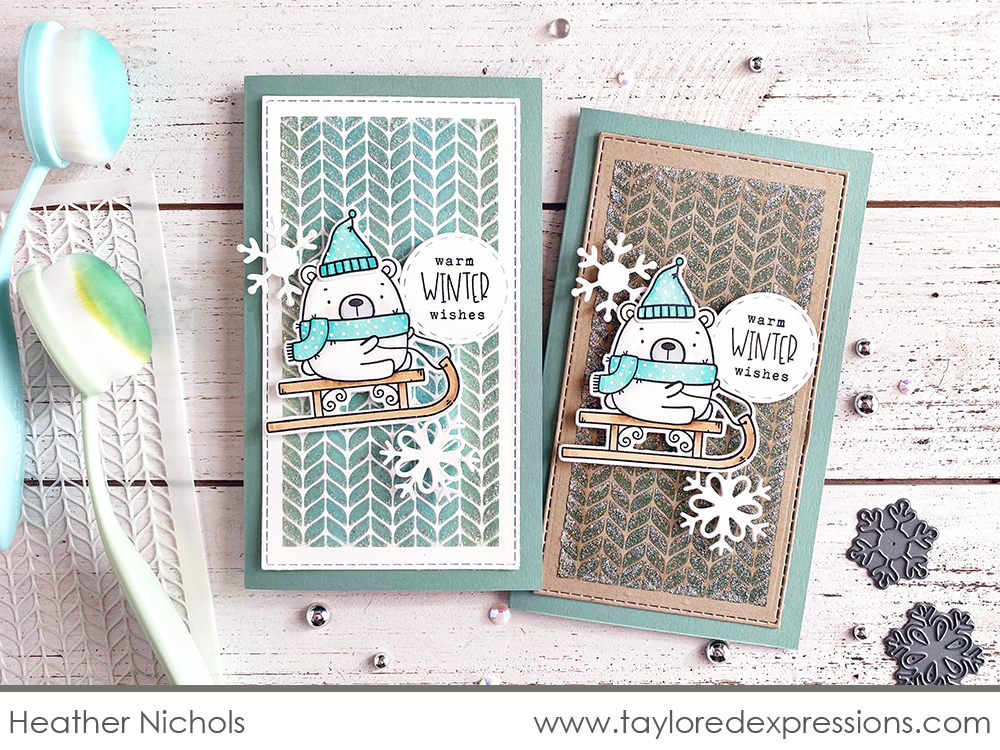
Heather Nichols used the Mini Slim Cable Knit stencil to create a pair of wintery cards that feature the cute sledding bear from the Fluffy Friends – Holiday stamp set. The backgrounds are blended with Sprinkles and Spearmint inks with a layer of the Moon Dust Stickles Glitter Gel over the top. A few die cut snowflakes and the sentiment from the Gus & Gertie Holiday Adventures stamp set complete the chilly look!

Even though the Mini Slim Floral Lattice stencil is great for floral projects, you can use it for other looks too like Jen Shults did on this card. She paired the stencil with the Mini Slim Masking Rectangle stencil to create the background. The ‘yay!’ word is die cut with the Caps Lock – Yay! die from Sugar Cube cardstock, blended to match the background colors, and combined with words and phrases from the Building Blocks – Happy Additions stamp that are cut out with the coordinating Building Blocks die to create the sentiment for the card.
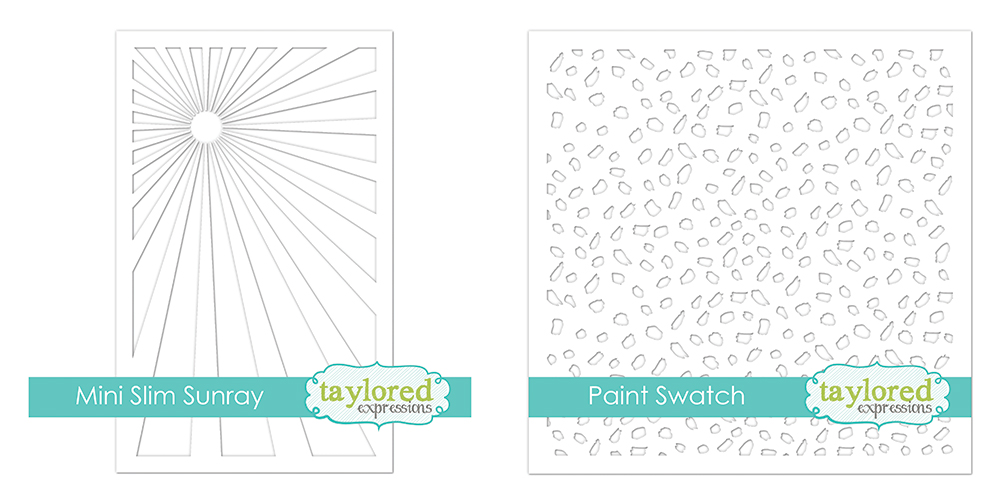
The Mini Slim Sunray stencil (3.75″ x 6.75″) has a ray pattern that radiates out from a single point. Use the stencil to depict a sunny sky or highlight an image on your project. Note: the sunray is positioned to work perfectly with the square openings on the Mini Slim Trifold template & dies!
The Paint Swatch stencil is the standard size (6″ x 6″) and has an all over pattern of flecks that look like they were painted on with a brush. You could interpret this background as a confetti look for birthday projects, animal spots, and more!
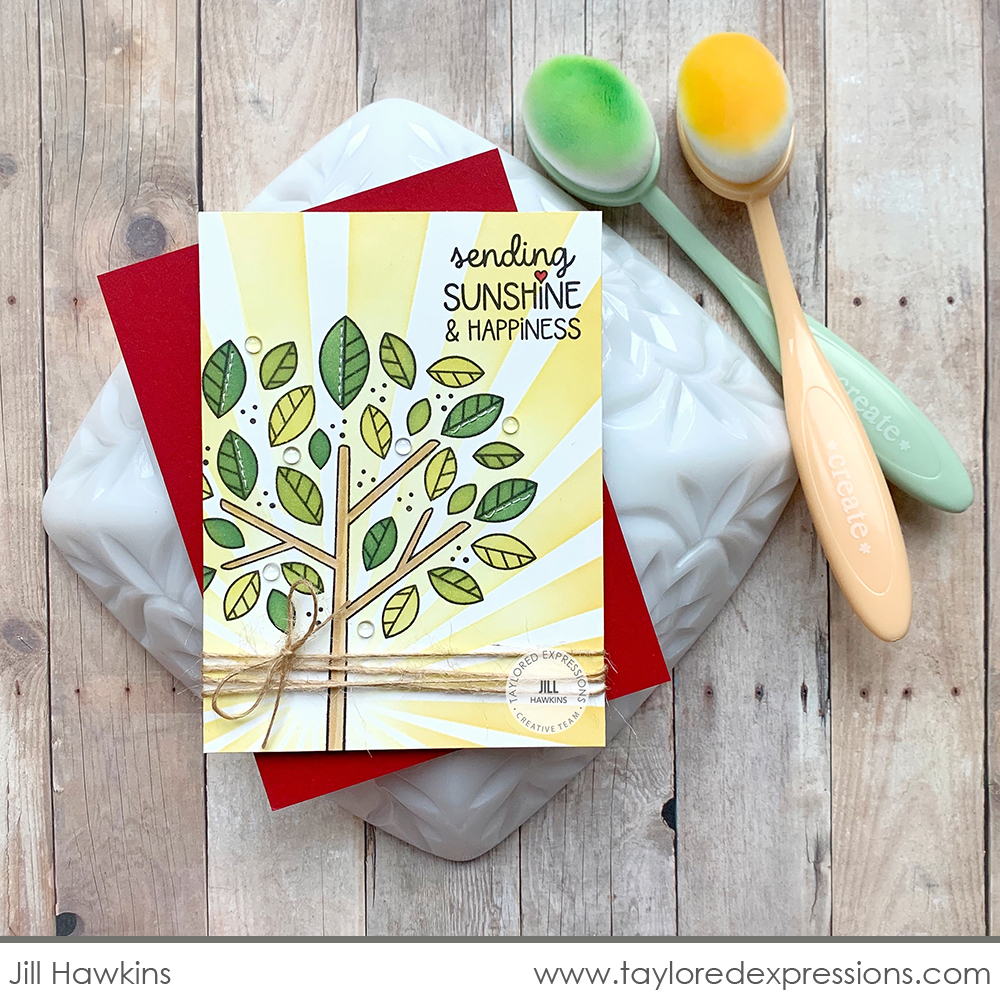
Just because a stencil is sized for a specific card size, doesn’t mean you can’t adapt it for whatever size you are creating in! Jill Hawkins used the Mini Slim Sunray stencil on an A2 card design behind the tree image from the Modern Tree stamp set. Jill stamped the outline tree, added color to the leaves with the coordinating stencils, and colored the tree trunk with Copic markers. I love the bright and sunny feel of the card and it certainly will brighten the day of the person who receives it!
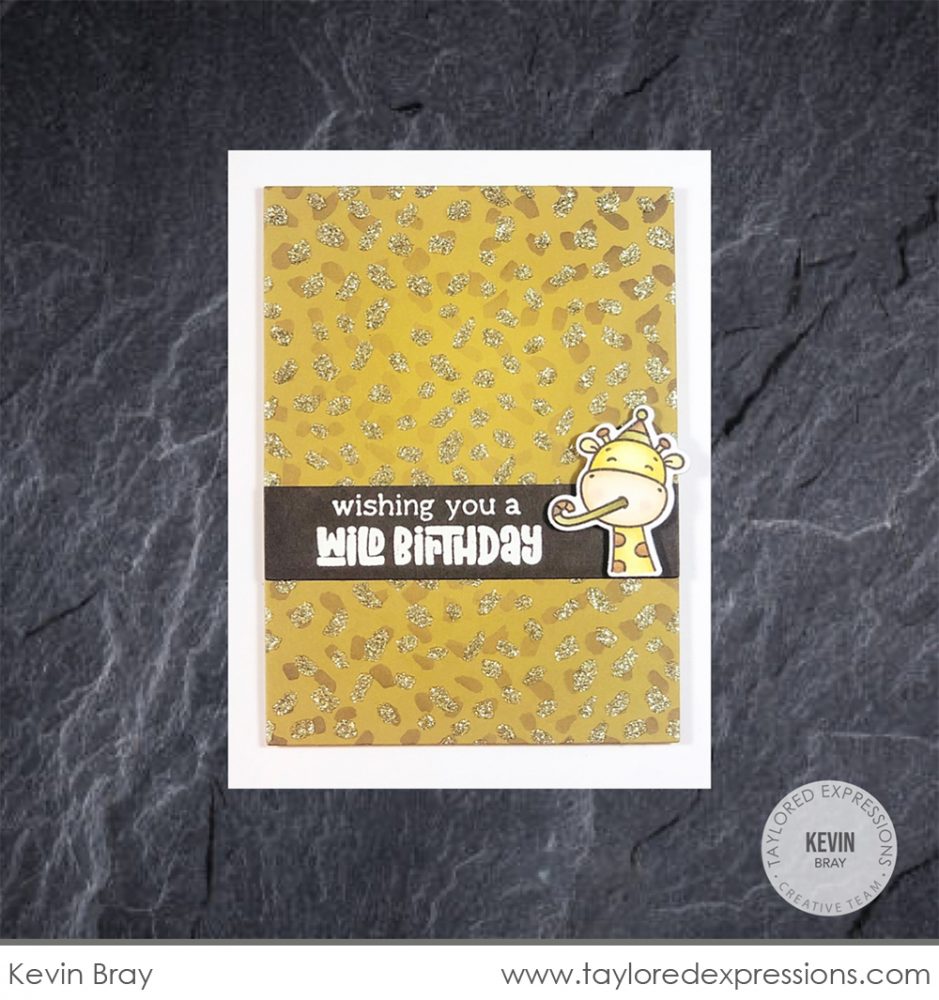
Kevin Bray used the Paint Swatch stencil to create a background of animal spots for this birthday card featuring the giraffe from the Life of the Party stamp set. He did a tone on tone effect for the first layer of spots and then finished things off with a layer of sparkle. To achieve a layered look with one stencil, rotate it to vary where the pattern falls to create different effects.
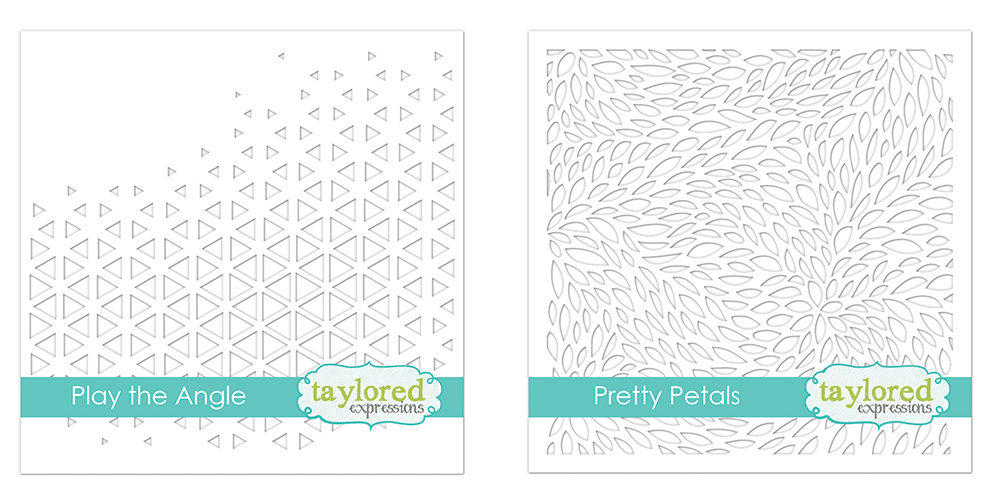
The Play the Angle stencil is the standard size (6″ x 6″) and features a geometric triangle pattern that is more defined in the middle and trickles off on the top and bottom edges. You’ll love incorporating this unique design into your projects!
The Pretty Petals stencil is the standard size (6″ x 6″) and features a swirling, organic petal design. This background pattern will pair great with floral designs and nature inspired projects.
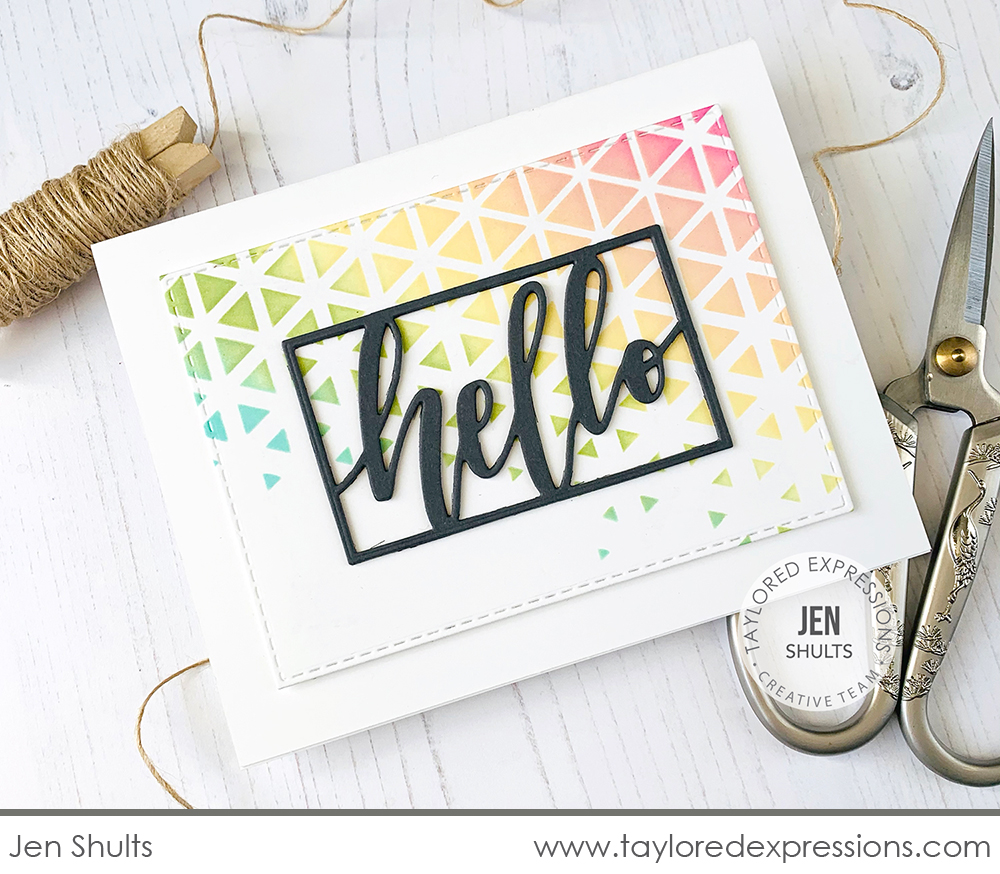
Jen Shults blended a soft, pastel, rainbow background using the Play the Angle stencil and cut it out with a Stitched Rectangle Stacklets die. She layered it onto a Sugar Cube card base and added the Script Frame – Hello die cut for the sentiment. This clean and simple design would be great to mass produce and send out to family and friends!
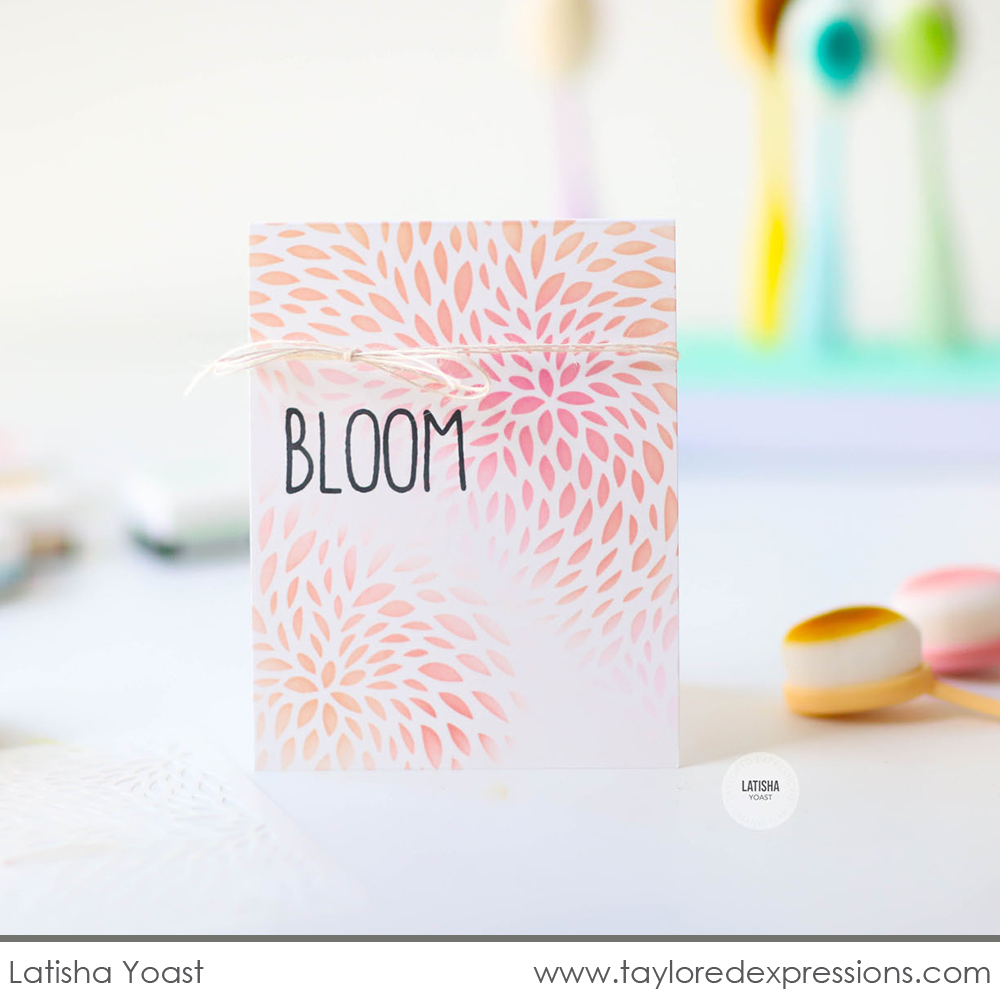
Here’s another clean and simple card design by Latisha Yoast using the Pretty Petals stencil. She stenciled the petals in pink and peach ink colors, leaving an unblended portion that draws your eye across the card design. The ‘bloom’ sentiment is from the Farmhouse Sentiments stamp set and Latisha finished off the card design with burlap twine tied around the card front.
Join Taylor live for “T Time” at 1pm Central today on the Taylored Expressions Facebook Page. She’ll be sharing a closer look at the new Pastel Blender Brushes, Tool Tray, stickers, and stencils making their debut today at TE. We hope to see you there – come join in on the fun!
Check out what the TE Creative Team came up with using the new Pastel Blender Brushes and stencils. Click each of the faces below to visit their blogs. We have LOTS to share with you this week on the TE Blog, so make plans to stop back again tomorrow!


