Mar 09, 2021
Purchase Exclusive Products + the Personalized Pop-up Shop is Back!
Hey, crafty friends! It’s Heather here and I am so excited to share the products that are being released today! Throughout the year, there are exclusive gifts that we have given away when you make a purchase of $100 or more in the TE webstore (CLICK HERE to check out the exclusive gift for this month!) If you missed out on any of these sets, you can now purchase them! Today, I have a rundown of the new products that are now available along with fresh inspiration from the TE Creative Team and a video from me.
I am also excited to announce that our exclusive Personalized Pop-up Shop is back for a limited time with four new designs to choose from. Here are all the details:
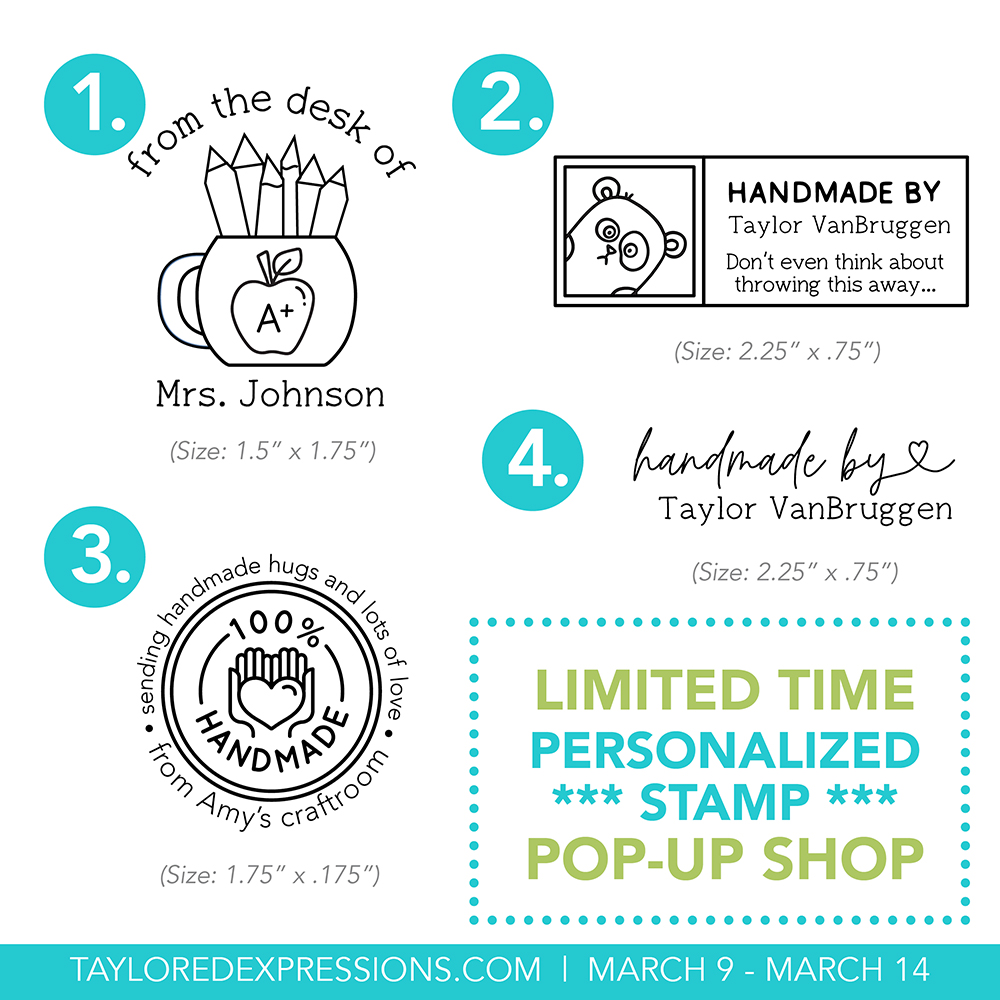
For a limited time, now through March 14th, you can select and personalize any of the four stamp options with your name! These are a wonderful tool to have especially when mass-producing cards as you can load your personalized stamp into your MISTI to quickly and easily add your mark to the back of your handmade cards. All of the designs are sized appropriately for both an A2 and Mini Slim (3.5″ x 6″) sized cards.
Here are the details for the different personalized stamp options:
- Option 1 – A+ Teacher: 20 character limit, size is about 1.5″ x 1.75″
- Option 2 – Paranoid Panda: 20 character limit, size is about 2.25″ x .75″
- Option 3 – 100% Handmade: First name only, 12 character limit, size is about 1.75″ x 1.75″
- Option 4 – Crafty cursive: 25 character limit, size is about 2.25″ x .75″
Please note: Stamps will be customized to match exactly what you have typed, so please proofread carefully. Because the personalized stamps must be custom designed and manufactured, expect your order to ship in 6 weeks. Orders in the United States that include additional items will be split-shipped. International orders with additional products will be held until the personalized stamp is ready to ship.
Because the personalized stamps are custom made, all sales are final and the stamps cannot be returned for a refund.
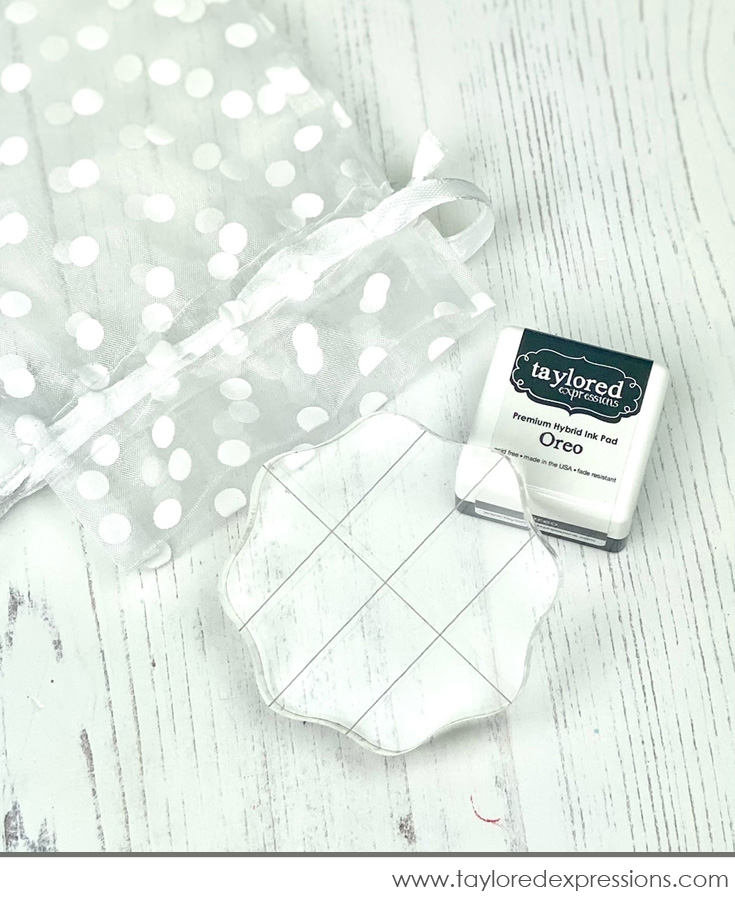
If you’re giving a Personalized Stamp as a gift, then be sure to make your gift extra special with our Stamp & Style Pouch. This little bundle includes one TE Premium Mini Ink Pad in Oreo and one 1 3/4″ round acrylic stamping block tucked inside an adorable polka-dotted drawstring bag. Perfect for getting your friends, family members and teachers into stamping!
Click below to shop the Personalized Pop-up Shop that goes through March 14th:
Click below to visit the TE webstore to shop the newly available products and then keep scrolling for all of the inspiration:

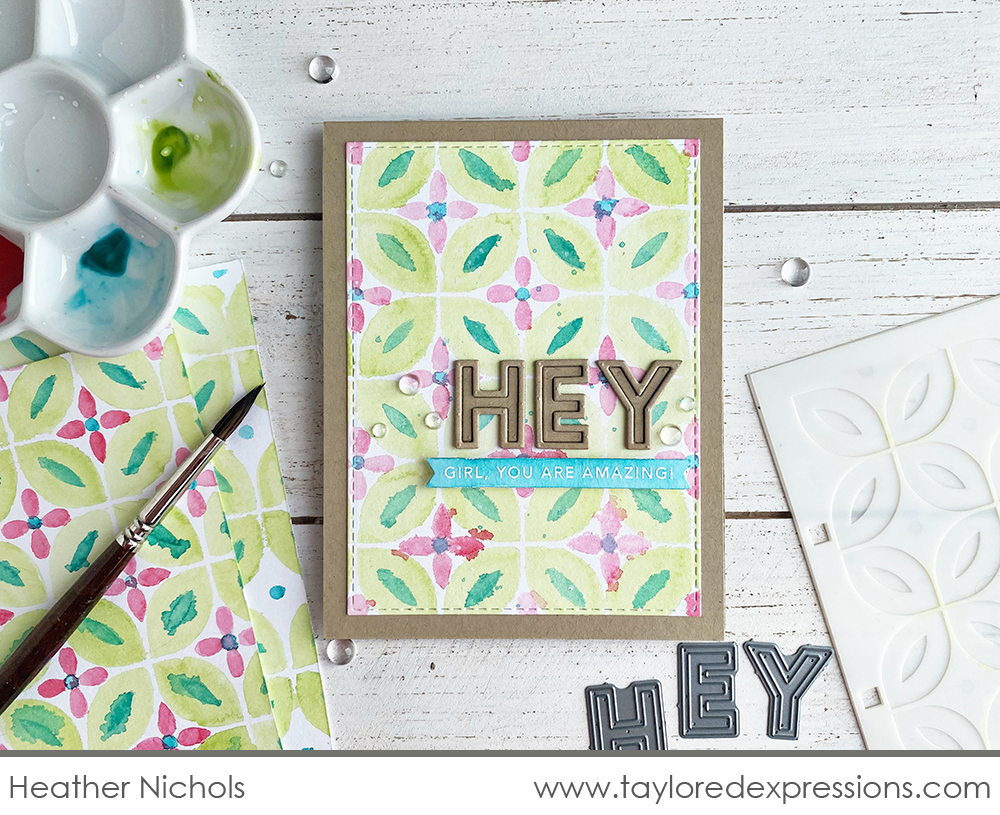
I had fun playing with the Modern Mosaic Layered Stencil set. Watch the video below to see the card that I created and how I used the stencils in a unique way:
In the video, I share how I used the Modern Mosaic Layered Stencil set with liquid watercolors. I share tips and tricks to create a watercolored pattern without too much bleeding and blending of the watercolor paints. I used the finished pattern as a background on a card, adding a sentiment using the Cap it Off Alpha dies and a sentiment from the Simple Strips – Thanks stamp.
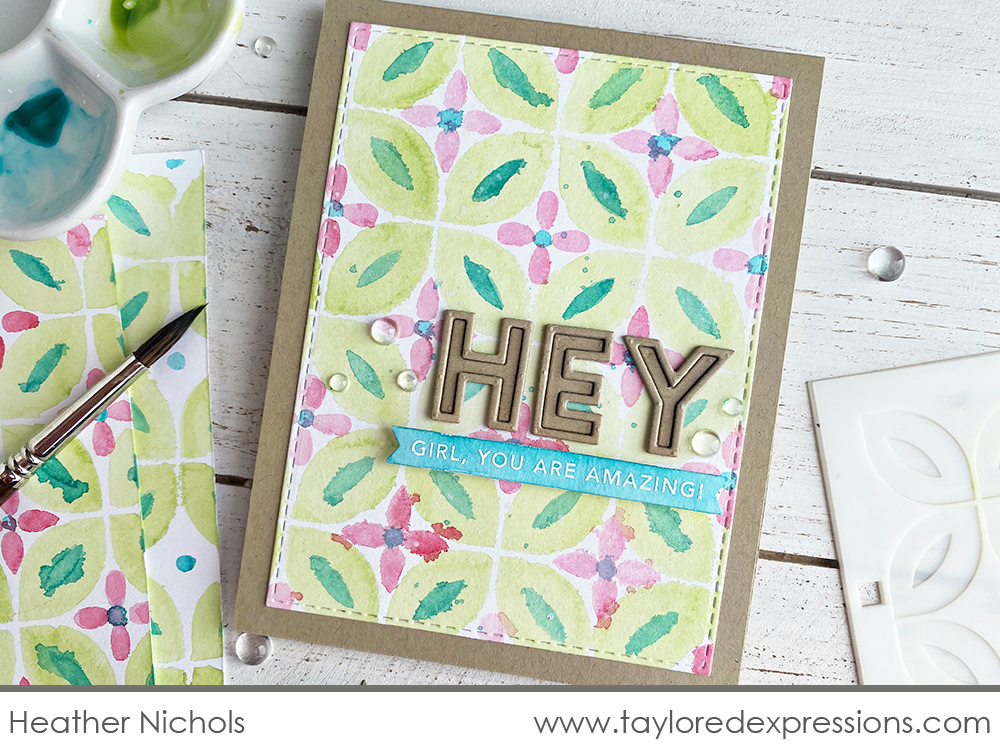
Using liquid watercolors with stencils gives you a very different look than the Blender Brushes do. The result is very flowy, imperfect, and you might have different effects from the colors blending and bleeding into each other. Making sure that the colors are completely dry before moving onto the next one is the best way to avoid the colors bleeding too much into each other and creating a muddy mess! You can either let things air dry or use a heat tool to speed up the process.
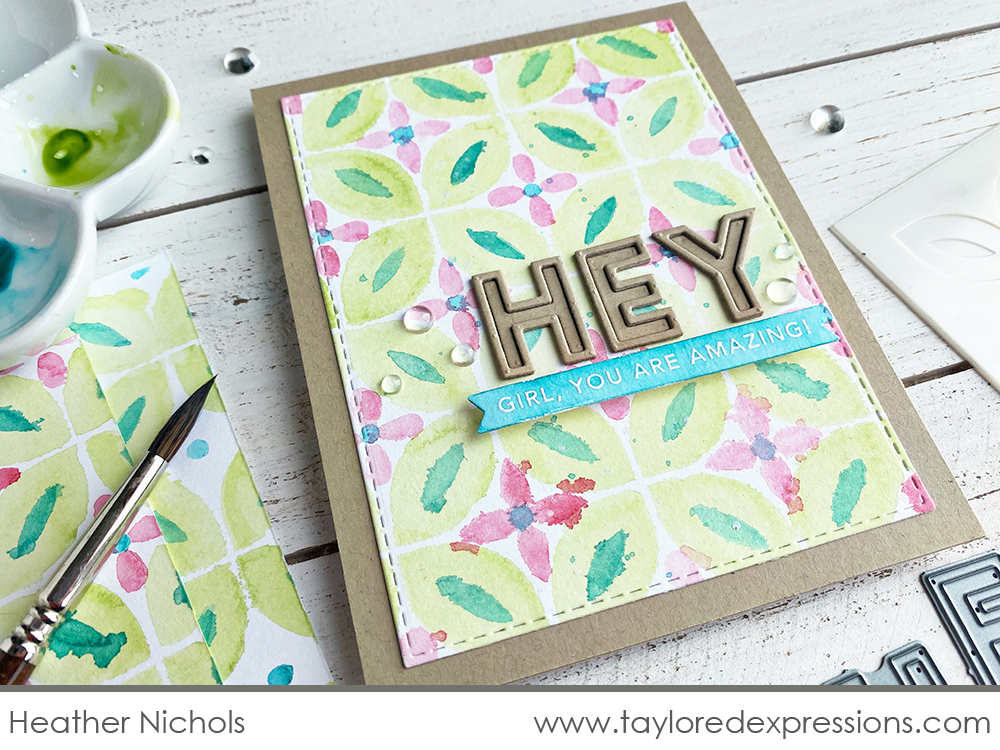
Creating custom sentiments for your projects couldn’t be easier with the Cap it Off Alpha dies. I cut out the letters to spell out the word ‘hey’ and paired with with a sentiment strip with the ‘girl, you are amazing’ sentiment from the Simple Strips – Thanks stamp. The sentiment is embossed in white on watercolor cardstock and I used one of the liquid watercolors that I used on the background pattern to add color so everything coordinates.
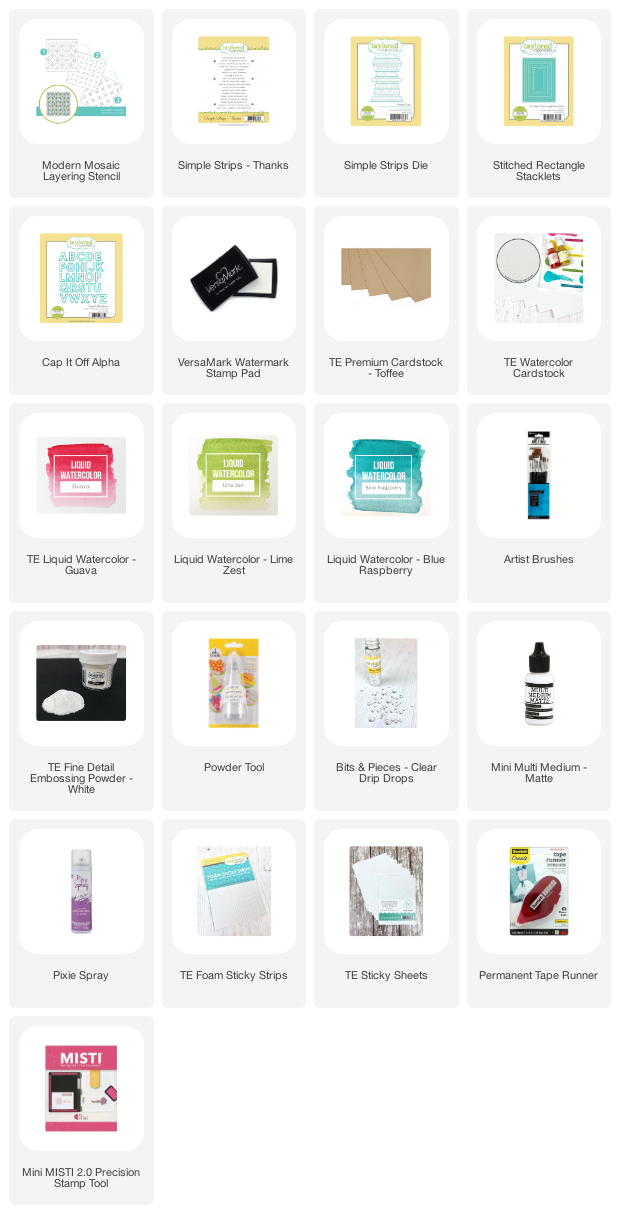
Check out the list below for the supplies that I used to create this project:

Here’s a closer look at all of the TE exclusive sets that are now available to purchase individually along with inspiration from the TE Creative Team:
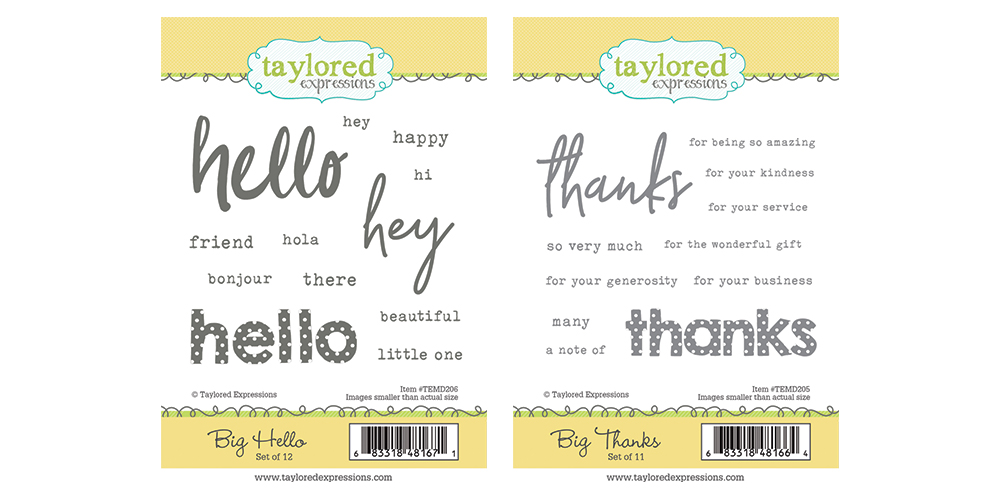
The Big Hello and Big Thanks stamp sets have large word sentiments in various, fun styles that make a big statement on your project. There are also smaller typed companion words and phrases designed to pair with them in each set. The Big Hello stamp set features ‘hello’ and ‘hey’ in the large size and the Big Thanks stamp set features ‘thanks’ in the large size.
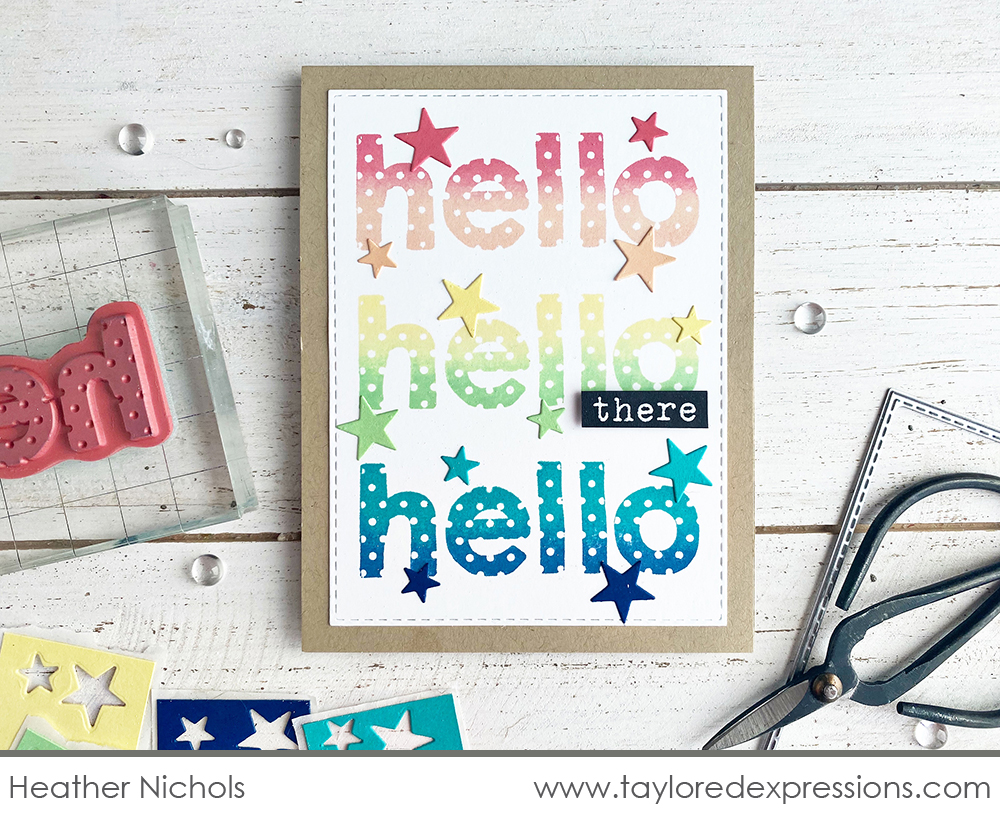
I (Heather Nichols) used the large polka dot ‘hello’ from the Big Hello stamp set to create an ombre rainbow look on my card. Mini ink cubes were perfect to create the color blend for each impression and I used my MISTI to perfectly space and stamp each ‘hello’. I added the ‘there’ to one of the ‘hello’ words embossed in white on an Oreo cardstock strip and scattered colorful stars across the card that are cut from coordinating cardstock colors.
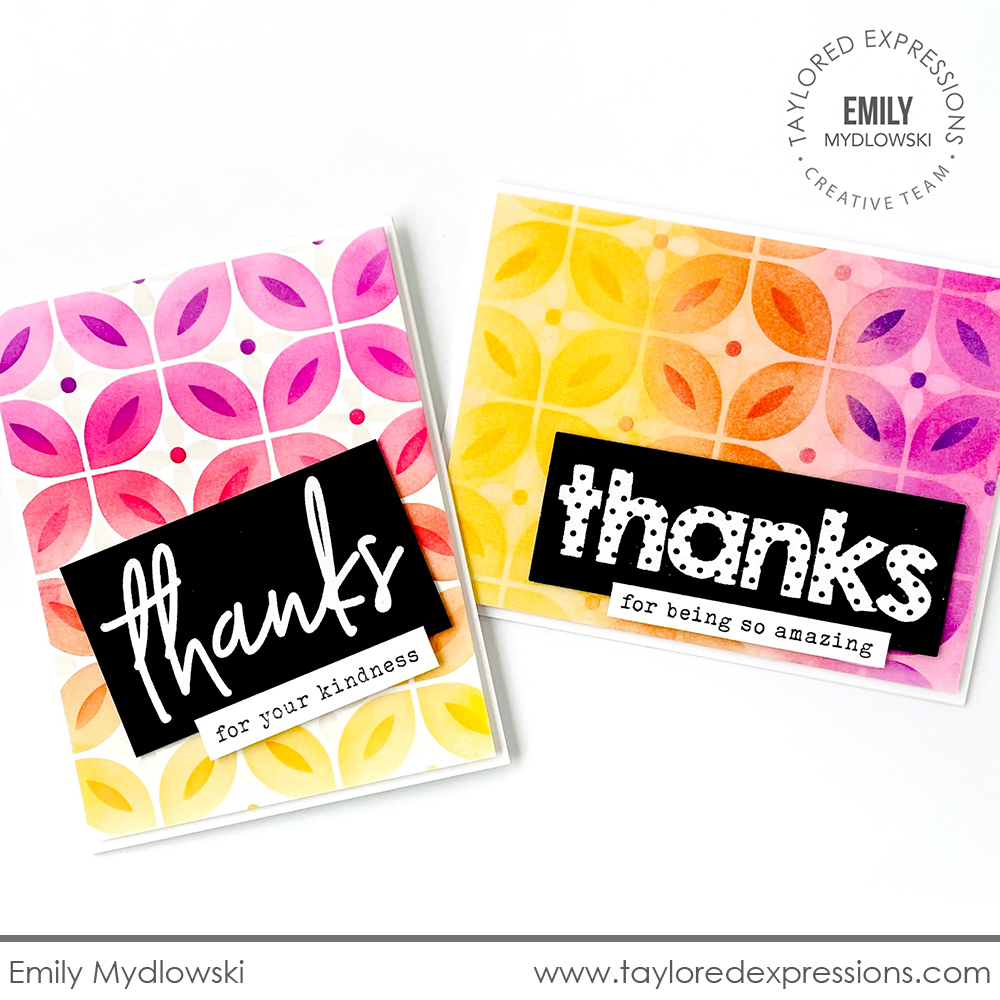
Emily Mydlowski went for a bold look by embossing the ‘thanks’ words from the Big Thanks stamp set in white onto Oreo cardstock. She added the coordinating phrases on Sugar Cube cardstock strips and set the sentiments onto colorful backgrounds created with the Modern Mosaic Layered Stencil set (more information below!)
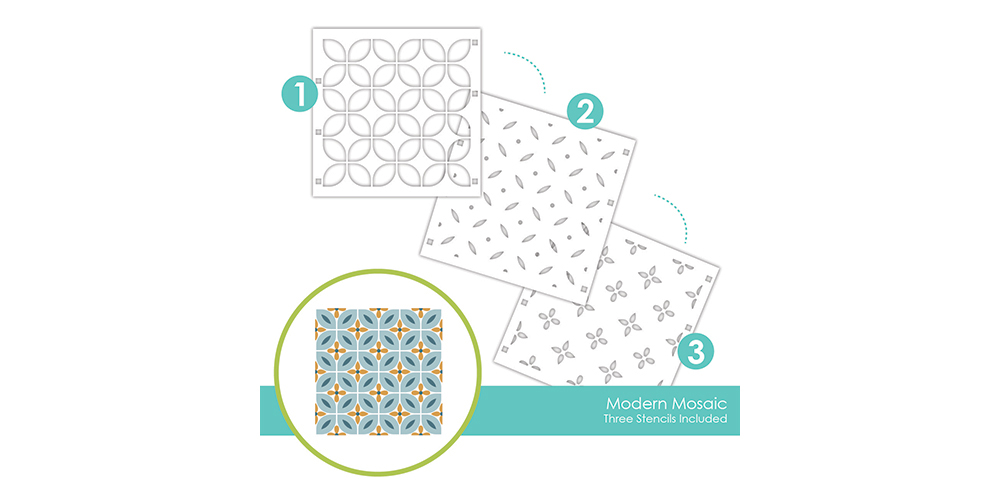
You just saw this stencil in the video above! Create beautifully blended backgrounds featuring a fun and playful pattern with The Modern Mosaic Layering Stencil! The three individual stencils layer to create a unique pattern that can be used for a variety of occasions depending on the color palette you choose. Fun to use with TE Blender Brushes (sold separately), each stencil includes alignment squares on either side to ensure your design lines up perfectly.
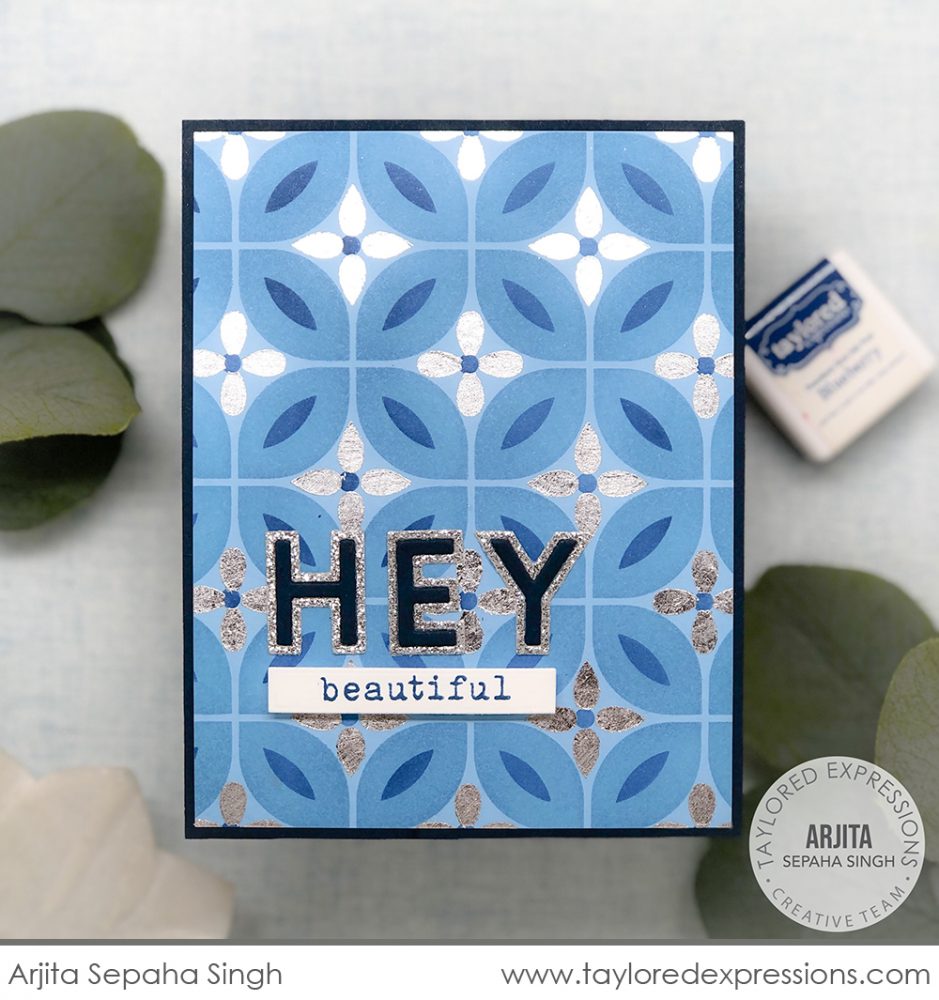
Arjita Sepaha Singh created a background in pretty blue tones with two of the stencils from the Modern Mosaic Layered Stencil set and then stepped things up by doing the third stencil with silver foil! I love how she added the silver into her sentiment as well by using silver glitter cardstock for the outline on the letters that she spelled out ‘hey’ with using the Cap it Off Alpha dies. Underneath the ‘hey’ is ‘beautiful’ from the Big Hello stamp set stamped in Blueberry ink on a Sugar Cube cardstock strip.
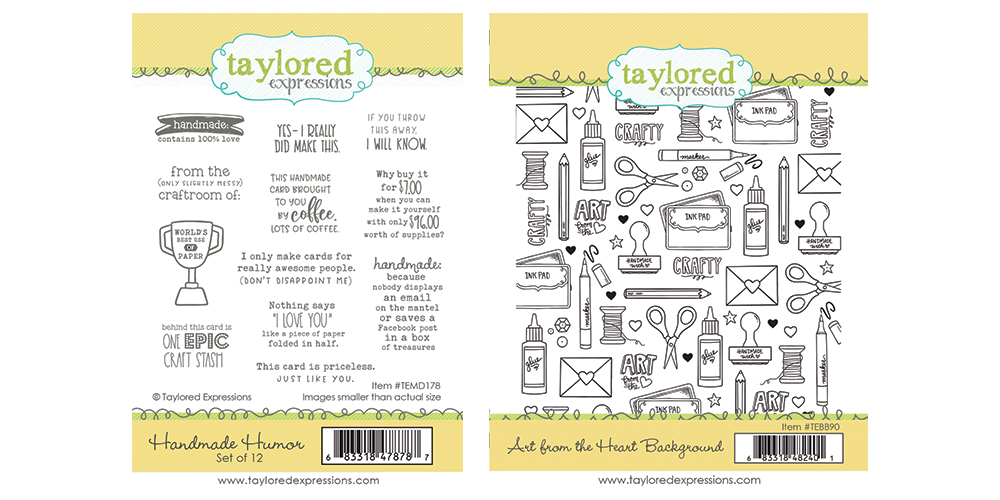
Send your friends and family a smile with cards you create with the Handmade Humor stamp set. The set includes 12 sentiments about all things crafty that will bring a smile to your face and all of your crafty friends that can relate! Add the sayings to your projects, card backs, envelopes, and more!
The Art From the Heart Background stamp is a crafty themed background stamp that pairs wonderfully with the Simple Strips – Crafty stamp! You can stamp the background and color in all the details or perhaps do some blending to add color to the inked background.
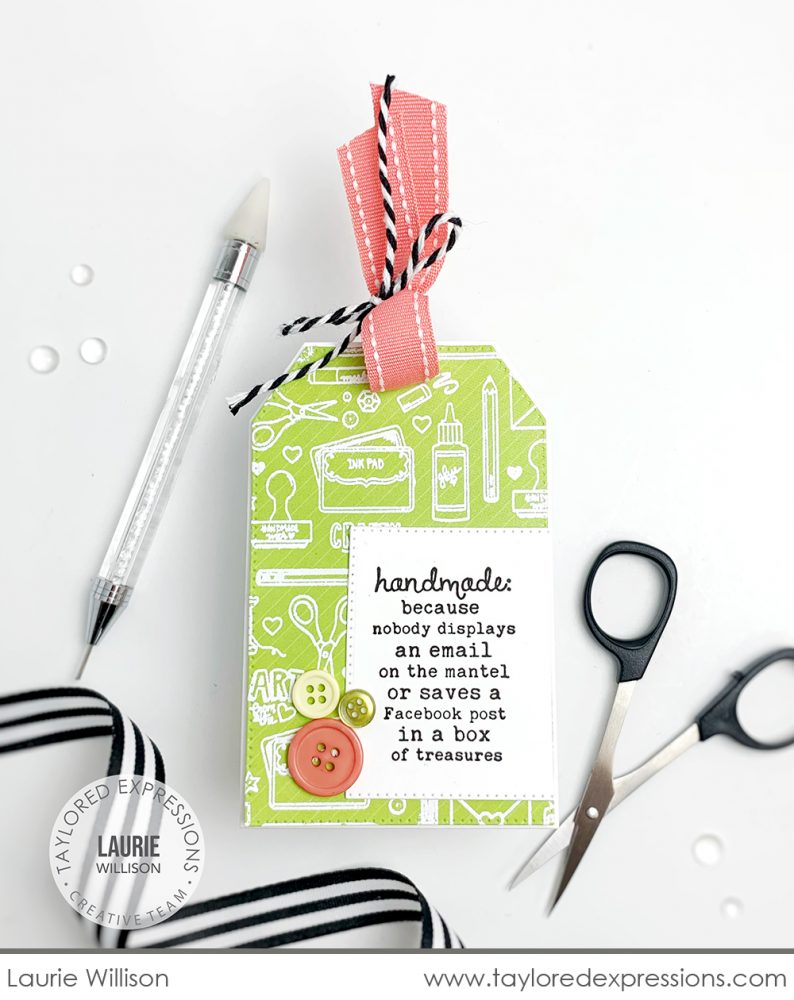
Laurie Willison combined both of the sets to create this adorably crafty tag! The Art From the Heart Background is embossed in white on a green patterned paper and she layered the sentiment from the Handmade Humor stamp set over the top along with a cute cluster of buttons. This tag is perfect to add to a gift for a crafty friend!
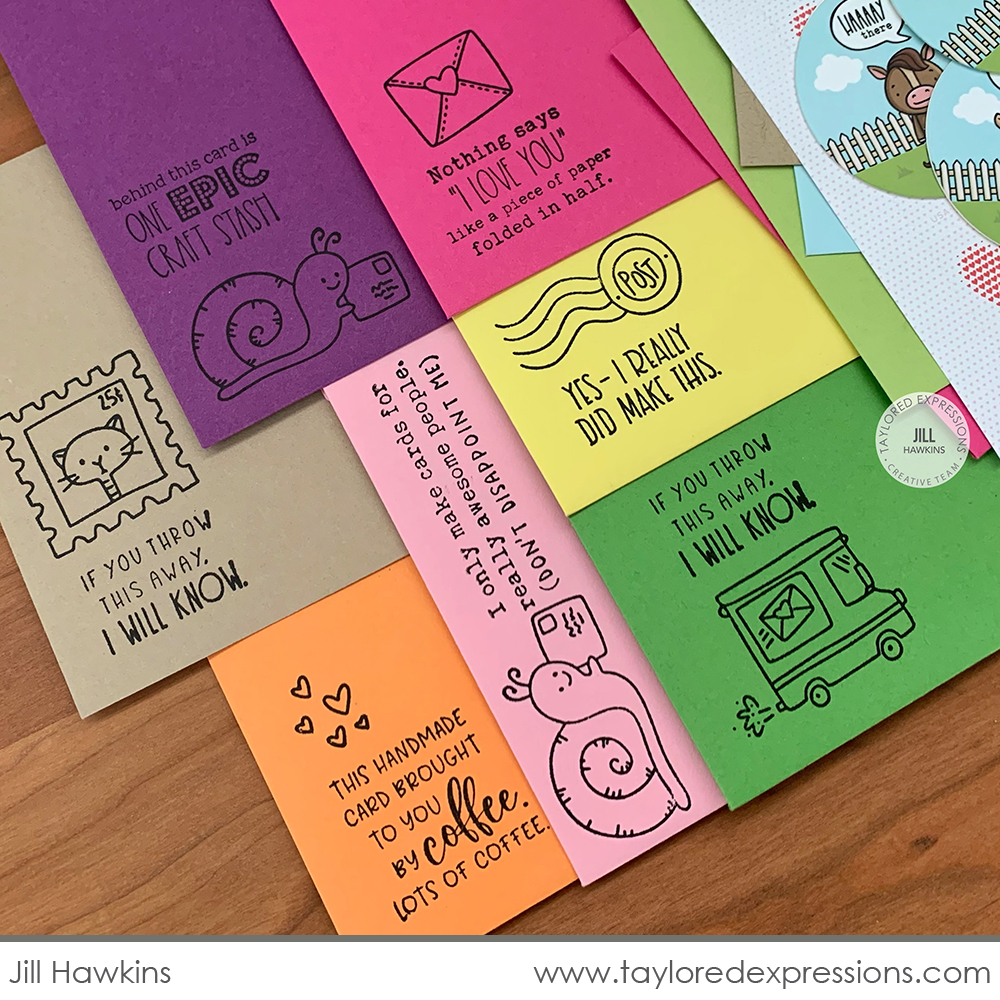
Jill Hawkins used the sentiments from the Handmade Humor set to decorate a whole rainbow of envelopes. What a fun idea and it’s so quick and easy to do with Oreo ink. She combined the sentiments with images from the Snail Mail stamp set – so cute! The smiles will begin even before the envelope gets opened!
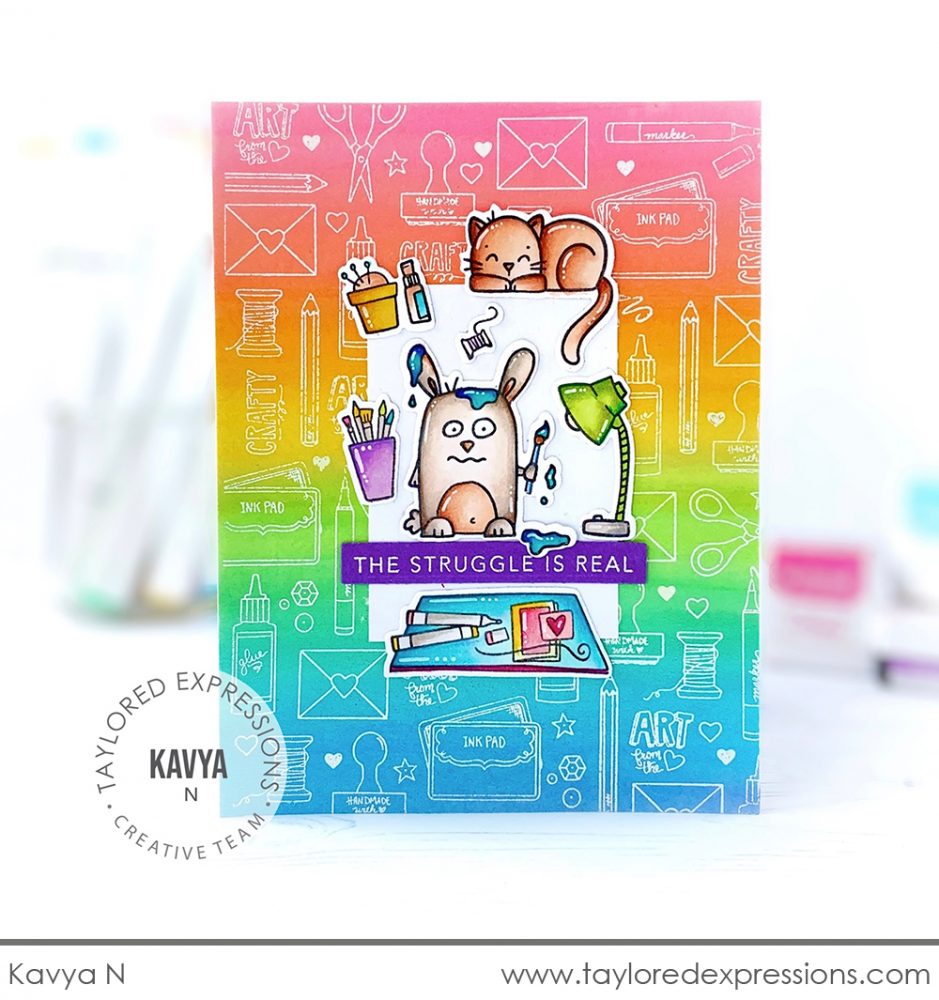
Kavya created a card that all of us who love to craft can relate to! The background features the Art From the Heart Background embossed in white over a rainbow blend that Kavya created with her Blender Brushes. That cute bunny is from the Crafty Grumplings stamp set and the crafty accessories that surround her are from the Do Something Creative stamp set. The sentiment from the Mini Strips – Fun & Funny stamp says it all. The struggle is definitely real.
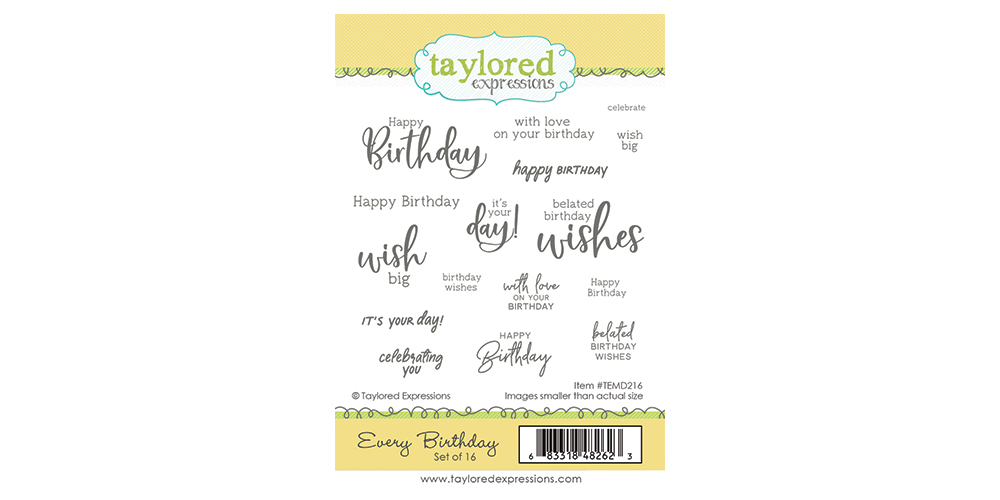
You can never have enough sentiments for birthdays! The Every Birthday stamp set includes 16 birthday themed sentiments in various sizes and styles that are perfect for celebrating. You’ll love adding these sentiments to cards, tags, scrapbook pages, and more!
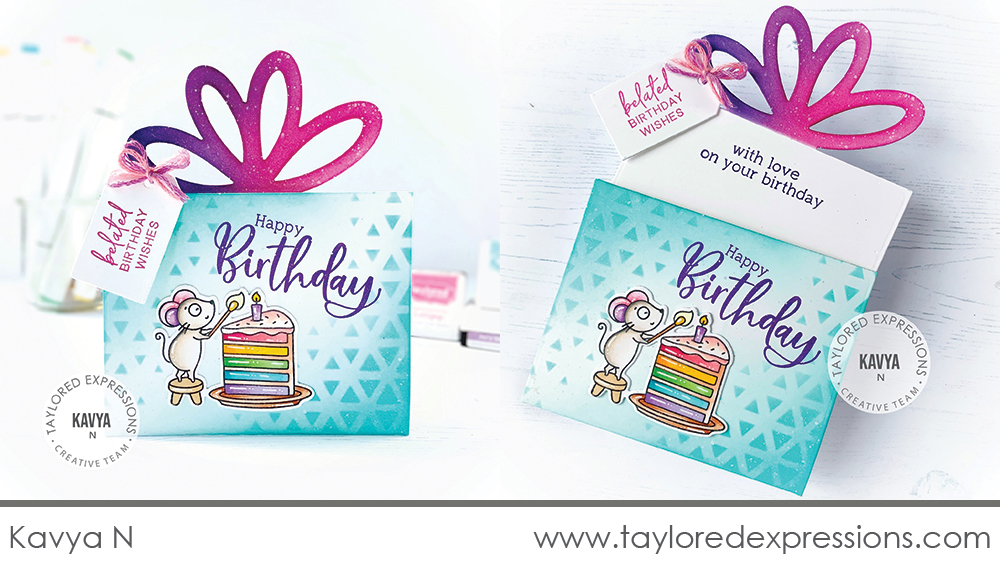
Kavya used several of the sentiments from the Every Birthday stamp set on this adorable, interactive birthday card! She created the present pocket with the Pretty Package die collection, decorated it with the Play the Angle stencil, added the Millie lighting the birthday cake candle image from the Millie’s Birthday Bash stamp set, and attached a sweet little tag tied onto the bow. The pocket insert pulls out to reveal the ‘with love on your birthday’ sentiment inside, along with space to write a personal note.
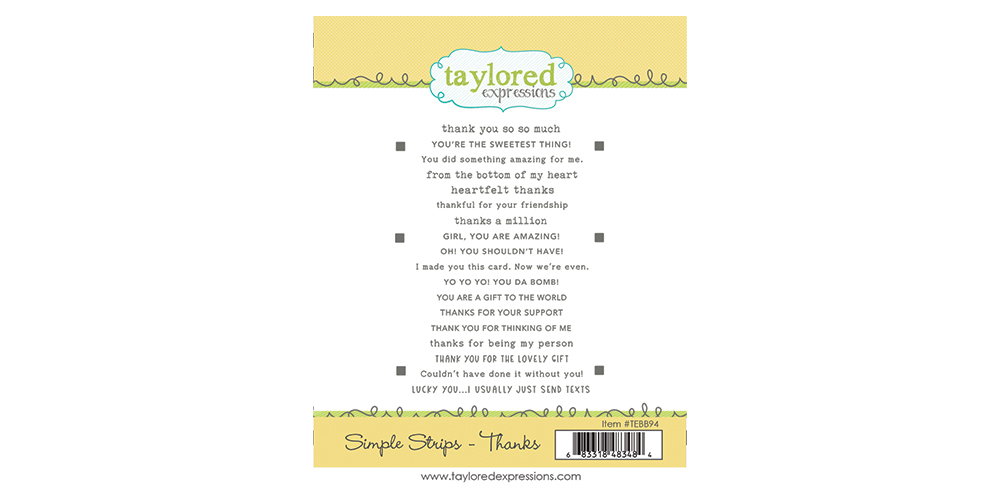
There is always something to be grateful for and it’s even better to let people know how thankful you are! The Simple Strips – Thanks stamp includes 18 sentiments perfect for sending your gratitude. Use the innovative alignment guides to cut out all 18 sentiments with one pass through your die cut machine with the coordinating dies (sold separately): Simple Strips, Simple Strips – Well Rounded, and Simple Strips – Asymmetrical.
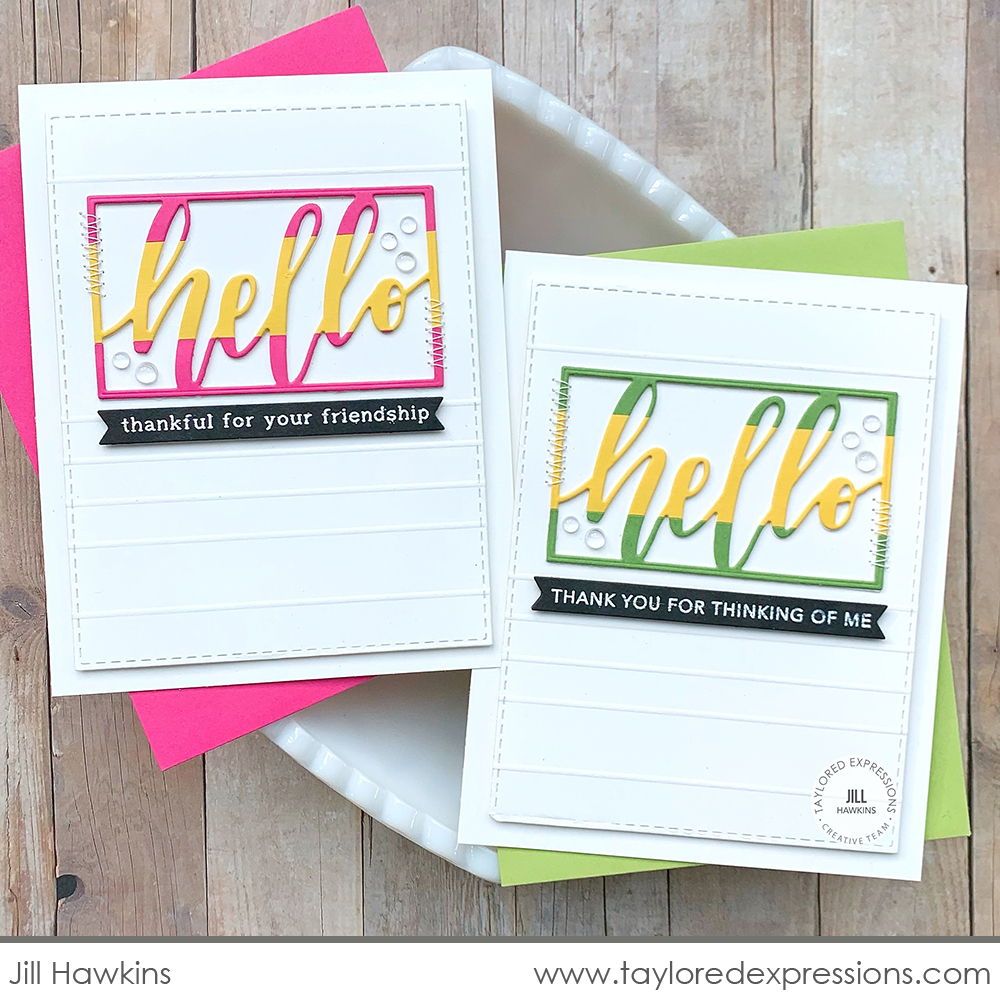
Jill Hawkins paired a few of the sentiments from the Simple Strips – Thanks stamp with Framed Script – Hello die cuts. I love how she cut the ‘hello’s from brightly colored strips that are pieced together! She embossed the sentiments from the Simple Strips – Thanks stamp in white on Oreo cardstock and that makes them coordinate with any color combination! Check out the subtle details that Jill adds to step up her cards, like the stitching and embossed lines!
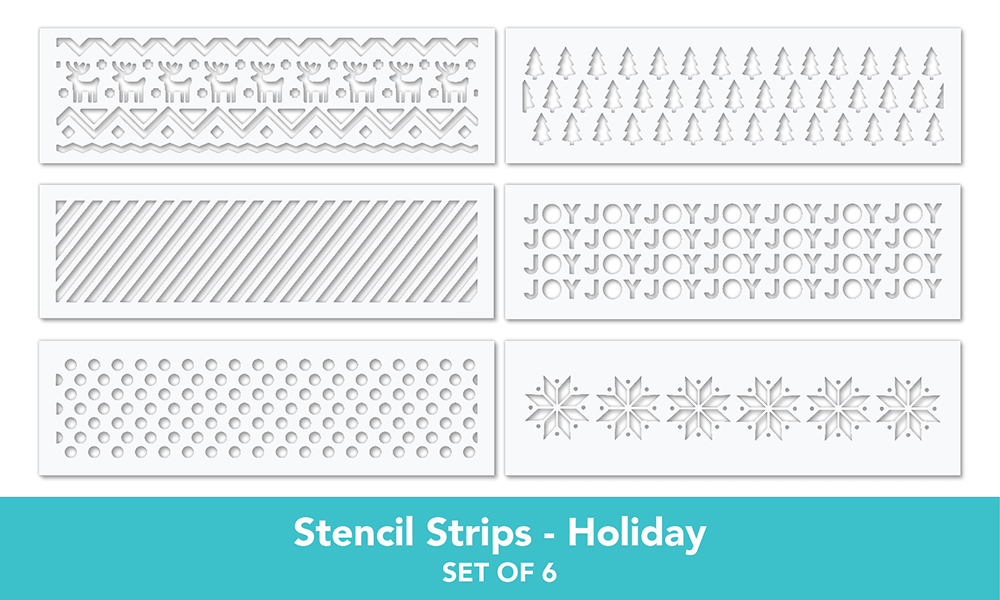
Get ready to get festive this winter with our fun set of Stencil Strips – Holiday! With patterns of Nordic reindeer, diagonal stripes, polka dots, evergreen trees, the word “Joy” and snowflakes, the working portion of each stencil measures 1 1/2″ x 6 1/4″, making them ideal for use on both A2 and Mini Slim cards. The Stencil Strips – Holiday set includes 6 stencil strips.
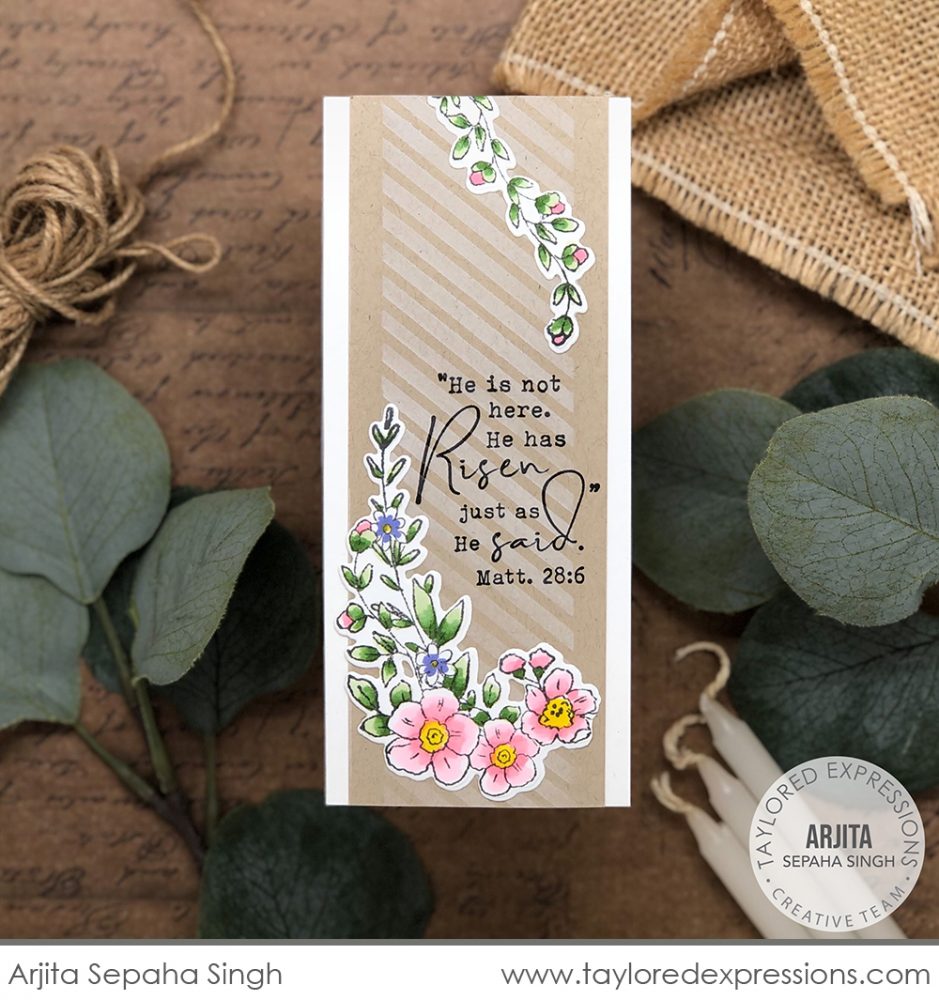
There are a number of stencils in the Stencil Strips – Holiday set that are perfect to use all year round. Arjita Sepaha Singh used the diagonal striped stencil strip as the background on this inspirational Easter card. She stenciled the stripes with Sugar Cube ink on Toffee cardstock down the length of this card and added the sentiment and pretty floral sprays from the Unexpected Blessings stamp set.

Join Taylor live for “T Time” at 1pm Central today on the Taylored Expressions Facebook Page. She’ll be sharing a closer look at the TE exclusive products that you can now purchase individually. We hope to see you there – come join in the fun!
The TE Creative Team has been busy creating with the TE exclusives and you will definitely want to see their beautiful creations! Click their faces below to hop to all of their blogs. Then, make plans to stop back here on Thursday for more inspiration and a video from Mindy Eggen!


