Aug 09, 2021
A ‘Shriek’ Peek of our NEW Halloween Release!
Hey, crafty friends! It’s Taylor here today and it’s time for one of my favorite releases of the year… Halloween! There’s always something so fun about switching from the bright colors of summer to the spooky colors of Halloween. It’s starting to feel like fall is on the horizon! And those who know me best know all about my love of candy so it’s probably no surprise that Halloween is one of my favorites!
The Creative Team and I have been busy creating projects with the new spooky goods from this release which includes over 25 new products; new stamps, dies, stencils, great Halloween themed background options, a cute pumpkin treat wrap, products to create tiny Halloween tags, and a fun die collection perfect for creating cute Halloween critters from felt!
Here’s what you’ll find on the blog this week:
- Our blog posts on Tuesday and Thursday will feature a video showcasing the new release products. Be sure to tune in!
- New products will be available for purchase starting tomorrow (Tuesday, August 10th) at 9am Central Time at the TE webstore!
- Get a chance to win it before you can buy it by commenting with your answer to my Question of the Day today only (located at the bottom of this blog post)
- Last, but certainly not least – take advantage of our special offers – we have two happening for this release (details below)!
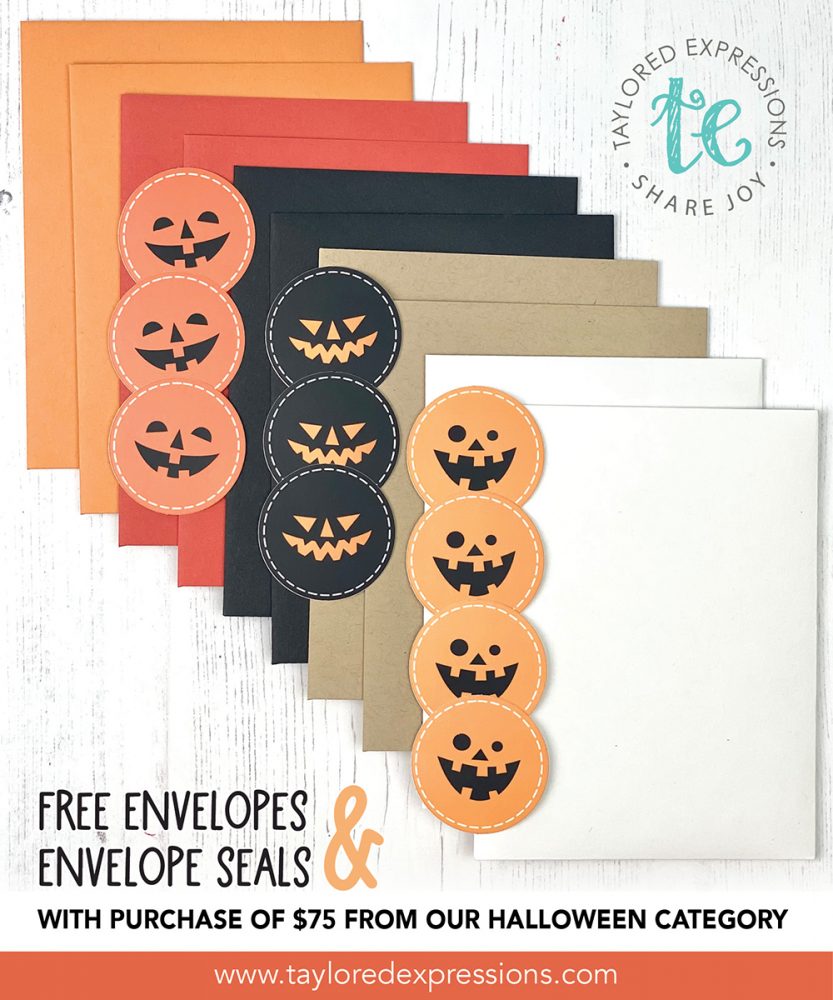
With any purchase of $75 or more from our Halloween category (including both new & previously released), you will receive a FREE pack of envelopes and custom Halloween envelope seals. The pack includes 10 envelopes (2 each of Candy Corn, Pumpkin, Oreo, Toffee and Sugar Cube) and 10 exclusive envelope seals (these seals are not available to purchase). This offer is valid starting 9AM CT tomorrow through Sunday, August 15th, or while supplies last.
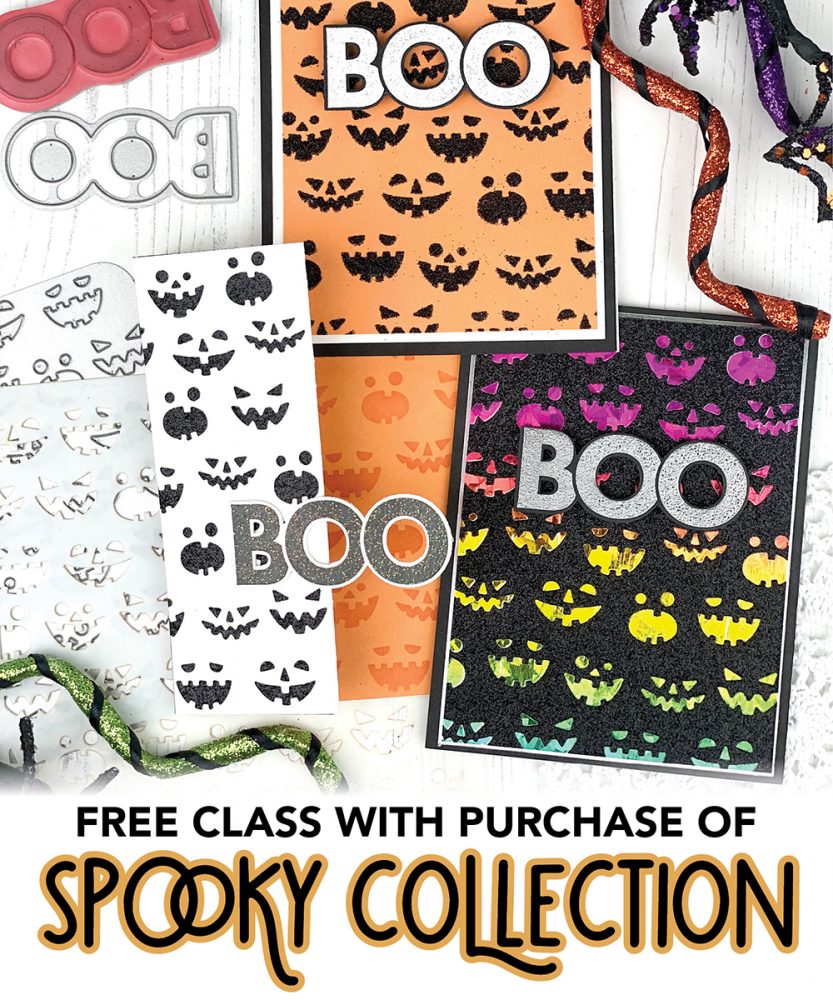
When you purchase the Spooky Collection (Jack-o-Lantern Cutting Plate, Jack-o-Lantern Stencil, On the Block – Boo and On the Block – Boo Shadow) through Sunday, August 15th, you will get a free exclusive 2-card video craft along class with Taylor!
This mini version of our Online Crafty Classes is a great way for you to put your new Halloween goodies to use right away making two different cards at your own pace! Watch the videos as often as you like and learn some new cardmaking tips and tricks while discovering inspiration for more designs!
Once you complete your purchase, you will receive an email (separate from your order confirmation email) with links to the class videos on YouTube, as well as a Tips & Tricks Download that you can use to jot down notes as you watch.
Although Taylor will recommend colors for ink and cardstock, you can use anything you have to make these projects uniquely yours!
Alright, now it’s time to check out the inspiration and get a peek at all of the new products debuting tomorrow for our Halloween release:
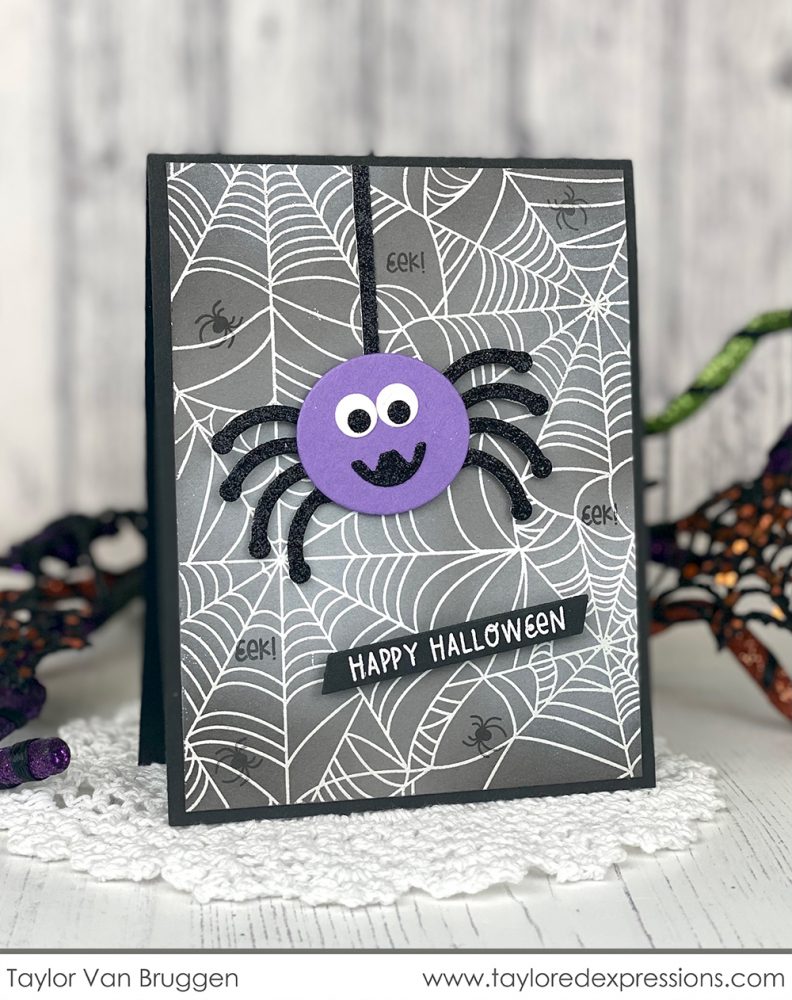
I created this quick and simple card that started with my desire to emboss the spiderweb with white embossing powder. I chose to emboss on Earl Grey cardstock and then added dimension with coordinating Earl Grey ink around the edges and Sugar Cube ink in the center of each web. I added spiders onto the web using the spider clear stamps that are included with the background.
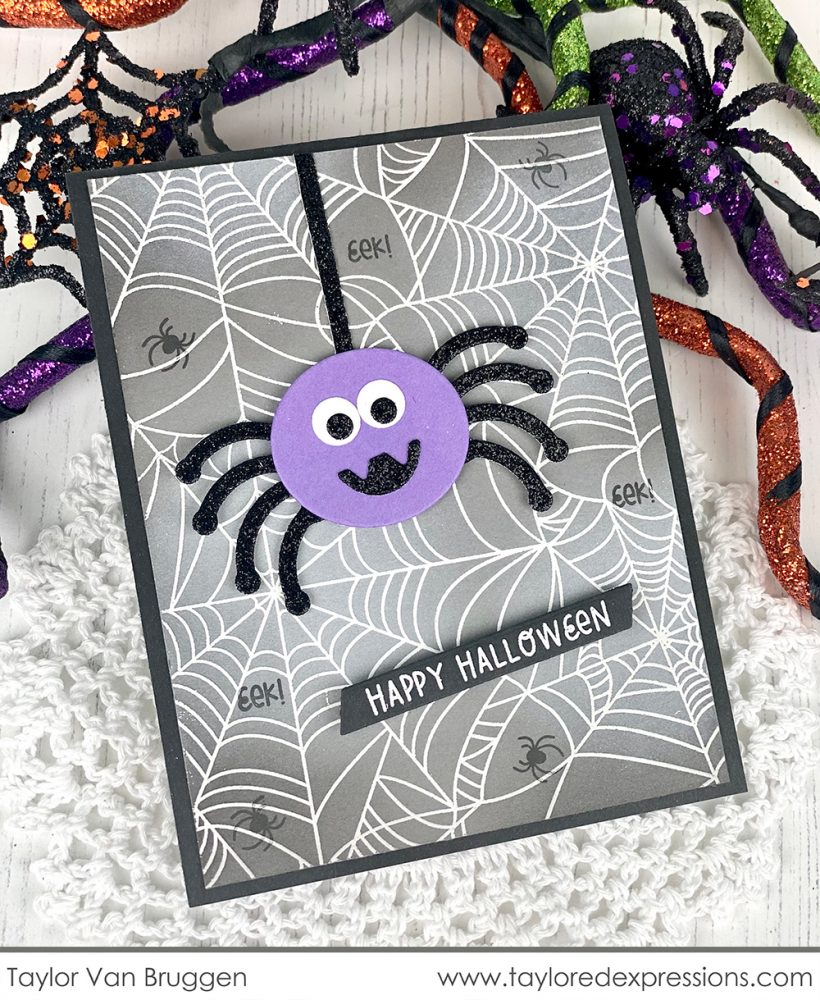
I also wanted to use the spider from the Critter Clips set on a card! I used this set of dies to make several felt clips for treat bags, but they’re also super cute on cards and tags! I cut the spider legs from black glitter cardstock and the body from Jelly Donut. I used the included dies to add the eyes, but they’d be super cute with googly eyes too!
Now let’s settle in and take a peek at all of the new Halloween release products along with inspiration from the TE Creative Team!
This first group of products is a part of the Spooky Collection that I mentioned above!

The Jack-o-Lantern Cutting Plate die & Jack-o-Lantern stencil feature an all-over design of jack-o-lantern faces and they are designed with exactly the same placement and spacing to allow for some fun color combinations and techniques (Glitter Grab & foil!). You can also use the faces that fall out of the cutting plate (or the faces on the stencil) and add them to other pumpkin designs, like the new Layer It – Pumpkins die collection that I will be sharing with you soon!
We’re adding a spooky addition to the On the Block collection with the new On the Block – Boo stamp and coordinating On the Block – Boo Shadow die. The sans-serif block letters slightly overlap and are not perfectly aligned, adding a whimsical charm to the word.

Heather Nichols is giving us a look at using both the Jack-o-lantern Cutting Plate die and stencil on this card and tag set. For the card, she cut the Jack-o-Lantern Cutting Plate from Oreo Cardstock and layered it over a piece of orange glitter cardstock. The sparkle on this card in person is just amazing! For the tags, she used the Jack-o-lantern stencil with Sweet Potato Pie ink to add the pumpkin faces to tags cut out from Candy Corn cardstock. Heather added pumpkins to her card and tags cut out with a new die collection I’ll share with you shortly and then added the faces to them that are pieces from the Jack-o-lantern Cutting Plate cut from black glitter cardstock. The ‘boo’ on the card is created with the On the Block – Boo stamped in Oreo Ink on Candy Corn cardstock and cut out with the On the Block – Boo Shadow die.
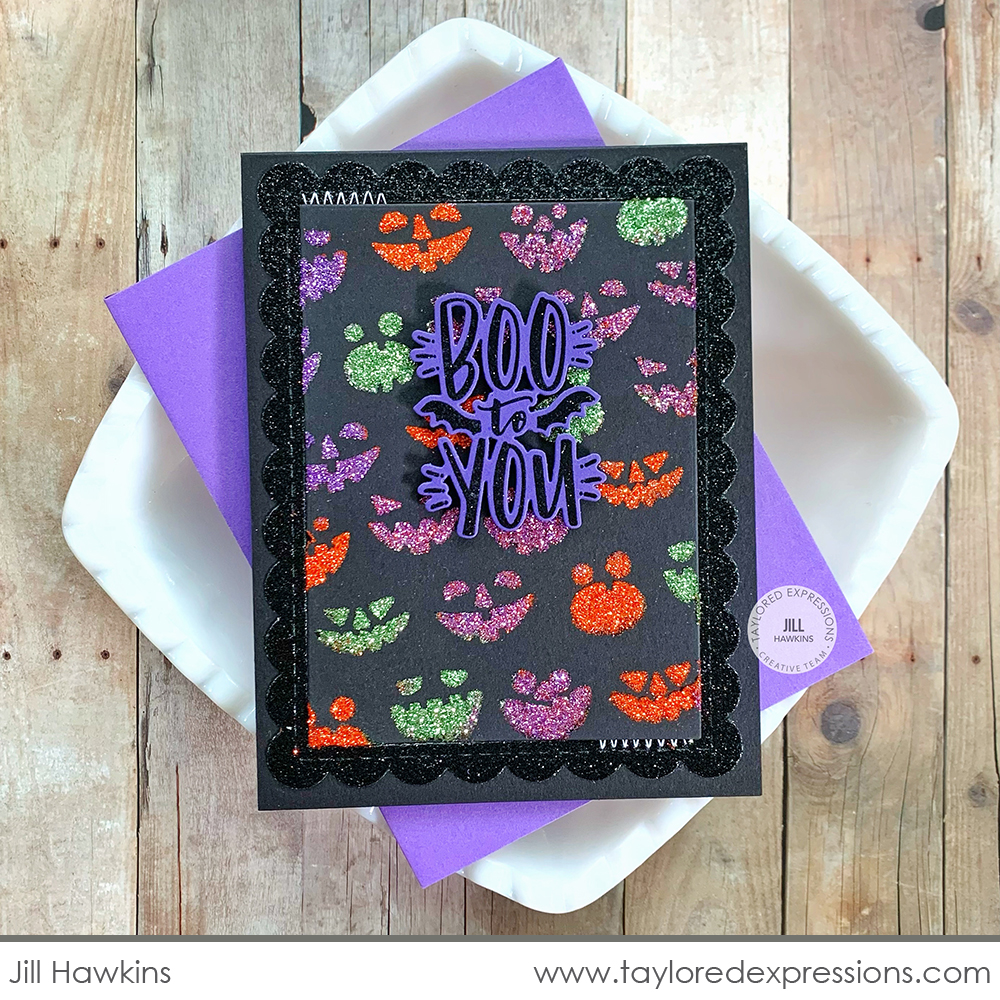
Jill Hawkins created a background of glittery pumpkin faces by using the Jack-o-lantern stencil with Glitter Grab! She added the design to Oreo cardstock and sprinkled Candy Corn, Peapod, and Jelly Donut glitter over the design while it was still wet. The ‘boo to you’ sentiment is from the Handlettered Halloween stamp set and is stamped in Oreo Ink on Jelly Donut cardstock. I love the extra glittery touch that Jill added by cutting out one of the Frame in Frame 2 Cutting Plate dies from black glitter cardstock!
There are new dies to add to your collection that are perfect for Halloween projects and more!

You all loved the Mini Slim version and now we are excited to share the A2 Thin Frame Cutting Plate die! With one pass through your die cut machine, cut out a pile of frames that you can use singly, stacked together, and more. You’ll love all of the possibilities and how these frames accent your designs.
The new Layer It – Pumpkins die collection includes 3 pumpkin sizes to adorn your autumn and Halloween projects. This set includes nine separate dies that can be cut in various tones of cardstock and layered together to create the pumpkins. (You got a peek of the pumpkins you can create on Heather’s project above!)
Add the perfect touch of spooky to your Halloween projects with the three different bats included in the Little Bits – Bats die collection. Cut them from plain cardstock or add sparkle by cutting them out of our Premium Glitter Cardstock.

Here’s another card from Heather Nichols created with the Layer It – Pumpkins die collection, but this time she skipped the jack-o-lantern faces to make this fall-themed card. To add extra dimension to the pumpkins, she cut them out from various shades of yellow and orange cardstock (Pineapple, Candy Corn, Sweet Potato Pie, and Pumpkin) and then used her blender brushes to add shading to the bottom of the pieces. She added the pumpkins to a background created with the Fall Foliage Stamp & Stencil Combo set and I like how she used neutral colors so that the pumpkins take center stage. To pull the design together and give it a polished look, Heather added a thin frame cut out from Candy Corn cardstock using the A2 Thin Frame Cutting Plate die. The ‘give thanks’ sentiment is from the Handlettered Thanksgiving stamp set.
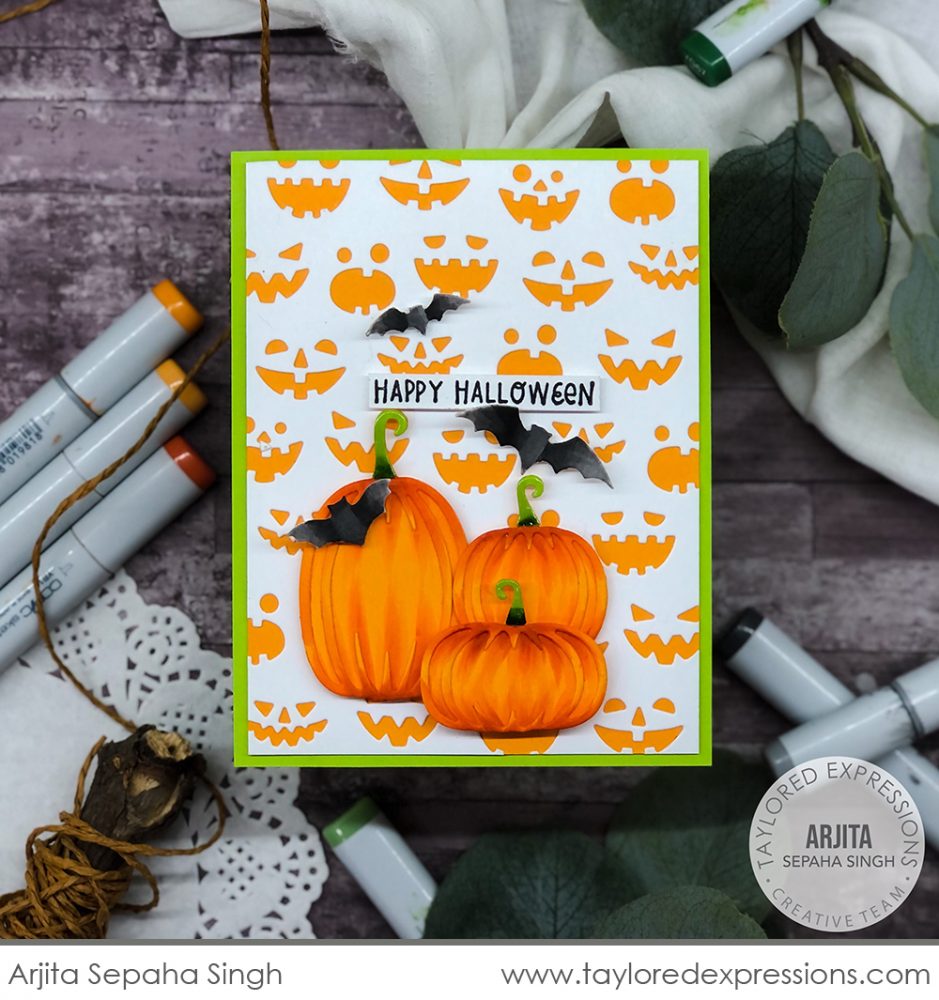
Arjita Sepaha Singh gave the Layer It – Pumpkins even more dimension by adding shading to the die-cut pieces with Copic markers. She added the pumpkins to a background created with the Jack-o-lantern Cutting Plate die cut from Sugar Cube cardstock layered over Candy Corn cardstock. For an extra touch of spookiness, Arjita scattered bats cut out with the Little Bits – Bats dies flying above the pumpkins!
It’s easier than ever to create Halloween cards with this next group of new stamps and stencils:

The Happy Halloween Stamp & Stencil Combo set includes a red rubber stamp of the large, script ‘Happy Halloween’ sentiment that fills up your card front and a stencil to add flourishes around the letters. Use the etched alignment guides to layer the stencil over the stamped sentiment perfectly and add the flourishes with your blender brushes, glitter paste, and more.
The Spiderweb Cling & Clear Combo set (you saw this used on my project above!) includes a red rubber stamp featuring a spooky spiderweb that fills up your A2 card, as well as six clear, photopolymer stamps to add several sizes of spiders and few ‘creepy, crawly’ words.
Use the Spooky Nights Layered Stencil set to add a whimsical star filled pattern to your projects. Two of the stencils feature stars and one features a polka dot pattern that you can add in multiple color layers using Blender Brushes, glitter paste, and more. Use the corner alignment guides to line everything up perfectly!
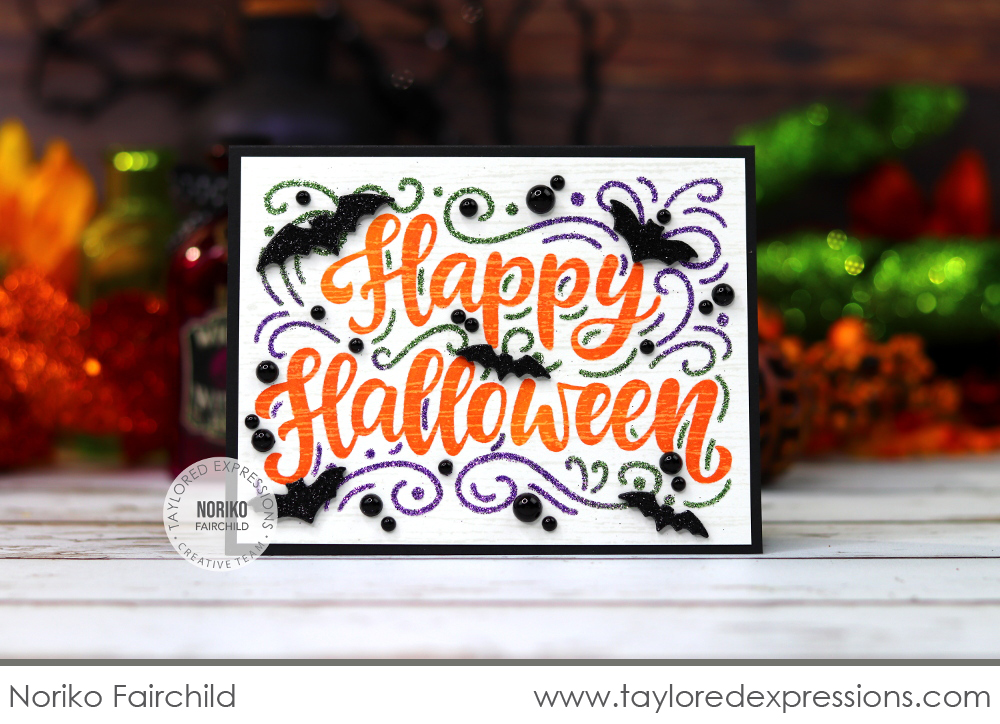
Noriko Fairchild used the Happy Halloween Stamp & Stencil Combo set to create this Halloween card. She stamped the ‘Happy Halloween’ sentiment onto a piece of Sugar Cube cardstock that was embossed with the Wood Plank Background to add an extra textured effect. The stenciled swirls are added with Glitter Grab and Noriko sprinkled Peapod and Jelly Donut glitter over the design while it was still wet. Noriko finished off the card by adding bats cut out from black glitter cardstock using the Little Bits – Bats dies and Bits & Pieces – Black Drip Drops scattered throughout the design.
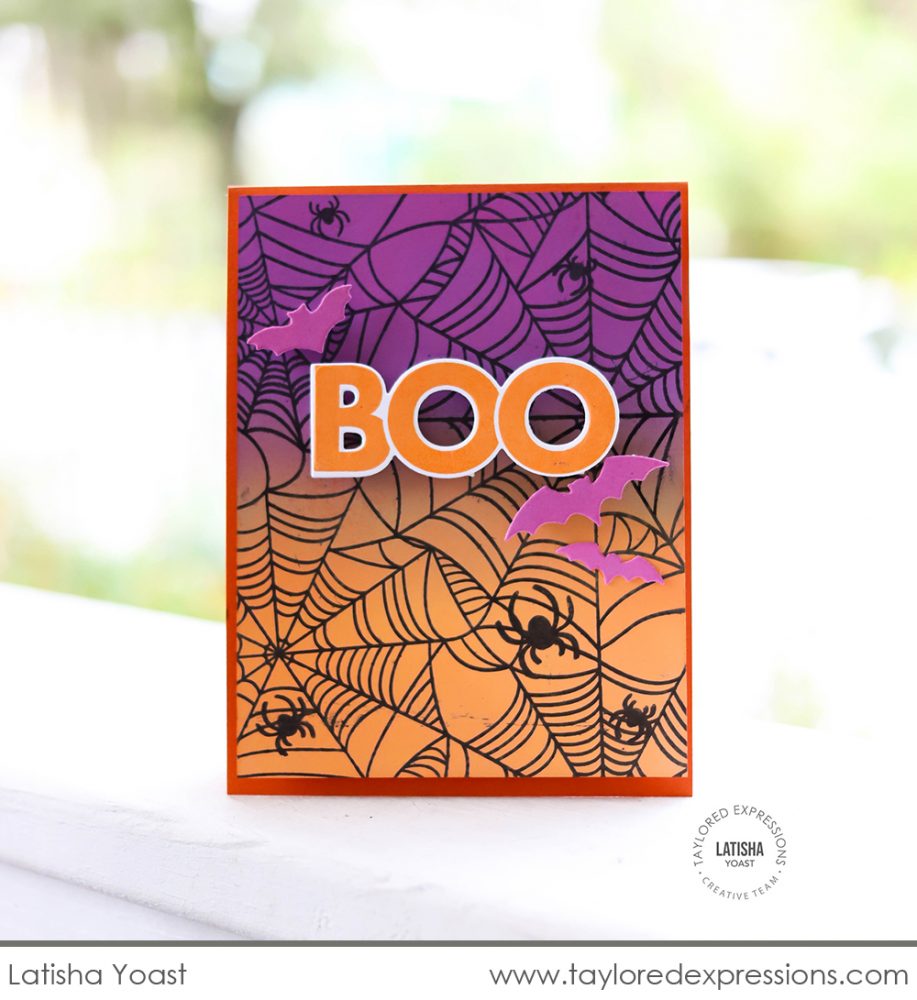
The Spiderweb Cling & Clear Combo set stamped over the top of a blended background is simply stunning! Latisha Yoast created a blended background with Candy Corn and Plum Punch inks and stamped the spiderweb background over the top with Oreo Ink. The spiders are added using the clear stamps that are included in the Spiderweb set. Latisha stamped the ‘boo’ using the On the Block – Boo stamp in Candy Corn ink and cut it out with the coordinating die and added a few bats around the ‘boo’ that are cut out with the Little Bits – Bats dies from Plum Punch cardstock.
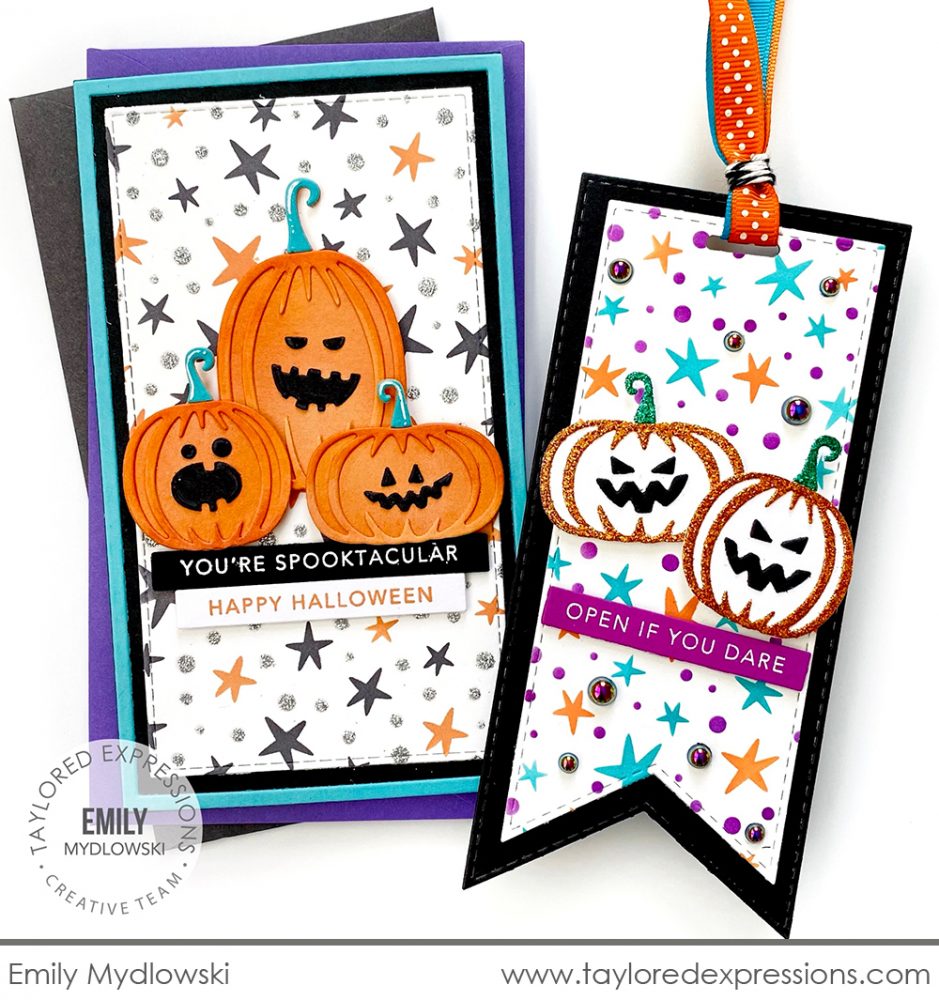
The starry background that you can create with the Spooky Nights Layered Stencil set is so fun and whimsical and I love it on this Mini Slim card and tag duo created by Emily Mydlowski! For the background, Emily stenciled the stars in Oreo and Candy Corn and added the polka dot layer using Glitter Grab and silver glitter. For the tag, Emily stenciled the stars with Candy Corn and Cookie Monster inks and the polka dots with Plum Punch ink. The pumpkins on the card and tag are created with the Layer It – Pumpkins dies with faces from the Jack-o-lantern Cutting Plate die. Emily added sentiment strips created with the Mini Strips – Halloween stamp and cut out with the Mini Strips die.

Millie is inviting you to her Halloween party with the images and sentiments from our Millie’s Haunted Halloween stamp set (+ coordinating dies). Part of our popular Max & Millie collection, this set features scenes of Millie the Mouse in dressed as a witch, flying on a broomstick, dressed as a pumpkin, and stirring up magic potions in a cauldron. The set also includes five coordinating Halloween sentiments that you can add both on the front and inside of your cards.
Celebrate Halloween with our Full Circle – Halloween stamp set! The set features a 3 1/4″ round stamp filled with Halloween icons (like the a jack-o-lantern, cats, ghosts, and candy) that can be used as a background or an accent on your cards and crafts. (It also happens to fit perfectly inside the larger circle stencil that’s part of our Masking Stencils – Circles!) The set includes six coordinating Halloween sentiments to add to your cards, tags, and more.
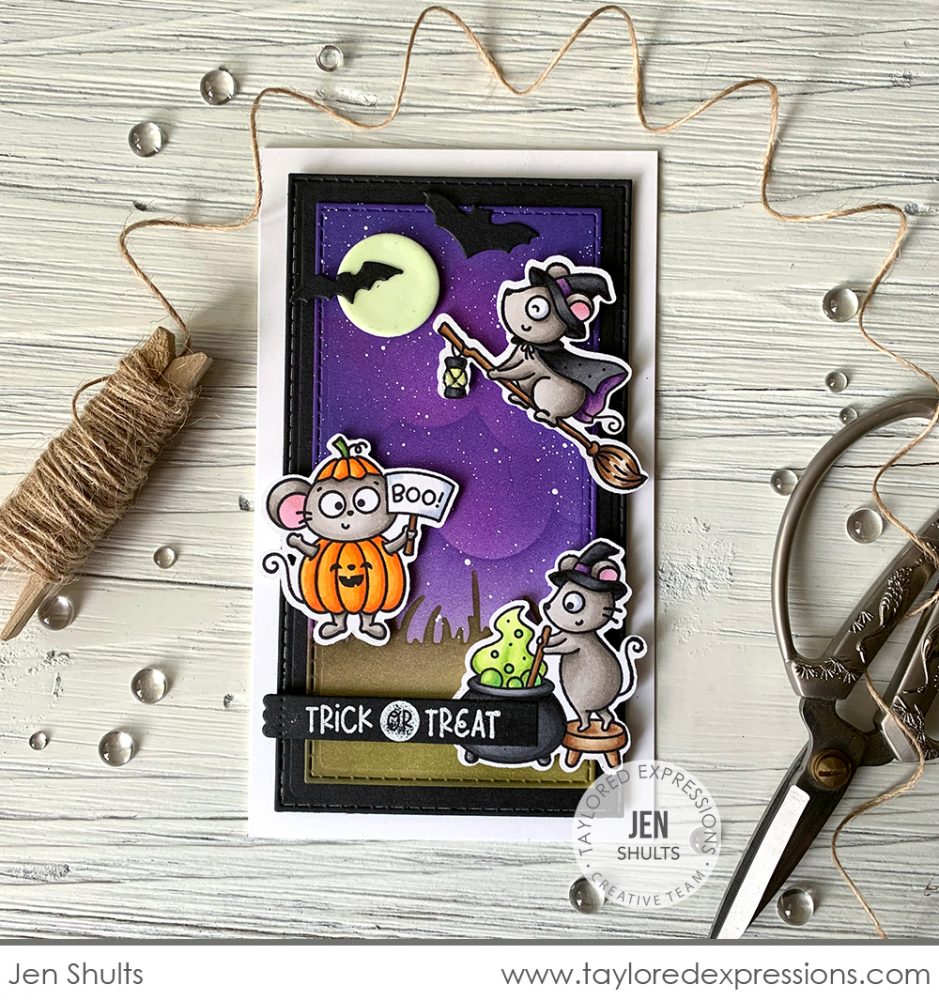
Millie the mouse is just too cute to spook! I love how Jen Shults used three of the festive images from Millie’s Haunted Halloween on this Mini Slim card. Jen colored the images with Copic markers and added them to a background stenciled with the Set the Scene – Grass and Set the Scene – Clouds Stencil Strips sets. She added a full moon, spatters for stars, and bats to complete the spooky scene! The ‘trick or treat’ sentiment from the Full Circle – Halloween stamp set is embossed in white on an Oreo cardstock Sentiment Strip Duo die cut.
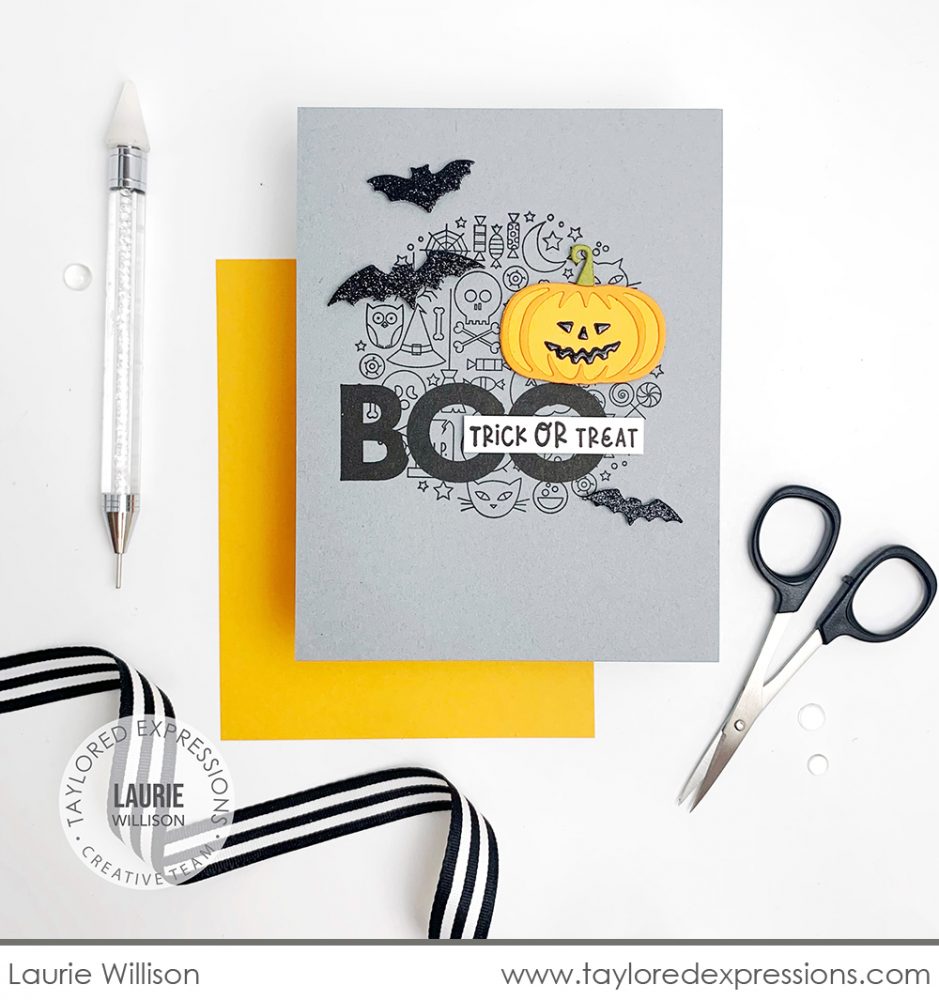
Laurie Willison used the circle image from the Full Circle – Halloween stamp set as the background on this Halloween card. She stamped the image in Oreo Ink onto a Earl Gray card base, stamped ‘boo’ with the On the Block – Boo stamp over the top of it, and added the ‘trick or treat’ sentiment on a Sugar Cube cardstock strip. The jack-o-lantern is created with the Layer it – Pumpkins die collection with a face from the Jack-o-lantern Cutting Plate. I love the shiny touch Laurie added to the face by coating the die cut pieces with Glossy Accents! The bats are cut out from black glitter cardstock using the Little Bits – Bats dies.

Create cards featuring sweet treats to celebrate all things candy with our Sugar Rush Stencil & Clear Stamp Combo set! The set includes eight layering stencils – four that work together to create a larger, individual candy that you can make into a lollipop or add a candy wrap onto and four that make a smaller row of candy sweetness – plus 9 clear stamps to accent the candies and make them come to life along with a few sweet sentiments. Use the coordinating Sugar Rush dies to cut out the larger candies and the whole row of tiny candy treats.

Jill Hawkins stenciled up a whole row of little lollipops using the Sugar Rush Stencil & Clear Stamp Combo set to use on this cute as can be shaker card! She stenciled the circles first in several pastel colors, stamped the details with the clear stamps, and cut them out all at the same time using the coordinating die. The shaker is filled with beads, Bits & Pieces – Rainbow Sprinkles, Bits & Pieces – Full of Heart, and Bits & Pieces – Sparkly Stars. The background on the card is stenciled with the Mini Slim – Swiss Hearts stencil and then sentiment is from the Simple Strips – Thanks stamp.
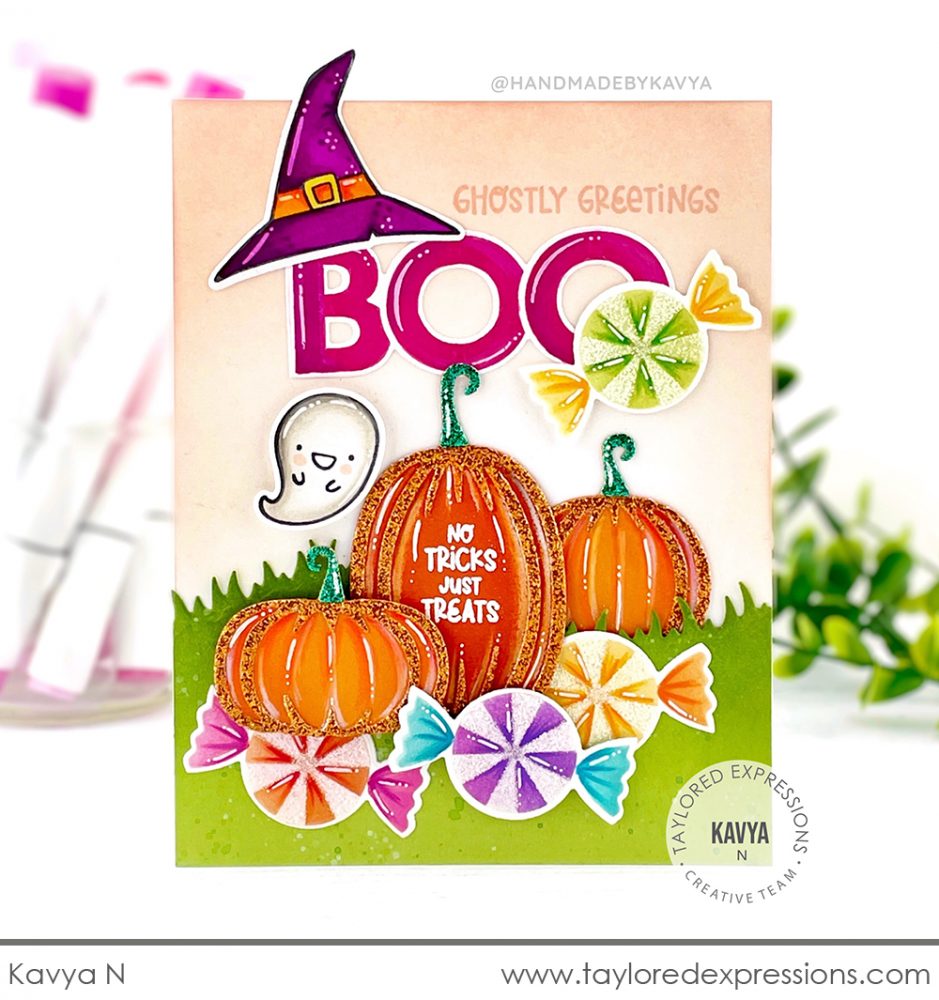
Kavya put together a fun Halloween scene using a bunch of Halloween products – old and new! The pumpkins are put together with the Layer It – Pumpkins dies, the candies are created with the Sugar Rush Stencil & Clear Stamp Combo set, the ‘boo’ is stamped with the On the Block – Boo stamp, the ghost and witch hat are from the Big Grumpy – Halloween stamp set, the ‘ghostly greetings’ sentiment is from the Full Circle – Halloween stamp set, and the grass is cut out with Build a Scene – Grassy Hills. Kavya always adds such great details with Copic markers, glitter, and white gel pen highlights!
We didn’t forget about Halloween treats! We have a number of fun options below:
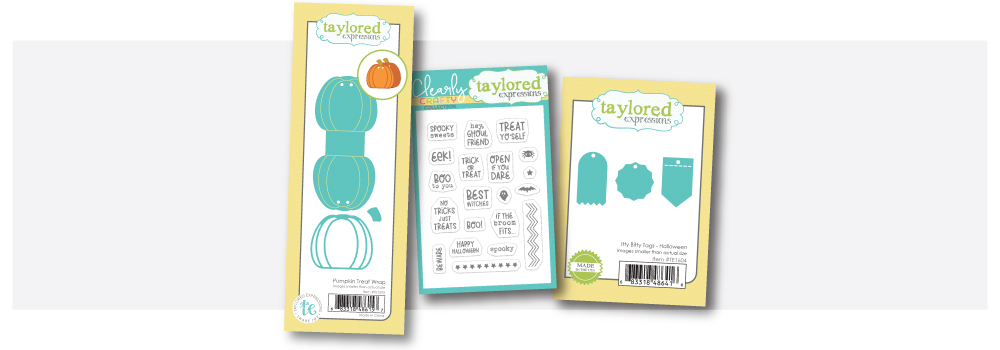
The new Pumpkin Treat Wrap is designed to wrap around a flat sucker, but also fits Ghirardelli chocolate squares and other candies too! Add details and dimension with the pumpkin outline and stem and tie with twine or ribbon.
Tie on tiny greetings to your Halloween treats with the Itty Bitty Sentiments- Halloween clear stamp set and Itty Bitty Tags – Halloween dies. The stamp set includes 14 tiny sentiments plus coordinating patterns and Halloween icons perfect for creating itty bitty tags for your treats. You can use the sentiments from the stamp set on their own too!

These cute pumpkin lollipop treats created by Melody Rupple with the Pumpkin Treat Wrap dies are way too fun! The wrap base is cut out from a different cardstock color for each pumpkin and then Melody added the detail layer with different glitter cardstock colors. The tiny tags cut out with the Itty Bitty Tags – Halloween dies are stamped with different Halloween sentiments, patterns, and/or icons from the Itty Bitty Sentiments – Halloween stamp set. Melody used a variety of things to secure the wraps: a black and white twine, burlap twine, and gold metallic twine.
We made Halloween treat packaging easy with the Pumpkin Treat Wrap Project Kit. The kit includes cardstock to make 25 treat wraps, a 2″ x 3″ clear stamp set to add pumpkin faces, and the Pumpkin Treat Wrap die set.

Create the cutest Halloween clips using the new Critter Clips – Halloween die collection. The set of Mixed Media dies includes a main body shape that can become a pumpkin, cat, bat, or spider. Cut out your critters from felt, cardstock, and more! Add the critters to a jumbo paper clip (the black clips are available in a set of 10) to create cute Halloween clips (a great non-food treat option!) or add the critters to cards, tags, and more.
We’ve put together a selection of felt colors that you can use to create with the Critter Clips – Halloween dies. The Critter Clips – Halloween Felt Bundle: includes 1 sheet each black and purple glitter 100% Wool Designer Felt and 1 roll 100% Wool Felt in Black Licorice, Split Pea, Marshmallow, Charcoal & Carrot.
Our White Glassine Treat Bags come in a set of 25 and are perfect for for packaging up Halloween treats and small gifts. The translucent flat bags are made with wax-like paper and are food-safe.
For another non- food treat option, we are excited to offer a set of Halloween Treat Stickers. This set of 25 durable vinyl stickers feature 5 different Halloween themed designs. You can use the stickers to seal up your Halloween treat bags or cards too!

It’s fun to get into all of the details for packaging up Halloween treats like Latisha Yoast did here! She filled up the White Glassine Treat Bags with sweet treats (I love how she used the Woodgrain embossing folder on one of them!), sealed them up with the Halloween Treat Stickers, and added clips to the top that she made with the Critter Clips – Halloween die collection. Instead of cutting her critters from felt, Latisha cut them from black, emerald, and orange glitter cardstock and then added them to the black jumbo paper clips.
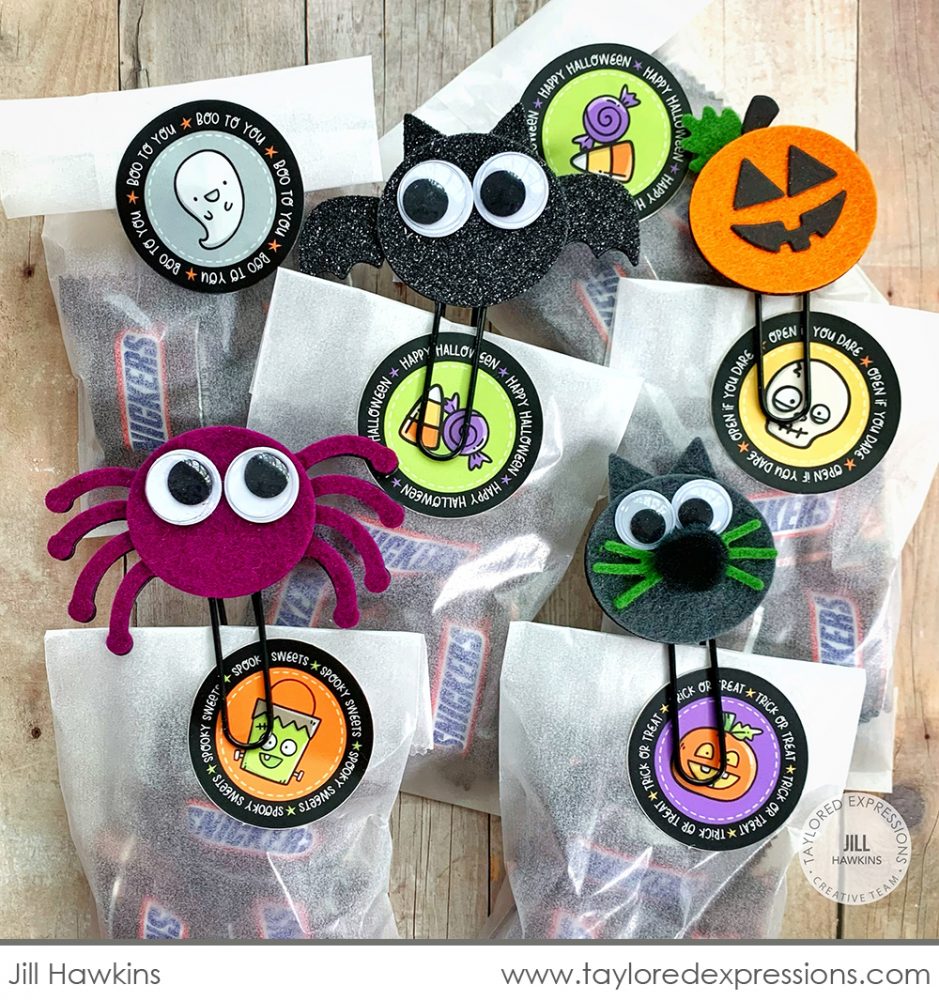
Jill Hawkins filled up the White Glassine Treat Bags with treats and used the cute clips to close the bag and hold the Halloween Treat Stickers so that the recipient can use the sticker however they want. Jill cut out her critters from various colors of felt using the Critter Clips – Halloween dies and instead of using the die cut shapes for eyes on the spider, cat, and bat, she used google eyes! She also used a pom pom for the nose on the cat! These critters are so much fun to put together and customize however you like!

And finally, we are excited to share three new colors of our Premium Glitter Cardstock: Orange, Emerald, and Black. You will love adding sugary, sparkly details to your projects! The cardstock is pre-cut in A2 size pieces (4.25″ x 5.5″) and offered in packages of 10 sheets per color. There are peeks of the glitter cardstock in a number of the projects from the TE Creative Team above!
Our new Halloween release will be available for purchase starting tomorrow at 9am Central Time, but before I head out for today, you have a chance to win it before you can buy it! Just comment below and let me know:
What’s your favorite candy? Gummy, crunchy, chewy? Fruity, sour, chocolatey? So many choices! AND what’s your favorite product from the sneak peeks? What are you most inspired by?
I’ll choose three lucky winners to receive one product of their choice (sorry, not a bundle) from this release!
Simply leave your comment by TONIGHT, Monday, August 9th at 10PM Central Time. One comment per person. Winners are chosen at random and will be announced on the TE blog on release day, tomorrow, August 10th!
Thank you for stopping by for our new Halloween release sneak peeks! Stop back tomorrow for more inspiration from the TE Creative Team and a new video from Mindy Eggen. See you then!


