Aug 12, 2021
It’s Not a Trick – We Are Treating You to MORE Halloween Inspiration!
Hey, crafty friends! It’s Heather back again today with one more round up of inspiration for our Halloween release! We’ll start things off with a video from Joy Baldwin that I can guarantee will make you think about your favorite candy treats! Then get ready for more inspiration from the TE Creative Team using the new Halloween goodies.
Before we get to today’s inspiration, here’s one last reminder about the promotions we have happening for this week’s release:
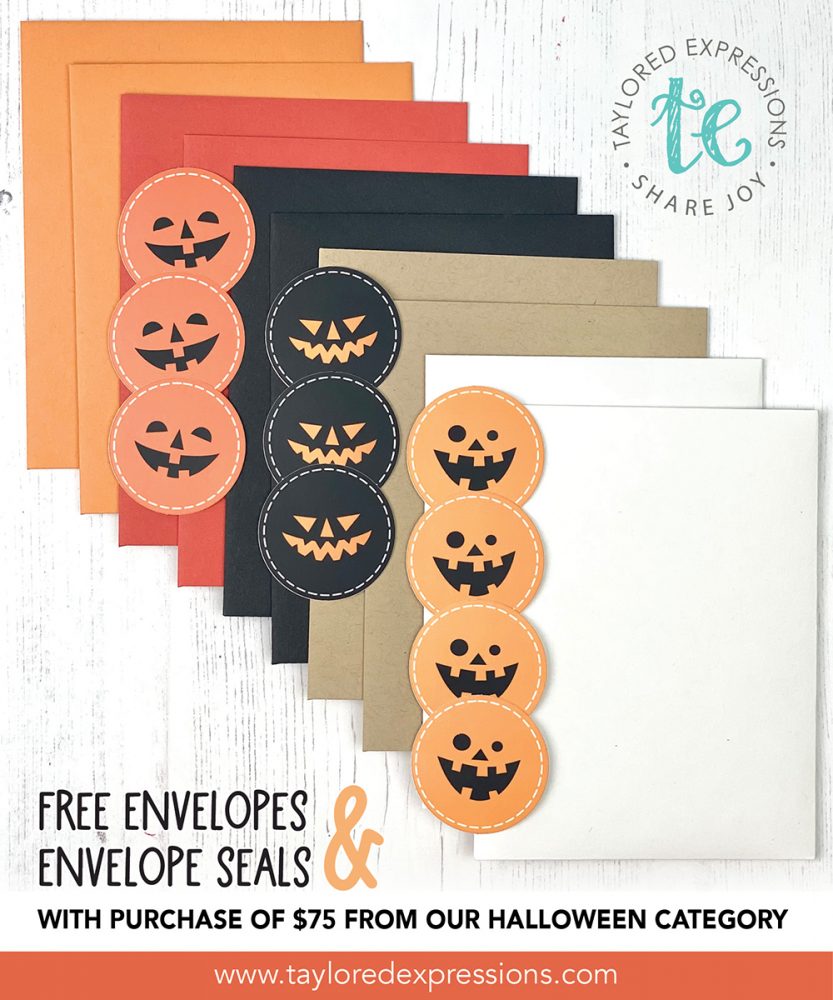
With any purchase of Halloween products (old and new!) of $75 or more, you will receive a FREE pack of envelopes and custom Halloween envelope seals. The pack includes 10 envelopes (2 each of Candy Corn, Pumpkin, Oreo, Toffee and Sugar Cube) and 10 exclusive envelope seals (these seals are not available to purchase). This offer is valid through Sunday, August 15th, or while supplies last.
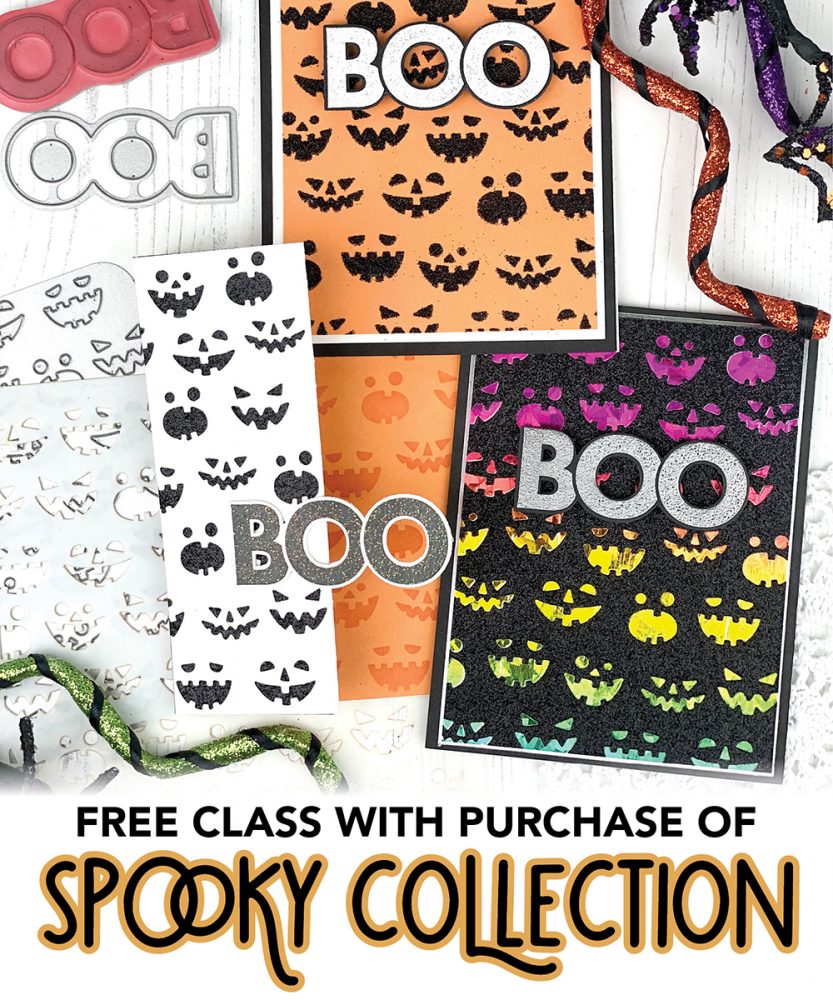
When you purchase the Spooky Collection (Jack-o-Lantern Cutting Plate, Jack-o-Lantern Stencil, On the Block – Boo and On the Block – Boo Shadow) through Sunday, August 15th, you will get a free exclusive 2-card video craft along class with Taylor!
This mini version of our Online Crafty Classes is a great way for you to put your new Halloween goodies to use right away making two different cards at your own pace! Watch the videos as often as you like and learn some new cardmaking tips and tricks while discovering inspiration for more designs!
Once you complete your purchase, you will receive an email (separate from your order confirmation email) with links to the class videos on YouTube, as well as a Tips & Tricks Download that you can use to jot down notes as you watch.
Although Taylor will recommend colors for ink and cardstock, you can use anything you have to make these projects uniquely yours!
Hurry! This offer is only valid through 11:59 pm (CT) on Sunday, Aug. 15, or while supplies last.
Click below to check out the new products in the TE webstore and keep scrolling for the inspiration!
- Tune in for new product inspiration: this release includes over 25 new products; new stamps, dies, stencils, great Halloween themed background options, a cute pumpkin treat wrap, products to create tiny Halloween tags, and a fun die collection perfect for creating cute Halloween critters from felt!
- Our TE blog posts this week Tuesday and today feature a new how-to tip, technique, or process video.
- Receive FREE shipping on orders of $50 or more in the United States!
- Earn a free, exclusive stamp with purchases of $100 or more. CLICK HERE for more information.

Are you ready for a sugar rush? Joy Baldwin created three different cards with the new Sugar Rush Stencil & Clear Stamp Combo set to share with you today. Watch the video below to see how she created them from start to finish:
In the video, Joy shares the three cards that she made with the Sugar Rush Stencil & Clear Stamp Combo set. She shows how to stencil the different candies and add details using the stencils and stamps in the set. On the larger candies, Joy uses Glitter Grab and different glitter colors to add sparkle to the candies.
Here is a closer look at the new products that Joy used in her video:
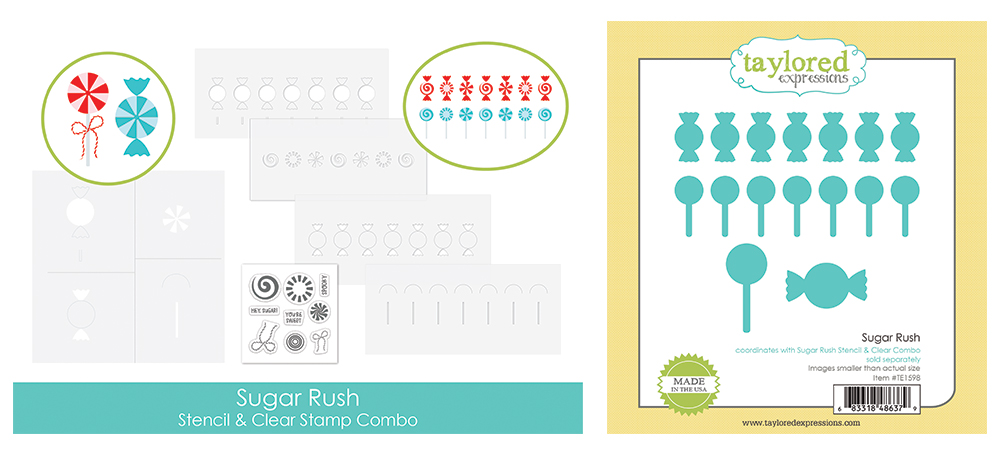
Create cards featuring sweet treats to celebrate all things candy with our Sugar Rush Stencil & Clear Stamp Combo set! The set includes eight layering stencils – four that work together to create a larger, individual candy that you can make into a lollipop or add a candy wrap onto and four that make a smaller row of candy sweetness – plus 9 clear stamps to accent the candies and make them come to life along with a few sweet sentiments. Use the coordinating Sugar Rush dies to cut out the larger candies and the whole row of tiny candy treats.
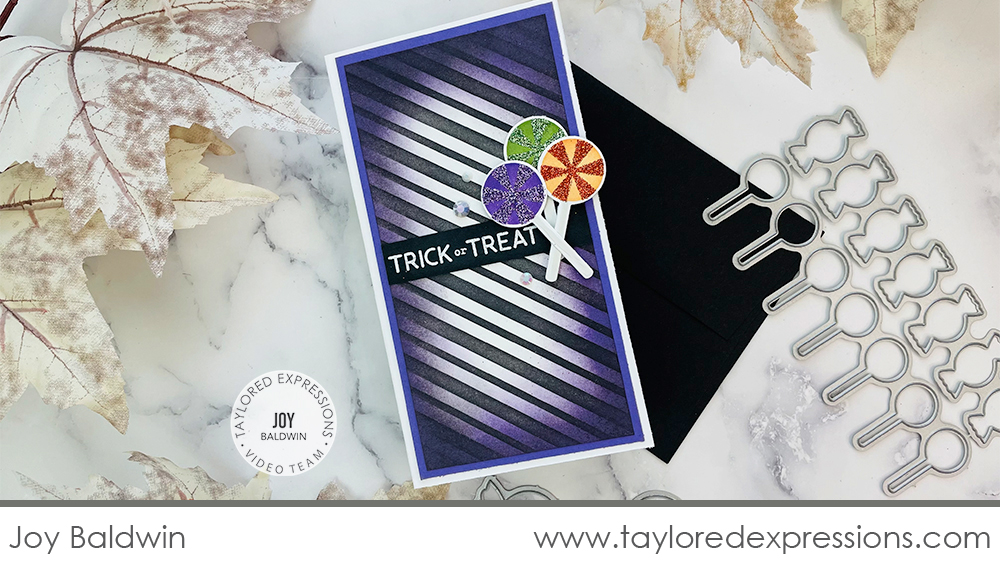
This Mini Slim card features the larger candy lollipops that are created with the stencils in the set. Joy stenciled the candies with Candy Corn, Jelly Donut, and Peapod inks. The lollipop sticks are stenciled with Sea Salt ink and then Joy added the details using Glitter Grab and coordinating glitter colors to match the ink. The background of the card is stenciled using the Mini Slim – Candy Cane Stripes stencil with Oreo Ink and Joy added extra blending around the edges with Oreo and Jelly Donut inks. The ‘trick or treat’ sentiment from the Pennant Parade – Halloween stamp set is embossed in white on an Oreo cardstock strip.

This next Halloween card features the larger wrapped candies that are created with the stencils in the set. Instead of adding the lollipop stick, Joy used the stencils to add the candy wrapper ends and then added Glitter Grab and Oreo glitter to add the candy stripes. The background of the card features various sentiments from the Pennant Parade – Halloween and Sugar Rush sets embossed in white on Oreo cardstock and a layer stenciled with the Mini Slim – Candy Cane Stripes stencil.

The last card has a line up of the smaller candies from the Sugar Rush set that Joy stenciled with Jelly Donut, Candy Corn, and Peapod inks. Joy alternated lollipop sticks and candy wrappers on the candies and then used the clear stamps to add details, bows, and the ‘spooky’ sentiment with Oreo ink. Joy’s finishing touch on all three cards is a few of the Bits & Pieces – White Rhinestones.
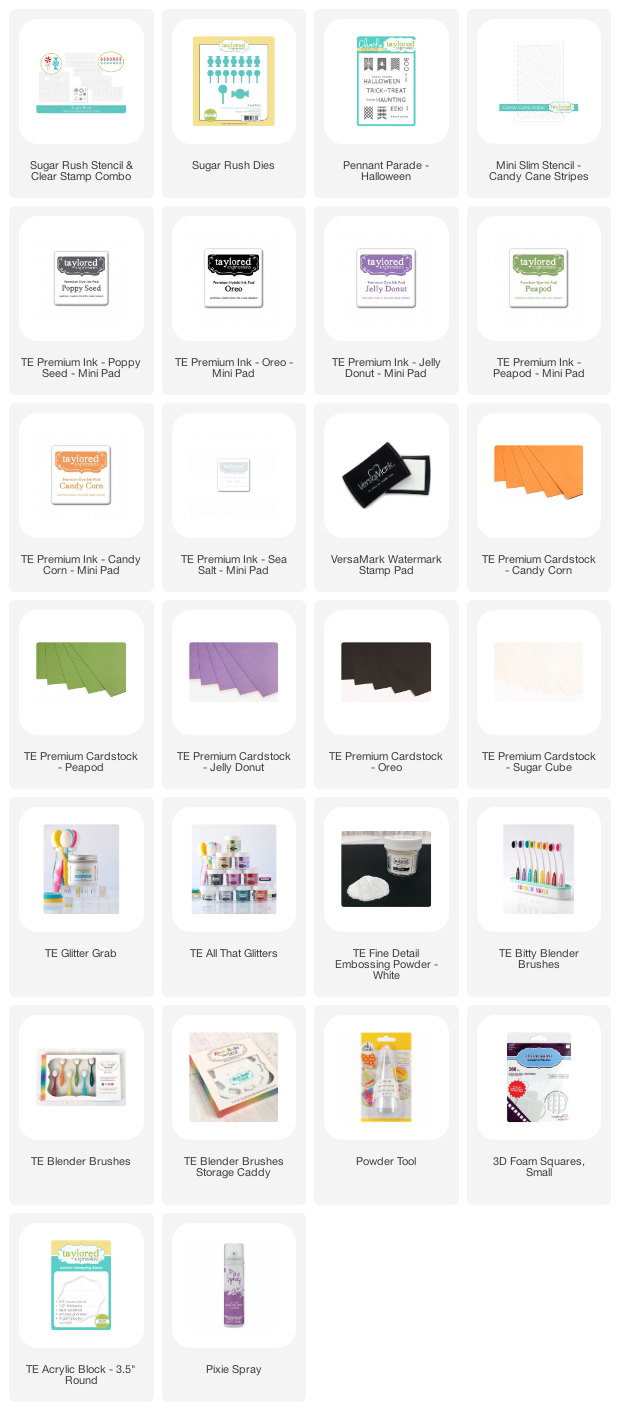
Check out the list below for all of the supplies that Joy used on her cards:

Now it’s time for inspiration from the TE Creative team using the new Halloween release products:
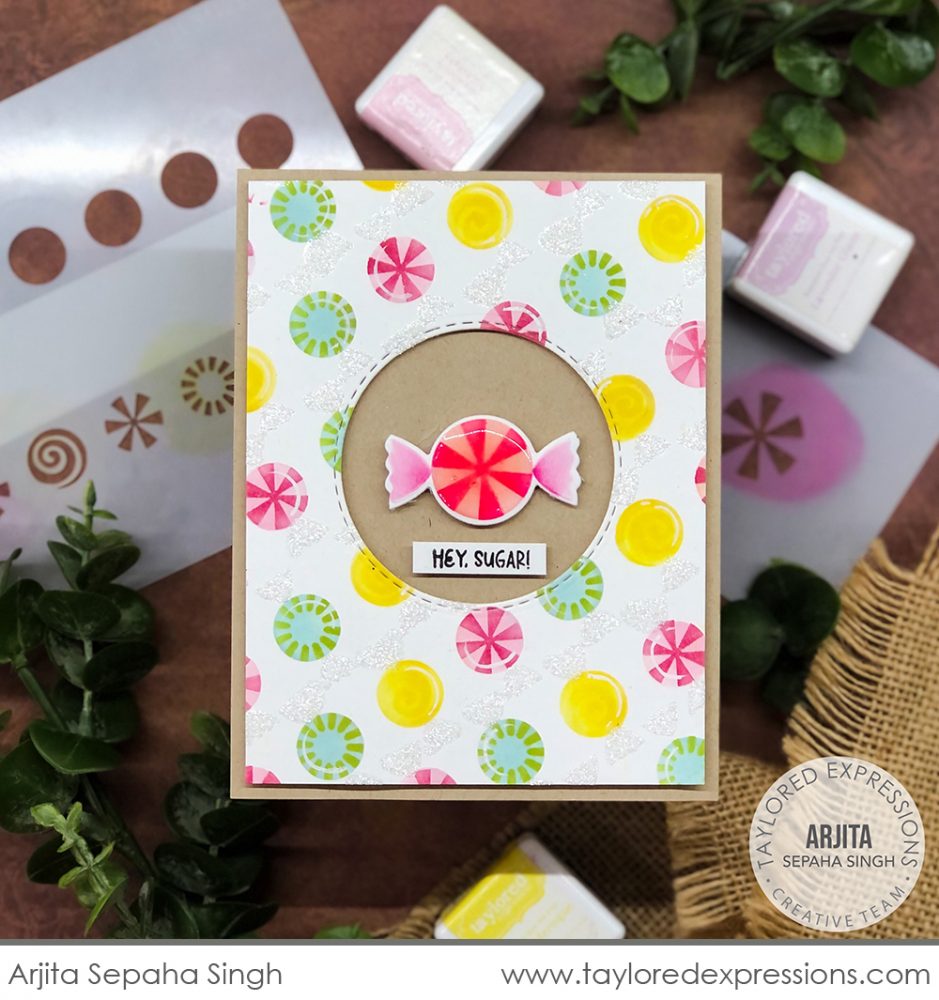
I love the sweet background that Arjita Sepaha Singh created with the Sugar Rush Stencil & Clear Stamp Combo set using the tiny candies. She stenciled the candy shapes, added the details onto the candies, and added the candy wrappers using Glitter Grab and Pearl glitter. Arjita cut out a circle from the middle of her candy background using a die from the Mini Slim Trifold Template + Dies – Circle set to feature a larger candy. There’s a layer of Glossy Accents over the candy to give it dimension and shine and then Arjita used a white gel pen to add highlights to the smaller candies in the background.
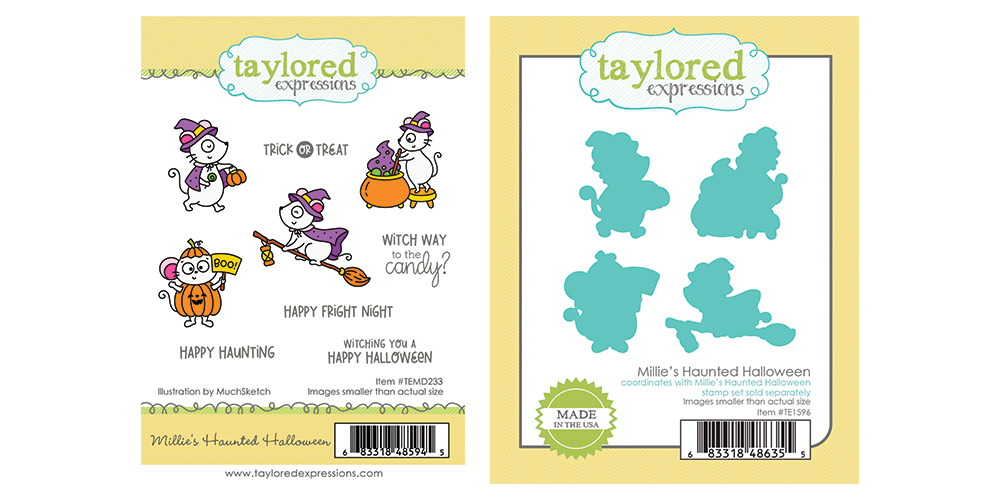
Millie is inviting you to her Halloween party with the images and sentiments from our Millie’s Haunted Halloween stamp set (+ coordinating dies). Part of our popular Max & Millie collection, this set features scenes of Millie the Mouse in dressed as a witch, flying on a broomstick, dressed as a pumpkin, and stirring up magic potions in a cauldron. The set also includes five coordinating Halloween sentiments that you can add both on the front and inside of your cards.
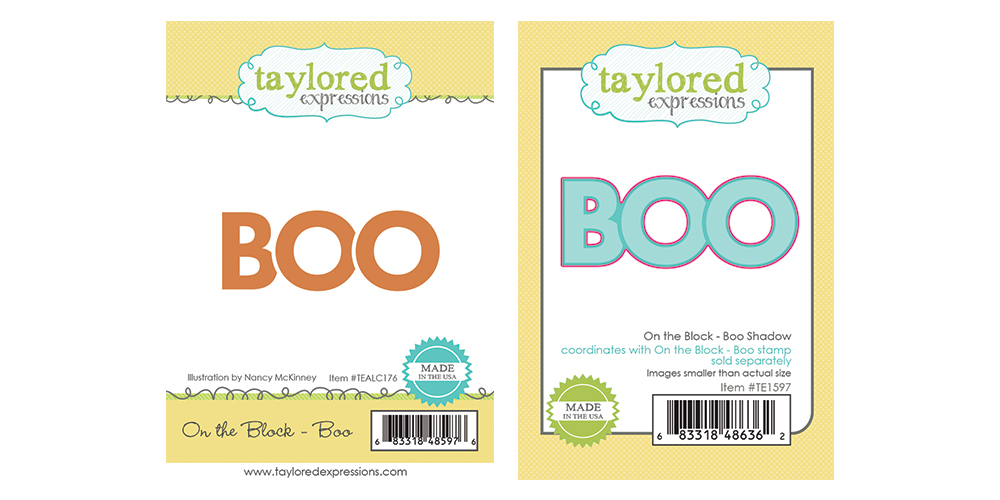
We’re adding a spooky addition to the On the Block collection with the new On the Block – Boo stamp and coordinating On the Block – Boo Shadow die. The sans-serif block letters slightly overlap and are not perfectly aligned, adding a whimsical charm to the word.

Millie is ready to go trick or treating on this Mini Slim card by Jen Shults! She colored the cute mouse from Millie’s Haunted Halloween stamp set with Copic markers and set her next to the ‘Boo’ and ‘Happy Fright Night’ sentiments. The On the Block – Boo stamp is embossed in white on Oreo cardstock and Jen added a bunch of lollipops created with the Sugar Rush Stencil & Clear Stamp Combo set over the top of it. I love all the layers Jen did using cardstock, patterned paper, and vellum on her card as well as the bats flying across the top to complete the spooky look!
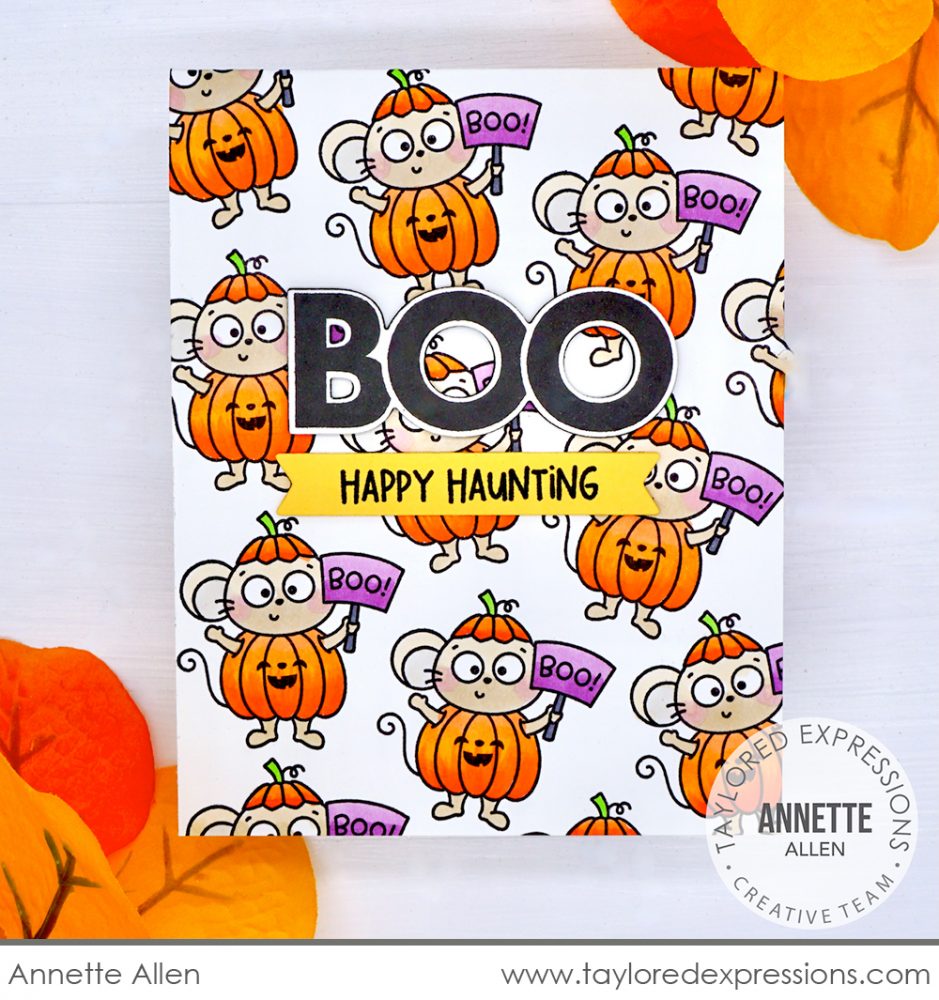
Annette Allen filled up her background with Millie in her pumpkin costume from the Millie’s Haunted Halloween stamp set! She stamped them with Oreo Ink on Sugar Cube cardstock, colored them with Copic markers, and added a sentiment that is put together with the On the Block – Boo stamp (+ coordinating die) and ‘happy haunting’ sentiment stamped on a Double-Ended Flag Stacklets die cut. This card is definitely too cute to spook!

Mindy Eggen used the Millie’s Haunted Halloween stamp set on this cute Halloween card. She used all of the images of Millie dressed as a witch on a background that is blended with the Spiderweb Cling & Clear Combo set stamped over the top with Sugar Cube ink. For the sentiment, Mindy inked up the On the Block – Boo stamp with both Jelly Donut and Oreo inks (mini ink cubes work great for inking stamps in multiple colors!) and then added the ‘happy fright night’ sentiment stamped underneath it. A few sparkly bats cut out with the Little Bits – Bats dies from black glitter cardstock and Bits & Pieces – Cosmic Drip Drops are the perfect Halloween finishing touches!
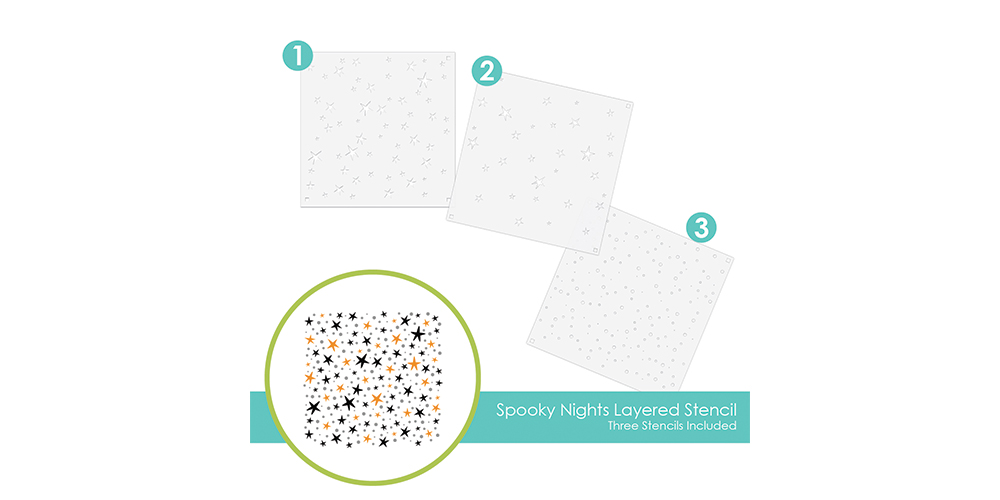
Use the Spooky Nights Layered Stencil set to add a whimsical star filled pattern to your projects. Two of the stencils feature stars and one features a polka dot pattern that you can add in multiple color layers using Blender Brushes, glitter paste, and more. Use the corner alignment guides to line everything up perfectly!
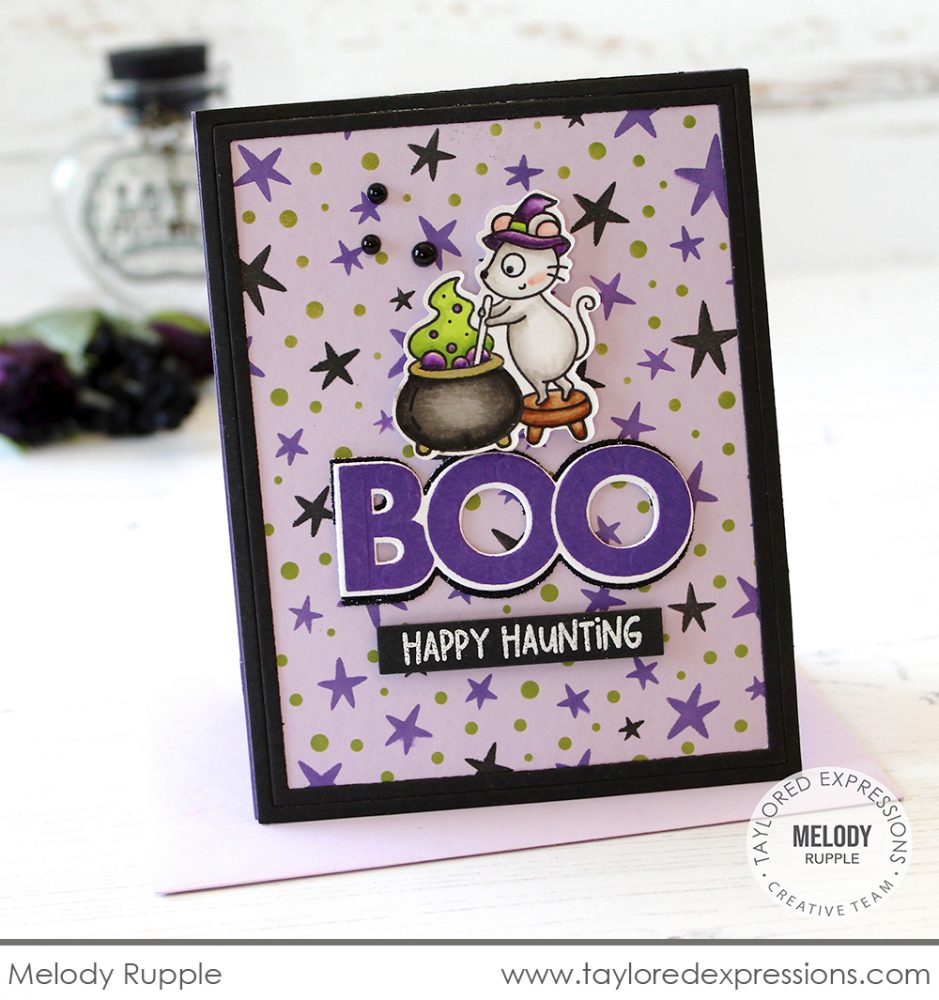
Melody Rupple has Millie stirring up a magical scene on this Halloween card. She stenciled the background on Lavender glaze cardstock using the Spooky Nights Layered Stencil set with Jelly Donut, Oreo, and Lime Zest inks. I love the Bits & Pieces – Black Drip Drop ‘bubbles’ that Melody added above the cauldron image from Millie’s Haunted Halloween stamp set! The card is framed with a few Oreo cardstock frames cut out with the new A2 Thin Frame Cutting Plate die and the sentiment is put together with the On the Block – Boo stamp (+ coordinating die) and the ‘happy haunting’ sentiment embossed in white on an Oreo Cardstock strip.
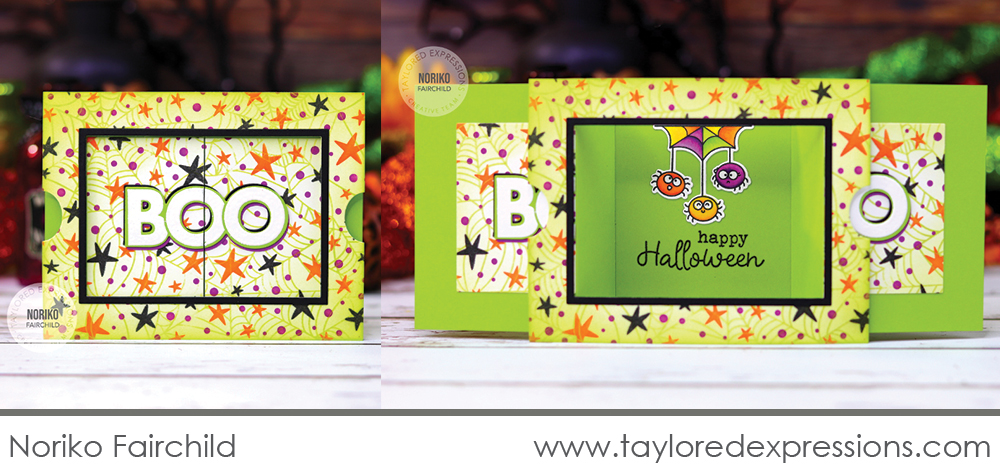
This Halloween theater fold card by Noriko Fairchild is definitely a showstopper! The card front features a background created with both the Spiderweb Cling & Clear Combo and Spooky Nights Layered Stencil set. Noriko added the ‘boo’ to the card front, framed with an Oreo Cardstock frame cut out with the A2 Thin Frame Cutting Plate die. When the card is opened by pulling out the sides, a cute spidery scene is revealed! The cute spiders and sentiment are from the Spooktacular stamp set. Create an interactive card like this using the Theater Fold Frame die collection.
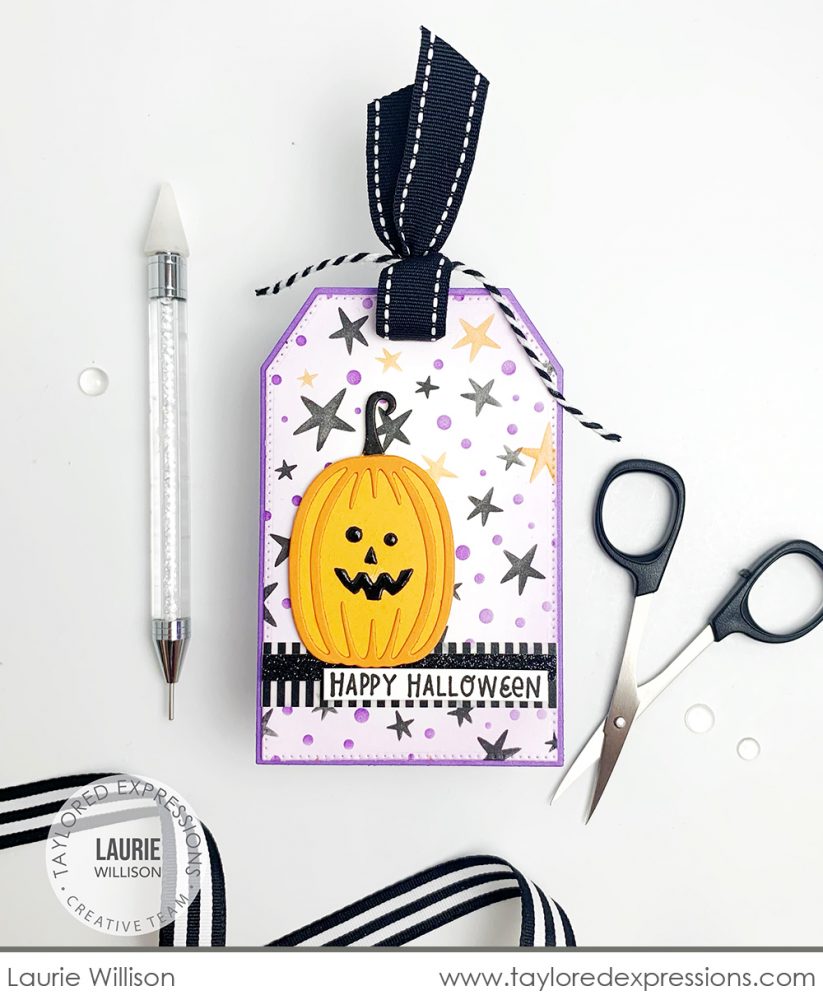
Dress up your Halloween tags with the Spooky Nights Layered Stencil set like Laurie Willison did here! She stenciled the design using Oreo, Candy Corn, and Plum Punch inks on a tag cut out with the Pierced Tag Stacklets 2 and Tag Stacklets 2 die collections. Her tag features a cute pumpkin put together using the Layer It – Pumpkins die collection and a face from the Jack-o-Lantern Cutting Plate. The sentiment on the tag is from the Full Circle – Halloween stamp set.

This adorable Mini Slim Halloween card by Emily Mydlowski features a background stenciled with the Spooky Nights Layered Stencil set using Cookie Monster, Plum Punch, and Candy Corn inks and framed with thin frames cut from Plum Punch, Cookie Monster, and Oreo cardstock with the Mini Slim Thin Frame Cutting Plate die. Emily cut out a circular opening using the Mini Slim Trifold Template + Dies – Circle set and Stitched Circle Stacklets die to highlight Millie stirring her cauldron from the Millie’s Haunted Halloween stamp set.
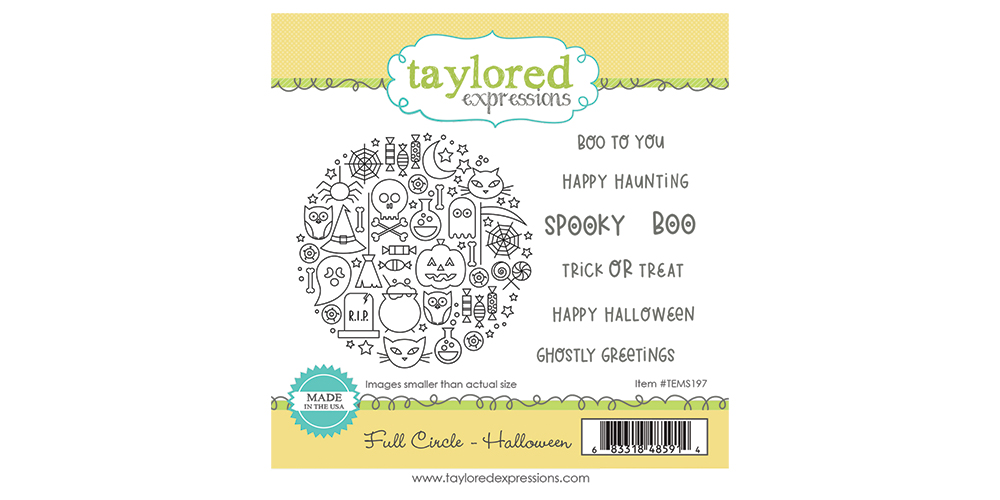
Celebrate Halloween with our Full Circle – Halloween stamp set! The set features a 3 1/4″ round stamp filled with Halloween icons (like the a jack-o-lantern, cats, ghosts, and candy) that can be used as a background or an accent on your cards and crafts. (It also happens to fit perfectly inside the larger circle stencil that’s part of our Masking Stencils – Circles!) The set includes six coordinating Halloween sentiments to add to your cards, tags, and more.
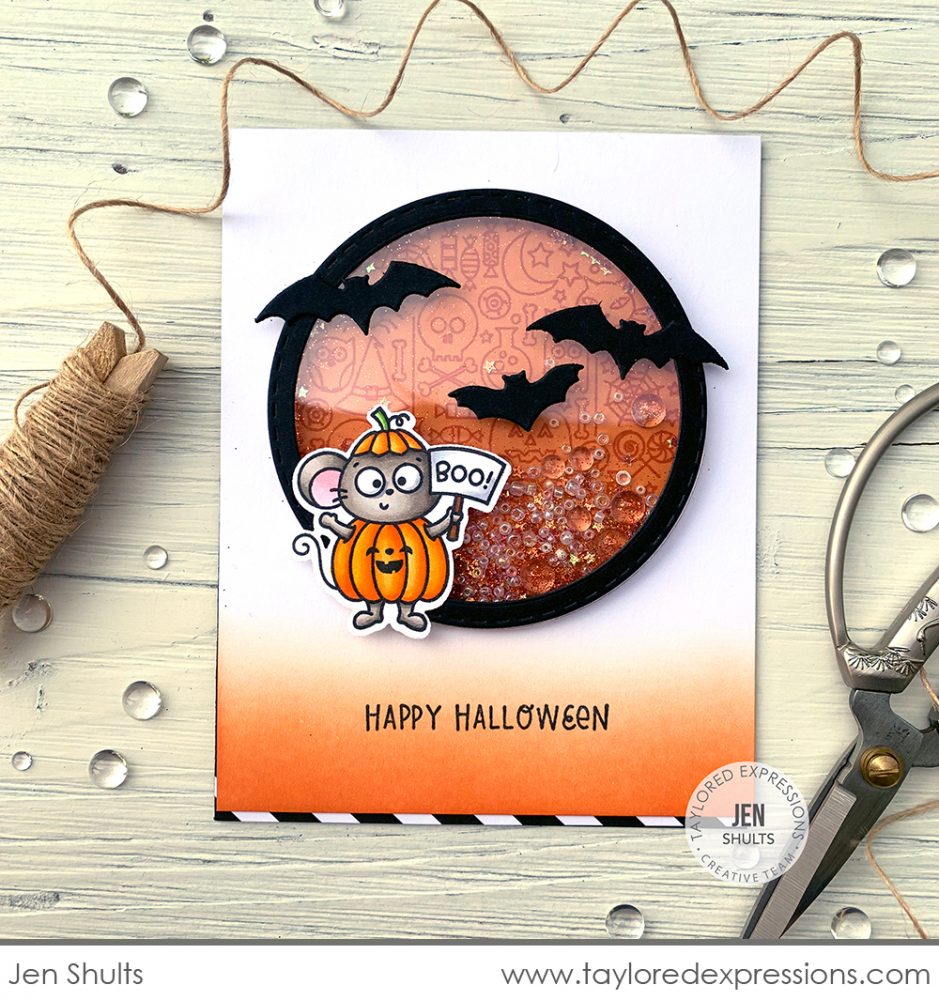
Jen Shults is shaking things up with this cute Halloween card! The shaker on the card has a background stamped with the circle image from the Full Circle – Halloween stamp set. Jen filled the shaker with beads and Bits & Pieces Clear Drip Drops and added Millie in her pumpkin costume from the Millie’s Haunted Halloween stamp set to the front along with a few bats cut out with the Little Bits – Bats dies. I love the subtle blending that Jen did at the bottom of the card – it gives off a sort of candy corn look!
That wraps up our Halloween inspiration using the new products from this release! I hope you enjoyed everything we shared this week and are inspired for your Halloween crafting. We can’t wait to see what you create and hope you will share with on on the Fans of Taylored Expressions Facebook Page! Next week, make plans to stop by the TE blog for more craft inspiration from a new kit that is debuting on Tuesday. I’ll post a sneak peek for you this weekend!
Did you know that you can subscribe to our blog and get our posts right in your inbox? Just sign up right HERE – that’s all there is to it to make sure you don’t miss any of our crafty inspiration!


