Oct 12, 2021
NEW Gel Printing Kit Available NOW!
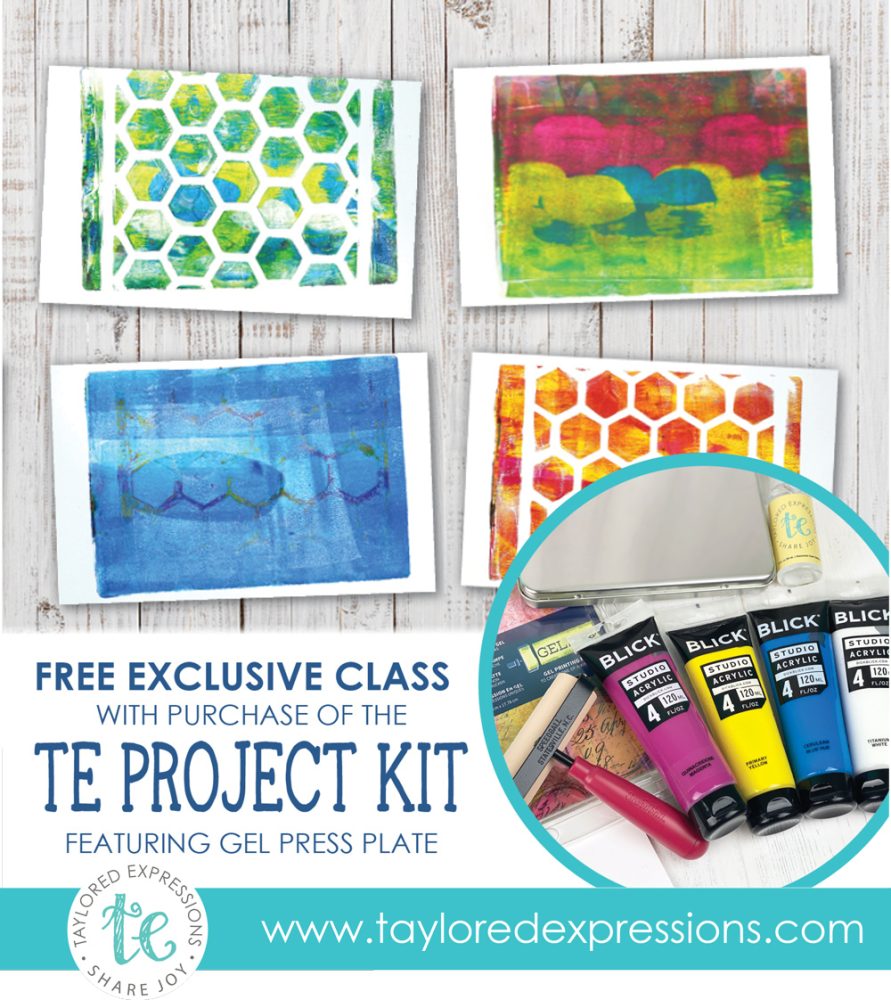
Hey, crafty friends! It’s Taylor here today and I can’t wait to introduce you to the latest crafty kit from Taylored Expressions. This special technique kit is brought to you in collaboration with Lydia Fiedler, the craft industry expert in gel printing! Lydia and I worked together to curate the perfect collection of products that includes everything you need to get started with gel printing! Grab all the background stamps, stencils, embossing folders, and even pieces of trash, and start creating beautiful treasures!
So what is gel printing? Gel printing is a technique that uses a gel printing plate (a soft and sticky plate made out of a polymer material) and a medium, like acrylic paint or dye-based inks, to create artistic prints and patterns. No two are ever the same and that’s the beauty of this fun technique!
Here’s a closer look at the new TE Project Kit – Gel Printing:
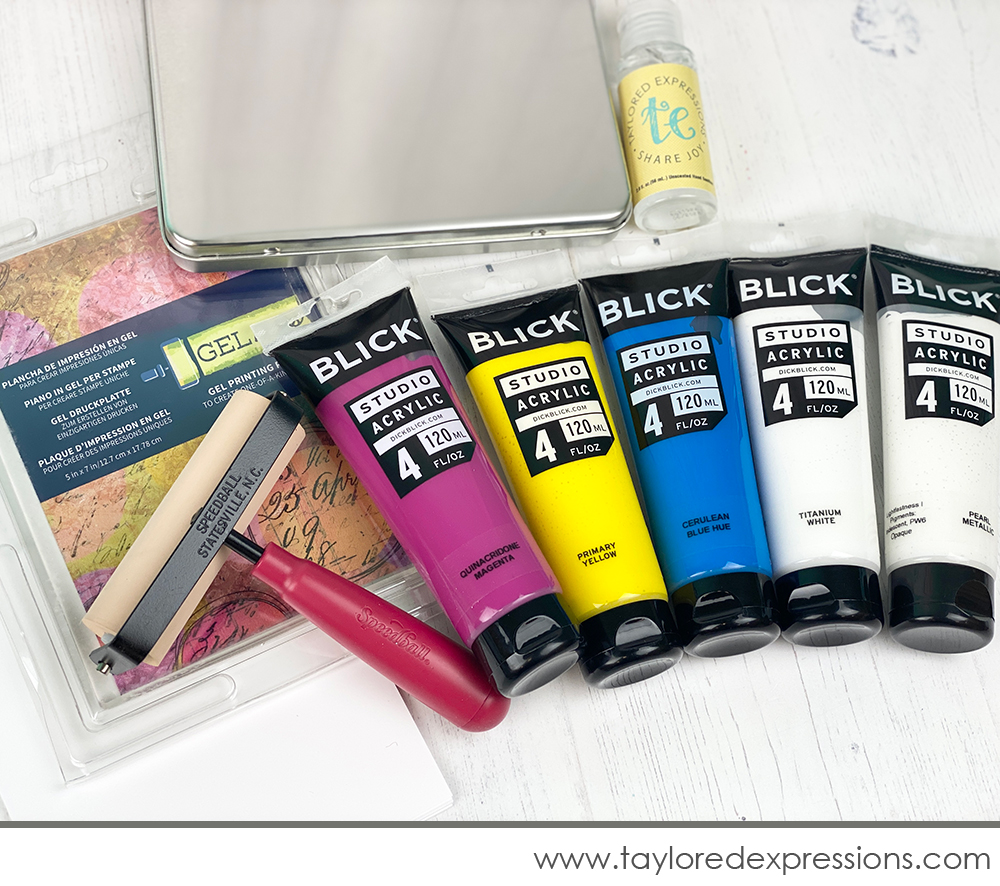
The Gel Printing Kit retails for $69 and includes:
- One 5″ x 7″ Gel Press Plate
- Five 4 oz tubes of acrylic paint (blue, magenta, yellow, pearl metallic white and titanium white)
- 20 sheets of Gel Printing Paper (5 1/2″ x 8 1/2″)
- One 4″ Soft Rubber Speedball Brayer
- One 2 oz bottle of gel hand sanitizer (for removing paint residue from the plate)
- A hinged tin perfectly sized for storing your Gel Press (7 1/4″ x 5 1/4″ x 1″)
Once you complete your kit purchase, you will receive an email (separate from your order confirmation email) with a link to the exclusive class with Lydia on YouTube. Watch it as often as you like and learn some great gel printing tips and tricks while discovering inspiration for more designs!
In addition to the Gel Printing Kit, we are offering a new background stamp, several new stencils, and additional packages of Gel Printing Paper! You can use the new stamp and stencils with your gel press or for other paper crafting projects.
Click below to shop and then keep scrolling for inspiration from the TE Creative Team using the Gel Printing Kit!
Watch for extra notes, tips, and ideas throughout today’s post noted with a double asterisk (**)!
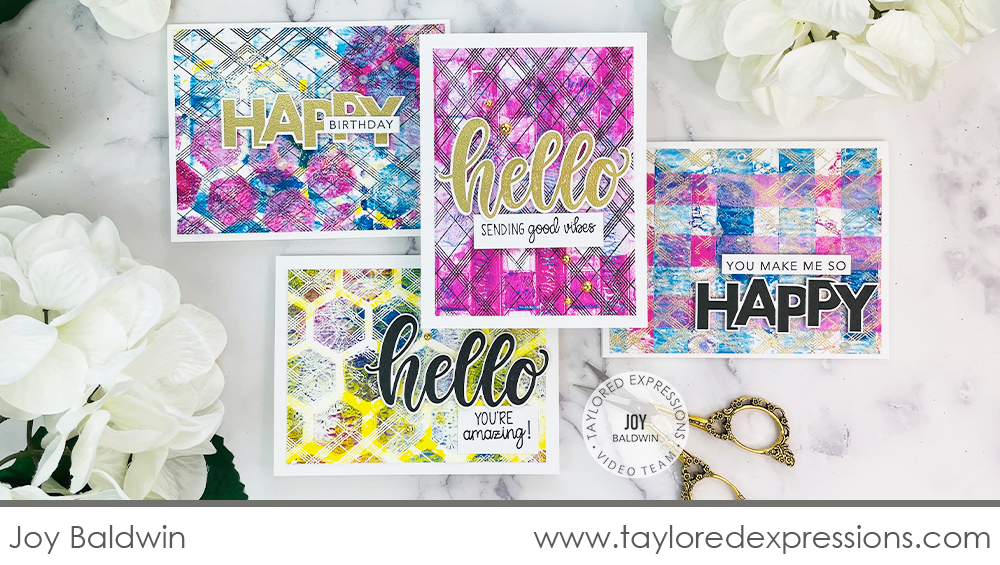
Joy Baldwin is taking you with her as she explores the possibilities with the new gel printing kit, along with new stencils and a new background stamp we are releasing today, to create a set of four cards. Watch the video below to see how much fun Joy had making gel prints!
In the video, Joy creates a number of backgrounds with the Gel Press included in the kit. She uses acrylic paints on the press with a brayer, impresses stencil designs into the paint, and pulls prints with our gel printing paper. When it comes to creating gel prints, there are not many rules so just let go of expectations and play! After the prints are dry, Joy adds stamping and/or embossing to the prints using the Diagonal Diamonds Background stamp. The prints are trimmed down and used as backgrounds on four cards.
**Note that the process of creating gel prints can be unpredictable. We are doing our best to describe to you the process that the designers used to create their projects, but following the same steps will likely yield different results. That is the beauty of using a gel press! Let go of perfection and enjoy the process!
Here’s a closer look at each of the cards that Joy created:
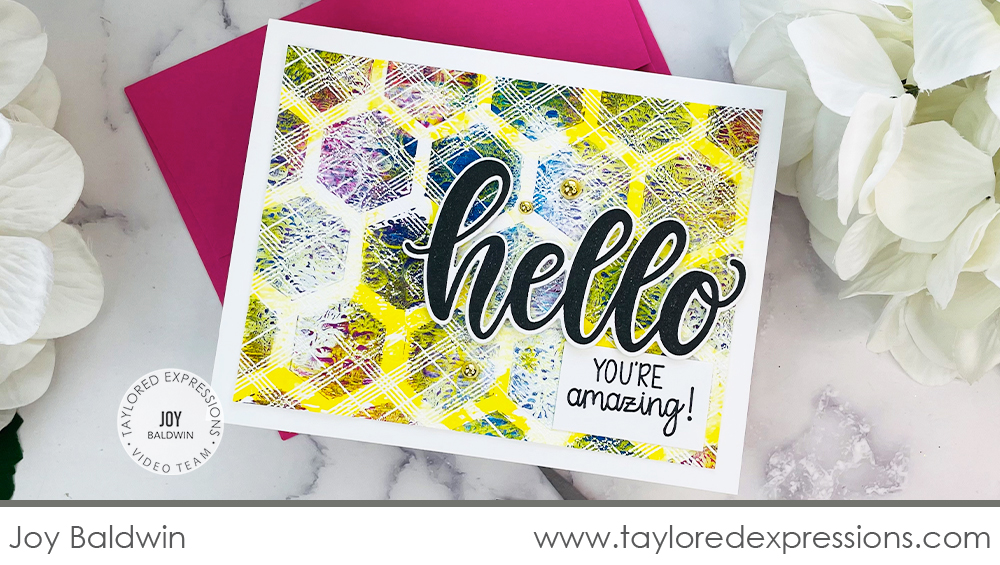
For this card, Joy used the new Honeycomb stencil along with her gel printing plate to create the background. Joy added blue and magenta paints to the press with a brayer, laid the Honeycomb stencil over the top, and pulled a print. She later went over the first print with another pull using yellow paint. The Diagonal Diamonds Background is embossed over the top of the print in white and Joy added the sentiment created with the Oh My Word – Hello stamp set (+ coordinating die).
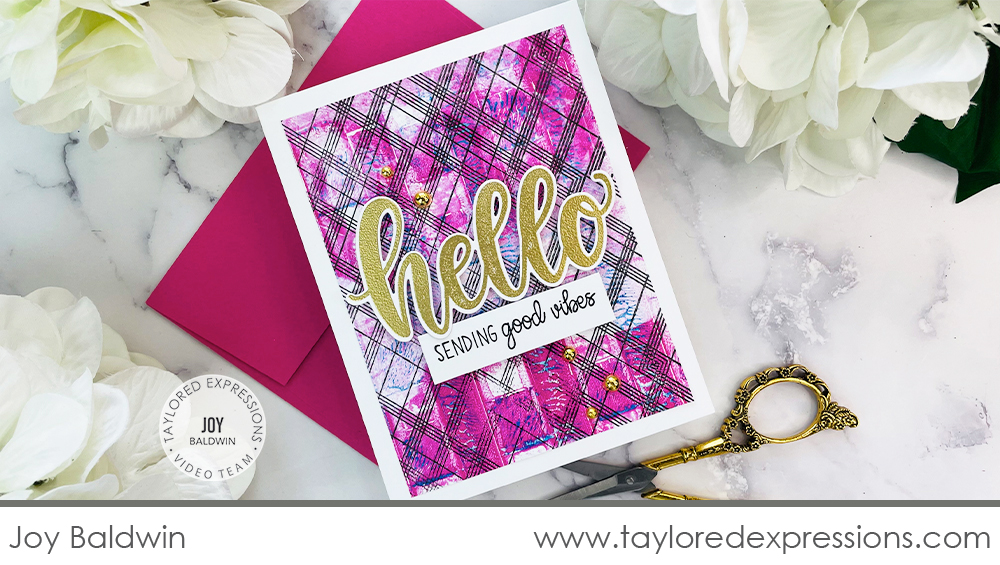
To create the background for this card, Joy used a brayer to add magenta paint to her gel press, layered the large stencil from the 3/4″ Stripe Stencil set over the top, pulled a print, added more magenta paint, layered the same stencil turned 90 degrees, and layered the print over the top of the first print. I love how it created a plaid design! You might notice the bits of yellow and blue paints that are also showing up from paint that is leftover on the press from previous prints. The unexpected pops of color add lots of interest and texture! Joy stamped the Diagonal Diamonds Background stamp over the top of the print with Oreo ink, trimmed the background for an A2 card and added the sentiment created with the Oh My Word – Hello stamp set (+ coordinating die).
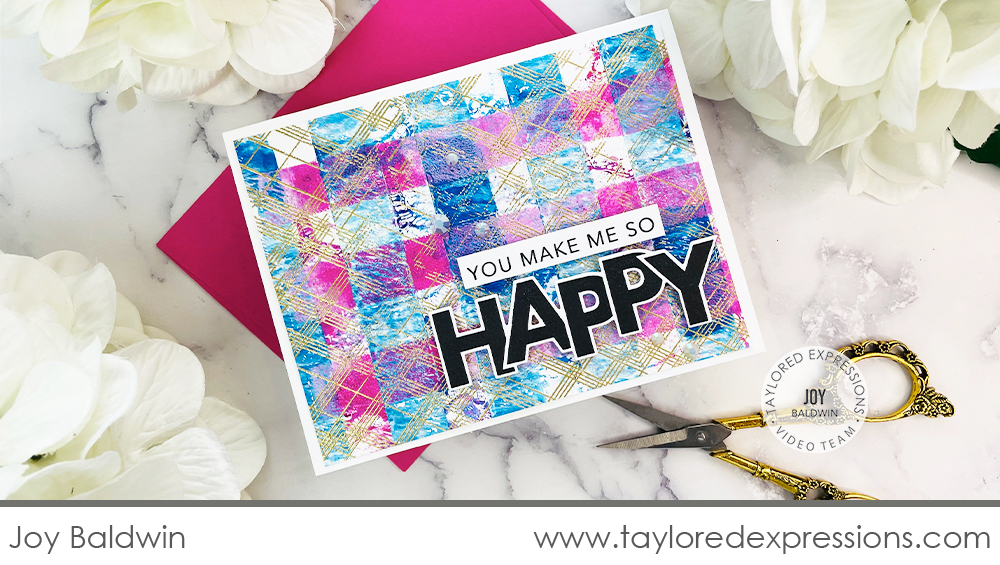
Joy kept the plaid design going for the background on this card. She added magenta paint to her gel press, layered the large stencil from the 3/4″ Stripe Stencil set over the top, pulled a print, added blue paint to the gel press, layered the same stencil turned 90 degrees, and pulled another print onto the first print to create the blue and pink plaid design. The Diagonal Diamonds Background is embossed over the print in gold, the background is trimmed down for the card, and the sentiment is added using the On the Block – Happy stamp (+ coordinating die) and the Building Blocks – Happy Additions stamp.
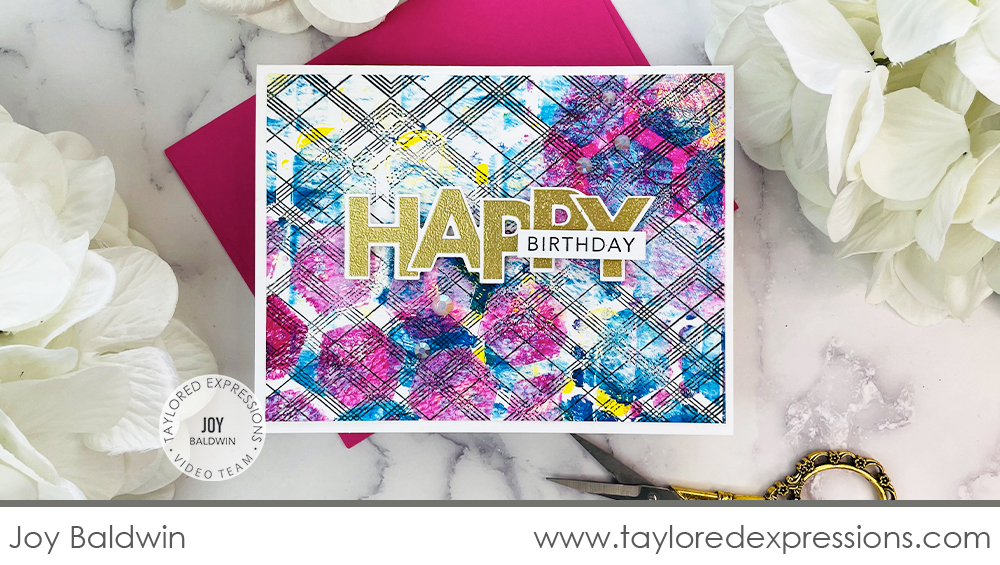
For this last card background, Joy really let go and tried out different things. She used a second pull (**Try pulling multiple prints before adding additional paint/mediums!) where she had added blue paint and layered the Honeycomb stencil over the top. She added magenta paint to her press, layered the Honeycomb stencil over the top, and then printed just portions of color onto the first print. You can also see where Joy played with a bit of yellow in this print too! The sentiment is created with the On the Block – Happy stamp (+ coordinating die) and the Building Blocks – Happy Additions stamp.
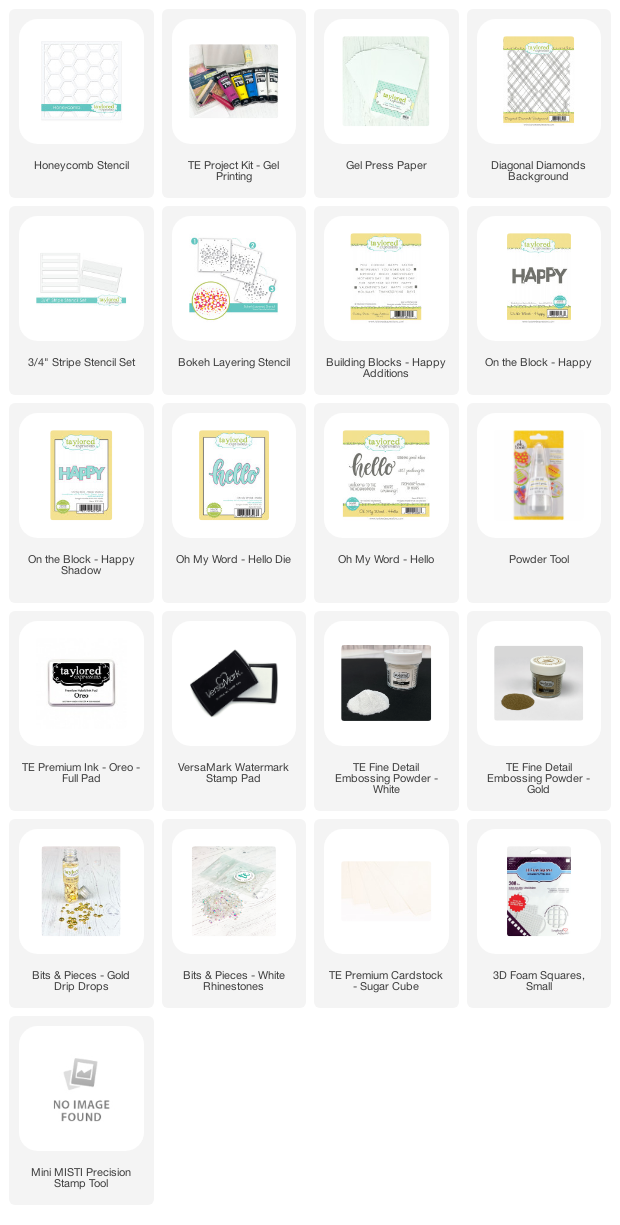
Check out the list below for the supplies that Joy used for all of the cards she shared in the video:

Here is a closer look at the additional products we are offering for this release along with more inspiration and tips:
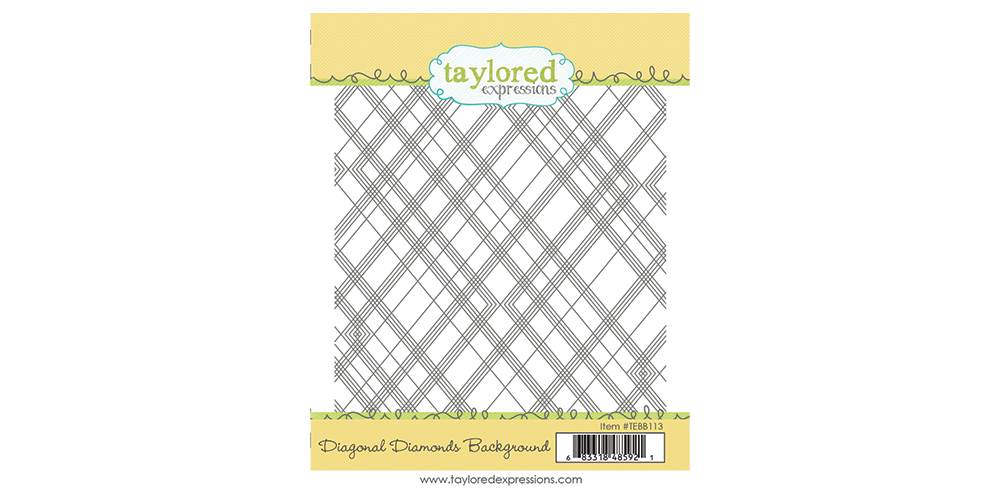
The new Diagonal Diamonds Background stamp features a pattern of interlocking diamonds drawn with single and triple stroke lines. This design will coordinate with so many different themes and looks for the backgrounds of your A2 cards.
**To use background stamps with your gel printing plate, you can impress your stamp into the mediums on your press, both un-inked or inked up with your ink or paint of choice! While we are releasing the Diagonal Diamonds Background stamp with the gel press, you can use it for any paper crafting project too. You can also use other background stamps with your gel press!
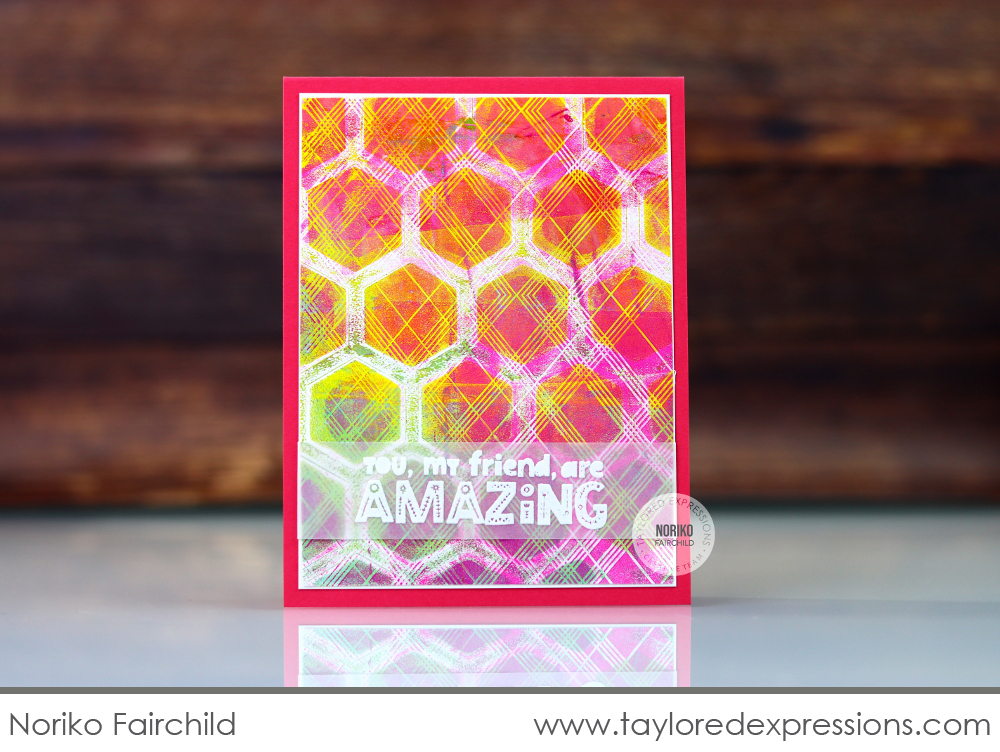
Noriko Fairchild added yellow paint to her gel press with a brayer and then layered a bit of pink paint over the top. She layered the Honeycomb stencil (scroll down for more information about this new stencil) over the top, pulled up the stencil, pressed the Diagonal Diamonds into the design, and then pulled a print. I love how the stamp pulled up the paint differently across the print, showing up in both yellow and white! The sentiment from the Folk Art Phrases stamp set is embossed in white on a vellum strip.
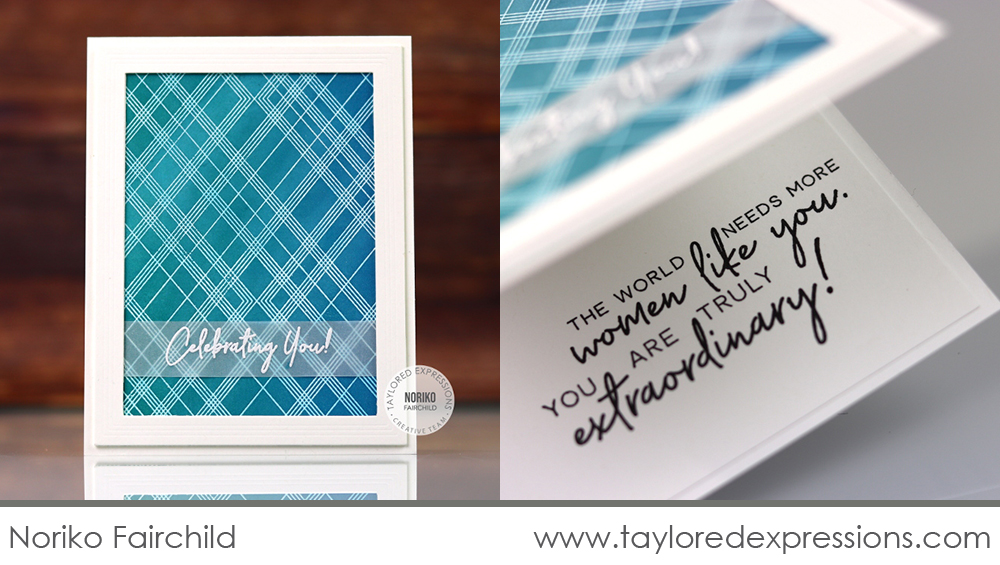
You don’t have to use just acrylic paint on your gel press, try out other mediums too! Noriko Fairchild layered a few colors of our dye ink onto her press, used a brayer to blend them together, pressed the Diagonal Diamonds stamp onto the press (it pulled up the ink from the press where the stamp touched it), and pulled a print. Being able to create a reverse impression like this just doubled your background stamp possibilities!
**Note that when you use inks on the gel press, they will appear very light because they are transparent. It looks like there isn’t a lot of ink on your press, but most likely there is plenty! Pull a print to see what you can create!

The Honeycomb stencil features a hexagon grid design that you can add to your cards and crafts. Dress the pattern up or down with color, patterns, and more!
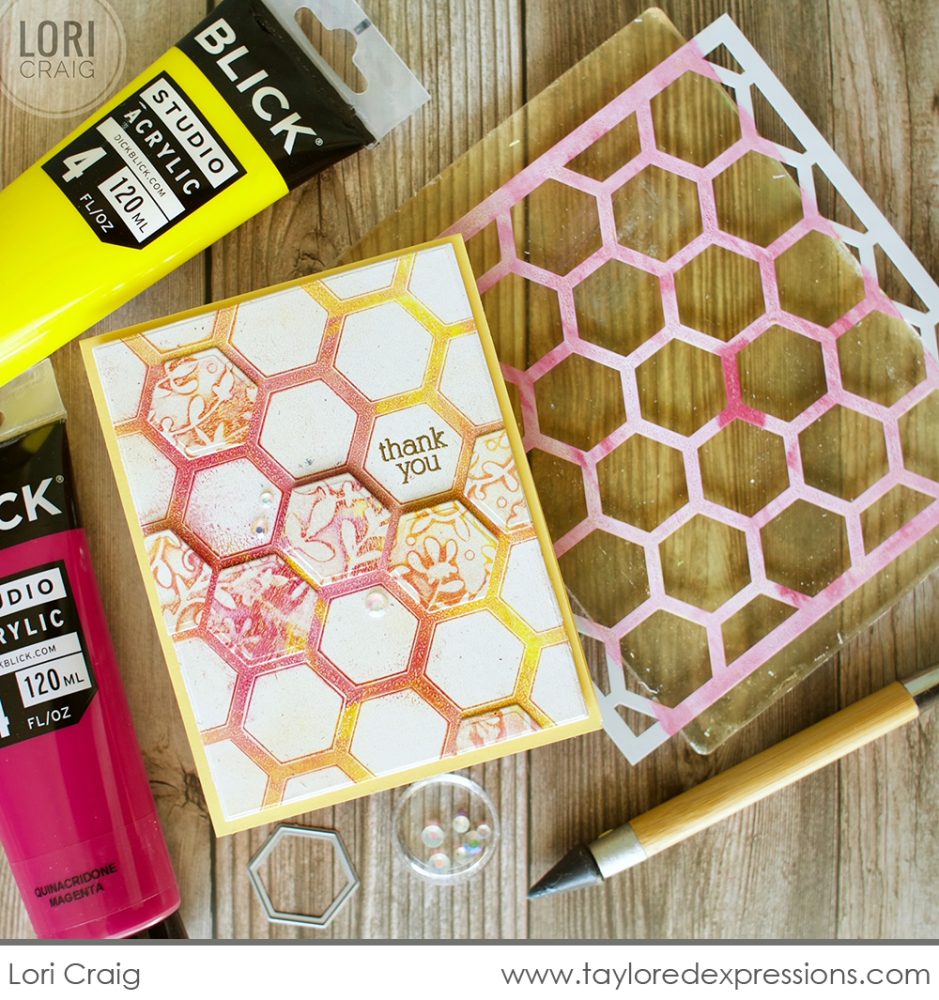
To create this card, Lori Craig added magenta and yellow paints to her gel press with a brayer, she layered the Honeycomb stencil over the top, and then used a lightweight piece of paper to “pull” out the ink from the stencil openings. Lori took the stencil off the press and then pulled the print. To add the flower design, Lori used the gel press again with the same paint colors and then impressed a piece of cardstock into the paint that was embossed with the Floral Vine embossing folder. She pulled the print and then cut out hexagons from it using the largest die in the Happy Hex die collection. The die cut hexagons are layered over the hexagon design on the first print.
**Embossing folders are great for adding texture to your gel prints! Emboss sturdy cardstock (TE cardstock works great!) using an embossing sandwich in your die cut machine and then press the embossed cardstock pieces into the mediums on your gel press to create the textured effects.
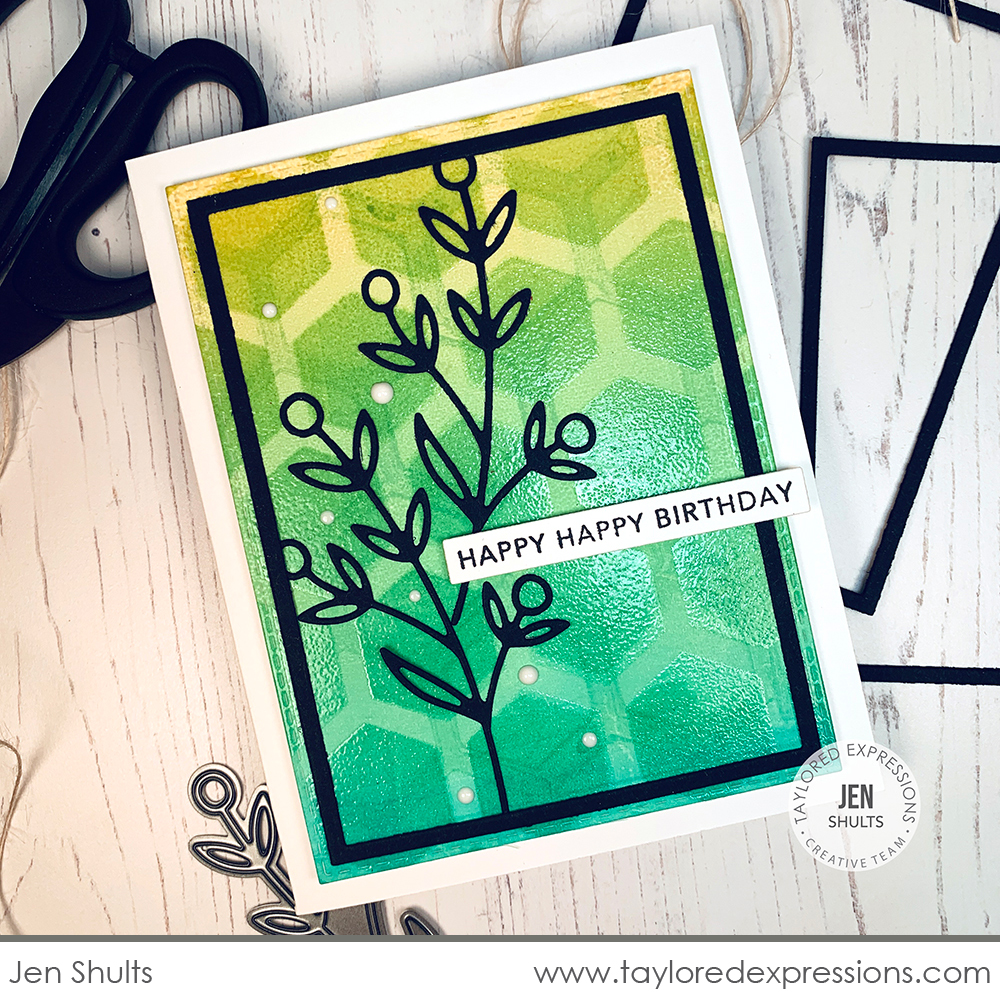
Jen Shults used our TE inks with the Honeycomb stencil to create the background on this birthday card. She added the inks to the gel plate to create a gradient from teal to light green, used a brayer to blend the colors together, put the Honeycomb stencil over the top to impress the design, pulled off the stencil, and pulled a print. Then, Jen stenciled over the top of the print with the Honeycomb stencil using Versamark ink and embossed the stenciled design with clear embossing powder. To finish the card, Jen added a Oreo Cardstock berry branch cut out with the Branch Out dies, a frame from the A2 Thin Frame Cutting Plate die, and the ‘happy happy birthday’ sentiment from the Mini Strips – Birthday stamp.
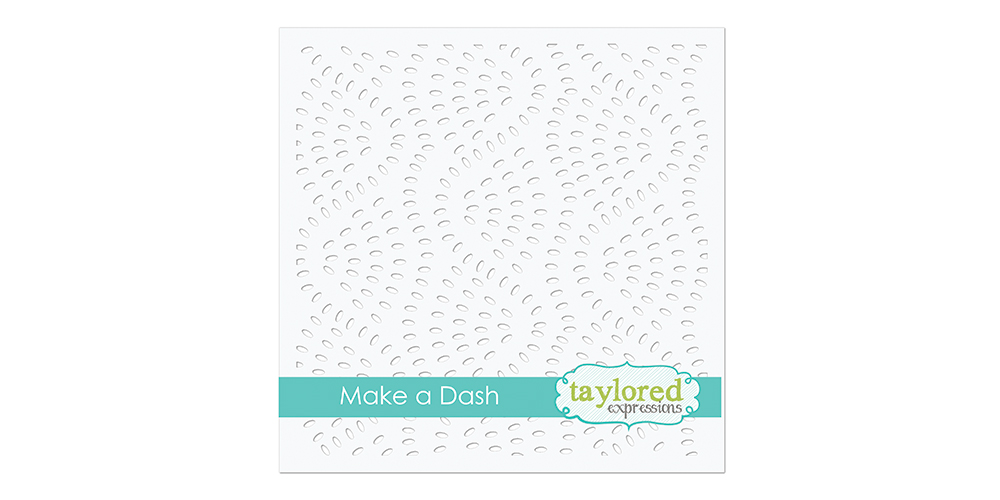
The new Make a Dash stencil will fill your paper crafting projects with a whimsical pattern of rounded dashes. Use the whole design or just parts of it to add texture and interest!
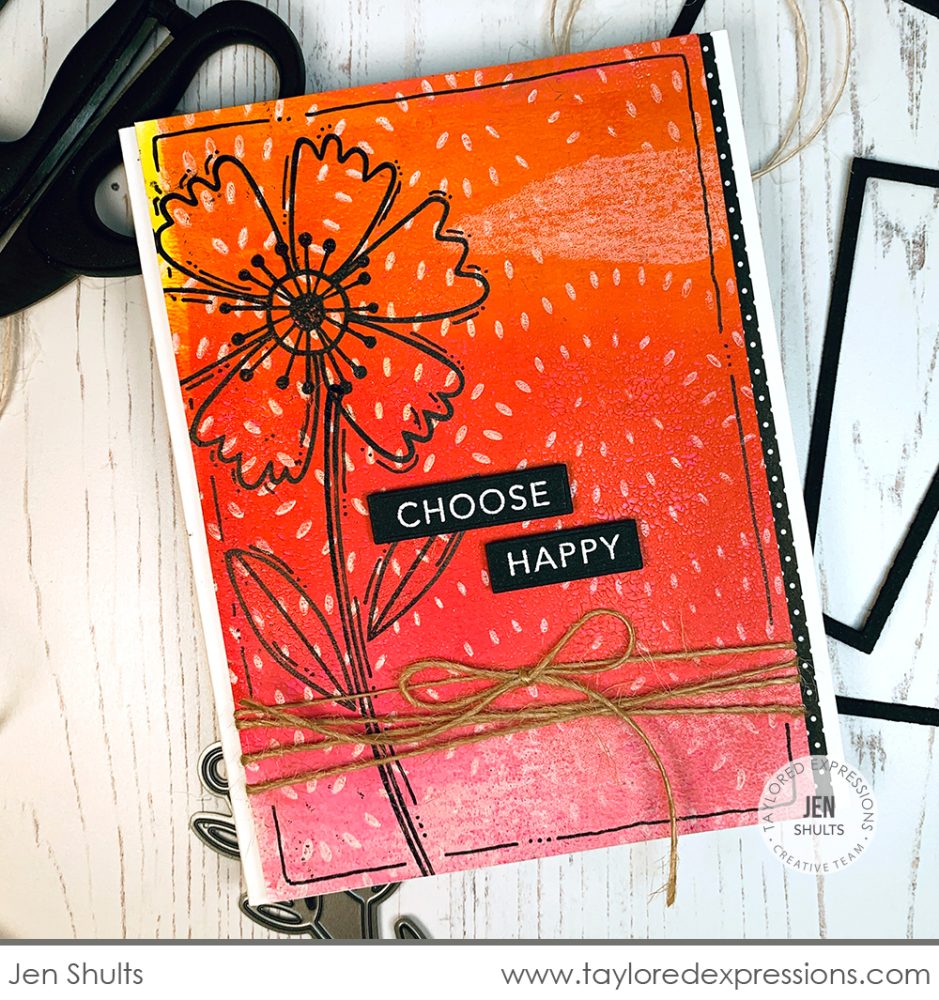
Jen Shults used magenta and yellow paints on her gel press and created a pretty color blend, mixing the magenta and yellow with her brayer to create orange tones. She pulled a print to transfer the color blend from the gel press to her paper. To add the overlay with the Make a Dash stencil, Jen laid the stencil on the gel press, rolled over the top of the stencil with white paint, pulled the stencil off the press, and pulled a print layered over the color blend. To finish her card, Jen stamped the flower over the top of the print with the Picked Posies stamp set and added the ‘choose happy’ sentiment put together from the Building Blocks – Happy Additions stamp.
**You don’t need to use a lot of paint on your gel press, a little goes a long way! If you find that you have too much paint, roll your brayer over your plate and then roll the brayer onto scrap paper. Repeat this process until the excess paint is removed.
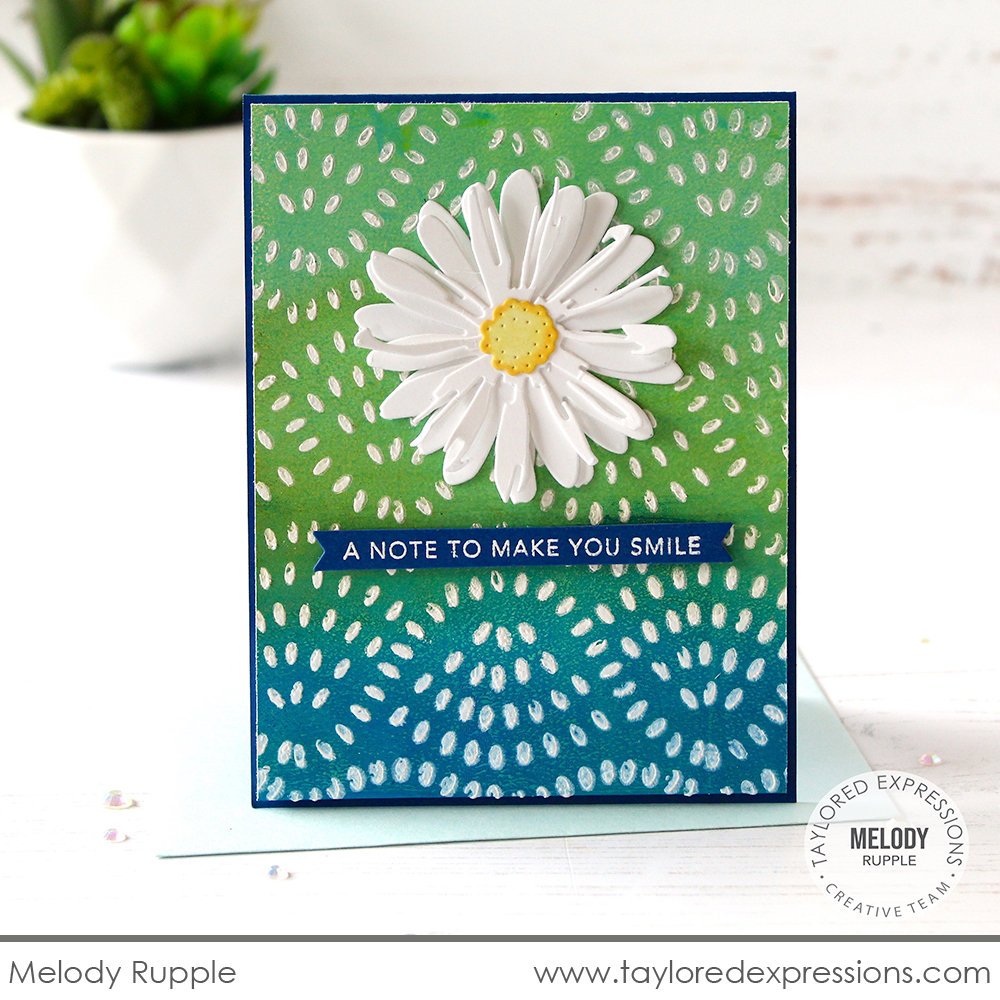
Melody Rupple created a color blend with the blue and yellow paints on her gel press using her brayer to blend the colors and then pull a print. She did the same thing as Jen did above to overlay the Make a Dash stencil pattern over the color blend. The print is a great background to showcase the pretty daisy created with the Layer It – Daisy dies and a sentiment embossed in white from the Simple Strips Background stamp.
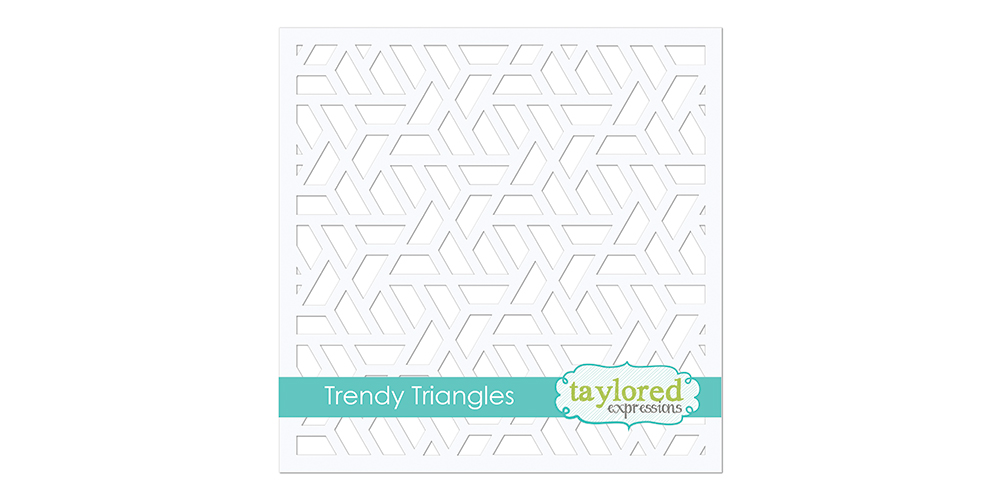
The Trendy Triangles stencil features a geometric pattern of trapezoids that form triangle designs. Create backgrounds, add glitter paste, use with your gel press, and more for your cards and other paper crafting projects.
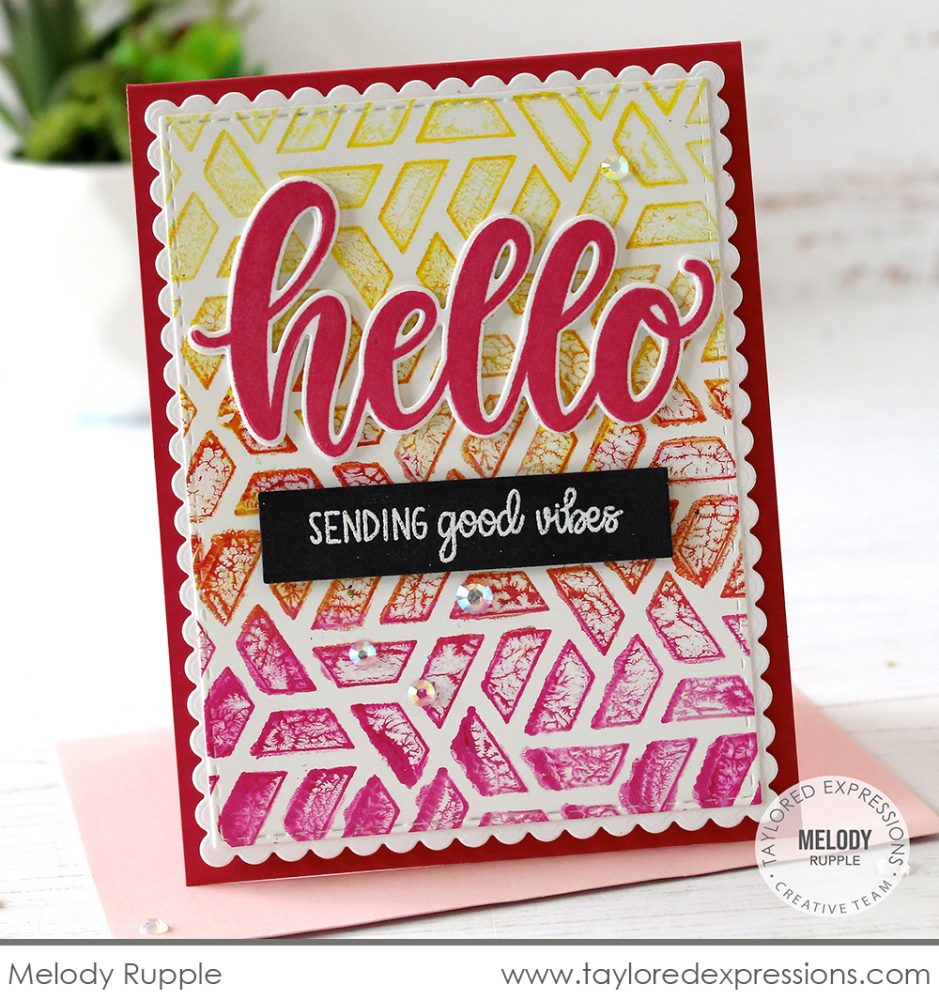
Melody Rupple created a color blend with magenta and yellow inks on her gel press, using her brayer to blend the color and create the orange in the middle. She laid the Trendy Triangles stencil over the color blend on the press and pulled a print while the stencil was still in place. The print is a great background for this card featuring a sentiment created with the Oh my Word – Hello stamp set (+ coordinating die).
**When using stencils with a gel printing plate, pull one print while the stencil is in place and then again after pulling the stencil off of the press. You get two prints for one!
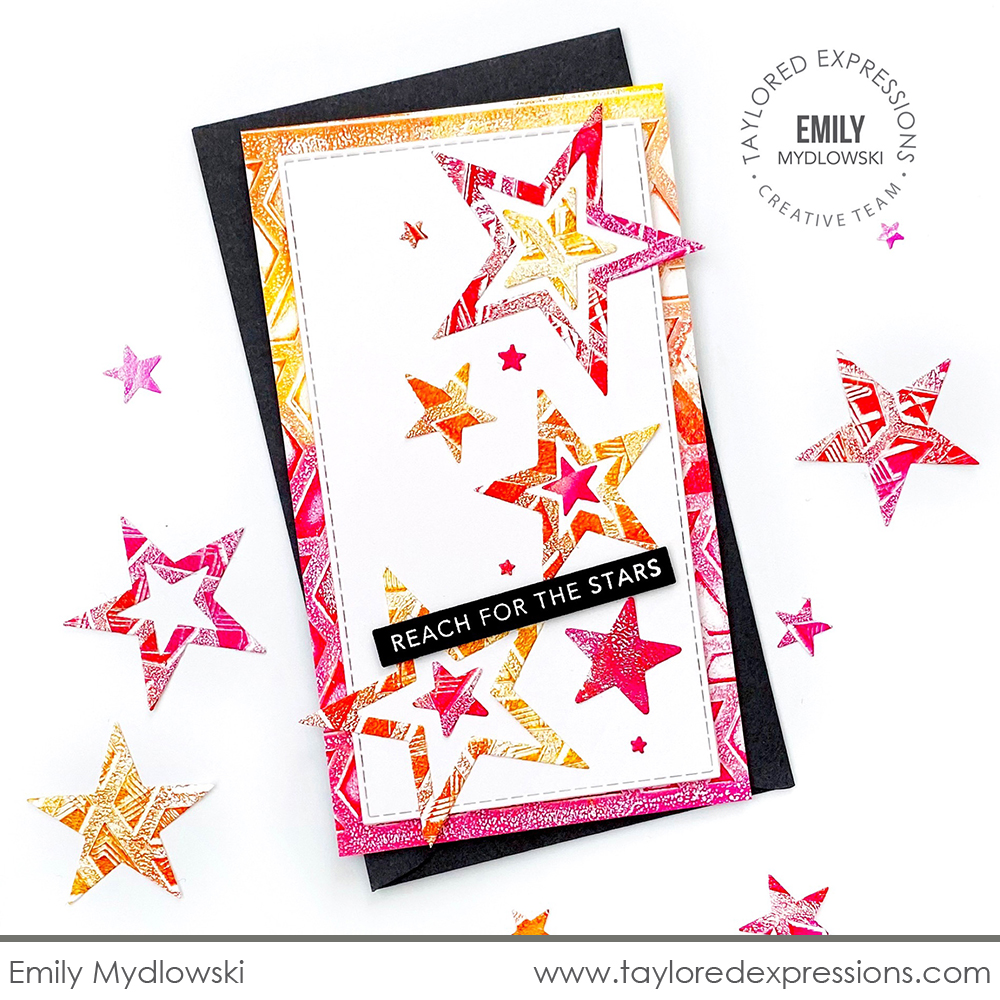
Play around with die cutting your gel prints like Emily Mydlowski did on this Mini Slim card! Emily used the Trendy Triangles stencil paired with the Diagonal Diamonds Background stamp to create prints with the magenta and yellow paints and then die cut them with the Starstruck dies. She used another print for the card base background and layered the die cut stars on a Stitched Mini Slim Stacklets die along with a sentiment from the Mini Strips – Grad stamp.
**If a print doesn’t work out the way that you would like, don’t throw it away just yet! Try layering another print pull over the top or use it to die cut shapes like Emily did above!
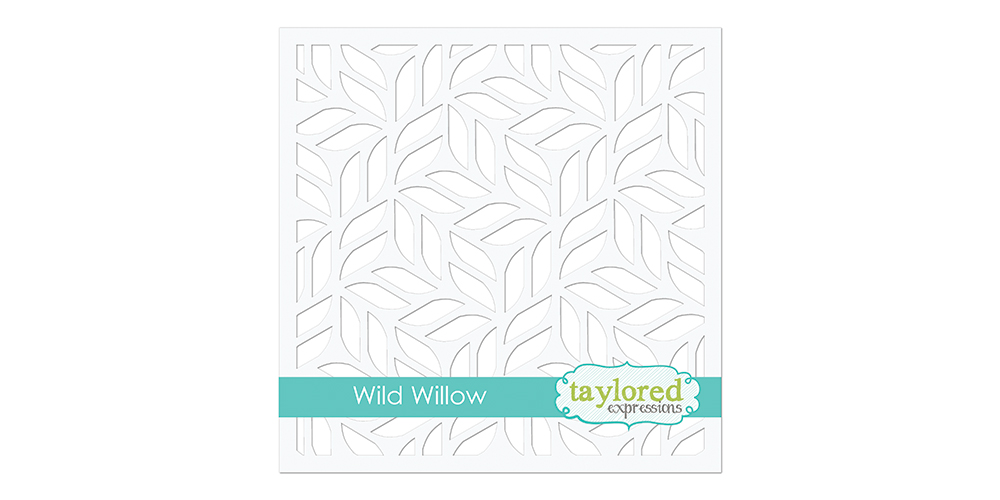
The Wild Willow stencil features an all-over pattern of leaves that you can dress up or down, depending on your card theme. Use the whole pattern or just portion on your projects!

Heather Nichols used the Wild Willow stencil to create the background for this Mini Slim card. She layered the stencil onto her gel press, added blue and yellow paint, mixing it to make green with her brayer, and then pulled the stencil off the press. She let the paint dry a bit on her press, layered blue paint over the top with her brayer, and then pulled a print. The background is cut out with a Stitched Mini Slim Stacklets die and Heather added a flower from the Bouquet Whimsy stamp set along with a sentiment created with the Framed Script – Hello die and Mini Strips – Hello Summer stamp.
**Once you pull a print, there might be leftover paint on your press. You can clean the press with hand sanitizer or you can pull a ‘ghost print’ to remove the paint. Add a thin layer of white paint on your press and pull the print. The ‘ghost print’ should remove the paint that is left or dried onto your press. Use these prints for projects too!
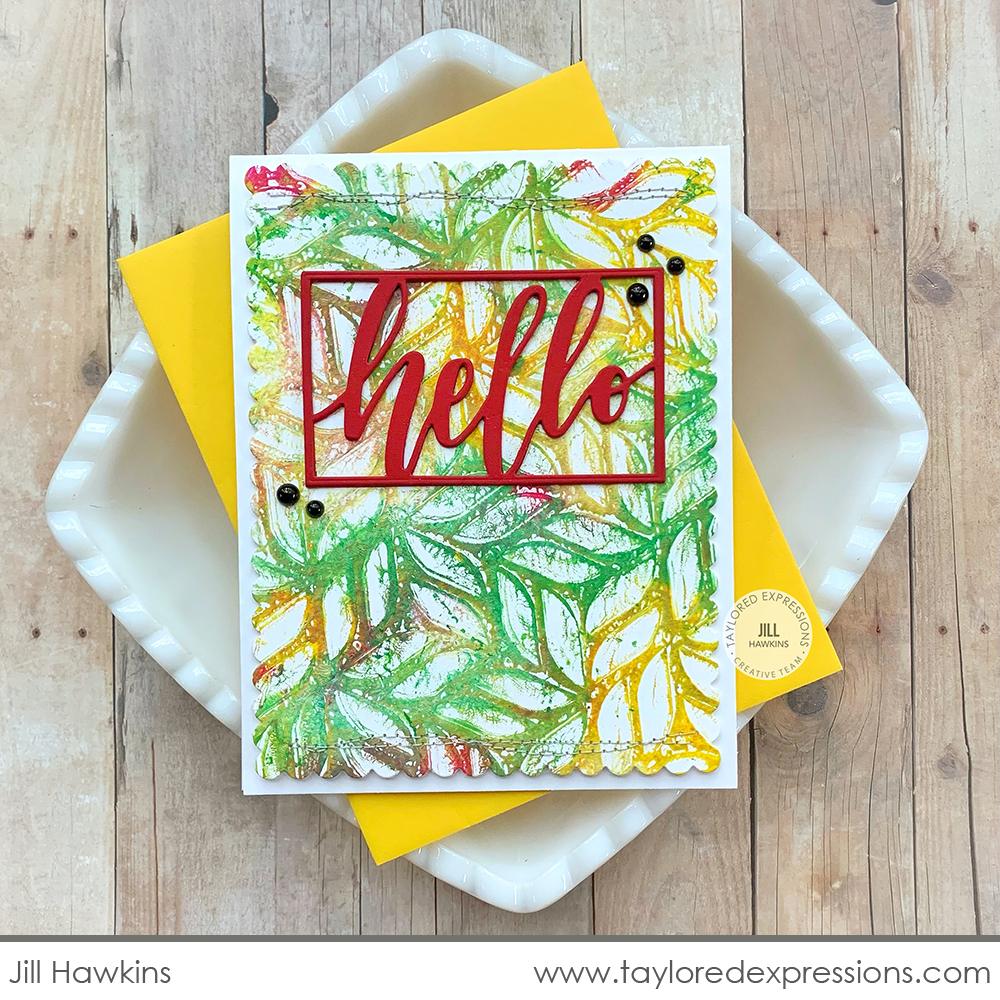
Jill Hawkins added paints to her press and blended them with her brayer to create tones of green, yellow, and red. She layered the Wild Willow stencil onto the press, pulled a print, removed the stencil, and pulled another print to create the background for this card. She cut the print out with a Petite Scallop Rectangle die, added the Framed Script – Hello for a sentiment, and finished off the card with stitching and Bits & Pieces – Black Drip Drops.
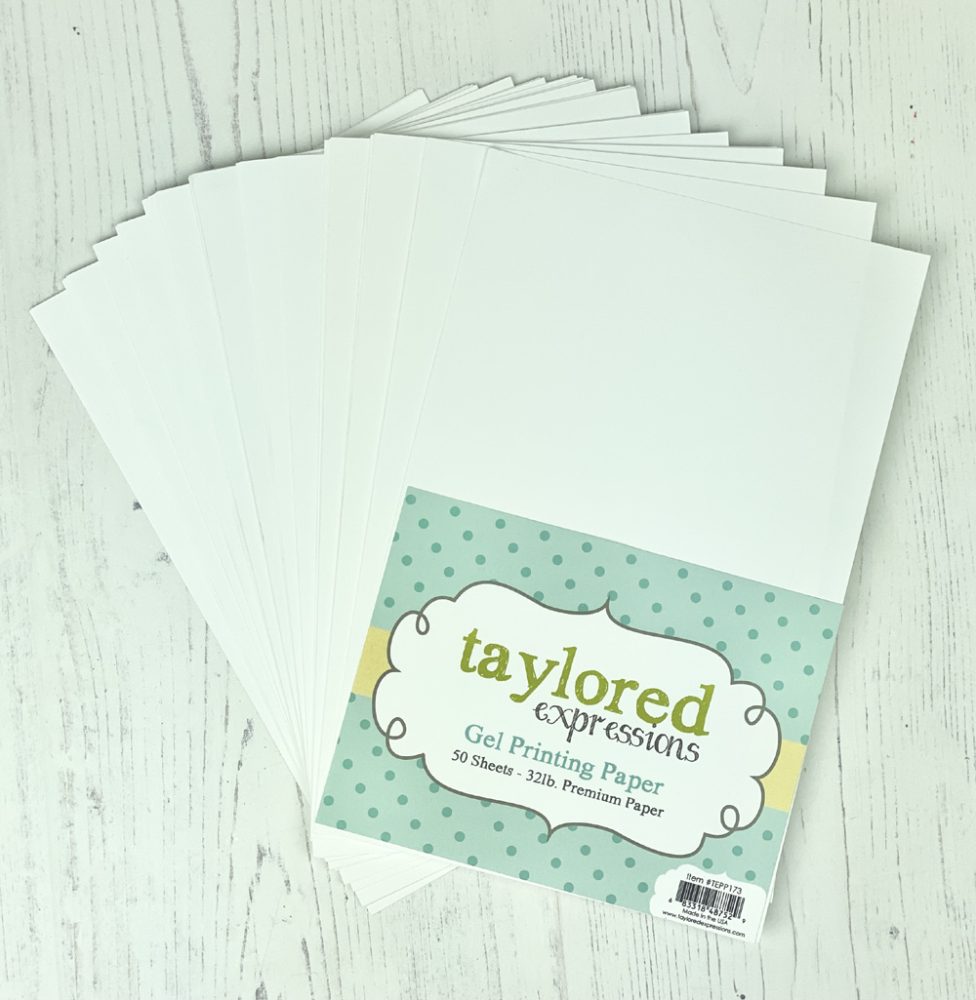
When you are using a gel press, the right paper makes all the difference! We recommend our Gel Printing Paper for the best results. This smooth, white 32 lb. paper comes in a pack of 50 – 5.5″ x 8.5″ sheets.

Join me live for “T Time” at 1pm Central today on the Taylored Expressions Facebook Page. I’ll be sharing an unboxing and closer look at the items in the Gel Printing Kit. We hope to see you there – come join in the fun! (Don’t worry, if you miss the live you can always watch the saved broadcast afterward!)
Thank you so much for stopping by today! Make sure you check out the rest of the TE Creative Team and our special guest designer projects using the Gel Printing Kit (I heard from many of them that this is their new favorite kit to work with!) – click their faces below to hop to their blogs! Stop back again here on the TE blog on Thursday for more inspiration, including a video from Emily Leiphart. See you then!


